Shrub: a fruit, herb and/or spice-infused syrup preserved with vinegar, sometimes referred to as a “drinking vinegar.” Commonly used in drinks, salad dressings or other additions.
I was craving a fresh shrub soda the other day, and oh my goodness I love an icy shrub on a hot summer day! Mixed with club soda and infused with fresh herbs, I am instantly refreshed and ready to tackle (most) anything the day holds.
Interestingly, drinking vinegars date back to ancient times, and Colonial sailors employed its concentrated dose of Vitamin C and antibacterial properties to prevent sickness while onboard. Derived from the Arabic word sharab, shrub concoctions have stood the test of time–and with good reason!
Surprisingly versatile, most anything can be made into a shrub: cranberries, apples, basil,
turmeric, grapefruit, rhubarb–the possibilities are truly endless. Use shrubs in cold drinks, salad dressings or glazes this summer, and you might just find yourself creating new combinations of flavors with tasty health benefits on the side. Below are 3 shrub recipes to get you started…
Prep ingredients: chop fruit, slice roots, roughly chop or muddle herbs
Combine shrub ingredients in a non-reactive bowl such as glass or stainless steel.
Add sugar and stir to thoroughly combine. Cover and chill 2 hours or overnight.
Remove from refrigerator and leave at room temperature, stirring occasionally 2-7
days. The longer the ingredients are combined, the more concentrated the flavor will be.
Strain remaining solids and add vinegar. Stir to combine.
To serve: Pour 2 ounces of shrub into the bottom of a glass. Layer with ice and 6
ounces of club soda or unflavored seltzer water. Add fresh mint, basil or herb of your
choice. Stir to combine and enjoy!
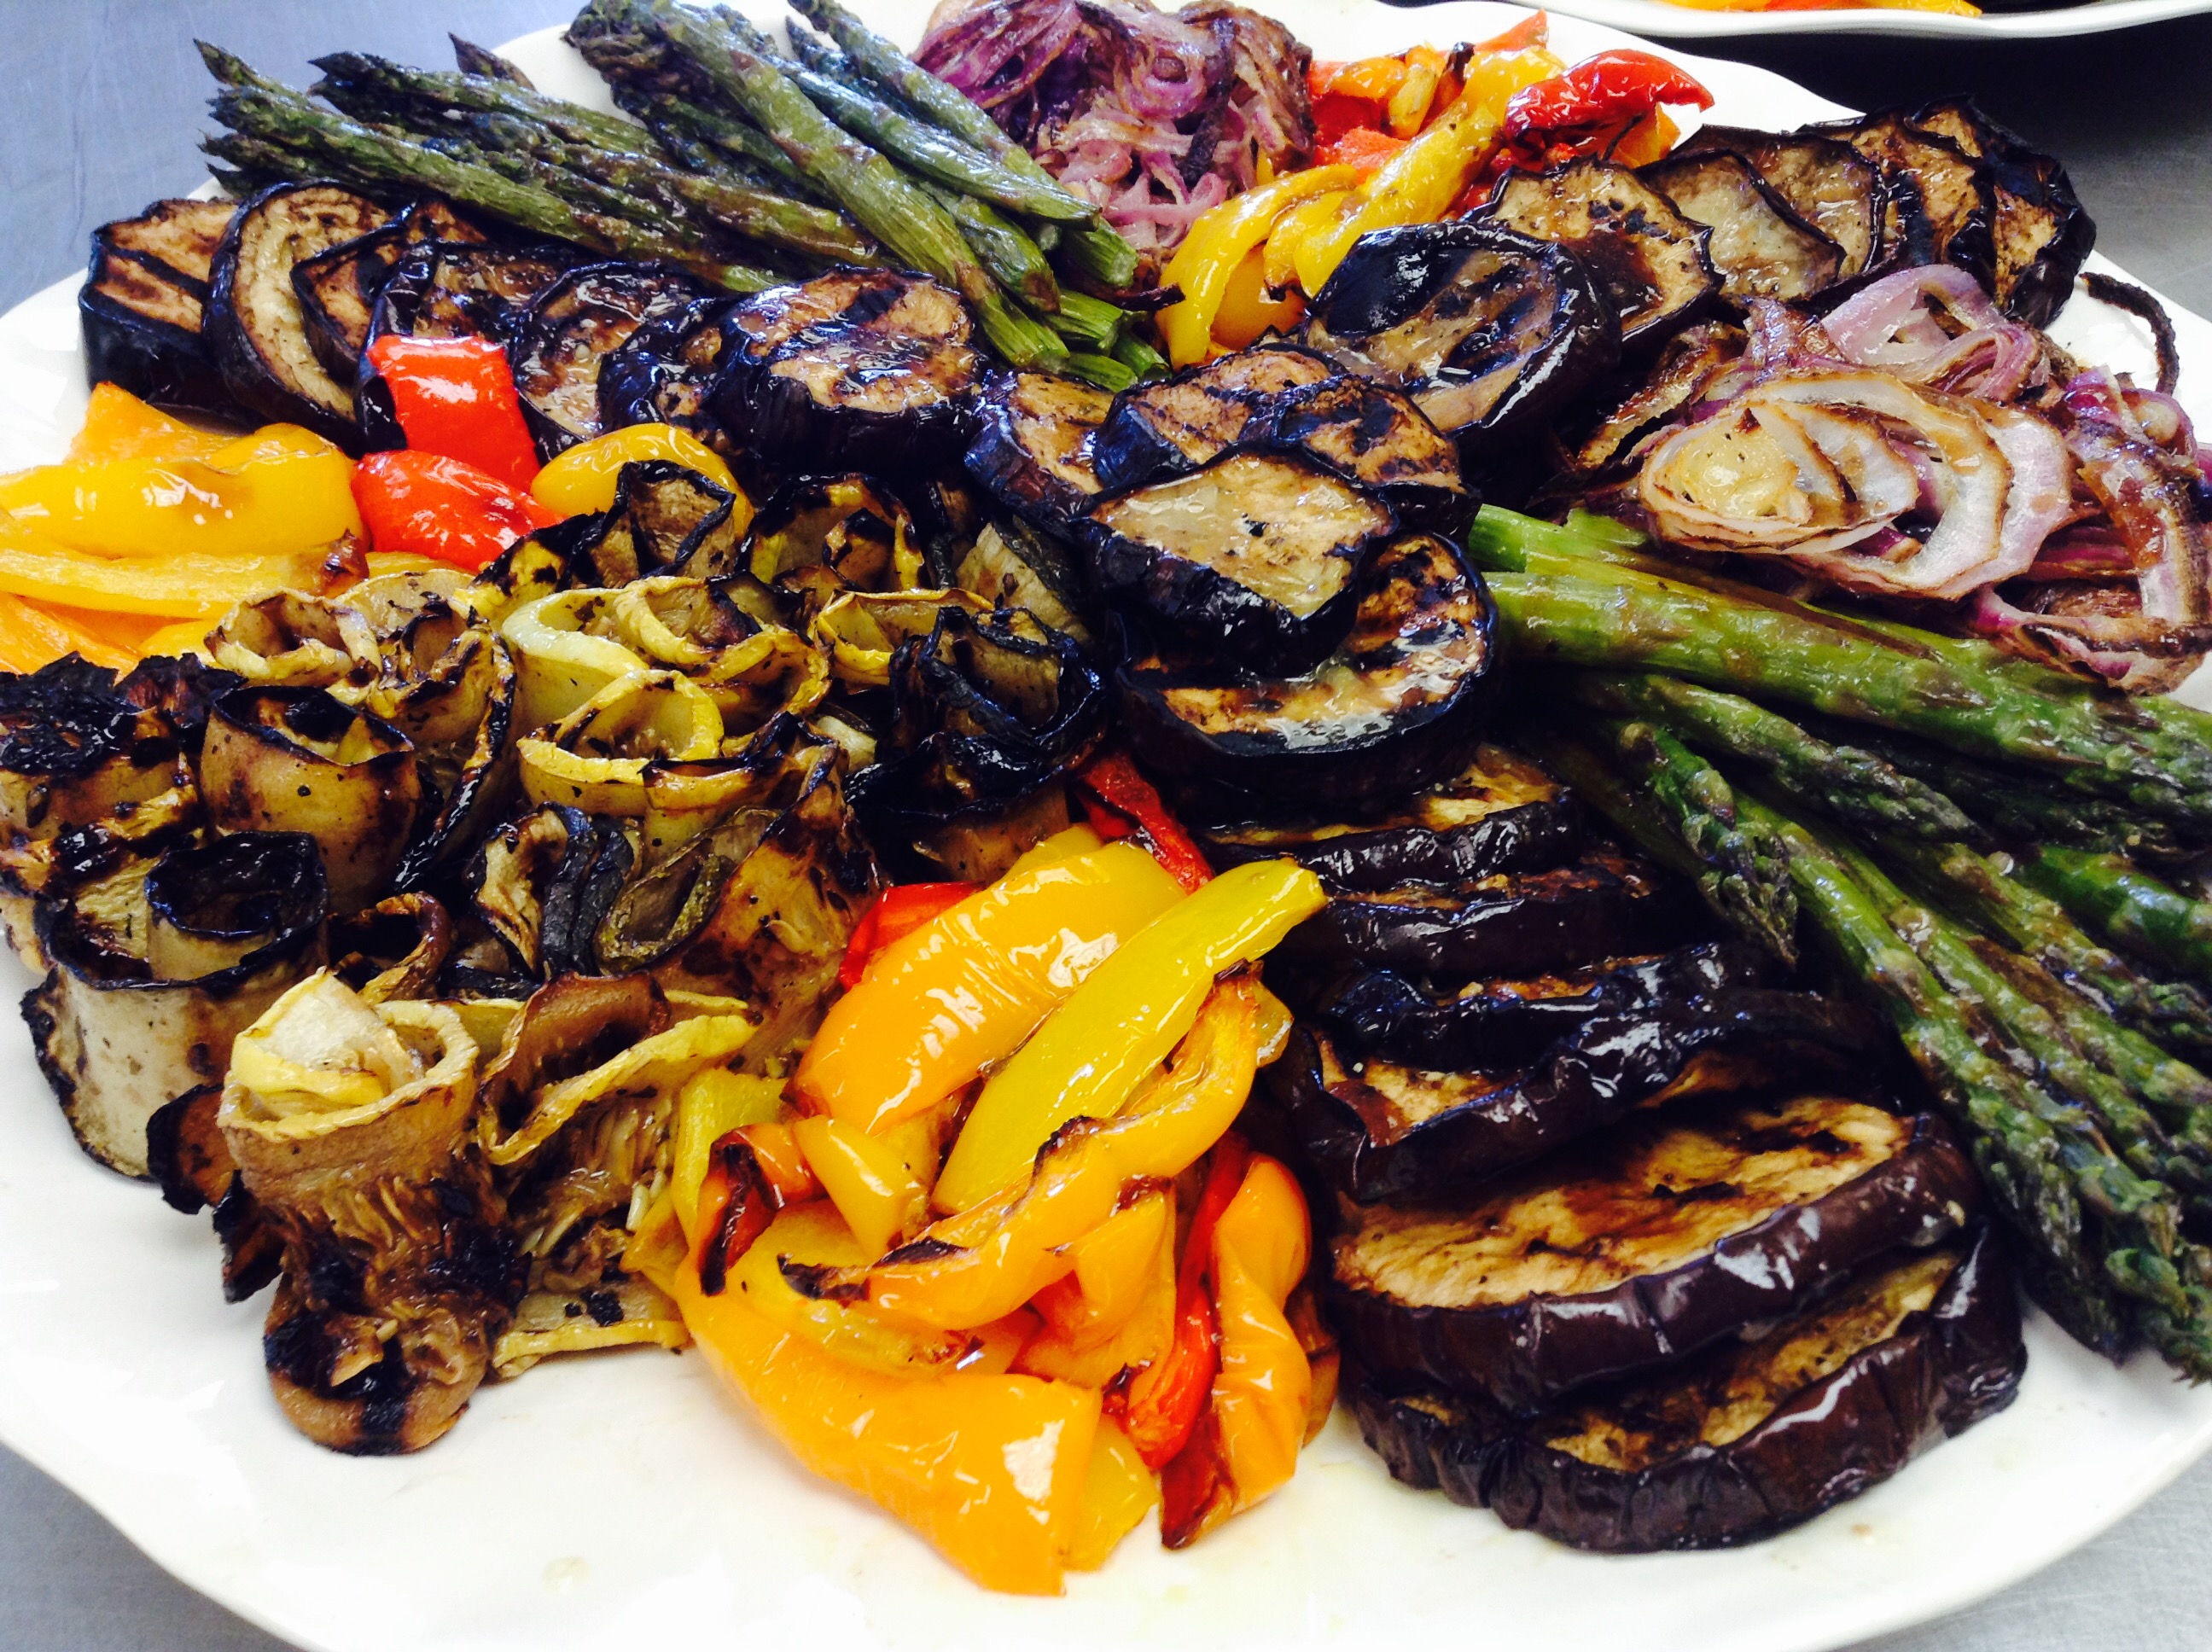
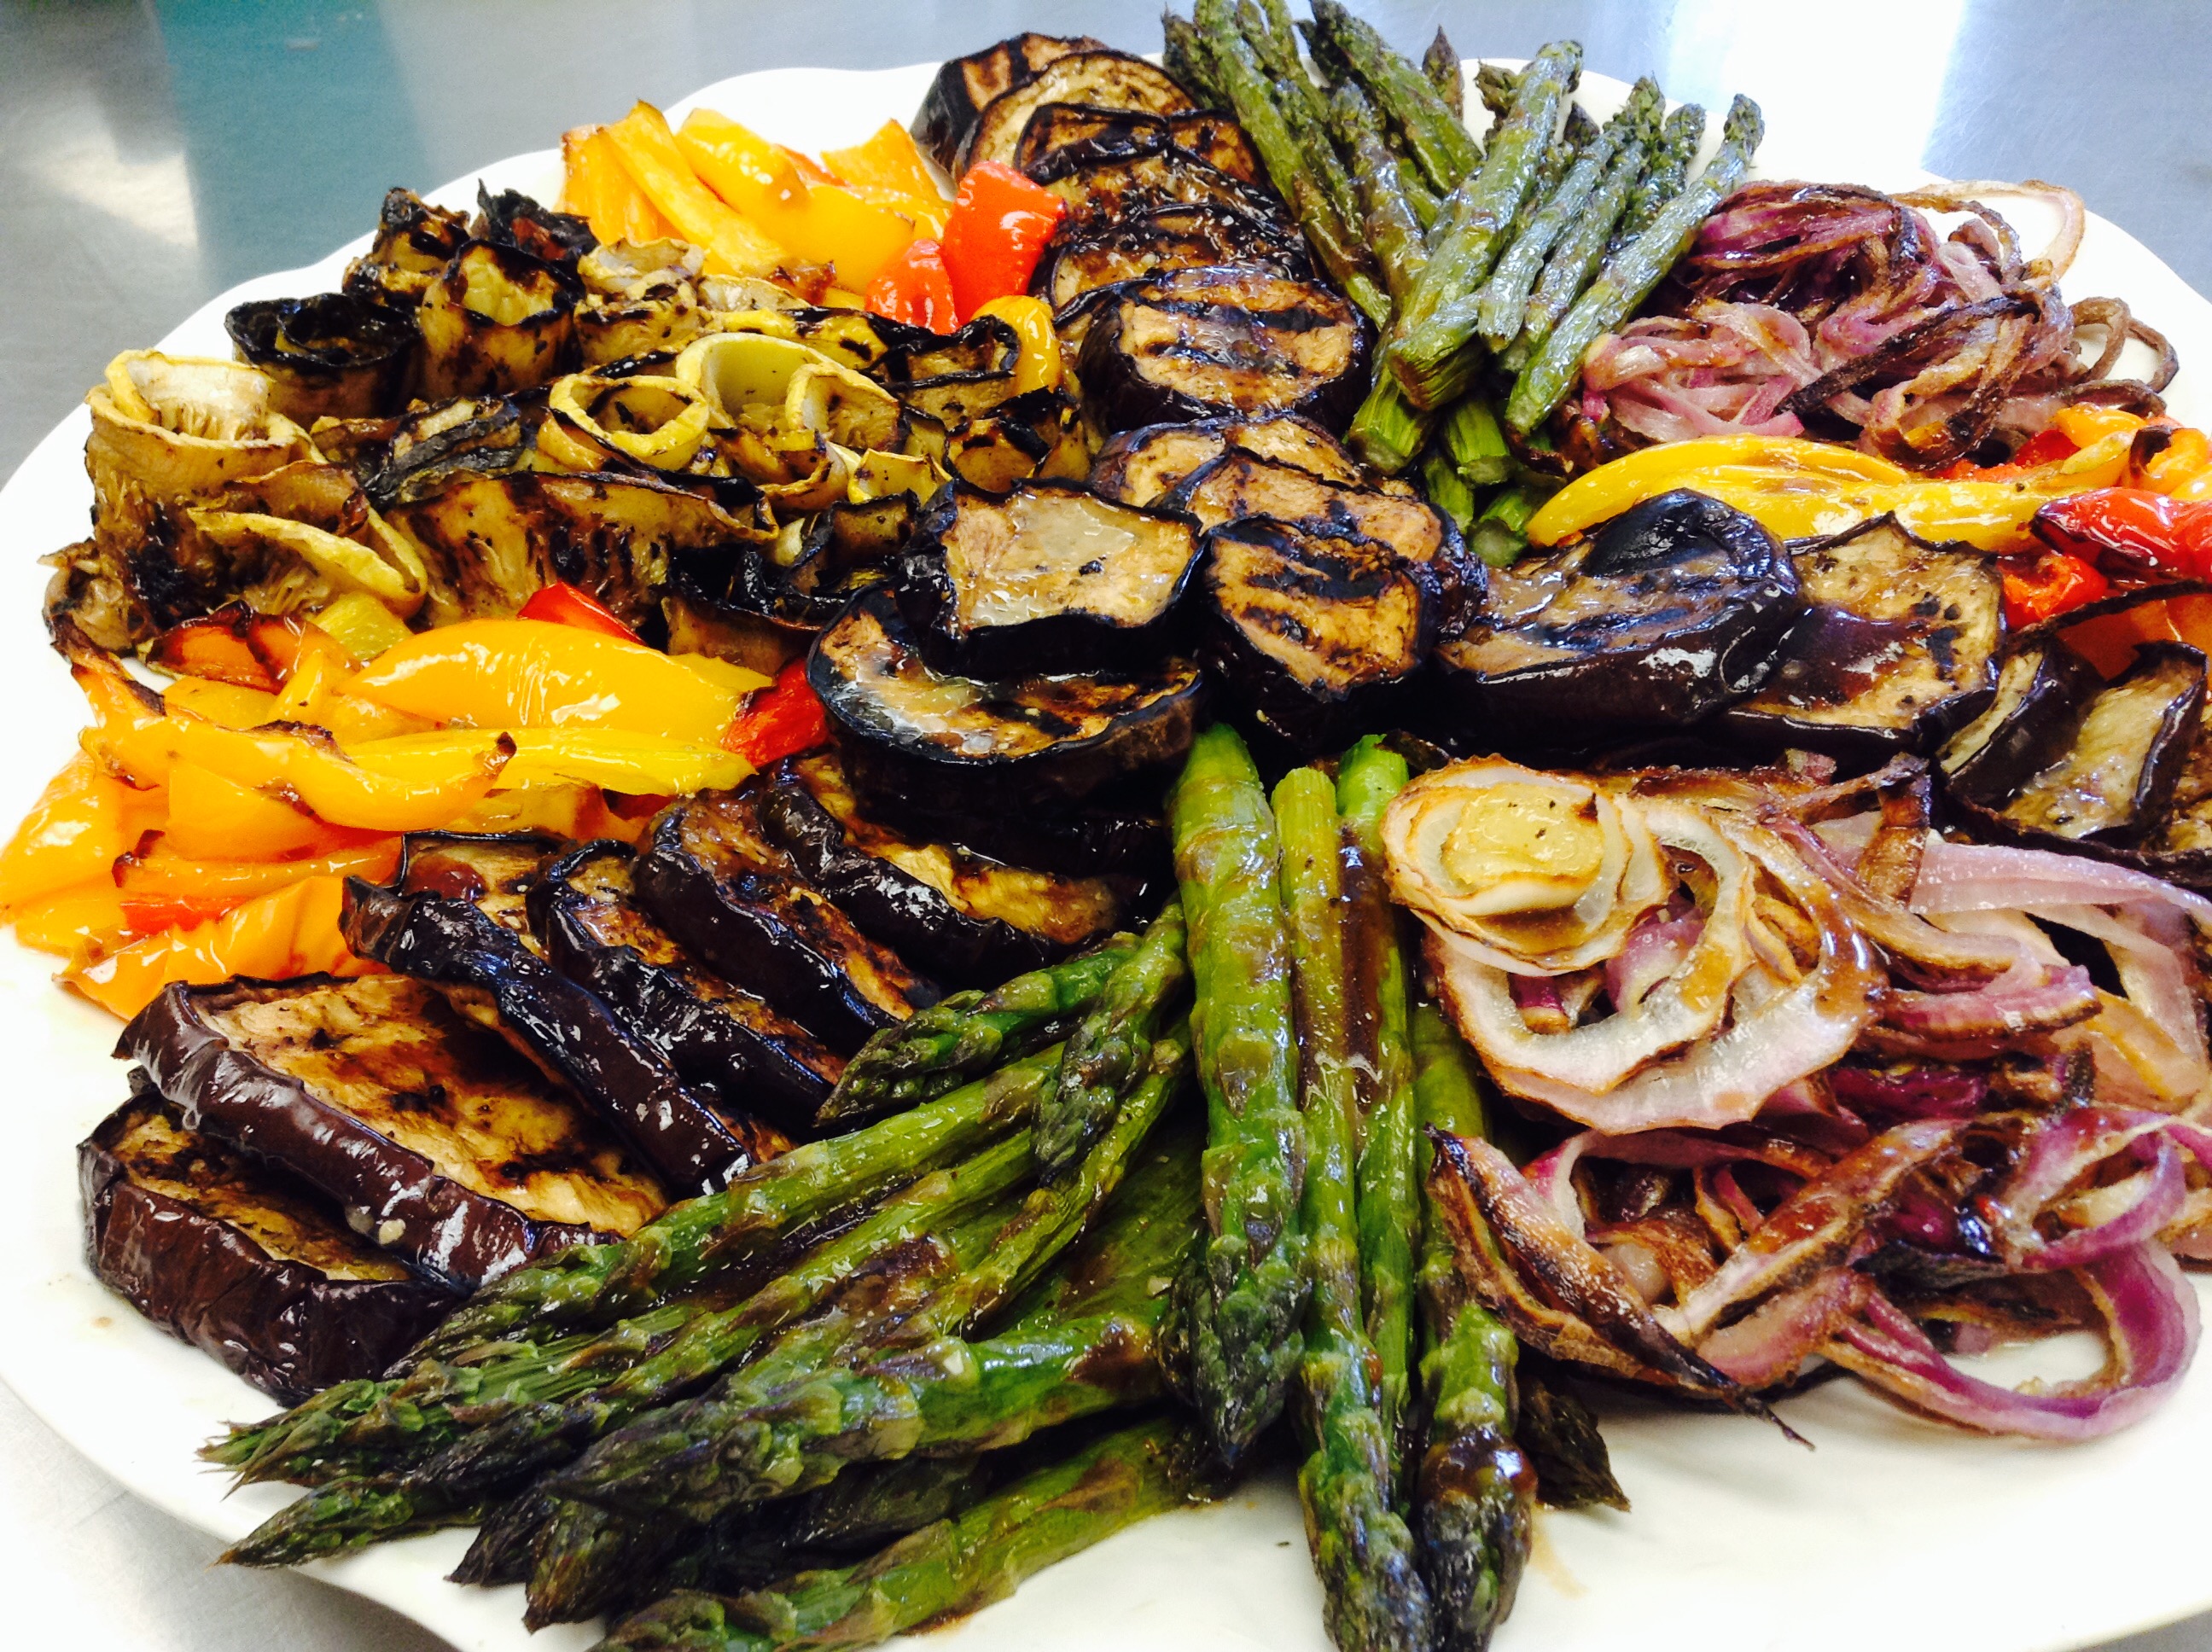
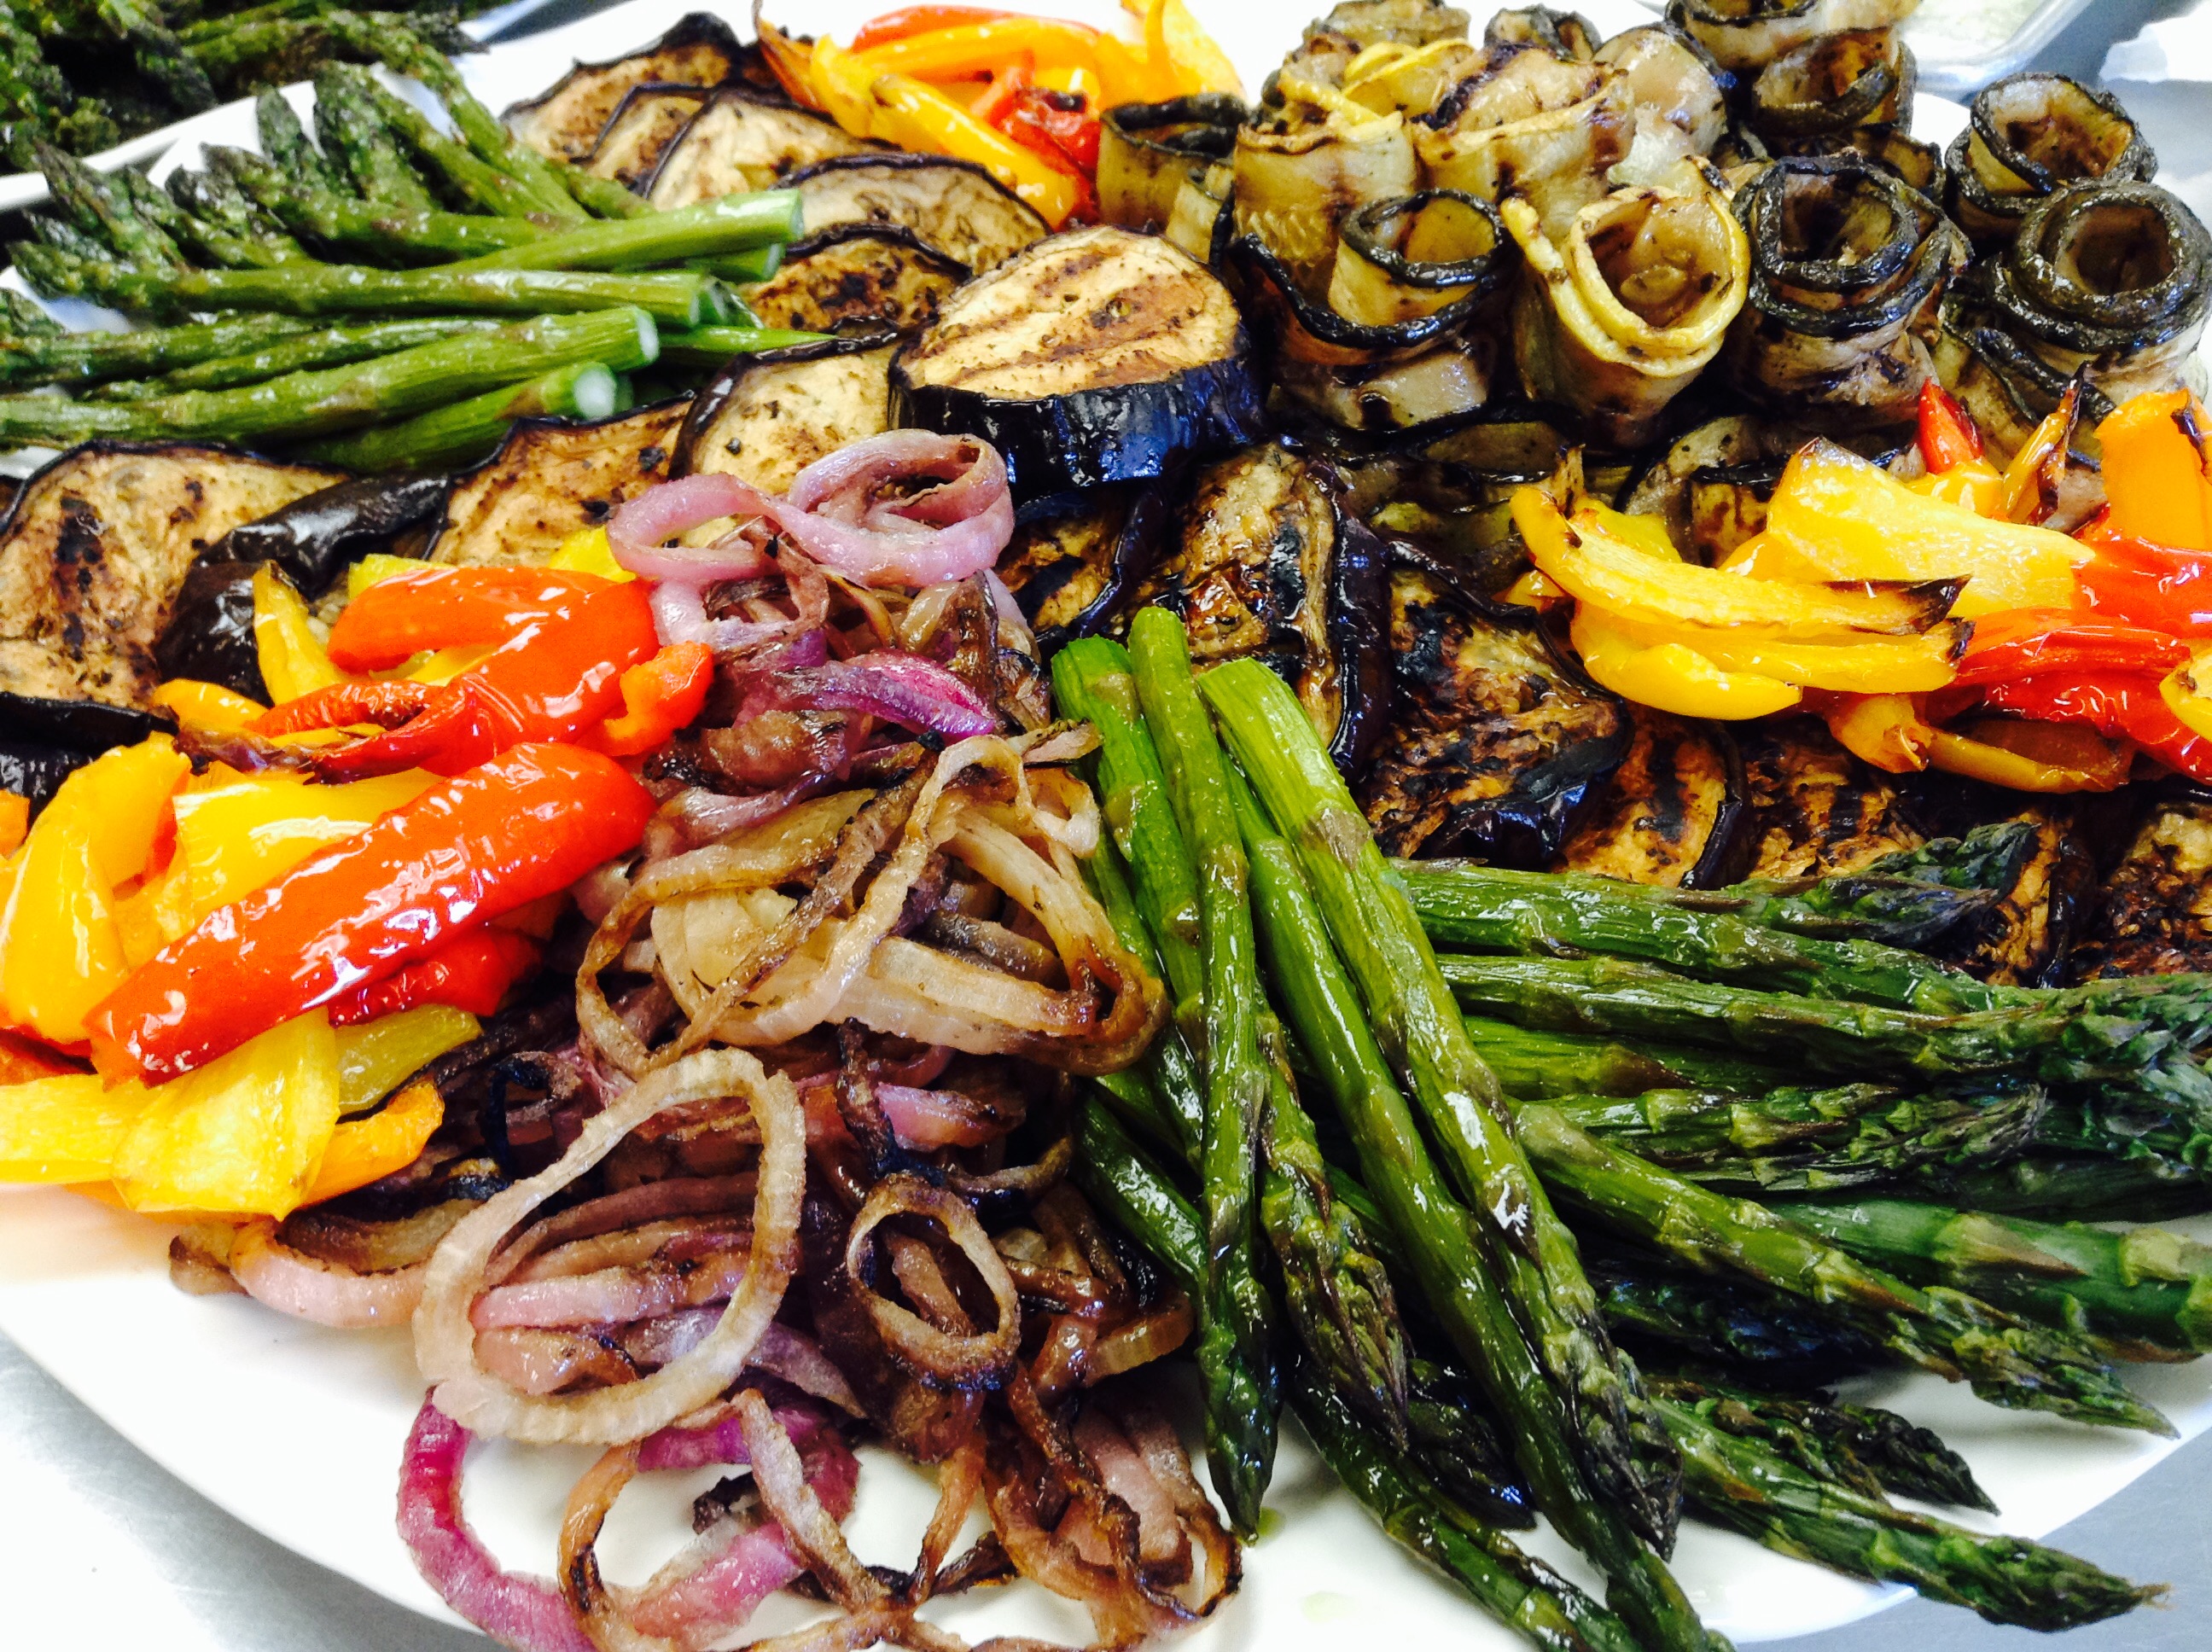
Time to get out the grill and put those fresh garden veggies to good use. This is a terrific recipe that makes a lovely party platter in a matter of minutes.
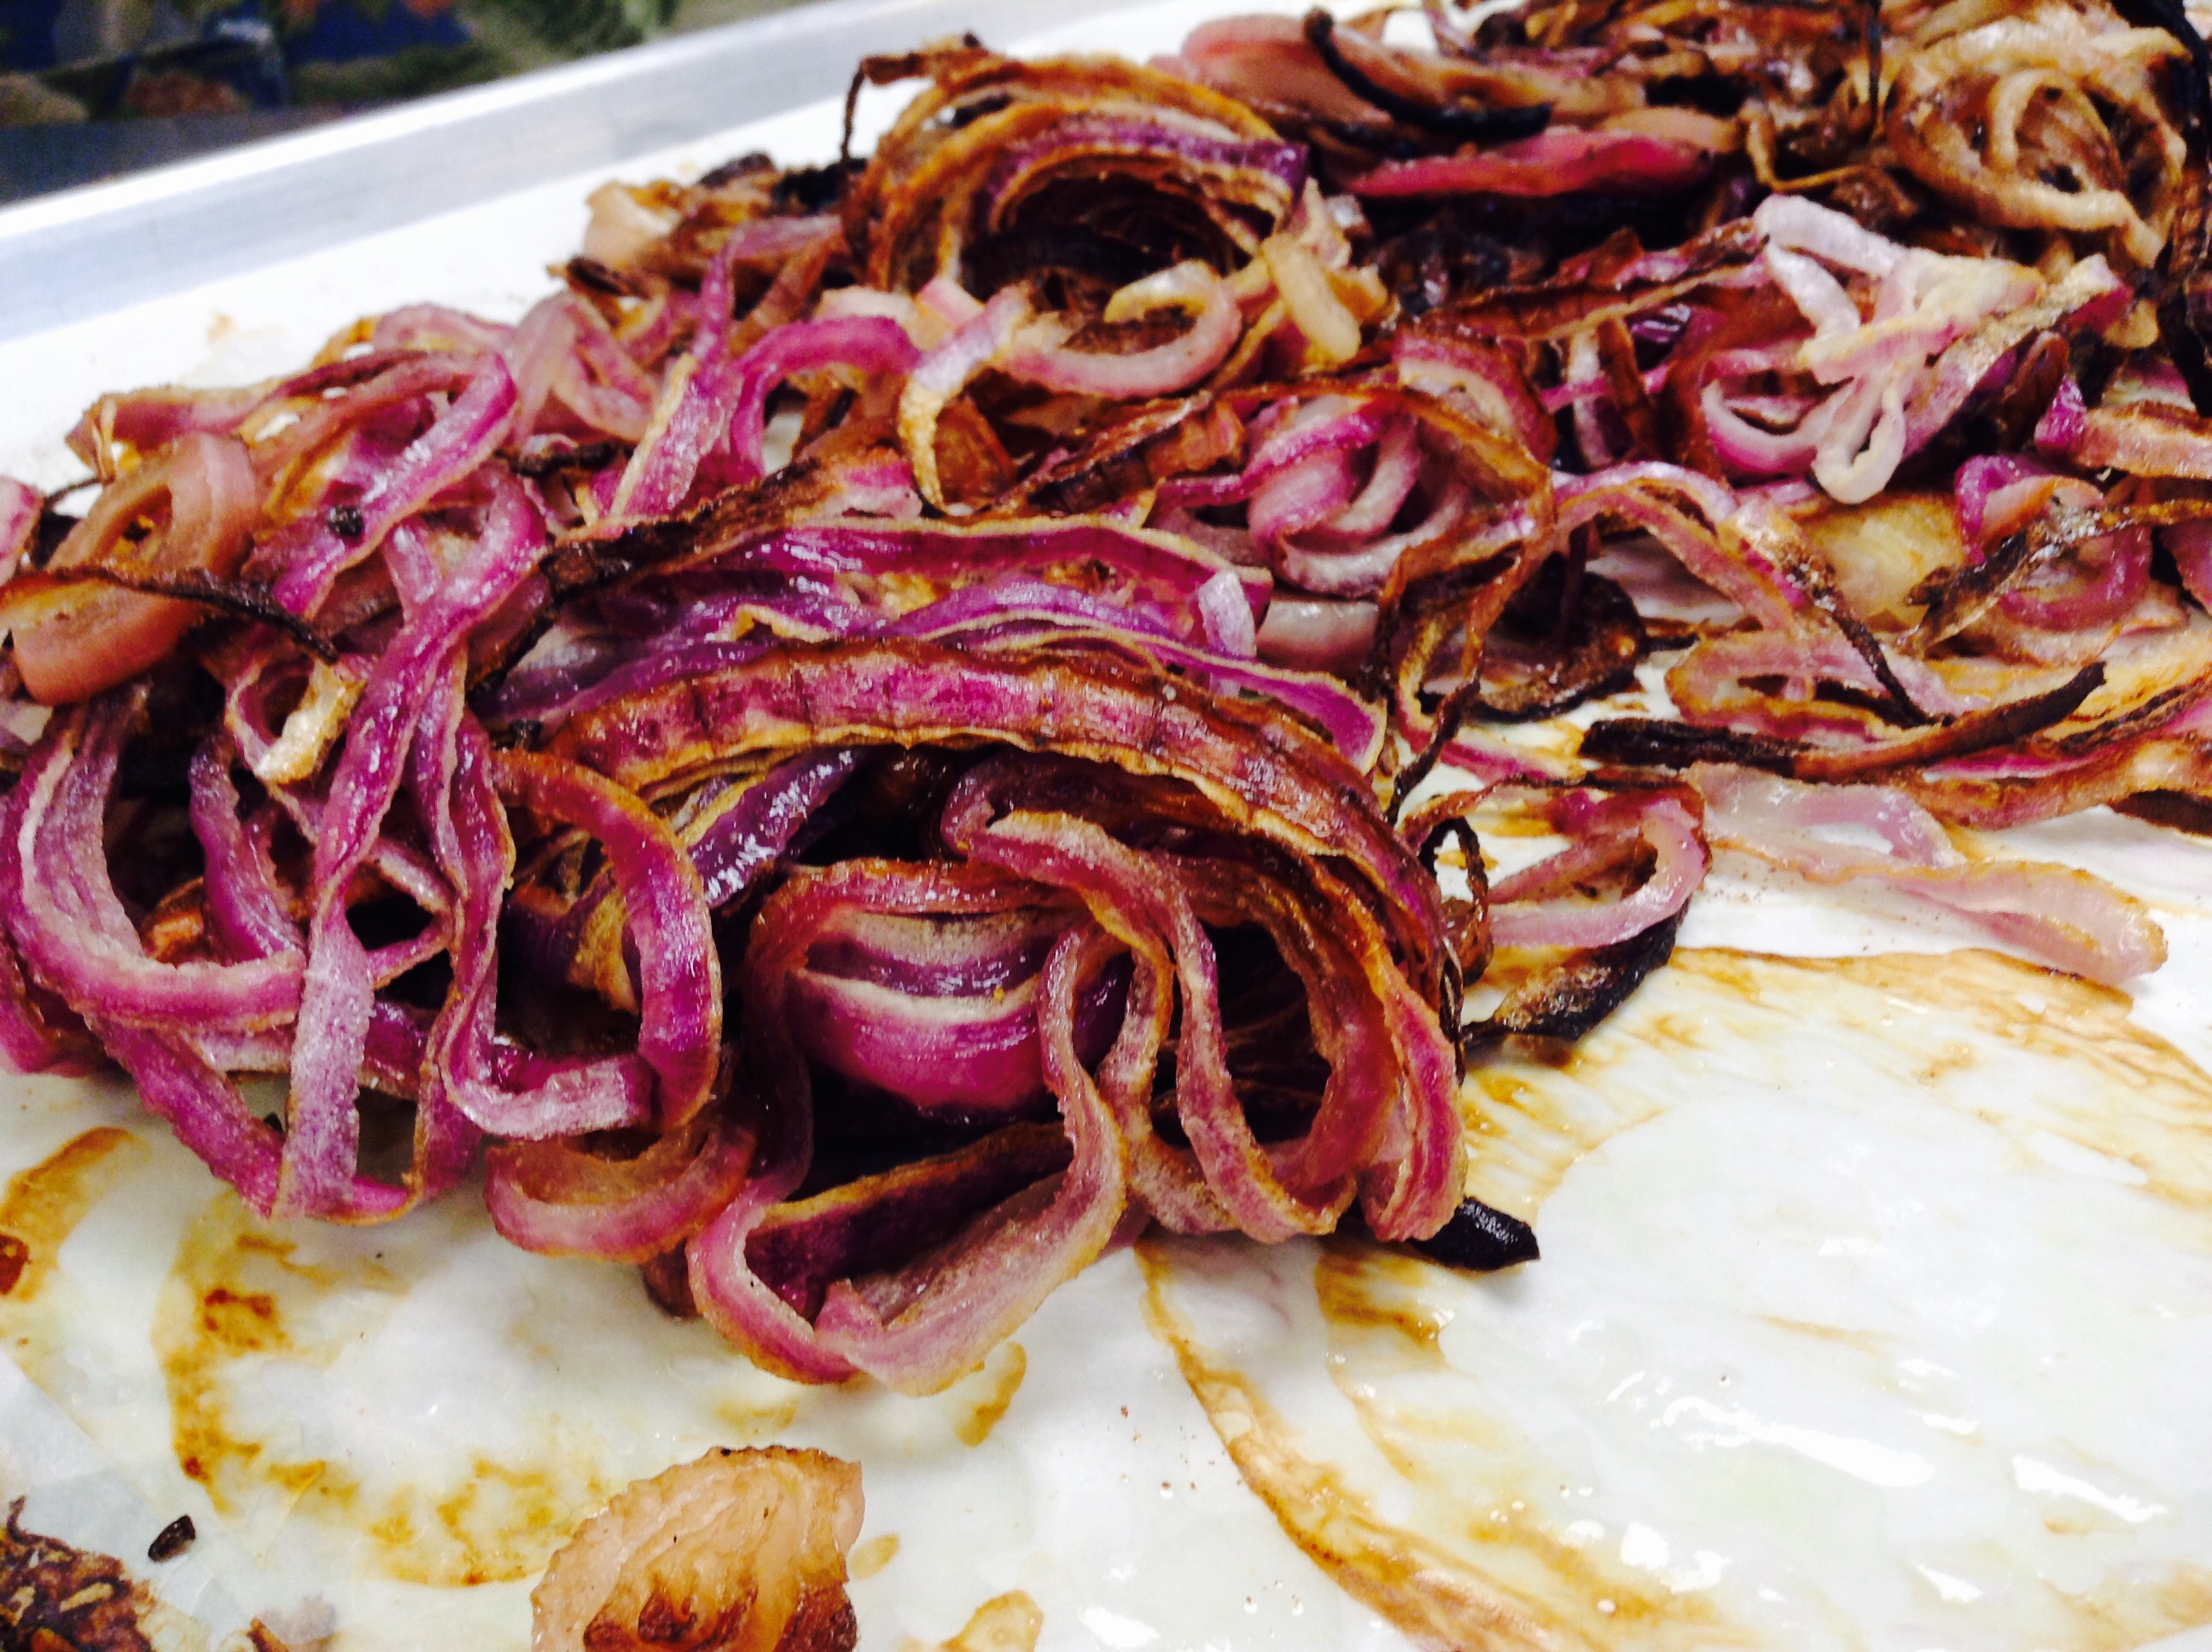
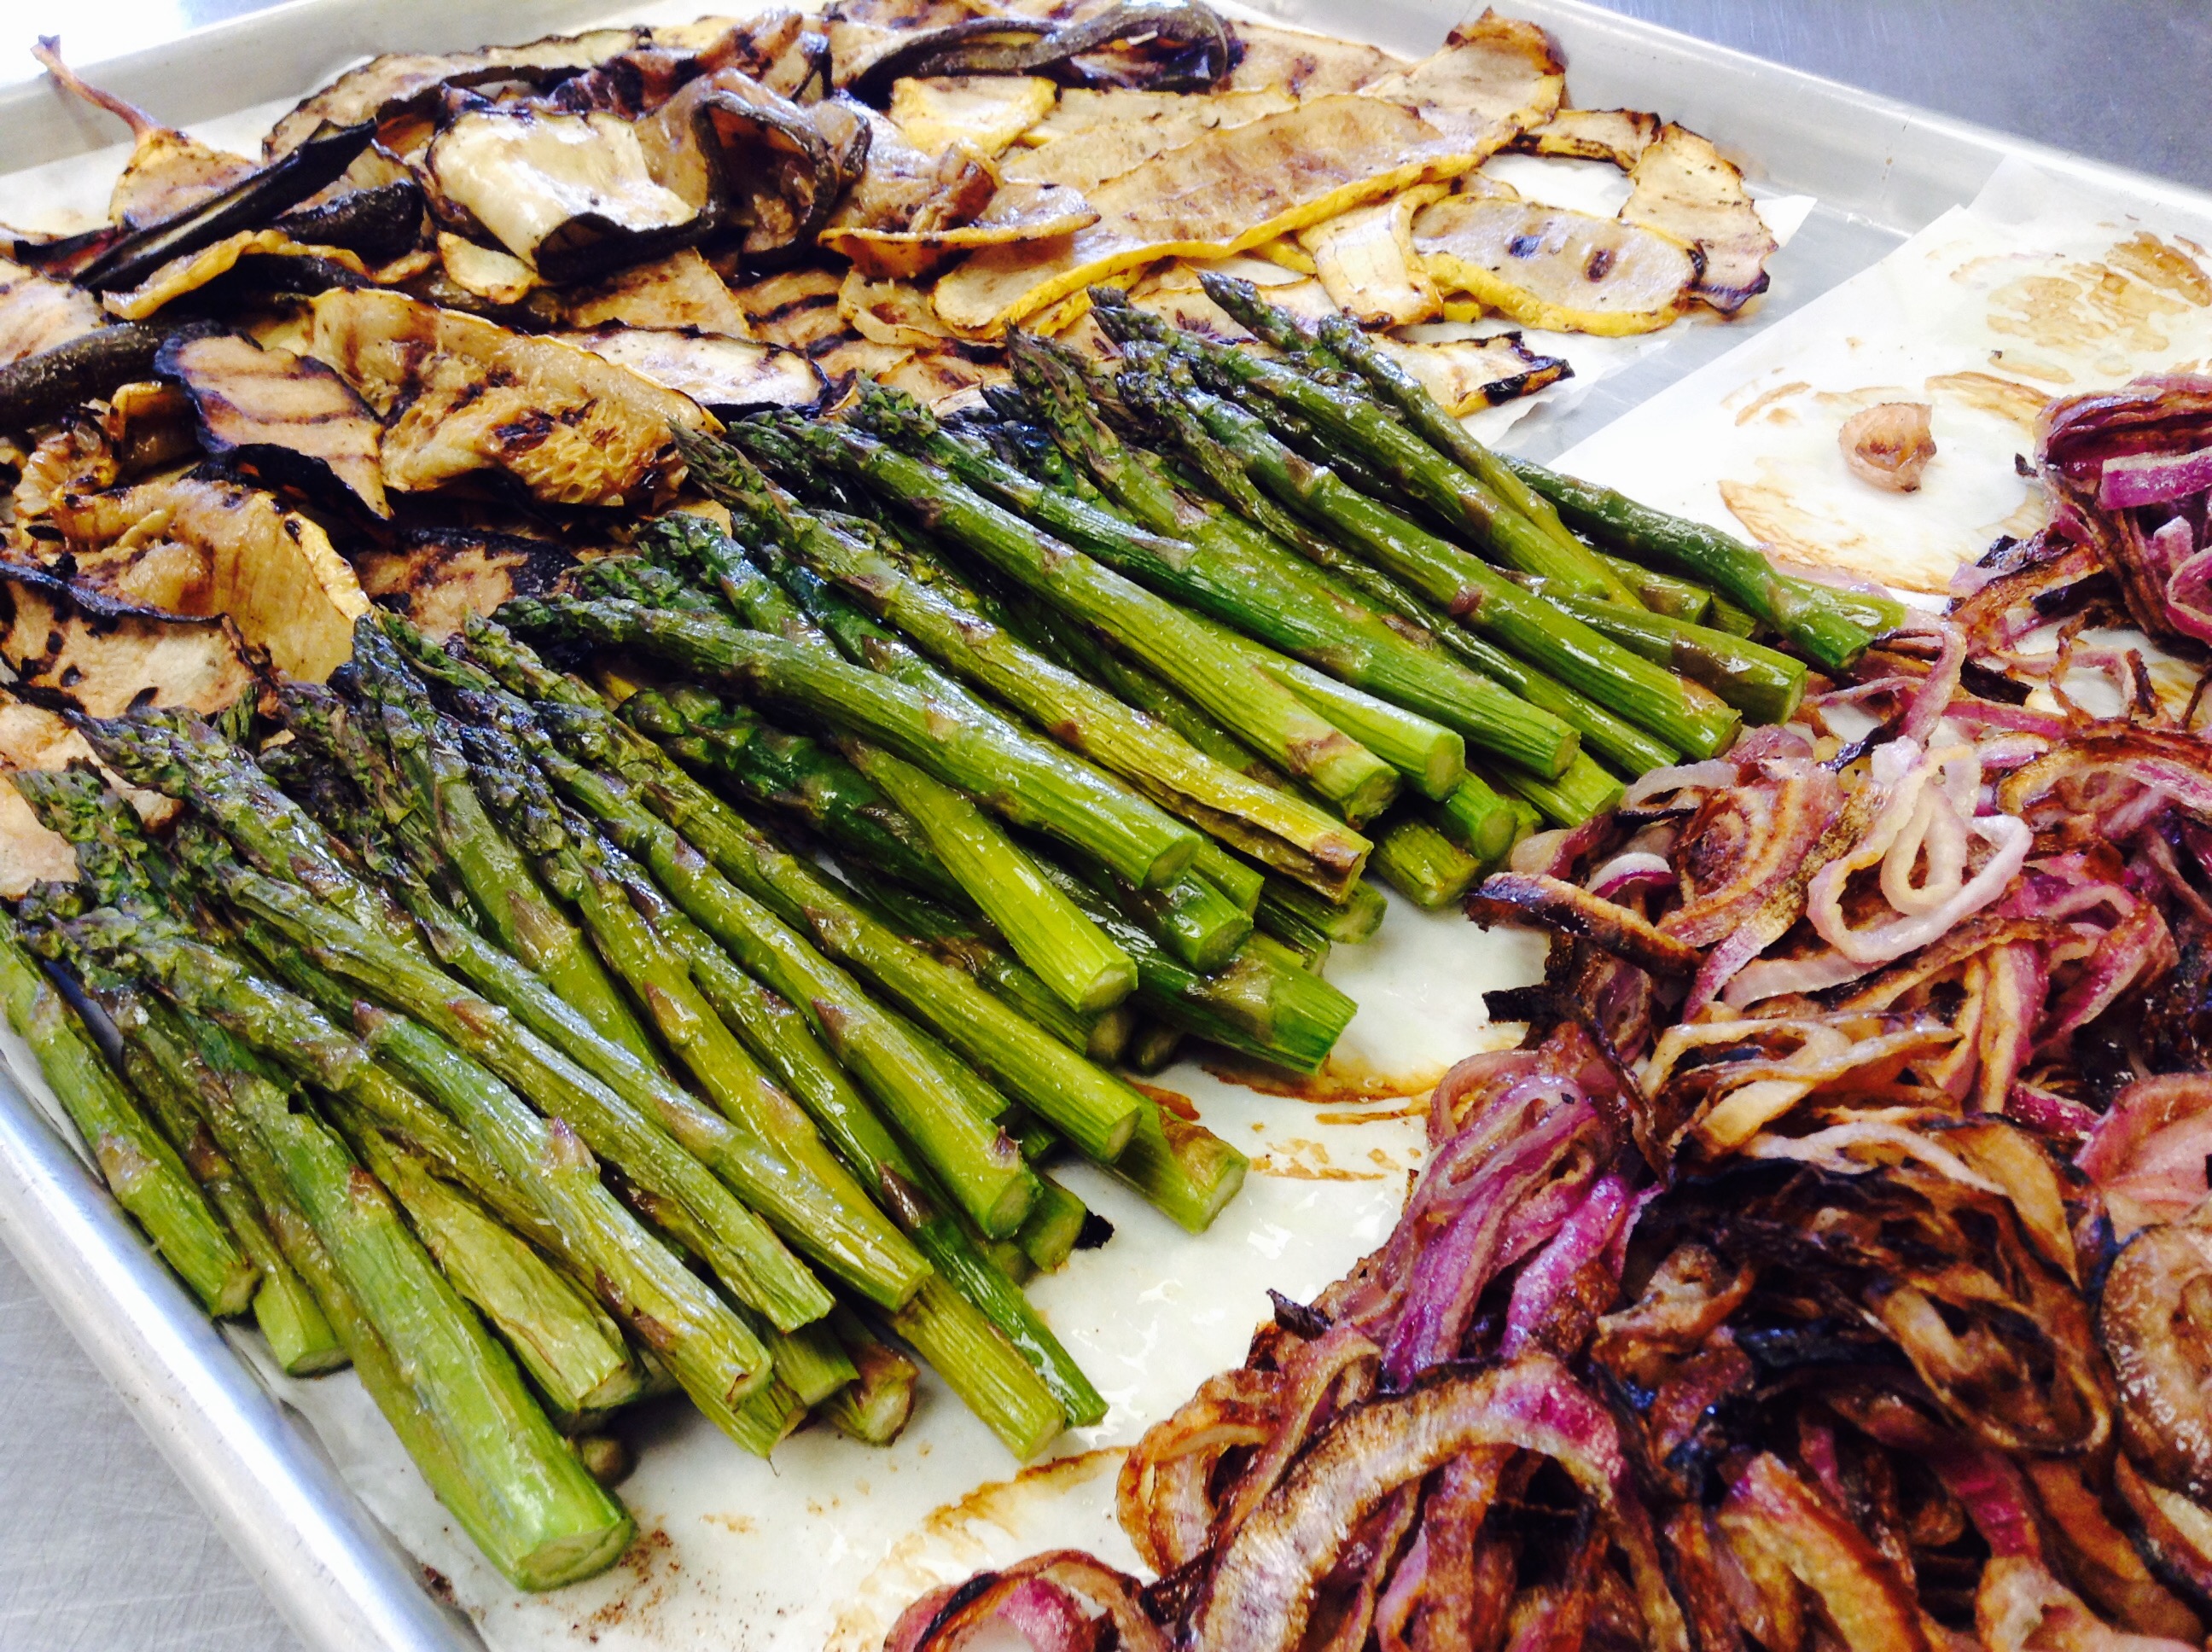
Eggplant, peppers, zucchini, asparagus, and red onions – marinated and grilled till soft on the inside and charred on the outside, then doused in garlicky marinade, and served with whipped goat cheese on the side.
Print Recipe
Votes: 0
Rating: 0
You:
Rate this recipe!
Marinated Grilled Vegetable Platter with Whipped Goat Cheese
Cut eggplants, onions, and zucchini in 1/4-inch thick slices.
Salt the eggplant slices, and leave in a colander for 20 minutes so the bitter juices drain out. Rinse and pet dry.
Wash the peppers, and leave whole.
Wash the asparagus, and cut the woody ends.
Mix olive oil, balsamic vinegar, apple cider vinegar, garlic and chopped oregano, with onion salt and black pepper, and brush all vegetables liberally with the marinade.
Grill veggies on medium heat, turning them over once or twice.
Remove the charred outer skin from the peppers by rubbing off- slice the pepper in half, remove seeds and then continue slicing the peppers lengthwise into 1” slices. Set aside until ready to assemble.
Remove the remaining vegetables to a plate and drizzle with the remaining marinade and more fresh oregano. Add more garlic if needed - they should have a distinct garlicky, tangy taste.
With an electric mixer beat the whipping cream until soft peaks form. Add the goat cheese, and smashed garlic, and a pinch of salt, then beat until fluffy.
Arrange the vegetables decoratively on a platter and serve with the whipped goat cheese on the side.
Place left over veggies in a container and pour over a marinade of equal parts apple cider vinegar and olive oil, plus lots of pressed garlic and salt. They will taste great the next day, and will keep in the fridge for a long time.
Saturdays in the Community call for a lot of physical participation, especially for our band members — 20 of which are sisters. Morning Beehive, the weekly time when all Community members gather to work together on whatever jobs need most to be done, starts at 8 am and continues until noon, with a half hour coffee break at 10 am.
Following lunch our convent band sisters pack up and take off with the rest of the band for a full afternoon of serious rehearsal often requiring considerable concentration as well as physical activity.
Everyone knows that when the band comes home they will come home very hungry and be looking forward to a substantial dinner. That’s why we always plan a hearty meal for that evening for all of us.
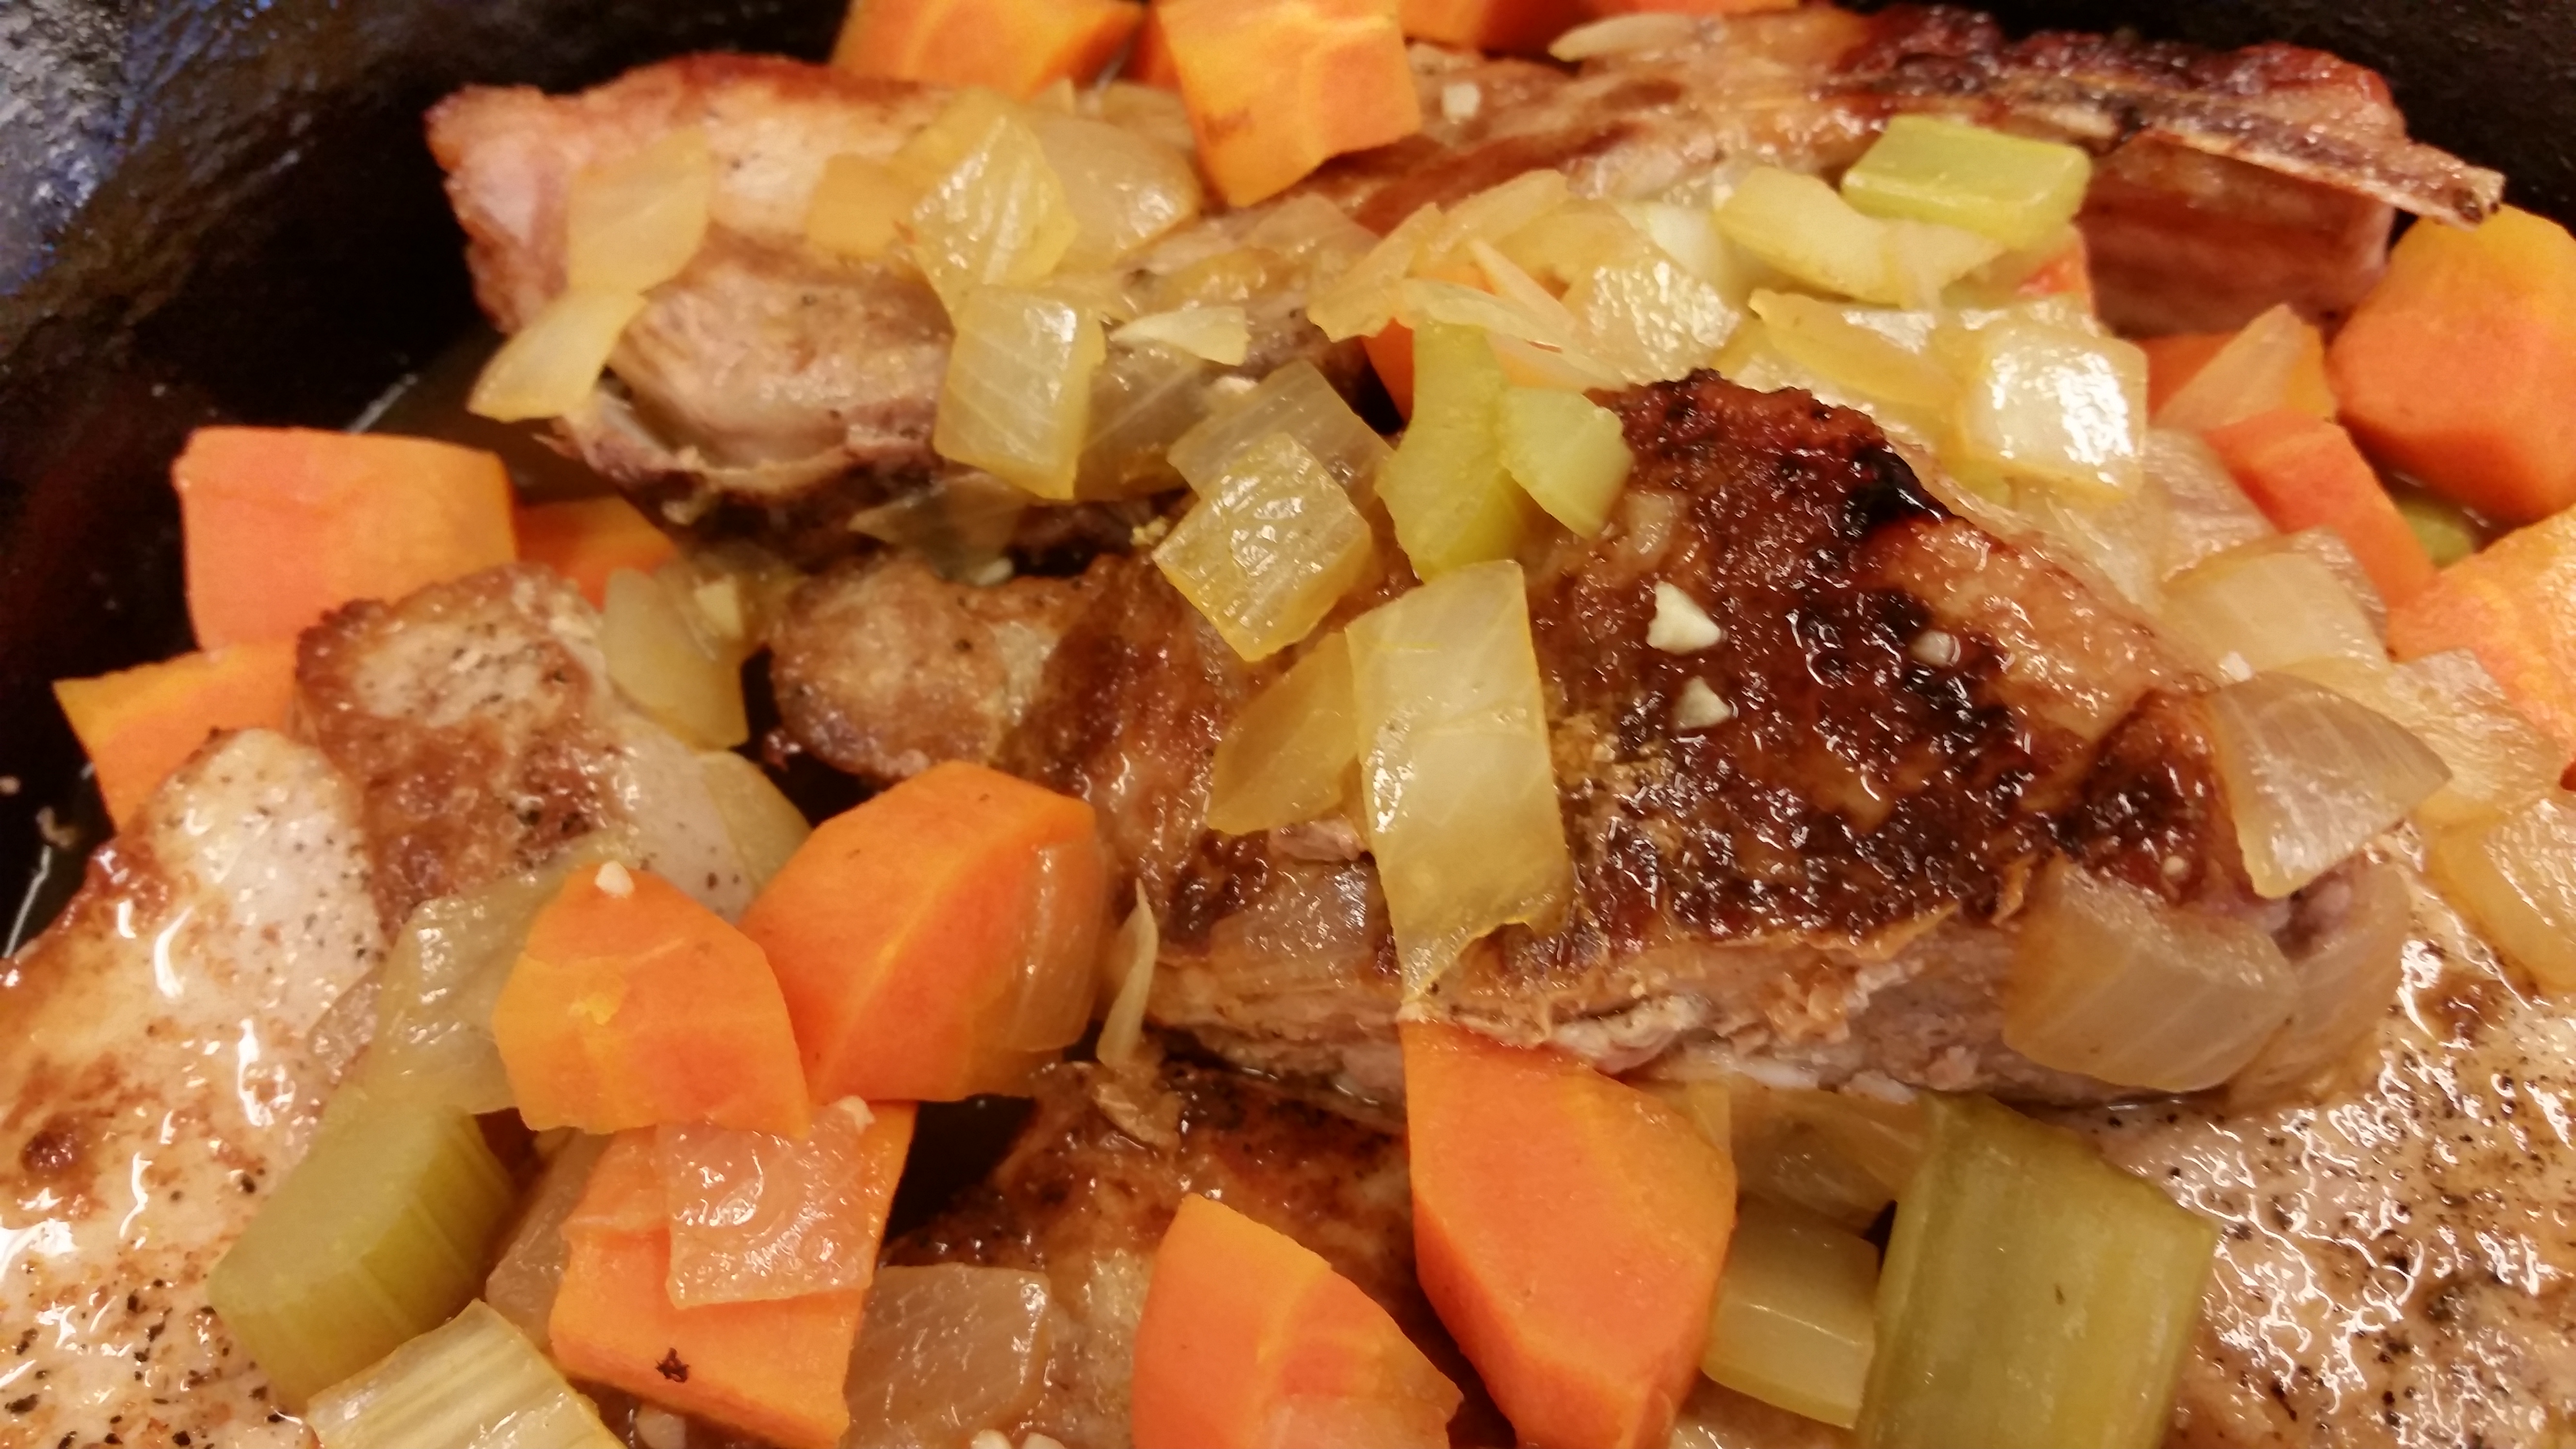
This week’s Saturday night dinner cook chose to do pork ribs with creamy polenta, chard, yellow squash and salad, but instead of grilling the ribs as we often do she surprised everyone by choosing to braise them…and…the result? Not a rib leftover and she has now been branded “Best Saturday night convent dinner cook!”
Pat the ribs dry and sprinkle with salt and pepper. Heat 2 tablespoons of the oil in a Dutch oven over medium-high heat and brown the ribs on all sides, working in batches if needed. Remove the ribs and set aside. Add the remaining 1 tablespoon of oil to the Dutch oven and reduce the heat to medium. Add the carrots, celery, onions and some salt and pepper and cook until soft, about 5 minutes. Add the garlic and cook until fragrant, about 1 minute. Add the tomato paste and cook, stirring, to remove the raw flavor, about 3 minutes. Deglaze the pan with the vinegar and wine, and then add the red pepper flakes and bay leaves.
Add the ribs back to the pan and add enough stock to reach halfway up the sides of the ribs. Bring the pan to a simmer, cover and place in the oven. Braise until the meat is tender, about 1 1/2 hours. During the last half hour, uncover to allow the liquid to reduce and the pork to brown. Remove ½ of the veggies and blend to a thick puree- return to pan juices to thicken the sauce.
Serve the ribs with Creamy Polenta, spooning the sauce on top, and garnishing with parsley.
Creamy Polenta
Spray the insert of a slow cooker with cooking spray (for easier clean up) and preheat on high.
In a medium saucepan, add 1 cup of the half-and-half, the milk, 1 tablespoon of the butter and the polenta. Season with salt and bring to a boil over medium-high heat, whisking constantly to keep the mixture lump-free. Boil for 2 to 3 minutes. Pour the mixture into the slow cooker and cook on high for 2 hours, stirring once or twice per hour.
Once you are ready to serve, open the slow cooker and whisk in the remaining 1 tablespoon butter, the remaining 1/3 cup half-and-half and the Parmesan. Salt and pepper conservatively since the polenta will be served with a robustly salted dish.
It’s not too early to start preparing for Christmas! By day, I am a sales rep. to our bookstores for our publishing house, Paraclete Press. For a couple months now, we have had our focus on offering our Advent and Christmas products to start stocking for the holidays. It always feels a bit odd, as the leaves are just beginning to turn, to talk about a season that feels so far off – but then again, it is almost October!
This is the perfect time to start thinking about making homemade gifts for your loved ones. The gardens are still yielding, and the season just begs us to do some canning. Since the Farmer’s Almanac predicts a long winter ahead, you might want to consider taking some time to get a jump start. Homemade gifts are a thoughtful touch, especially when you have put your own heart and time into preparing them. Cut down on the frenzy of shopping, and maybe you’d have a little more time to spend with Jesus!
This recipe was inspired by jalapeno peppers given to me from my parent’s garden. Gift wrapped with a box of Ritz Crackers and Philadelphia Cream Cheese, this is the ultimate homemade Christmas gift!
Bring boiling-water canner, half-full with water, to a simmer.
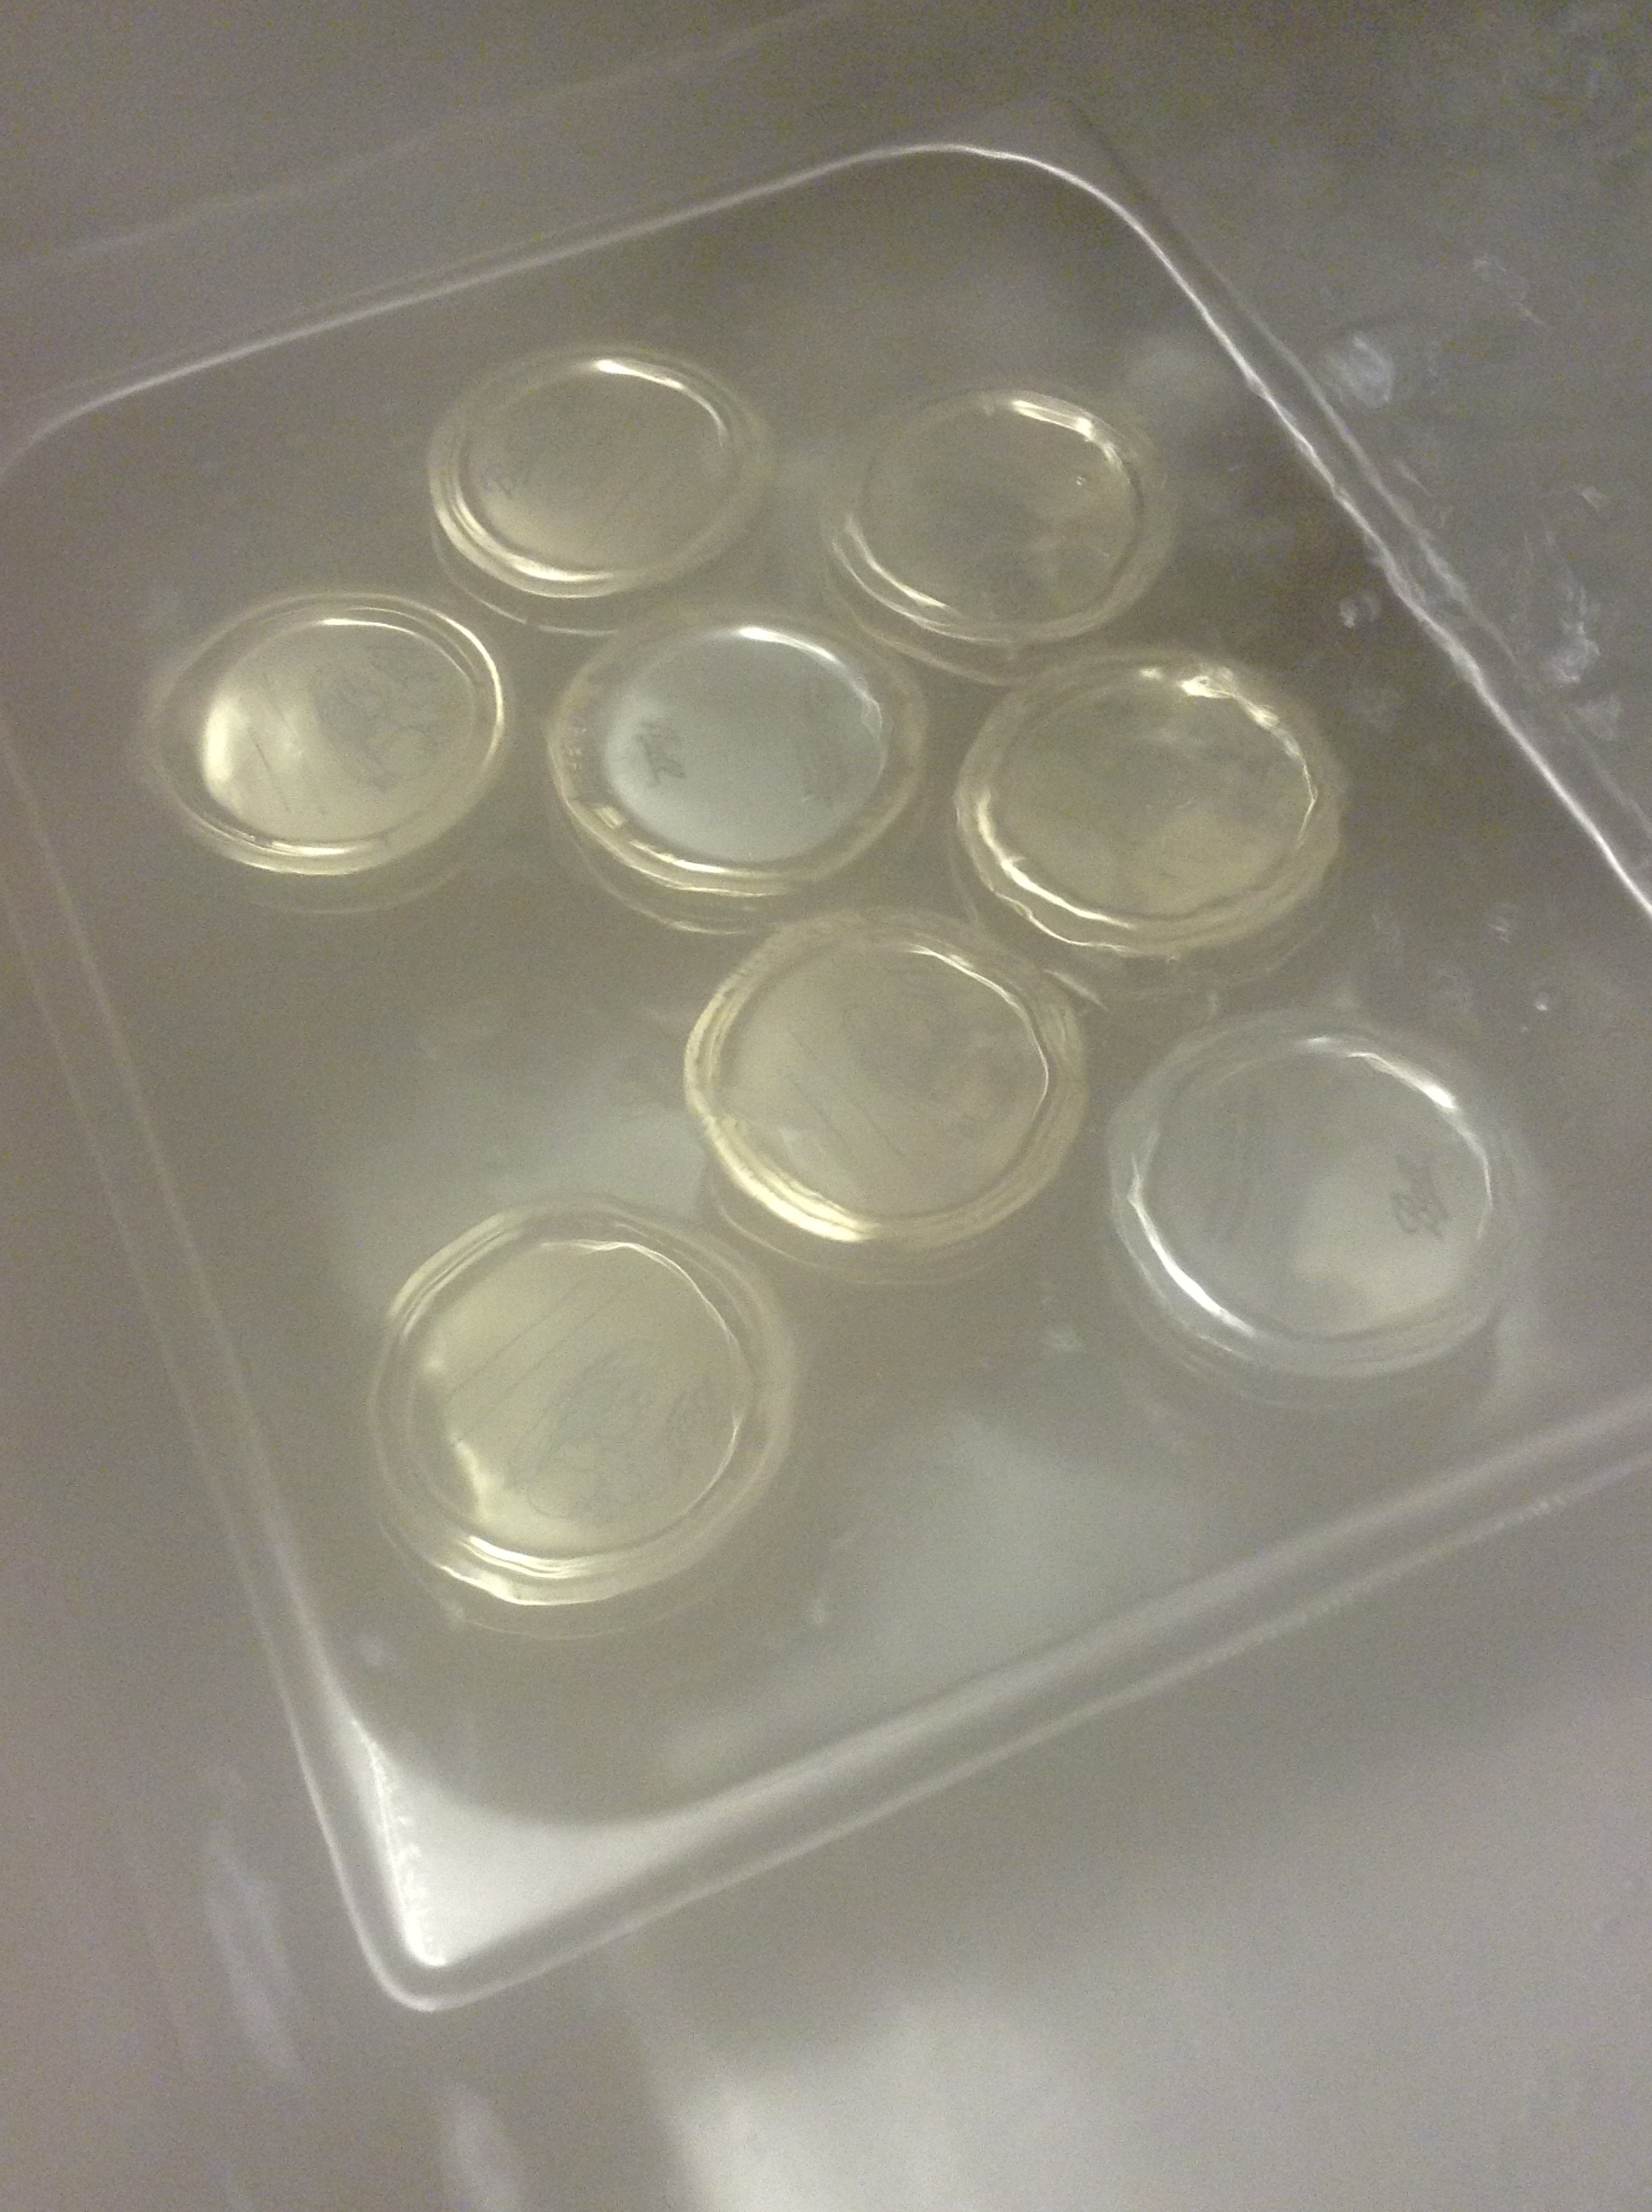
Wash jars and screw bands in hot soapy water; rinse with warm water. Pour boiling water over flat lids in saucepan off the heat. Let stand in hot water until ready to use. Drain well before filling the jars with jam. Keep jars warm and dry in a low oven.
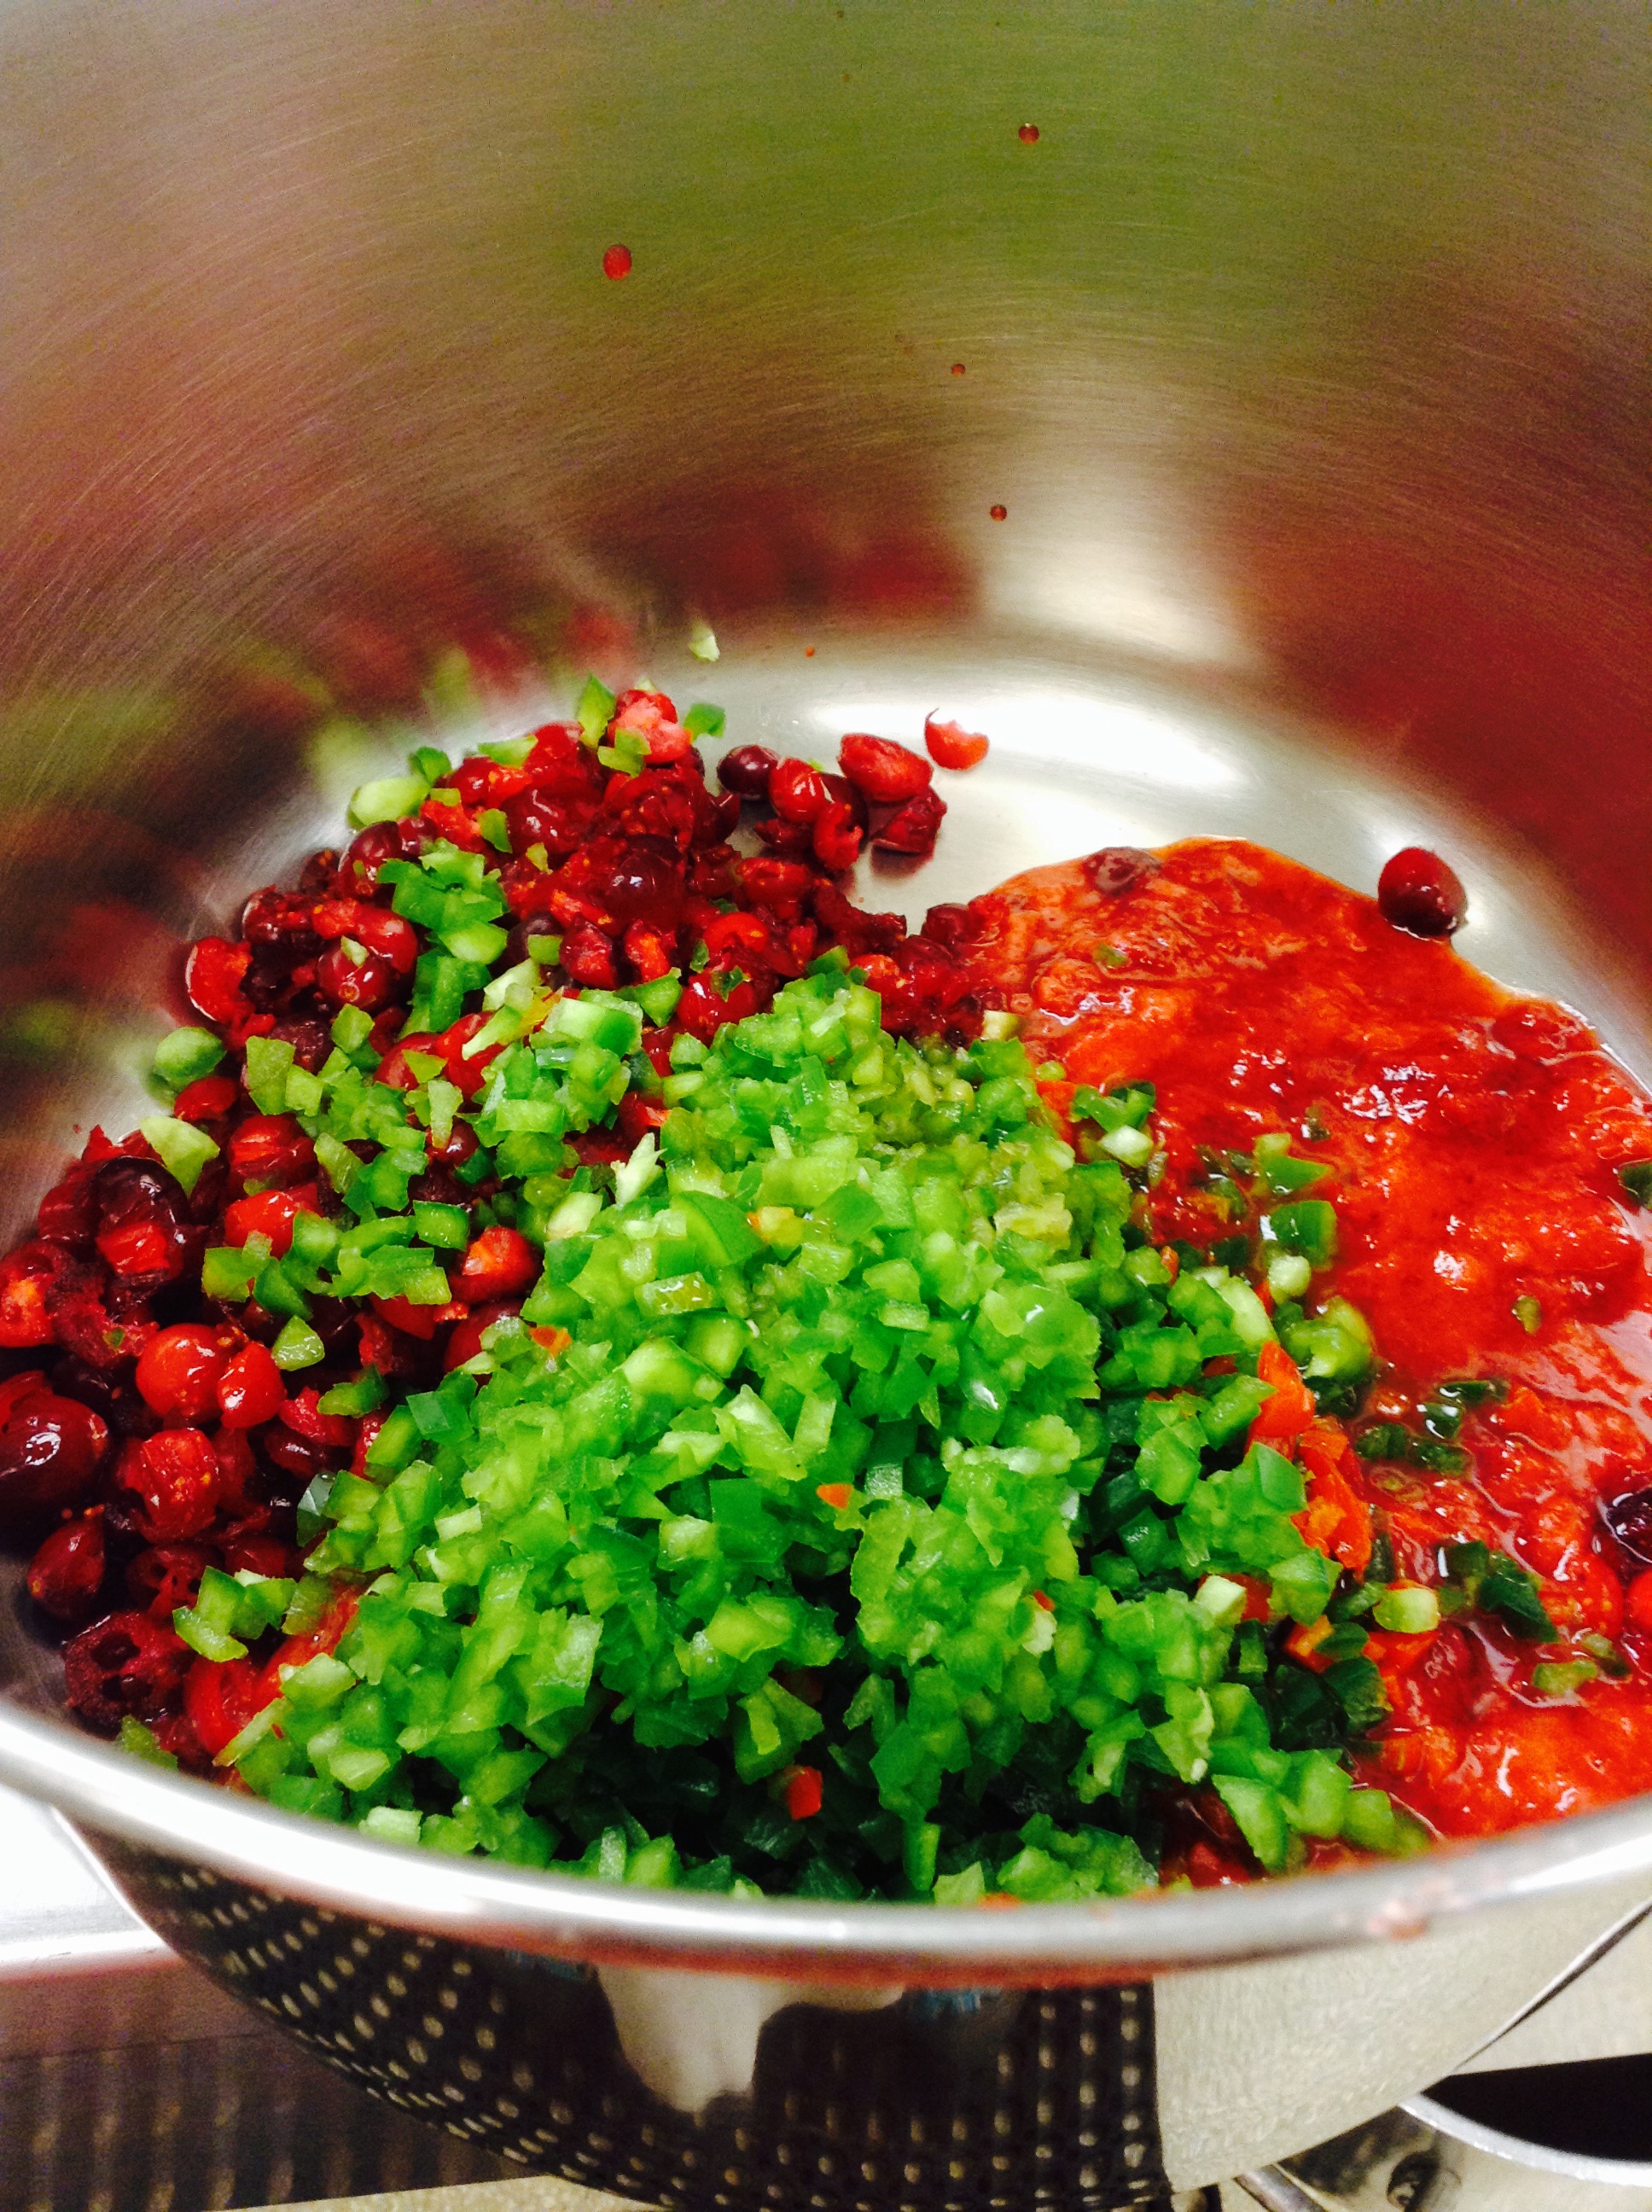
Make the Jam: add prepared fruit, peppers, salt and vinegar to a 6 or 8 quart pot
Begin heating on medium high and stir in the sugar
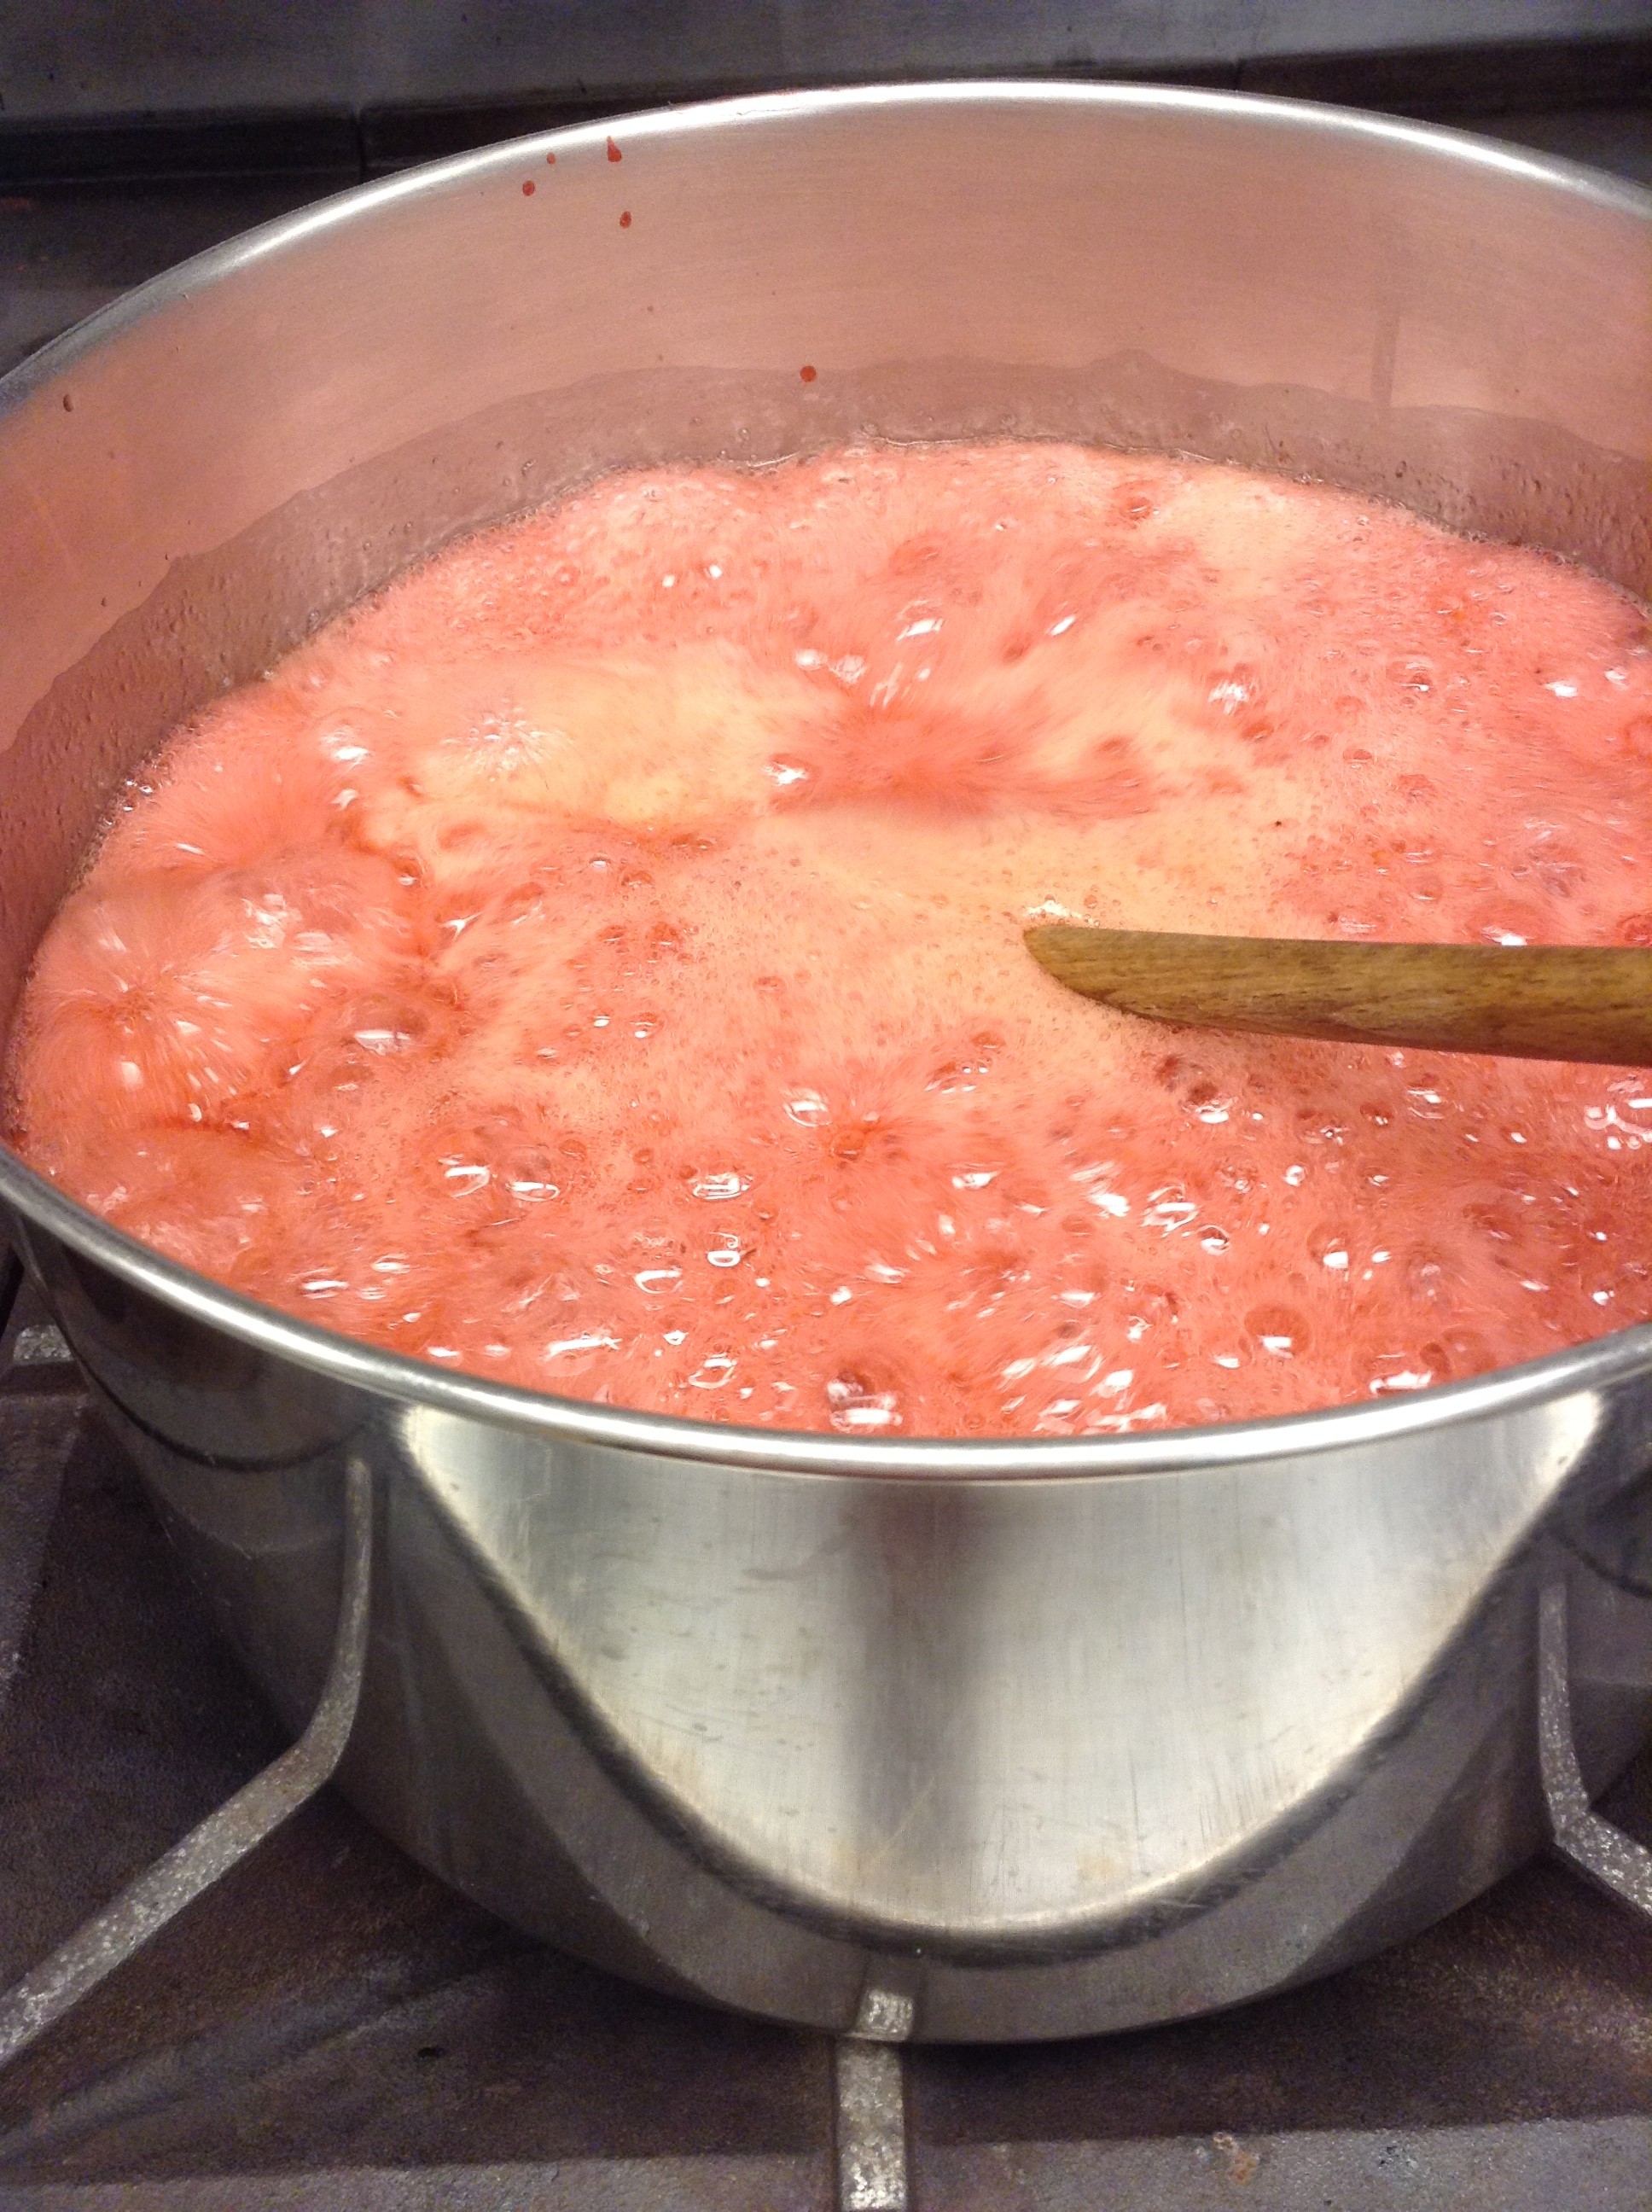
Once the mixture comes to a full rolling boil (a boil that doesn’t stop bubbling when stirred), add the pectin.
Return to a full rolling boil and continue boiling for exactly 1 minute, stirring constantly. Remove from heat.
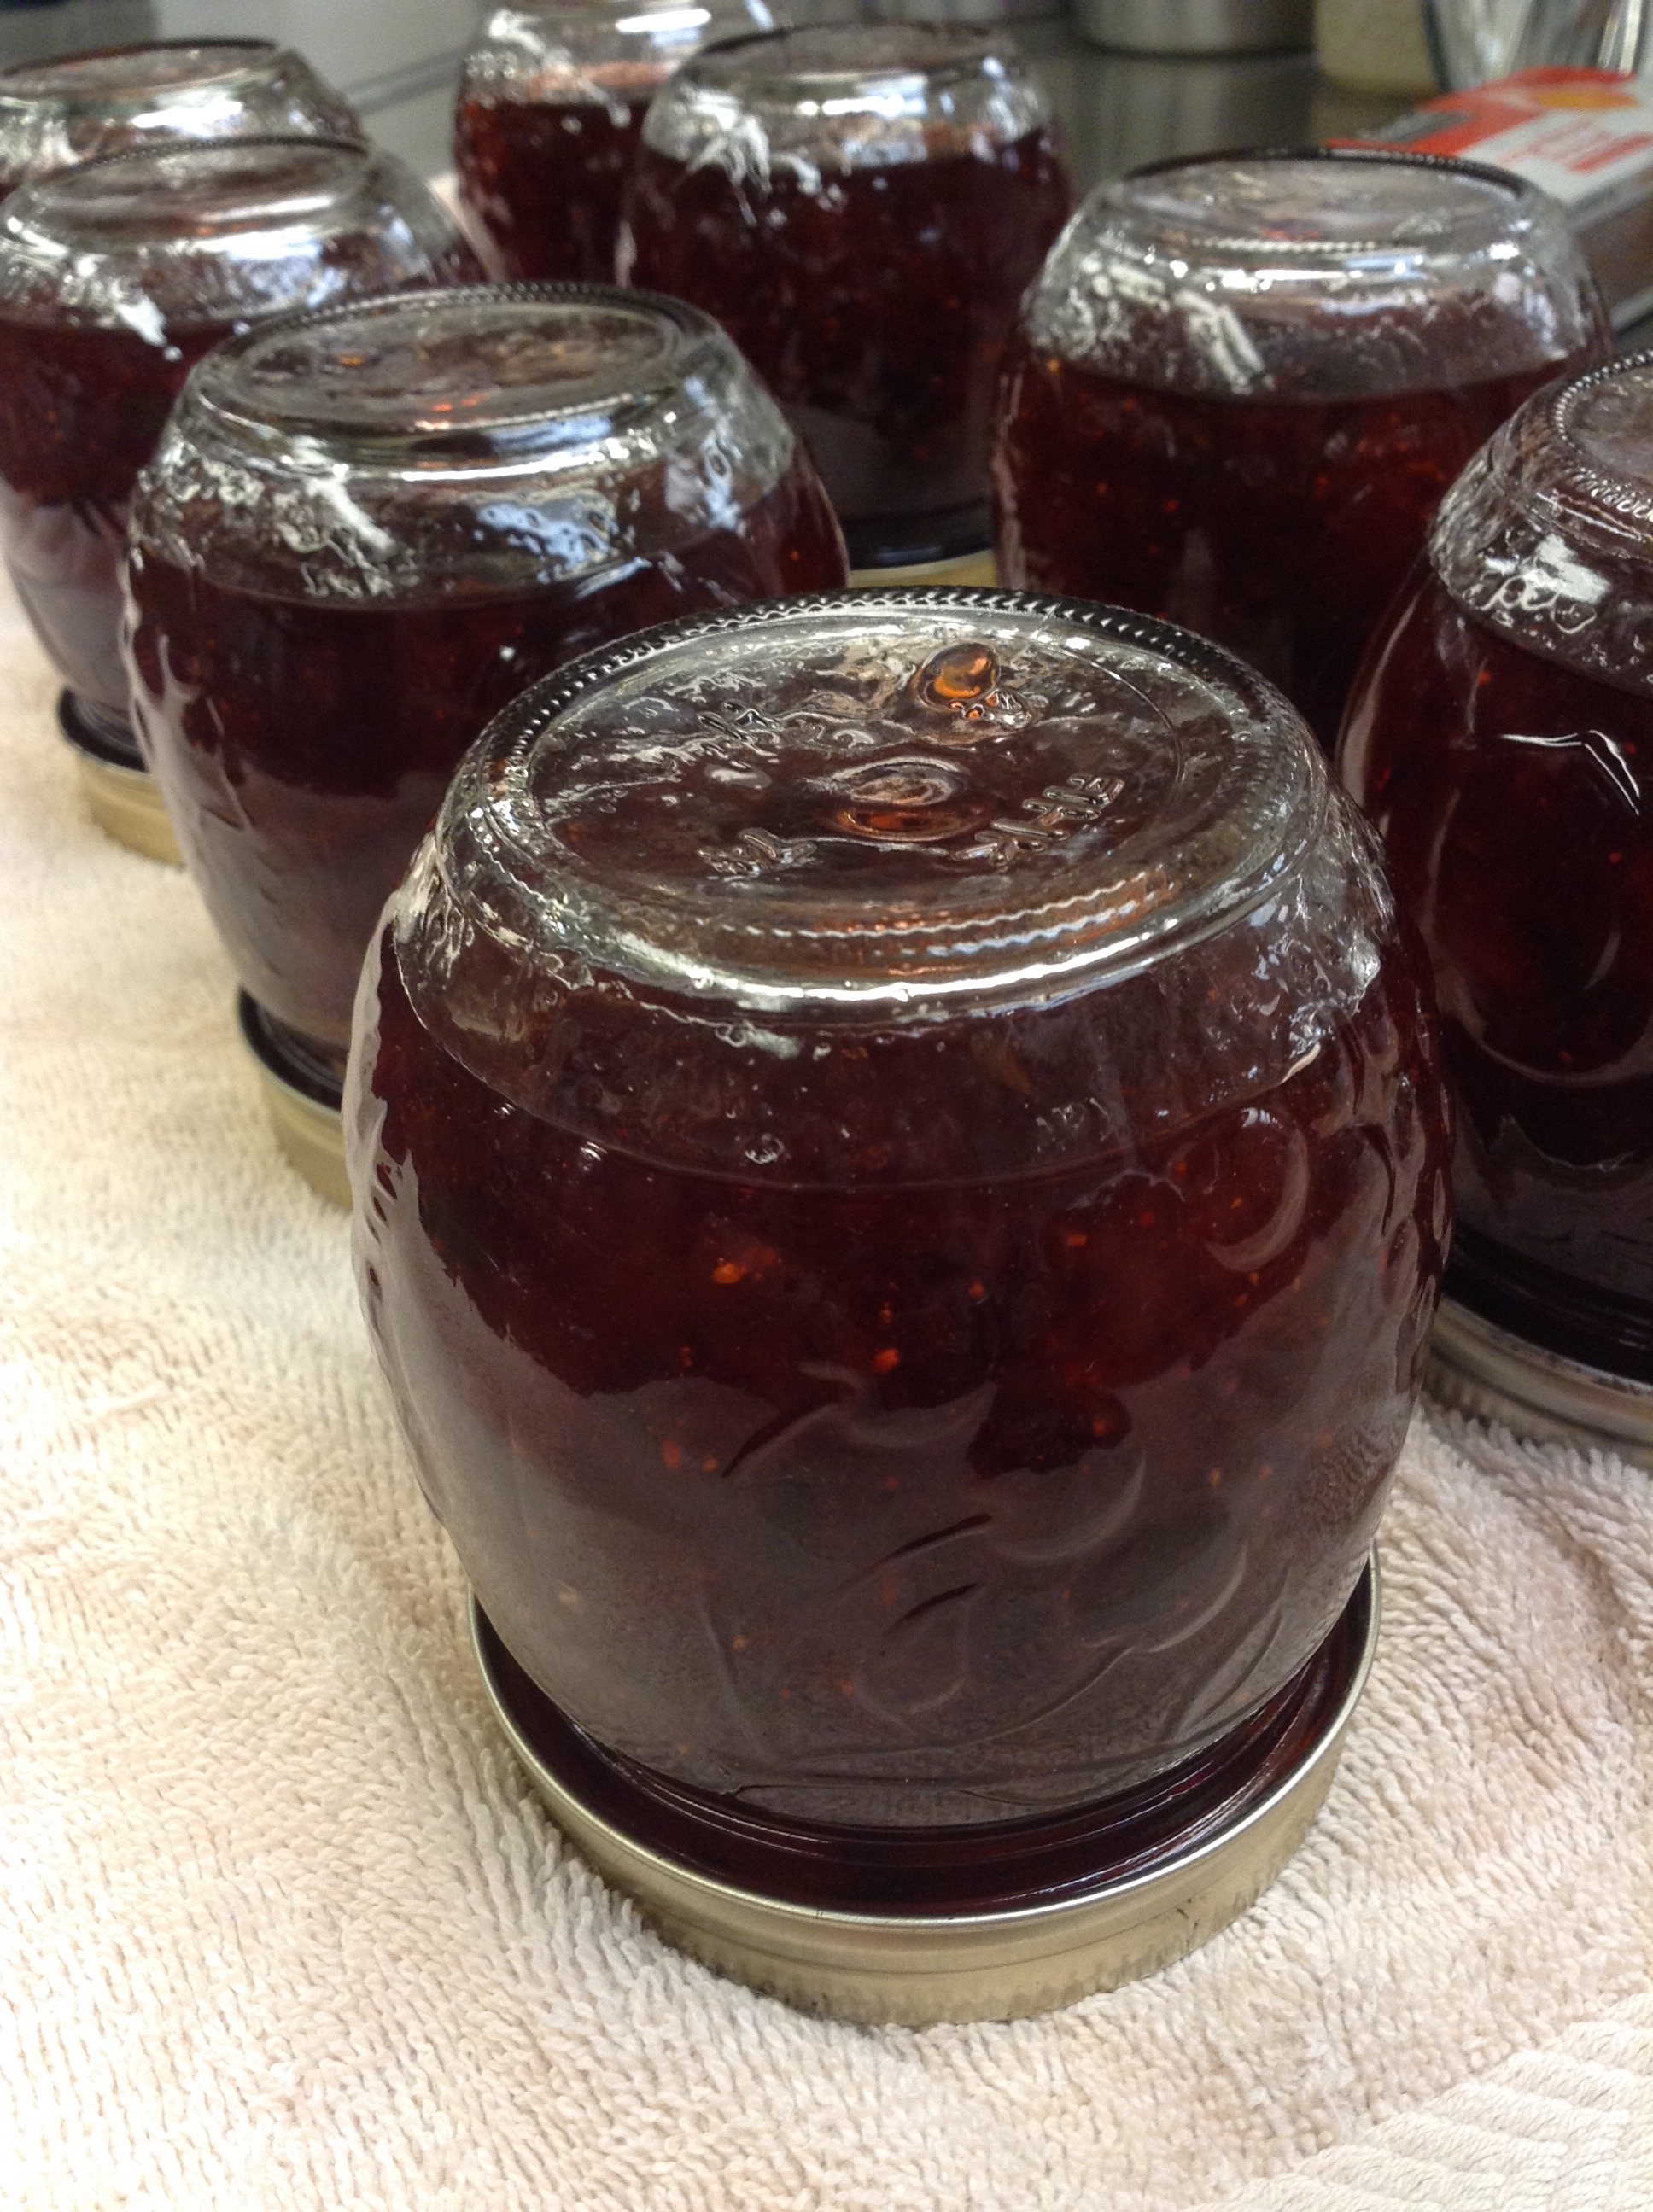
Ladle immediately into prepared jars, filling to within an 1/8th of an inch of the top. Wipe rim with a clean, damp cloth, put lid on followed by the band, and screw tightly.
Place jars on elevated rack in canner. Lower rack into the canner. (Water must cover jars by 1 to 2 inches. Add boiling water, if necessary.) Cover; bring water to gentle boil. Process 10 min. Remove jars and with a mitt, make sure band is tight, and invert the jar. After 10 min, place the jar upright on towel to cool completely. After jars cool, check seals by pressing middles of lids with finger. (If lid springs back, lid is not sealed and refrigeration is necessary.)
I am a cold weather girl. Yesterday was one of those crisp fall days, and I was actually cold! It’s a promise of things to come — apples being picked and pumpkins rolling in — so I do look forward to it. I love autumn! This year we have a bumper crop of pears. Last year was plum year — we had hundreds of pounds of the purple beauties. I don’t think we have as many pears, but it is a respectable harvest, enough that one starts wondering how many pears a person can eat? I love pears off of the tree, and I love to make upside cakes, poached pears, and pear muffins…. I also love chutney, so I decided to make up a few jars of a fiery pear one. Perfect for pork, or ham, turkey or chicken. Great in a ham and cheese sandwich on the griddle, or in the oven. But be warned — this one has a kick!
Print Recipe
Votes: 0
Rating: 0
You:
Rate this recipe!
Golden Pear Chutney
SERVINGS
CHANGE SERVING SIZE
COOK TIME
1hour
PREP TIME
READY IN
Ingredients
3lbs.pearshard, under-ripe, peeled, seeded, and chopped
Cook the pears in enough water to cover until they are medium soft.
Drain, saving the water, then make a syrup of the water in which the pears were cooked and the brown sugar by boiling in a large nonreactive pot until thick, about 20 to 30 minutes.
While the syrup is boiling, add the remaining ingredients to the pears, then mix everything together and cook for about 30 minutes or until the raisins are softened, the onions are transparent, and the chutney has a good thick consistency.
Transfer to sterilized jars and seal, process in a boiling water bath for 10 minutes, or store in refrigerator.
(Quatre – Epices: equal amounts of white pepper, nutmeg, ground cloves and ground ginger. Cinnamon can also be added, but for this recipe I left it out.
Memorial Day is supposed to be the kick off for summer, but it was a little questionable with the cold temperatures and constant rain. The vegetables in the garden seemed happy enough — potatoes, beans, leeks all were thriving with the extra moisture they were getting. I was a little concerned that steaks on the grill weren’t going to do all that well in the pouring rain. Monday dawned clear and warmer, and we were able to have our picnic as planned. It was delightful and almost sparkling in the sunshine. I made my favorite potato salad. My sister has always made it this way, and I recently realized that this is also the way my mother always made it. The secret is in the salad dressing going on the potatoes while they are still warm and making it a day ahead so the flavors have a chance to develop.
Print Recipe
Votes: 0
Rating: 0
You:
Rate this recipe!
My Mom’s Potato Salad
SERVINGS
CHANGE SERVING SIZE
COOK TIME
PREP TIME
READY IN
Ingredients
My Mom’s Potato Salad
2 1/4potato(es)Yukon Gold, peeled and cut into chunks (you can also use red potatoes for this, unpeeled)