We are blessed with three very large vegetable gardens. This week, our task list was large for the “veggie volunteers”: tying up the cucumbers and tomatoes, doing our second planting of lettuce, picking and processing kale, beets, and swiss chard, and our other ongoing tasks such as weeding, mowing, string trimming, and watering. We’ve been in near-drought conditions here on the Cape, so we were grateful for our unexpected late Saturday afternoon rain shower.
There is nothing more satisfying to me than harvesting the vegetables you have grown from seed and then being able to create something tasty and delicious. I always wonder if God might be smiling at the pleasure He gives us when we co-create with Him.
Print Recipe
Votes: 0
Rating: 0
You:
Rate this recipe!
Kale Salad with Blueberries, Beets, Quinoa and Avocado
Rinse the quinoa with cold water in a sieve. Place in a saucepan with 1 1/2 cups cold water and 1/2 tsp salt. Bring to a boil. Reduce heat to low and cover, cook for an additional 10 min. or until the water is absorbed. Remove from heat and let sit until cool.
Make the vinaigrette by combining all the ingredients and whisk well. Adjust taste, adding a bit more honey if you want a sweeter version.
Using a spiralizer, spiralize your beets on the "Angel Hair" or "Spaghetti" attachment. You can also buy them already spiralized if you want to skip this step, or you can grate or julienne them by hand. You do not need to cook the beets, they are eaten raw. Set aside.
Place the chopped kale in a large bowl and add the dressing. Massage the dressing into the kale with your hands.
Add the quinoa to the bowl along with the blueberries and feta cheese and toss gently.
Put the salad on a platter or in a serving bowl and add your avocado chunks. Top with your spiralized beets. Sprinkle with toasted almonds or sunflower seeds, if desired.
The spiralizer is a kitchen utensil with fine blades that can slice raw vegetables and fruits into an assortment of shapes. If you don't have a spiralizer - simply grate the beets, or julienne them by hand.
While they were eating, Jesus took a loaf of bread, and after blessing it he broke it, gave it to the disciples, and said, “Take, eat; this is my body.” Matthew 26:26
As we come to the end of Holy Week, many symbols and traditions come to mind: foot washing on Maundy Thursday, the meaningful services which mark Good Friday, the vigil of Holy Saturday and finally the joy of Easter Sunday. Tucked among these landmarks of Holy Week is the Last Supper that Jesus shared with his disciples–the breaking of bread.
Throughout the Bible, bread serves as a vehicle for miracles, teaching illustrations and as symbol of Jesus’ sacrifice. It is also in the act of breaking bread that revealed his identity as the risen Christ. In this spirit, I am sharing one of my most favorite bread recipes.
Join with us this Holy Week as we break bread, united as the Body of Christ around our tables and throughout the world. With prayers for a healthy and joyful Eastertide!
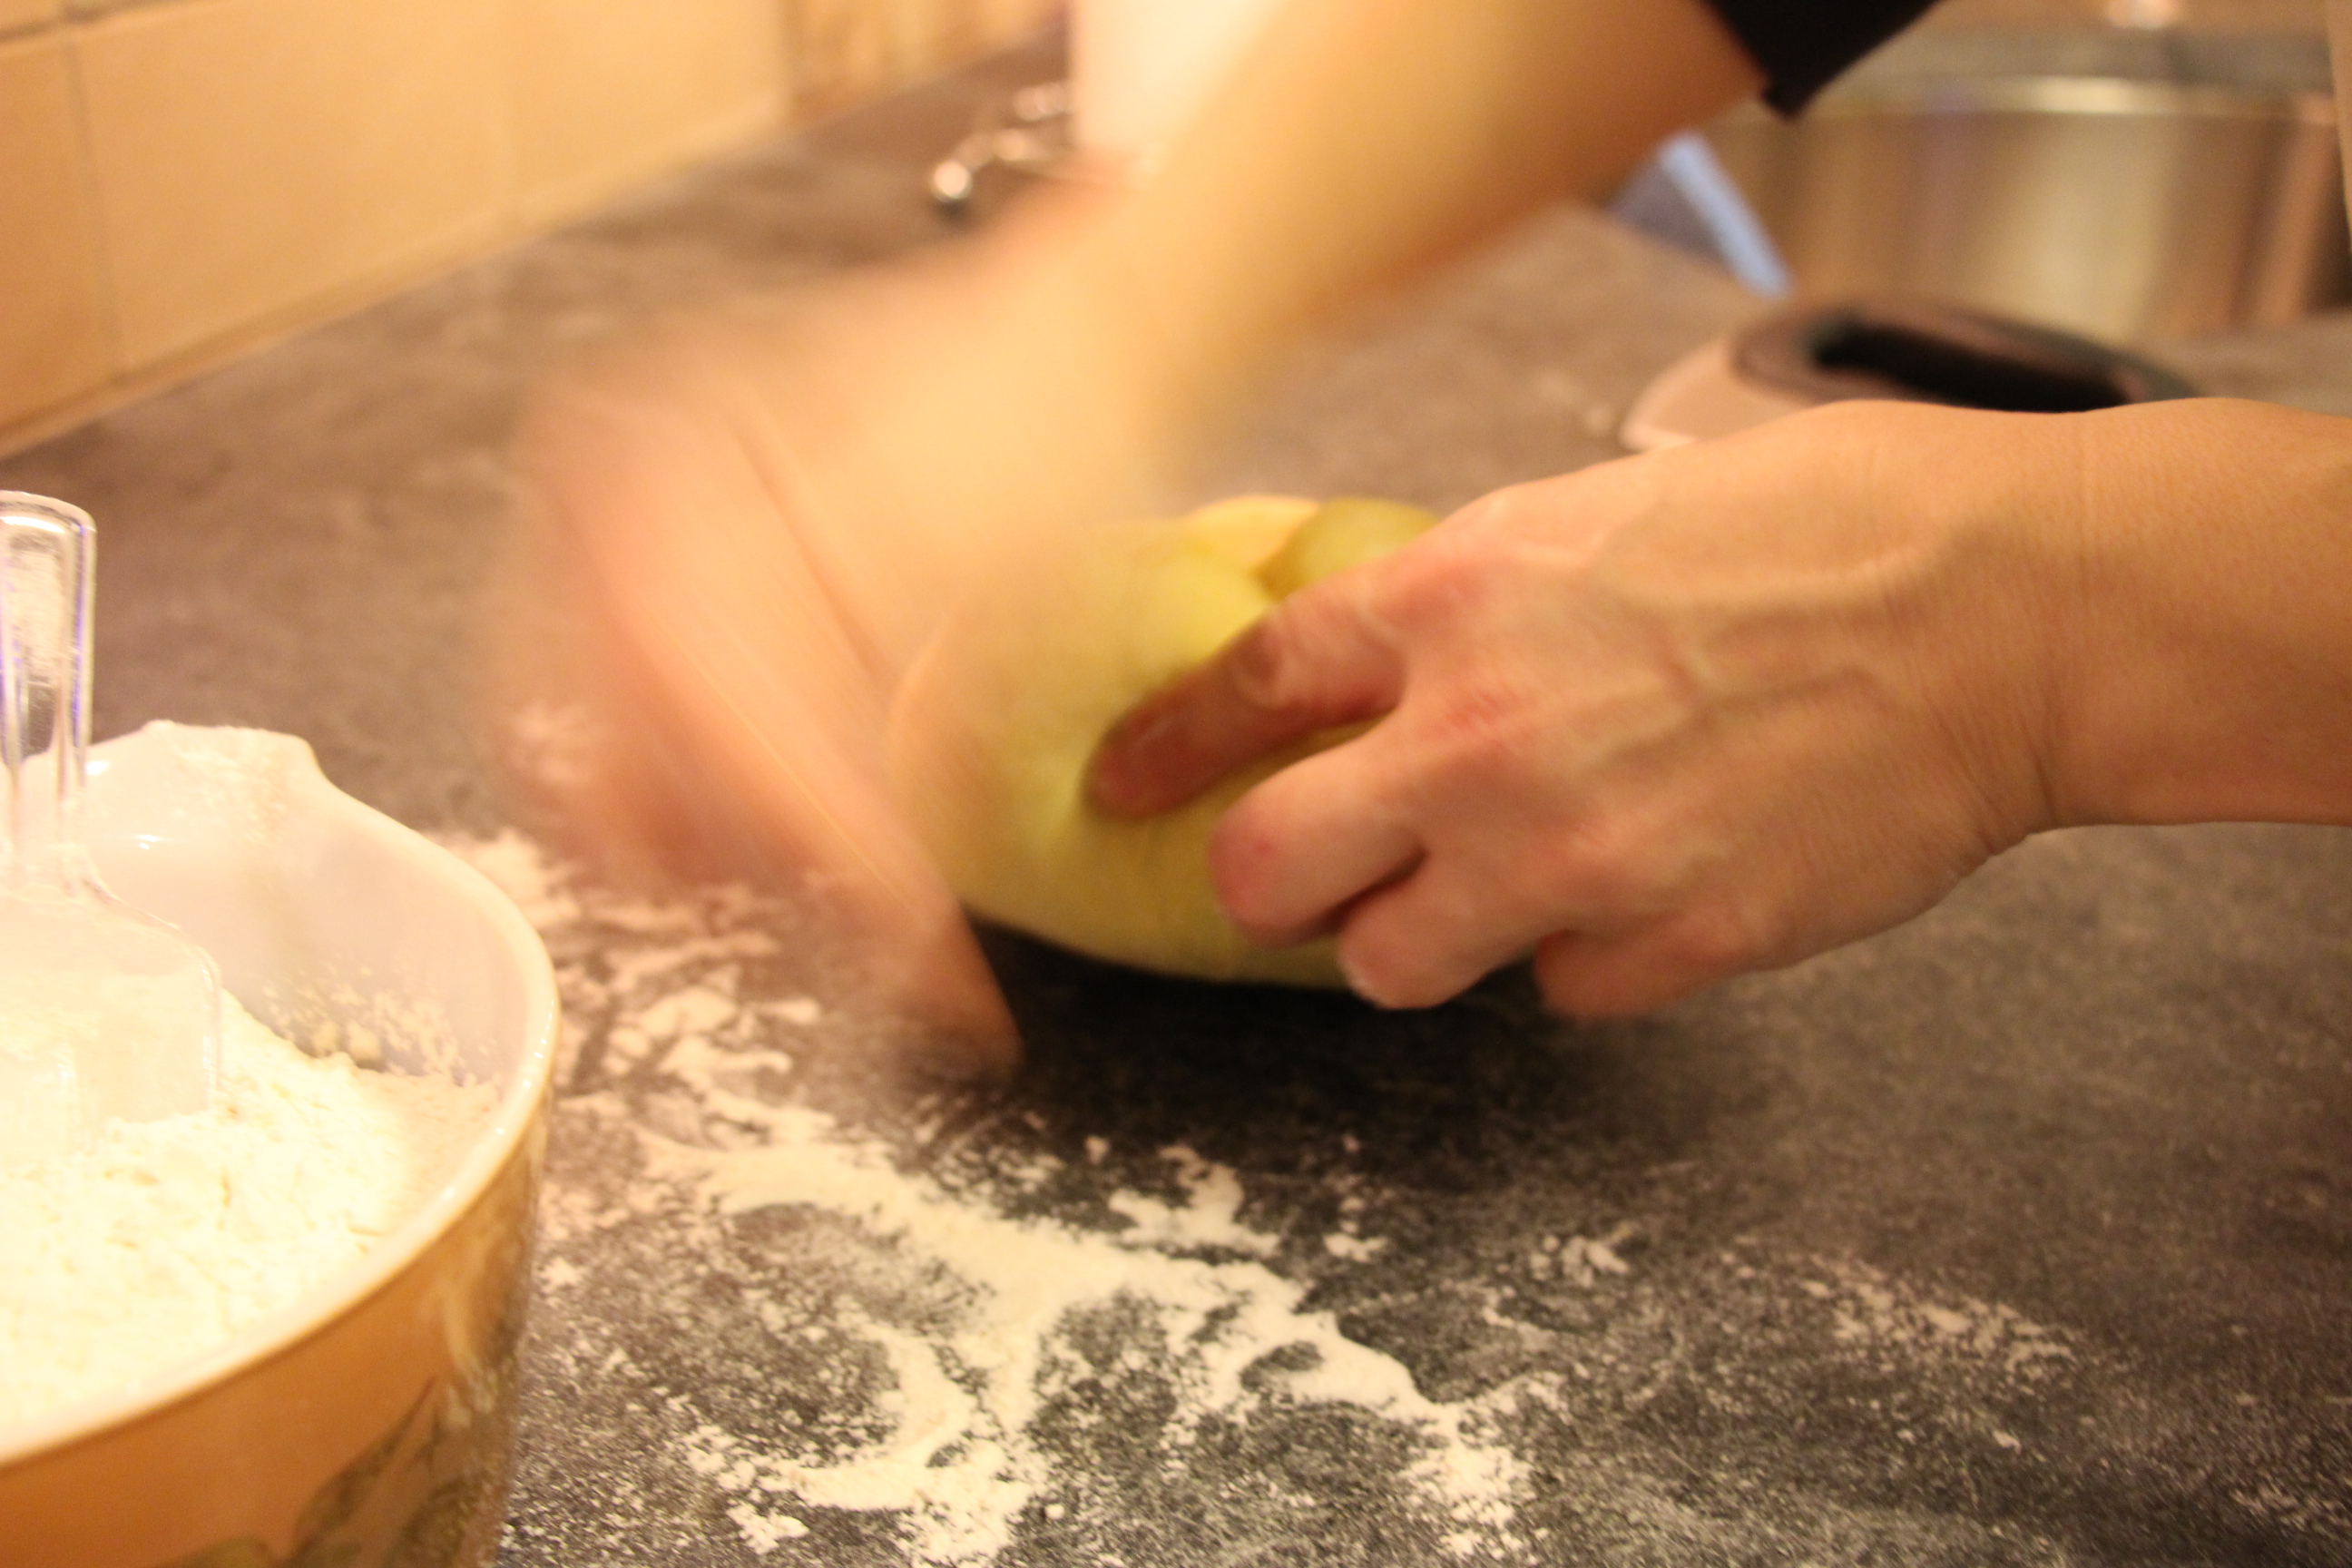
Mix yeast with warm water and allow the yeast to activate, about 10 minutes. It will be ready when bubbles form at the top.
In a saucepan, heat milk and butter while yeast is activating.
Whisk the egg, honey, spices and salt together in a small bowl. When ready, add yeast, and milk and butter mixture.
Gently stir 2 c of the flour into the liquid mixture. Add flour 1/2 c at a time while mixing, and keep adding 1/2 cups of flour until the dough is smooth.
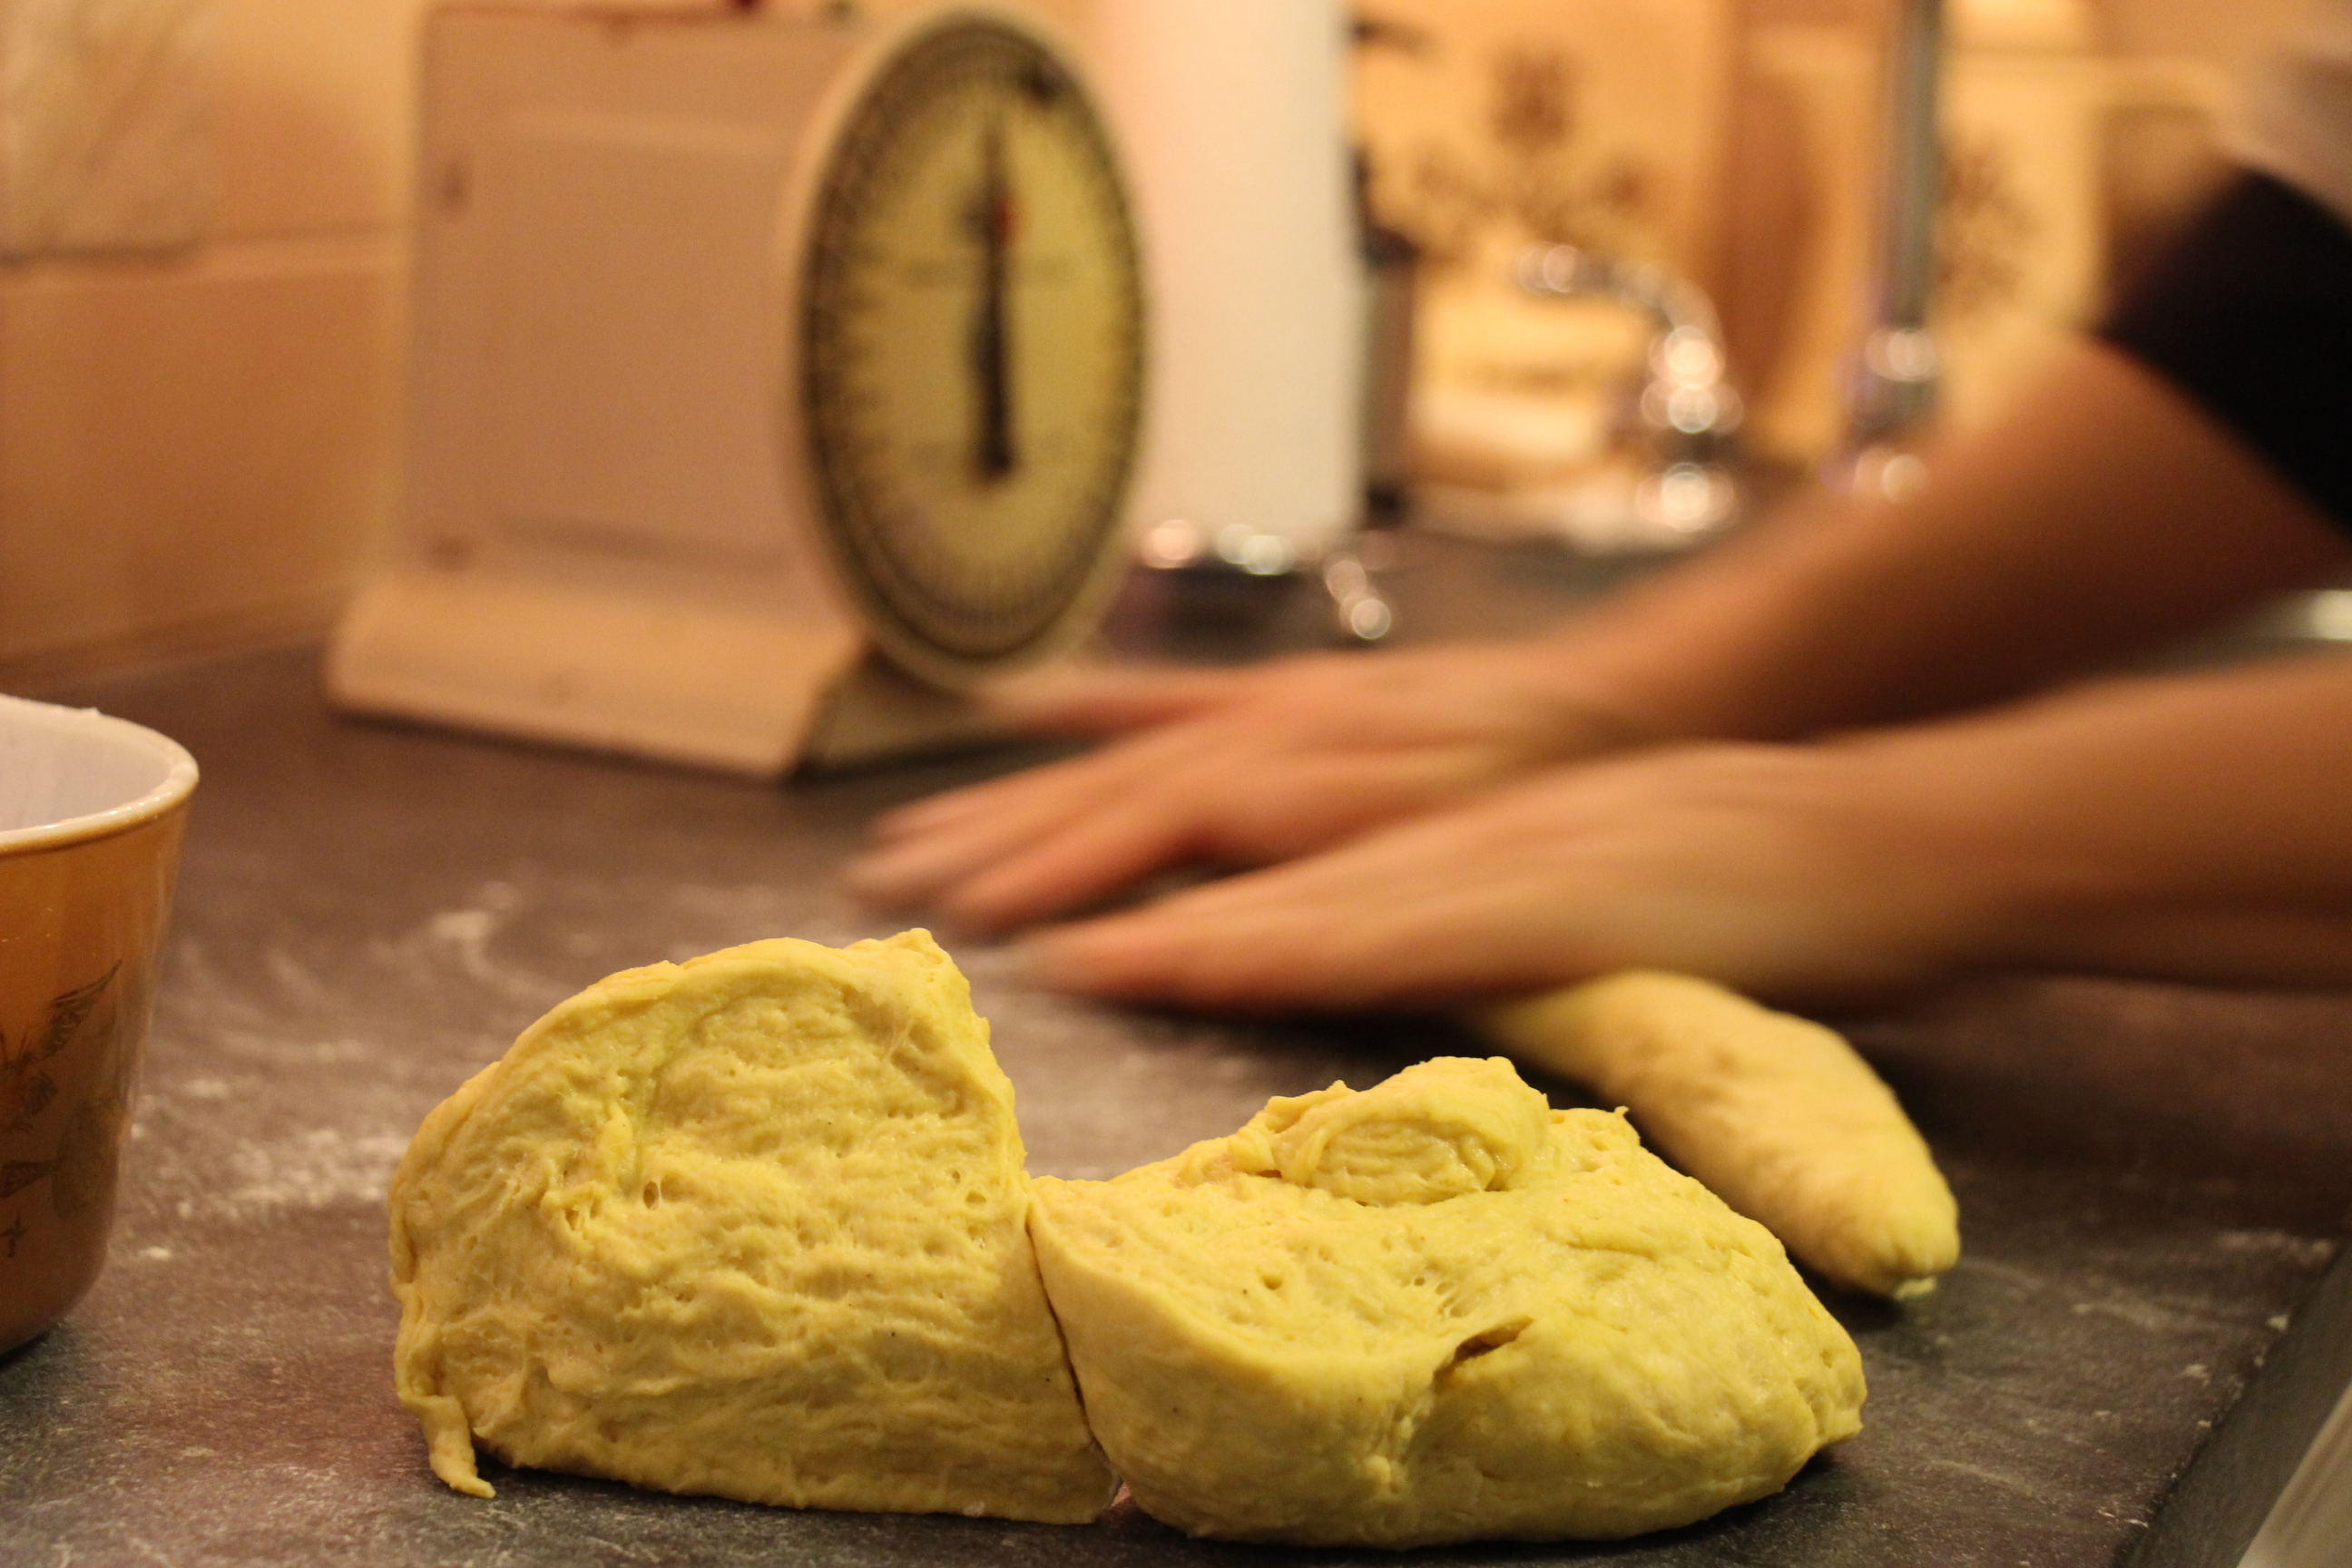
Knead the dough on a lightly floured counter until it is smooth and elastic.
Place in a lightly oiled metal or glass bowl and cover with a clean towel and let rise in a warm place until doubled in size, about 1 hour.
Punch the dough down and form into a round loaf. Place it on the baking sheet, covered with a towel in a warm place for another 45 minutes.
While dough is rising a second time, preheat oven to 325 degrees.
Bake for 1 hour, rotating the baking sheet halfway through.
lnsert a thermometer into the middle of the bread. If it registers between 180-190 the bread is finished.
Our community looks forward to autumn for many reasons, but chief among them is harvesting fruit from our orchards: apples, pears, stone fruit, and grapes from the vines. The abundance is truly something to be grateful for as we compare the delicate spring blossoms to the bountiful fall harvest that we enjoy into the first frosts of winter…an annual miracle!
Recently, we tried this simple recipe for our supper as a twist on the classic avocado toast–this time with sun-ripened pears and fresh ricotta with milk from our cows. Drizzled with honey, this may well become another reason to look forward to autumn.
Oops! We apologize to our readers who received this new recipe via email with the subject line: Tortellini Salad.
Nothing delights the Sisters more than warm, gooey sticky buns straight out of the oven on a Sunday morning. This year, we had the wonderful opportunity to offer baked goods to our community for Easter morning. We spent a good part of the weekend preparing over 50 pans of sticky buns. This year, I came up with a new recipe that we all decided was probably the very best sticky buns we have ever eaten. The comments back to us confirmed this was true. Even though I’d like to keep this recipe a secret, I thought we’d share it with you.
You won’t regret surprising your loved ones with these wonderfully fluffy and sinfully delicious breakfast treats! They are wonderful to eat year ’round!
Dissolve yeast in very warm water and let sit for 5 mins
Add ingredients in order listed above.
Add flour (dough will be slightly sticky, but should pull away from side of bowl).
Mix together the yeast dough, cover and let rise, until doubled in size in a warm, draft free place (approx.1 - 1 1/2 hrs) or overnight, covered, in the refrigerator)
Assemble:
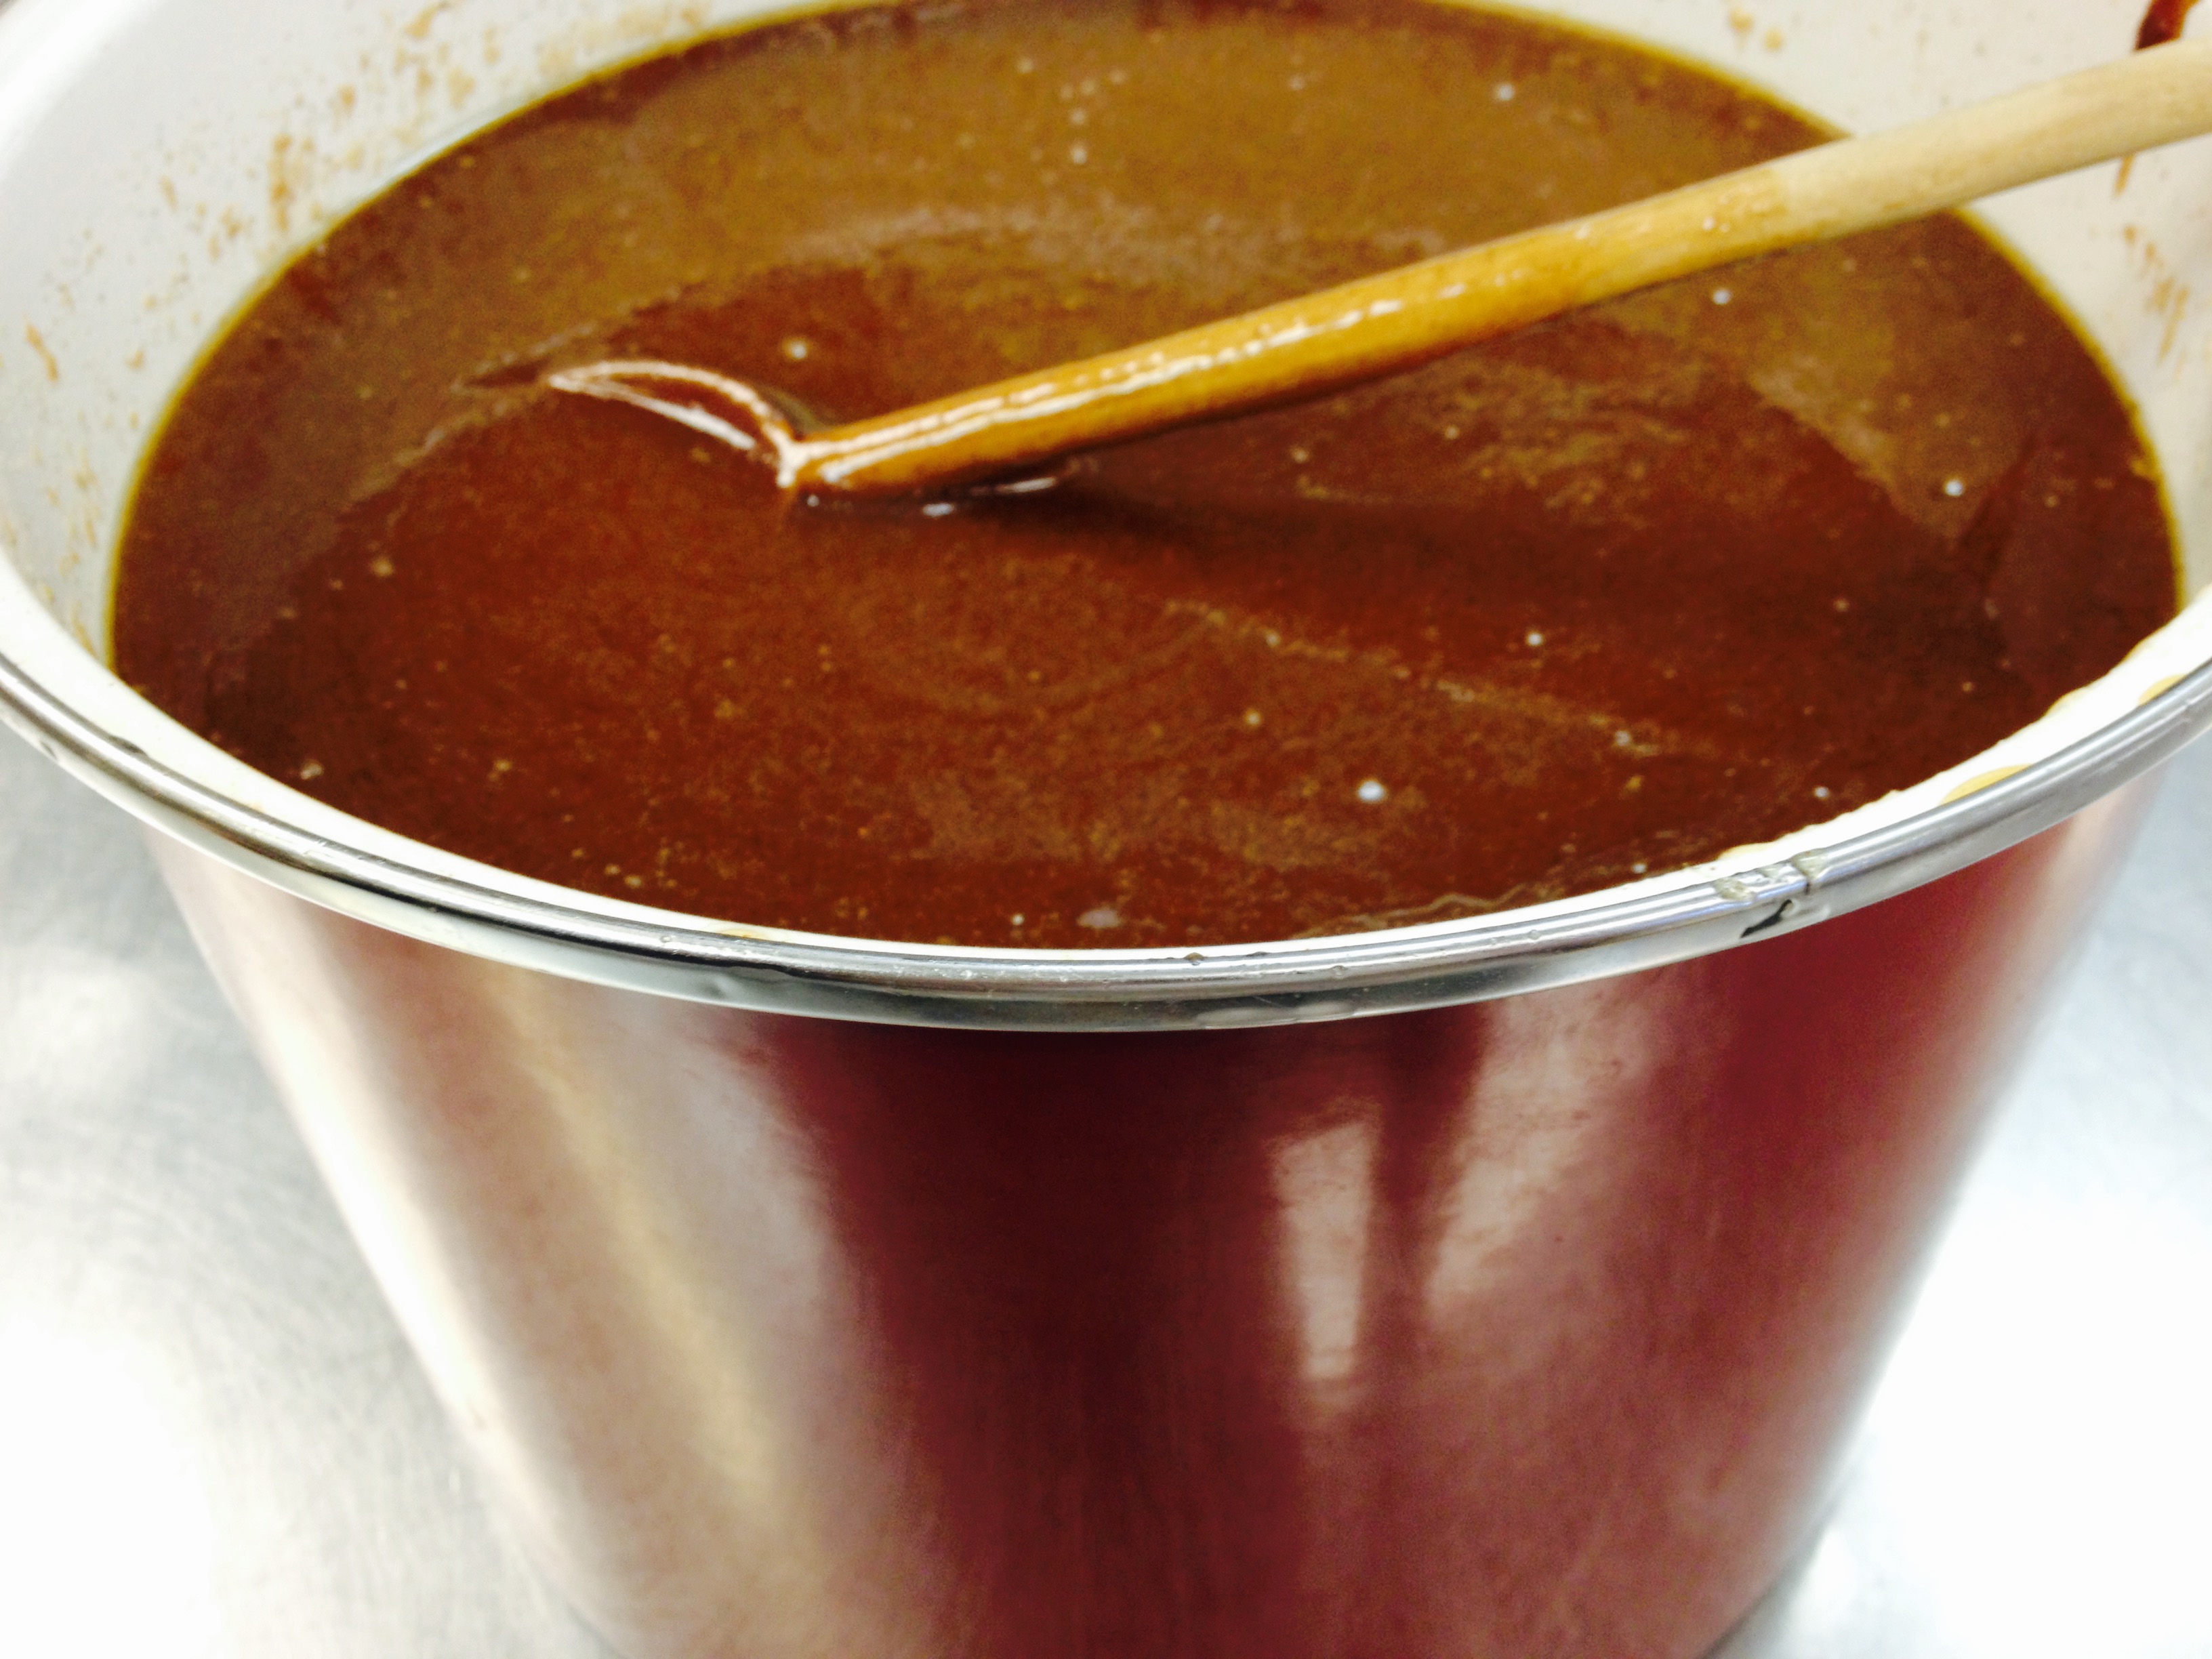
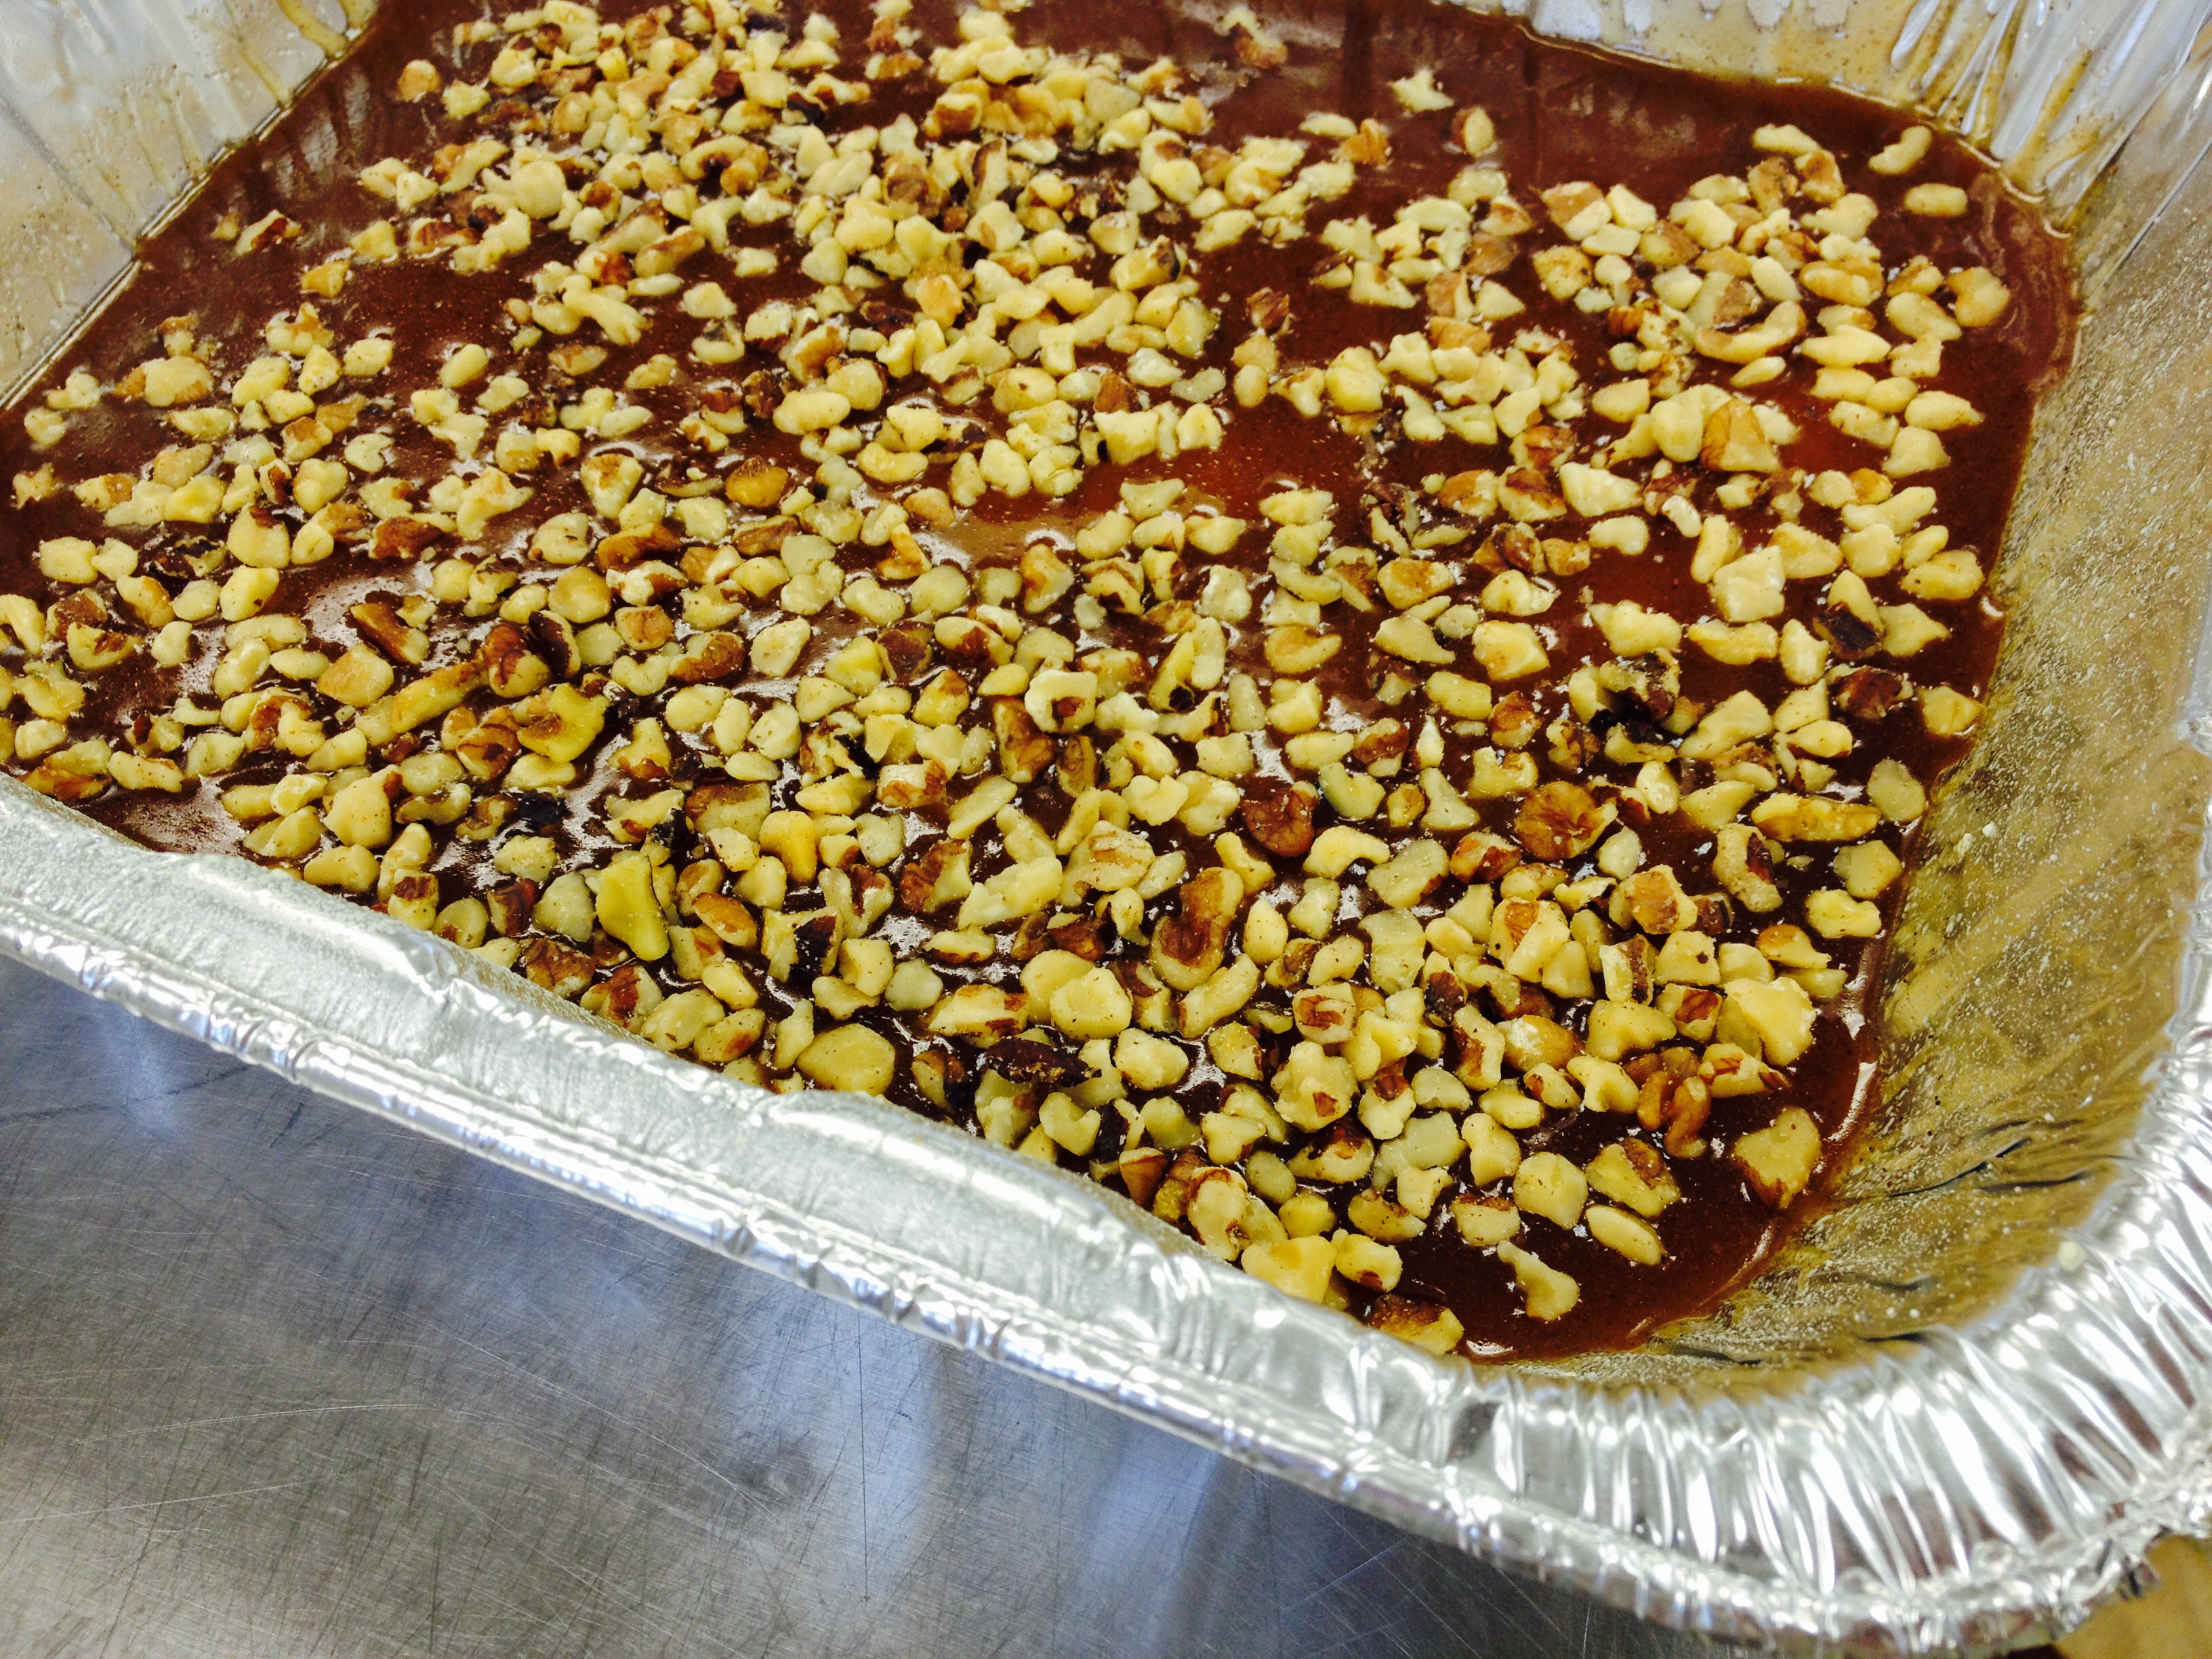
For the filling: Mix together melted butter, brown sugar, honey and cinnamon. Divide in half, setting aside half the caramel for the filling.
Using three 9-inch cake pans that have been sprayed with Pam, equally divide the rest of the caramel topping over the bottom of the pans. Scatter the pecans or walnuts over the caramel mixture and set aside.
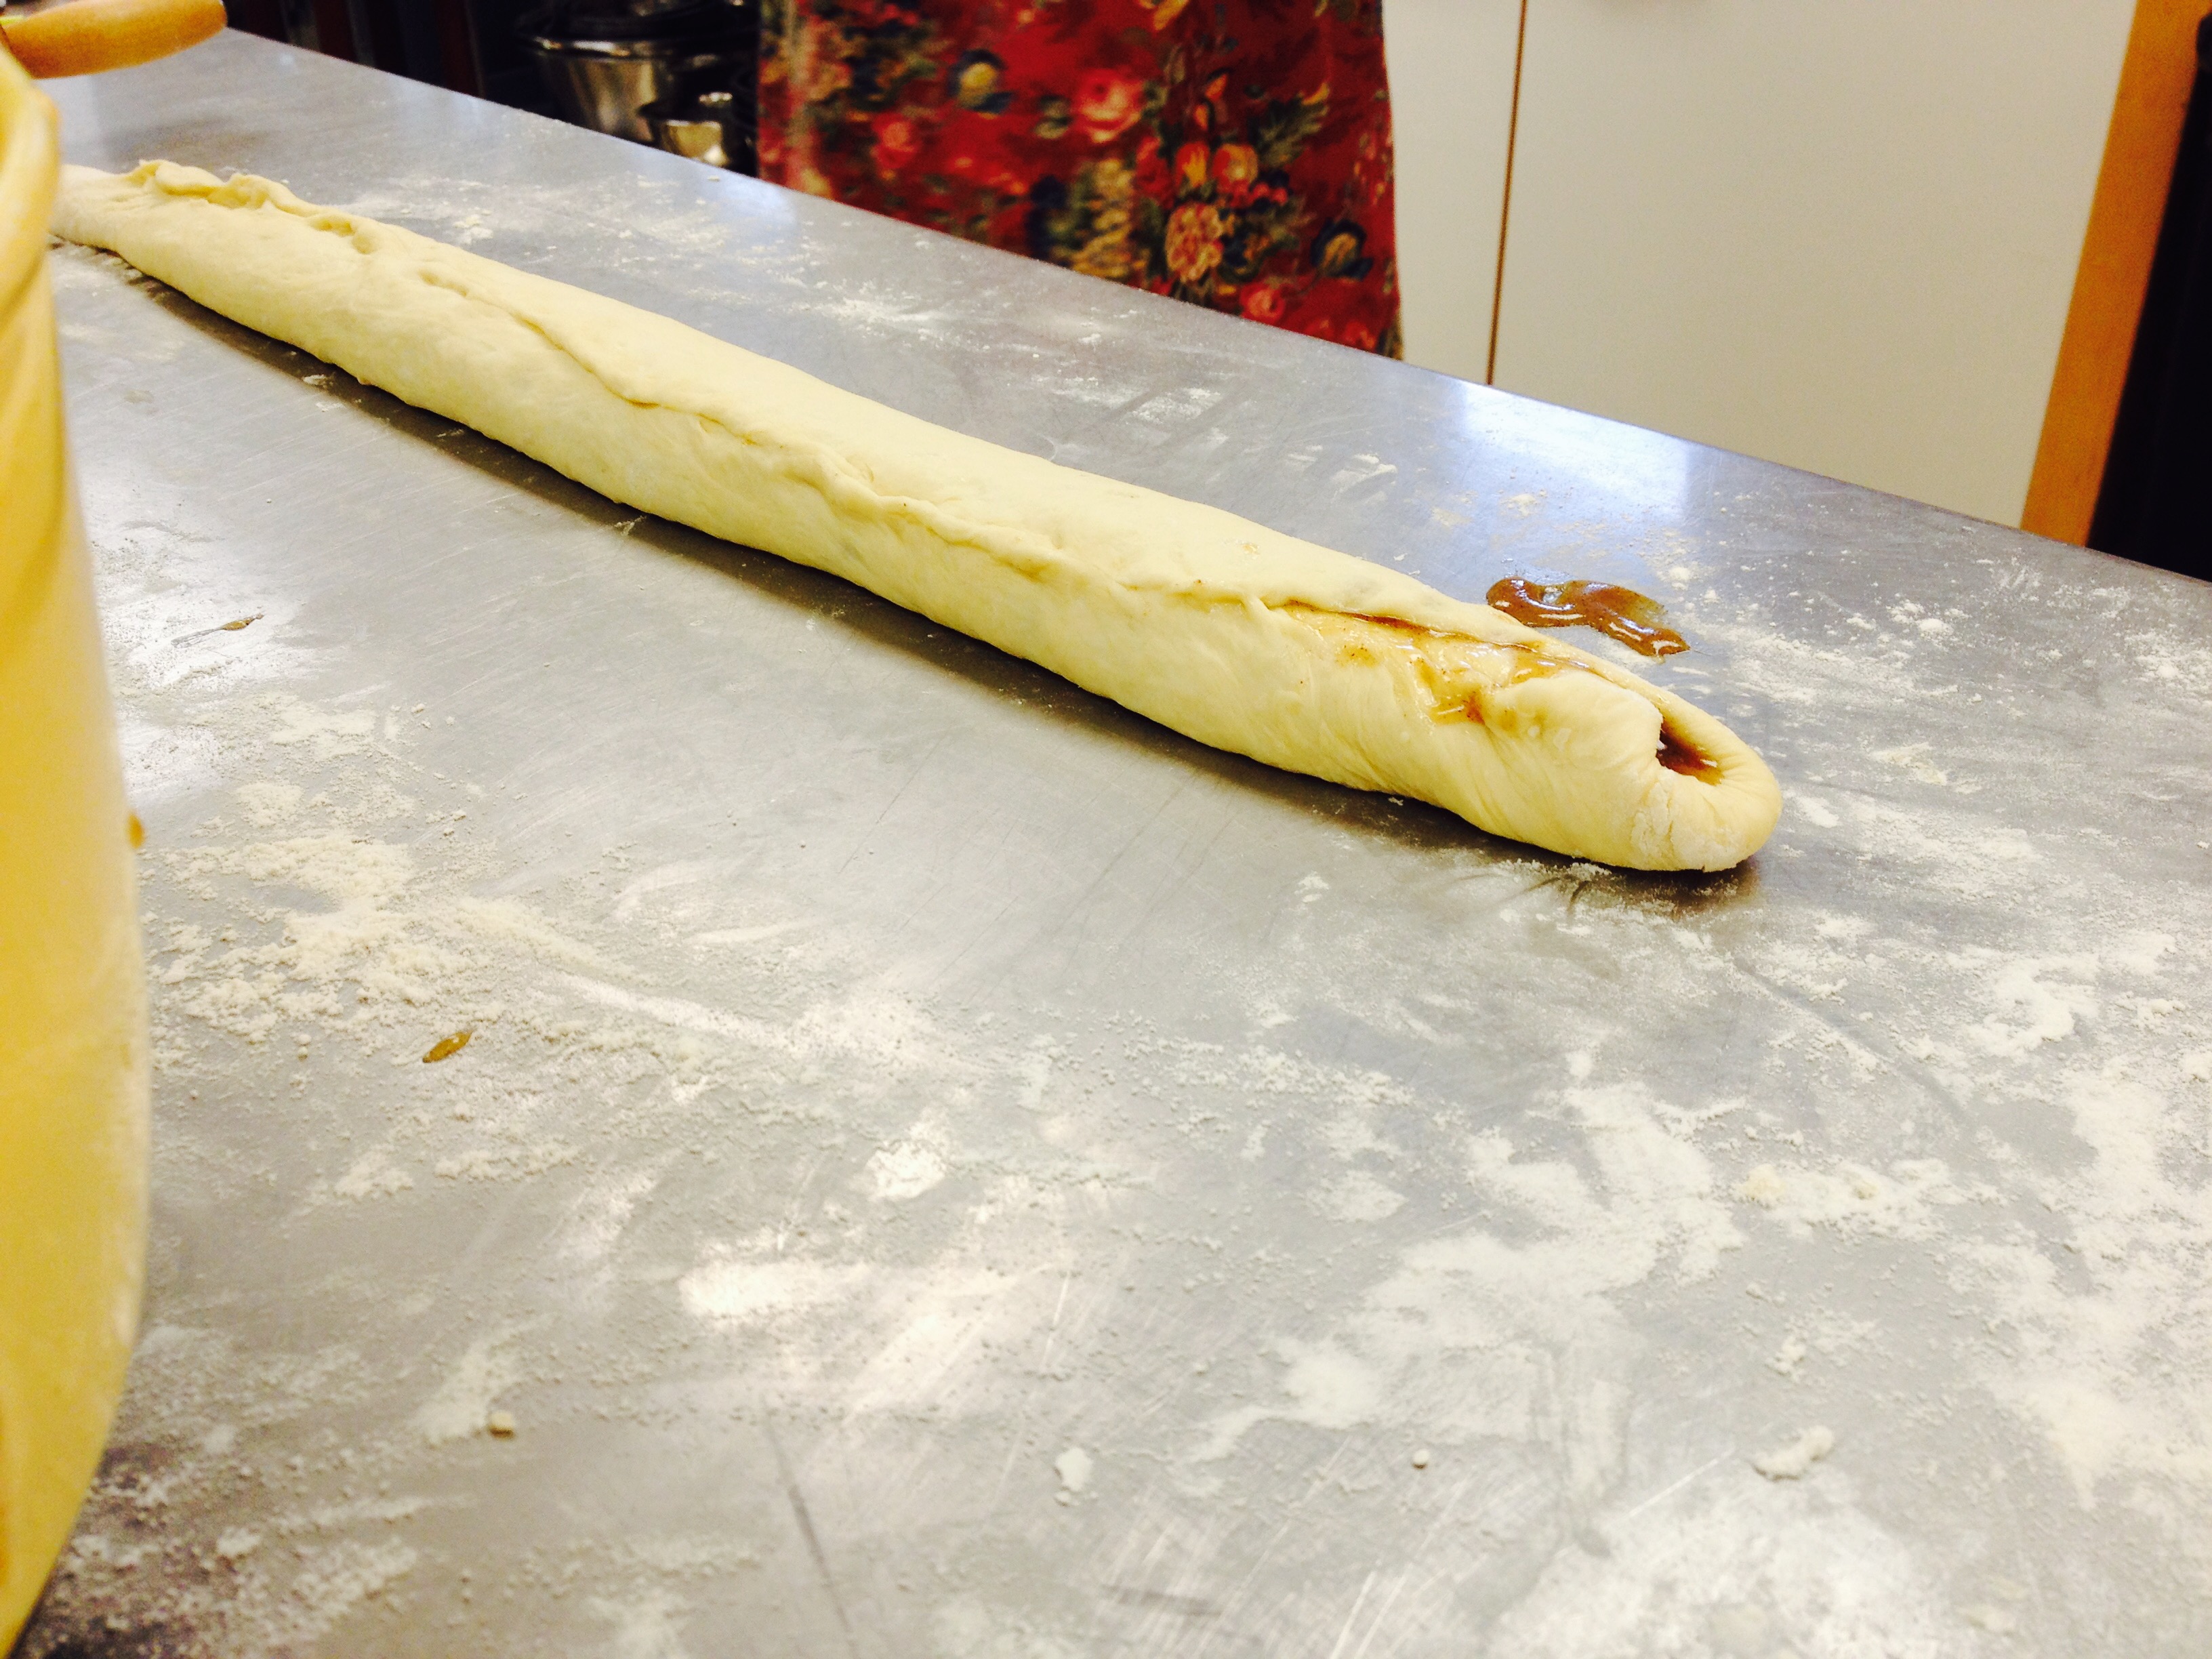
Dust your work surface with flour. Divide the dough in thirds. Roll out the dough to a ⅛ -inch thick rectangle (around 20 inches long). As you roll out the dough, make sure there is enough flour to prevent it from sticking to the work surface
Divide the remaining caramel mixture into thirds and evenly spread it over the rolled out dough leaving 1 inch around the edge of the dough without the filling.
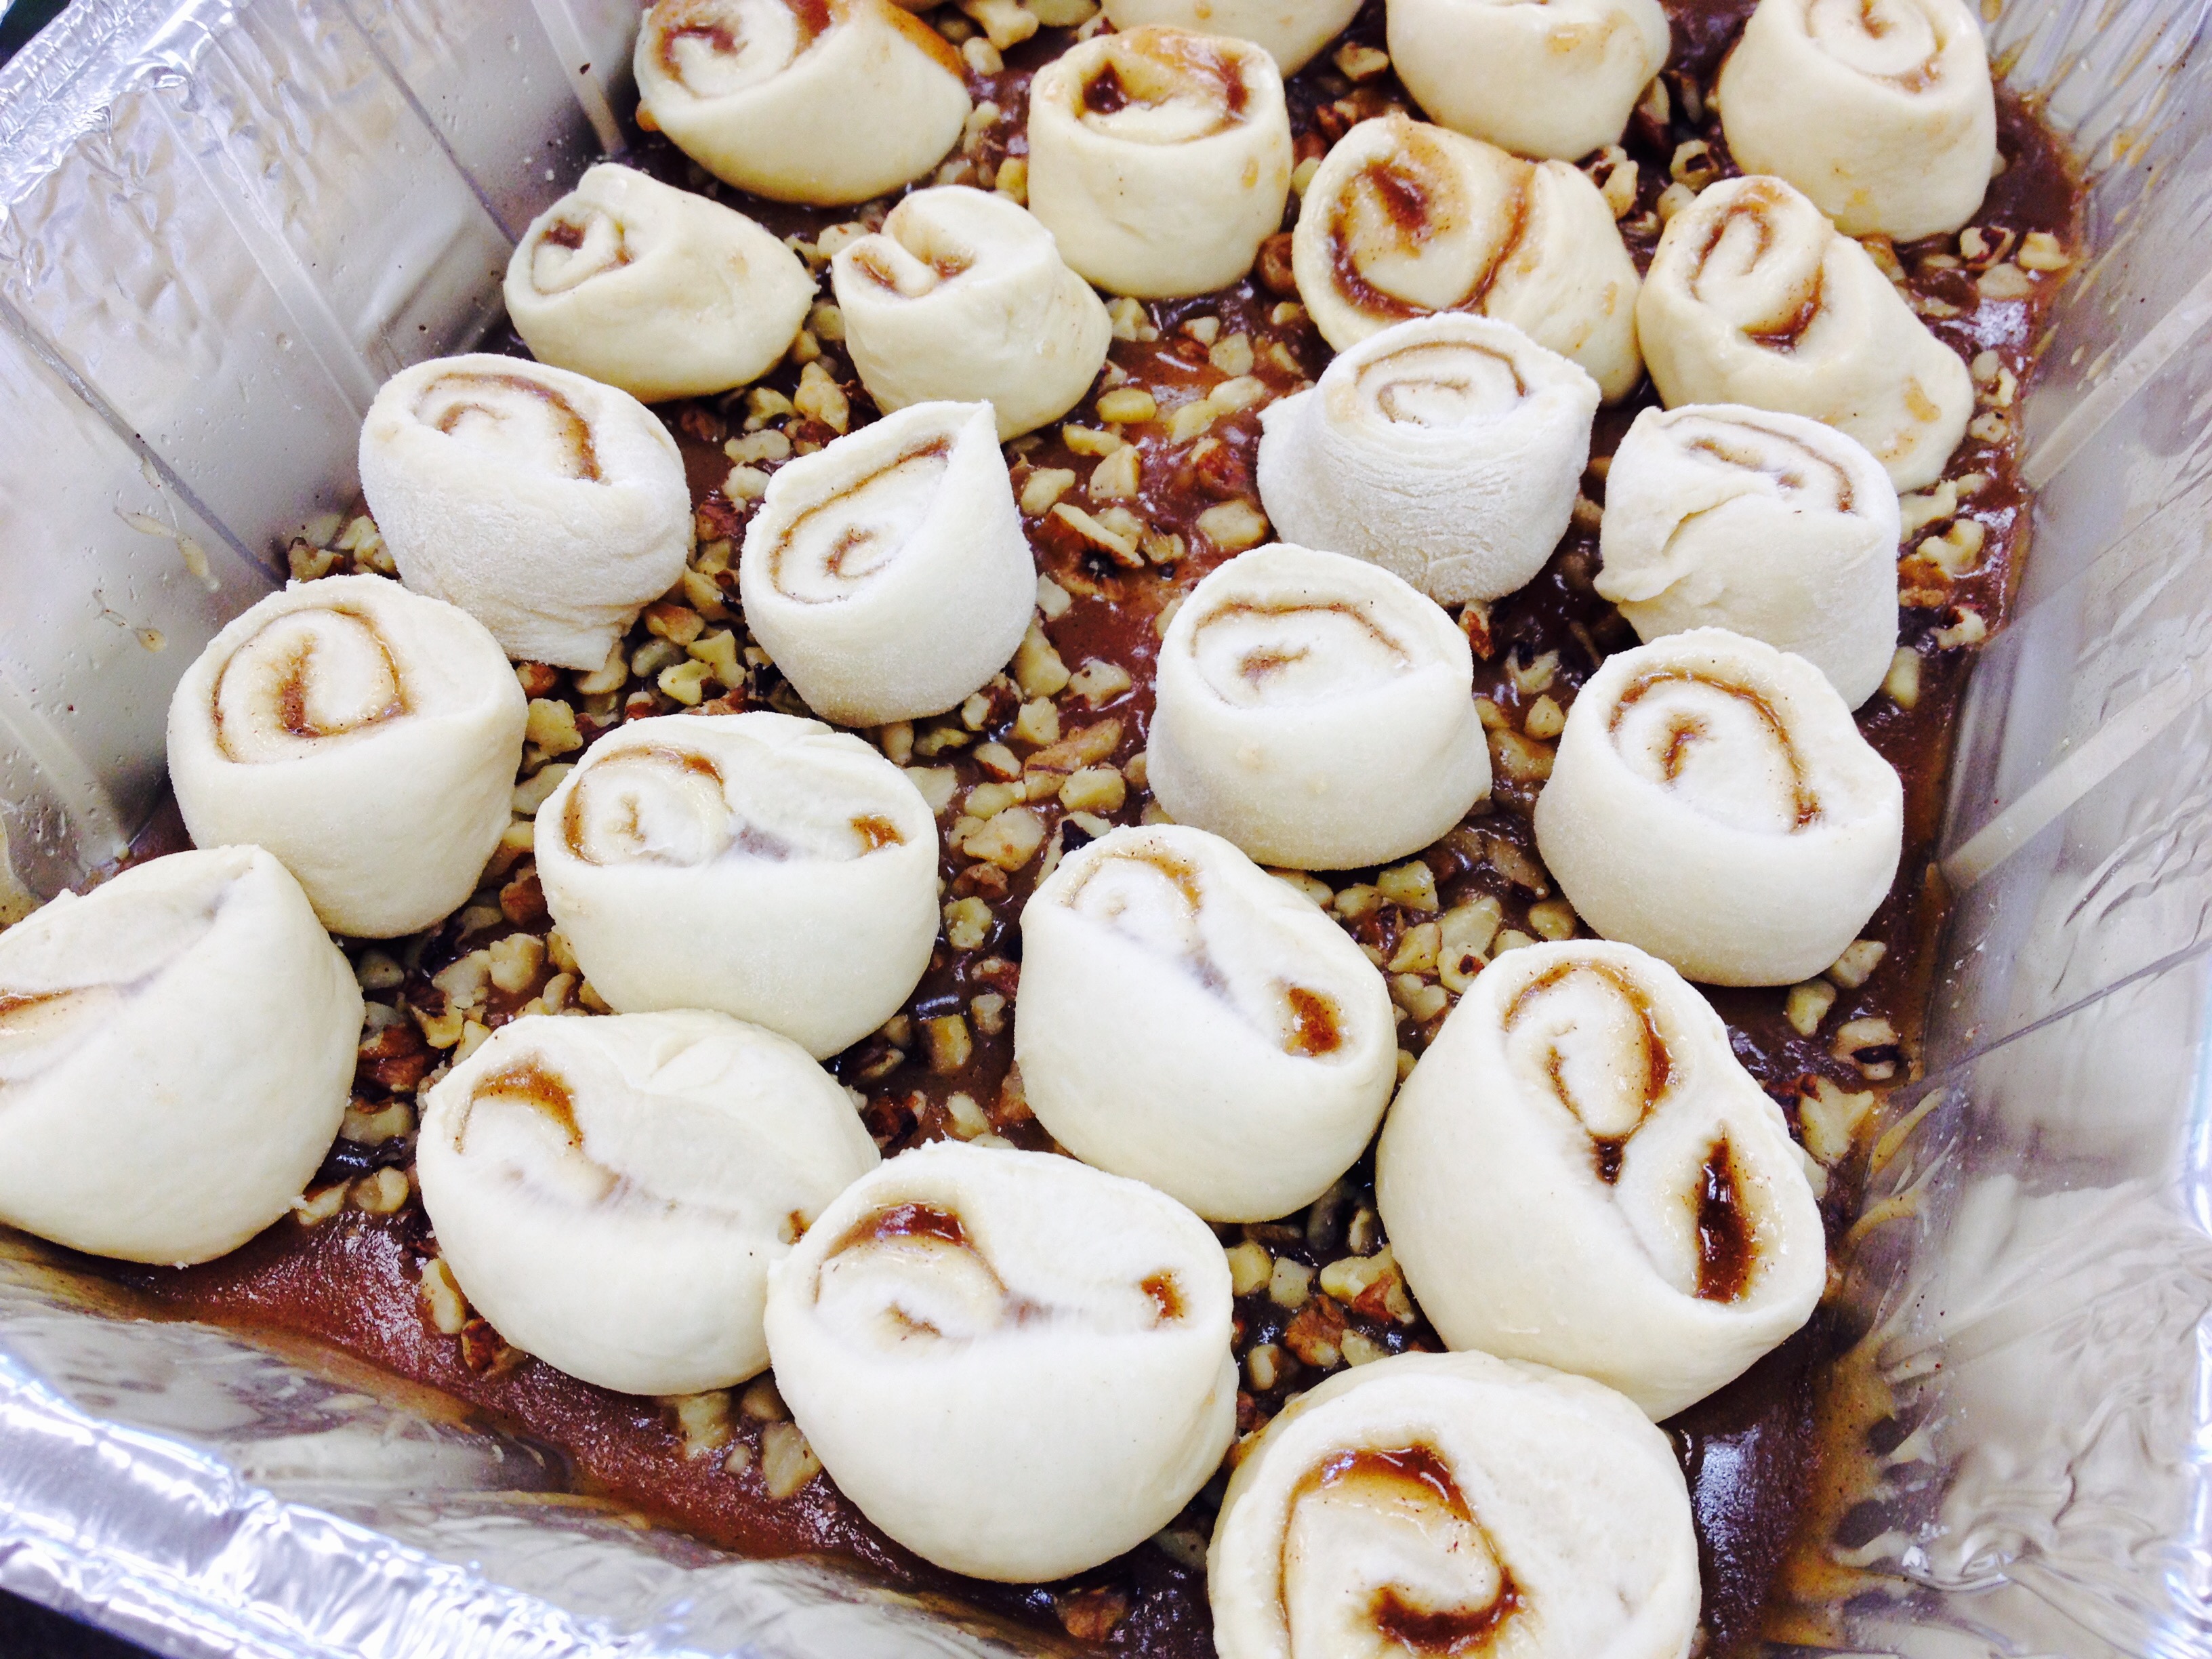
Starting with the long side, roll the dough into a log. Roll it over until the seam is underneath. Pinch the seam together with your fingers
Using a sharp knife, cut the log into 1 ½ -2 inch rolls.. Arrange the rolls over the nuts in the prepared pan, so that the swirled cut edge is facing upward.
Repeat with the rest of the dough and filling.
Cover the tin with plastic wrap and allow to rest for 1 hour. During this time they will rise up to meet the tin and becoming bubbly.
Once proofed, place the rolls on a baking sheet covered with parchment, in case the caramel bubbles over.
Preheat the oven to 350 F and bake for roughly 35- 40 minutes, or until golden brown and firm in the center.
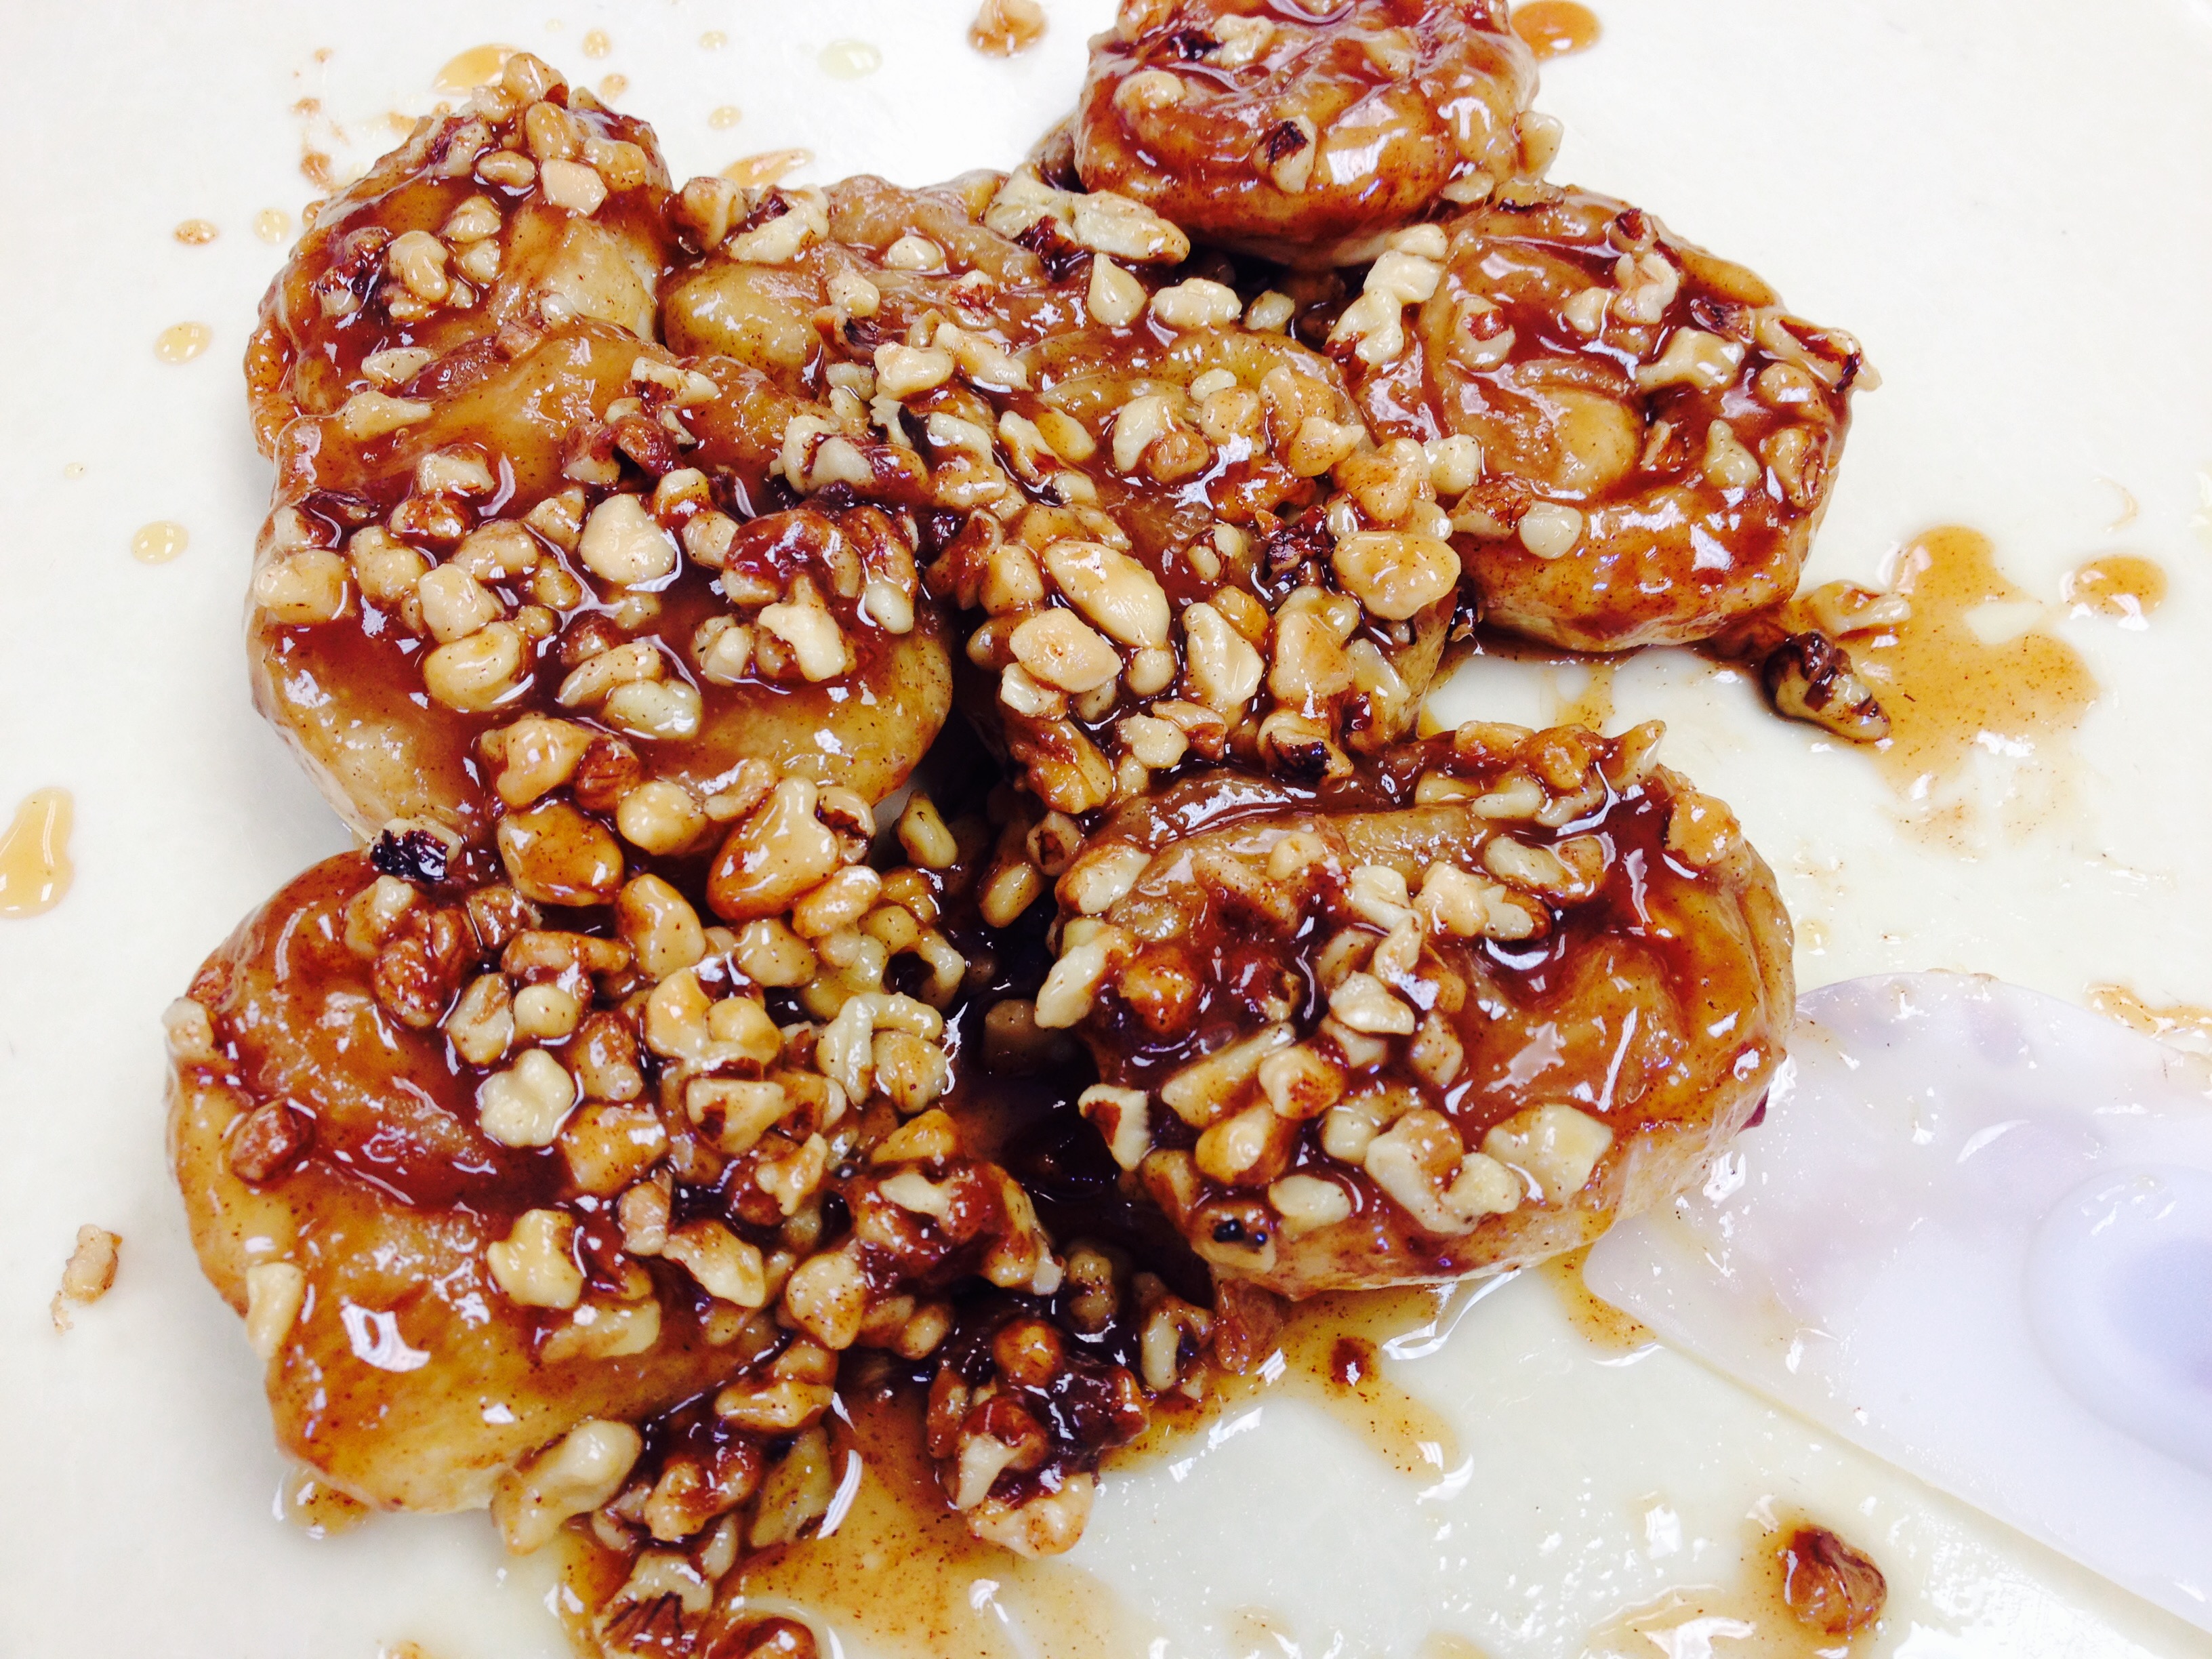
While still hot, run a thin spatula around the outer edge of the pan to release the caramel rolls, and invert immediately onto a serving dish. Enjoy warm!
To subscribe to the weekly Recipe blog from the Monastery Kitchen at the Community of Jesus click here: http://monasterykitchen.org/
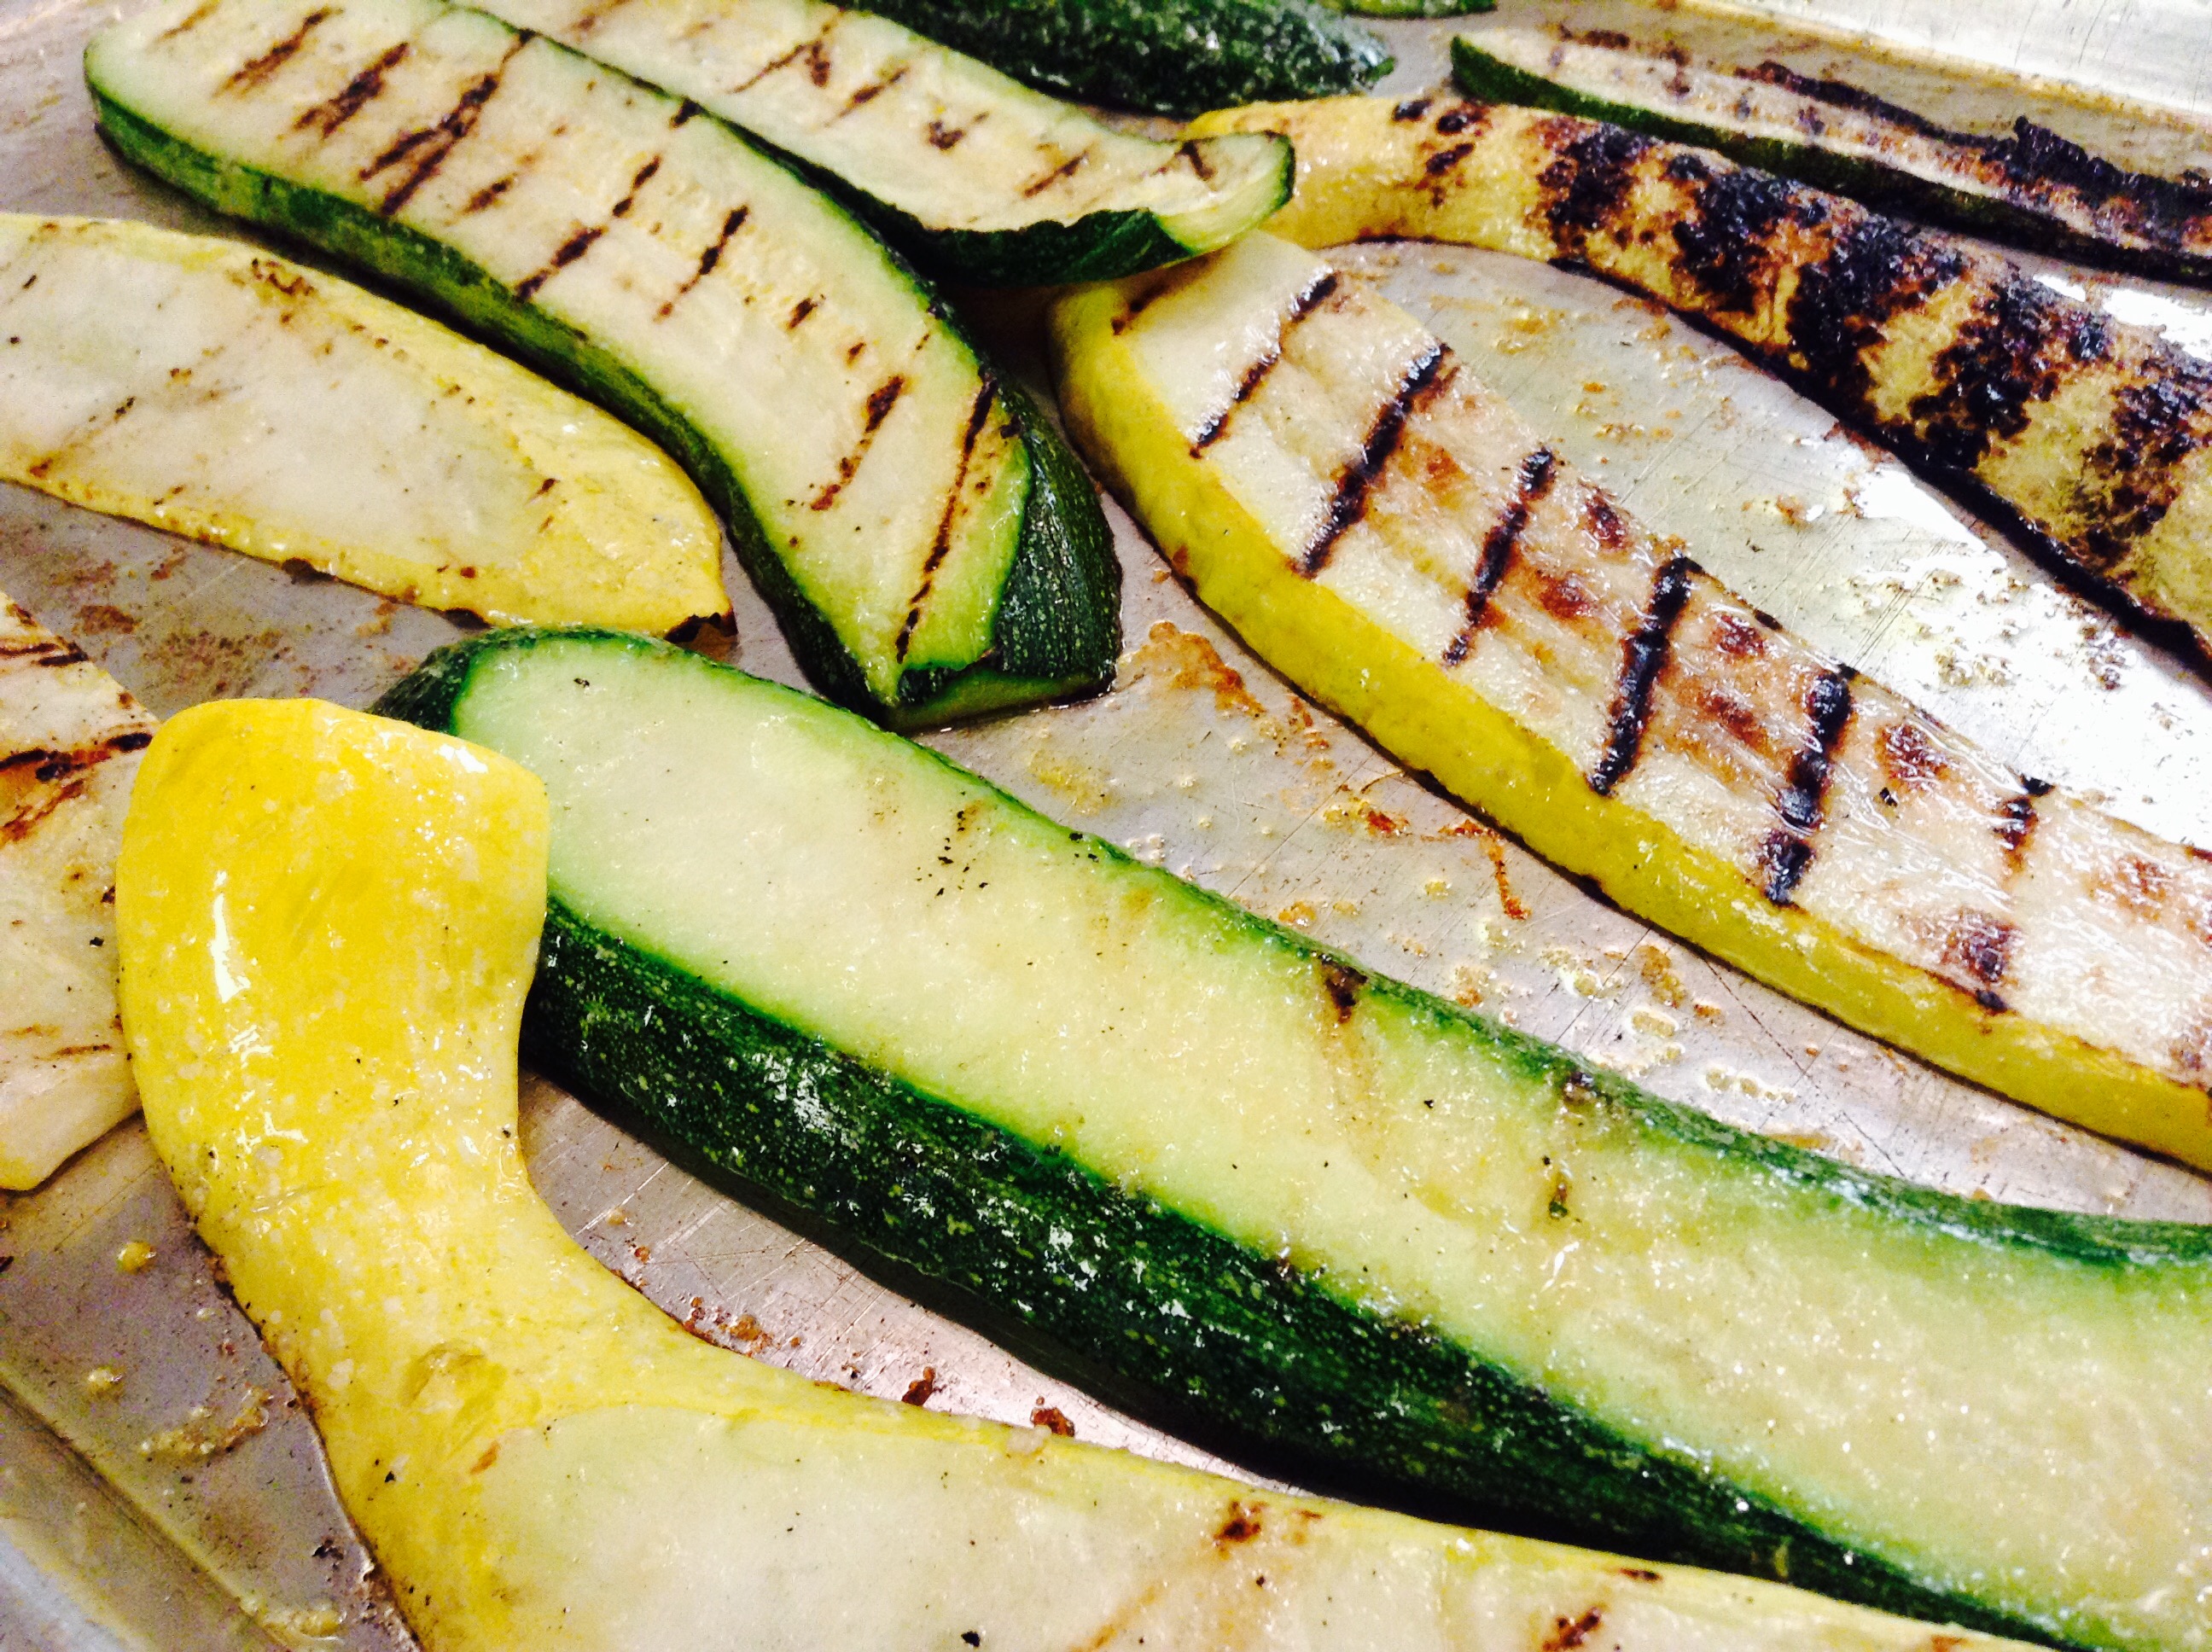
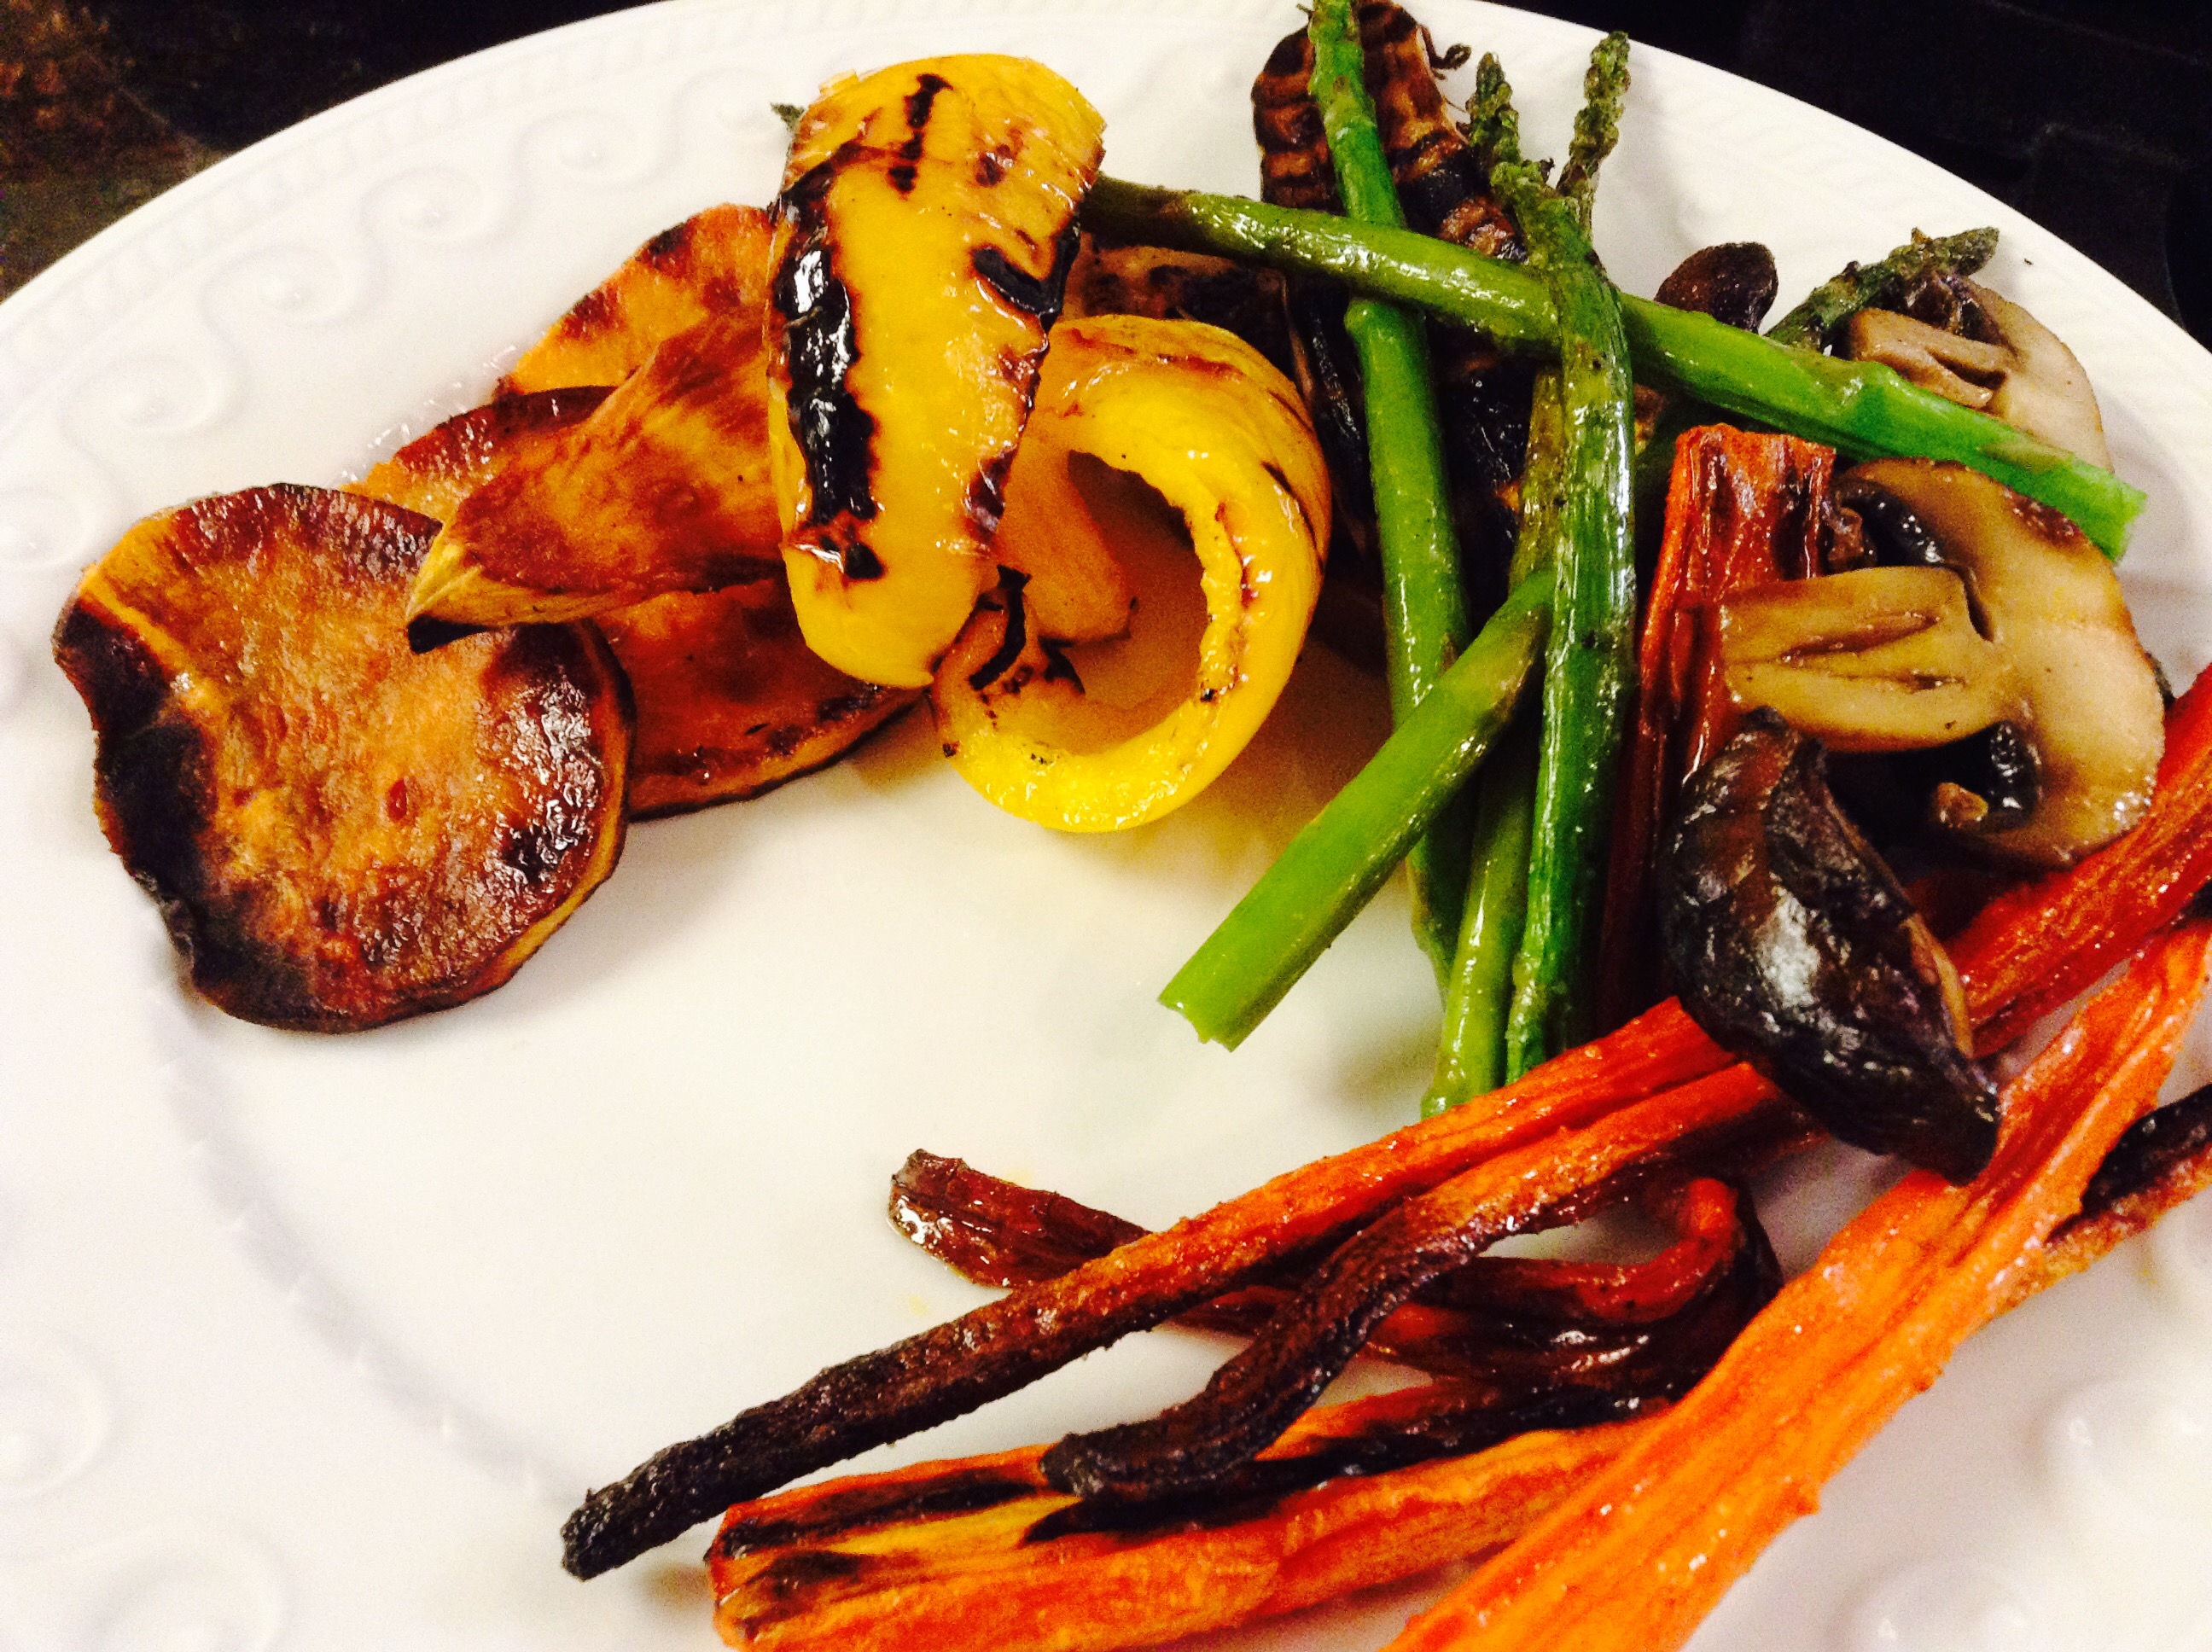
The crispness of fall is all around us. This past Monday, the Sisters rose early to put our gardens to bed for the winter. It’s always bittersweet for me, as working in the earth, getting my hands dirty and seeing the fruits of our labor and God’s creative act are moments that I treasure. We decided not to put our “chef garden” to bed, as the tomatoes, chard, beets and kale are still growing, and a late crop of peas is sprouting their heads above the earth. So, as a tribute to summer, I wanted to share this wonderful recipe with you. You can use any vegetables for grilling, so don’t feel limited by the ingredients here. If you’re anything like me, your grill stays outside until it snows! Take advantage of the beautiful fall weather and enjoy.
Print Recipe
Votes: 0
Rating: 0
You:
Rate this recipe!
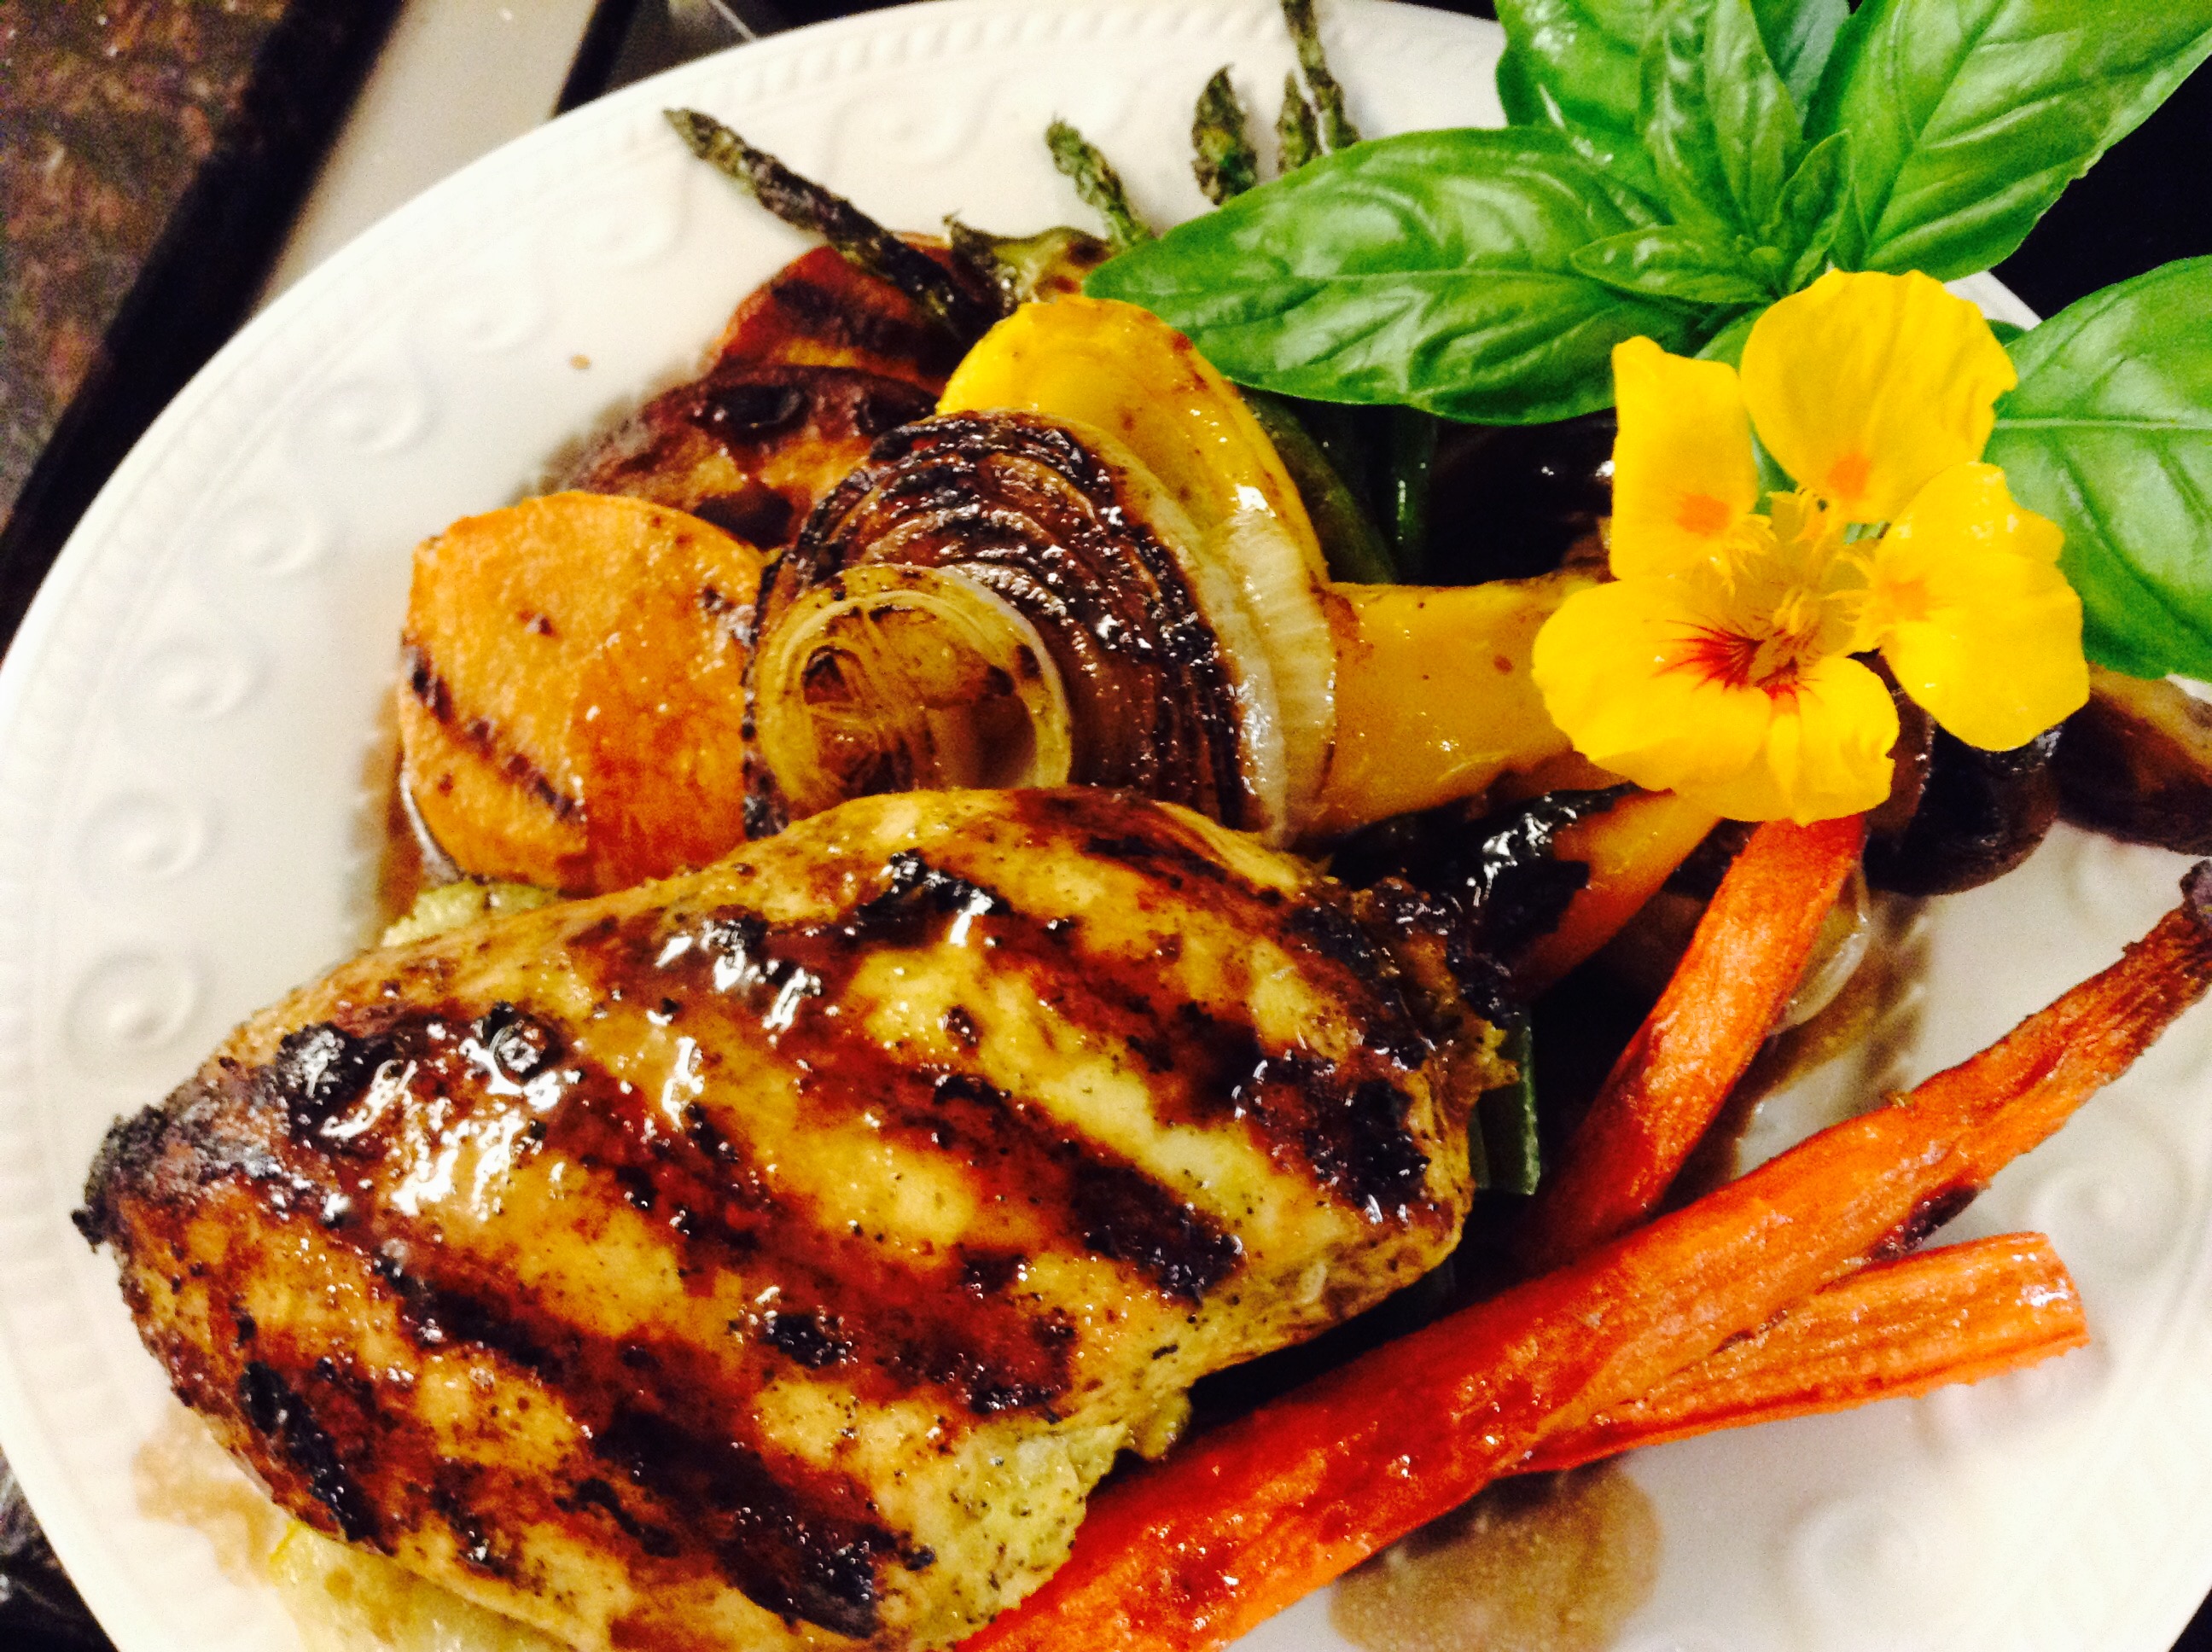
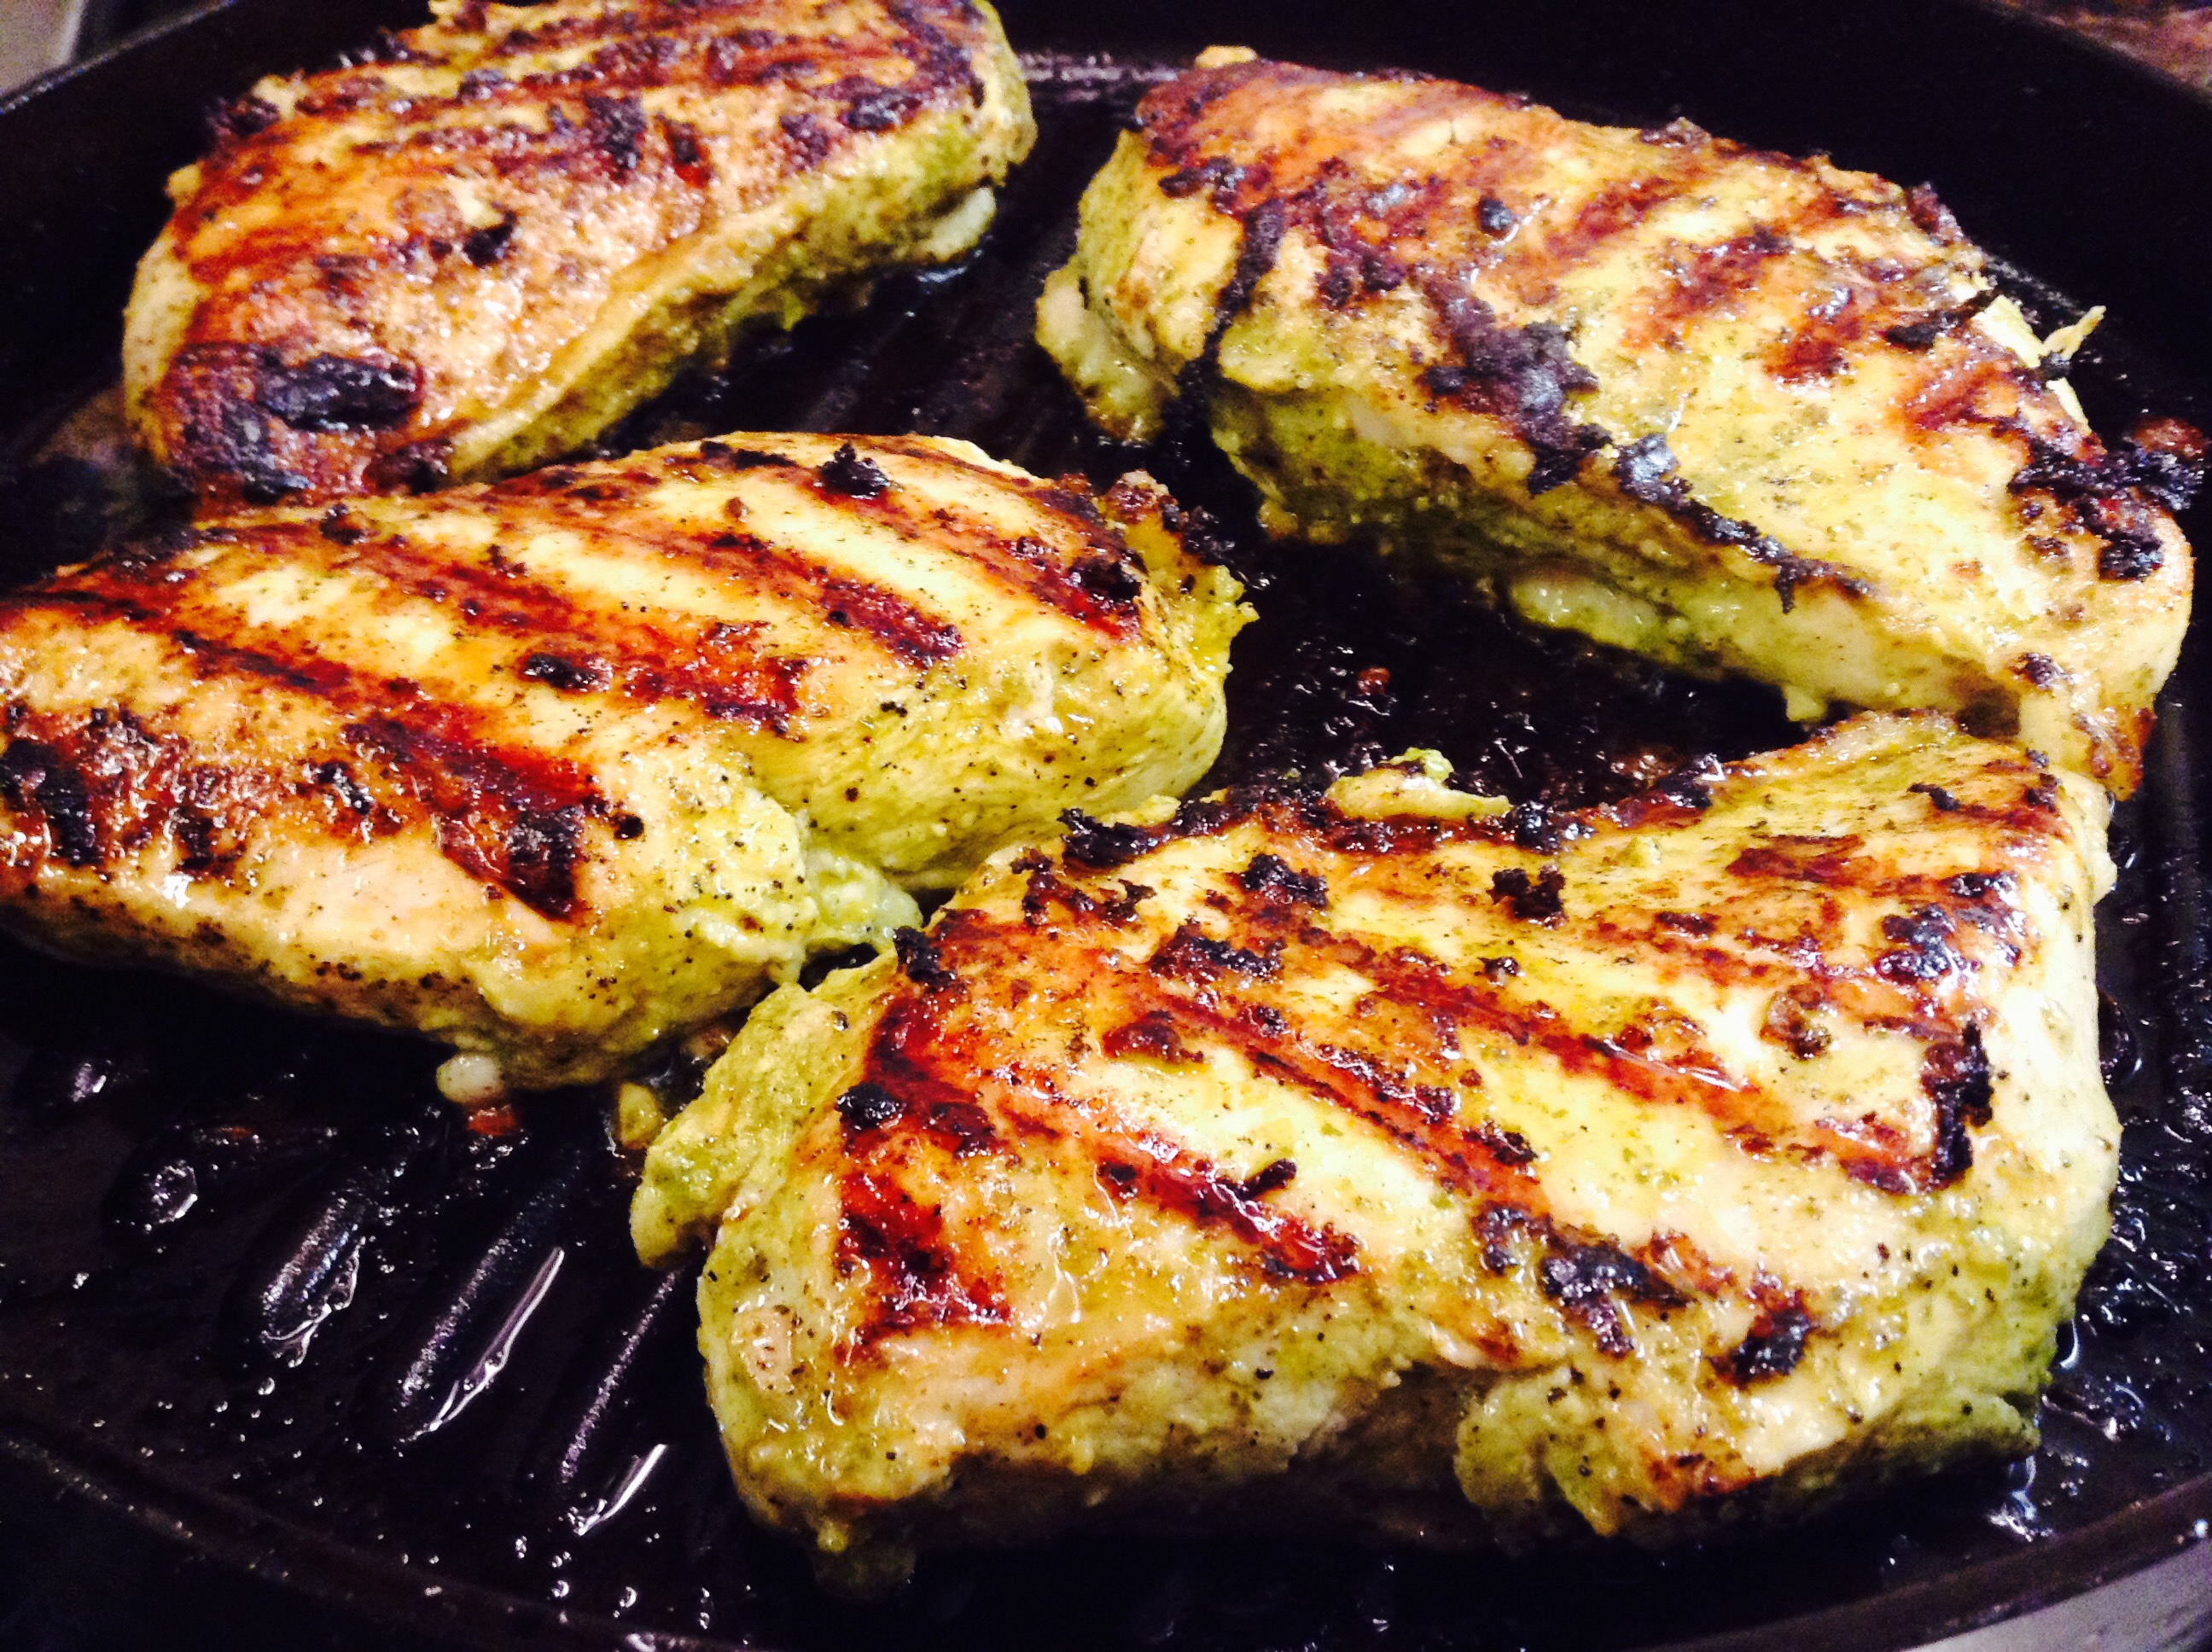
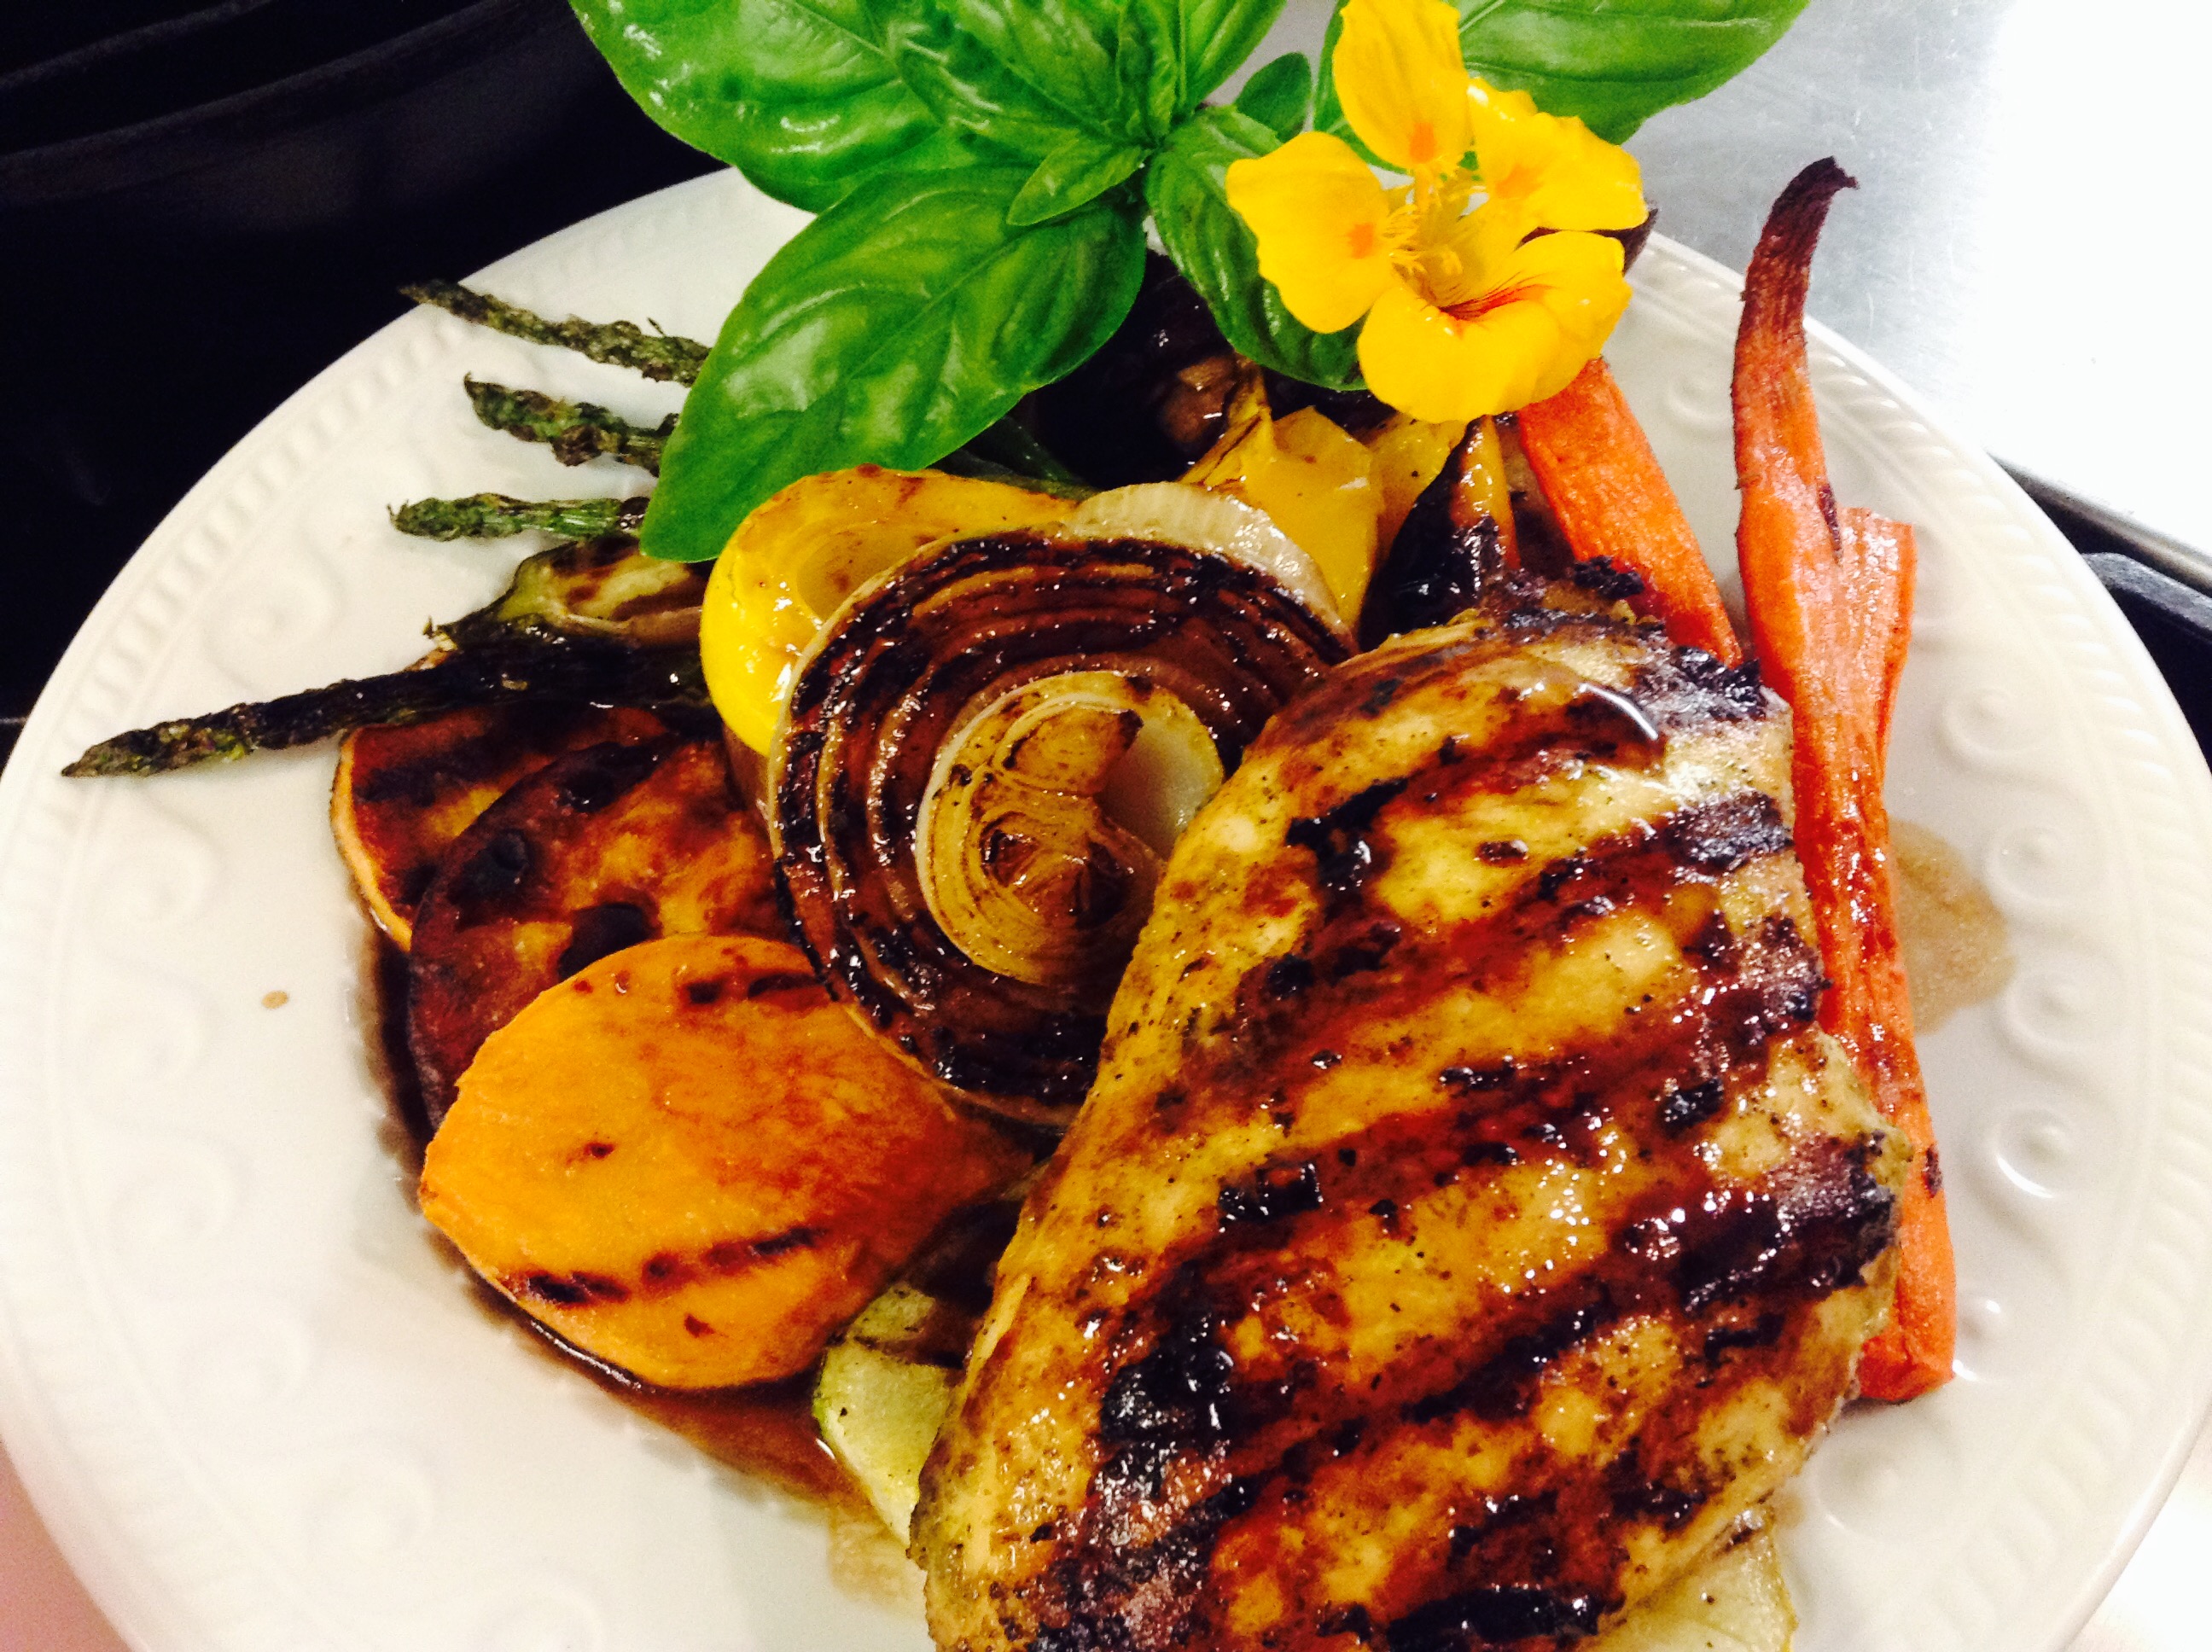
Honey Balsamic Grilled Chicken with Grilled Vegetables
Marinate chicken with pesto, garlic, red pepper flakes, lime juice and 1/2 teaspoon salt at least 1 hour, or overnight for best results.
Mix oil, balsamic vinegar, honey and 1/4 tsp salt in a small bowl.
Heat a grill over medium-high, be sure grates are clean and well oiled to prevent sticking.
Brush oil on each side of the vegetables and sprinkle with salt and pepper
Put vegetables on 1 large grill tray or directly on grill, and cook, turning constantly until the vegetables are cooked and golden, about 6 to 10 minutes. Set aside on a dish.
Put the chicken on the grill and cook about 4 to 5 minutes on each side until grill marks appear and the chicken is cooked through. If you prefer to finish them off in the oven, I suggest a grill pan or cast iron skillet - cook until the internal temperature reaches 160 degrees.
Transfer the chicken to a platter with the vegetables and pour the balsamic dressing over everything and serve.
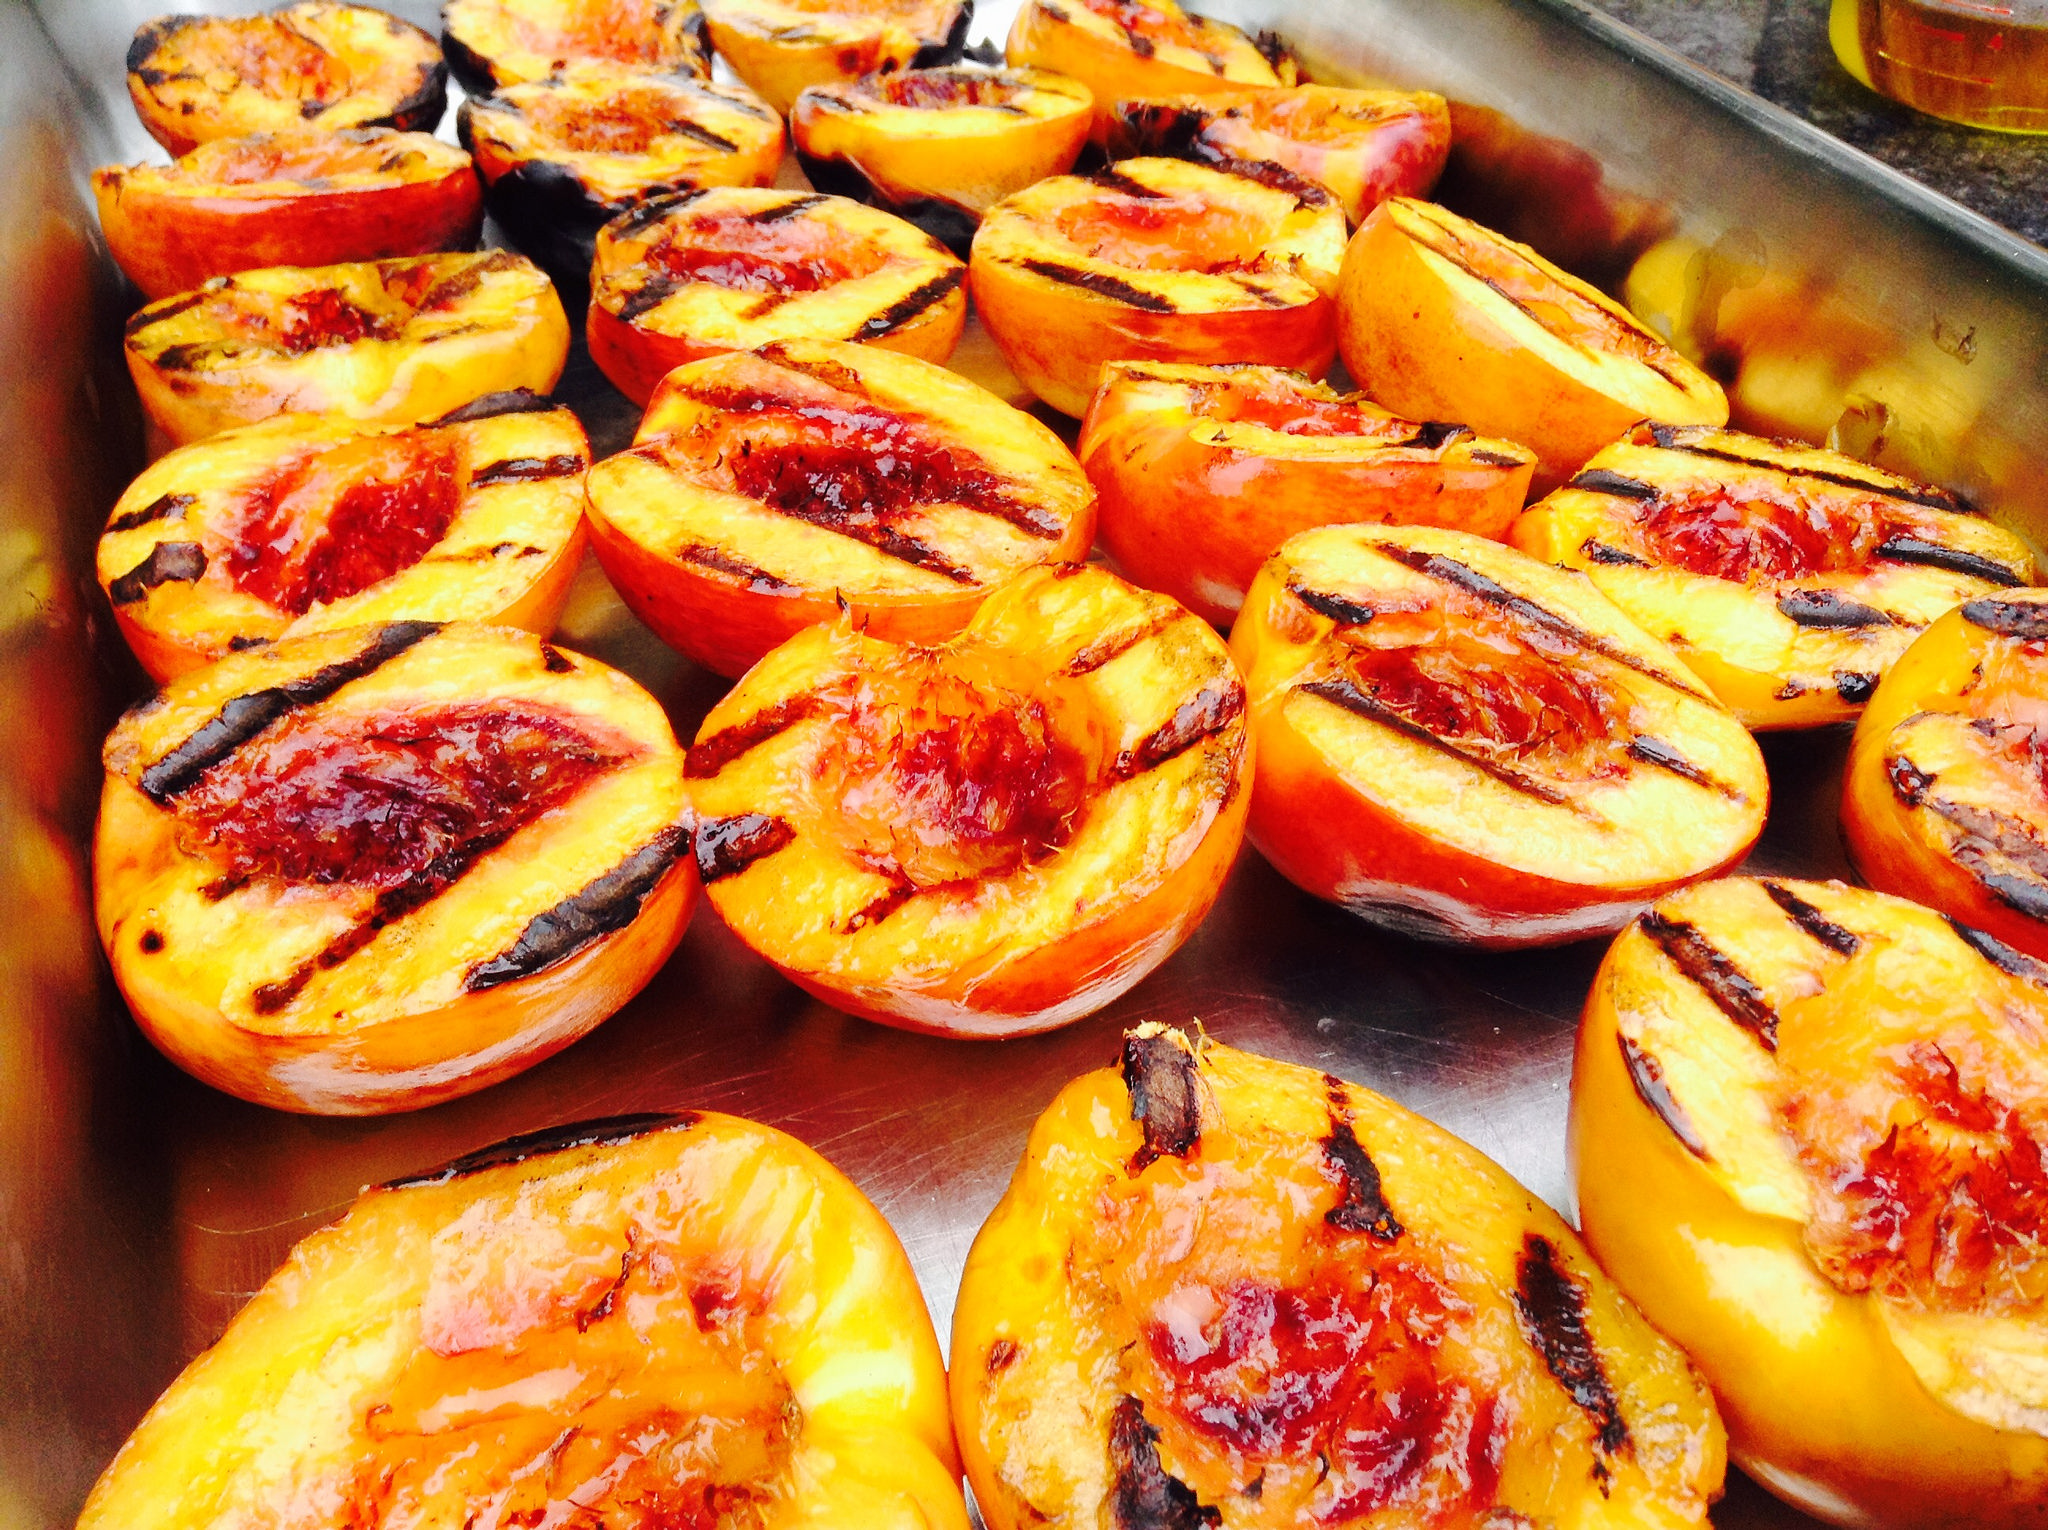
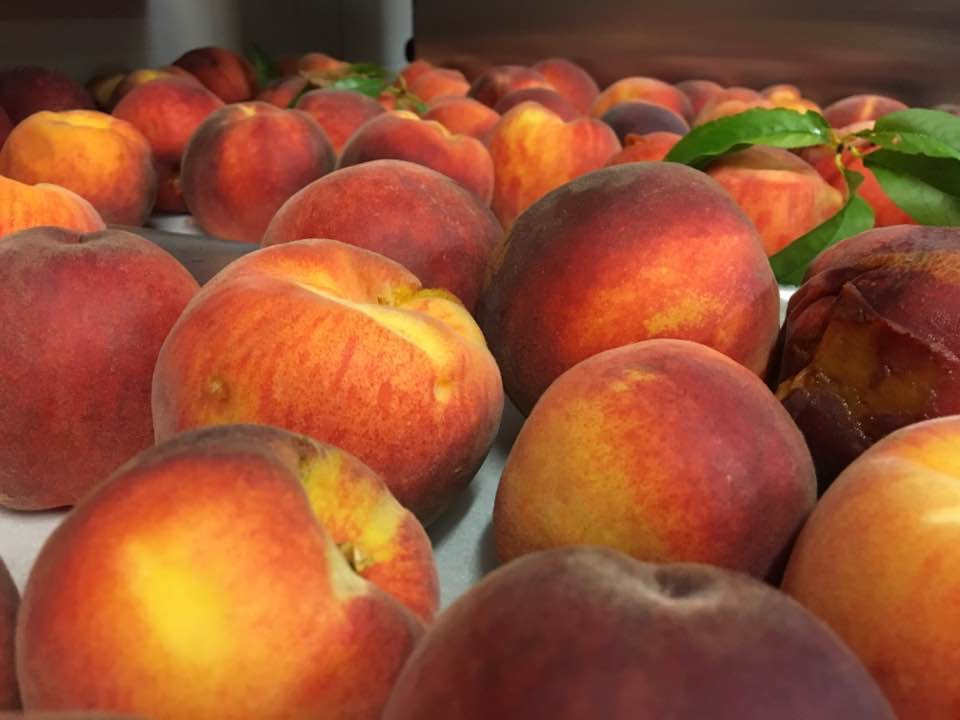
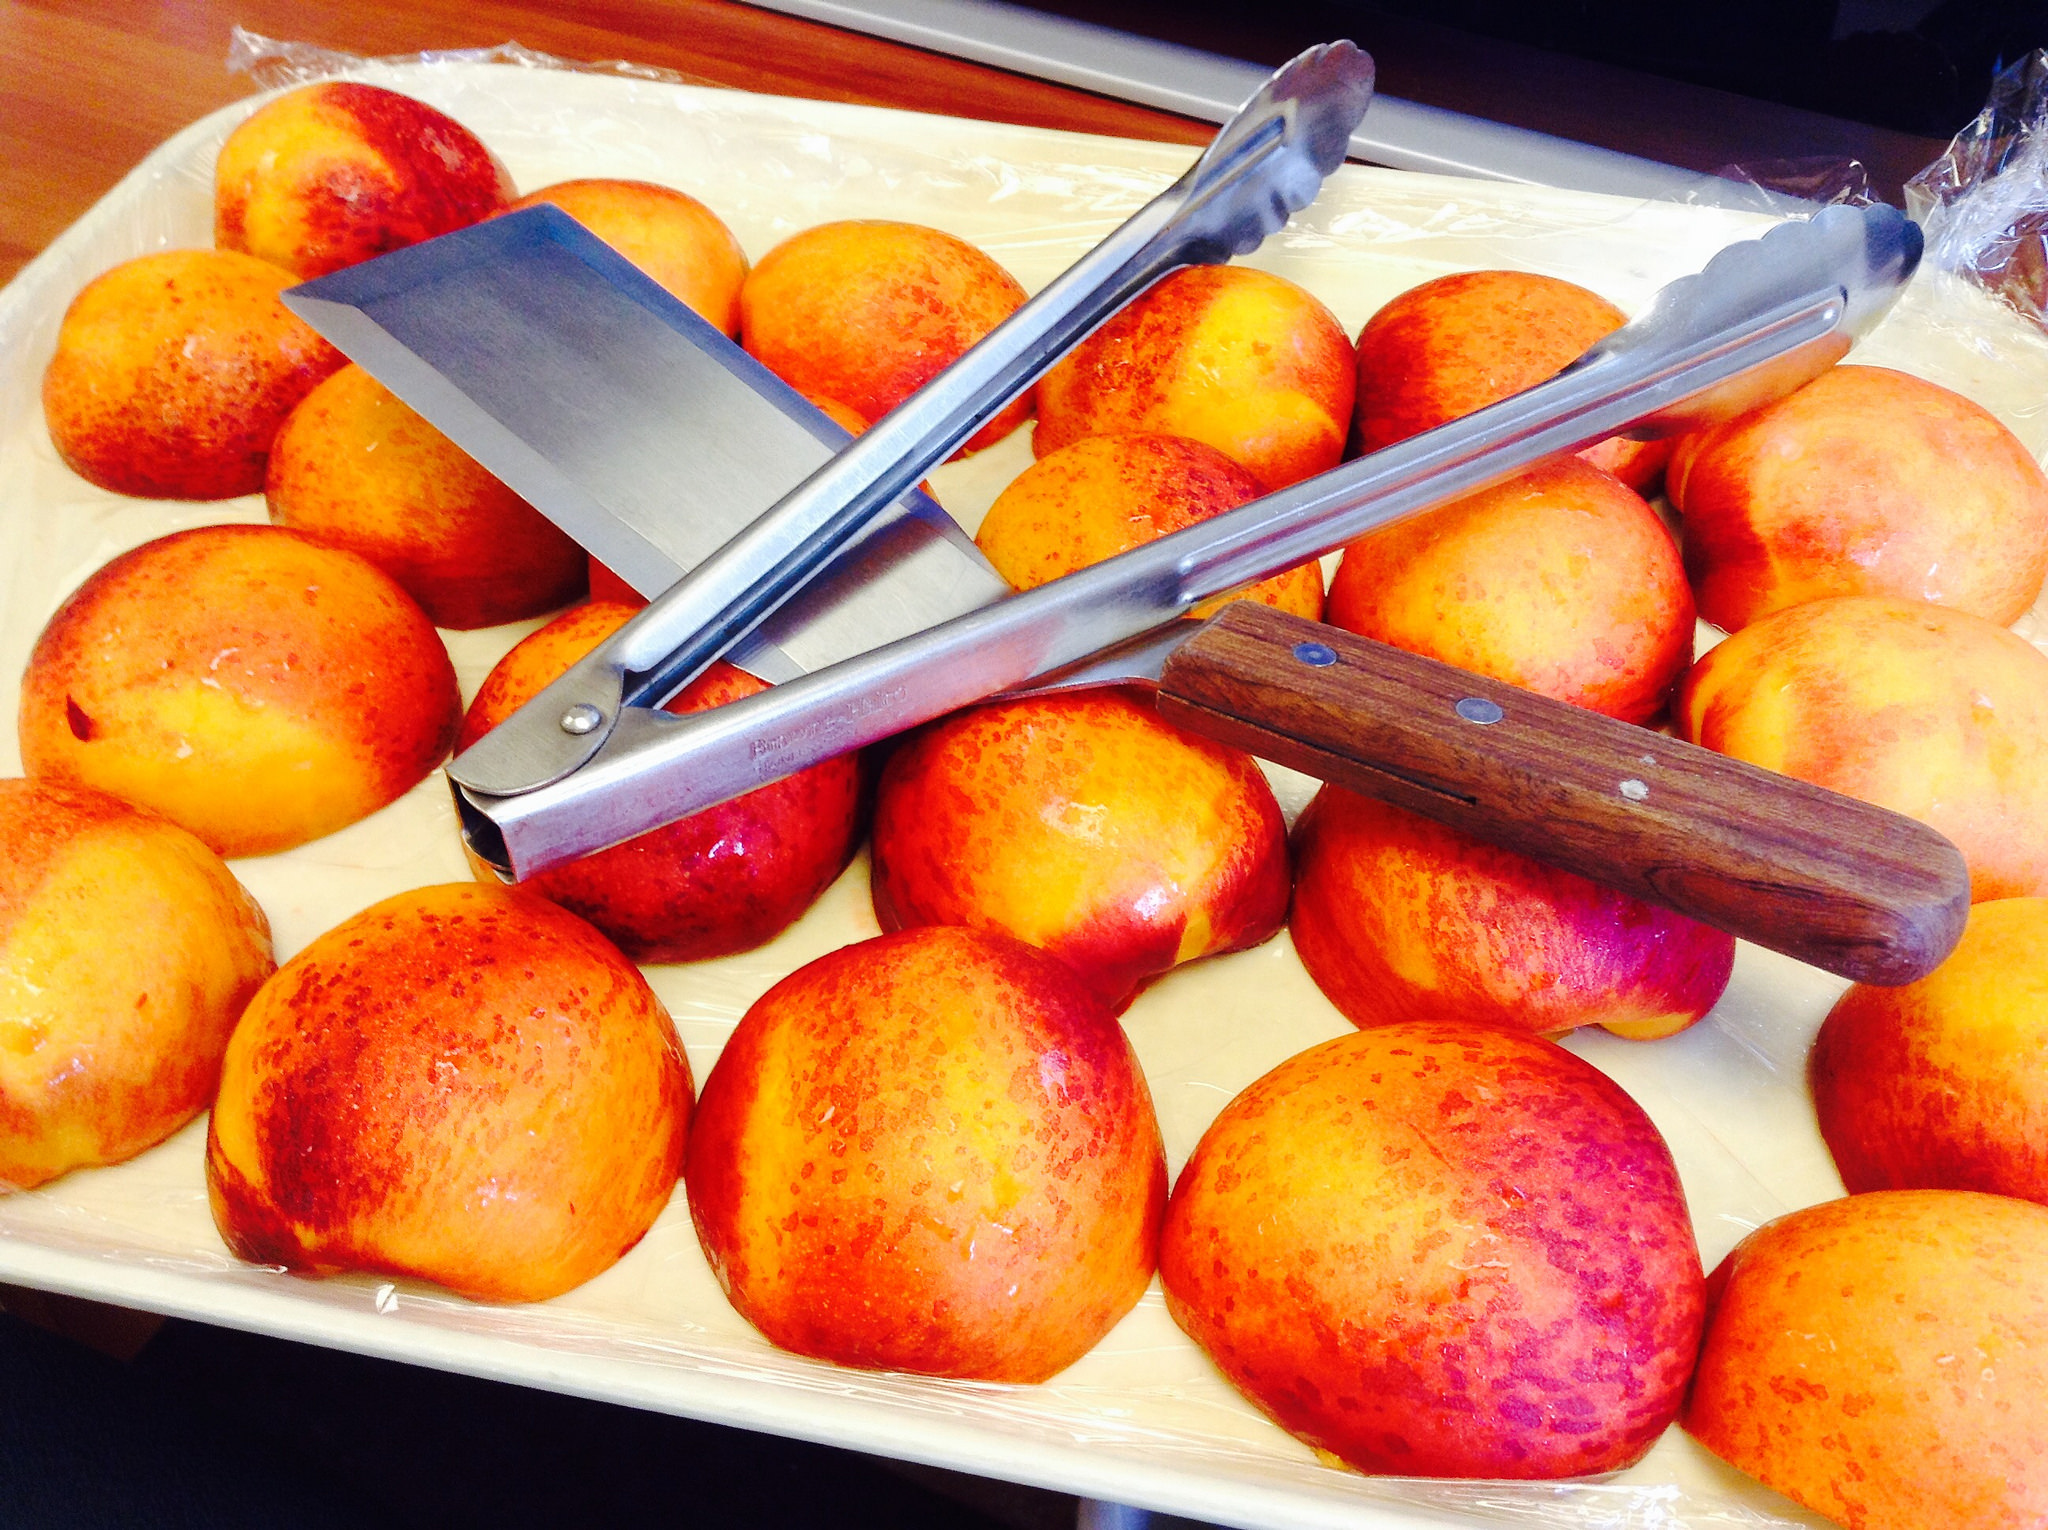
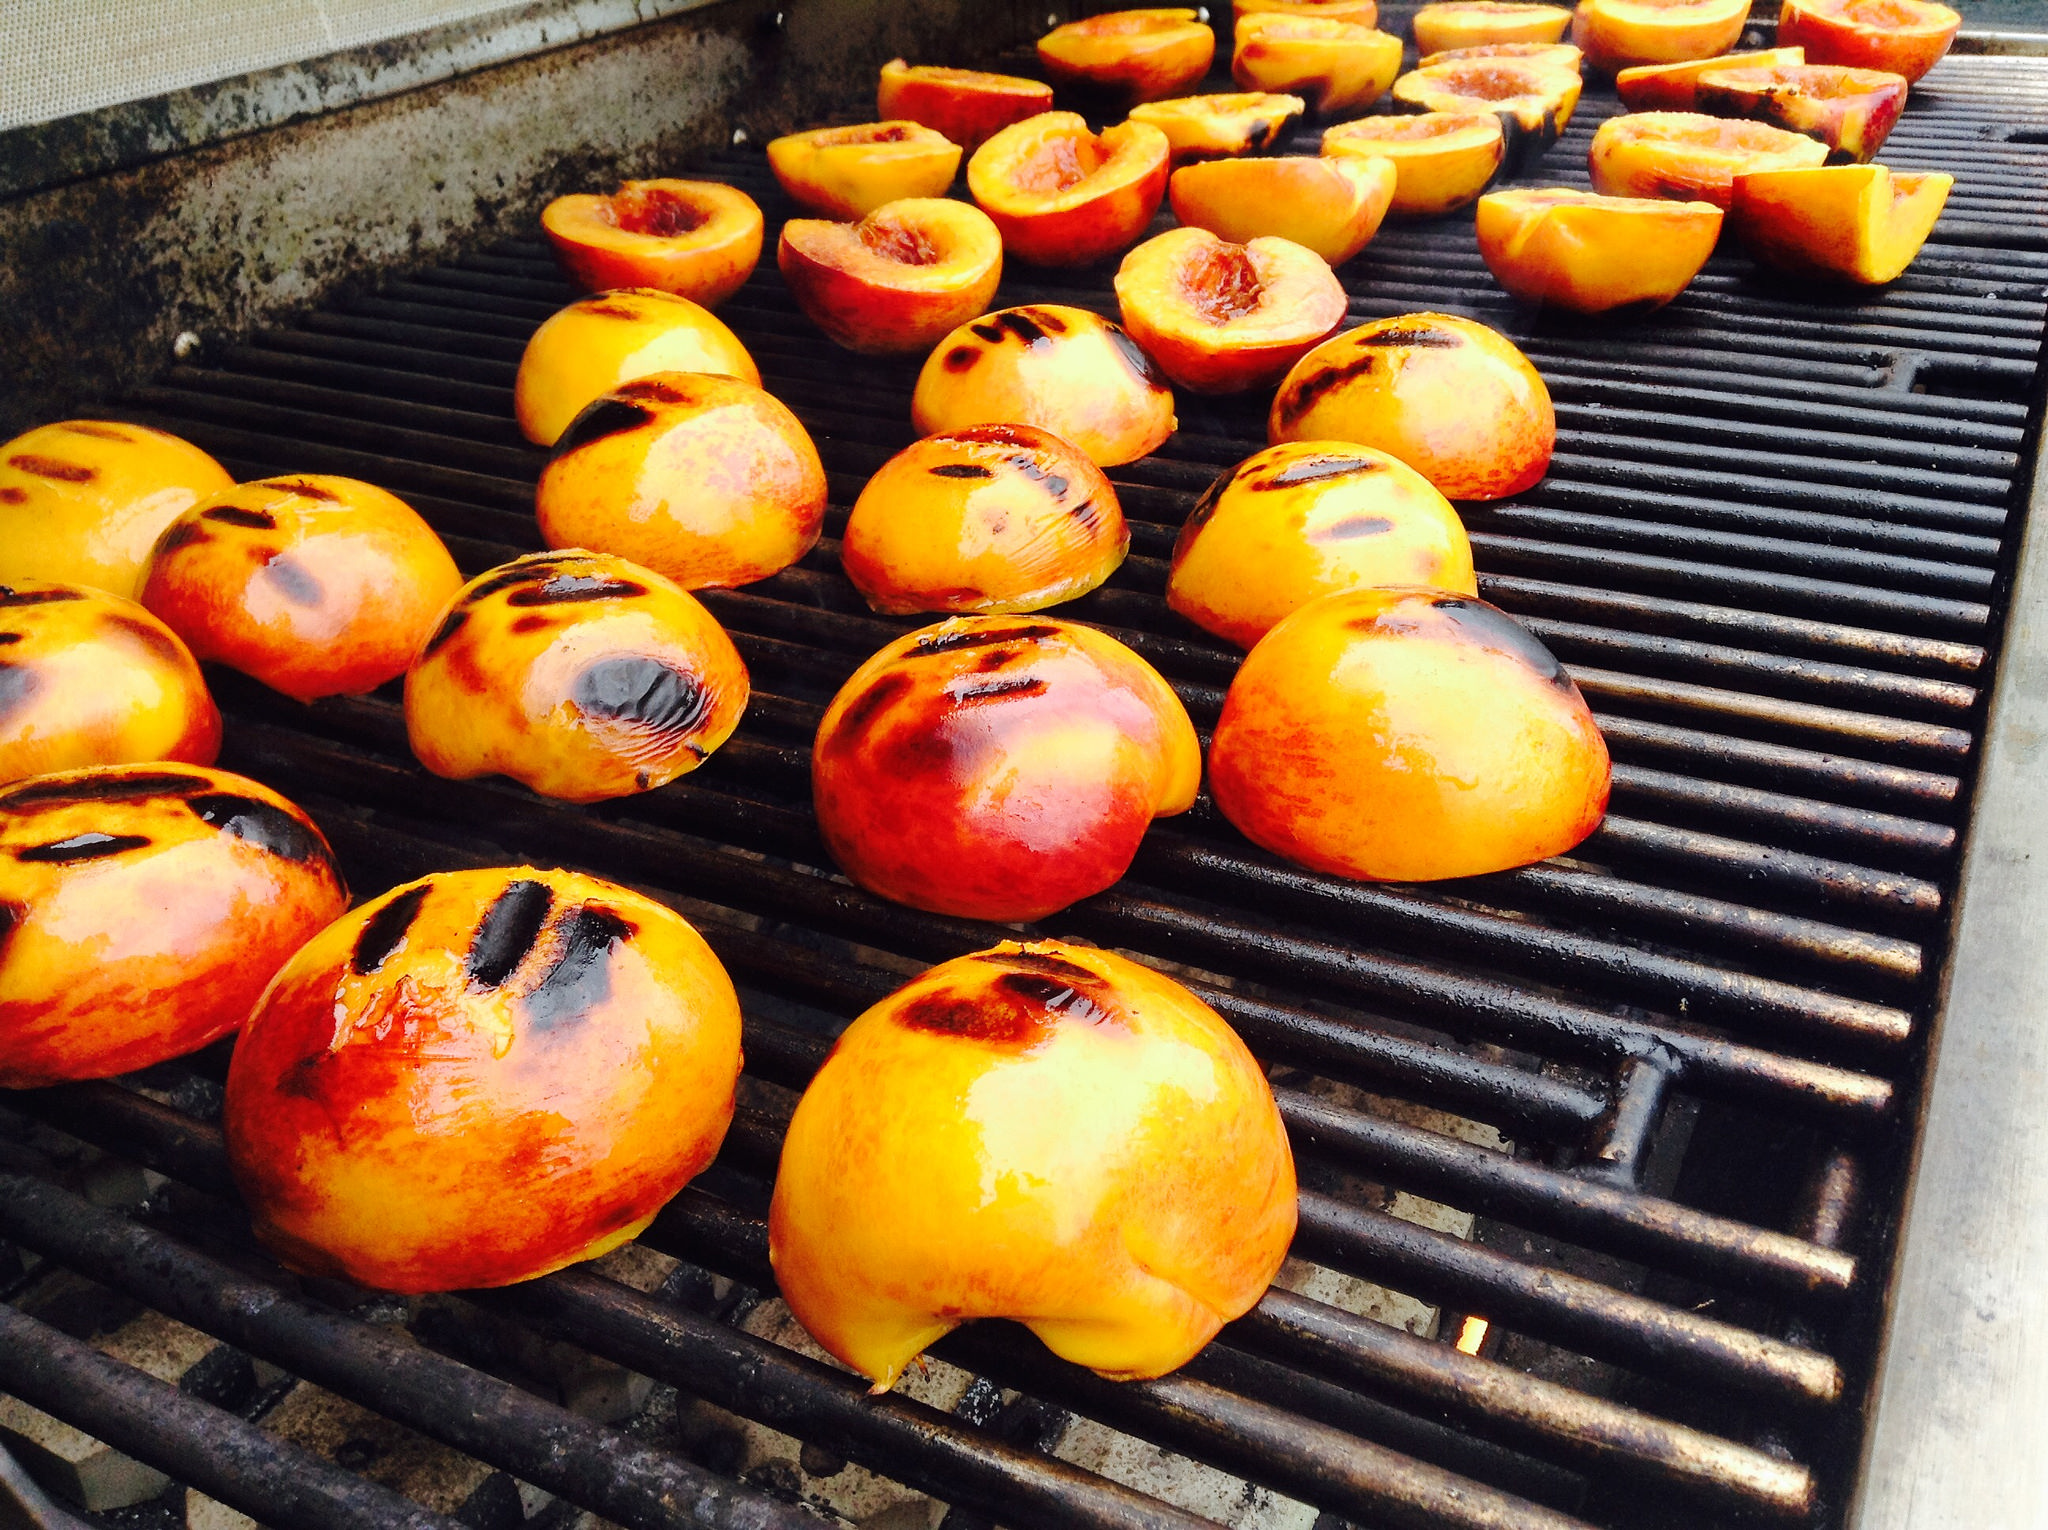
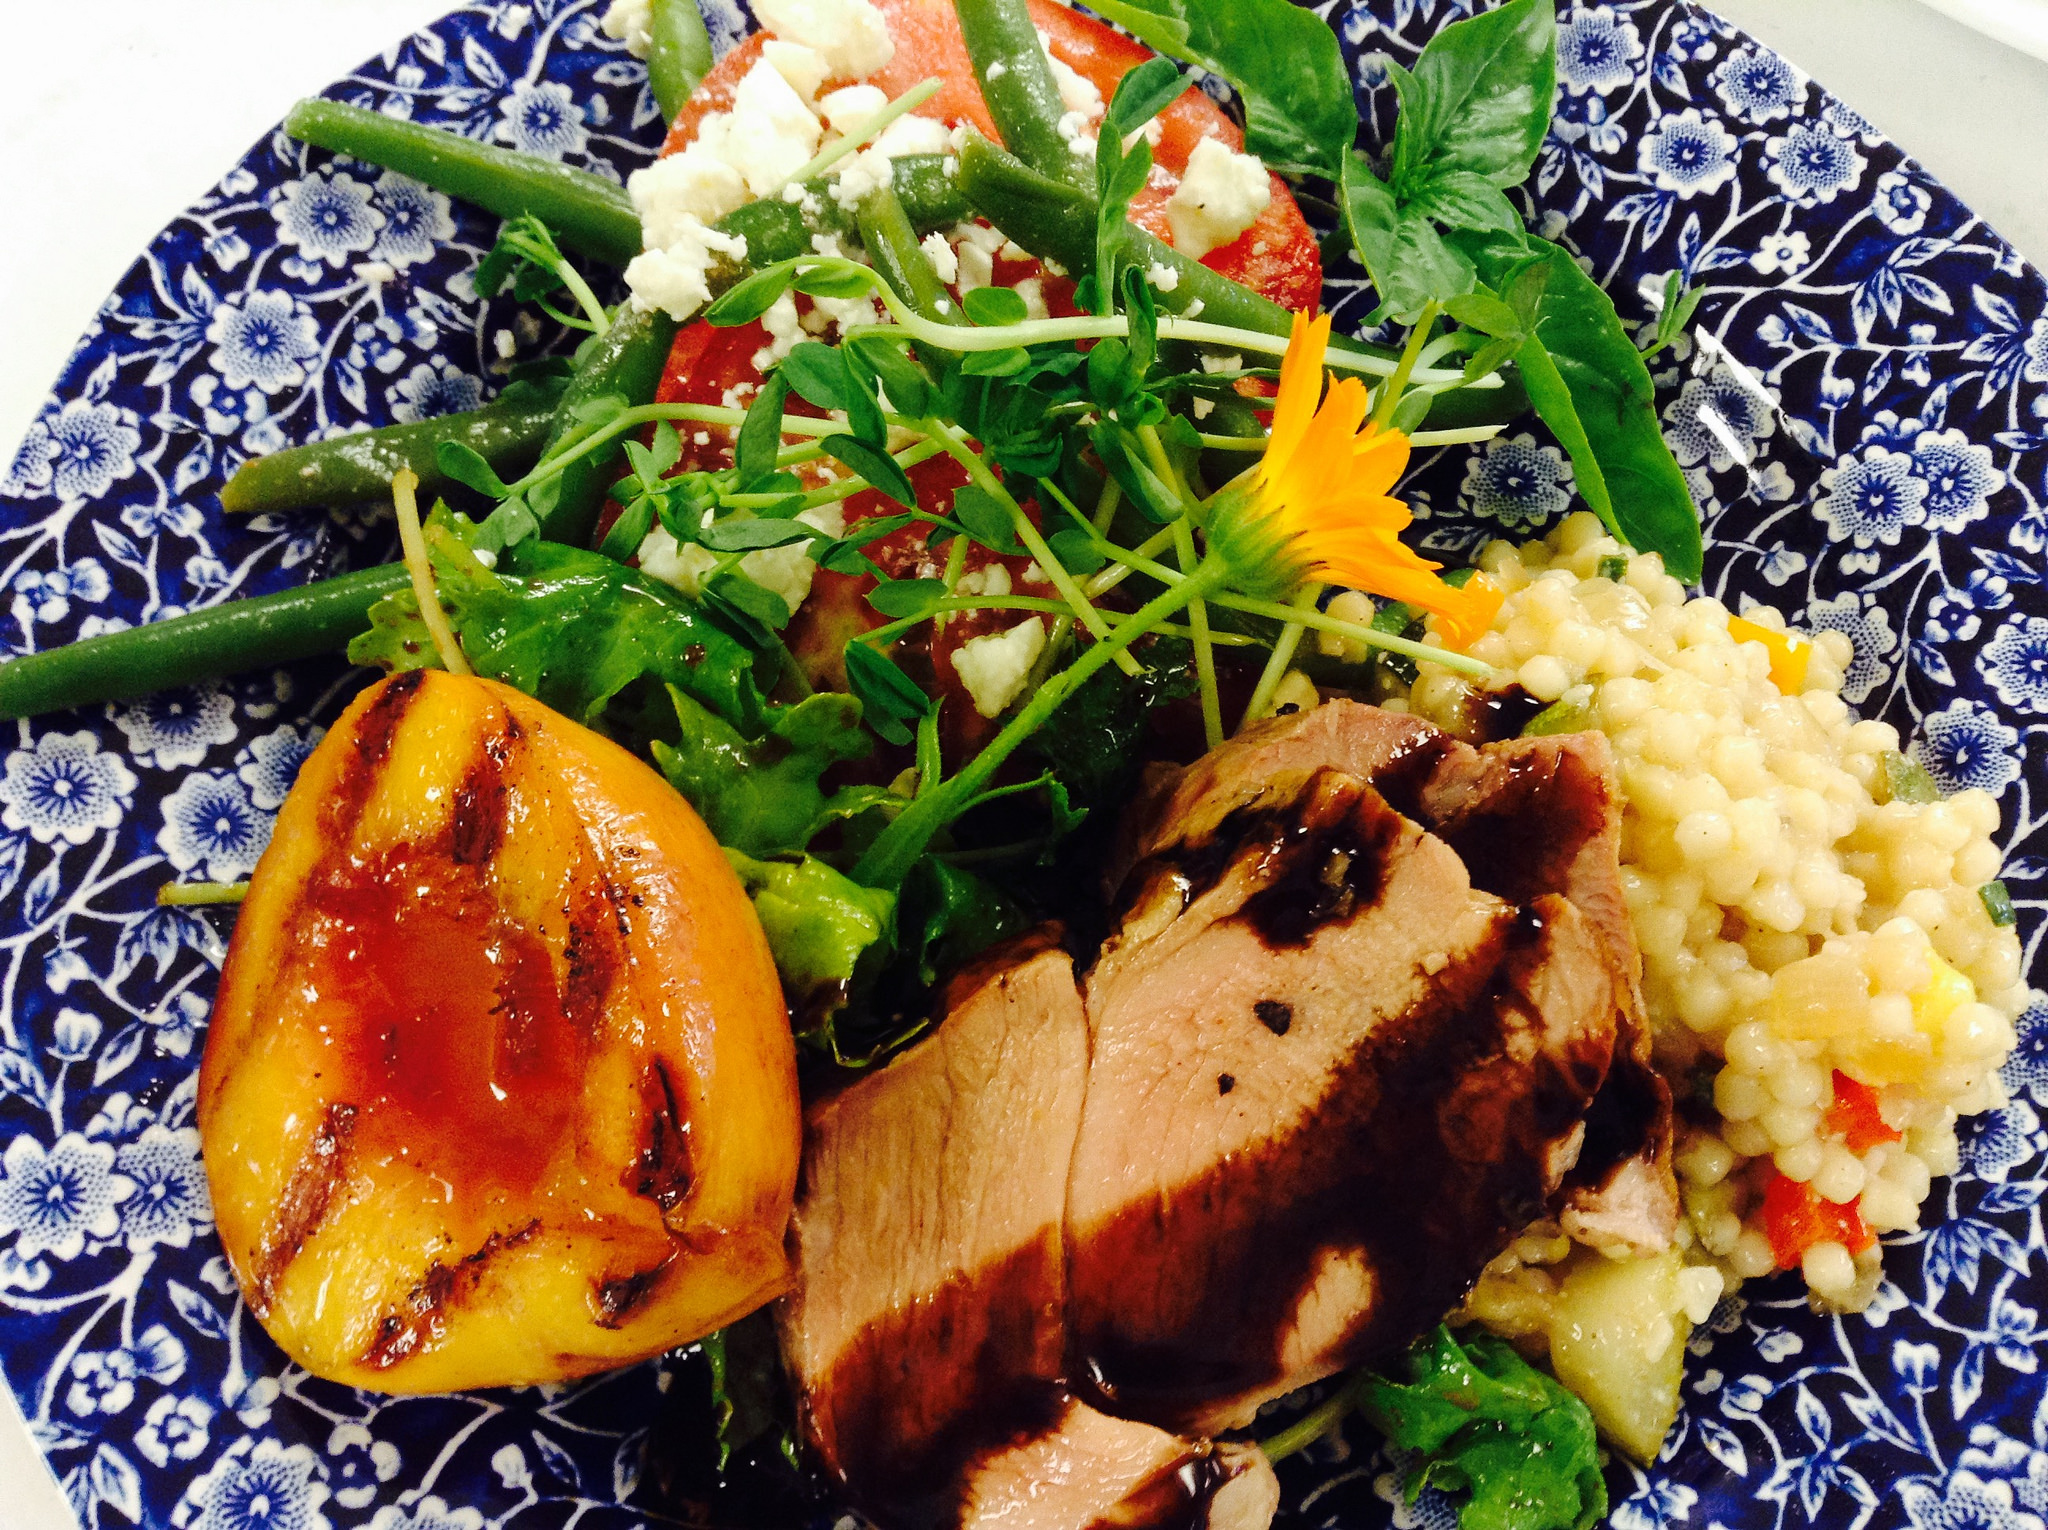
Over the last week, we’ve been enjoying plucking the nectarines and peaches off of our trees and enjoying them in a variety of ways. One of our Sisters used to own a peach orchard and enjoys turning the bruised and moldy drops into the most delicious jam. As the peachy smell wafts through the Convent, I pop down to the kitchen to dip my spoon into the bubbly pot. “Sister, this is SO delicious!” I purr, wishing I could bottle up this moment for eternity. Summer is wonderful, because the simple beauty and naturalness of fruit and vegetables can stand alone without being covered up in heavy sauces just to be palatable.
Over this past weekend, I had fun grilling nectarines to accompany an herb rubbed grilled pork tenderloin for our Dinner Theater. Follow these simple steps and add a little nectar to your next savory dish — it’s a beautiful thing!