At our Convent and Community each year, it is tradition for us to celebrate the Twelve Days of Christmas. Advent is a time of waiting and the twelve days that follow Christmas allows time for us to reflect and live the “Incarnation of Christ” as we journey towards our yearly profession of Vows on Epiphany. It’s a time of Enclosure for us when we can withdraw from the busyness of our daily lives and set aside time of quiet for Christ and community.
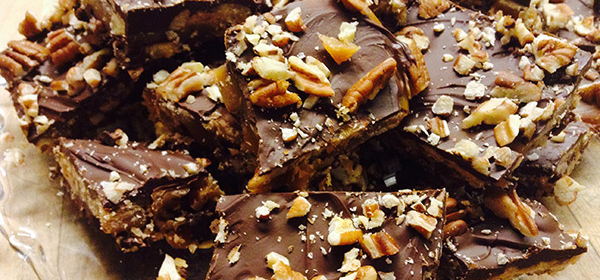
This Christmas, each of us cooks decided we’d make one special gift for the sisters over each of the twelve days. I chose Monday the 26th and couldn’t wait to make this decadent candy. We have lots of chocolate lovers in the Sisterhood, so I thought it might just be ‘the bomb’ and it was! With just a couple tweaks, it is now going to become my favorite holiday indulgence. I had to quadruple the recipe in order to make enough for 65 Sisters and have some extra for gifting, so it will multiply out well. This recipe is just too special to make for just “any” time of year, so save it for a special occasion.
Blessed Twelve Days of Christmas to you!
Print Recipe
Votes: 0
Rating: 0
You:
Rate this recipe!
Holiday Buttercrunch
SERVINGS24pieces
|
COOK TIME10-15minutes |
PREP TIME10minutes |
READY IN1hour |
Ingredients
Instructions
- In a large, deep heavy-bottom saucepan, melt the butter.
- Stir in the salt, sugar, water, and corn syrup, and bring the mixture to a boil. Boil gently over medium heat, without stirring, until the mixture reaches hard-crack stage (300°F on an instant-read or candy thermometer). The syrup will bubble without seeming to change much for awhile, but be patient; all of a sudden it will darken, and at that point you need to take its temperature and see if it's ready, about 10 to 12 minutes. Pay attention; too long on the heat, and the syrup will burn.
- While the sugar mixture is gently bubbling, spread half of the toasted nuts (1 cup), in a fairly closely packed, even single layer, on a lightly greased baking sheet or 1/2 sheet pan.
- Top with half the chocolate chips (1 1/3 cups).
- When the syrup is ready, pour it quickly and evenly over the nuts and chocolate. Immediately top with the remaining chocolate (1 1/3 cups).
- Wait several minutes for the chips to melt, then gently, using the back of a spatula, spread the chocolate evenly and top with the remaining toasted nuts (1 cup).
- Allow to cool at room temperature and the chocolate will harden. When cool, break it into uneven chunks.
- Store cooled candy tightly wrapped; it'll stay fresh for a couple of weeks at room temperature. Freeze for longer storage.
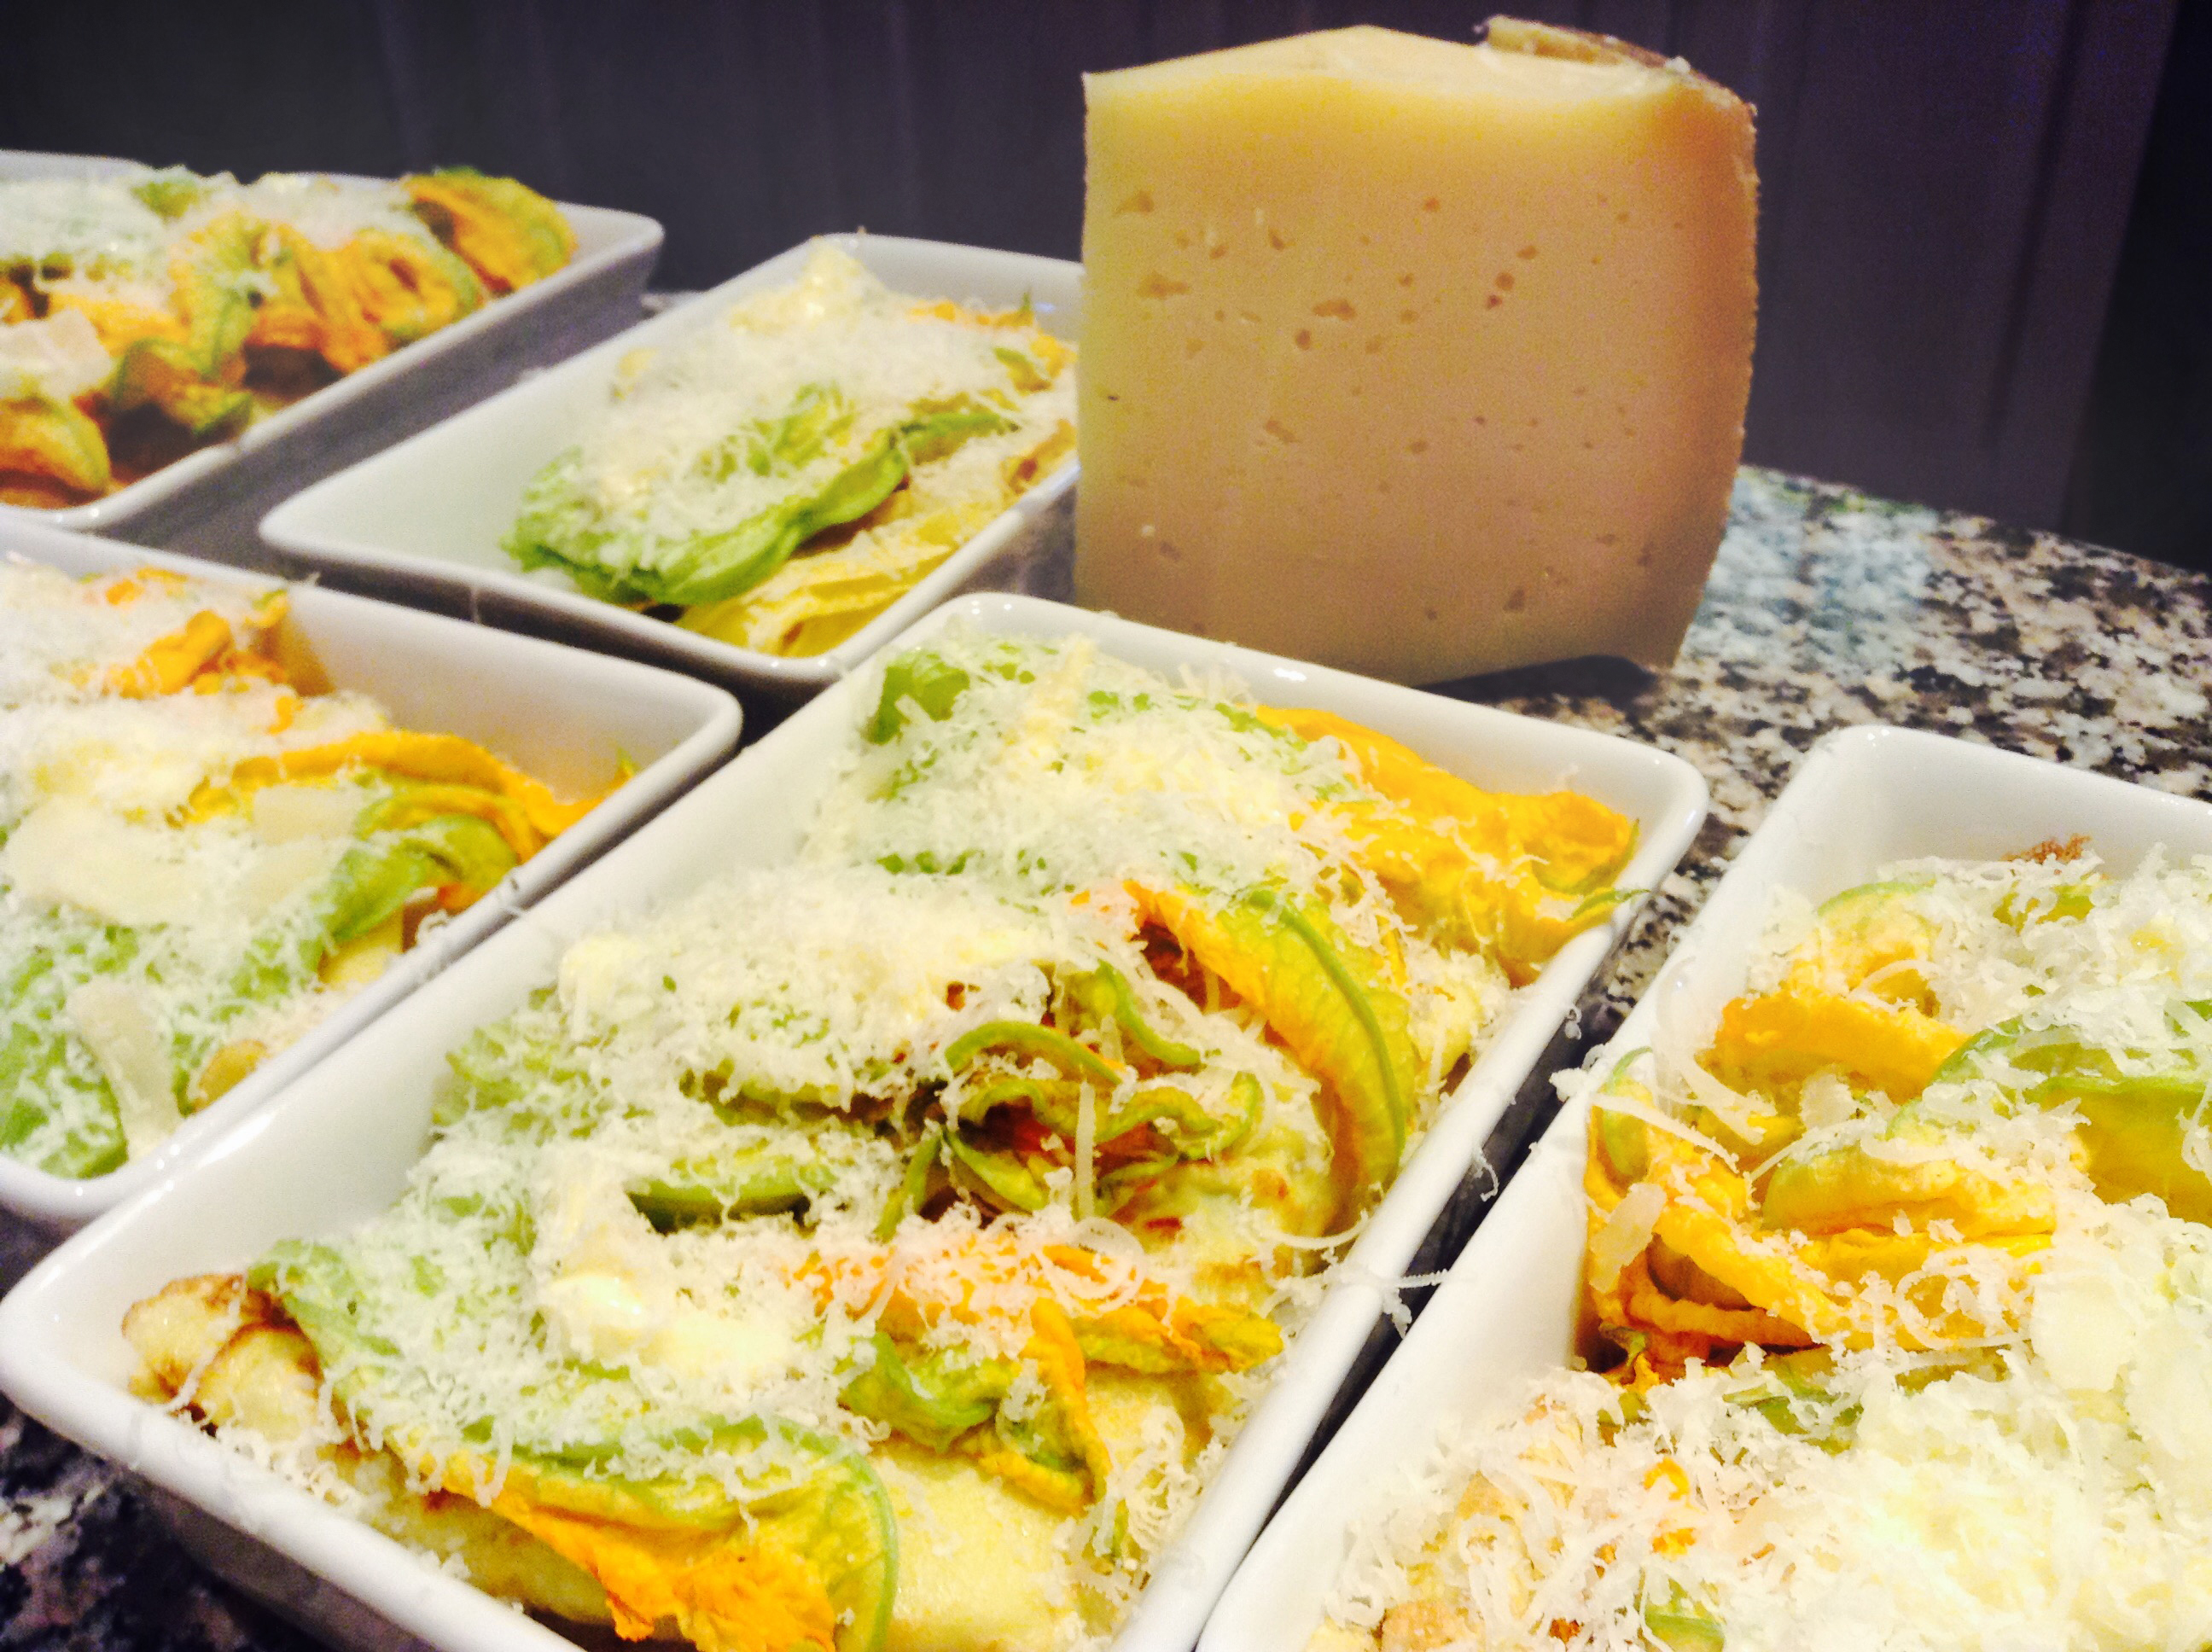
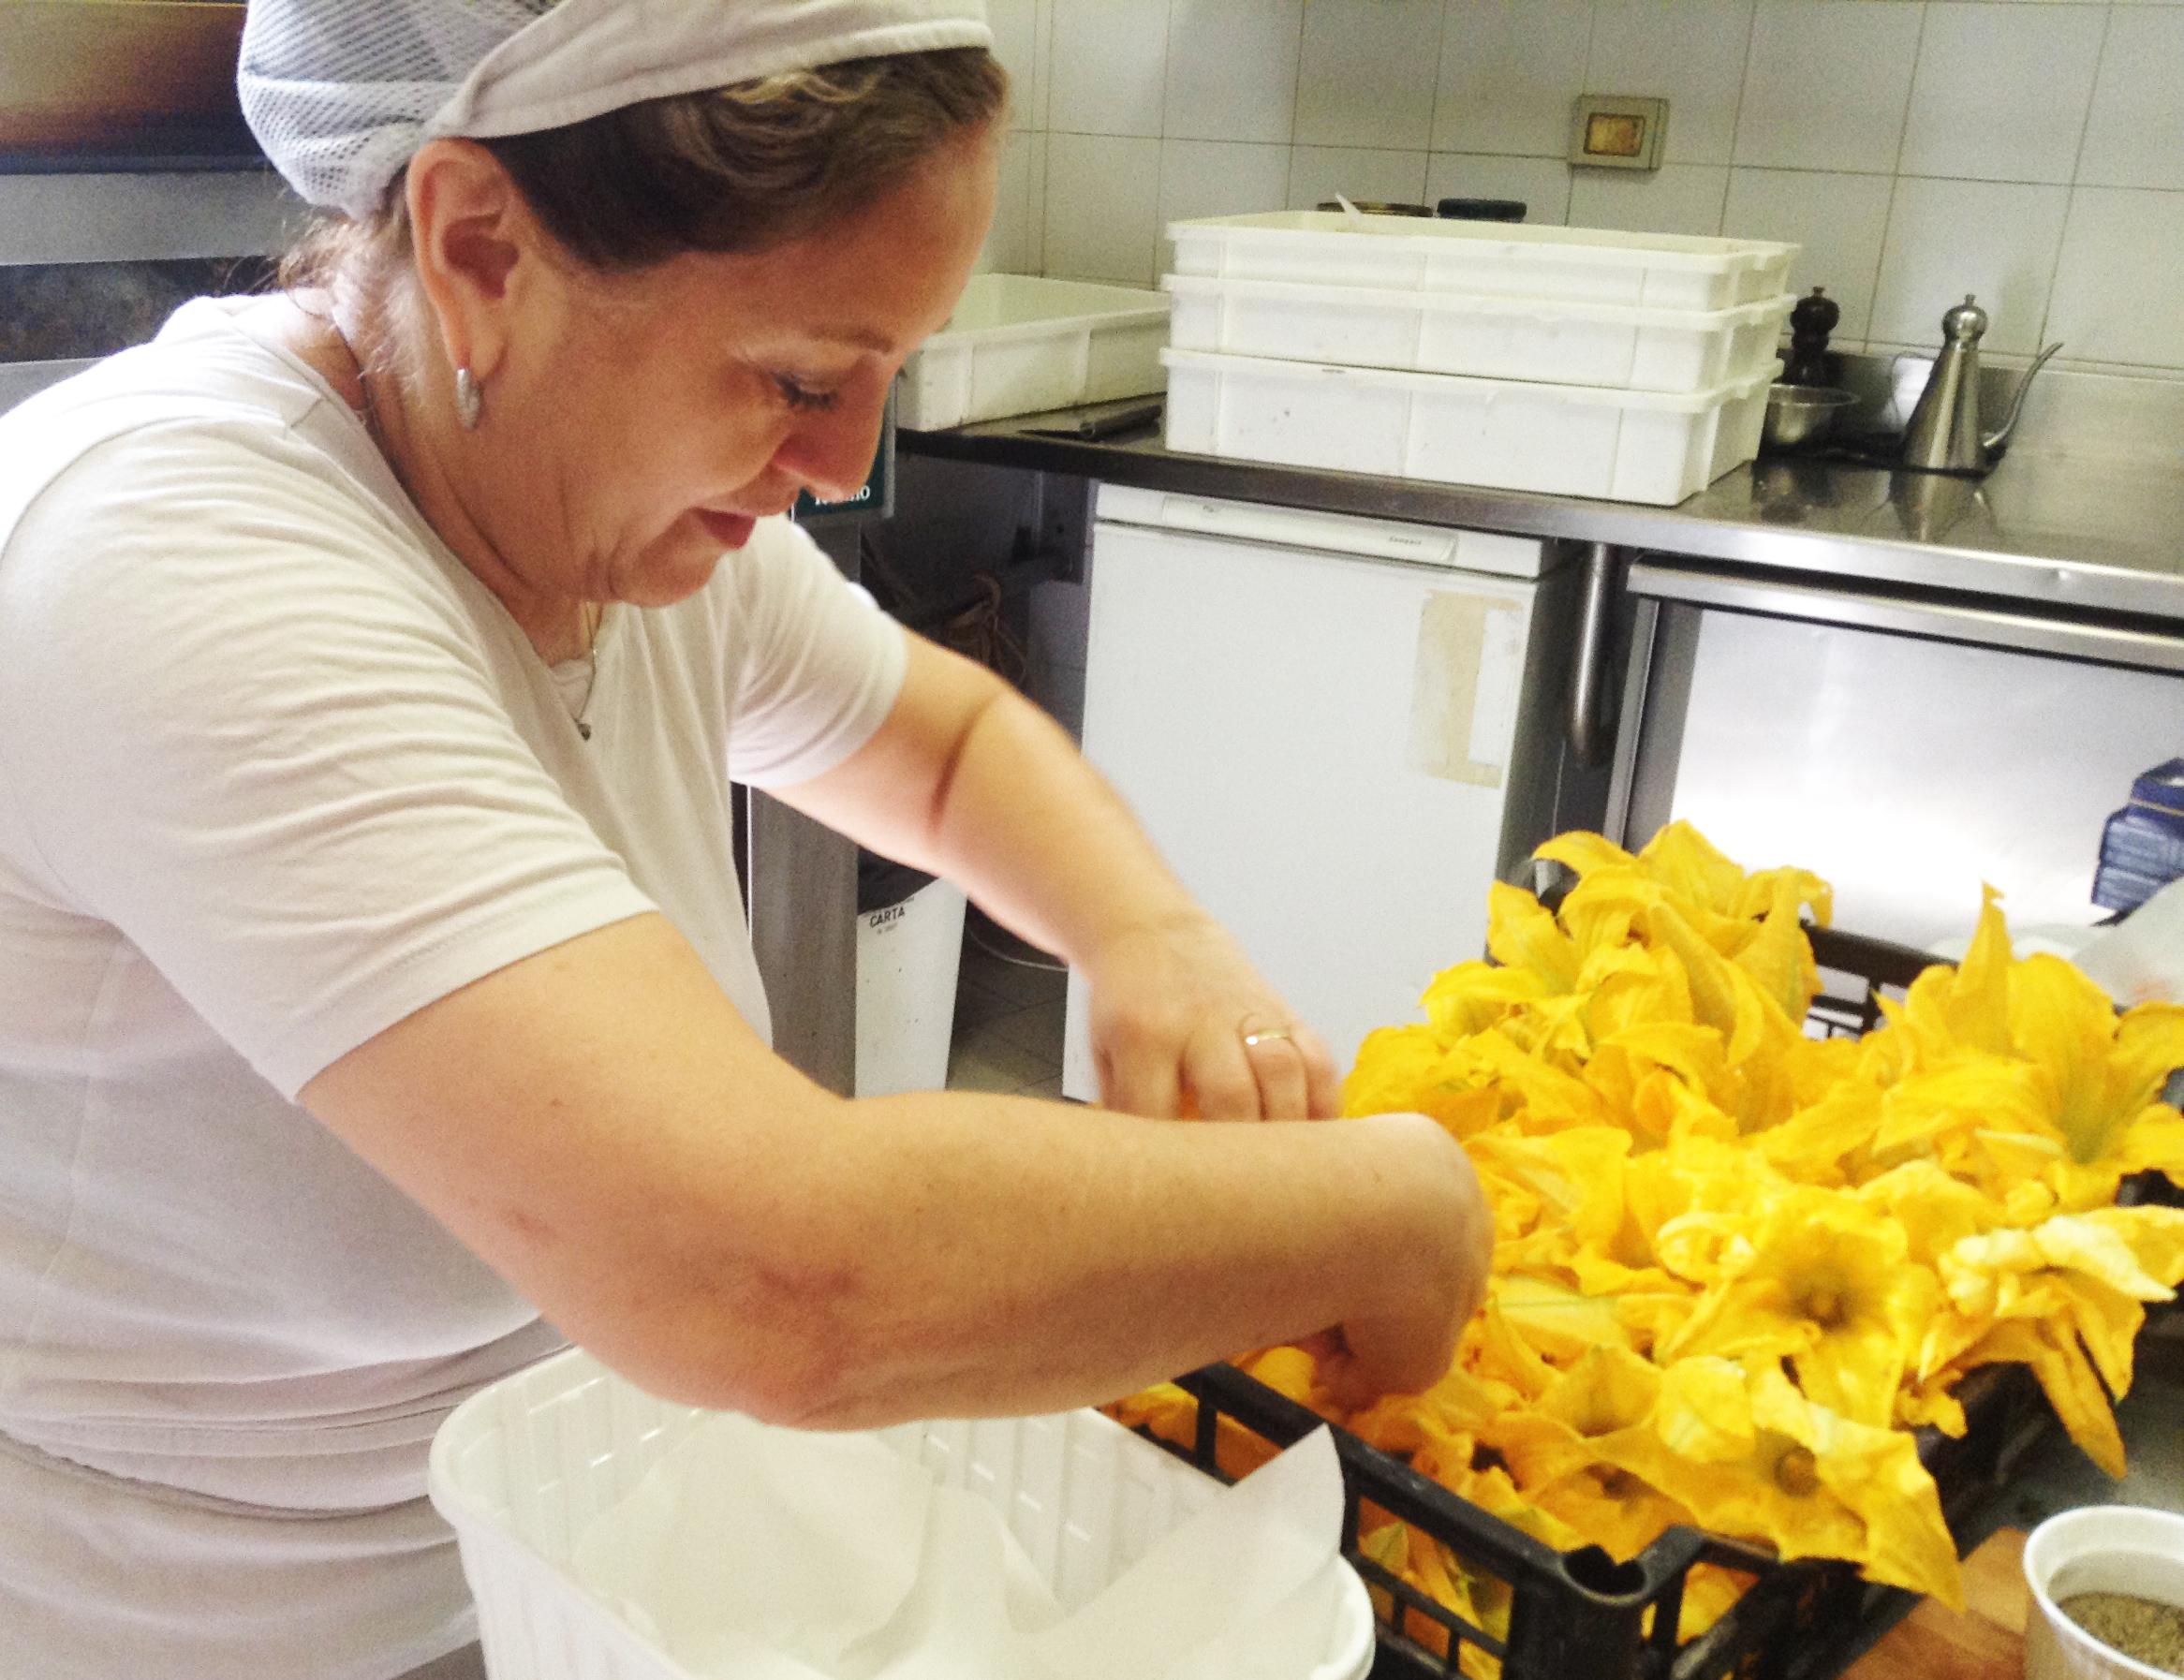
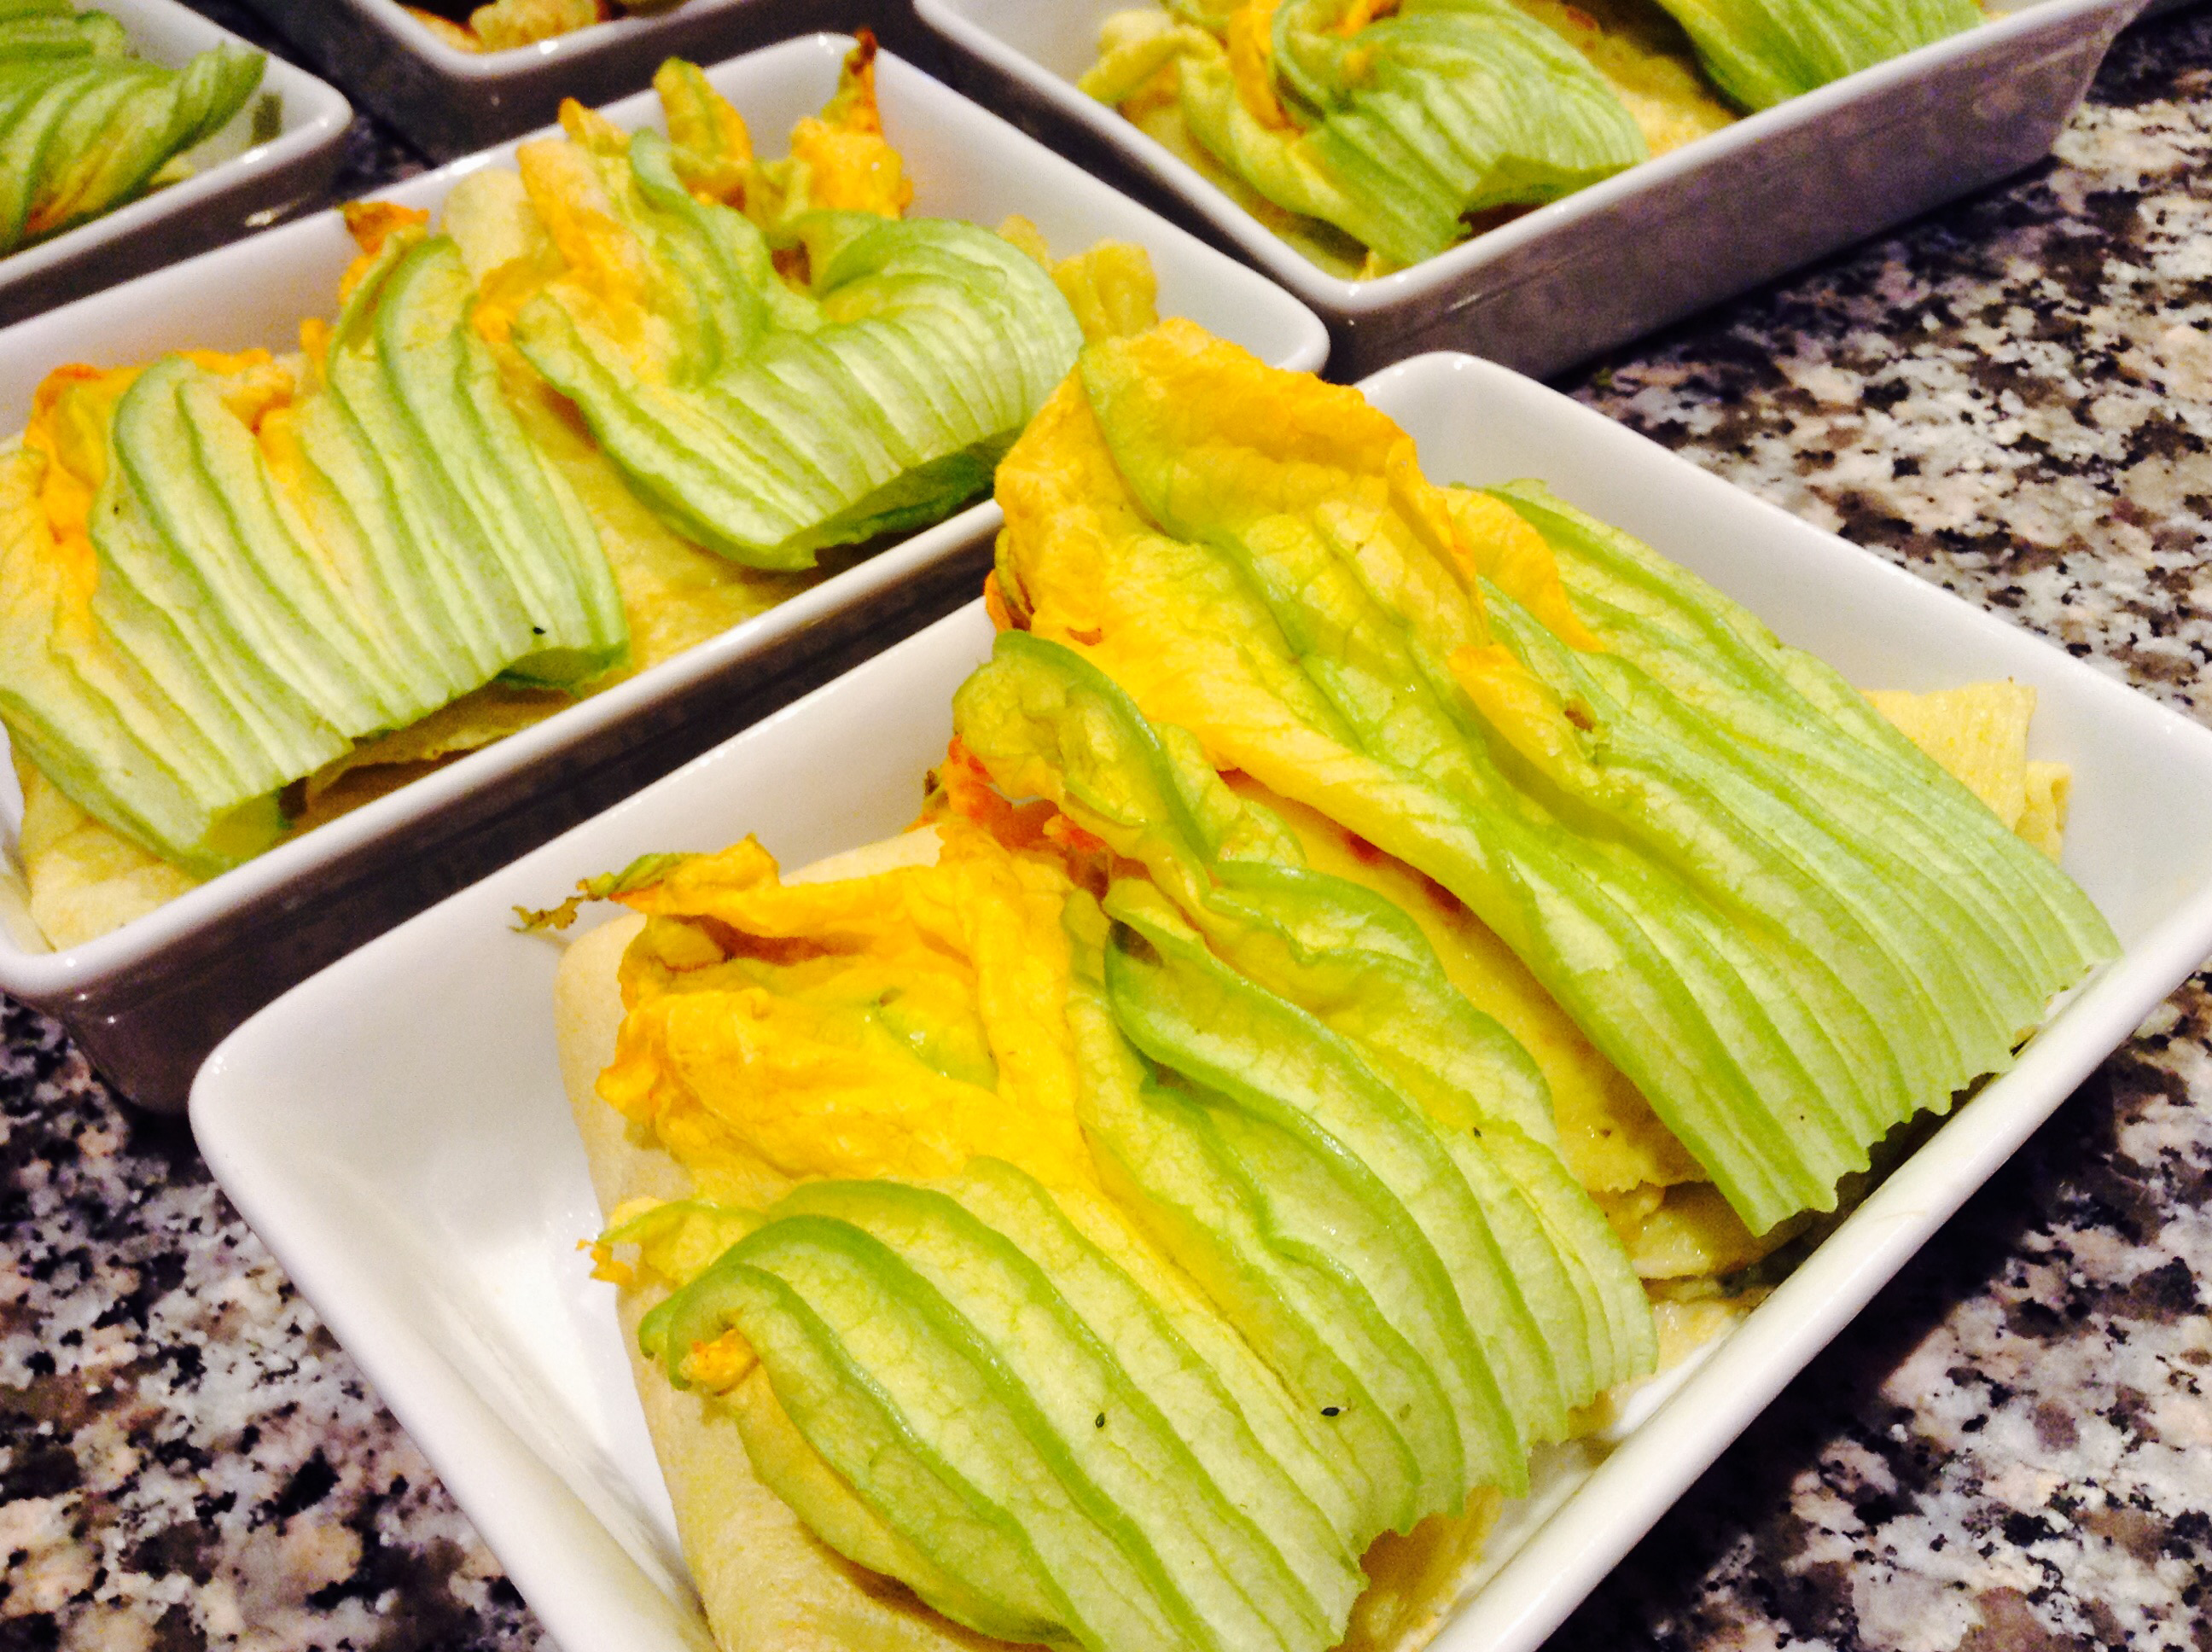
I’ve had the great joy of working side-by-side with an Italian chef over these last few weeks. The other Sisters who have lived and worked at Via Sacra have also had the tremendous privilege of learning from her. Chef Laura has been so generous with her time and energy as we try to absorb all that we can about Italian cooking. Below is one of her recipes that she taught me this past week and I went home and made it for the villa. These crepes are so delicious and light! Chef Laura serves this as a first course at her restaurant, but we enjoyed it as a light supper served with a fruit salad and a tossed green salad on the side.
All Chef Laura’s recipes are in her head, so I tried to reproduce it here by just observing her. If the quantities seem a little off, just adjust them to your liking! We can still get squash blossoms in the market this time of year in Italy. If you have any zucchini plants in your garden, just pluck the blossoms off and you are all set!
Print Recipe
Votes: 0
Rating: 0
You:
Rate this recipe!
Crepes filled with Zucchini Puree and Topped with Squash Blossoms
SERVINGS4people
|
COOK TIME5min |
PREP TIME1hour |
READY IN1hour |
Ingredients
Instructions
- Make the filling: Over low heat, melt your butter in a saucepan and add the zucchini and red onion. Cook, stirring occasionally, until both vegetables are very soft. Continue cooking until most all of the moisture is removed (the zucchini will let off a lot of water while it cooks). While the zucchini mixture is cooking, prepare the crepes.
- Make the crepes: In a blender, combine all the crepe ingredients above and blend until smooth. Let rest about 5 min.
- Heat a lightly oiled Teflon frying pan (omelet size pan) over medium heat. Pour or ladle the batter into the pan, using approximately 1/4 cup for each crepe. Tilt the pan with a circular motion so that the batter coats the surface evenly. Cook the crepe for about 2 minutes, until the bottom is light brown. Loosen with a spatula, turn and cook the other side for 1 minute. Remove to a plate, put a square of wax paper on top and repeat until all the batter is used up. This recipe should make 8 crepes.
- Remove the filling from the heat and mash with a potato masher. Let cool slightly and add the cream cheese and stir until smooth. Add salt and pepper to taste. This mixture should be the consistency of pesto or a little thicker.
- Preheat oven to 425 degrees F. (or broiler)
- To assemble, in one quadrant of your crepe place a heaping tablespoon of the filling and spread to fill that quadrant. Fold the crepe into quarters and place into oblong serving ramekins (2 per person) or a casserole dish. Repeat, until all the crepes are filled.
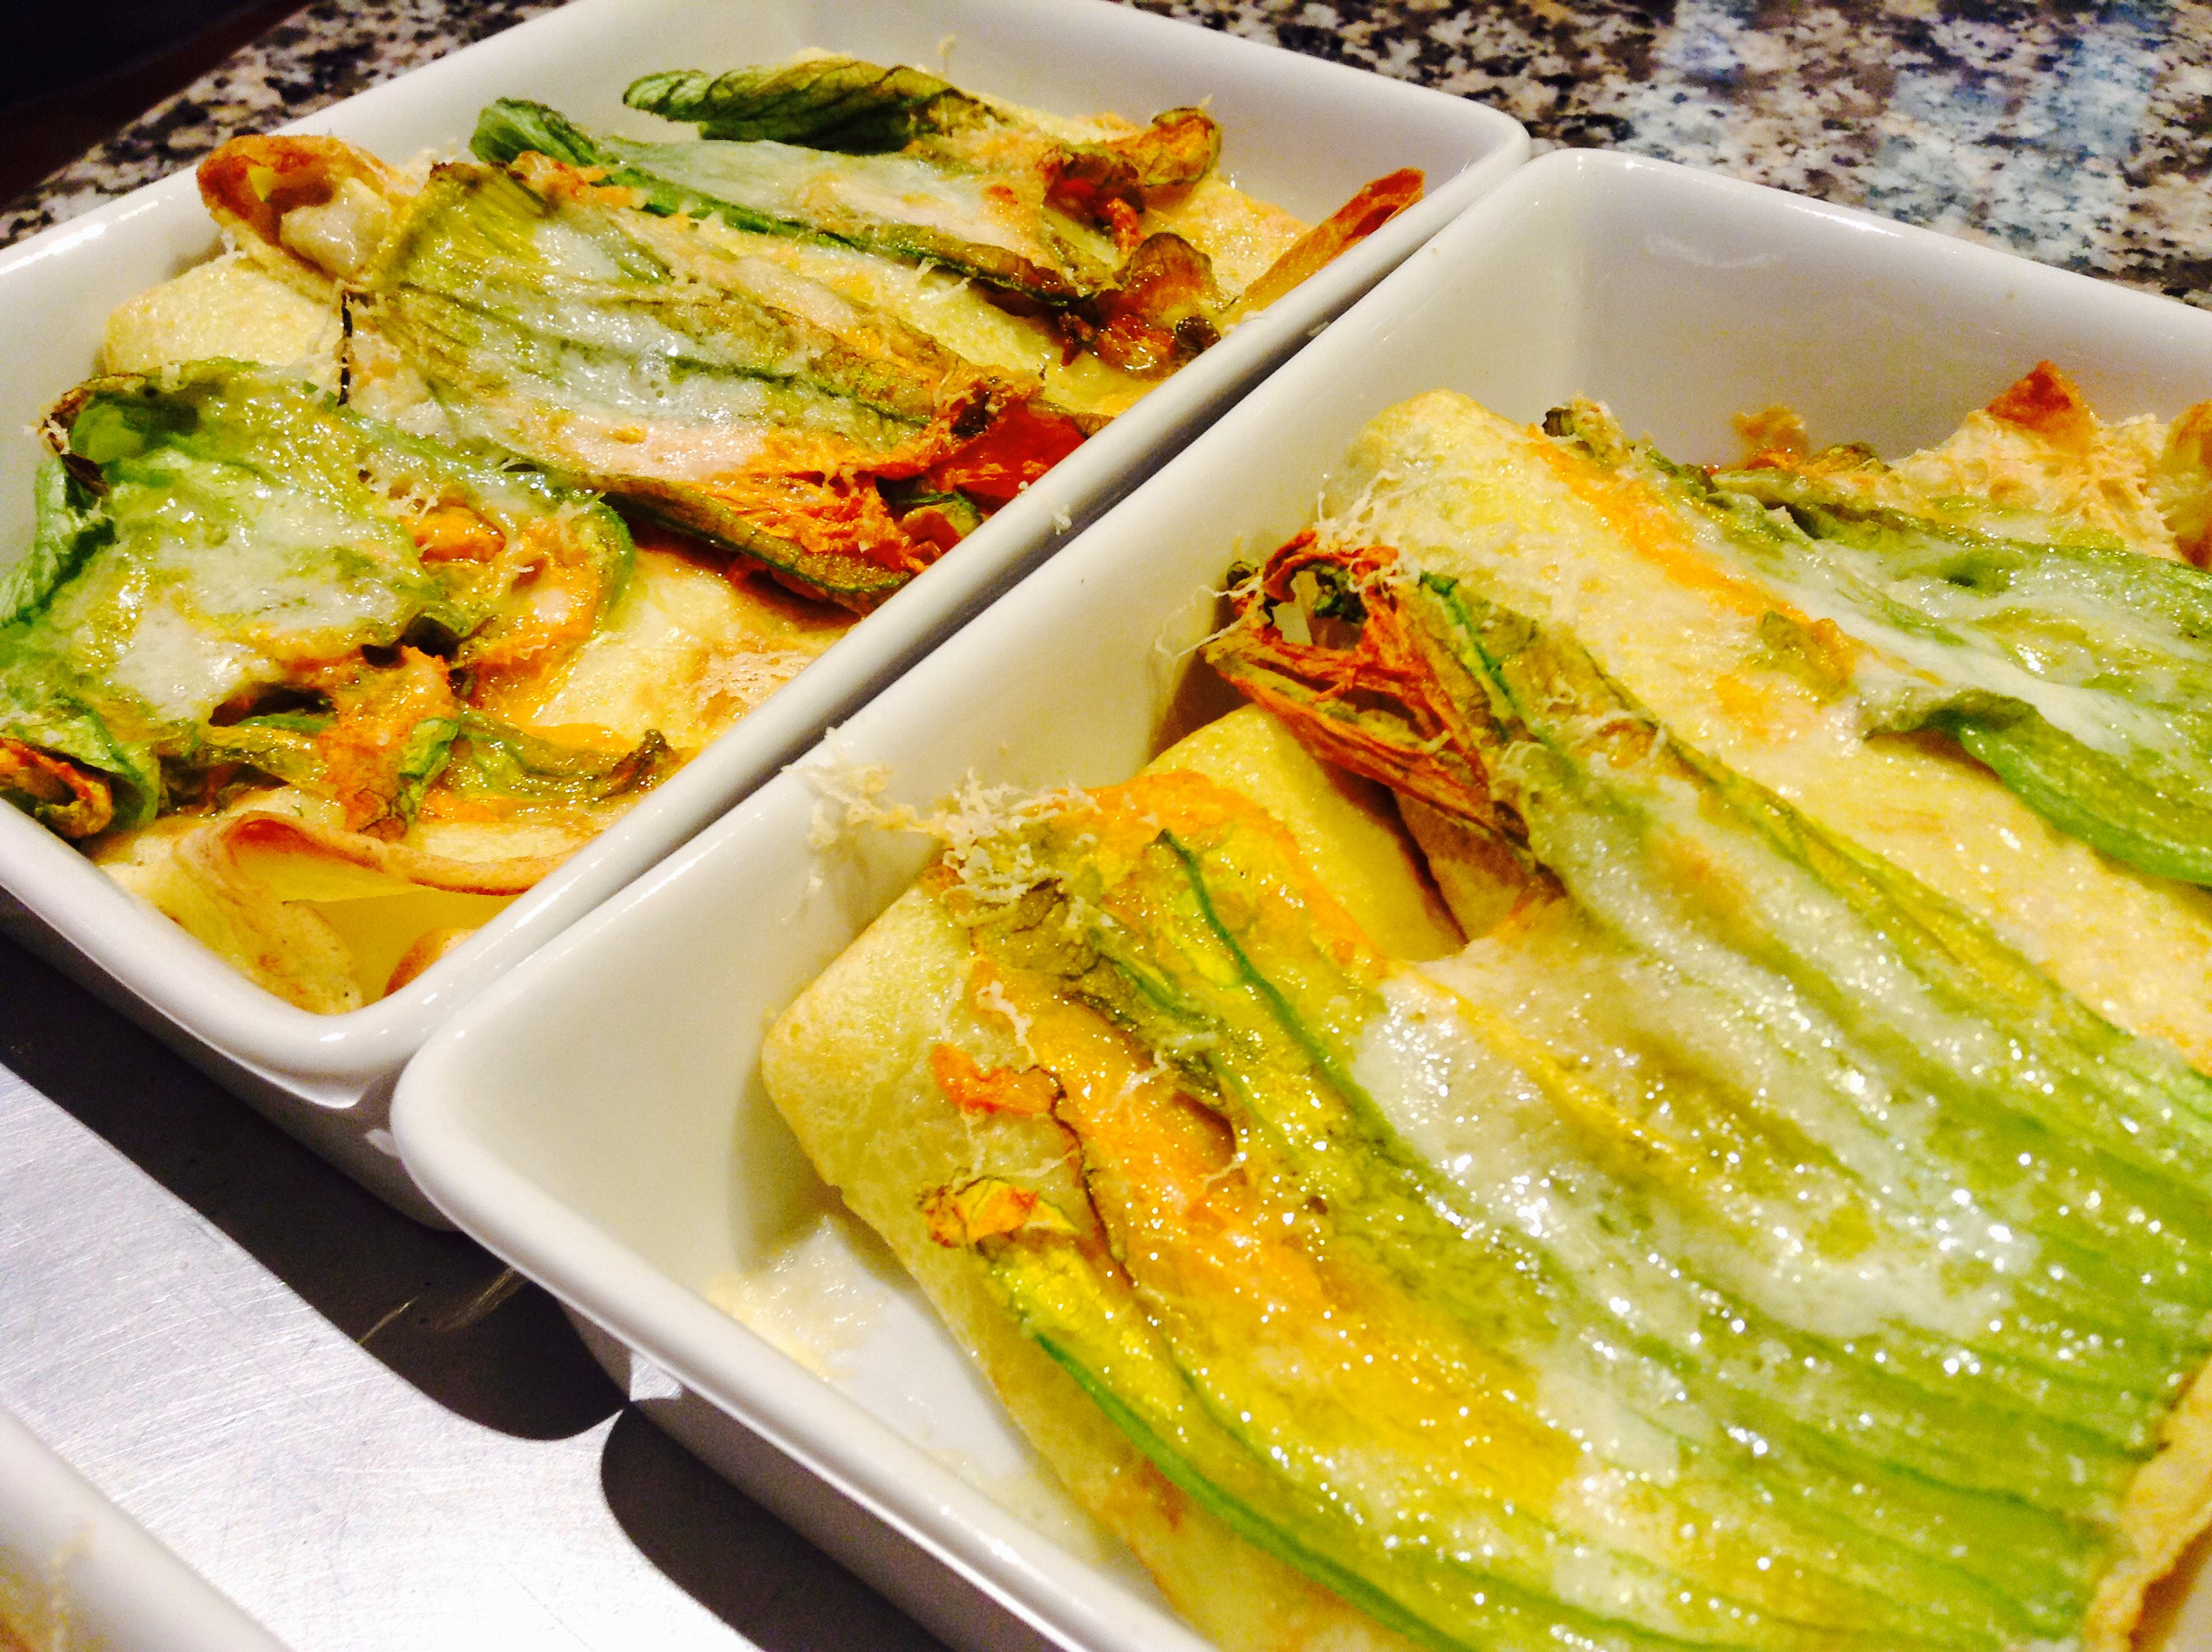
- Dot each crepe with butter and lay the squash blossoms over them to cover the crepes. Again, dot butter over the squash blossoms and sprinkle the grated cheese over the entire crepe.
- Place the crepes in the oven and bake until the cheese is melted and golden, about 5 min. If you prefer, you can also broil them at this step.
- Remove from the oven and serve.
Andiamo mangiare!
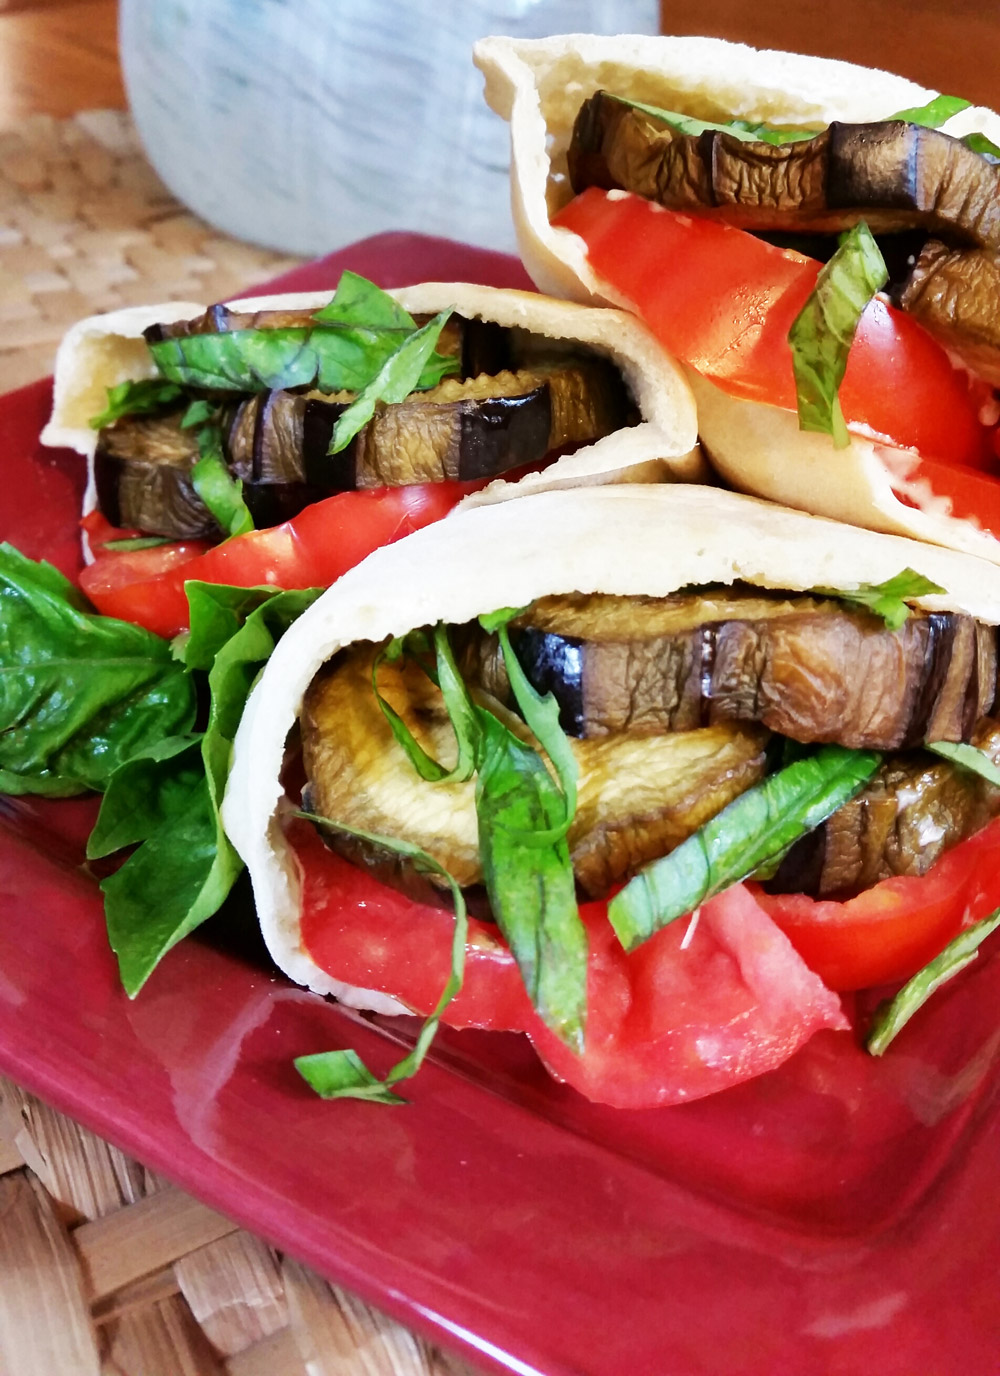
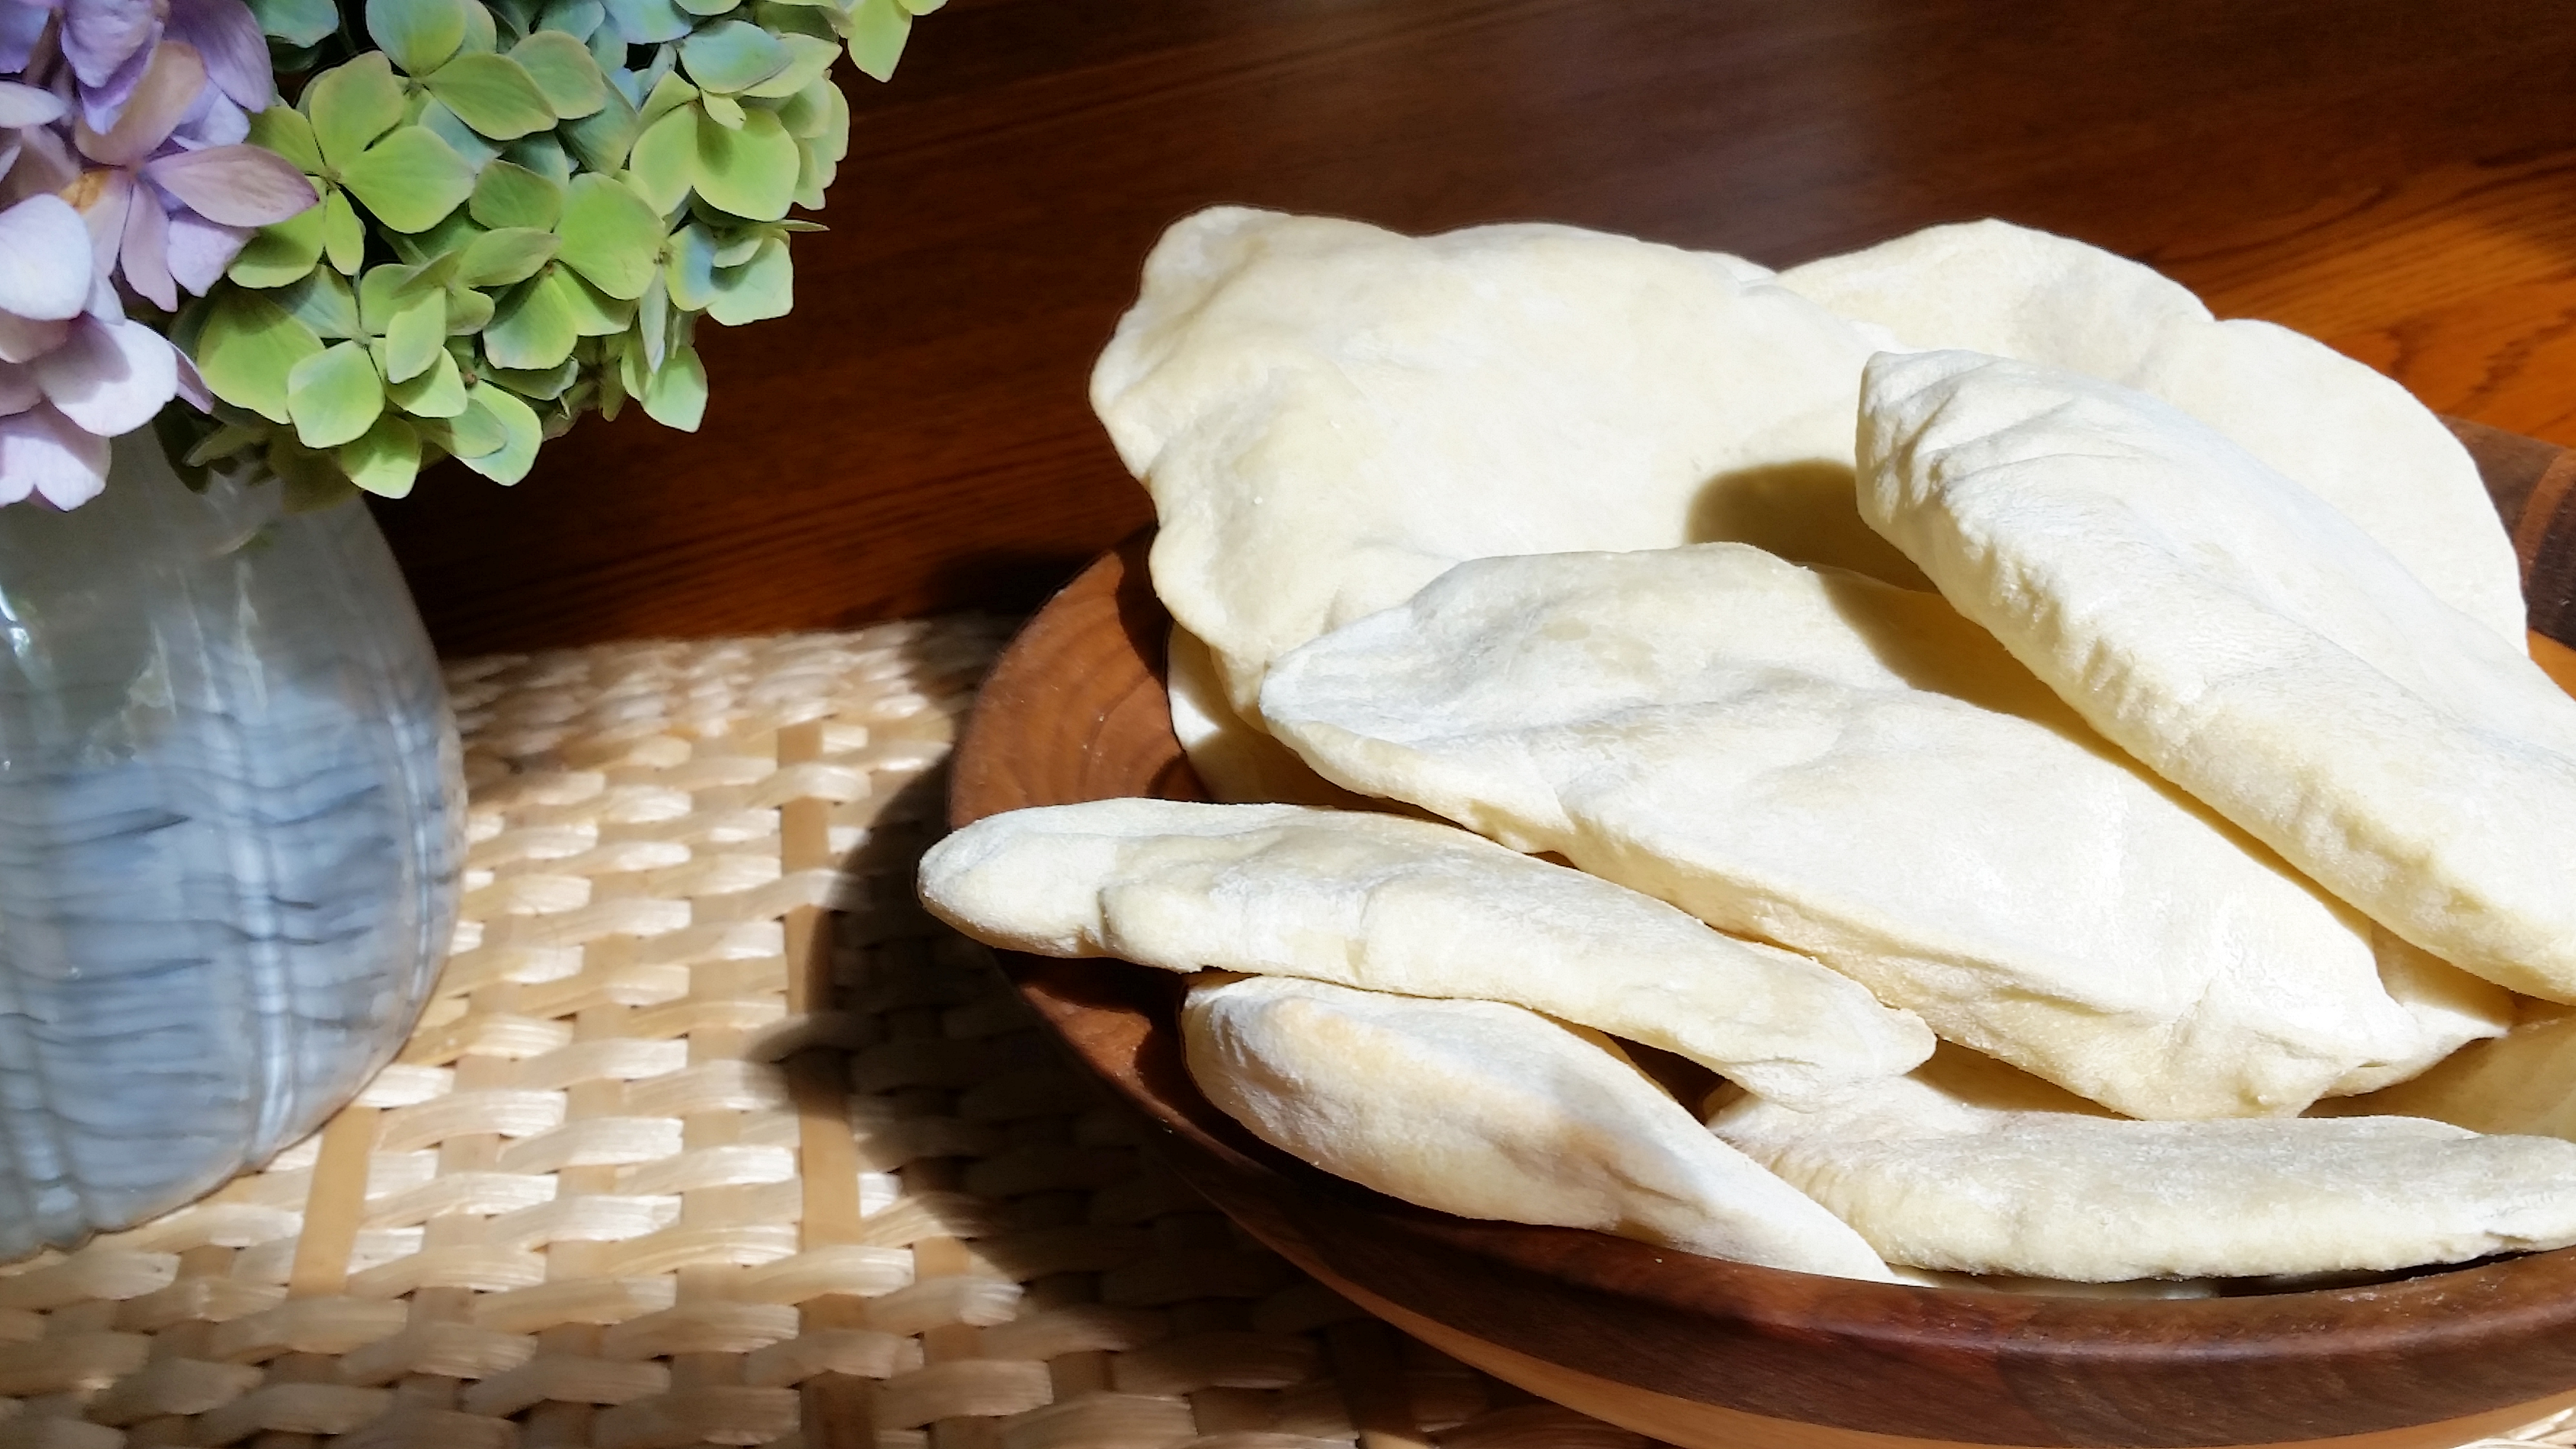
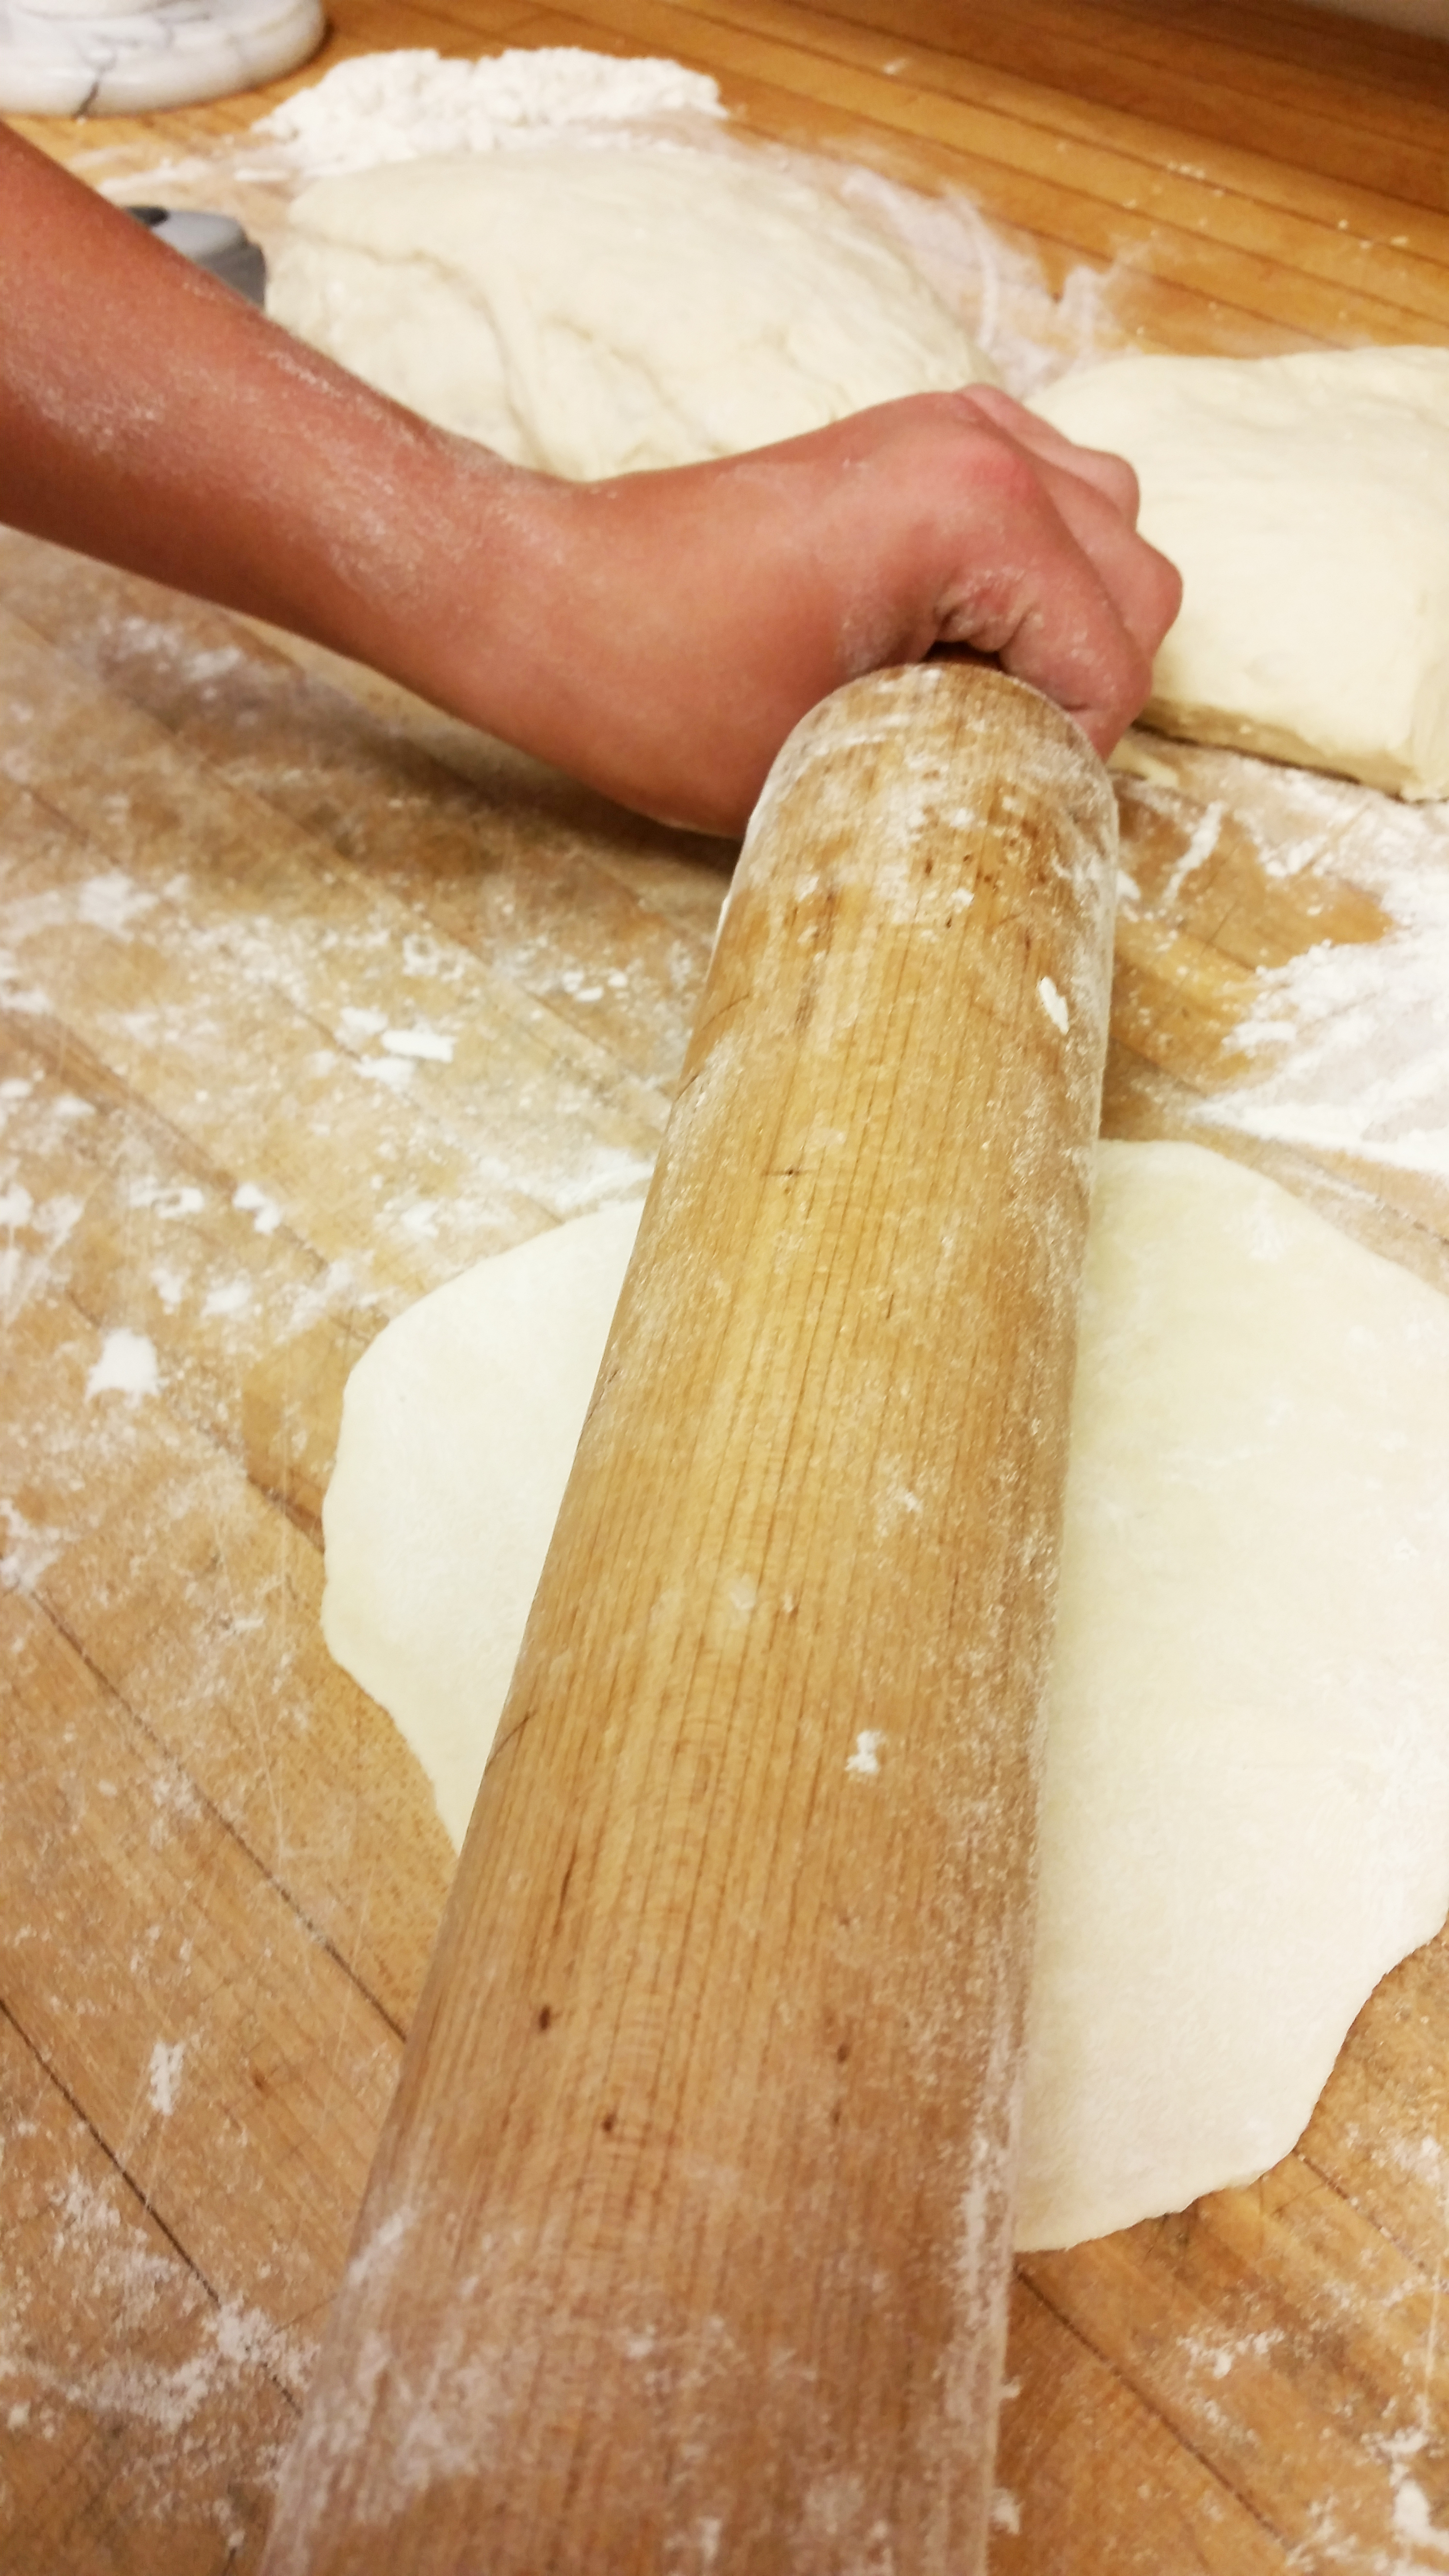
Years ago before pita pockets, as we now know them, had become so common and readily available commercially, they were a regular everyday staple in our home. We called these Syrian bread, because we had an authentic Syrian neighbor who baked it regularly for her household and taught my mother how to make it. I have many happy memories of helping my mother shape the dough into the round loaves. I loved watching these magically puff up into inflated discs in the oven as they baked; and then settle back down into their original shapes after they came out of the oven and cooled.
Always we would roll some of the bread up into towels while still warm; when it cooled this way it had a much chewier texture which I especially liked just with plain butter. However there are so many ways to enjoy it. Sisters particularly love it stuffed with fried or roasted eggplant and fresh sliced tomatoes, roasted onions, peppers, and zucchini or yellow squash slices, with a sprig of fresh basil.
Another favorite way we eat it is split in half, brushed with oil, herbs of choice, onion salt and grated Parmesan. Then baked in 400 degree oven for 5-10 minutes until brown and crisp. It is a fun bread to bake and a fun bread to eat in whatever way you like.
Print Recipe
Votes: 2
Rating: 2.5
You:
Rate this recipe!
Syrian Pita Bread
SERVINGS6-8pitas
|
COOK TIME5-7mins. |
PREP TIME1 1/2hrs. |
READY IN |
Ingredients
Instructions
- In a small bowl dissolve the yeast and the sugar in the water and allow to get bubbly.
- In a food processor, pulse the flour with the salt.
- With the machine on, pour in the yeast mixture and then the oil and process until the dough forms a ball.
- Turn the dough out onto a lightly floured work surface and knead it a few times.
- Form the dough into a ball.
- Lightly oil a bowl with olive oil.
- Transfer the dough to the bowl and turn to coat
- Cover the bowl with plastic wrap and let the dough rise in a warm place until doubled in bulk, about 1 hour.
- Take the dough and divide it up into 6-8 sections.
- On a floured surface, shape the dough into little flat circles.
- Heat your oven to 475 degrees Fahrenheit.
- Baking the breads 2-3 at a time bake them for 5-7 minutes. Just till they turn a nice golden brown.
- Take them out the oven, let them cool and then ENJOY!
This year, we celebrated the Fourth of July in style. It was the first time in over 10 years that our award winning Spirit of America Band was able to participate in our hometown parade in Orleans, Massachusetts. It was a day marked with patriotism and pride, and one to remember all of our loved ones that have sacrificed so much for the great freedom we have today. Like most families across America, we concluded the day with fireworks and “All American” cookout topped off with these magnificent Stars and Stripes Pies.
I am reminded of a beautiful prayer that Billy Graham offered to this Nation – may we pray it together for the future of America:
“Our Father and Our God, we praise You for Your goodness to our nation, giving us blessings far beyond what we deserve. Yet we know all is not right with America. We deeply need a moral and spiritual renewal to help us meet the many problems we face. Convict us of sin. Help us to turn to You in repentance and faith. Set our feet on the path of Your righteousness and peace. We pray today for our nation’s leaders. Give them the wisdom to know what is right, and the courage to do it. You have said, “Blessed is the nation whose God is the Lord.” May this be a new era for America, as we humble ourselves and acknowledge You alone as our Savior and Lord. This we pray in Your holy name, Amen. “
Print Recipe
Votes: 0
Rating: 0
You:
Rate this recipe!
All American "Stars and Stripes" Pie
SERVINGS8people
|
COOK TIME1 hr 15 min |
PREP TIME45 minutes |
READY IN2 hours |
Ingredients
Instructions
To Prepare Crust:
- 1. Dice the butter and return it to the refrigerator while you prepare the flour mixture. Place the flour, salt, and sugar in the bowl of a food processor fitted with a steel blade and pulse a few times to mix.
- 2. Add the butter and shortening. Pulse 8 to 12 times, until the butter is the size of peas. With the machine running, pour the ice water down the feed tube and pulse the machine until the dough begins to form a ball.
- 3. Dump out on a floured board and roll into a ball. Divide the dough in half. Wrap in plastic wrap and refrigerate for 30 minutes.
Assembling the Pie:
- 4. Roll out both pie crusts. Press one into the bottom of the pie pan – leaving an overhang for your crust (you will finish this off at the end). Reserve the second pie crust (keep covered w/ a sheet of plastic)
- 5. Fold aluminum foil strip into 90 degree angle wedge to fill 1/4 of the pie and place in pie shell
- 6. Fill the 1/4 area with the uncooked blueberry filling
- 7. Fill the rest of pie with strawberry rhubarb filling
- 8. Remove foil
- 9. Dot fruit filling with about 6-8 small chunks of butter (about ½ Tbsp each)
- 10. Using the reserved pie crust, take a pizza cutter and a ruler and cut three full length 1" stripes and two half length 1" stripes out of your dough. Use the remaining dough to cut your stars (we used a sharp knife or you can use a cookie cutter). Place the stars and stripes on top of the fruit, as seen in the picture, being sure to press the ends of the stripes into the bottom crust.
- 11. With your fingers, pinch crust to create a nice ruffled edge.
- 12. Brush the entire crust with egg wash and a sprinkling of sugar
- 13. Bake at 325 for about an hour and 15 min. or until crust is golden and fruit is bubbling
- Cool slightly and enjoy with a big scoop of vanilla ice cream!
More and more, we are getting requests from guests for gluten-free and dairy-free diets. Finding recipes that are healthy and tasty all at the same time can be challenging! The reason I love this soup is, you can actually taste the zucchini! So many times zucchini soups are masqueraded in sour cream, cream cheese and dill and you absolutely loose the flavor of the vegetable itself.
Delightful if chilled overnight and served ice cold on a hot summer day, or conversely, ladled out piping hot on a steely winter night. Easy to prepare, vegan (if you swap out the butter), and delicious, you might want to add this to your weekly lunch menu!
Print Recipe
Votes: 1
Rating: 3
You:
Rate this recipe!
Silky Zucchini Soup
SERVINGS4people
|
COOK TIME20 minutes |
PREP TIME10 minutes |
READY IN45 minutes |
Ingredients
Instructions
- In a large saucepan, melt the butter and the olive oil. Add the onion and garlic, season with salt and pepper and cook over moderately low heat, stirring frequently, until softened, 7 to 8 minutes.
- Add the zucchini and cook, stirring frequently, until softened, about 10 minutes. Add the stock and 1 1/2 cups of water and bring to a simmer; cook until the zucchini is very soft, about 10 minutes.
- Cool slightly. Working in 2 batches, puree the soup in a blender until it's silky-smooth. Return the soup to the saucepan and season with salt and pepper. Serve it either hot or chilled, garnished with julienned zucchini.
- The soup can be made ahead and refrigerated overnight.
- **Recipe adapted from Food & Wine.

")