I’ve had my eye on this recipe for quite a while now and decided to whip it up for Thanksgiving. I added a bit of orange zest to the original recipe because I love the combination of those flavors. The pie is like a little jewel, bursting with flavor and color. Sweet and tart at the same time. The curd on its own would be wonderful in many other ways as well. I hope you enjoy it this Holiday season. Blessed Advent!*
Put the gingersnaps in a food processor and process until they are fine crumbs or place in a ziplock bag and crush with a meat hammer. (this should be a heaping cup) Add the pecans and sugar and process again until everything is finely ground (or finely chopped the pecans and add to the fine crumbs with the sugar.) Add the butter and combine.
Pat the crust into a 9 inch pie plate, and up the sides. Bake for 10-12 minutes. Set aside to cool.
Put the cranberries, 1 cup of the sugar, and 1/4 cup water to a simmer in a saucepan. Lower the heat and simmer the cranberries, uncovered, for about 15 minutes until they've popped and the mixture is quite thick. Let cool slightly and then puree until completely smooth (I did this in a blender)
Whisk the puree, the eggs, yolks, salt, lemon juice and 1/2 cup sugar together in a saucepan and set over medium heat. Cook, stirring constantly, until the mixture thickens and coats the back of a spoon, this will take about 10 minutes or so. It can burn easily, so keep a good eye on the mixture and don’t keep your heat too high.
Push the curd through a mesh strainer, using the back of a spoon to get it all through.
Let the curd cool for a few minutes and add the room temperature butter in, bit by bit, while you stir to melt it. Add the mandarin zest.
Pour the curd into the pie crust and smooth out evenly. Chill the pie until it is firm, about 2 hours or so.
Decorate with sugared cranberries if you like. To make sugared cranberries, roll damp cranberries in granulated sugar and let dry.
It’s too easy to lose track of the origin of some of the many wonderful recipes that we all love–but have no idea where they came from!
One of our Sisters, known for her love for cooking and her creative culinary skills, has a great intro to one of her favorite recipes… that lives on to this day!
“My mother, who came to this country as a young girl, first obtained a job doing housework for a wealthy family on 5th Ave, N.Y. The lady of the house had a special liking for a tall, moist, three-layered cake from a nearby bakery—with a creamy custard filling, generous swirls of maple-flavored frosting and lavishly sprinkled with finely chopped walnuts. My mother soon cultivated a taste for this culinary wonder also—and developed her own recipe for the cake by taste and instinct.”
And now, through the years, it’s been passed on to us, with modifications and adjustments, and continues to be the quintessential dessert for the right occasion.
Beat in egg yolks and add milk alternating with flour mixture; mix well
Beat egg whites until stiff and fold into cake batter
Bake at 350 for about 30 minutes, or until cakes tests done, using a toothpick
Cool before filling and frosting
Filling
Scald milk and let cool slightly
Beat eggs and whisk into milk
Place milk back on medium heat and whisk in sugar, flour, cornstarch mixture
Slowly bring to a boil, stirring constantly. Remove from heat and add butter, vanilla and banana flavoring
Allow to cool and thicken before filling cake
Fluffy Maple Frosting
Melt brown sugar in the water and bring to a boil.
Gently continue boiling for about 15”, until it reaches the soft ball stage, about 240 degrees.. The thickness should be similar to maple syrup.
Beat egg white until stiff. While continuing to beat, slowly pour in brown sugar mixture. Add in maple flavoring to taste; continue beating until cool, and it appears to be of a spreading consistency.
Tonight, our Convent was humming with Christmas cheer as we readied our home for Christmas. Some wrapped presents to send to families, other Sisters spent time catching up with old friends as they penned their lovely cards. In the kitchen, we turned on Bing Crosby and poured over old fashioned family recipes as we pondered which cookies we would make this year. The royal icing was prepared and crispy butter cookies were being decorated with sprinkles covering every surface. I remembered a cookie that I hadn’t baked in years and a favorite to be sure. In fact, you won’t find this anywhere else on the internet, at least I couldn’t. Cut from an old magazine, pressed onto an index card and covered in plastic, this shows how treasured this recipe is. Sometimes baking can restore wonderful memories of times past and other times it just puts a smile on your face, honey in your belly and much joy for the adventures ahead. I love Christmas. The beauty, the magic and most of all the precious gift that is awaiting us in the form of a little baby on Christmas morning.
May the season of light be yours this year. Blessed Christmas!
To make the filling: In a small saucepan, combine the apricots, sugar and water and simmer for 15-18 min. or until the liquid is reduced by half and add the rum or brandy. Let the mixture cool slightly and in a food processor or blender, puree it.
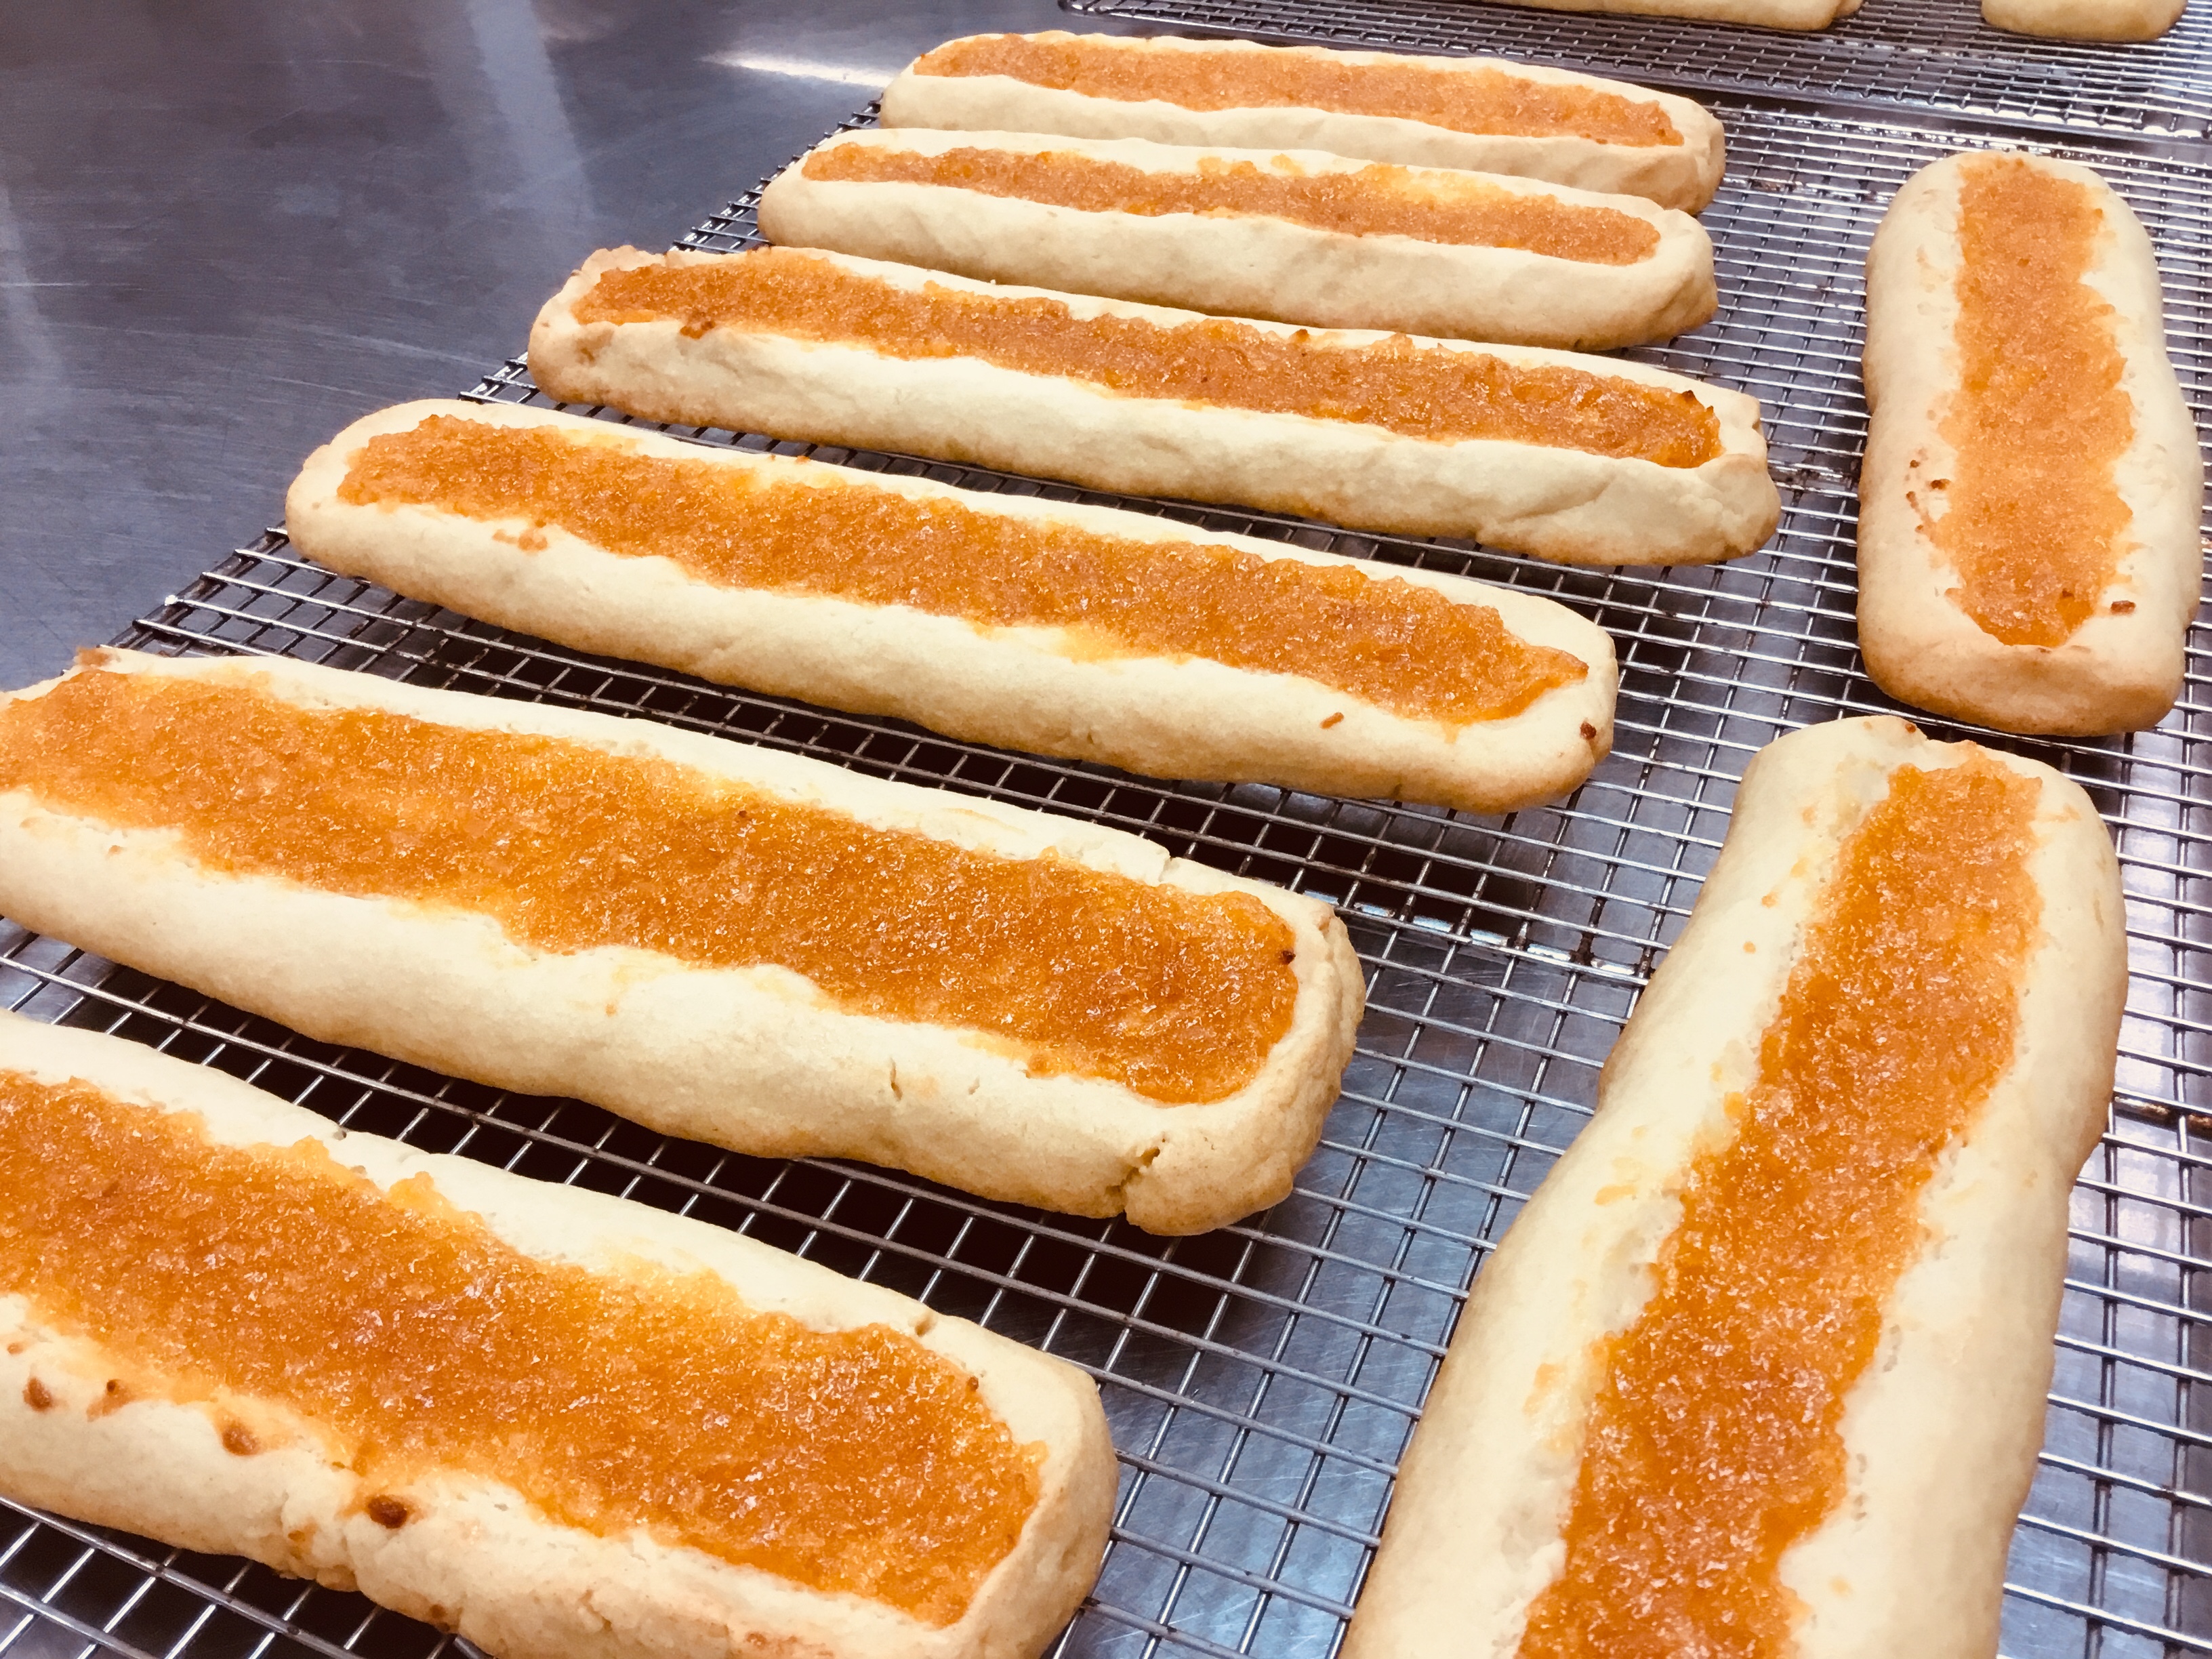
Make the shortbread cookie dough. In a bowl, whisk together the flour, baking powder and salt. In a separate standing mixer, beat together the butter, sugar, and brown sugar until the mixture is light and fluffy. Beat in the vanilla and the egg, beating the mixture until it is well combined. Slowly, add the flour mixture in stages and mix until just combined, but don't over mix or your shortbread will be tough.
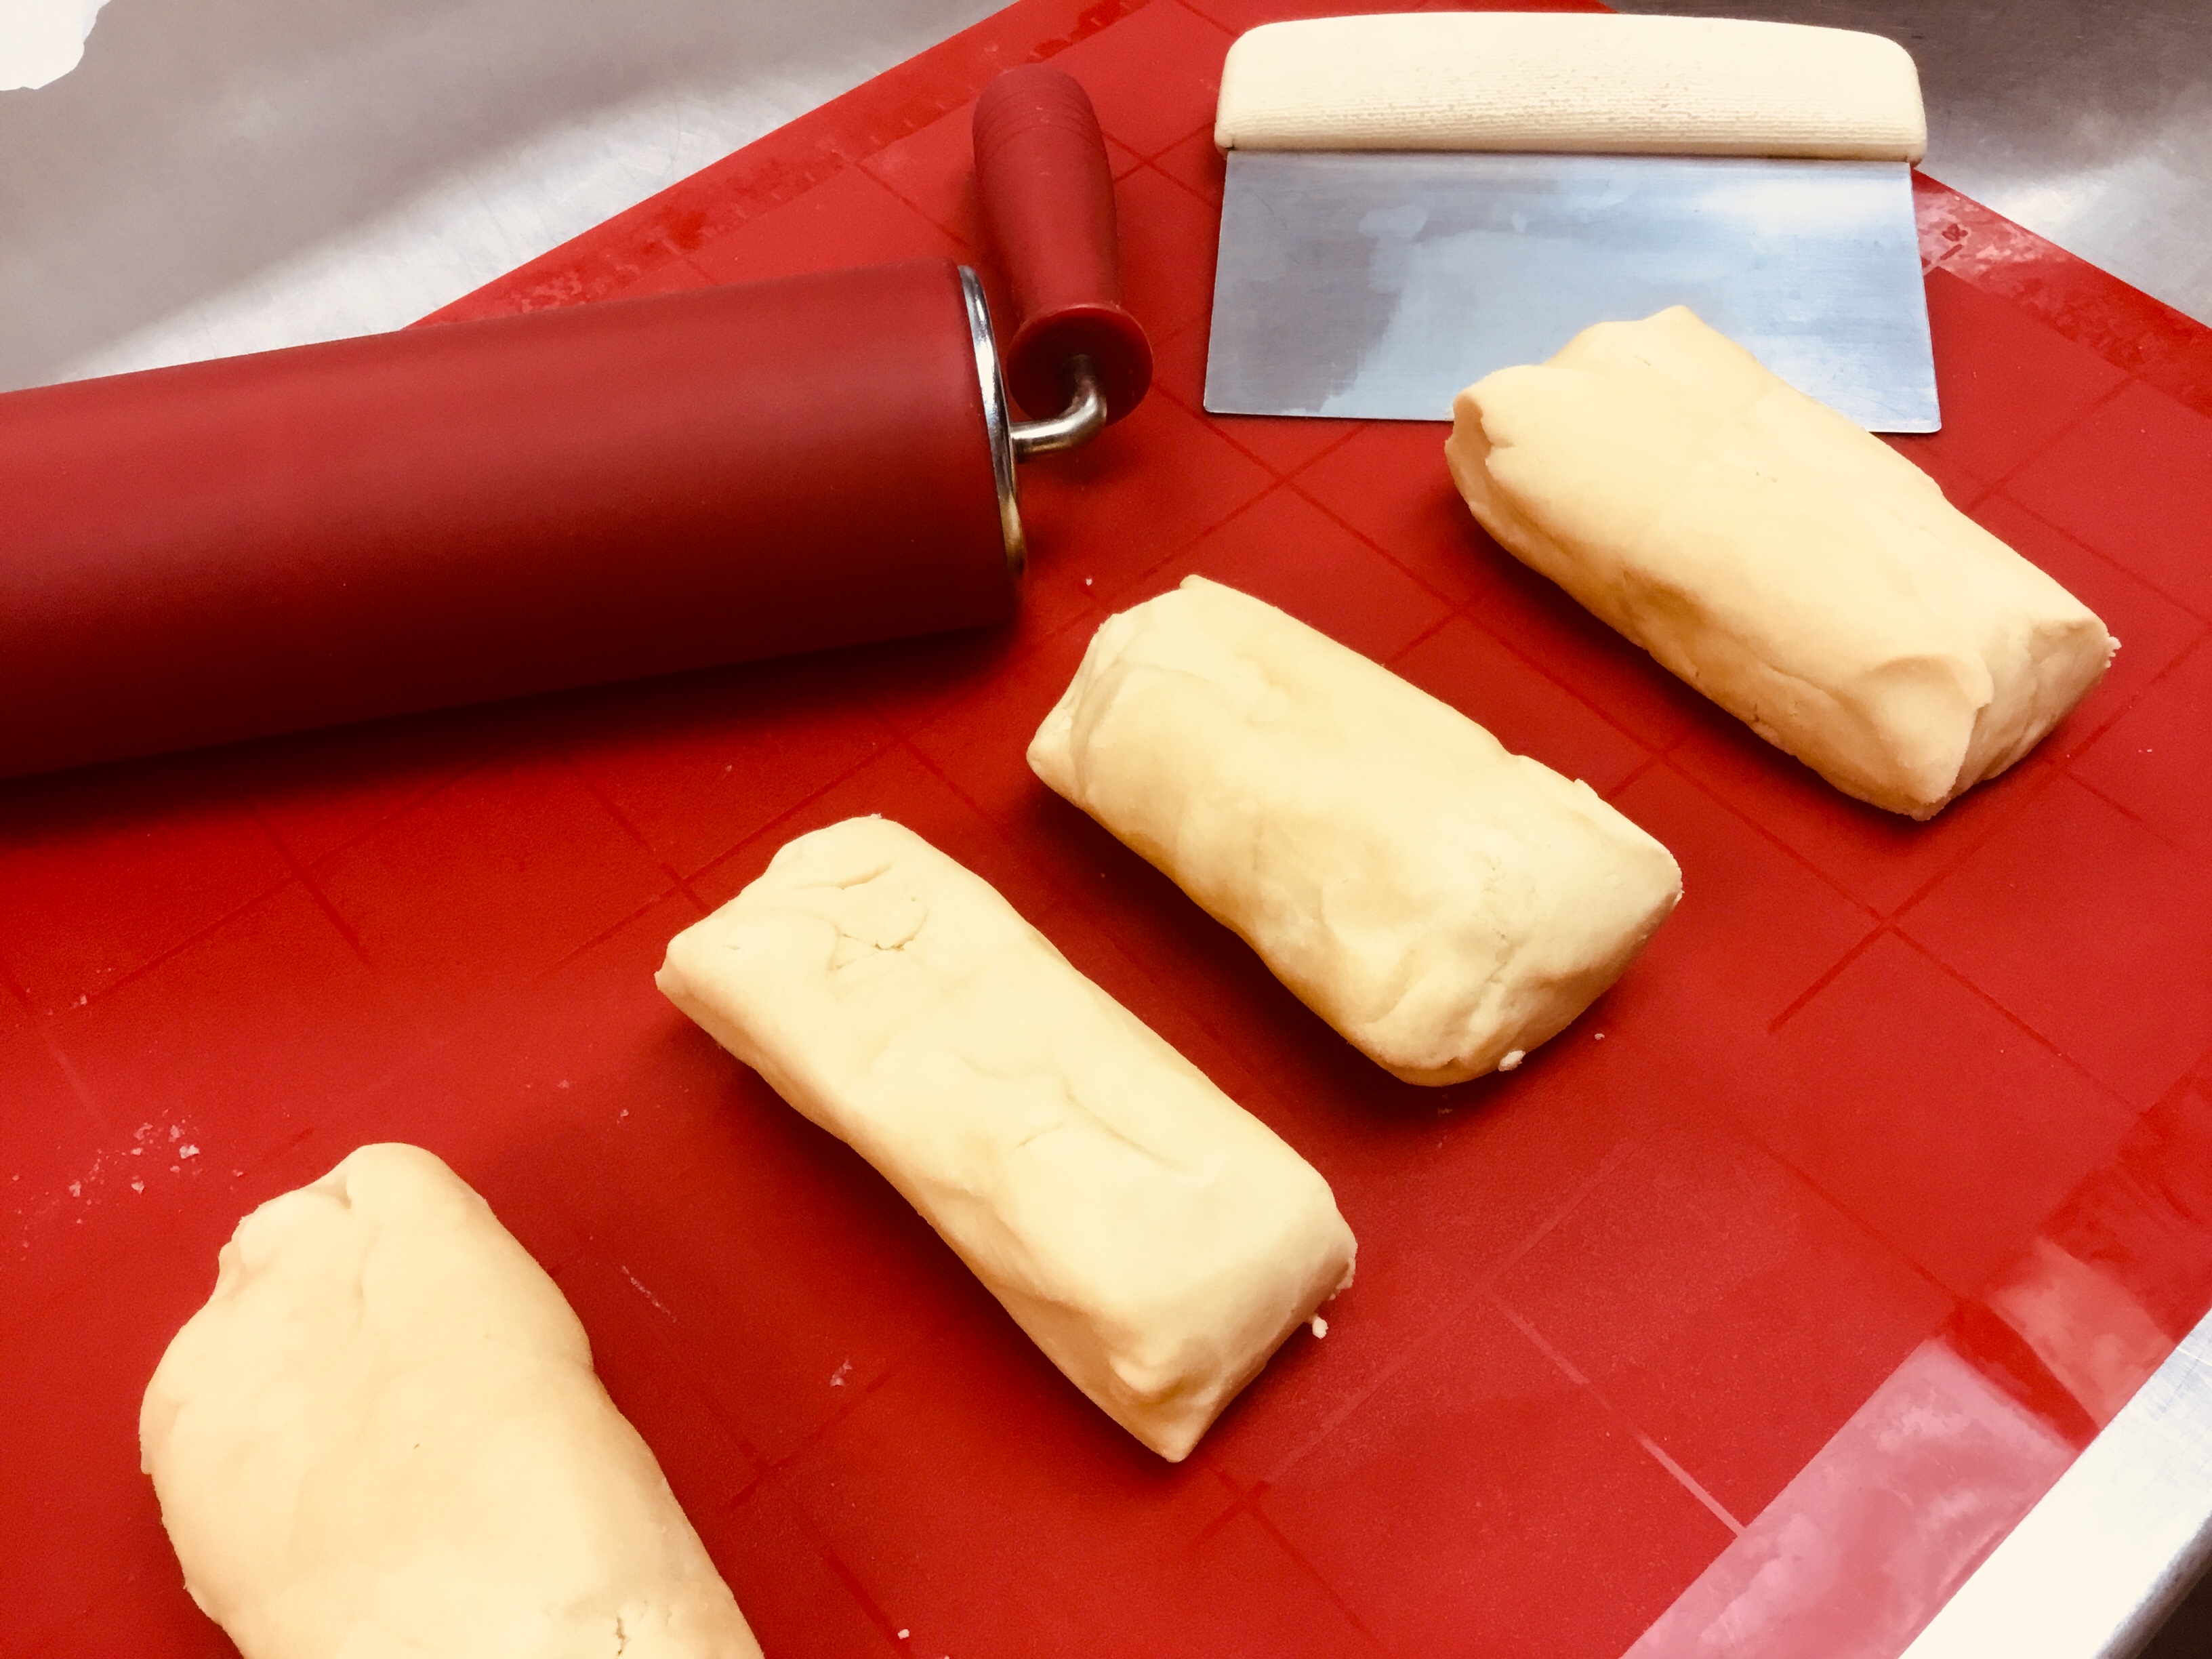
Form the dough into a log, wrap well in plastic wrap and chill for 1 hr. Divide the log into 4 pieces.
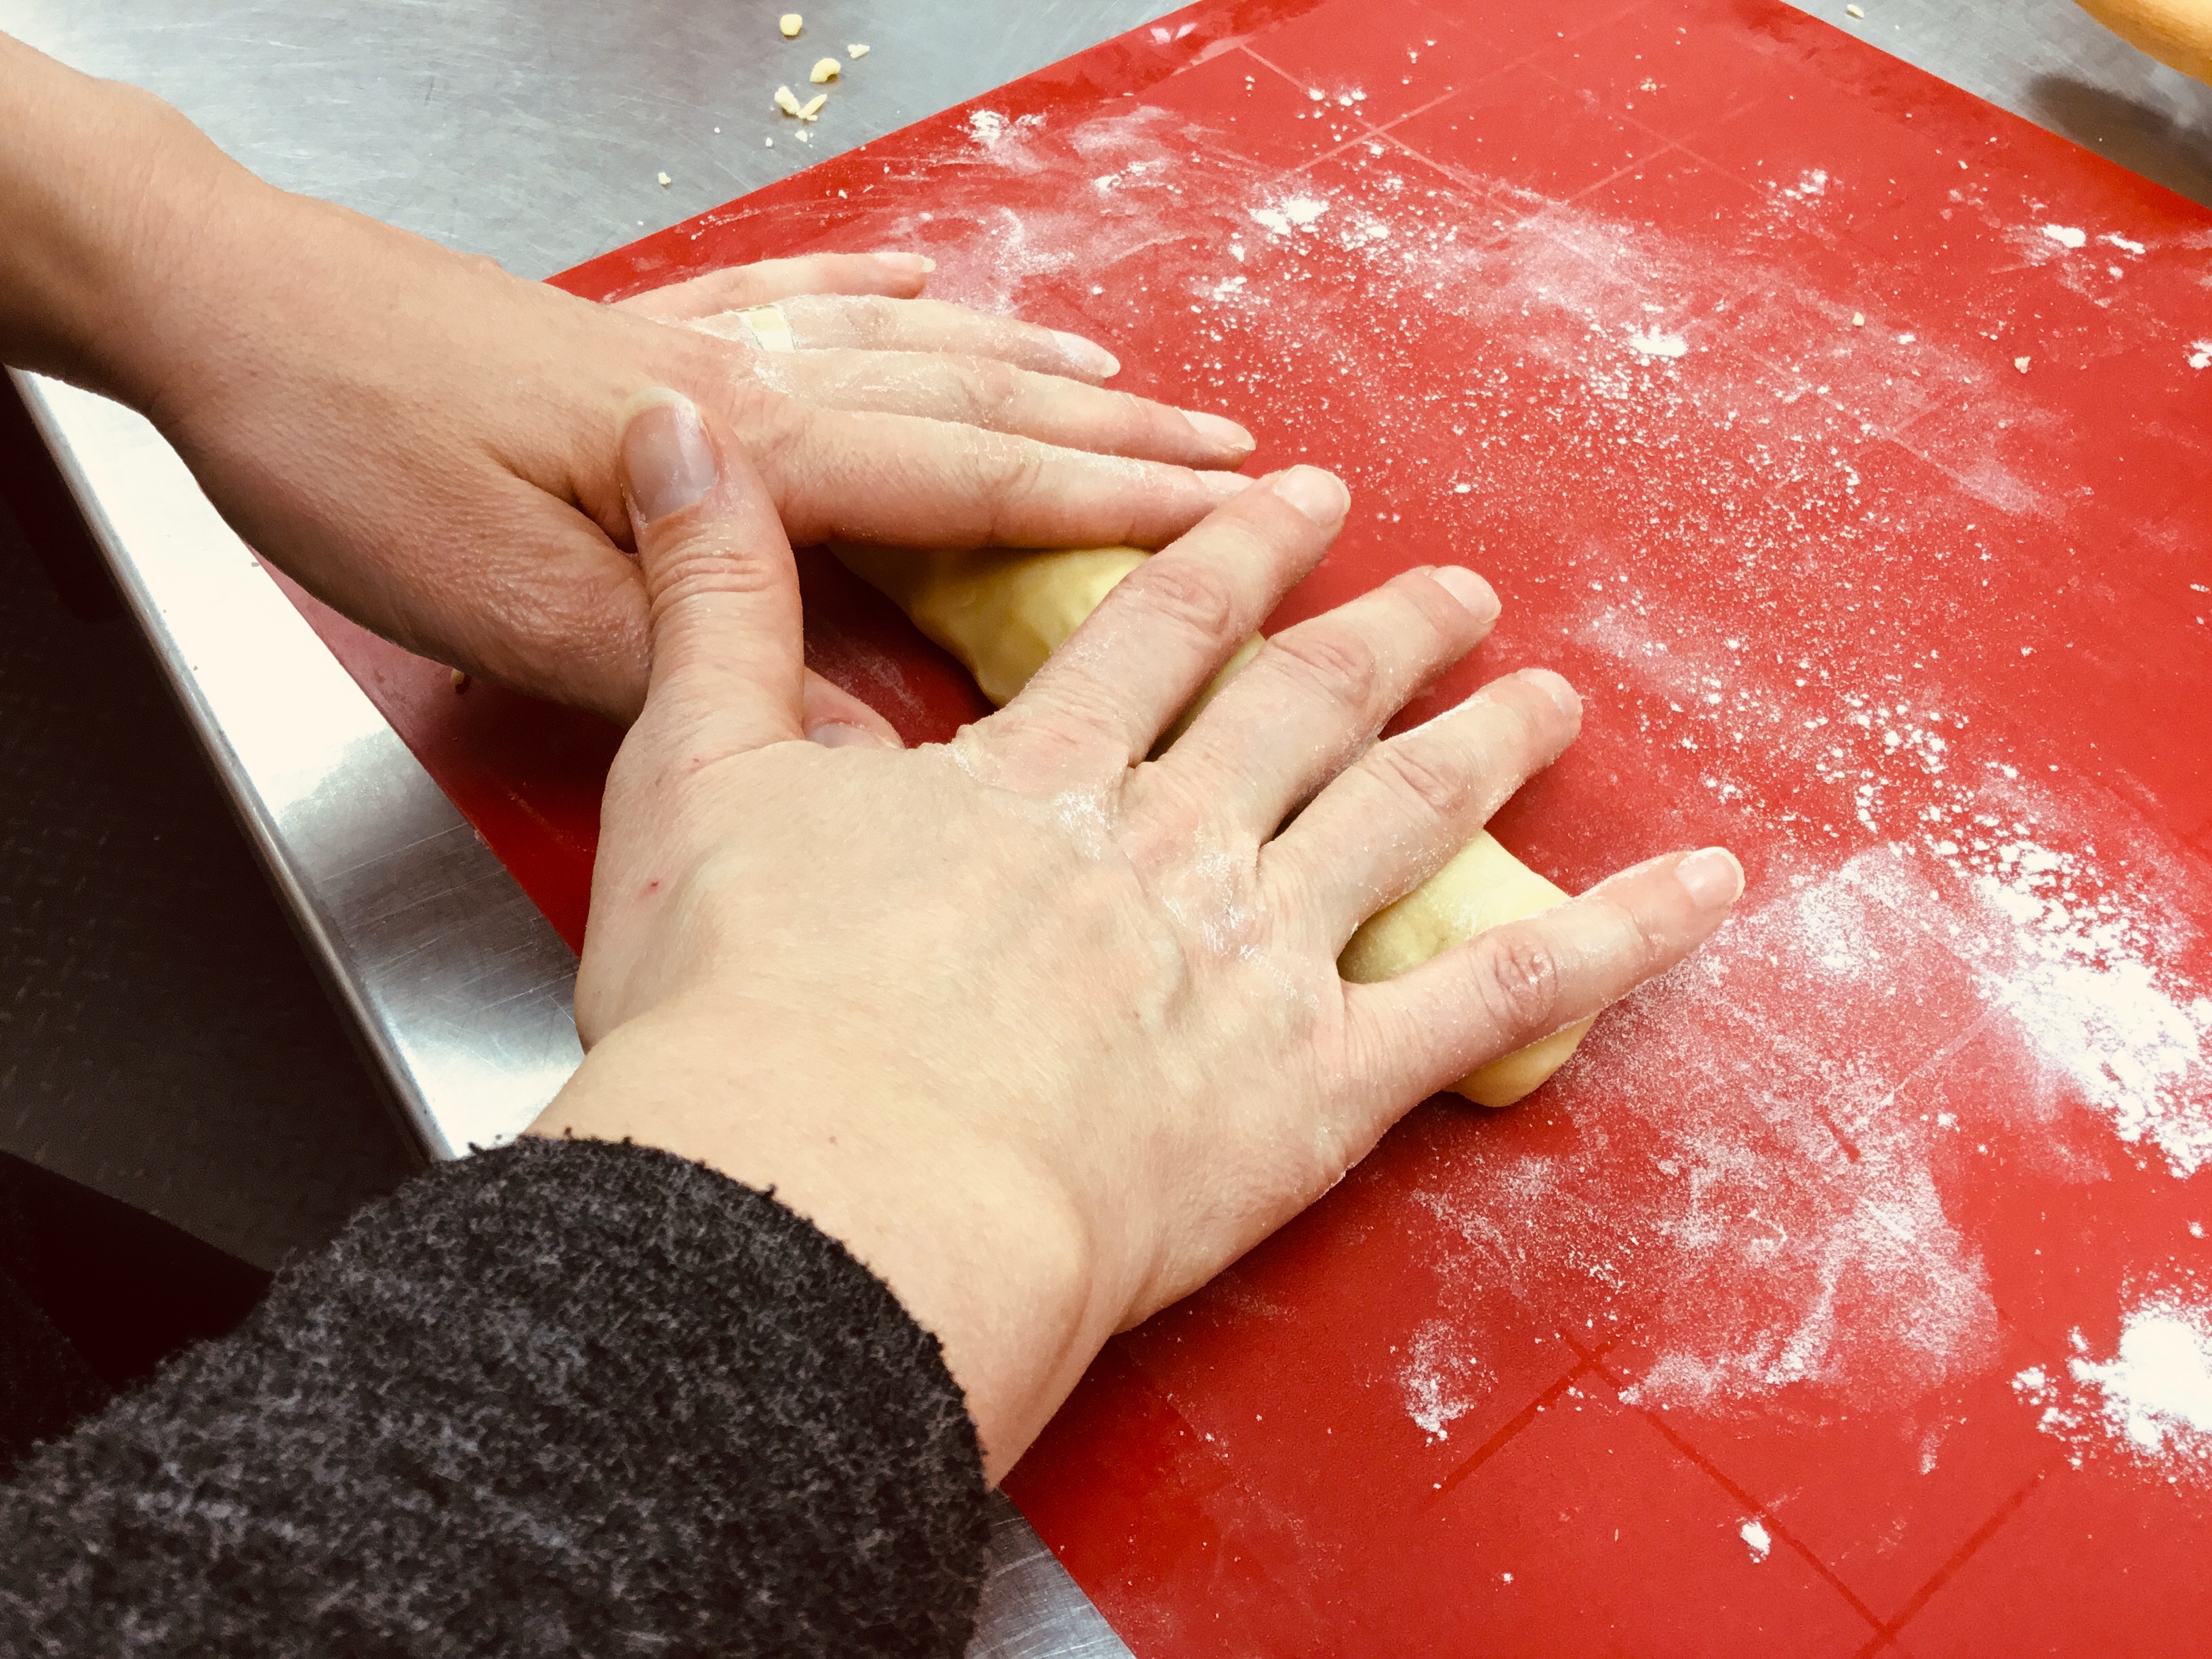
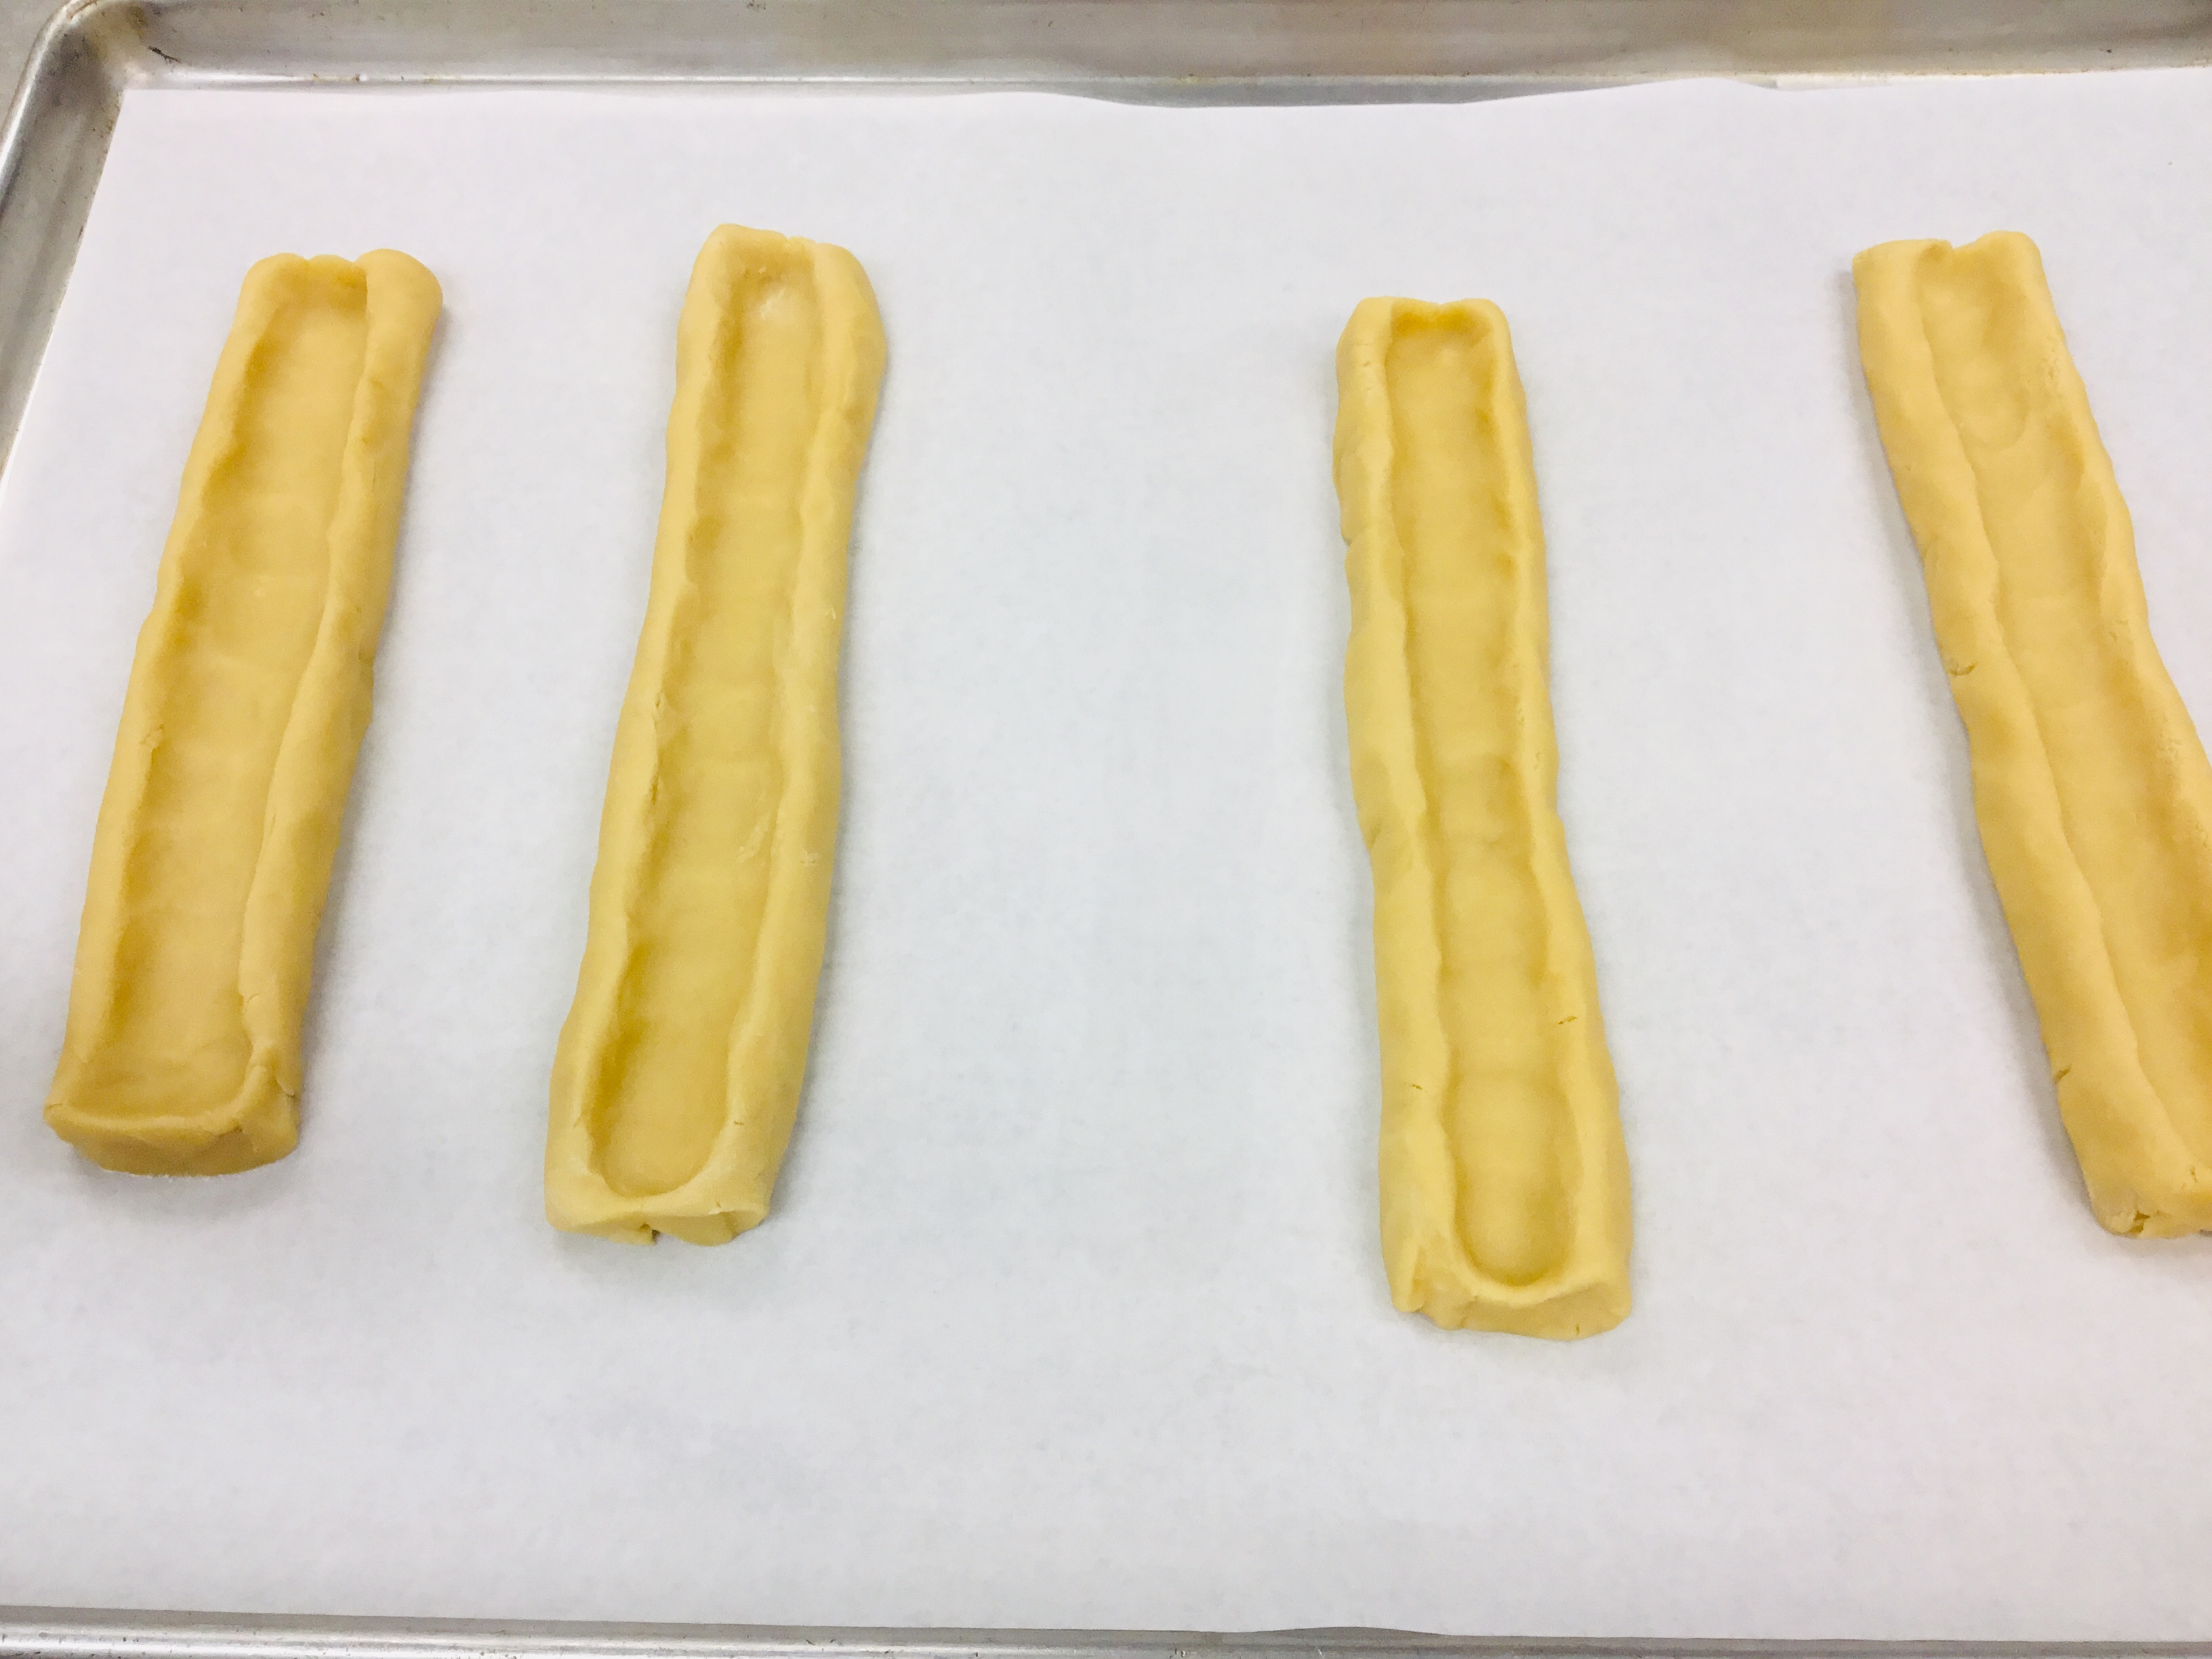
Working with one piece of dough at a time, place the dough in plastic wrap and roll into an 8 inch long rope - place on a parchment covered sheet pan and make a canal down the center with your finger so the log becomes a 8 x 2" rectangle with a channel in the middle.
Spread the apricot puree in the canals.
Bake the cookie sticks in a 350 degree oven for 18-20 min. until the edges are slightly golden.
Transfer to a rack and let them cool.
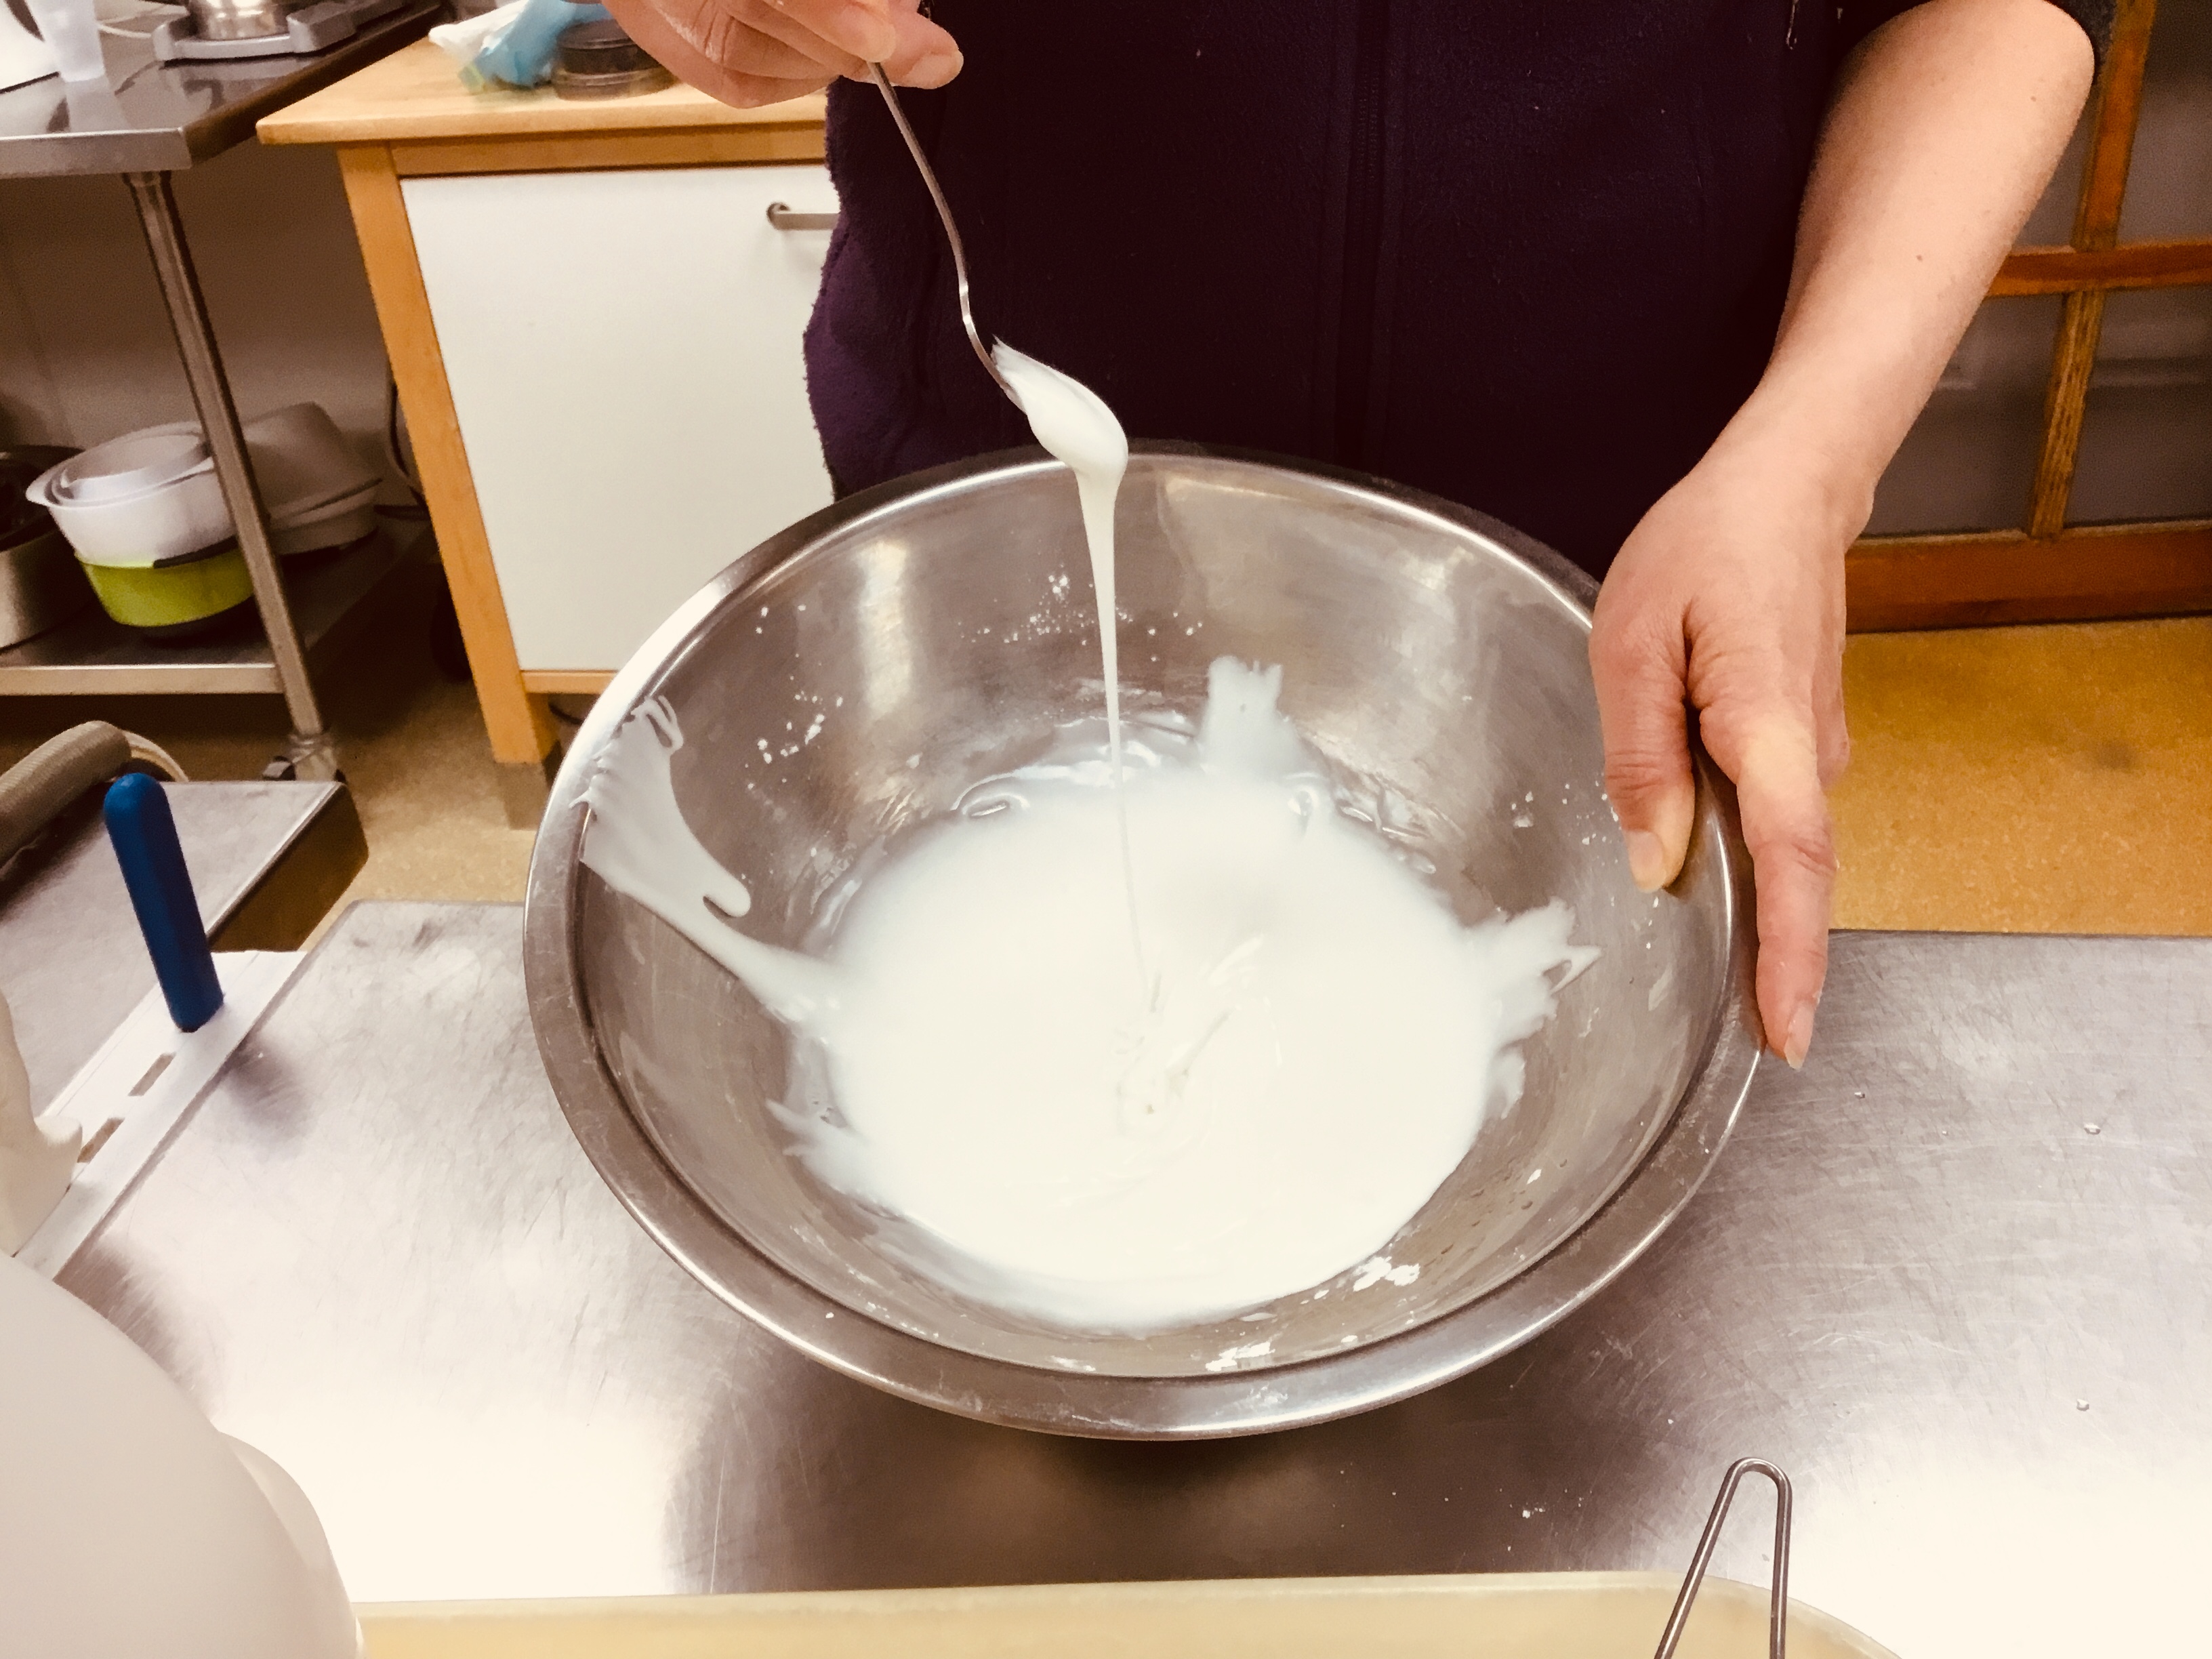
In a small bowl, whisk together the glaze ingredients and add just enough water to make a thick but pour-able icing - you want it to be on the thick side.
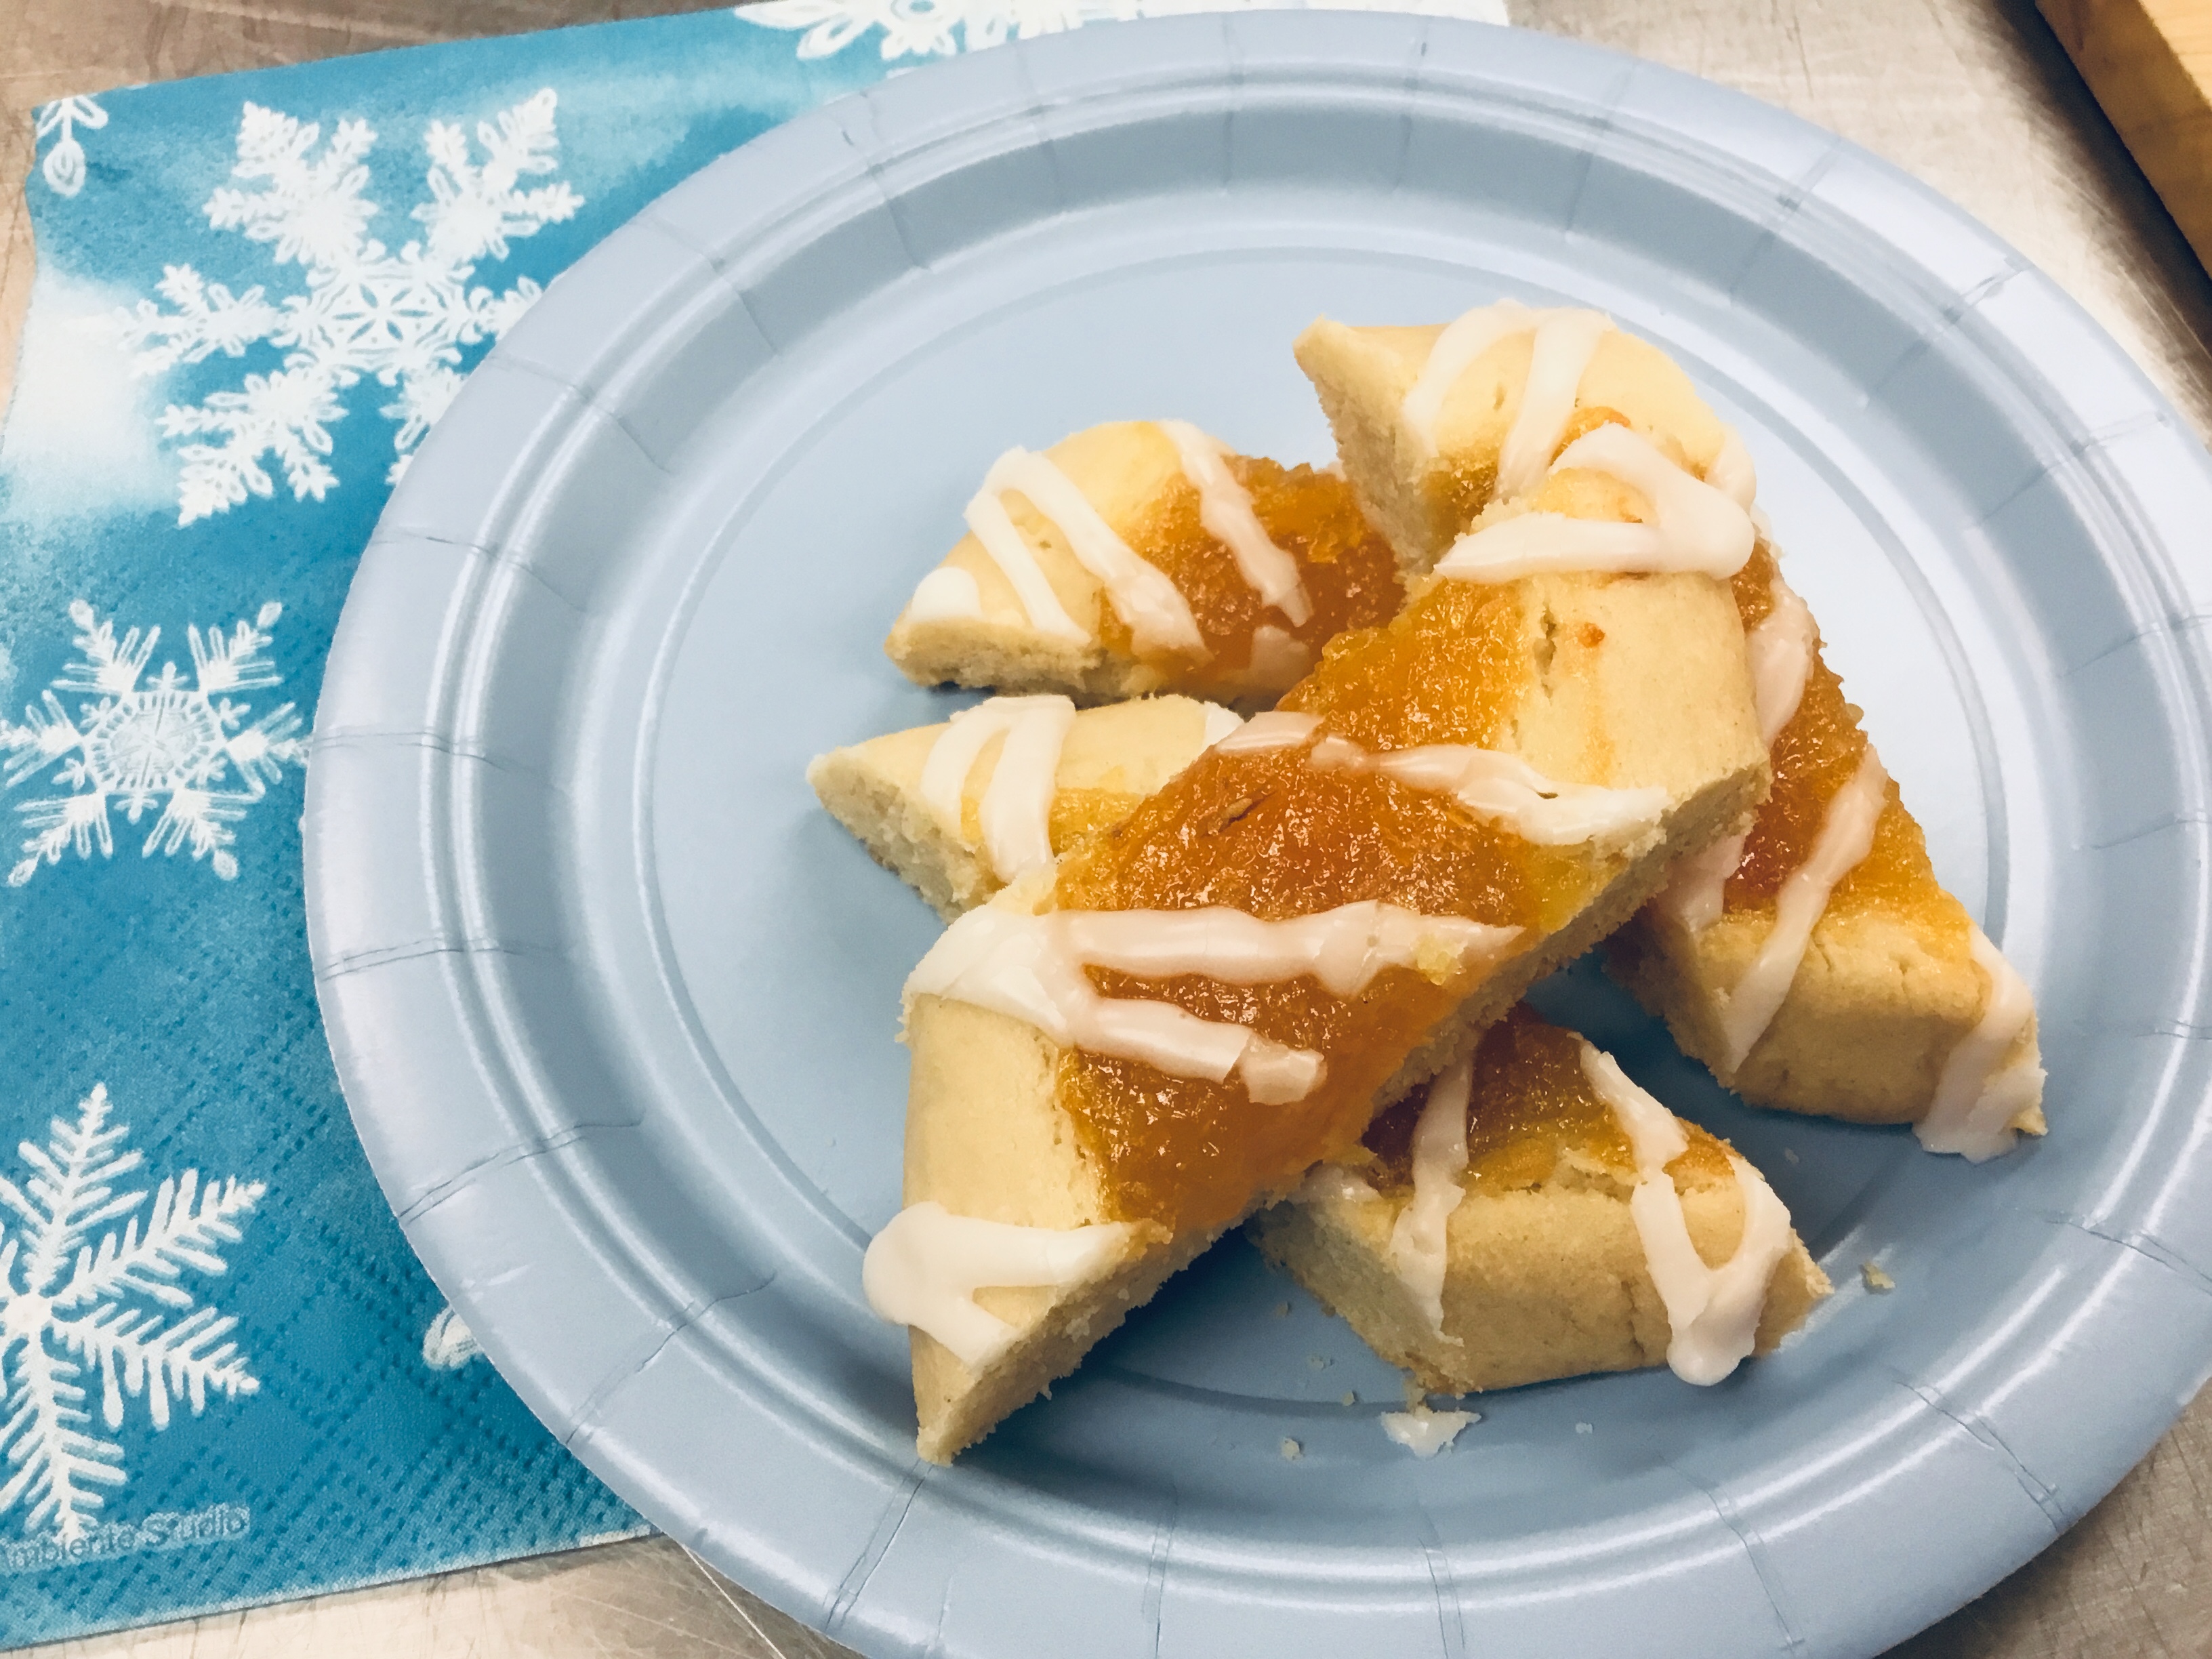
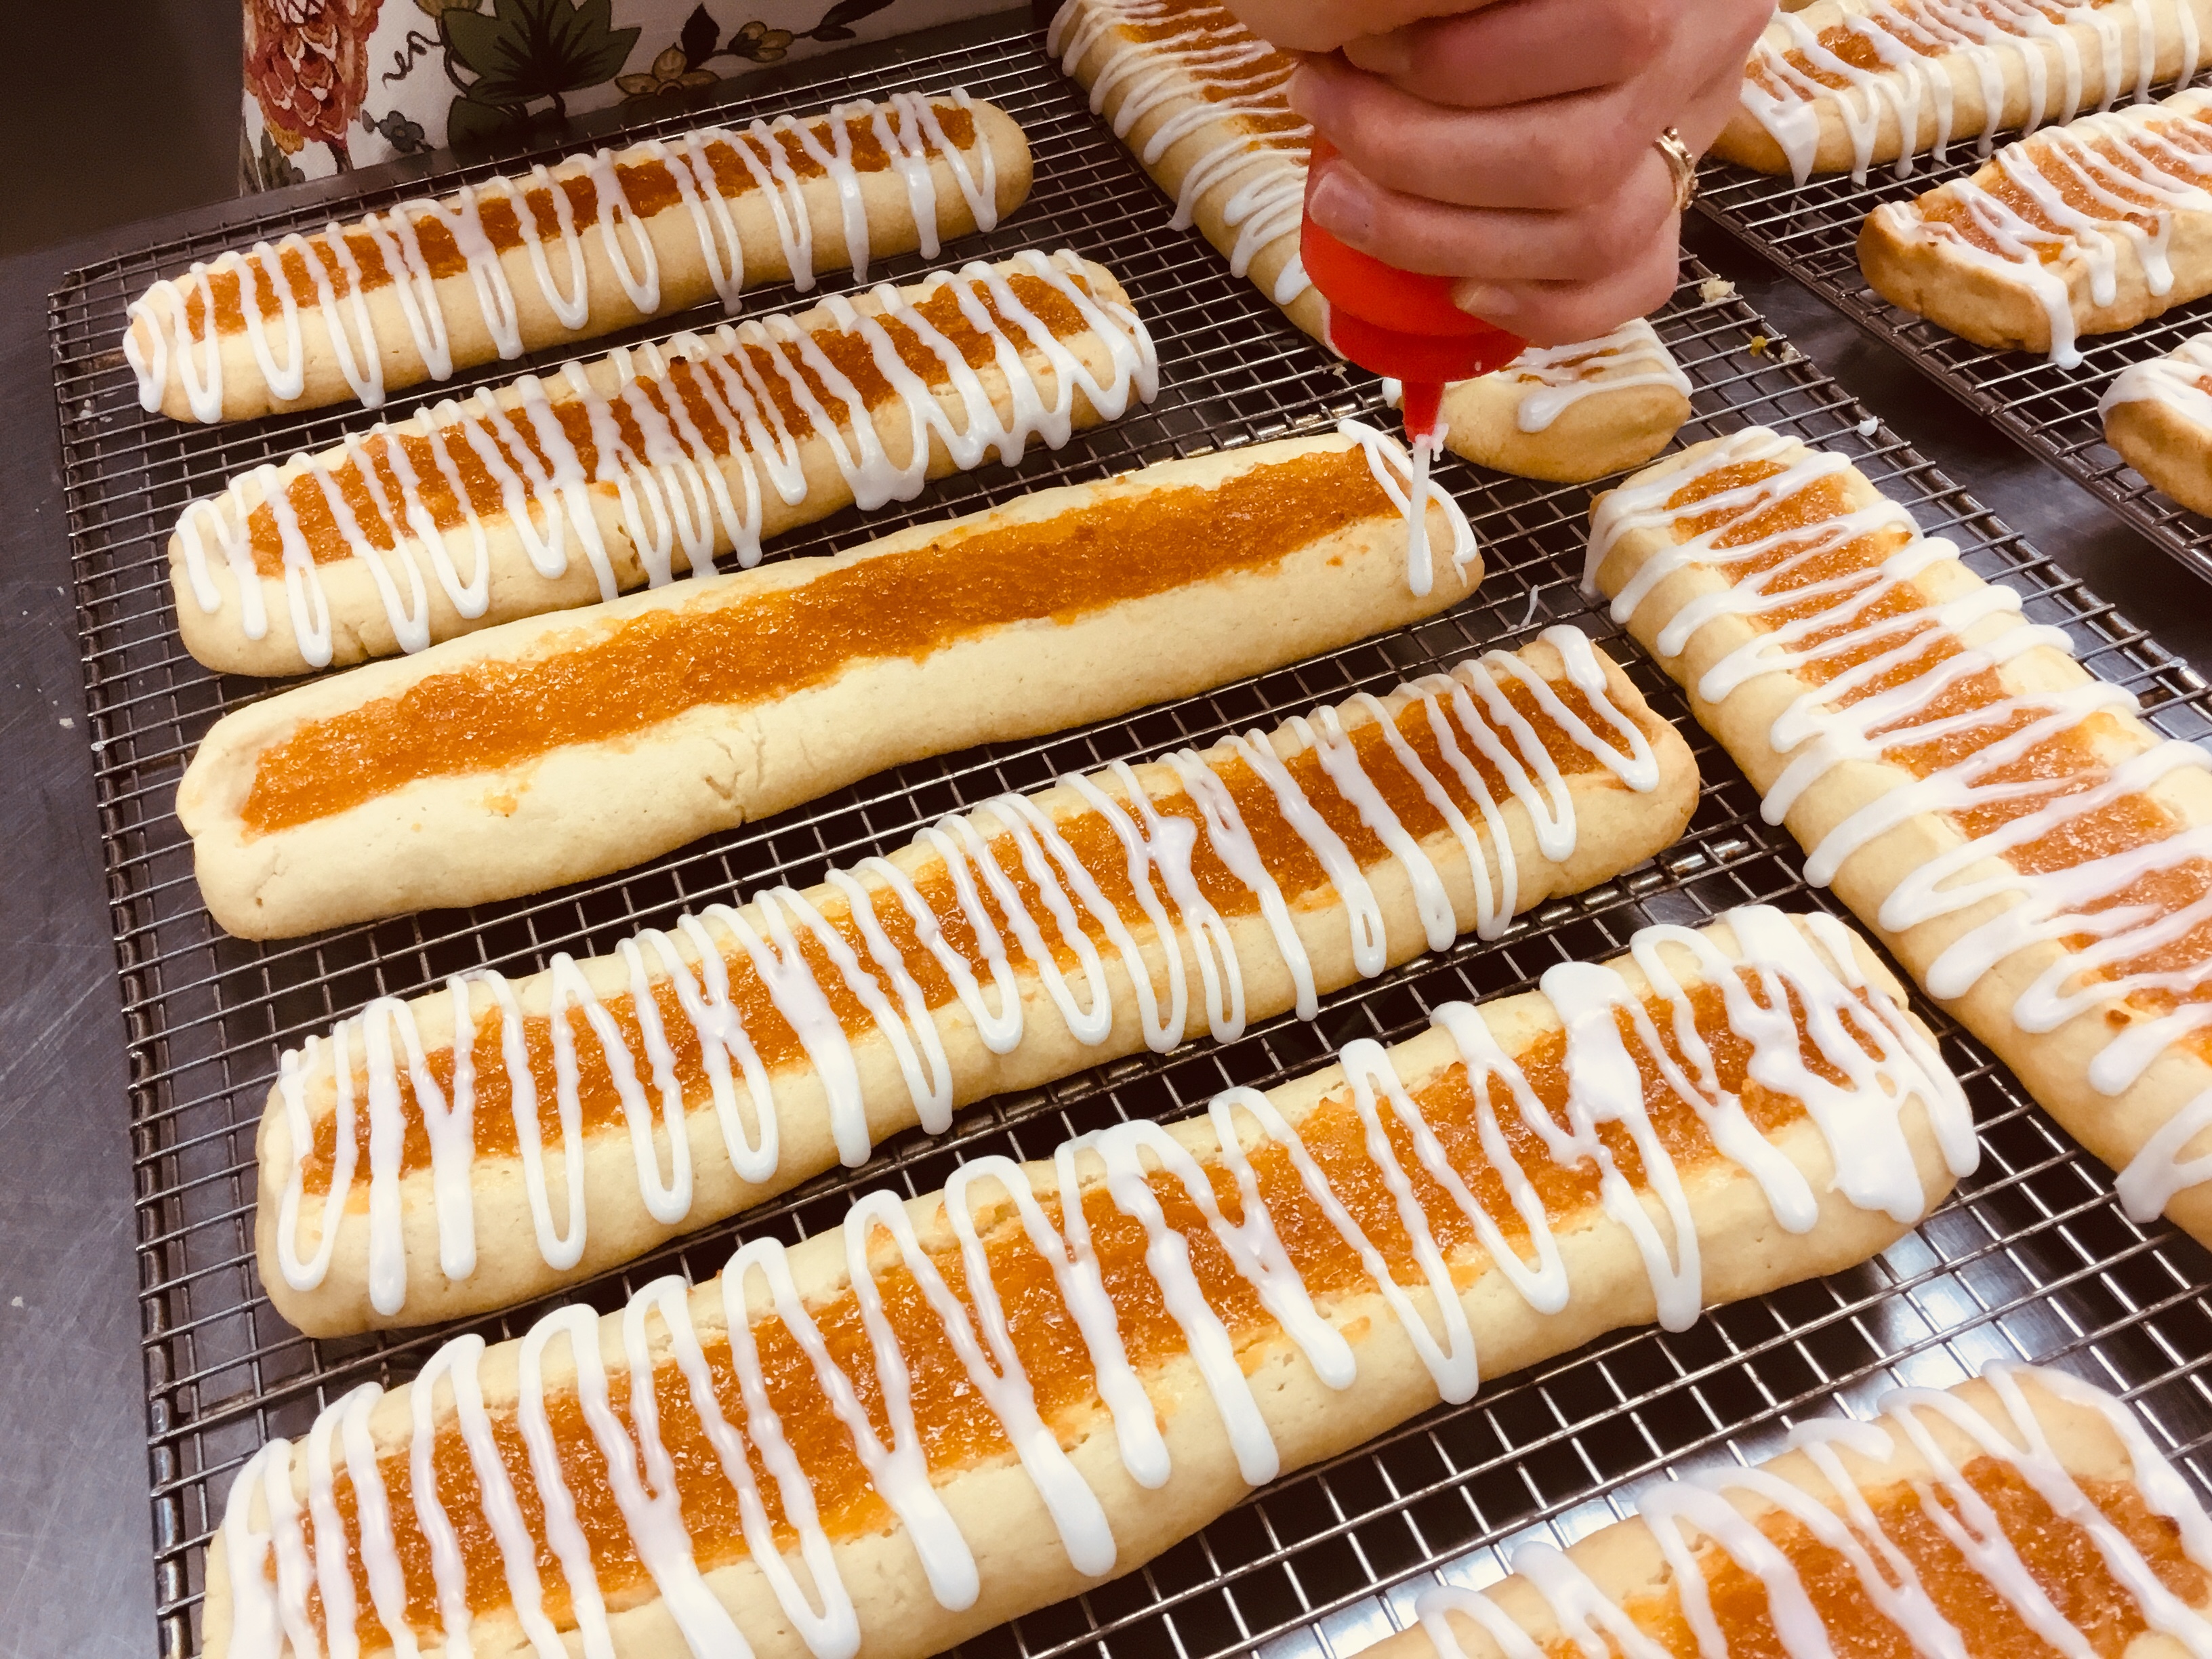
If desired, transfer the glaze to a squeeze bottle or piping bag and drizzle the icing over the cookies.
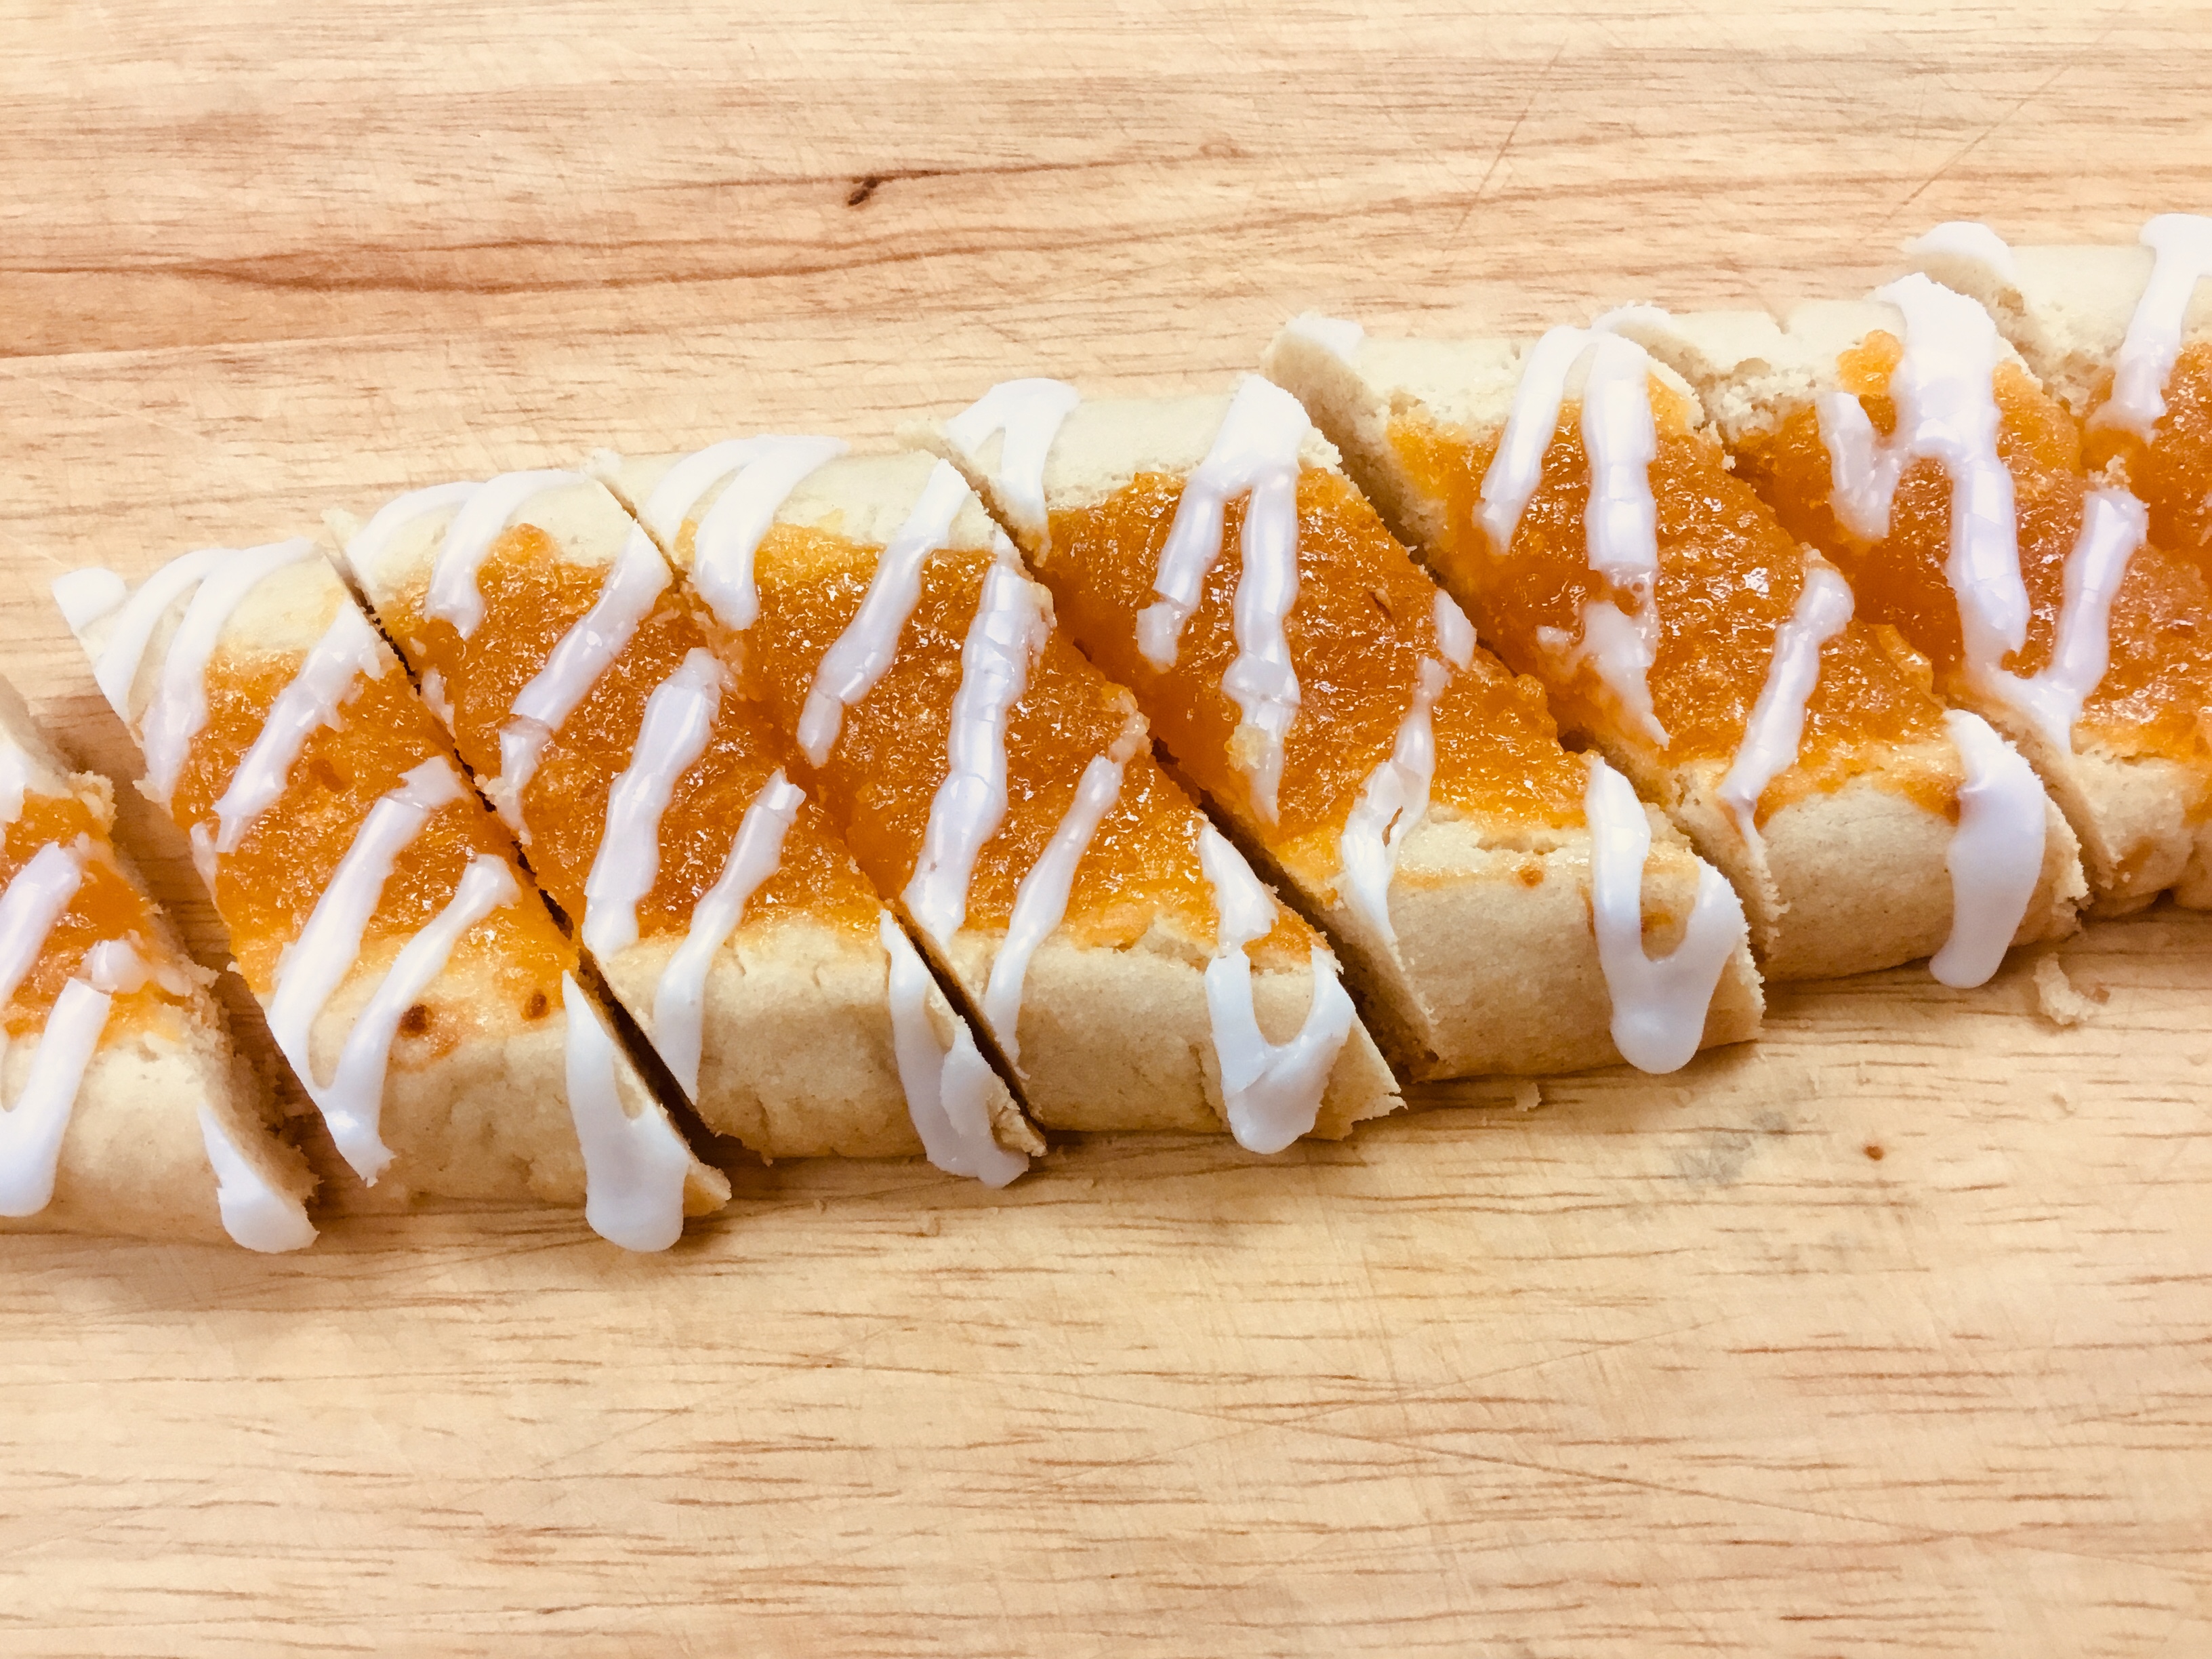
Cut the rectangles diagonally into 1" strips.
The cookies will keep in the freezer or in an airtight container for 1 week.
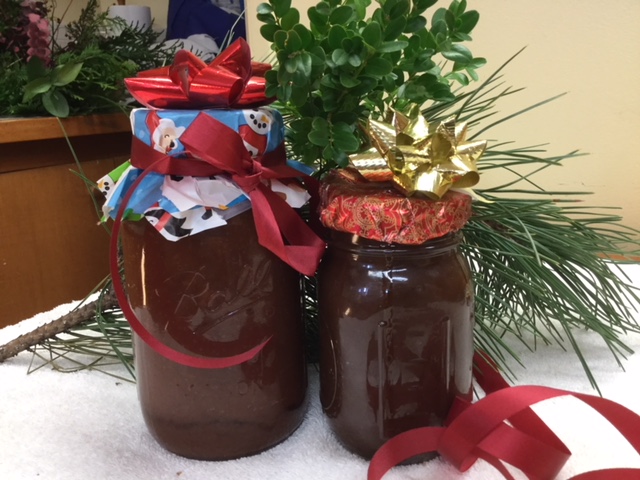
Christmas wouldn’t be “Christmas” without at least a sprinkling of homemade food gifts. However I was not too excited when a sister suggested our making apple butter as one of our gifts to give this year. That is, not until I came down into the convent kitchen early one morning and sampled a “Trial Run” of butter which had been making itself in our slow cooker all night while we had all been fast asleep.
As I ate my last bite of hot buttered toast topped with this delectable wonder I was convinced that this was the perfect “homemade” gift for us to give this Christmas. My only concern being would there be enough left by Christmas eve to give away to others?
Place the apples in a slow cooker. In a separate bowl mix sugars, cinnamon, nutmeg cloves and salt. Combine with apples and mix well.
Cook in slow cooker on low for 10 hours stirring occasionally. The apple mixture will become thick and dark brown.
Uncover and add vanilla. Continue cooking uncovered on low for 2 hours.
Remove from slow cooker and blend using an immersion blender, food processor or a countertop blender and puree the apple butter until completely smooth.
Transfer the mixture into containers or your choice.
Top your favorite toasted bread or muffin with fresh apple butter and enjoy with a steaming mug of tea or coffee for a simple morning treat!
NOTE: This can be frozen or stored up to 2 weeks covered in the
refrigerator.
Years ago, we were asked by the local Episcopal church to help them with their annual Devonshire Tea, a lovely traditional English tea served every summer in the church gardens.
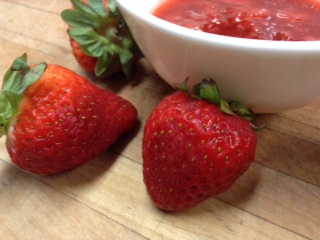
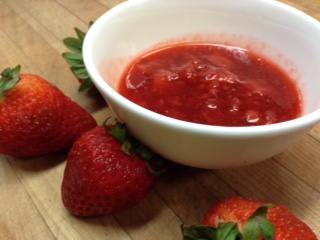
The lady who for many years had been responsible for them, met with me to discuss the details. The simple menu consisted of three items: biscuits, coddled cream, and strawberry preserves. Her main concern was the size and shape of the biscuits. To ensure their correctness, she carefully sketched them on a page from her personal notebook and gave the page to me.
The biscuits’ size and shape were of utmost importance! She was certain I would make the cream perfectly, and as far as the preserves were concerned, any I chose would be fine. My choice was a vibrant colored fresh strawberry jam sometimes referred to as “freezer jam”, although none I’ve ever made stayed around long enough to reach the
freezer!
Perfect for the occasion, it met with great applause and added a most beautiful touch to this splendid event.
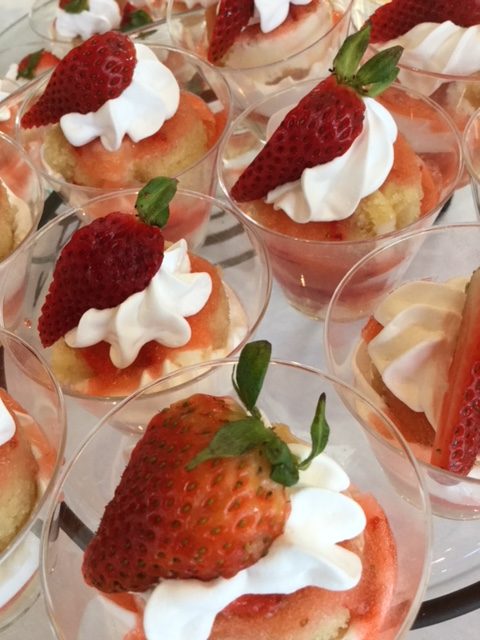
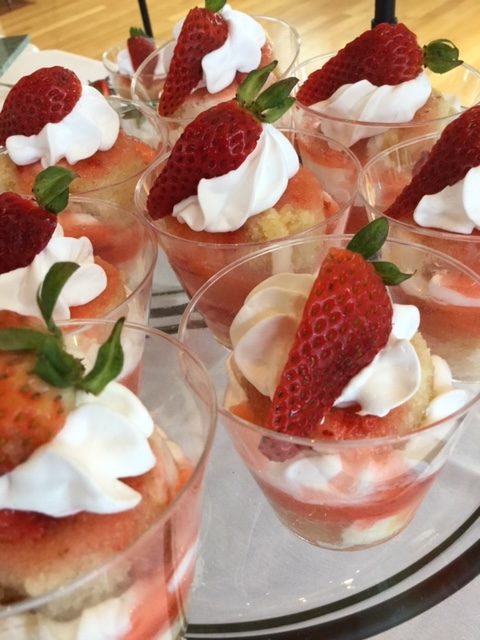
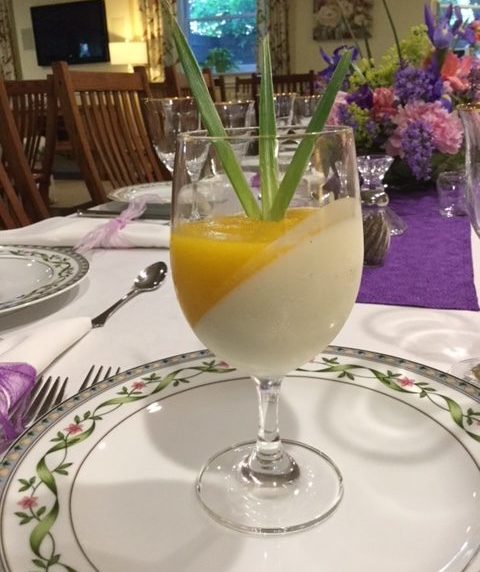
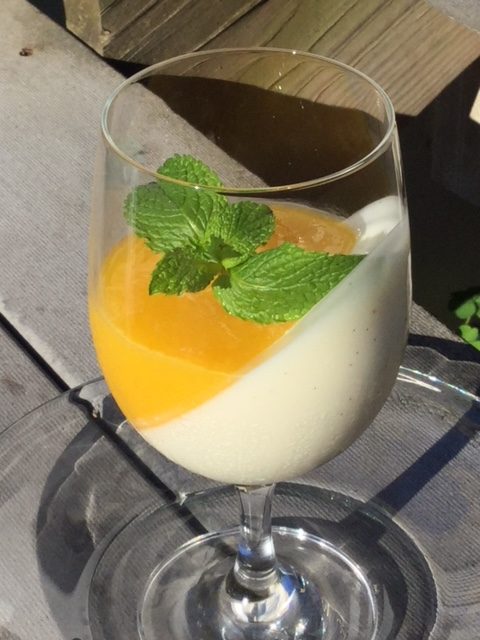
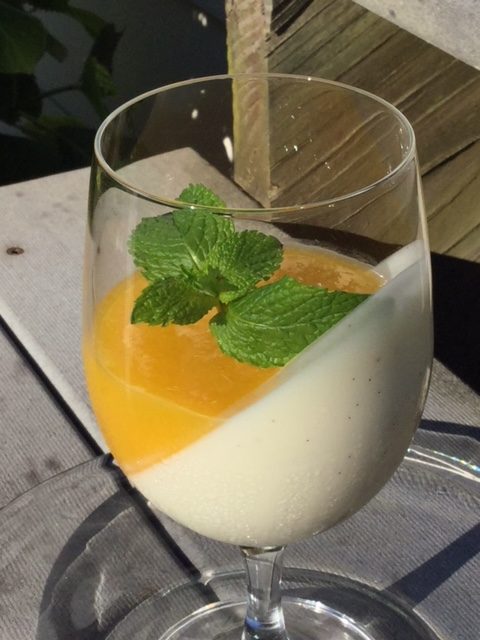
Birthdays are joyous occasions, and with so many Sisters in the Convent, there are bound to be several birthday celebrations each month. This is especially true with what we refer to as “big birthdays”, birthdays that mark a new decade in the life of a sister. Over the weekend, we celebrated the 70th birthday of one of our sisters with a beautiful dinner for all. The meal ended with one of our most favorite desserts: Vanilla Bean Panna Cotta. While not a traditional birthday cake, this was no less festive as it also featured a delicious mango puree.
Dense, creamy and with minimal ingredients you most likely already have in your kitchen, this is a great way to mark special occasions this summer. Served chilled with fresh berries, this may well become a favorite with you and your guests!
Place the cream in a saucepan and scrape out the seeds of the vanilla bean with a knife, adding the seeds to the cream.
Add the sugar and bring to a simmer over medium-low heat, stirring occasionally.
In a separate bowl, sprinkle the gelatin over the milk and let stand until the gelatin softens, about 5 minutes.
Pour the gelatin mixture into the cream and vanilla bean mixture and stir until dissolved.
Add the yogurt and stir to thoroughly incorporate.
Pour evenly into six to eight ramekin and cover with plastic wrap. Chill for 6 hours or overnight for the panna cotta to set.
As this is chilling, prepare the mango puree by combining the fruit, sugar, lemon juice and salt in a blender or food processor. Chill in a bowl until panna cotta is ready to serve.
To Serve
Note: There are several ways to serve this dessert. As shown, we chose to chill the panna cotta at an angle and serve in a clear water goblet for a pleasing visual effect. For the more ambitious, panna cotta can be served inverted on a plate, similar to flan. Below are two methods of serving this dessert--both are equally impressive!
Inverted Method
Once the panna cotta has set, place each ramekin in warm water--the water should be halfway up the sides of the ramekin.
Once this has been in the water bath 1-2 minutes, put your serving plate on top of the ramekin and invert the panna cotta onto the plate.
Spoon the puree over the top and garnish with fruit and fresh mint as desired.
Angled Method
Before making the panna cotta, prepare the glasses you will be serving in, tilting them securely at an angle on a tray. An egg carton works well for this.
When pouring panna cotta mixture, use a funnel and gently fill the tilted glasses to the desired height.
Carefully transfer the tray into the refrigerator, taking care not to bump or jostle the tray, as this will leave a milky residue on the side of the glass.
When fully set (6 hours or overnight) stand the glasses upright and pipe in the mango puree. Piping helps control the puree and keep it from smearing on the glass.