For everything there is a season, and with this post on one of summer’s classic favorite fruits, we publish our final recipe. We know many of you loved trying out the recipes over the years and this post on creamy frozen strawberry squares will be no exception!
While this is the final new recipe/post for this blog – the entire searchable library of recipes will remain here on the site as always. The recipe search option can be used to find recipes that feature a certain ingredient, or perhaps an old favorite.
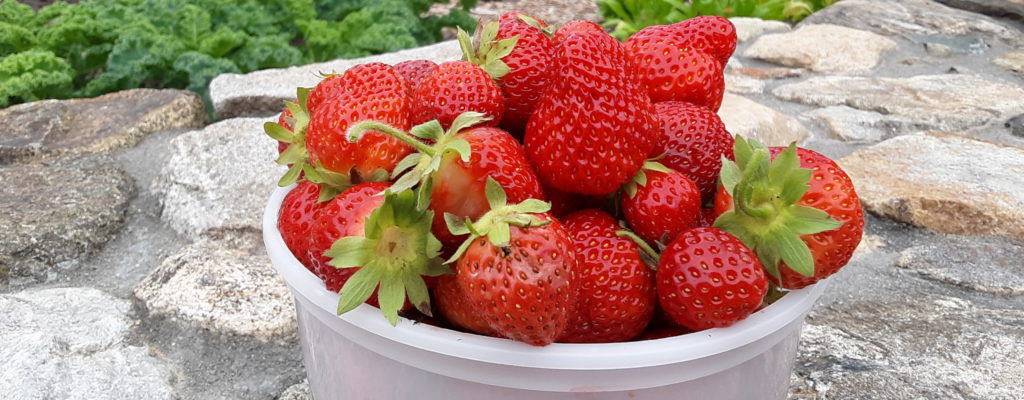
Today’s post features the strawberry – so abundant in the summer months!
Its surplus gives thoughts to strawberry rhubarb pie, a sisterhood favorite, the time honored classic strawberry shortcake, as well as other new ideas. A particularly bumper crop of strawberries this year has given us an opportunity to experiment and try some fresh ideas. After working with different combinations of crunchy crumbs and creamy strawberry fillings, this one proves to be a winner and captures the essence of Summer!
While the posts for this website are ending, we will be continuing to publish “Daily Bread” – a daily spiritual meditation on the Community of Jesus website that includes an excerpt from the Liturgy of the Hours, a meditation, a prayer and the lectionary readings. The “Daily Bread” can also be delivered to your mailbox.
In a large bowl, toss together topping ingredients and then spread out on a baking sheet
Toast in oven until walnuts are fragrant and crumbs are golden. Set aside.
Creamy Strawberry Filling
Spray a 8x11 or 9x13 pan with nonstick spray
Place strawberries in blender and puree until smooth (saving a few whole ones aside for garnish)
In mixing bowl, beat heavy cream until stiff peaks form; set aside in another bowl
In same mixing bowl, beat cream cheese and powdered sugar until creamy, then add condensed milk, vanilla, pureed strawberries;mix slowly until combined
Fold in whipped cream, until partially blended
Spread half of the toasted crumbs into baking dish, followed by strawberry filling
Sprinkle remaining crumbs on top and place in freezer for 2 or more hours, until frozen
When thoroughly frozen, remove from freezer 1 half hour before serving; cut into squares and serve with whipped cream topping and fresh strawberry garnish
Sunday breakfast is an opportunity to make something a bit more special in the Convent. With the start of summer and still in our quasi “stay at home” status, this Sunday was no different. These scones laced with Cape Cod flavor were the perfect accompaniment to fluffy scrambled eggs and a hot cup of coffee. You can even prepare them the night before and bake them fresh in the morning. We hope you enjoy them as much as we did.
Print Recipe
Votes: 3
Rating: 4
You:
Rate this recipe!
Cape Cod Cranberry Scones with a Summery Lemon Glaze
Sift the flour, baking powder, sugar and salt into a large bowl, add zest of one orange. Cut in butter using a pastry blender until it resembles small peas. Stir in the craisins.
Mix together 1/2 cup milk and sour cream in a measuring cup. Pour all at once into the dry ingredients, and stir gently until well blended. Do not overwork the dough or they will be tough.
With floured hands, pat the dough into one large disk about 1" tall. Place the disk on a cookie sheet lined with parchment and with a sharp knife or bench knife, score into 8 triangles cutting almost all the way through the dough. (If not baking until the next day, cover tightly with plastic wrap and refrigerate at this point.)
Whisk together the egg and 1 tablespoon of milk or heavy cream. Brush the top of the scone with the egg wash and sprinkle with 1 Tbsp. sugar. Let them rest for about 10 minutes.
Bake for 20-25 minutes, until the tops are golden brown, but not deep brown and the scone is cooked through. Cool for about 10 min. while preparing the glaze.
Glaze
Mix the lemon juice with the powdered sugar until dissolved in a microwave-safe bowl. Whisk in the butter and lemon zest. Microwave for 30 seconds and whisk until the glaze is smooth.
Drizzle the glaze over the top of the scones. Let it set a minute before serving. Enjoy!
Tonight, our Convent was humming with Christmas cheer as we readied our home for Christmas. Some wrapped presents to send to families, other Sisters spent time catching up with old friends as they penned their lovely cards. In the kitchen, we turned on Bing Crosby and poured over old fashioned family recipes as we pondered which cookies we would make this year. The royal icing was prepared and crispy butter cookies were being decorated with sprinkles covering every surface. I remembered a cookie that I hadn’t baked in years and a favorite to be sure. In fact, you won’t find this anywhere else on the internet, at least I couldn’t. Cut from an old magazine, pressed onto an index card and covered in plastic, this shows how treasured this recipe is. Sometimes baking can restore wonderful memories of times past and other times it just puts a smile on your face, honey in your belly and much joy for the adventures ahead. I love Christmas. The beauty, the magic and most of all the precious gift that is awaiting us in the form of a little baby on Christmas morning.
May the season of light be yours this year. Blessed Christmas!
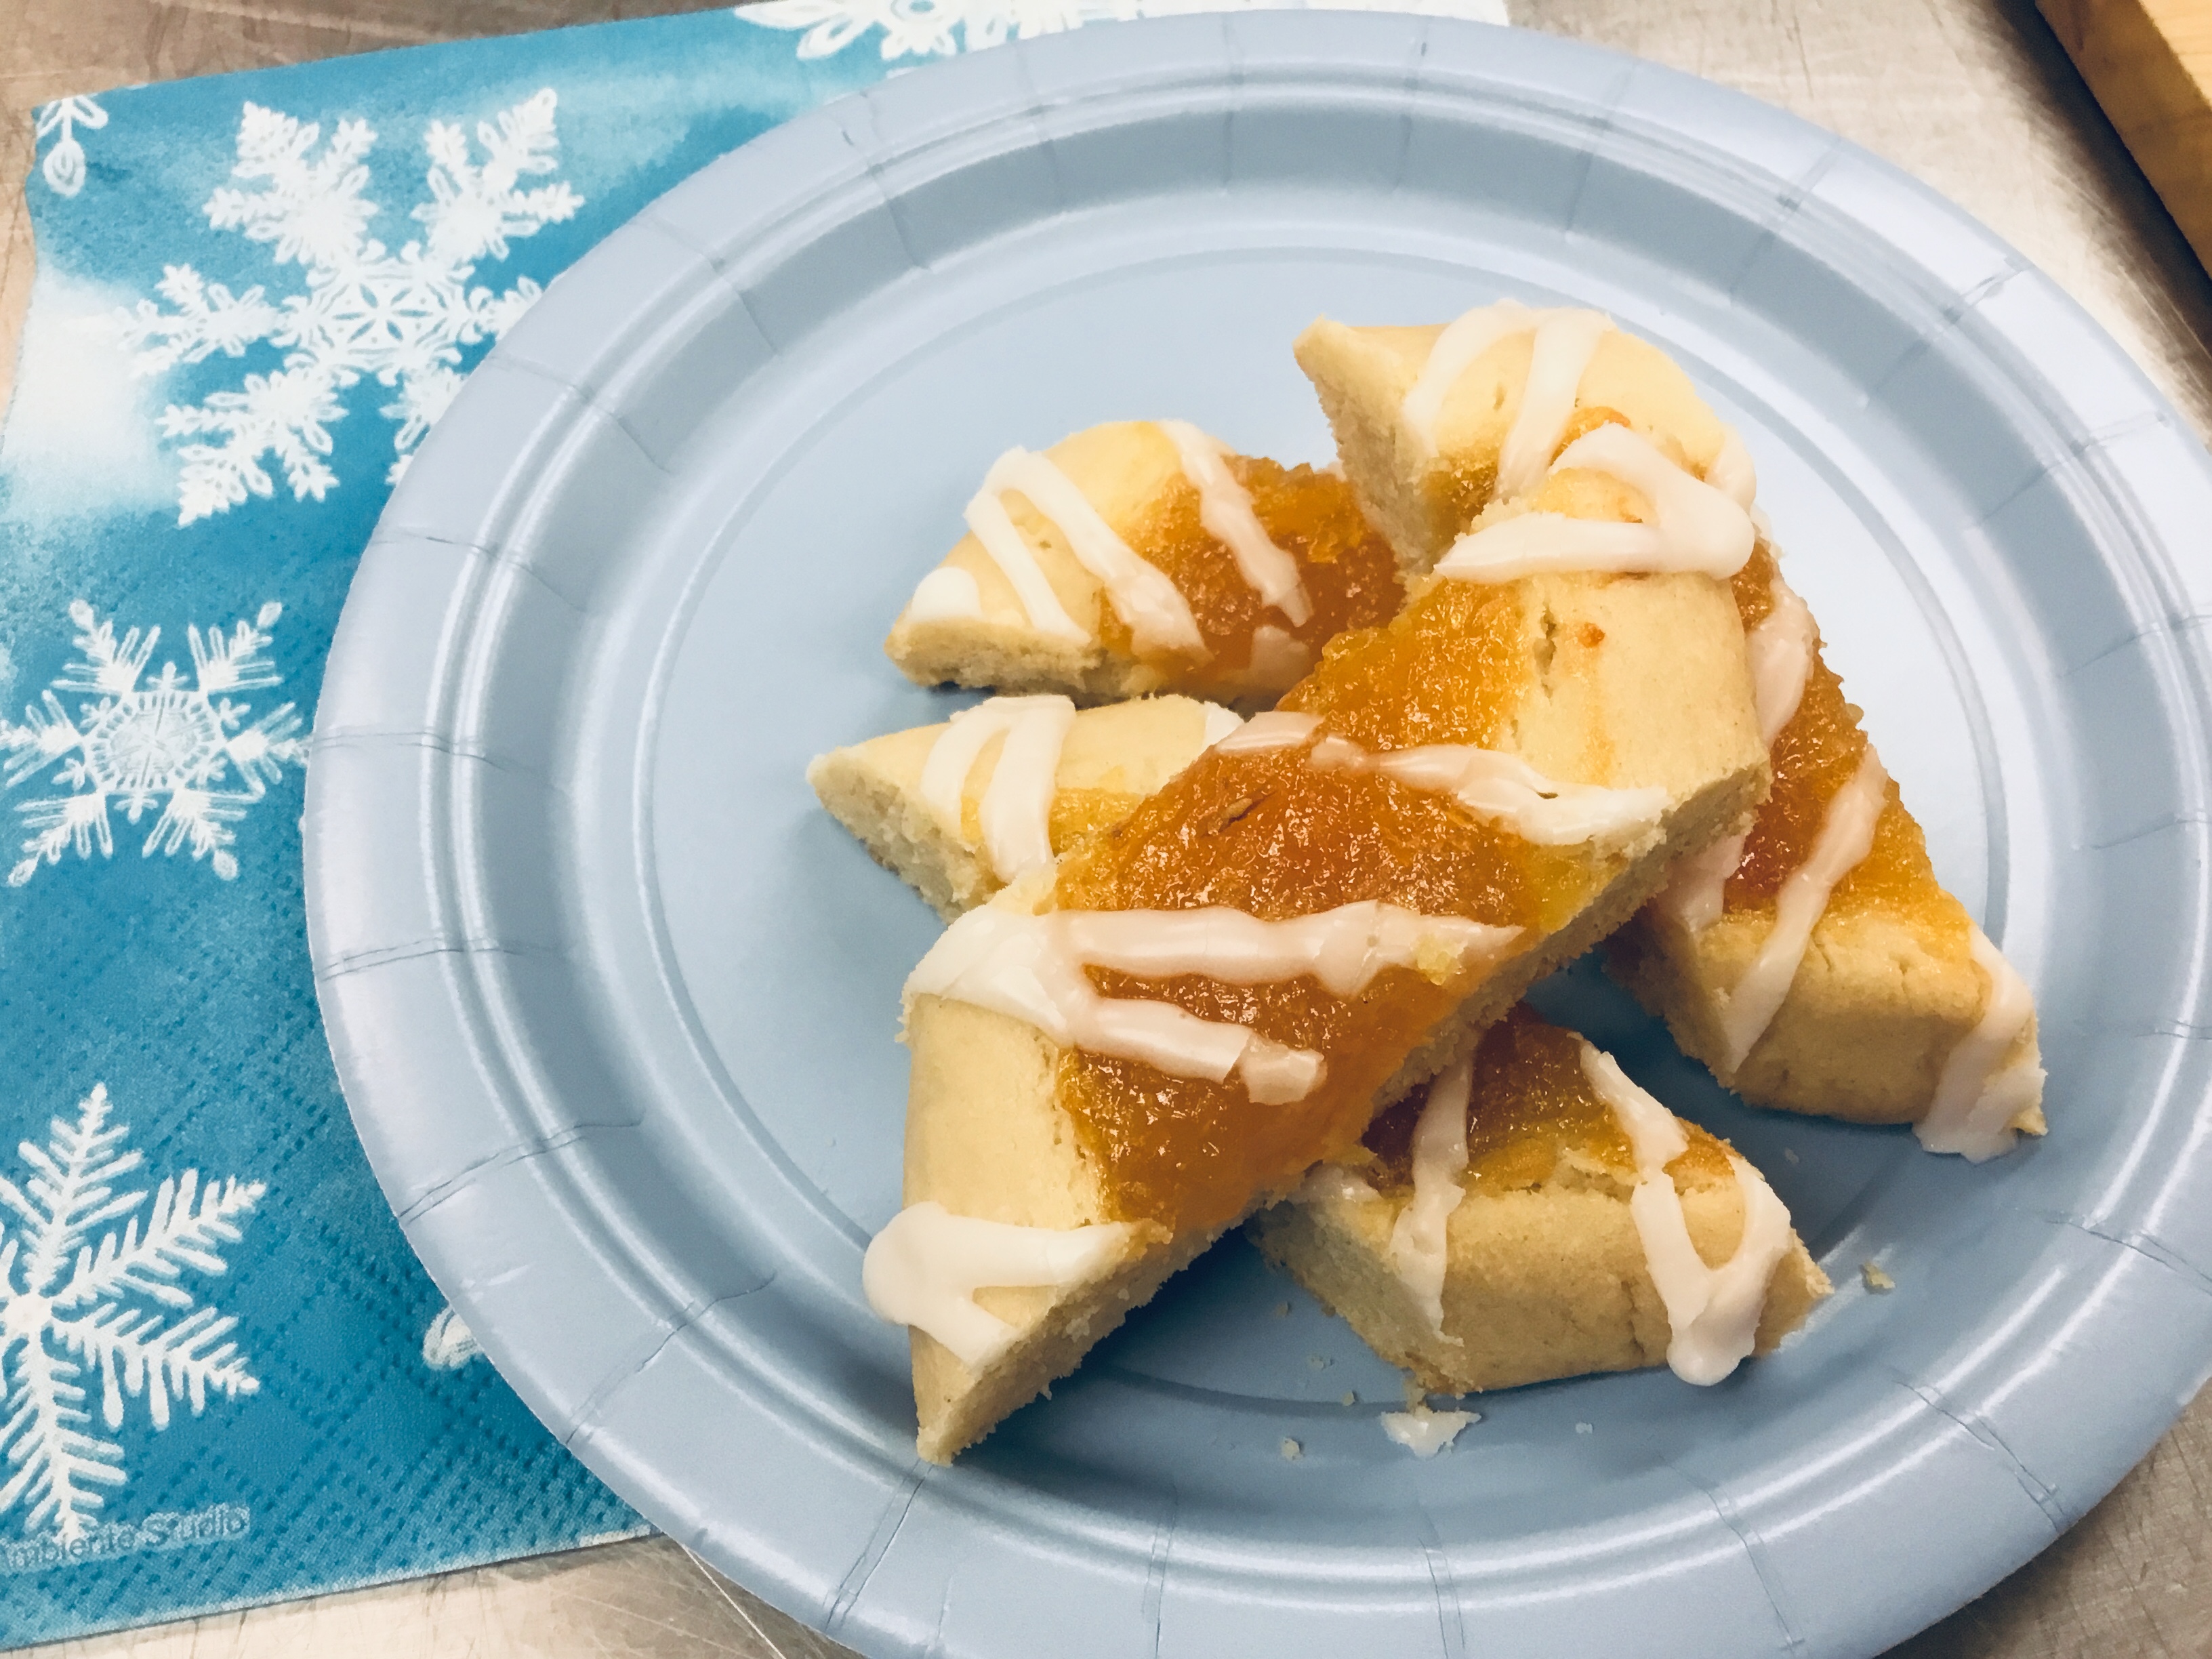
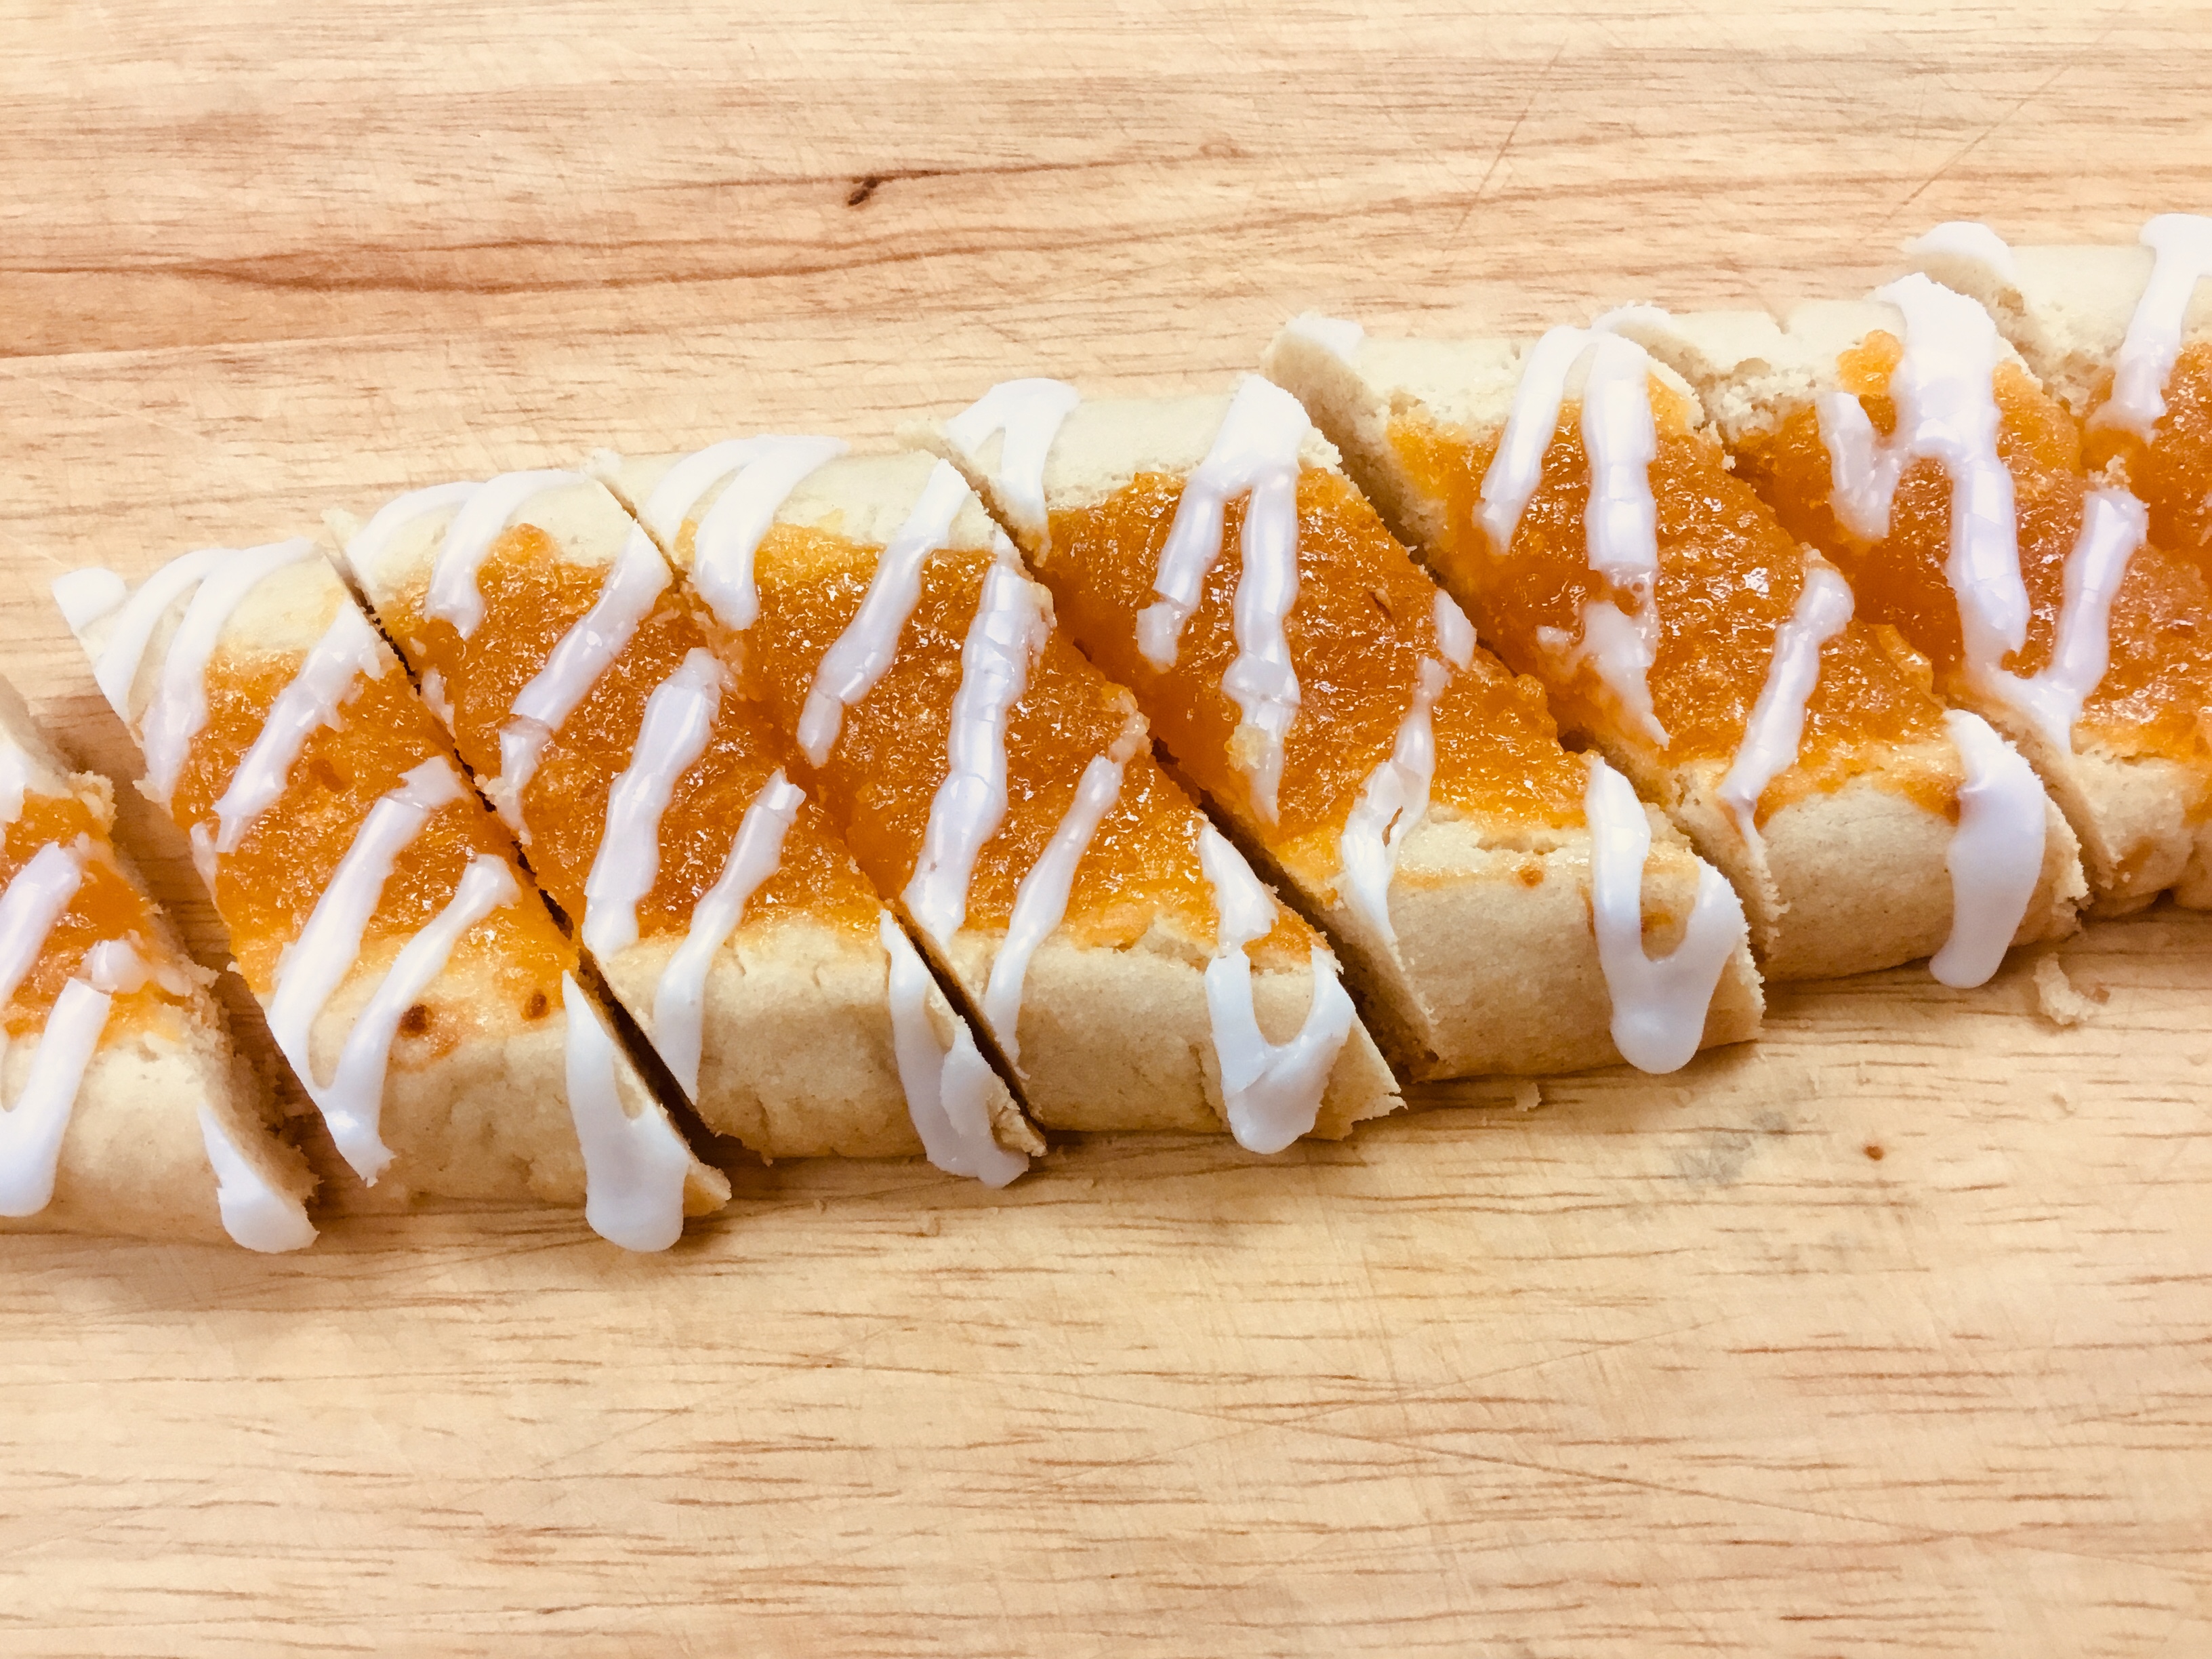
To make the filling: In a small saucepan, combine the apricots, sugar and water and simmer for 15-18 min. or until the liquid is reduced by half and add the rum or brandy. Let the mixture cool slightly and in a food processor or blender, puree it.
Make the shortbread cookie dough. In a bowl, whisk together the flour, baking powder and salt. In a separate standing mixer, beat together the butter, sugar, and brown sugar until the mixture is light and fluffy. Beat in the vanilla and the egg, beating the mixture until it is well combined. Slowly, add the flour mixture in stages and mix until just combined, but don't over mix or your shortbread will be tough.
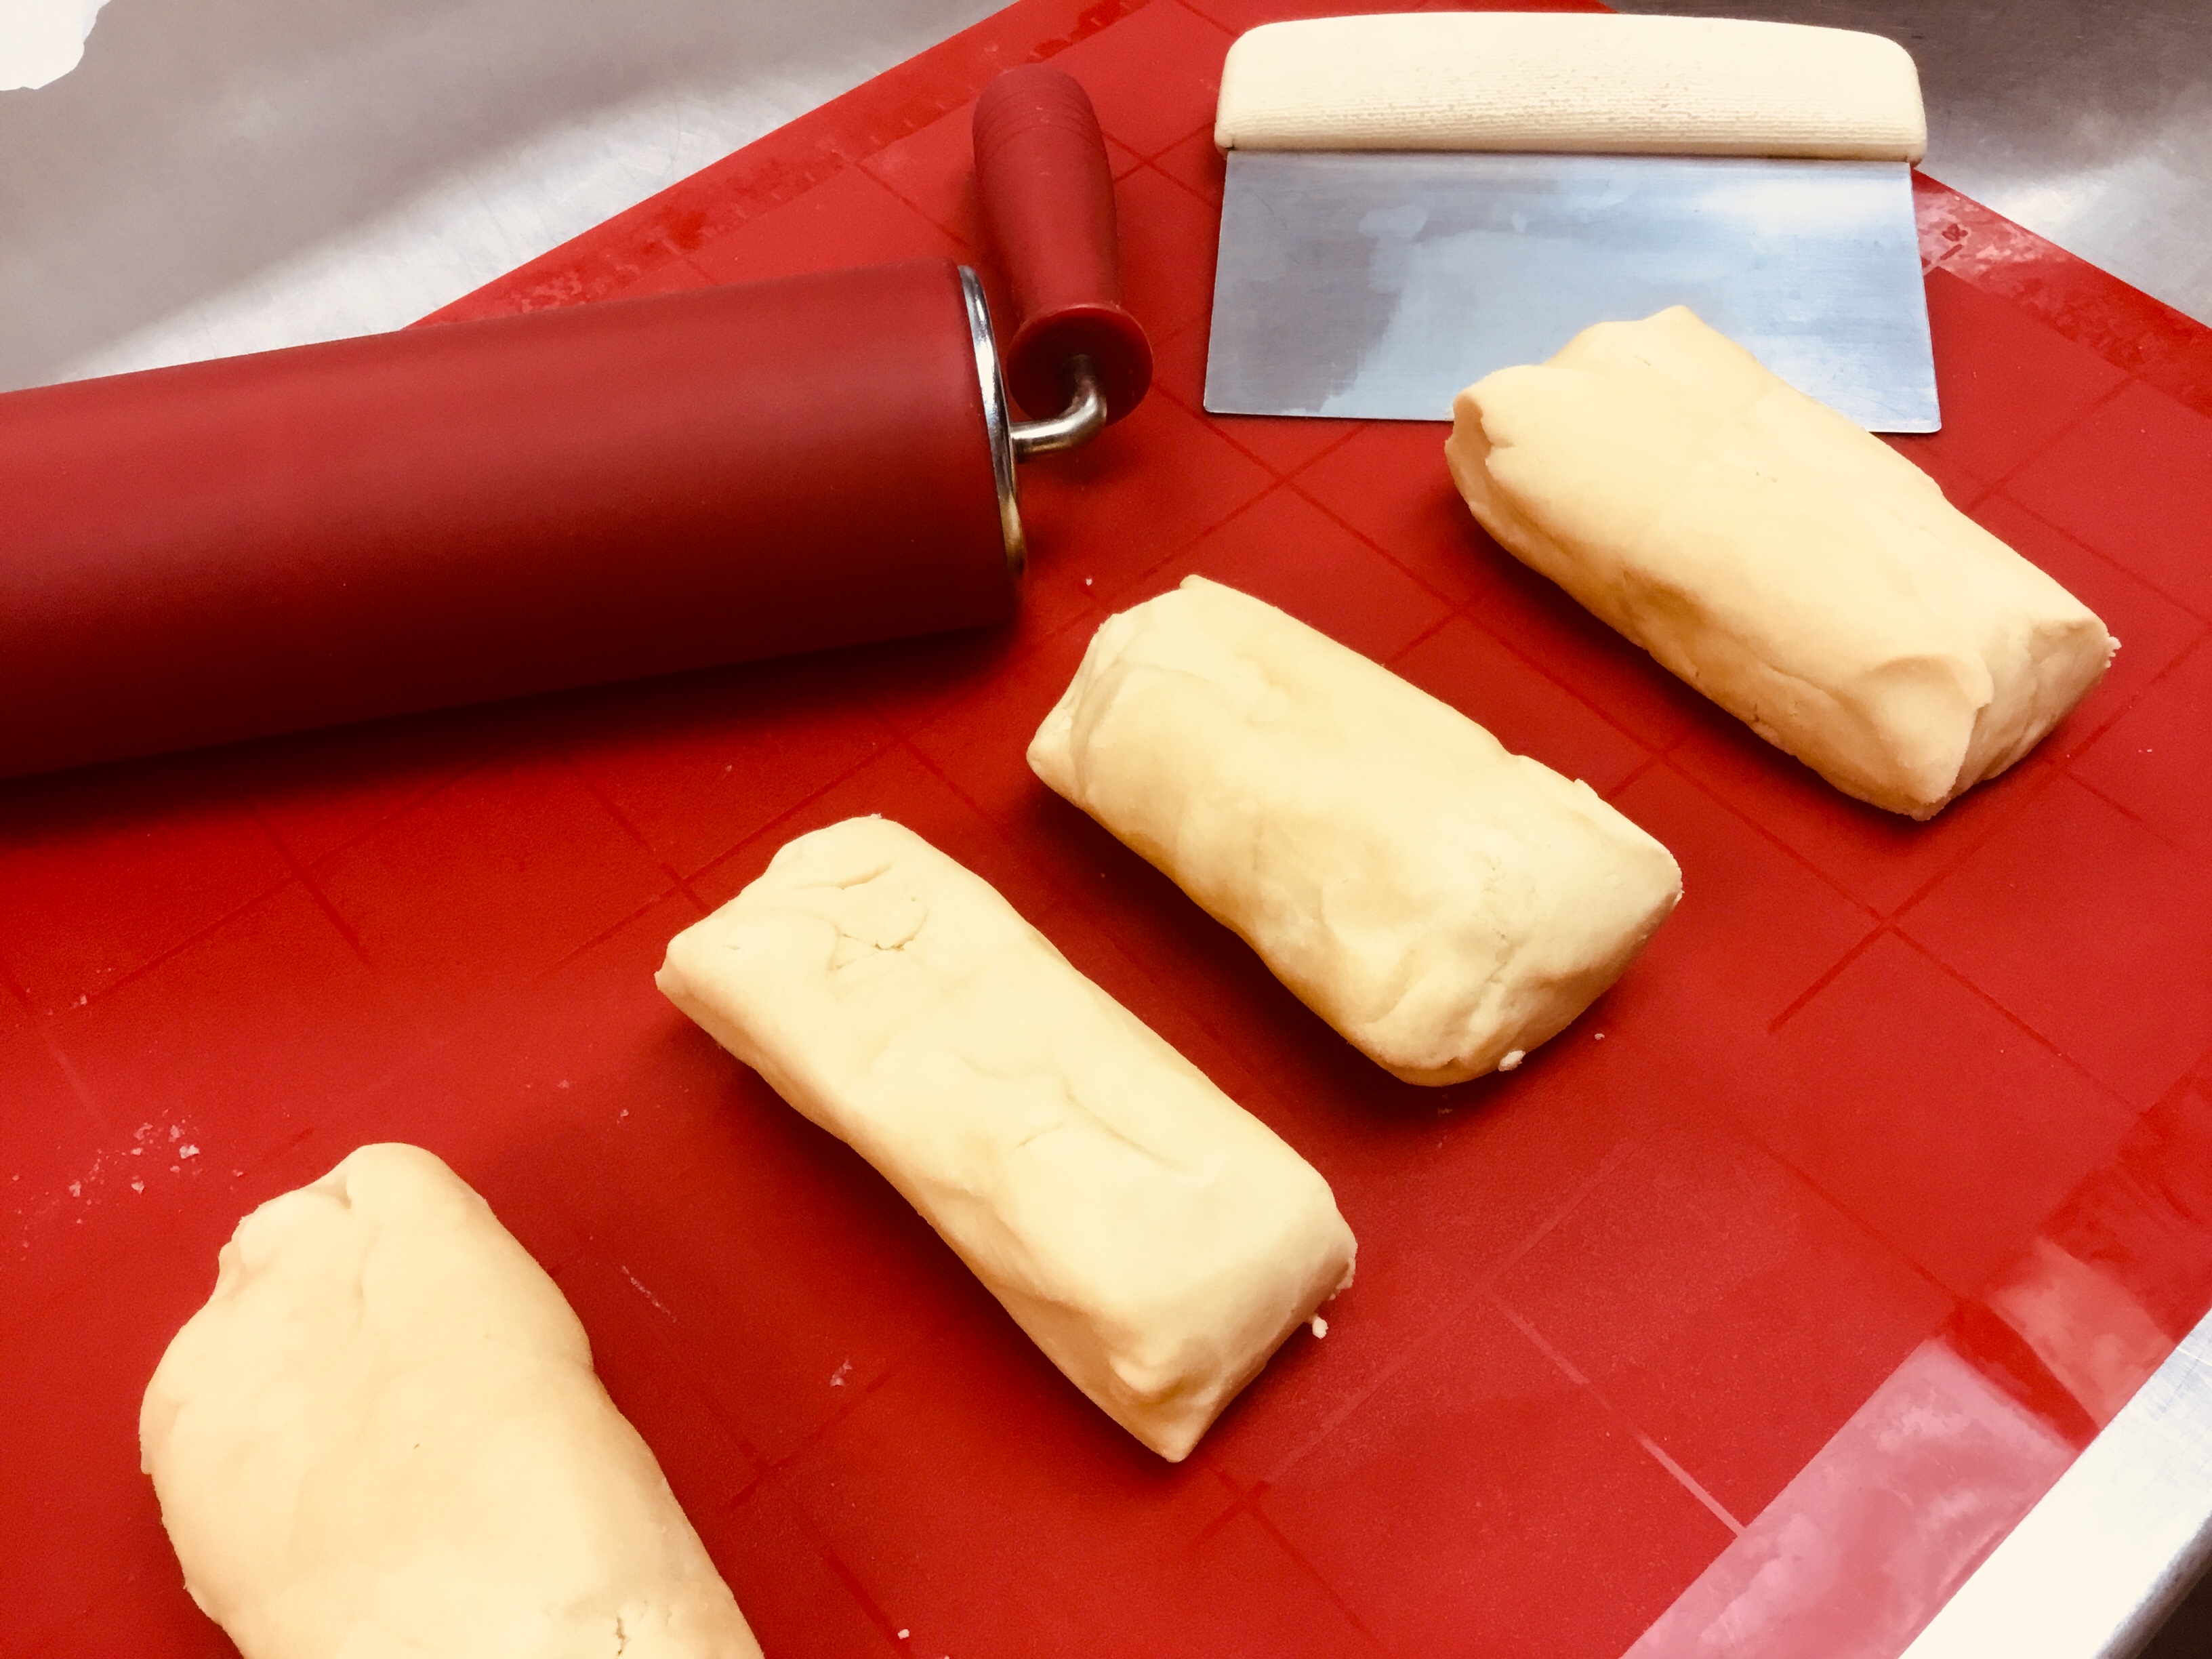
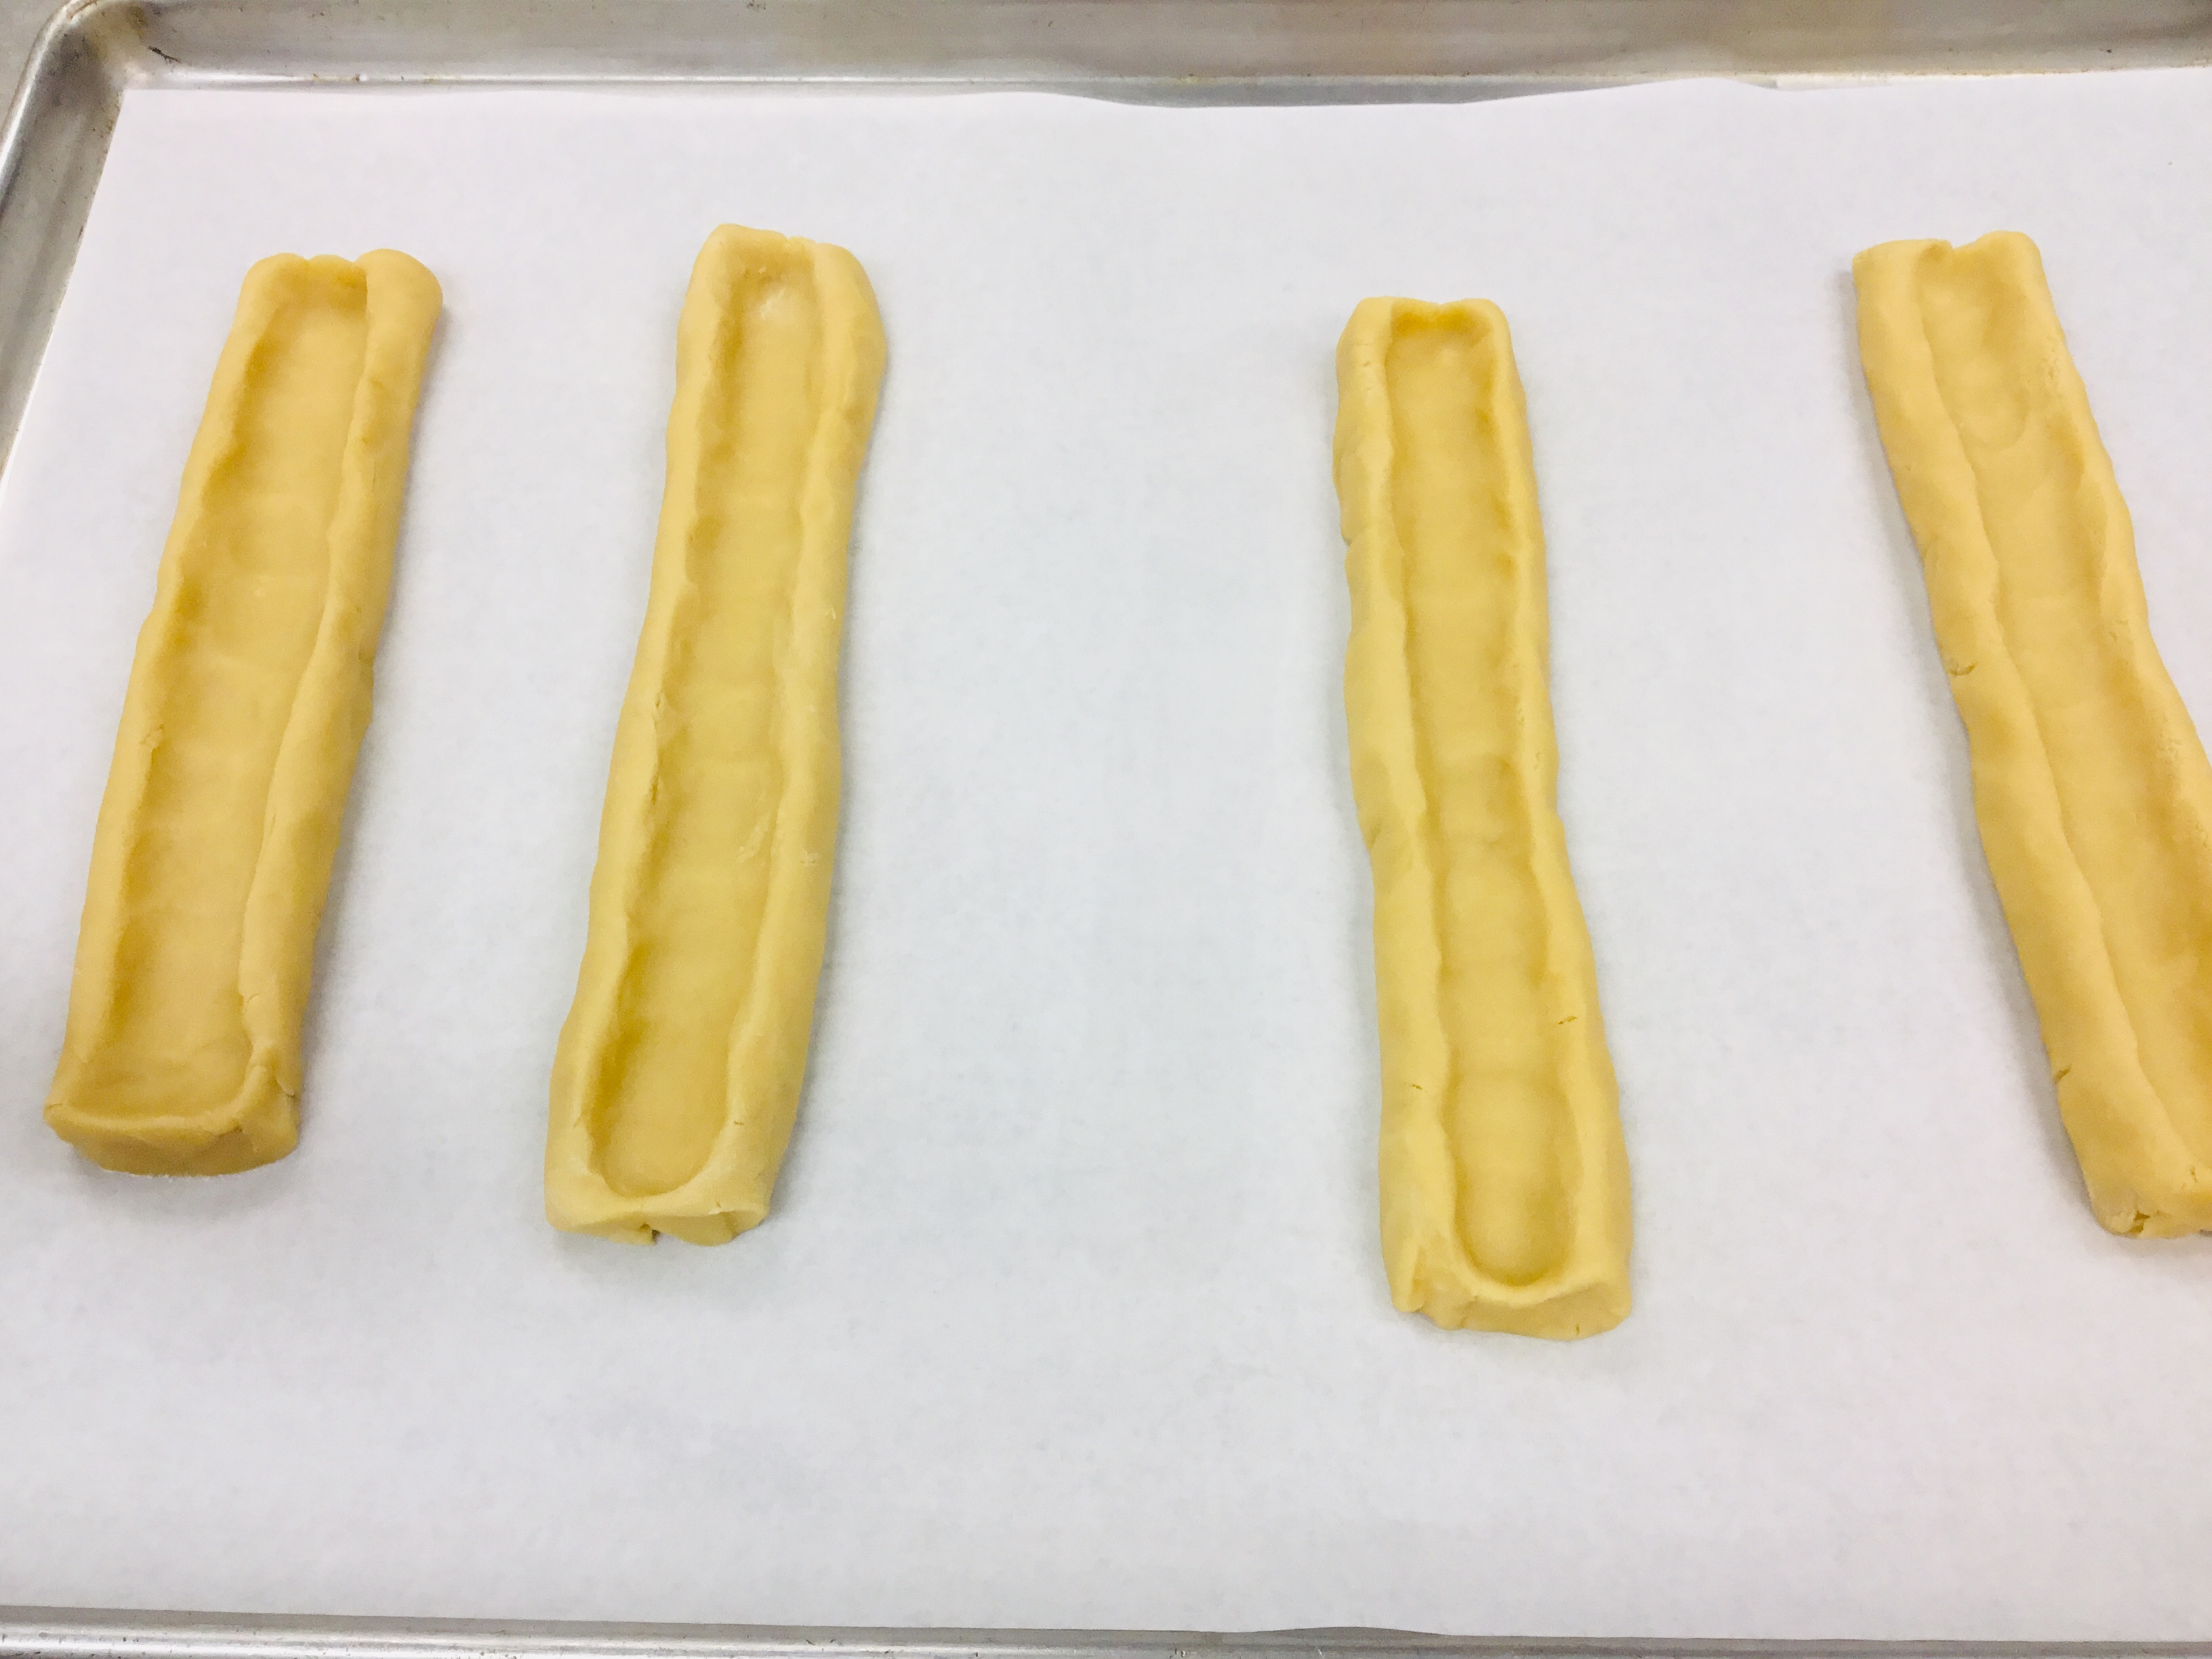
Form the dough into a log, wrap well in plastic wrap and chill for 1 hr. Divide the log into 4 pieces.
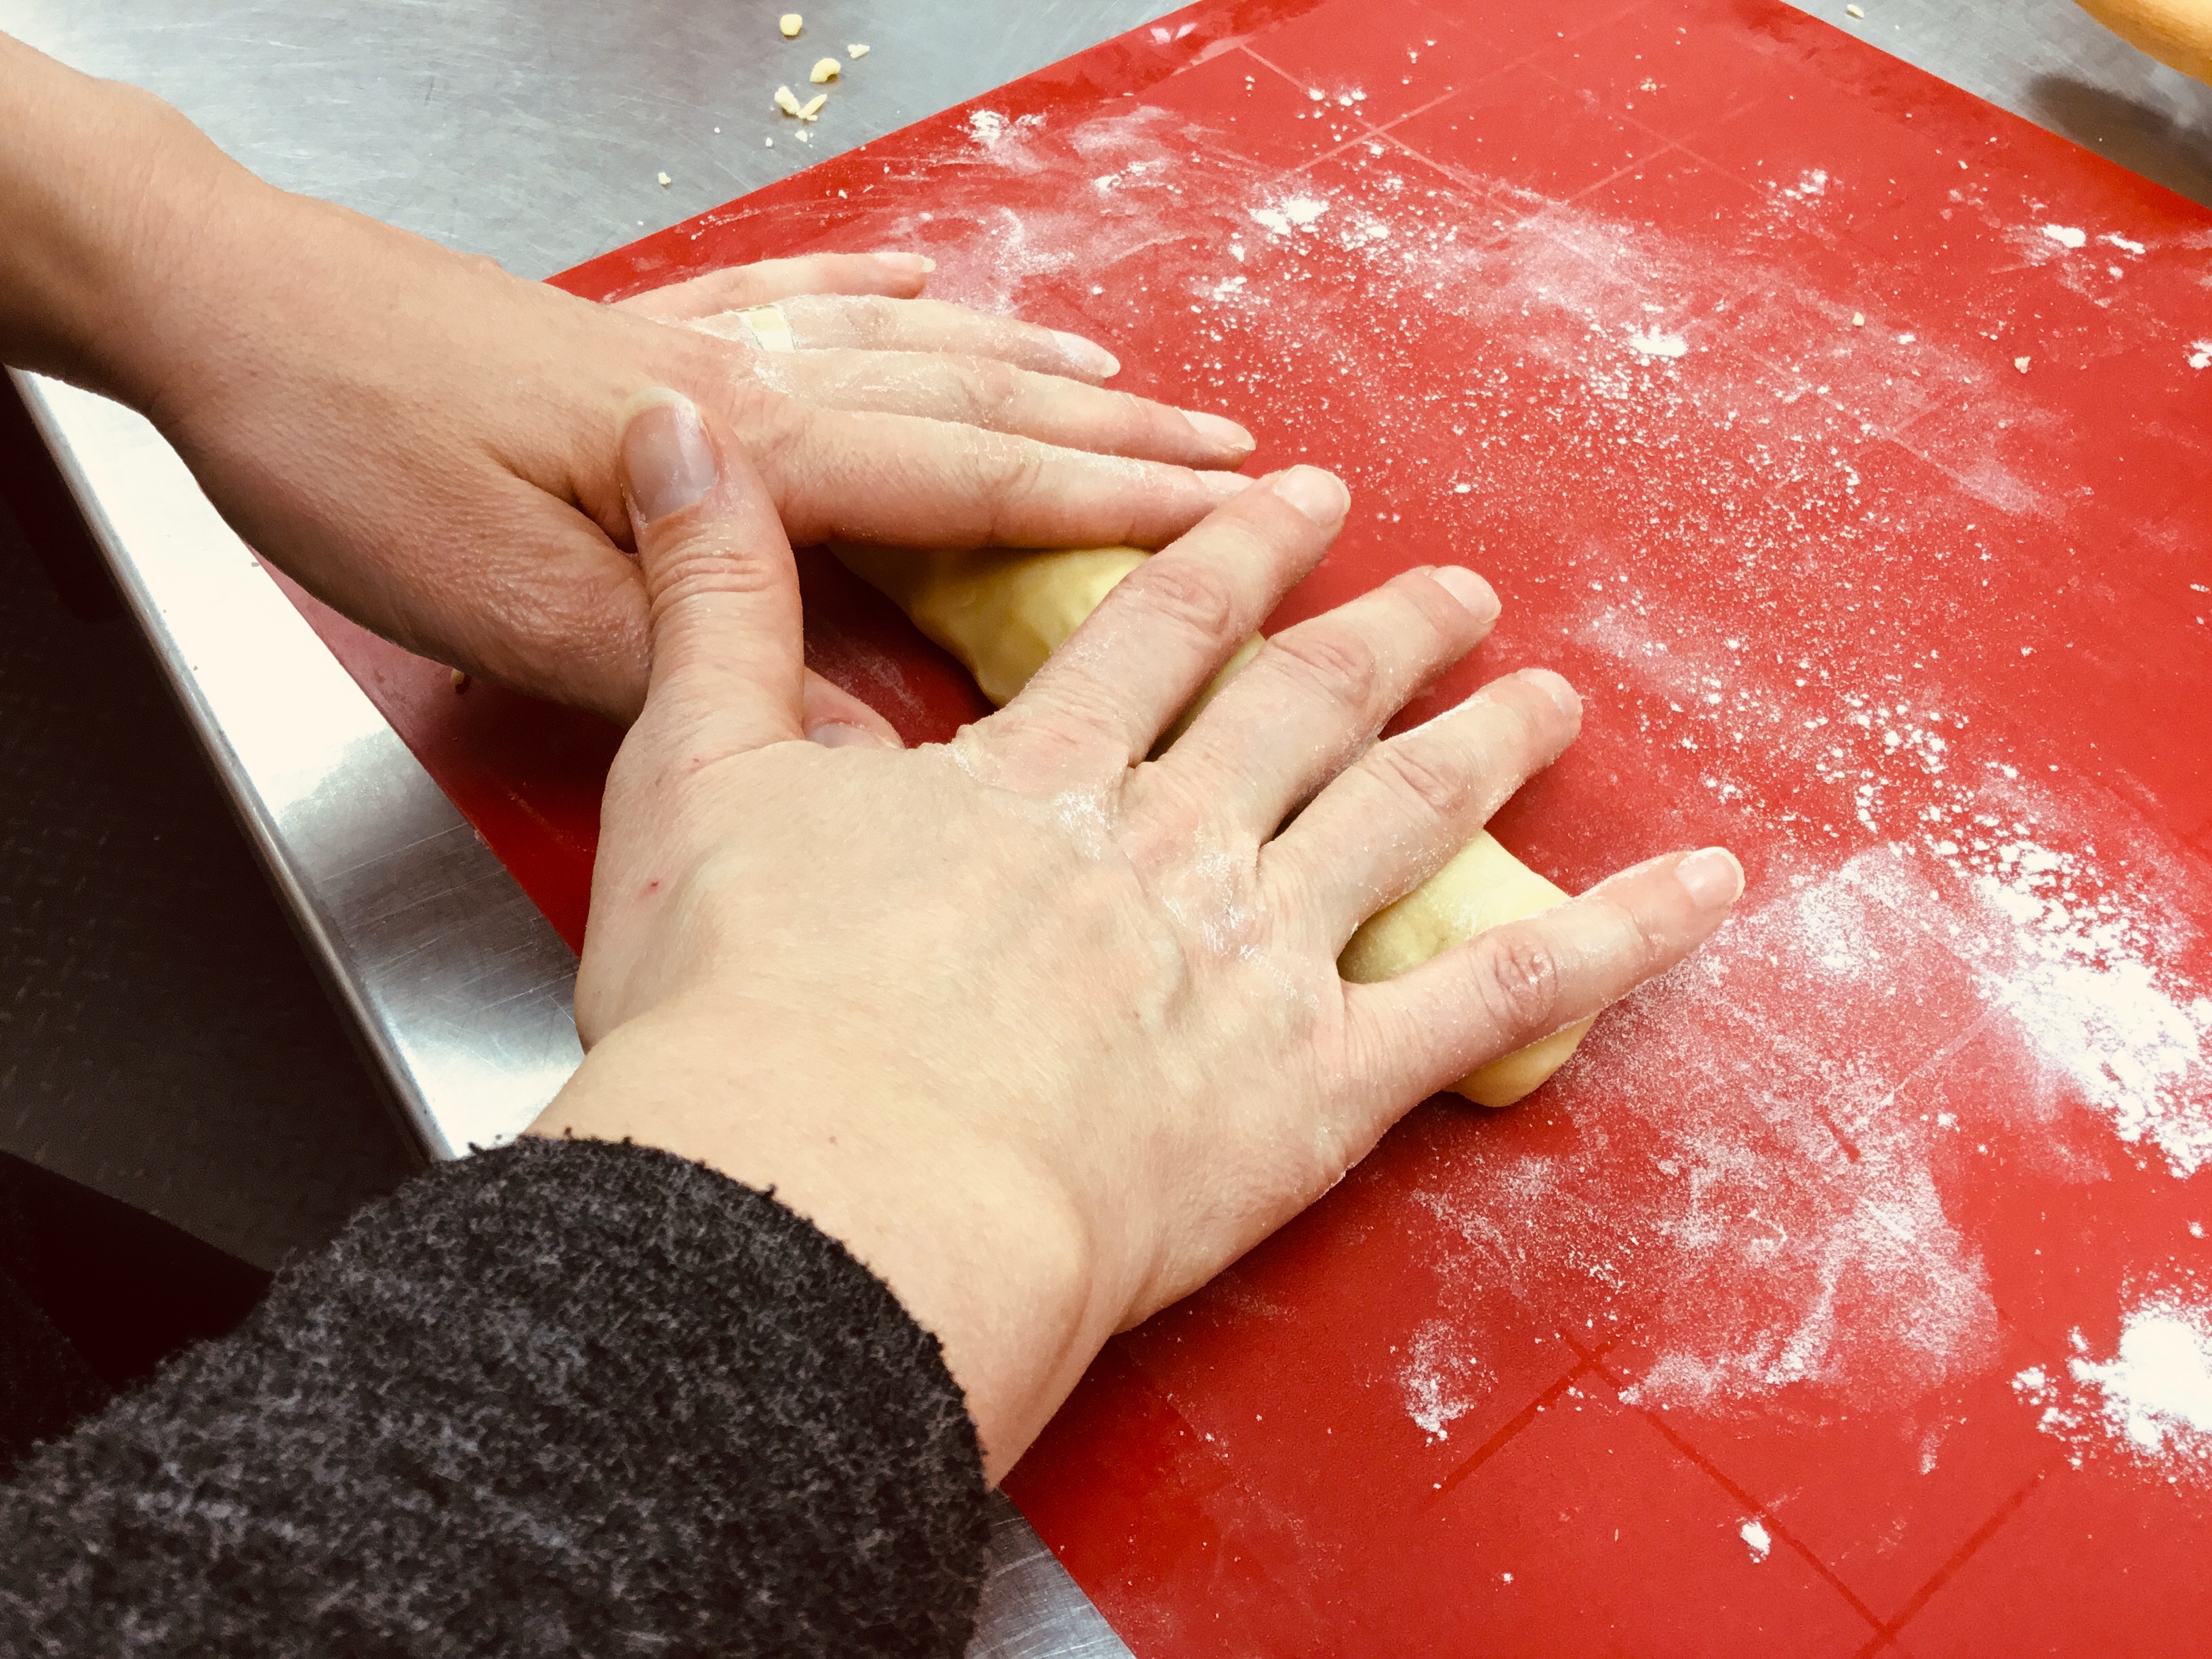
Working with one piece of dough at a time, place the dough in plastic wrap and roll into an 8 inch long rope - place on a parchment covered sheet pan and make a canal down the center with your finger so the log becomes a 8 x 2" rectangle with a channel in the middle.
Spread the apricot puree in the canals.
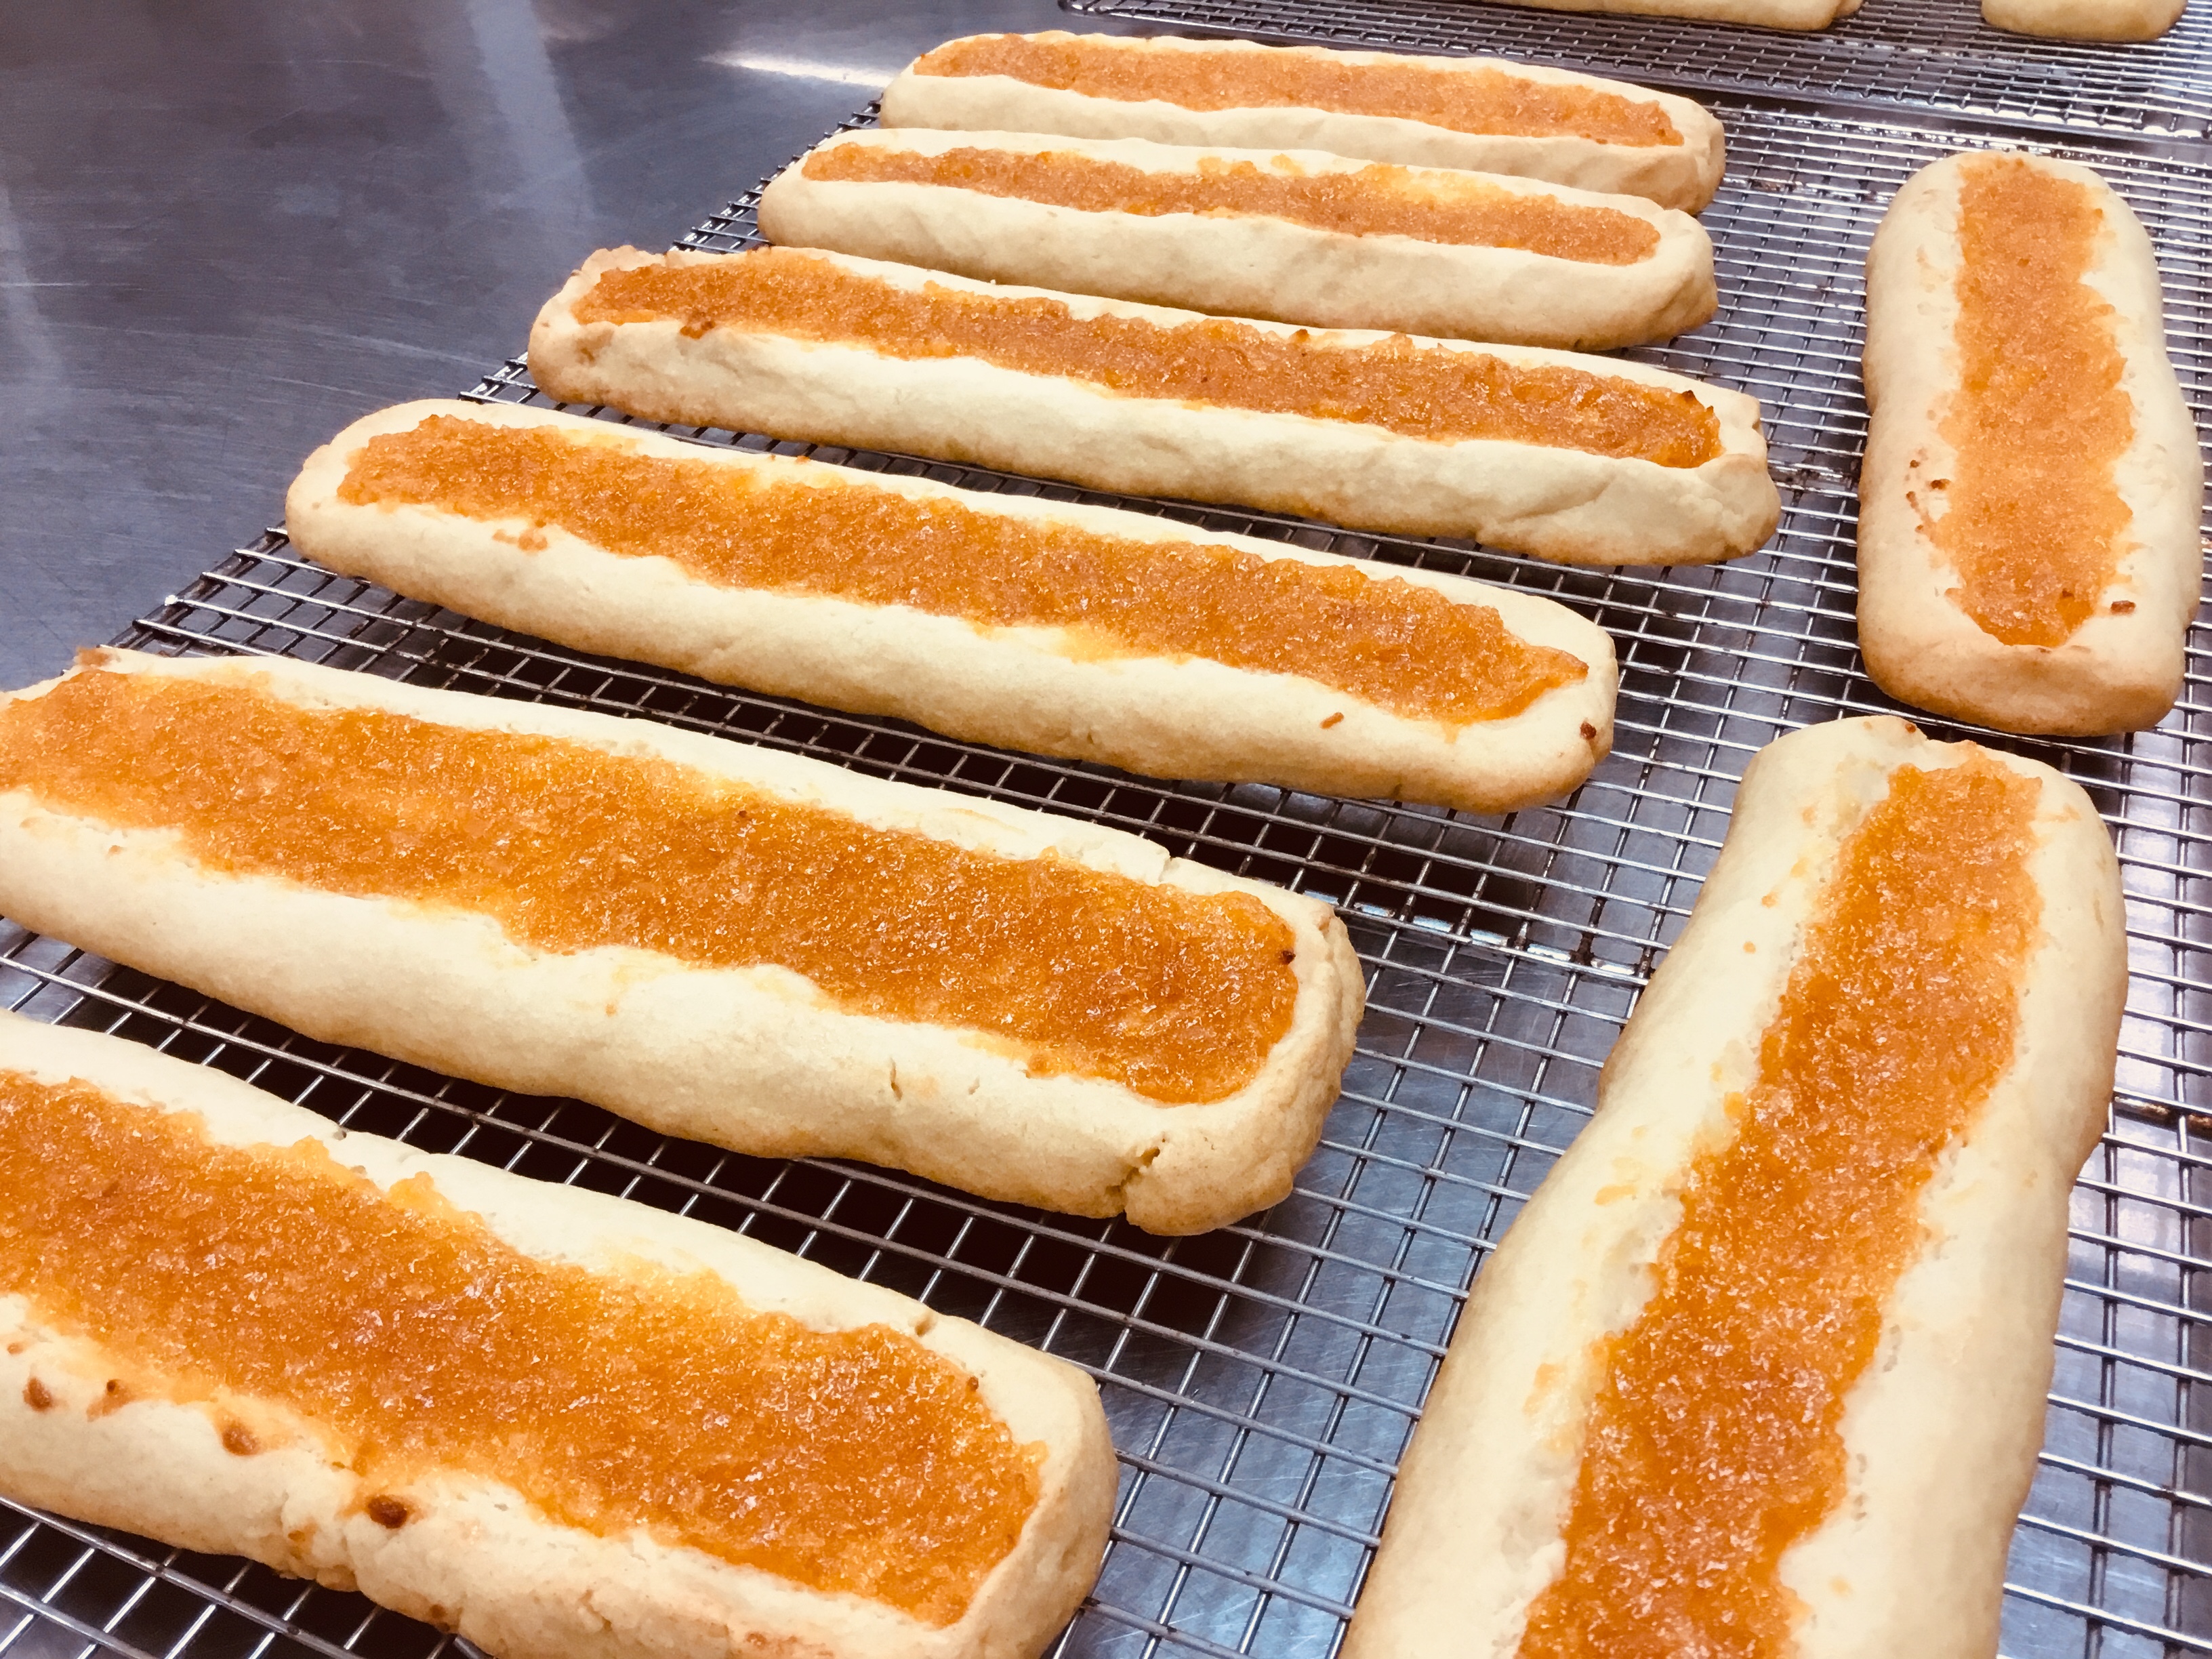
Bake the cookie sticks in a 350 degree oven for 18-20 min. until the edges are slightly golden.
Transfer to a rack and let them cool.
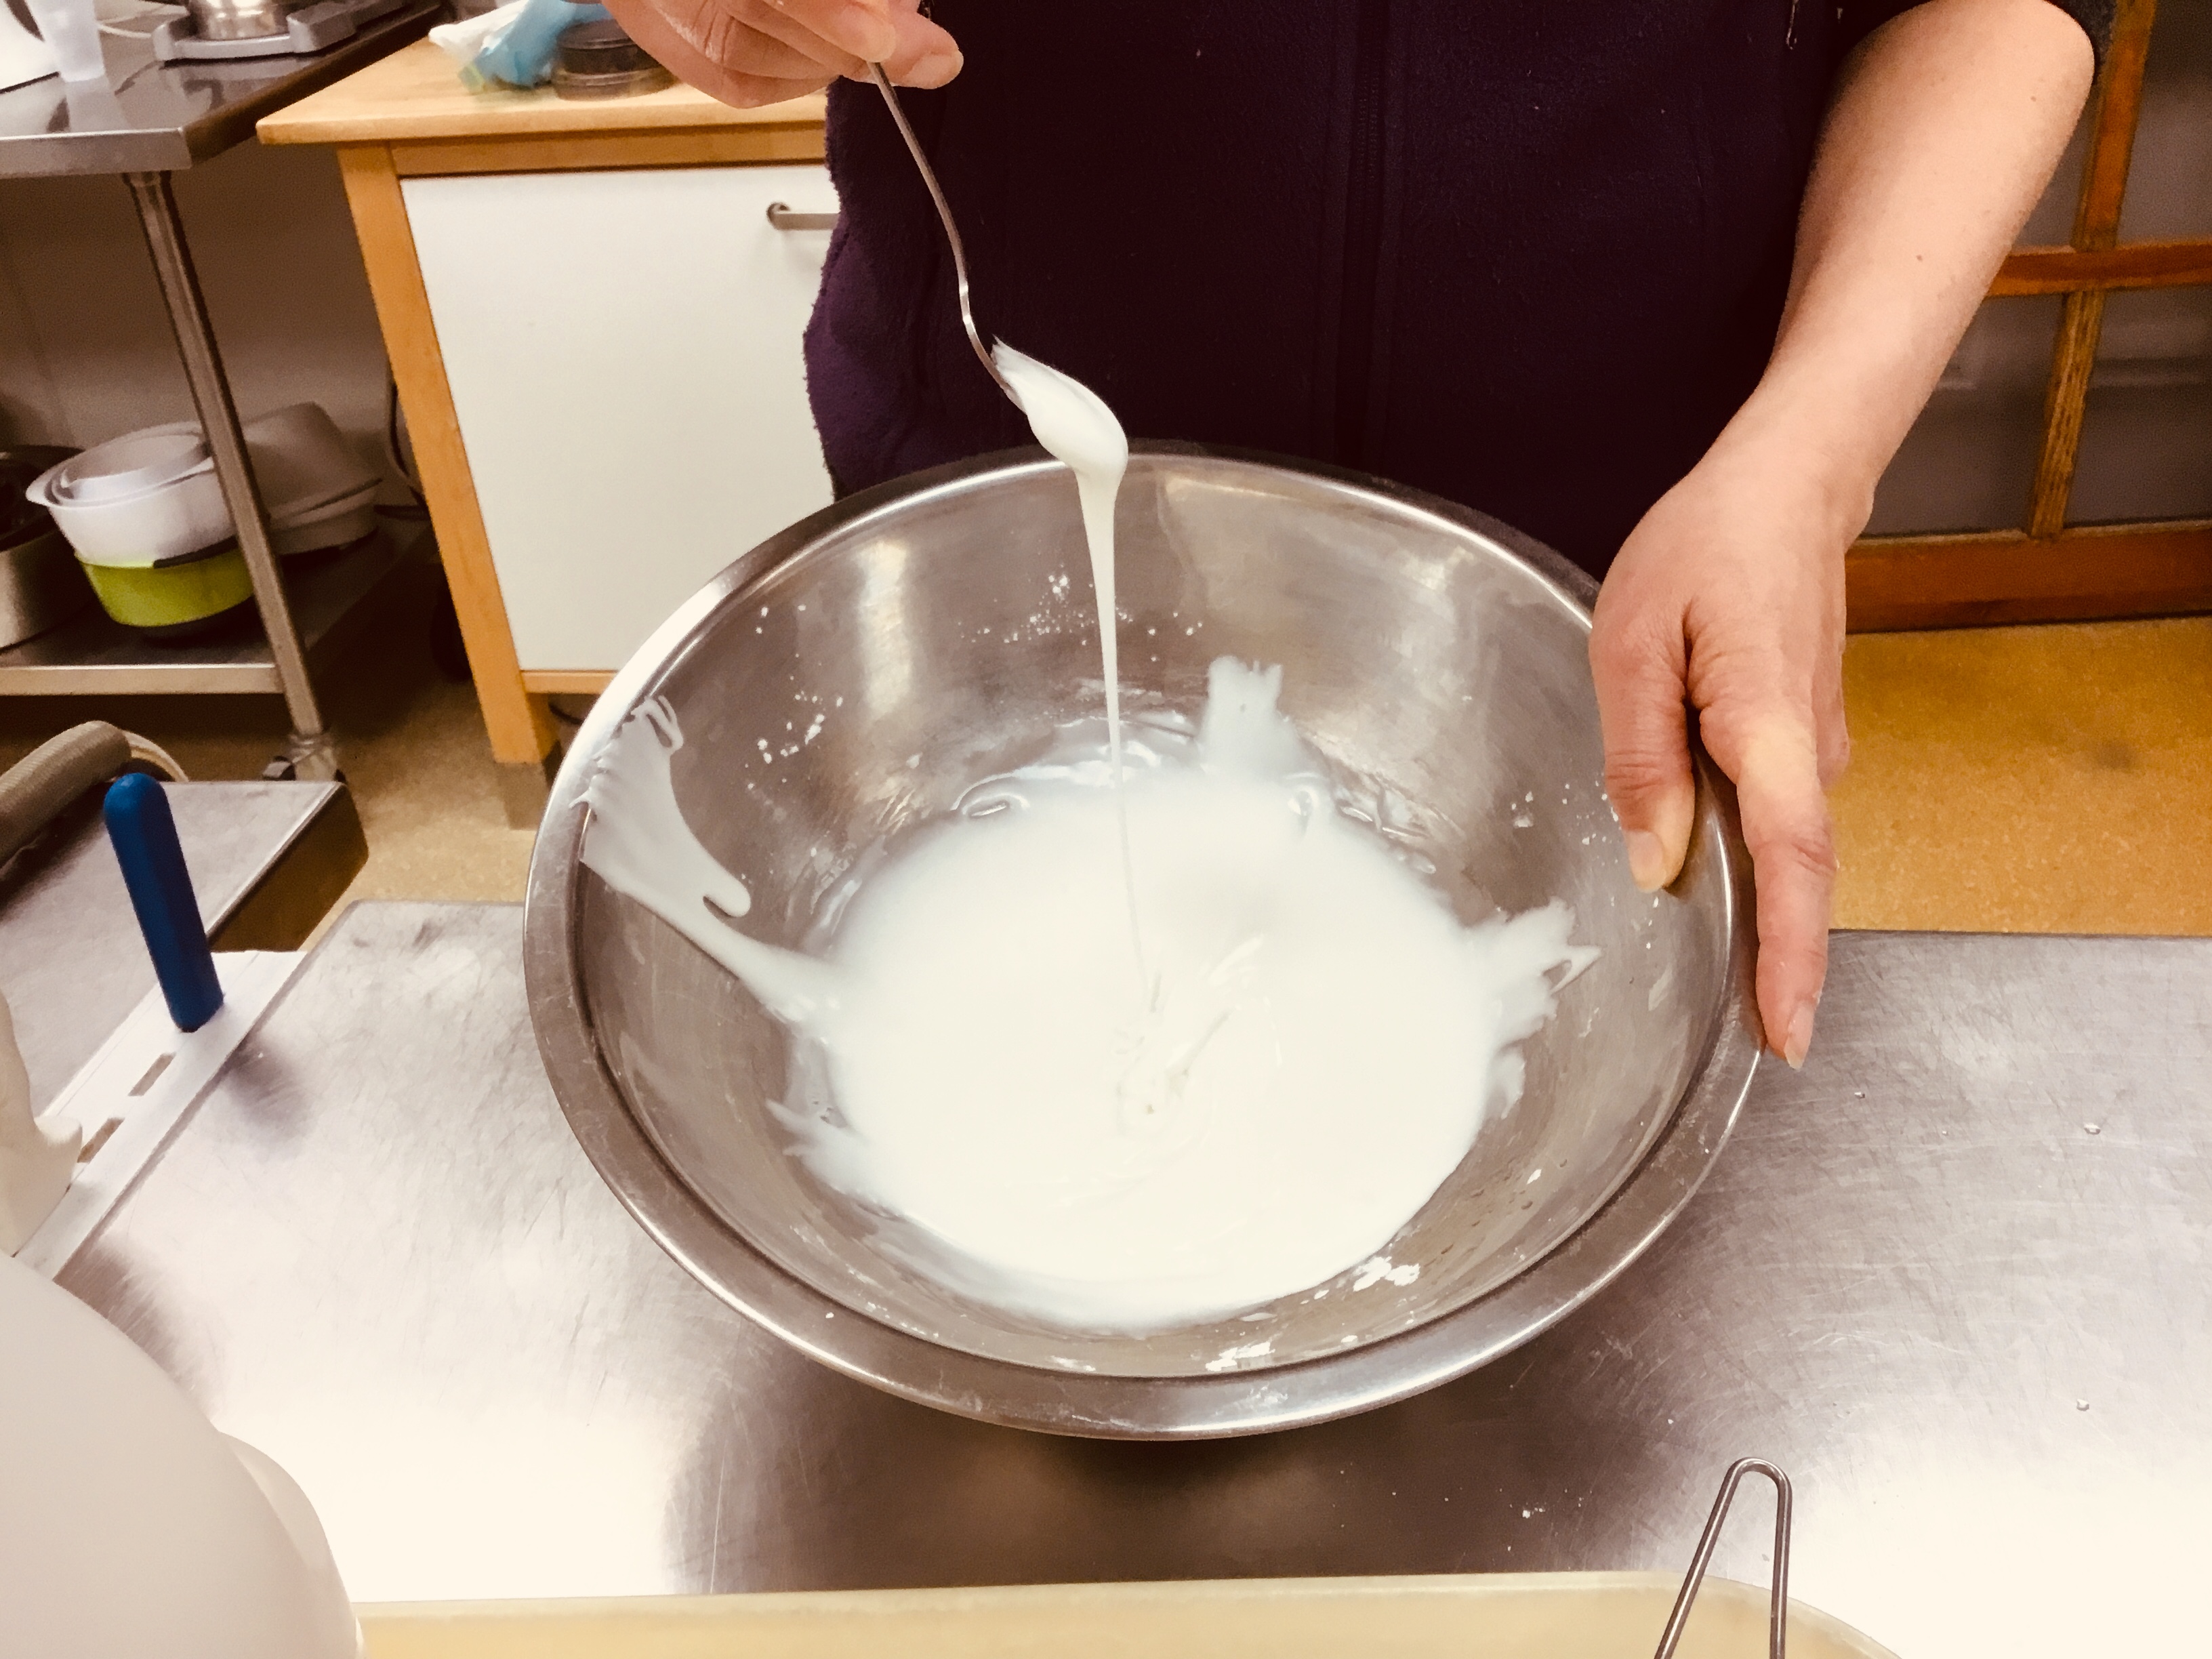
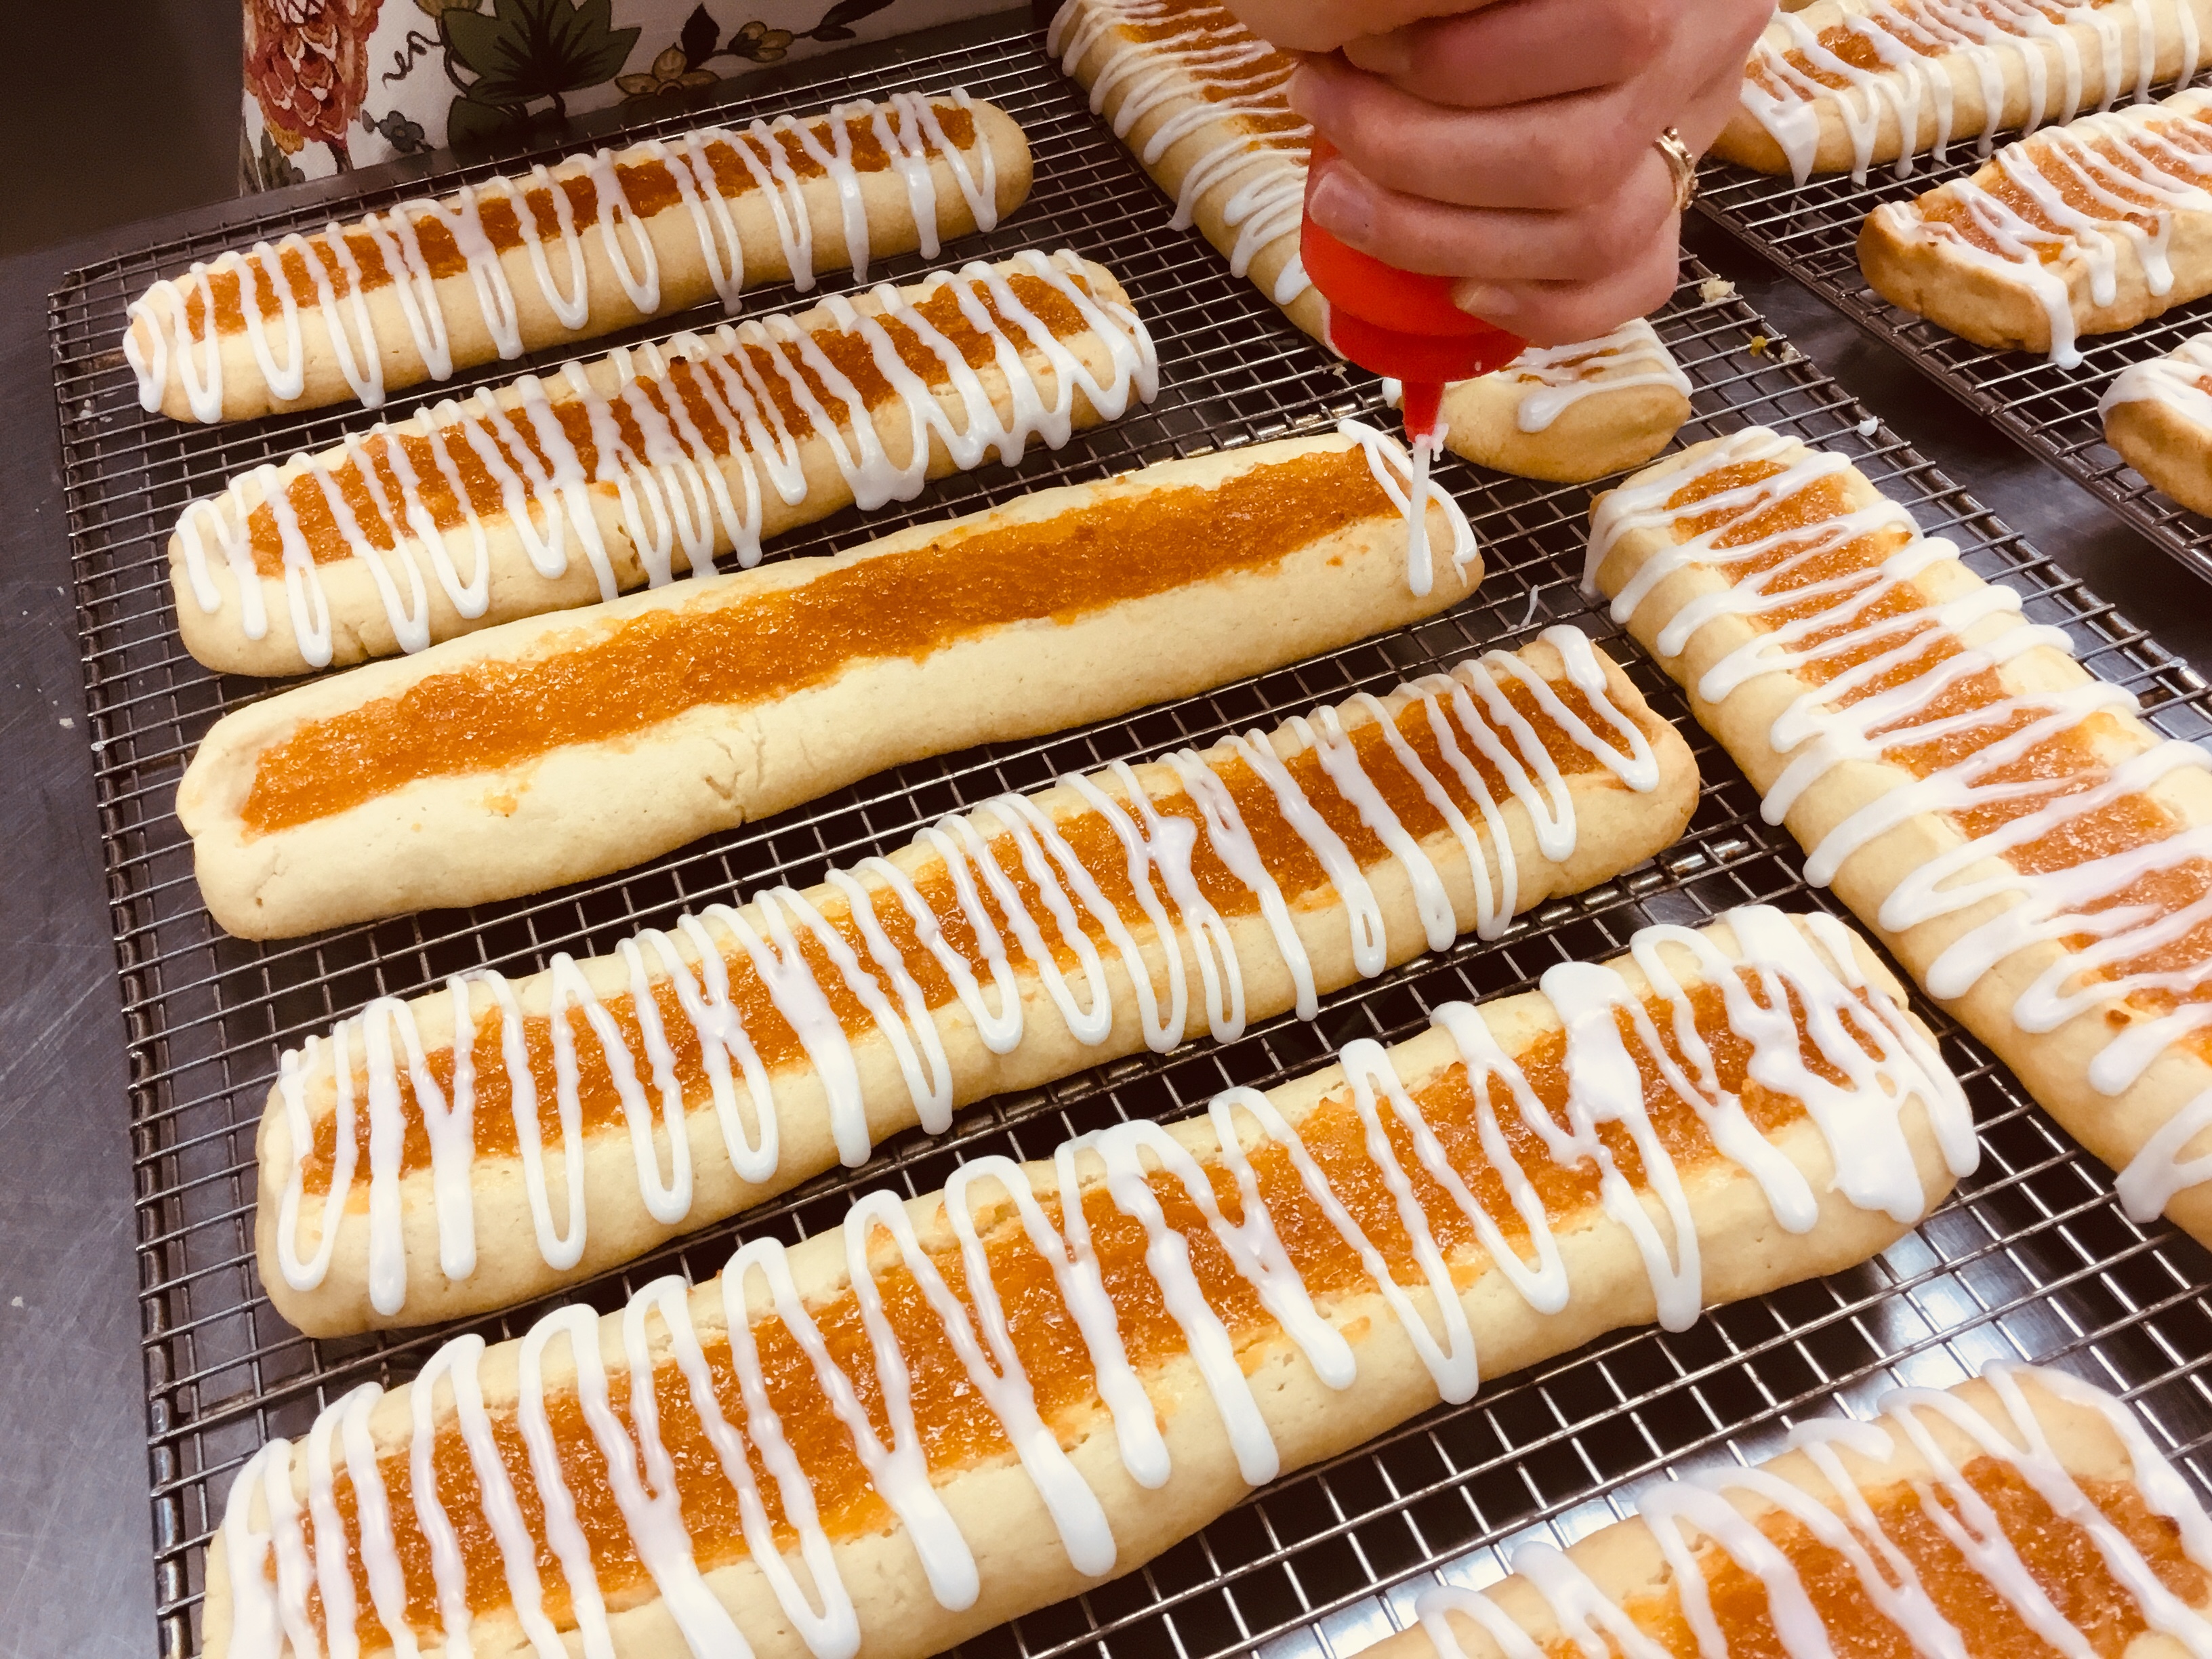
In a small bowl, whisk together the glaze ingredients and add just enough water to make a thick but pour-able icing - you want it to be on the thick side.
If desired, transfer the glaze to a squeeze bottle or piping bag and drizzle the icing over the cookies.
Cut the rectangles diagonally into 1" strips.
The cookies will keep in the freezer or in an airtight container for 1 week.
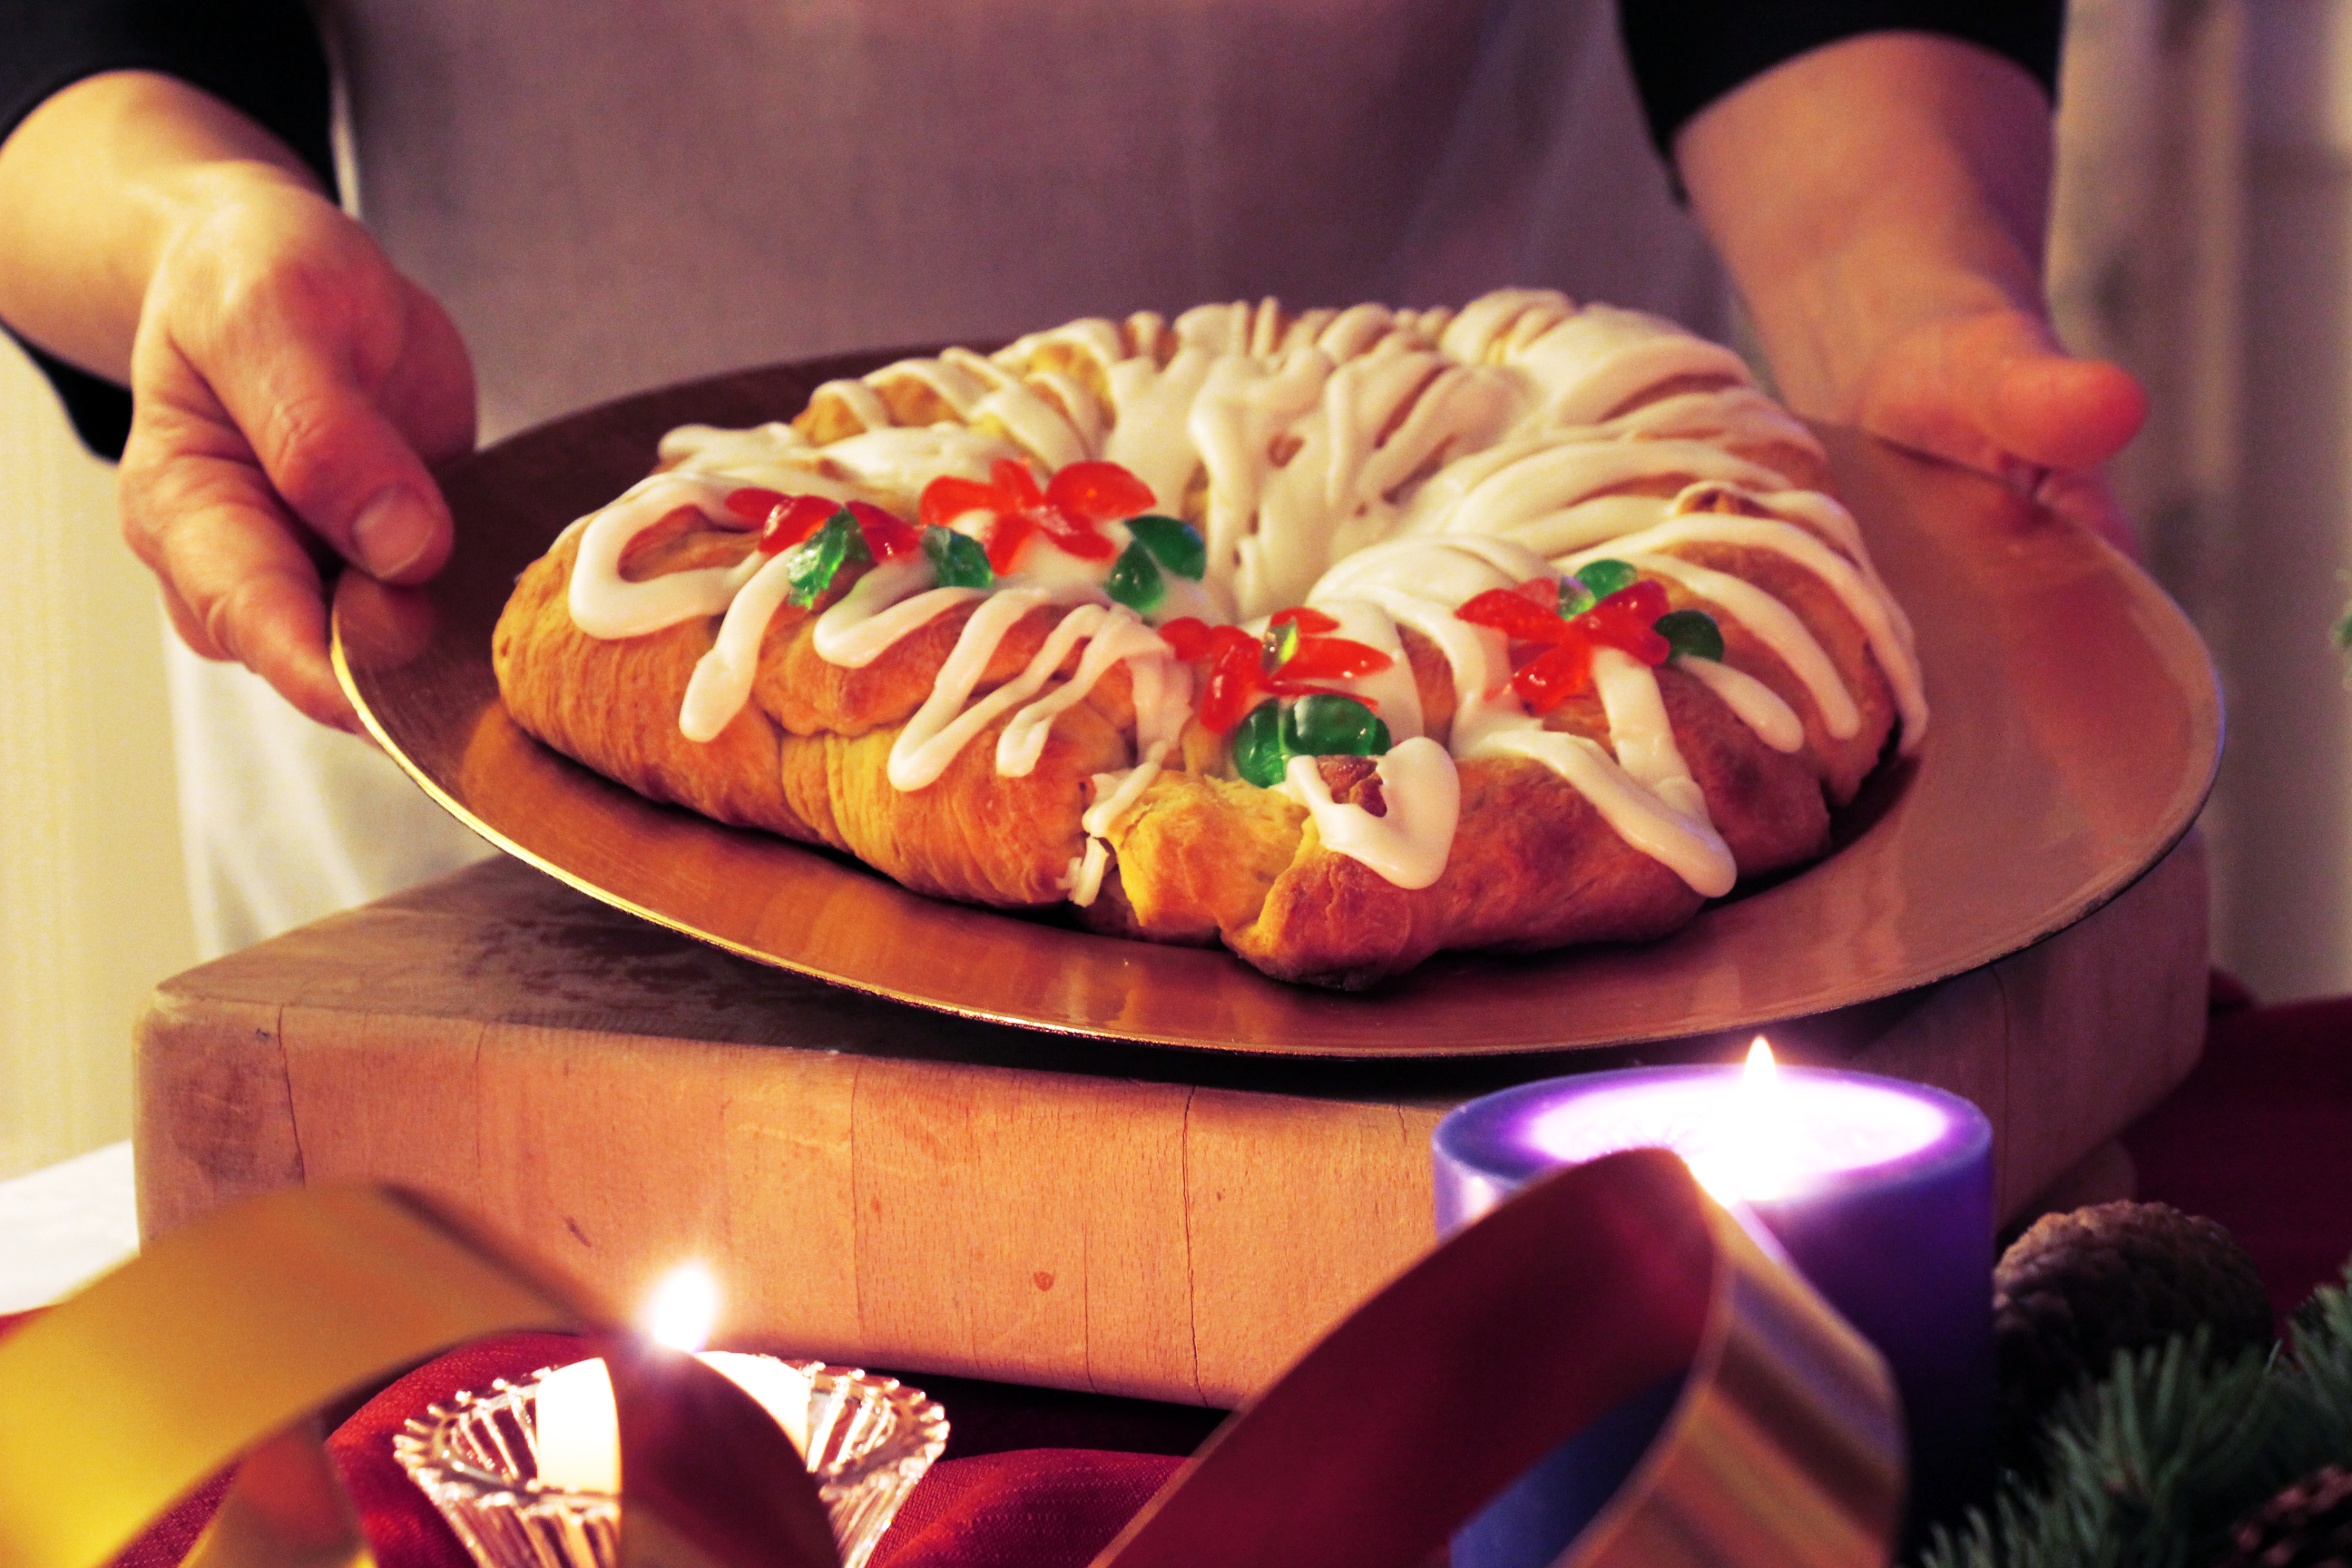
Since St. Lucia’s Day (or St. Lucy’s Day) is just around the corner on December 13th, we thought we’d share this special Swedish bread with you – fantastic for the Holidays. The celebration of the day comes from stories that were told by Monks who first brought Christianity to Sweden. “St Lucia was a young Christian girl who was martyred, killed for her faith, in 304. The most common story told about St Lucia is that she would secretly bring food to the persecuted Christians in Rome, who lived in hiding in the catacombs under the city. She would wear candles on her head, so she had both her hands free to carry things. Lucy means ‘light’ so this is a very appropriate name.” (see note below**)
December 13th was also the Winter Solstice, the shortest day of the year, in the old ‘Julian’ Calendar and a pagan festival of lights in Sweden was turned into St. Lucia’s Day. It is now celebrated by a girl dressing in a white dress with a red sash around her waist and a crown of candles on her head. Thus, the wreath of bread dotted with candied “berries.” If you’d like you can also add small candles to the cake as well for a more festive look.
In a large mixer, soften the yeast in the warm water
Heat the milk until warm. Add the oil and sugar and stir to dissolve.
Add this mixture to the yeast mixture in the mixer
Add salt and saffron
Add the 3 slightly beaten eggs and mix with dough hook.
Add the lemon zest, citron and almonds and continue mixing
One cup at a time, add the flour and mix well after each addition. Stop adding the flour when the dough starts pulling away from the side of the bowl. Adding more flour if necessary.
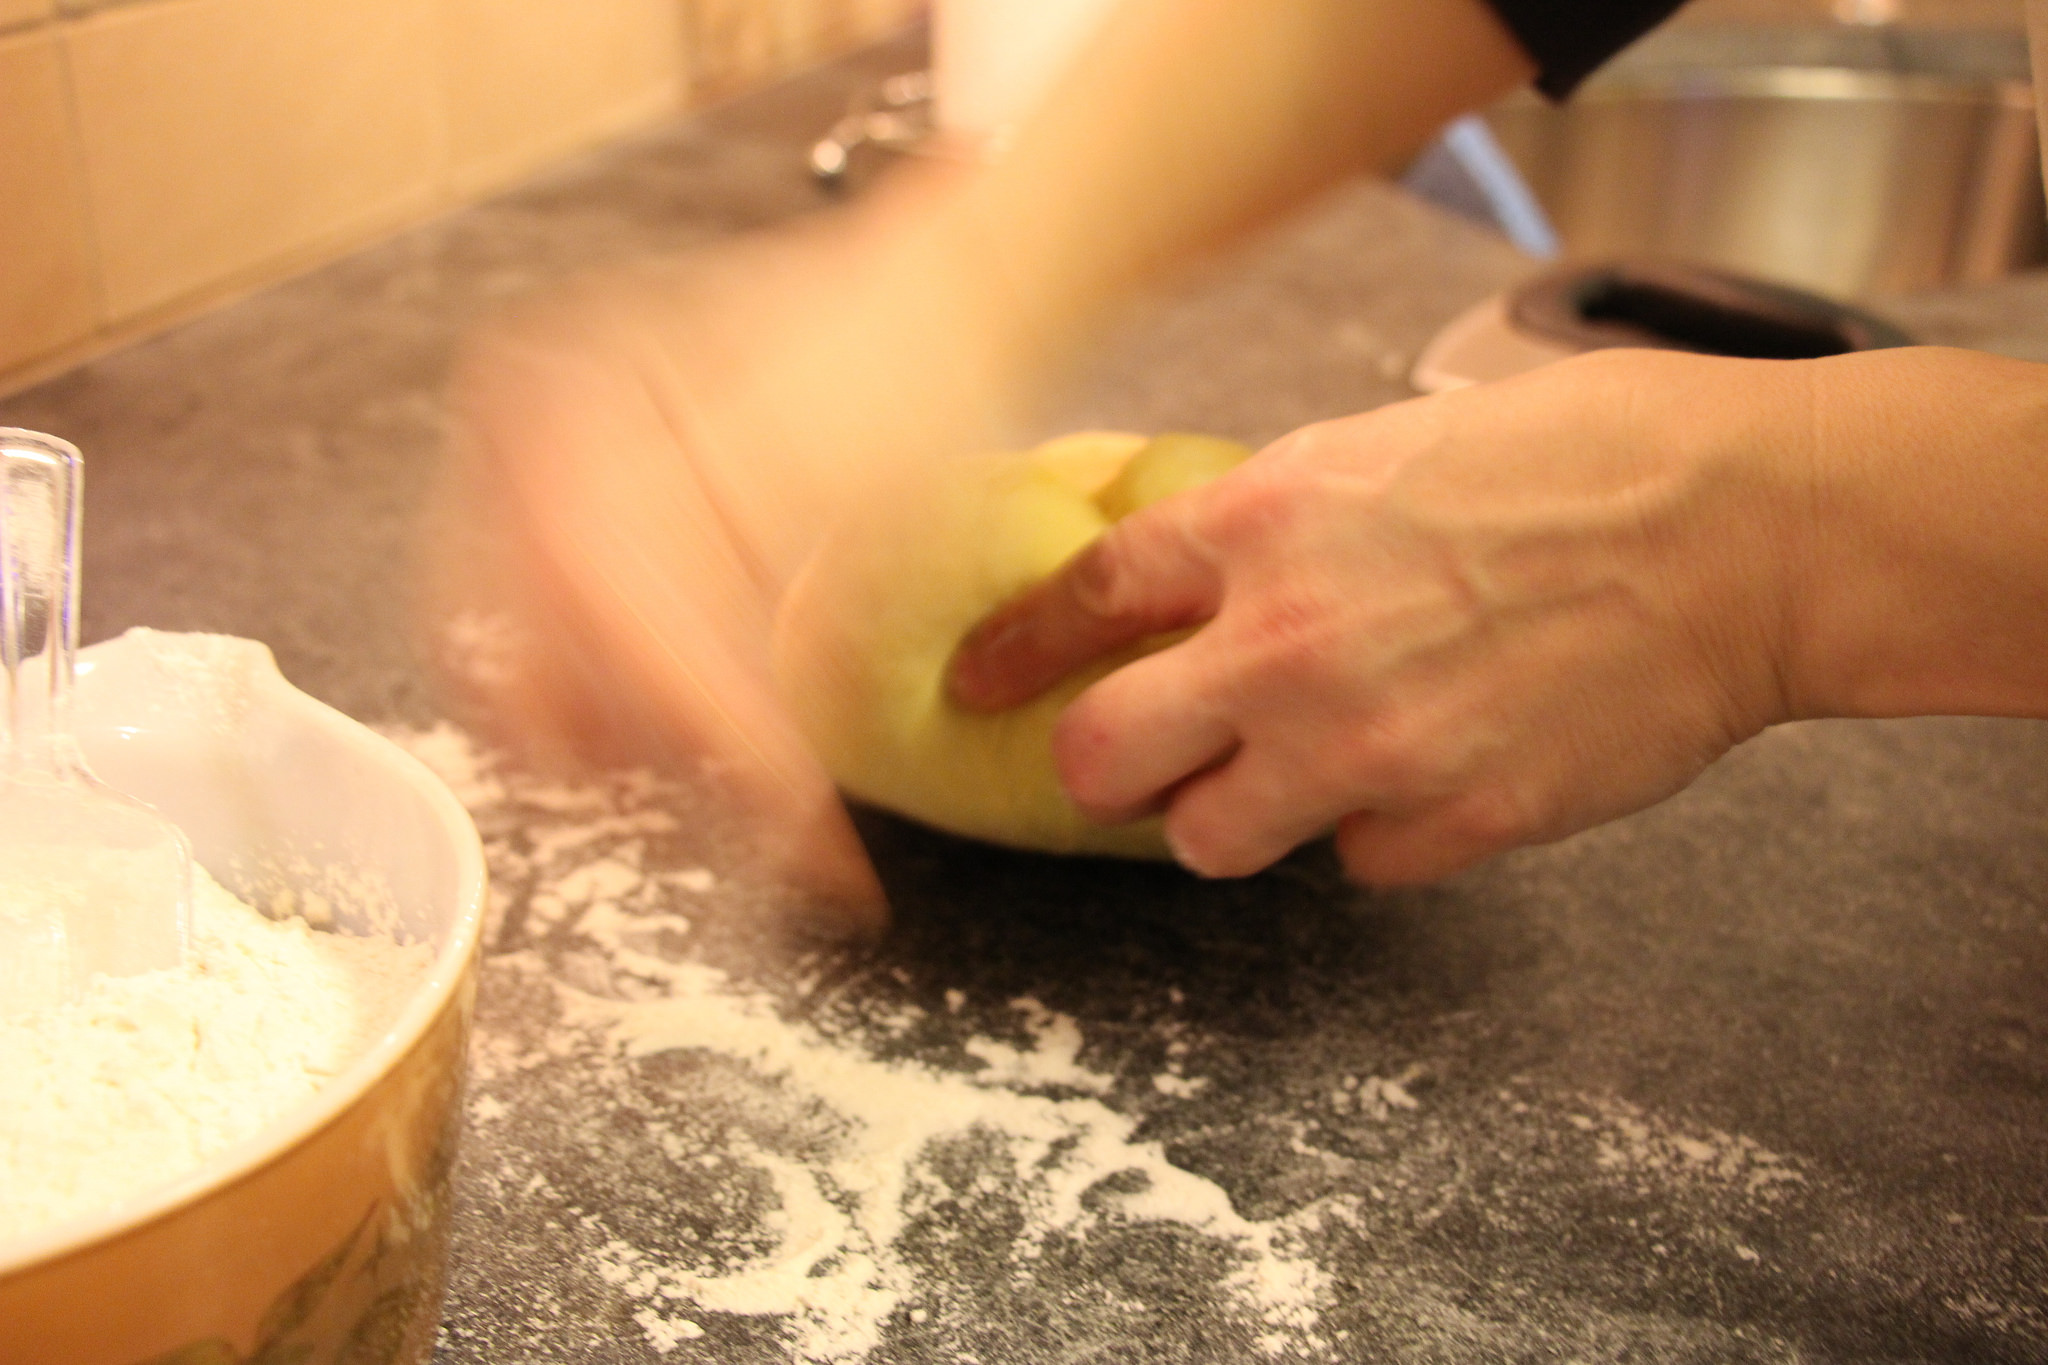
Turn the dough out onto a floured board and knead for 5 min, or until dough becomes smooth and elastic; adding flour as necessary.
Place the dough in a greased bowl, cover, and let rise in a warm place until almost doubled in size, about 1 hr. (At this point, you can refrigerate the dough, if you want to work with it later).
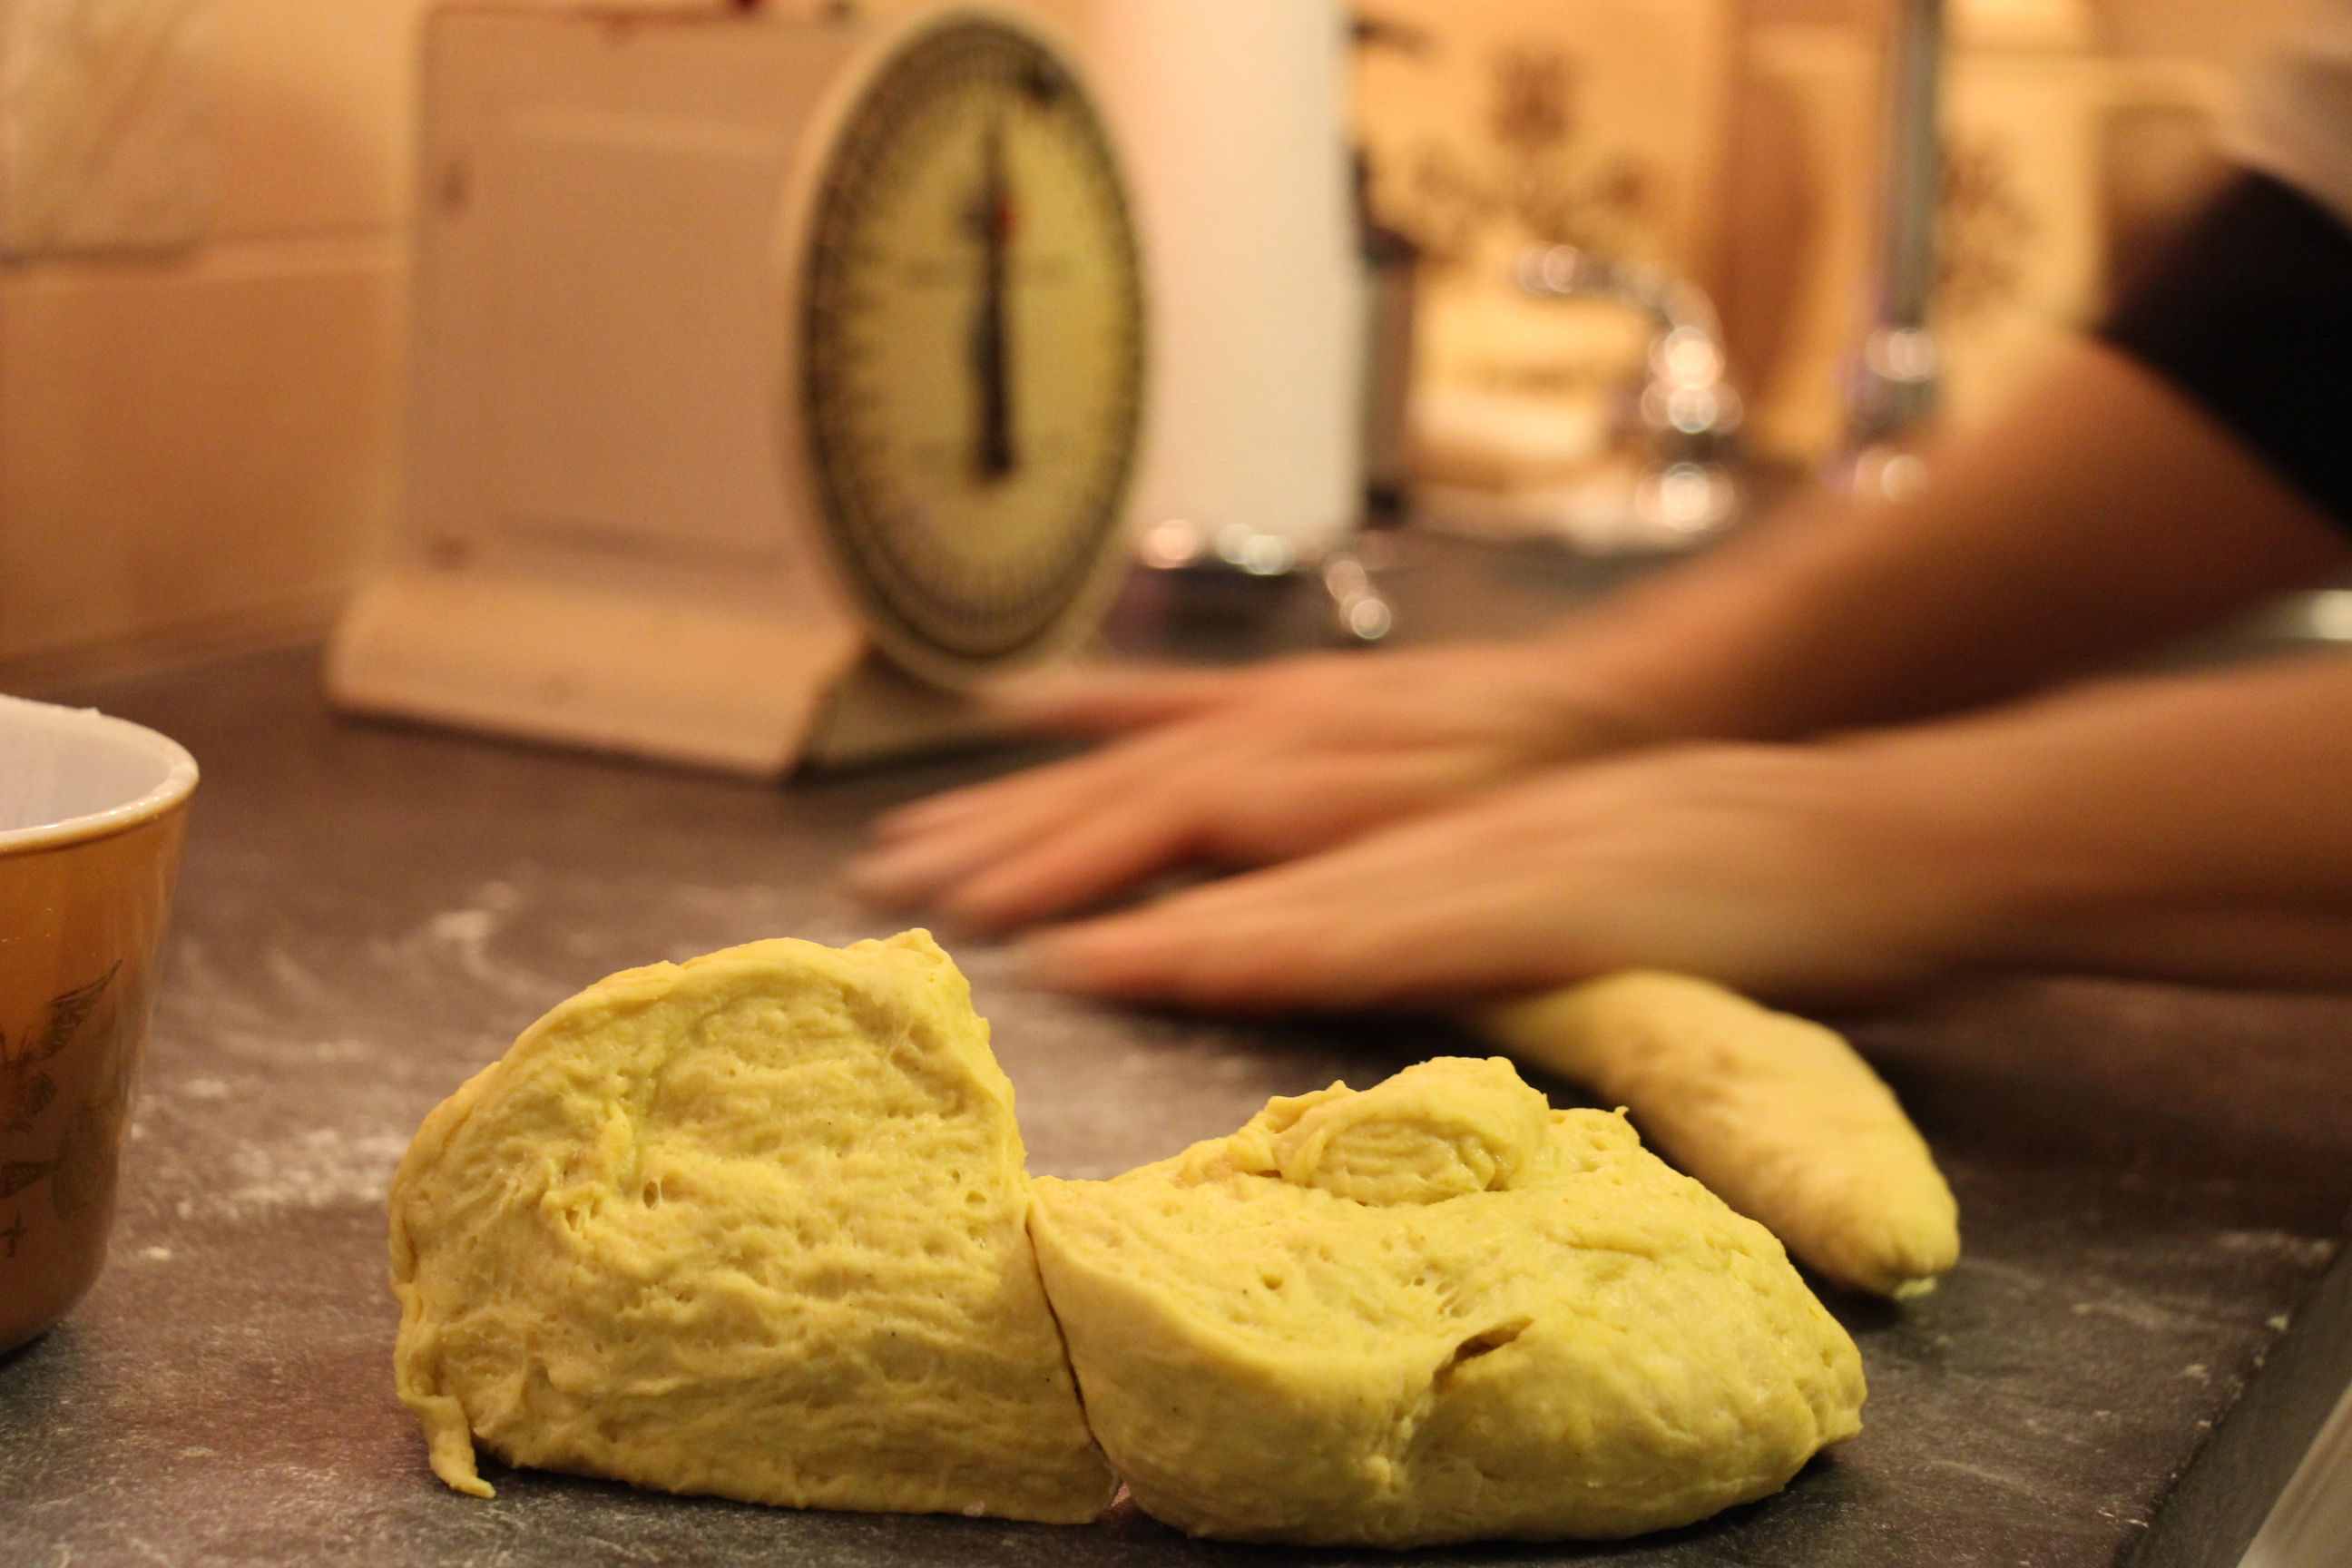
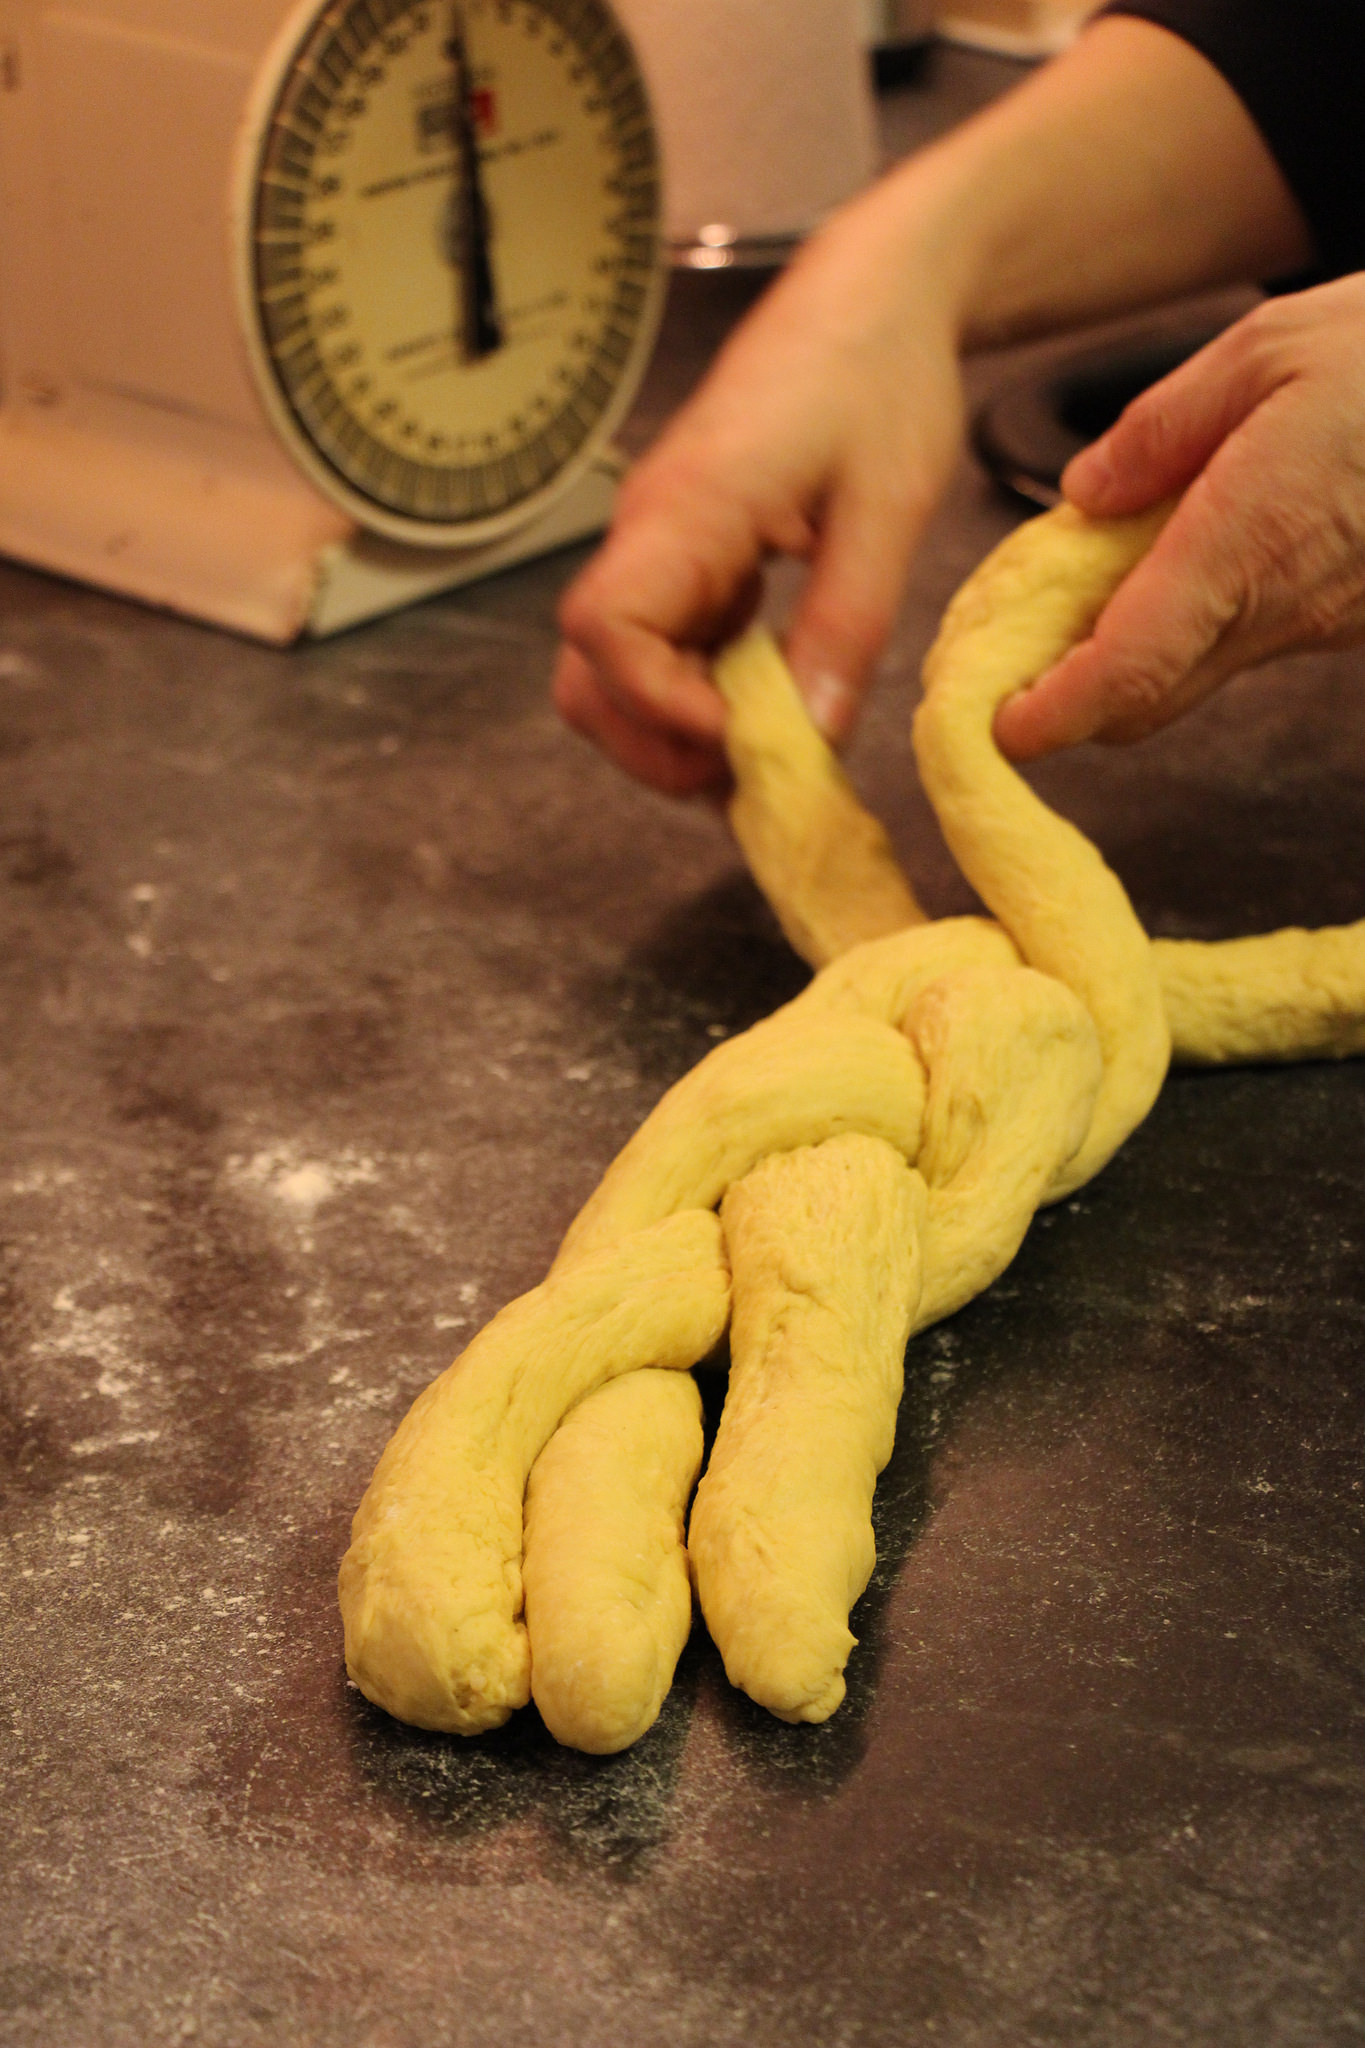
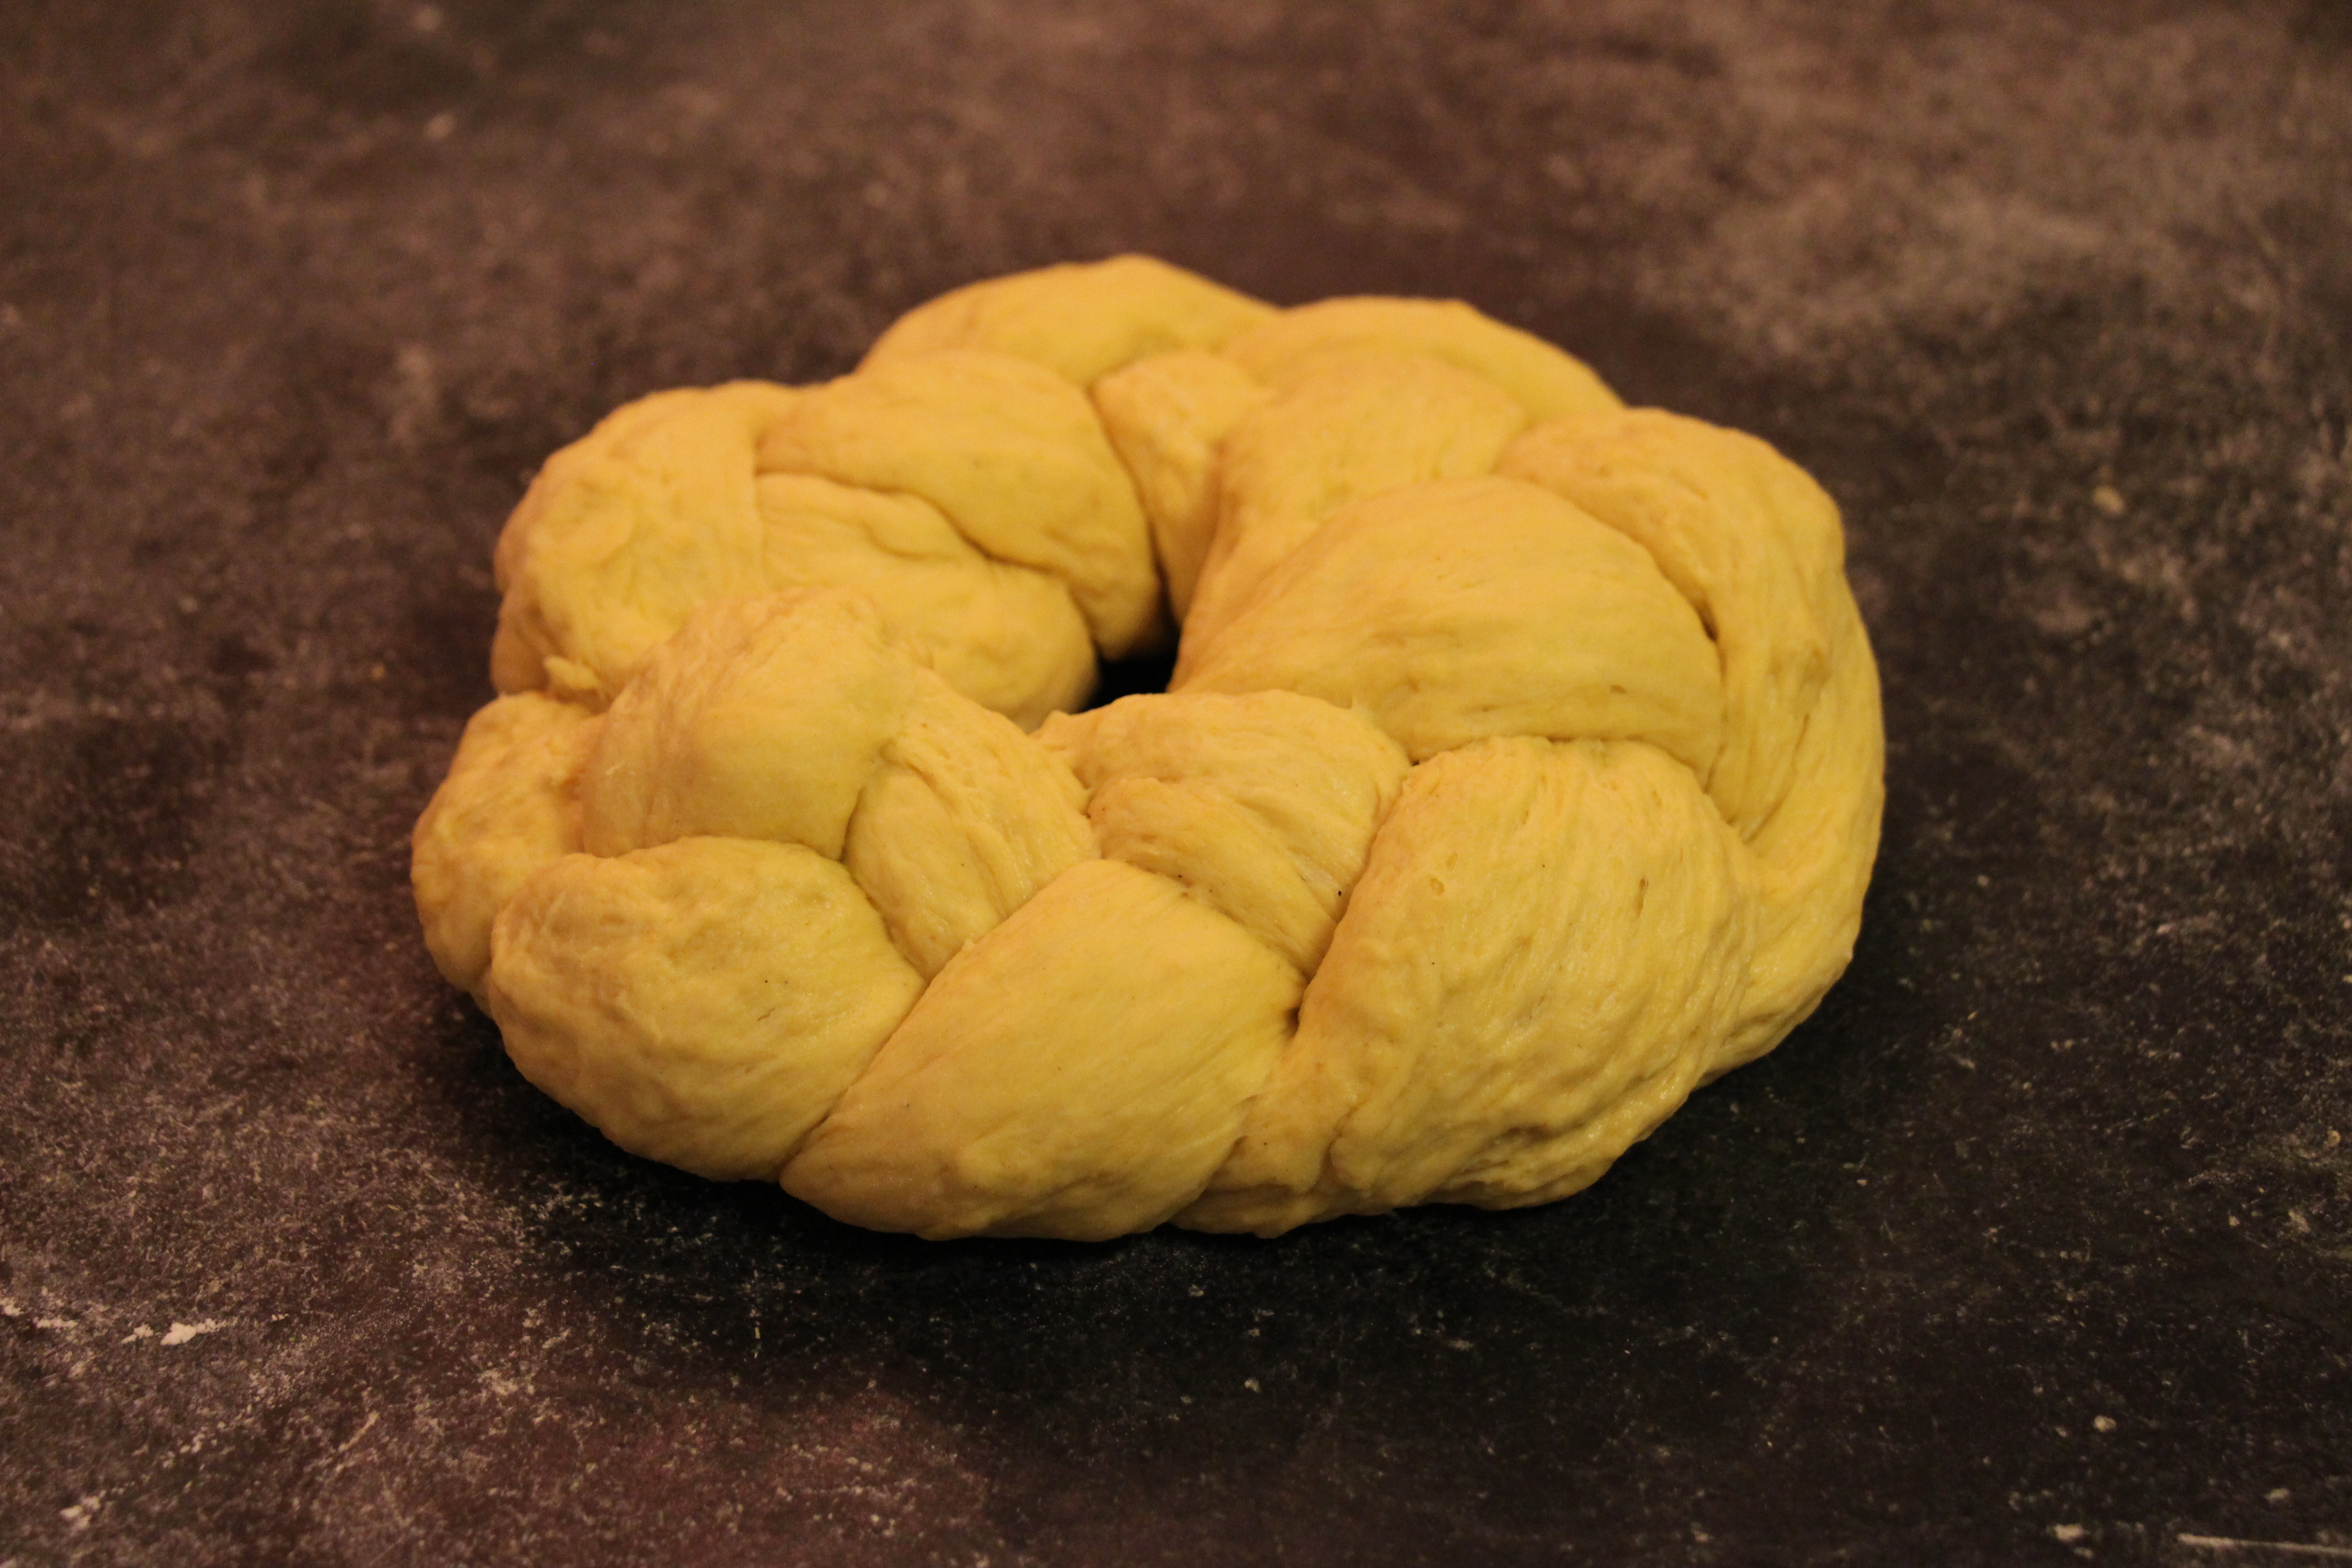
Divide the dough into six equal balls and roll into large ropes and then braid three together, making two braids.
Pinch the two ends together and tuck under, forming two circular loaves.
Preheat oven to 325 degrees. Line two sheet pans with baking paper, or grease, and put a braided loaf on each pan.
Cover and let rise in a warm place, until doubled.
Combine the remaining egg with a tablespoon of water to make an egg wash, and brush on the braids.
Bake for about 20-25 min or until the loaf feels firm to the touch. If you would like to use a thermometer, the internal temperature should read about 190 degrees.
While the bread is baking, prepare your frosting, mixing all ingredients until smooth and on the thicker side. Cut your cherries in half.
Remove bread from the oven and cool slightly, then decorate, using the green cherries as leaves, and the red as berries.
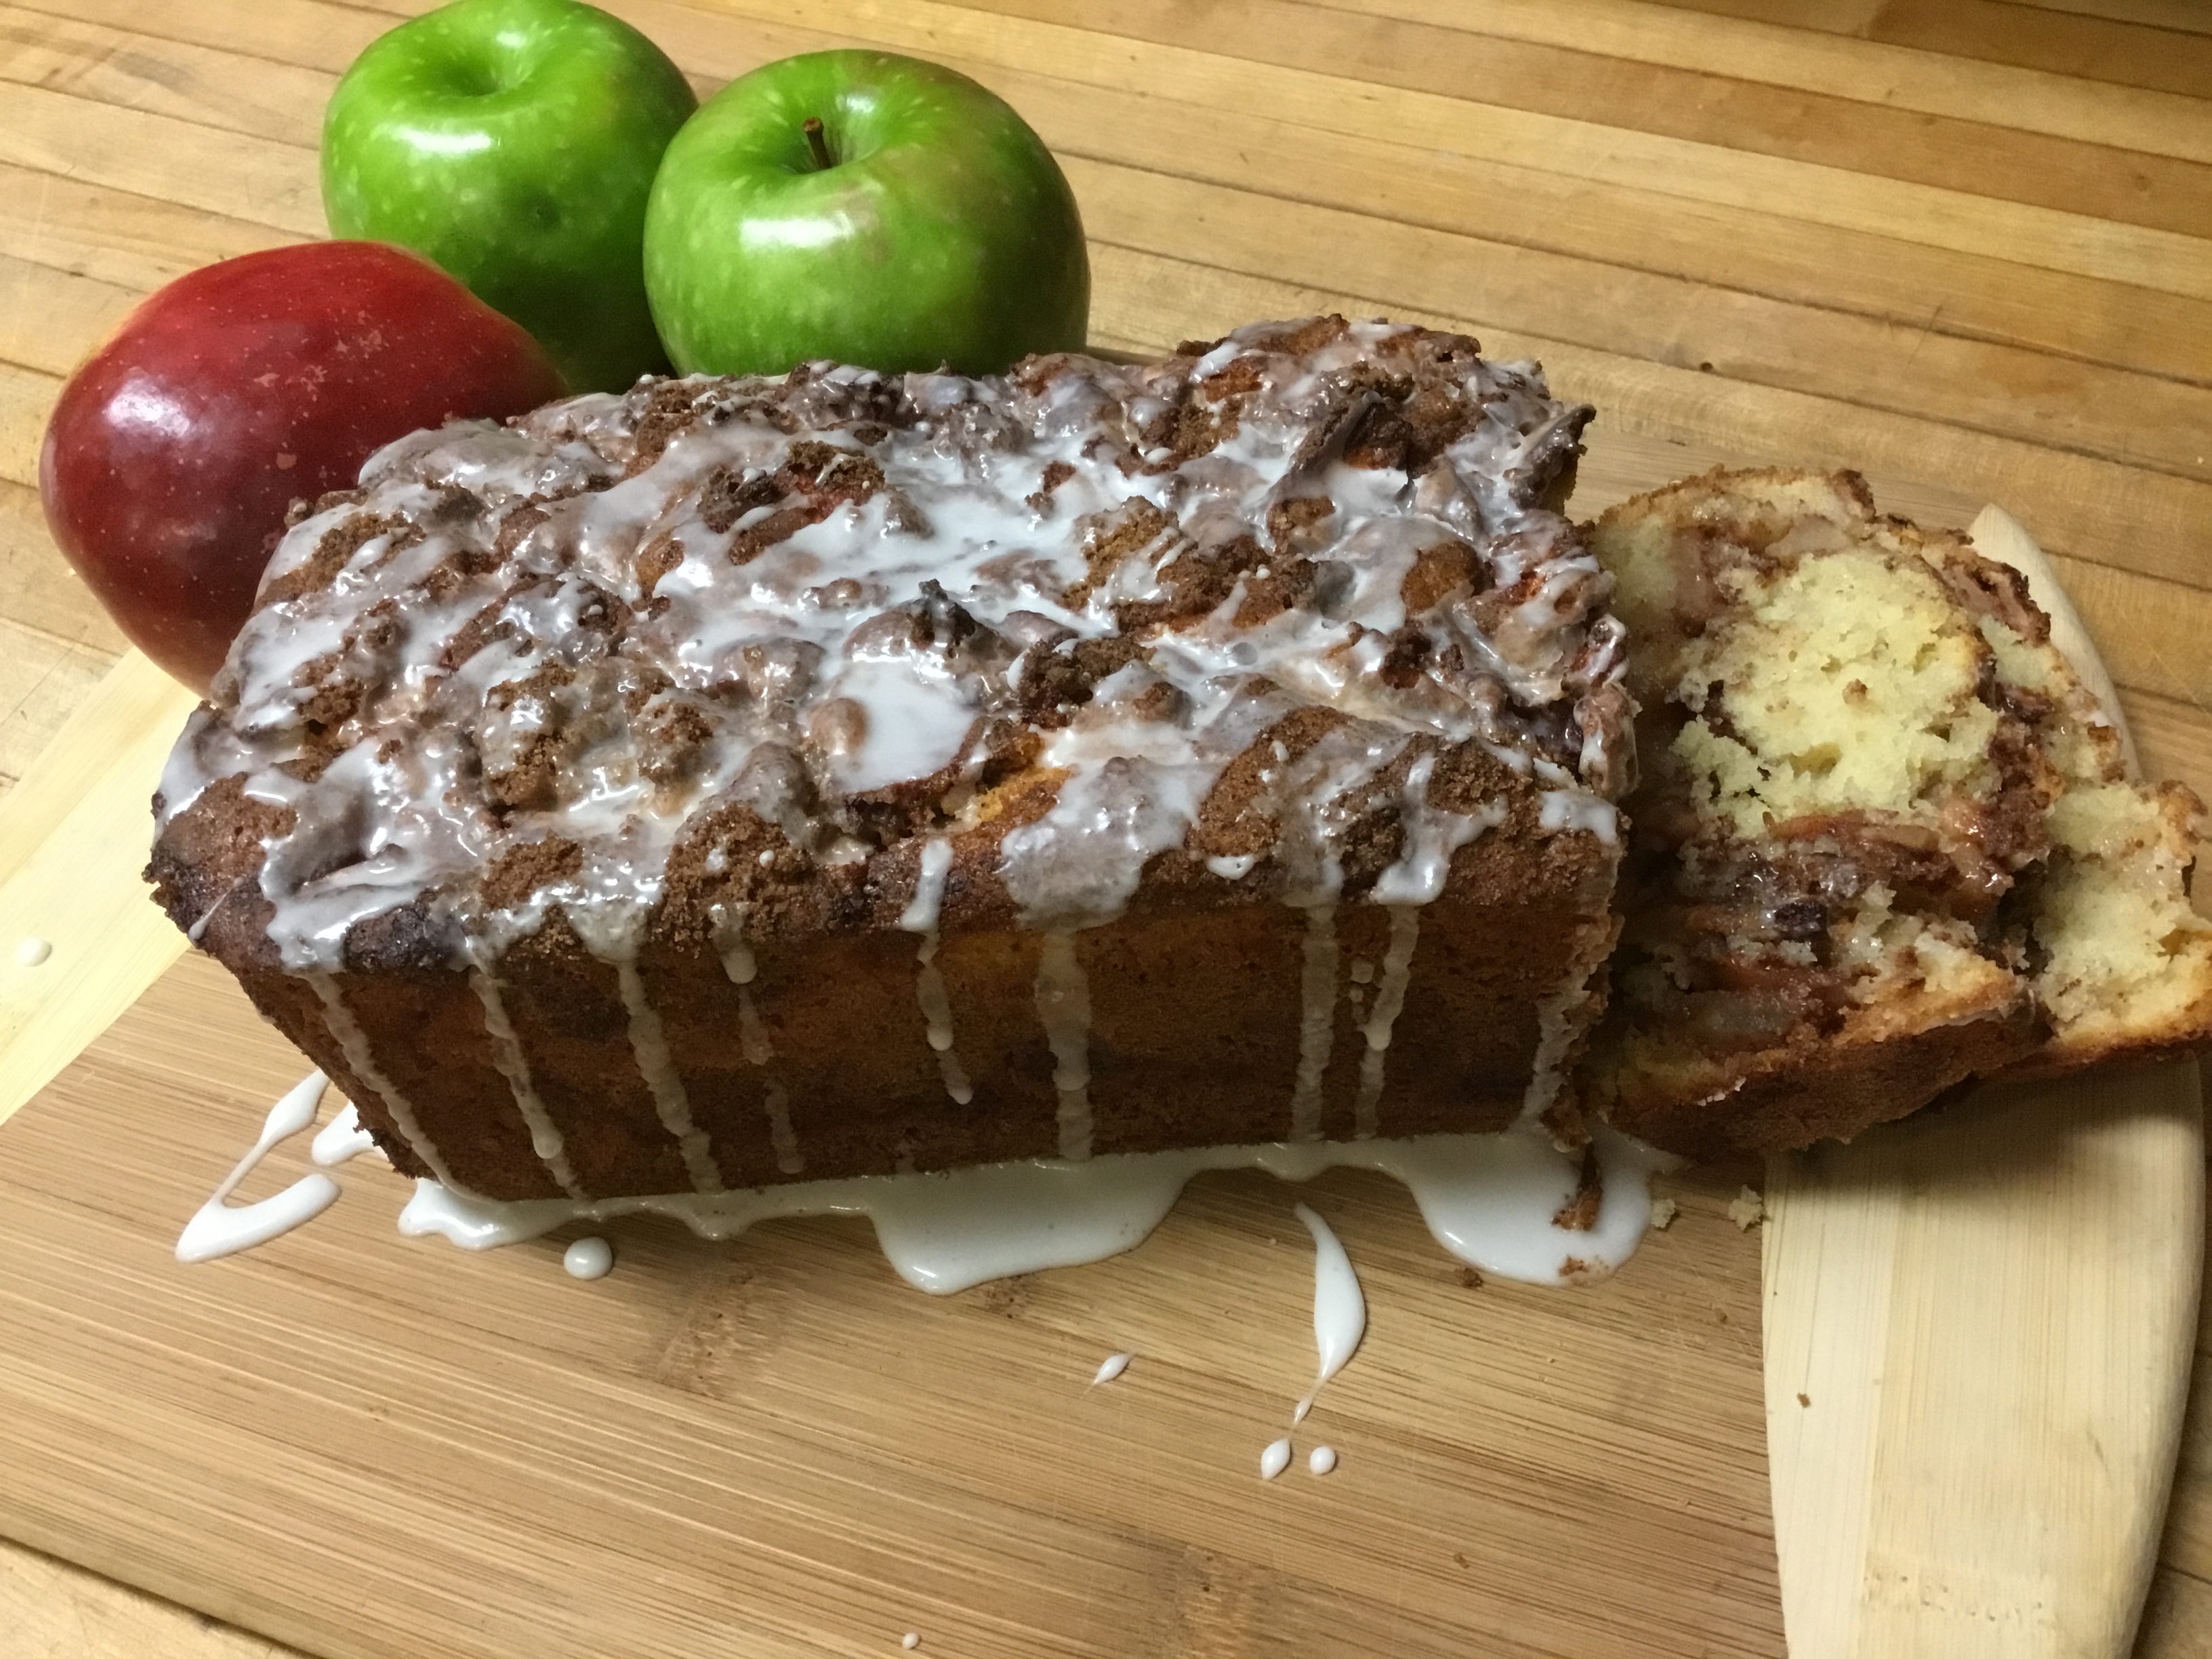
Several of us Sisters were recently sharing our favorite fall doughnut flavors, and it seemed the most popular Fall favorite was Apple Fritters. As a child, I remember getting these as a treat at our Fall fairs – crispy on the outside and slathered with creamy frosting, it just takes one quick bite to sink your teeth into the most delightful apple pieces covered with cinnamon. Yum! Just writing about it now makes my mouth water! Since our waistlines aren’t exactly what they were when we were kids, but still just dying to bring the memory back, I stumbled upon an Apple Fritter Bread. With a few modifications, this bread, although slightly healthier, still has those magical flavors. It’s a perfect recipe for young children to participate in making. And the aroma it brings into your kitchen…you don’t want to miss it!
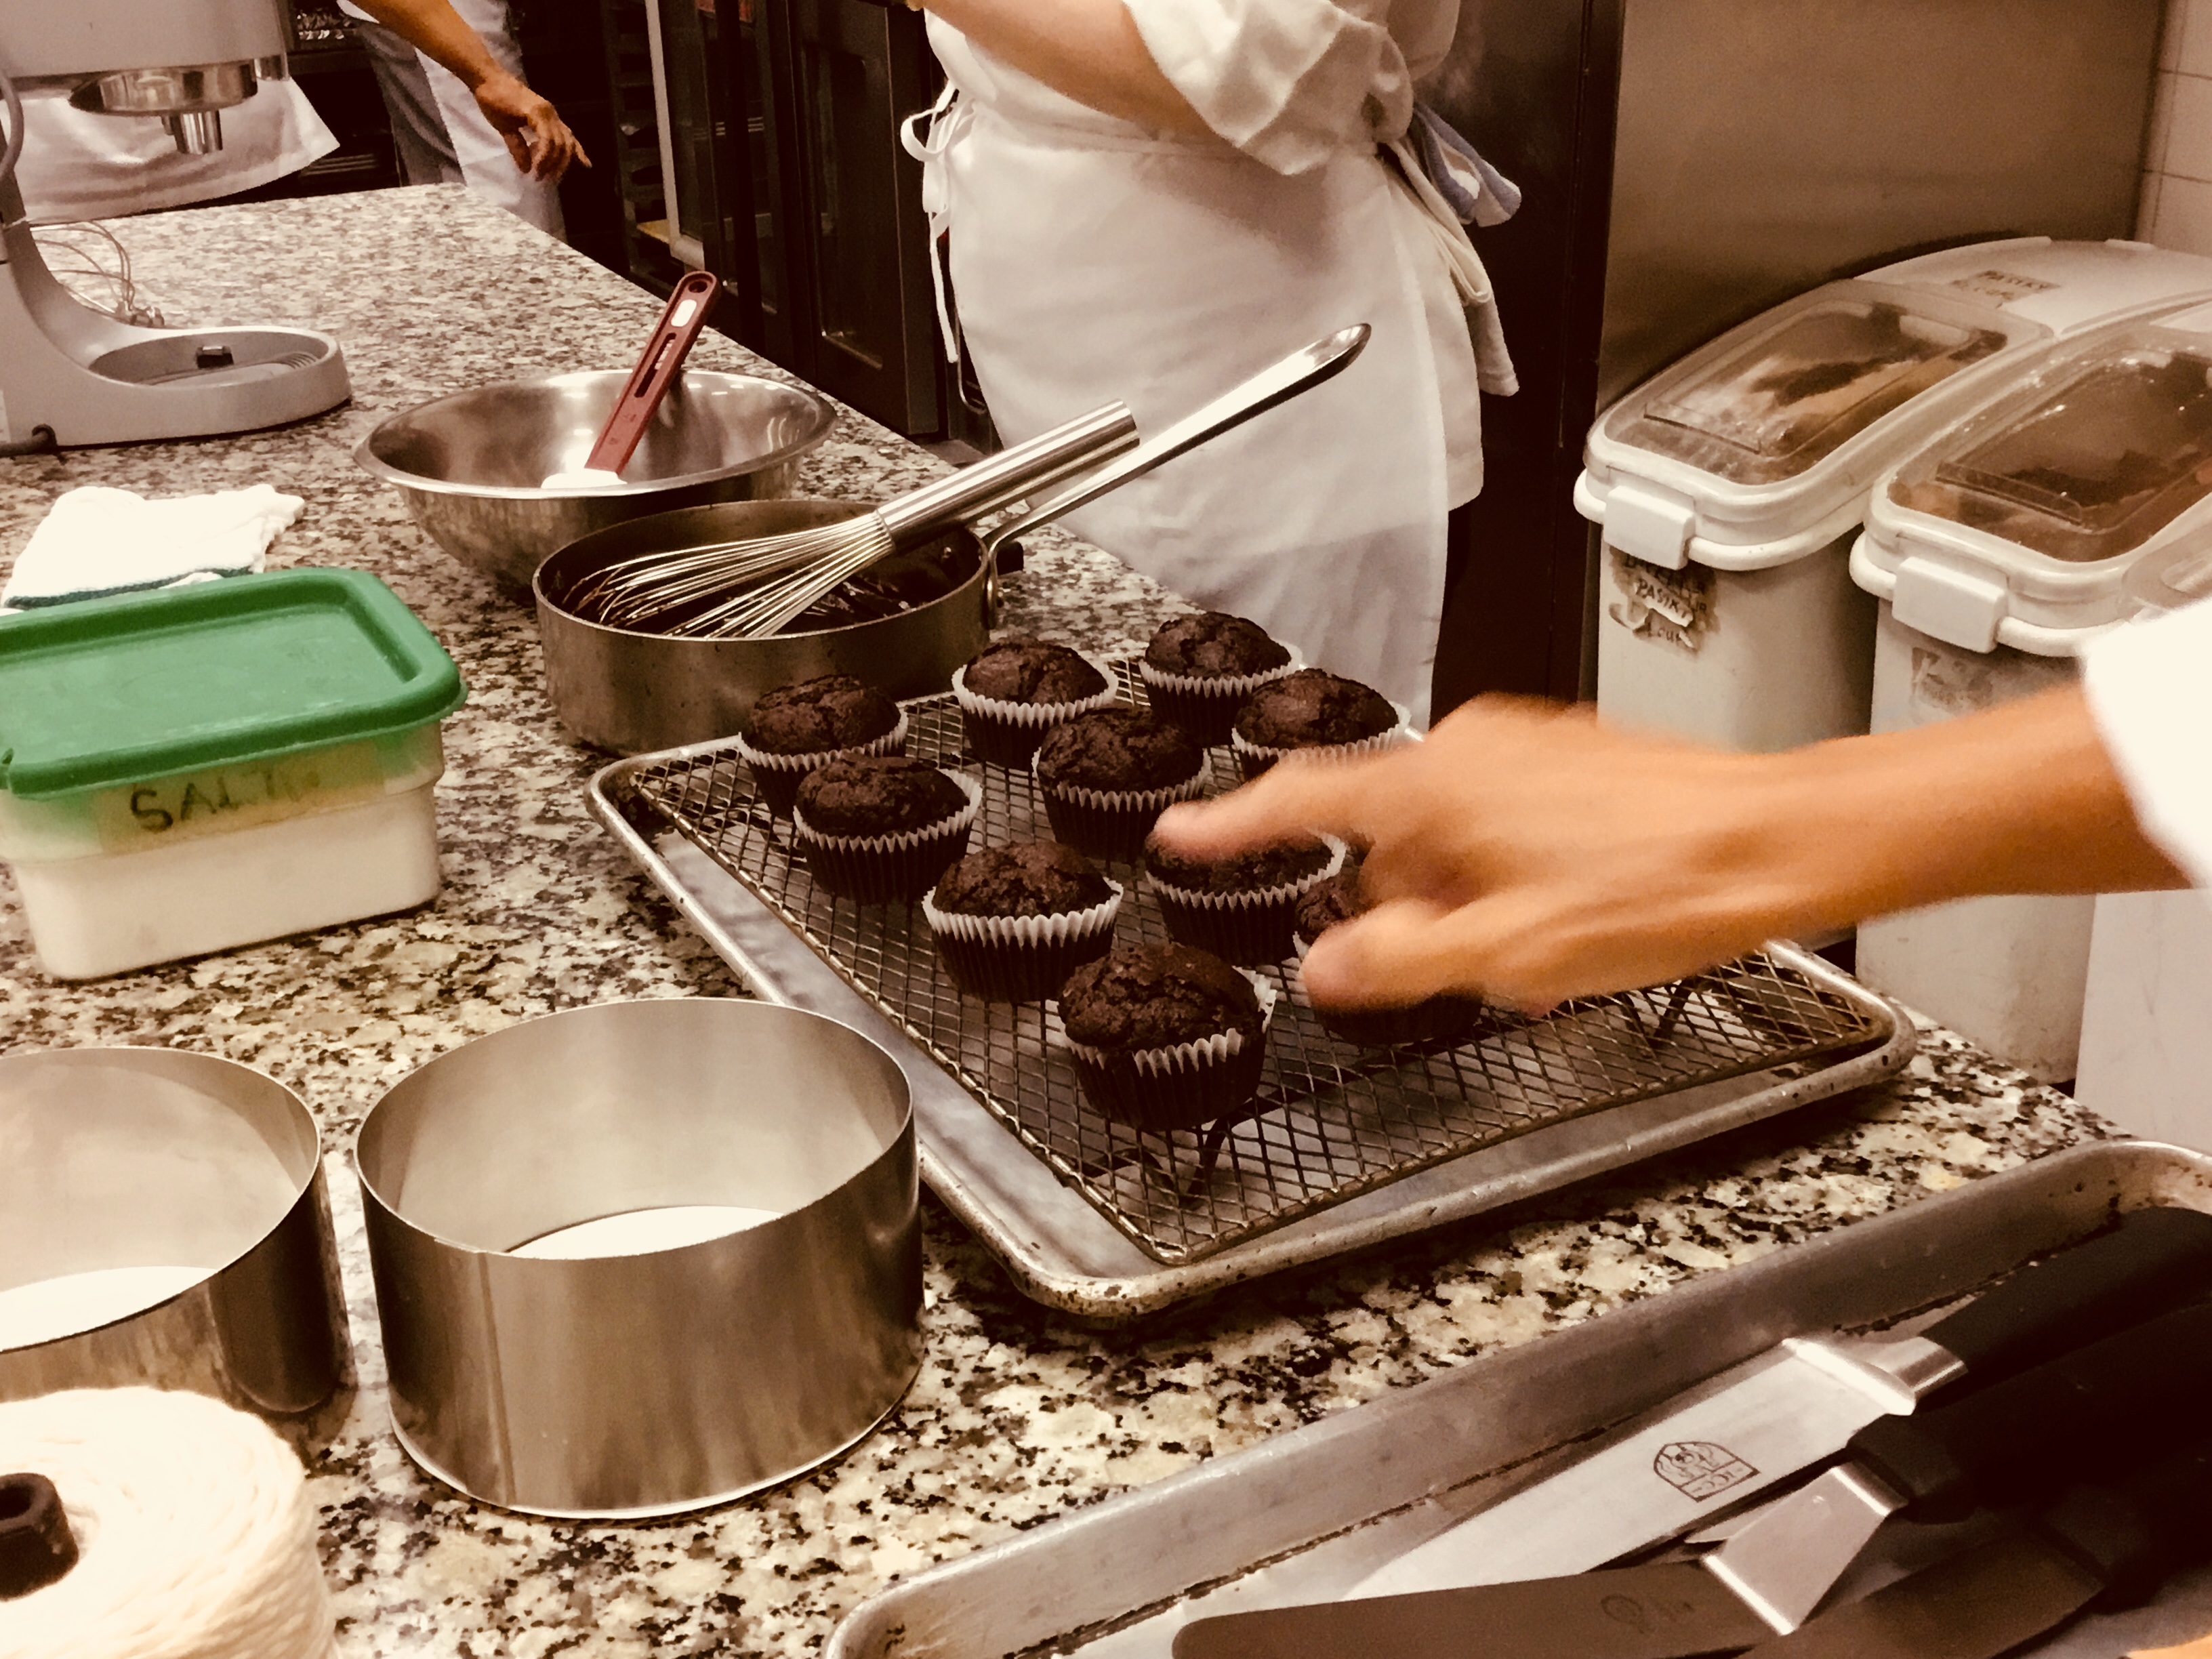
Recently, I had the privilege and gift of studying for a week in the Essentials of Pastry Arts at the International Culinary Center in New York City. Once known as the French Culinary Center, ICC has some of the most renowned pastry chefs in the United States – such as Jacques Pepin and Jacques Torres. Their alumni are some of the most noteworthy in the food and hospitality industry. It was a week of intense learning as well as exploring an area of personal inadequacy. Give me a savory dish over a fancy rolled fondant cake anytime! But, little did I know what a week of good, concentrated study could do to boost my confidence. Leaning into our insufficiency can sometimes prove “sweet” results.
Print Recipe
Votes: 0
Rating: 0
You:
Rate this recipe!
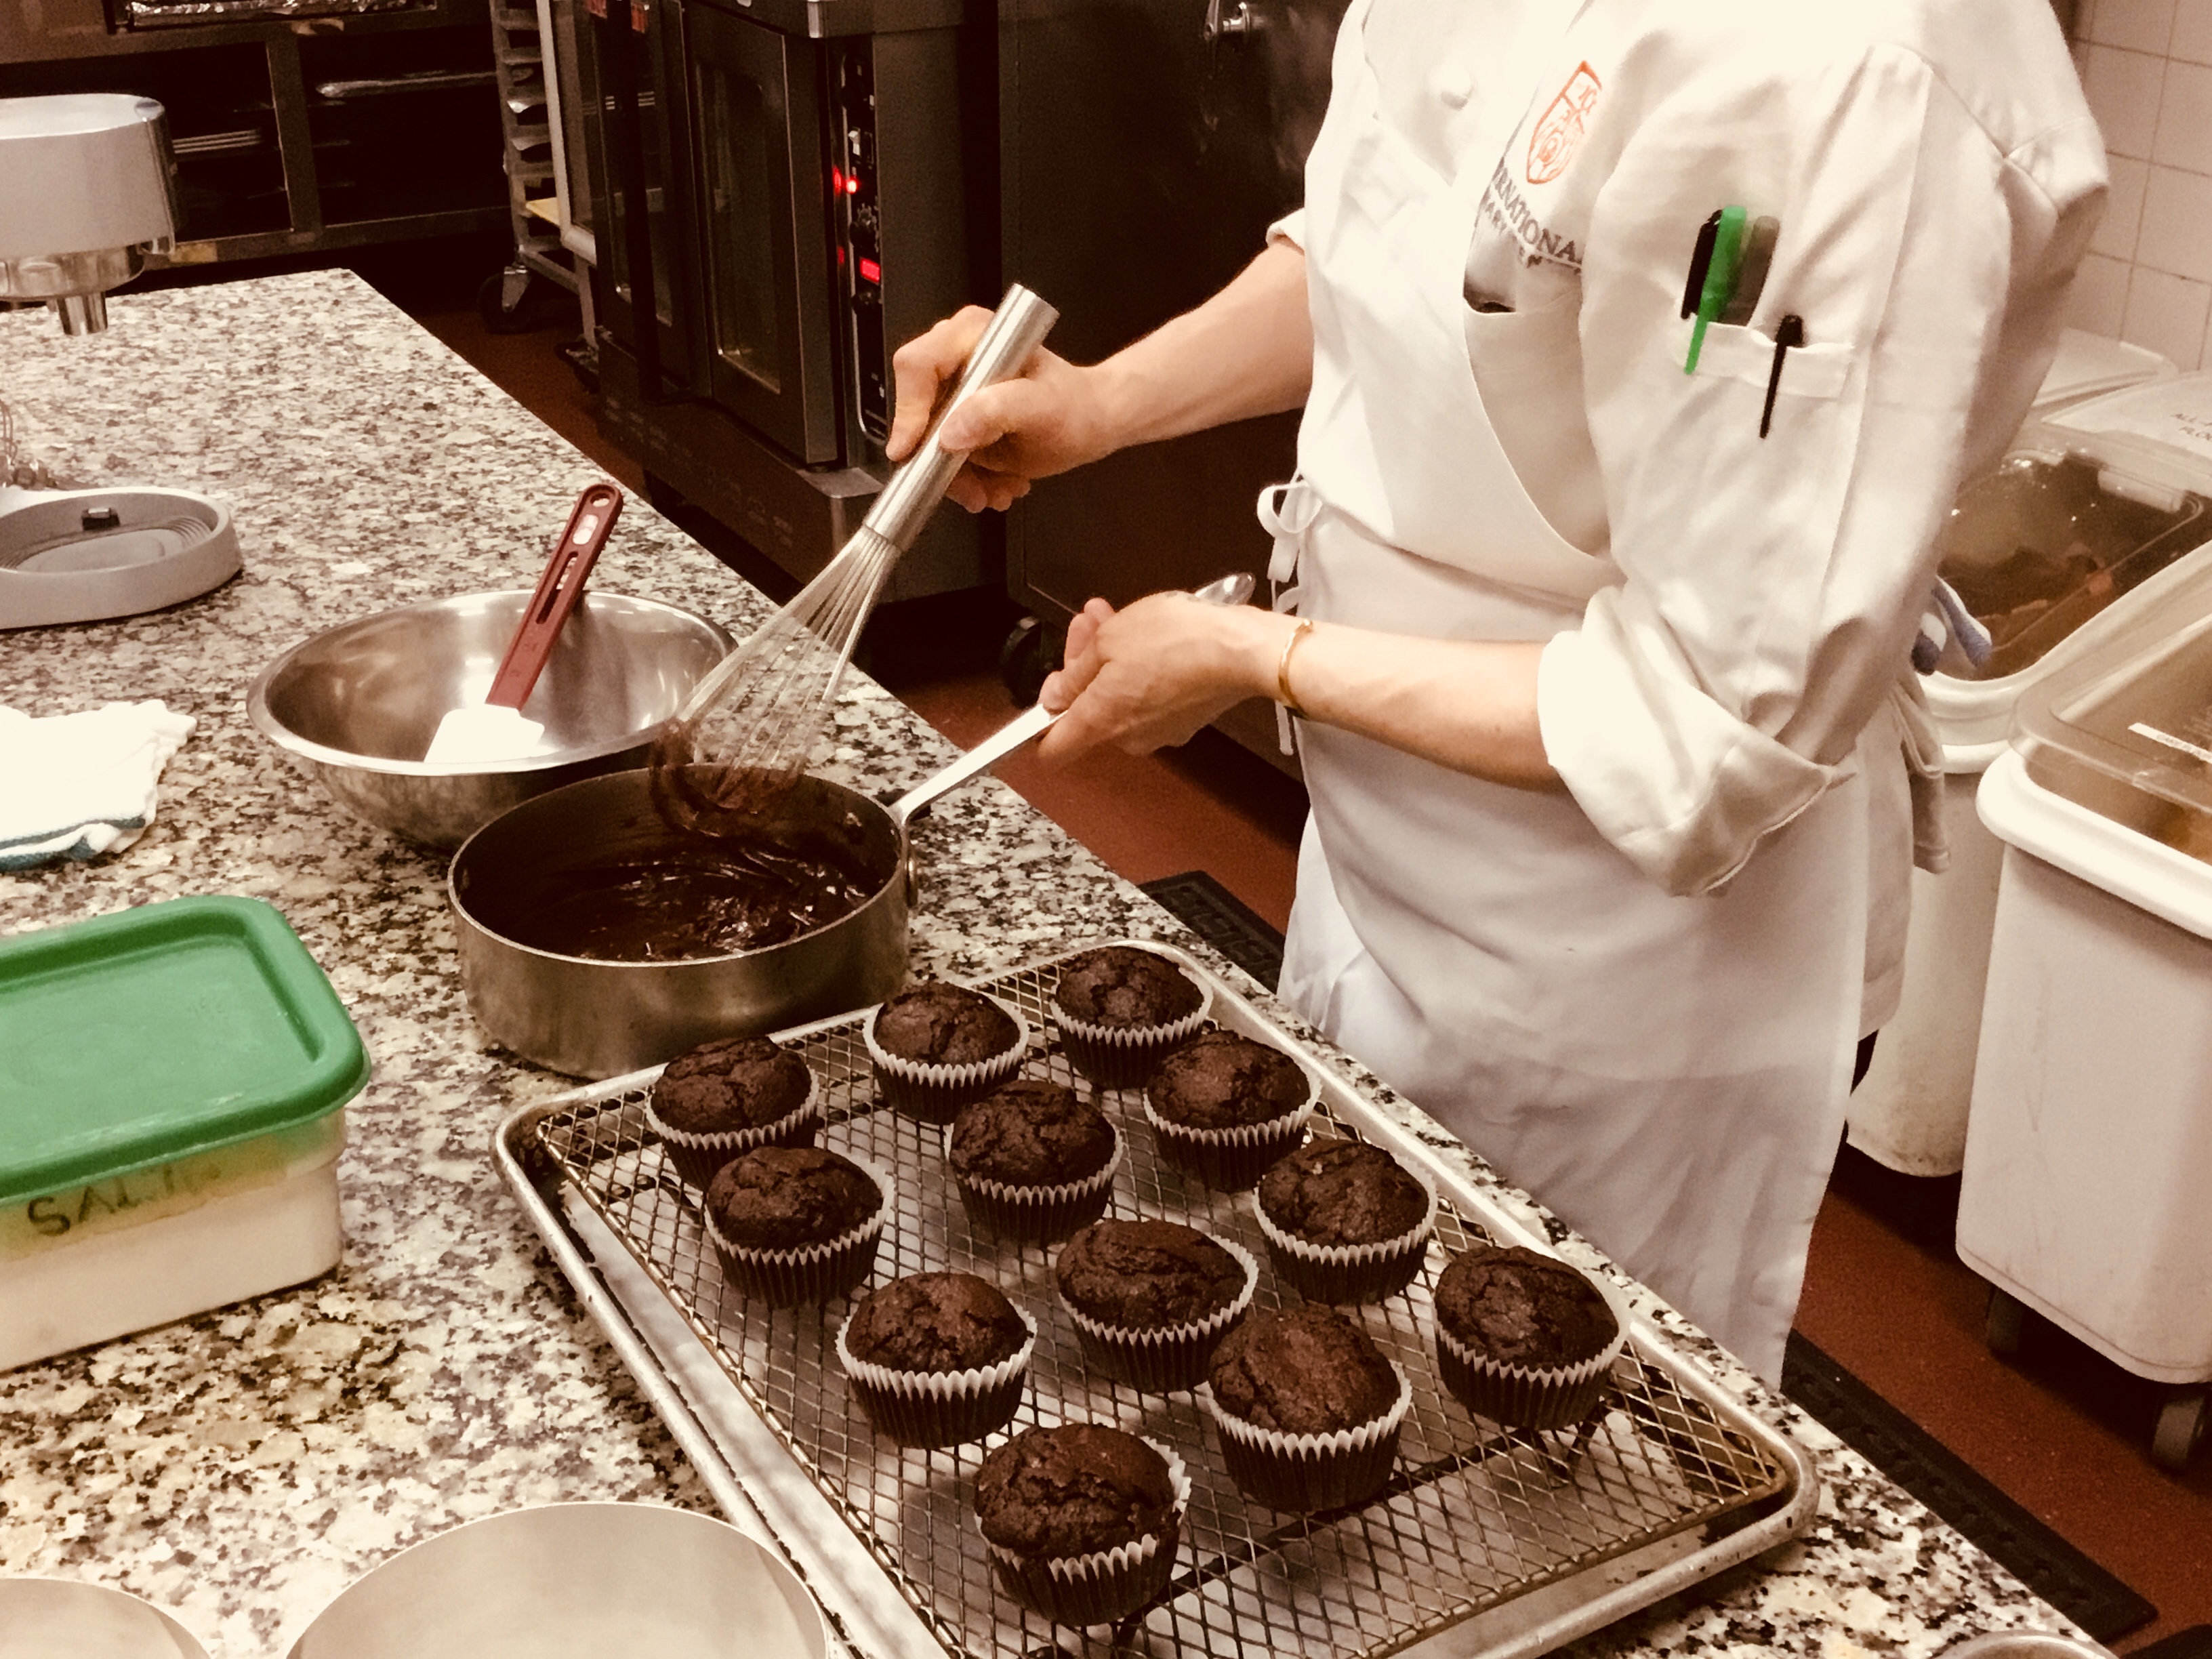
Decadent Chocolate Cupcakes
Tip - use a digital scale to weigh these ingredients and always be sure to "tare" your scale after putting your mixing bowl on it; that is, reset the scale to "0" before you start measuring ingredients
In a bowl, sift together the sugar, flour, salt and baking soda.
Combine butter, oil, cocoa powder, and water in a bowl and whisk until warm over a bain marie.
Whisk together the whole eggs, egg yolk, vanilla, and buttermilk until combined; add to butter mixture.
Stir liquid ingredients into the sifted flour mixture until just combined.
Portion the batter into the prepared cupcake molds until 3/4 full and bake in preheated oven for 15-20 min. (Bake as soon as you fill them; otherwise, they won't rise as much in the oven.)
Test the cupcakes for doneness - your finger should bounce back to the touch.
Immediately unmold the cupcakes onto a cooling rack Let them cool completely before icing.
Fudge Icing:
Place all ingredients for the icing in a saucepan and warm, stirring to combine.
Remove the pan from the heat and allow it to cool until desired consistency is reached.
Dip the cupcake tops by inverting into the cooled icing and then twist and place right side up on a cooling rack. Iced cupcakes are best served the day they're made. Add sprinkles on top if desired.