Old Fashioned Slow-Cooker Apple Butter

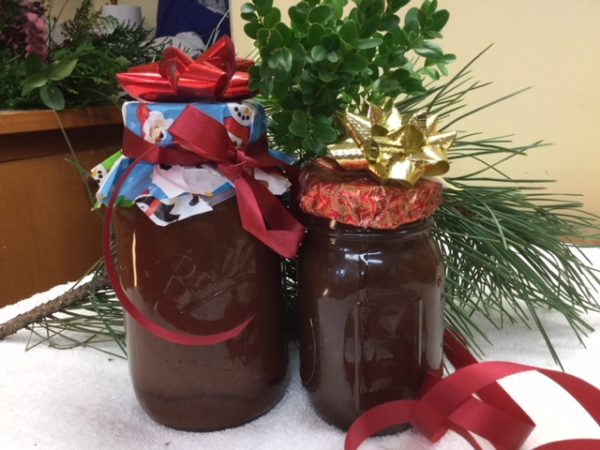
Christmas wouldn’t be “Christmas” without at least a sprinkling of homemade food gifts. However I was not too excited when a sister suggested our making apple butter as one of our gifts to give this year. That is, not until I came down into the convent kitchen early one morning and sampled a “Trial Run” of butter which had been making itself in our slow cooker all night while we had all been fast asleep.

As I ate my last bite of hot buttered toast topped with this delectable wonder I was convinced that this was the perfect “homemade” gift for us to give this Christmas. My only concern being would there be enough left by Christmas eve to give away to others?

Print Recipe
Votes: 0
Rating: 0
You:
Rate this recipe!
Old Fashioned Slow-Cooker Apple Butter
SERVINGS
4pints
CHANGE SERVING SIZE
pints
COOK TIME
12hours (or overnight)
PREP TIME
30mins
READY IN
12 1/2hrs

Ingredients

Instructions

  1. Place the apples in a slow cooker. In a separate bowl mix sugars, cinnamon, nutmeg cloves and salt. Combine with apples and mix well.
  2. Cook in slow cooker on low for 10 hours stirring occasionally. The apple mixture will become thick and dark brown.
  3. Uncover and add vanilla. Continue cooking uncovered on low for 2 hours.
  4. Remove from slow cooker and blend using an immersion blender, food processor or a countertop blender and puree the apple butter until completely smooth.
  5. Transfer the mixture into containers or your choice.
  6. Top your favorite toasted bread or muffin with fresh apple butter and enjoy with a steaming mug of tea or coffee for a simple morning treat!

NOTE: This can be frozen or stored up to 2 weeks covered in the
refrigerator.

St. Lucia Bread

Since St. Lucia’s Day (or St. Lucy’s Day) is just around the corner on December 13th, we thought we’d share this special Swedish bread with you – fantastic for the Holidays. The celebration of the day comes from stories that were told by Monks who first brought Christianity to Sweden. “St Lucia was a young Christian girl who was martyred, killed for her faith, in 304. The most common story told about St Lucia is that she would secretly bring food to the persecuted Christians in Rome, who lived in hiding in the catacombs under the city. She would wear candles on her head, so she had both her hands free to carry things. Lucy means ‘light’ so this is a very appropriate name.” (see note below**)

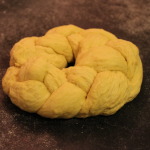
December 13th was also the Winter Solstice, the shortest day of the year, in the old ‘Julian’ Calendar and a pagan festival of lights in Sweden was turned into St. Lucia’s Day. It is now celebrated by a girl dressing in a white dress with a red sash around her waist and a crown of candles on her head. Thus, the wreath of bread dotted with candied “berries.” If you’d like you can also add small candles to the cake as well for a more festive look.

** read more at https://www.whychristmas.com/cultures/sweden.shtml

Print Recipe
Votes: 0
Rating: 0
You:
Rate this recipe!
St. Lucia Bread
SERVINGS
2loaves
CHANGE SERVING SIZE
loaves
COOK TIME
20-25mins
PREP TIME
30mins
READY IN
2-3hrs

Ingredients

Instructions

  1. In a large mixer, soften the yeast in the warm water
  2. Heat the milk until warm. Add the oil and sugar and stir to dissolve.
  3. Add this mixture to the yeast mixture in the mixer
  4. Add salt and saffron
  5. Add the 3 slightly beaten eggs and mix with dough hook.
  6. Add the lemon zest, citron and almonds and continue mixing
  7. One cup at a time, add the flour and mix well after each addition. Stop adding the flour when the dough starts pulling away from the side of the bowl. Adding more flour if necessary.
  8. Turn the dough out onto a floured board and knead for 5 min, or until dough becomes smooth and elastic; adding flour as necessary.
  9. Place the dough in a greased bowl, cover, and let rise in a warm place until almost doubled in size, about 1 hr. (At this point, you can refrigerate the dough, if you want to work with it later).
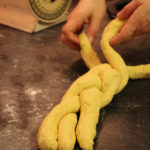
  10. Divide the dough into six equal balls and roll into large ropes and then braid three together, making two braids.
  11. Pinch the two ends together and tuck under, forming two circular loaves.
  12. Preheat oven to 325 degrees. Line two sheet pans with baking paper, or grease, and put a braided loaf on each pan.
  13. Cover and let rise in a warm place, until doubled.
  14. Combine the remaining egg with a tablespoon of water to make an egg wash, and brush on the braids.
  15. Bake for about 20-25 min or until the loaf feels firm to the touch. If you would like to use a thermometer, the internal temperature should read about 190 degrees.
  16. While the bread is baking, prepare your frosting, mixing all ingredients until smooth and on the thicker side. Cut your cherries in half.
  17. Remove bread from the oven and cool slightly, then decorate, using the green cherries as leaves, and the red as berries.

Cheese Danish Braid

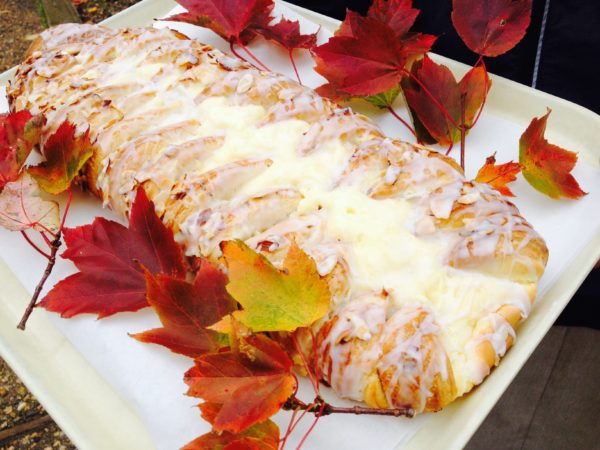
At our Thanksgiving feast we enjoyed celebrating God’s blessings. One of them, the best in my opinion, is of course, lovely breakfast treats. In specific, a golden cream cheese danish with a hint of almond…can you see where were going with this?

Danishes can be a little tricky – below is simple version of the recipe. If you’d like a flakier danish, I suggest doing the square of butter version (see notes at end of recipe).
But either way, with a straight-forward approach and a little bit of time, you can enjoy the sweet, flaky treat for a Sunday brunch or with your mid-morning coffee. We are so grateful to God’s many blessings and pray that you also were able to appreciate God’s goodness this year. Happy belated Thanksgiving!

Print Recipe
Votes: 2
Rating: 4.5
You:
Rate this recipe!
Cheese Danish Braid
SERVINGS
12servings
CHANGE SERVING SIZE
servings
COOK TIME
15-20mins
PREP TIME
20mins
READY IN
30mins (plus overnight for resting dough)

Ingredients

Instructions

  1. In a medium bowl, add the yeast, 1 teaspoon sugar, and warm water. Let the yeast rest until it proofs (5 minutes). Once the yeast has proofed, add the egg, milk, sugar, and salt. Stir with a whisk, and set to the side.
  2. Place the flour and 1/2 cup cubed butter into a large bowl. With a pastry blender, combine until the butter is in tiny pieces. (You can also use the food processor for this step.) **NOTE** If you'd like a flakier Danish, set aside 1/2 cup of butter and make into a butter square.
  3. Add the wet ingredients to the flour and combine until the dough comes together. Place the dough onto a floured work surface and shape into a square. Roll the dough into a rectangle 9 x 13-inches. If you'd like a flakier crust, place the butter square (see #8) in the middle and fold the dough lengthwise into thirds (similar to folding a letter to fit into an envelope). Roll the dough into a rectangle again, and then again fold into thirds. Repeat this process twice more, until you've done it a total of 3 times. Cut the dough in half, wrap each piece in plastic wrap, and place in the fridge overnight. The dough keeps for one week in the fridge and 2 months in the freezer.
  4. Beat Cream Cheese till very smooth and no lumps remain. Combine with rest of filling ingredients.
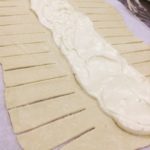
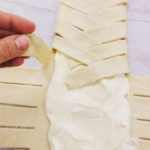
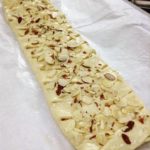
  5. Remove one piece of dough from the fridge, and save the other for a rainy day (the dough can last in the fridge for up to 5 days and in the freezer for 3 months). On a floured piece of parchment paper, roll out the dough into a 9 x 13-inch rectangle. Spoon some of the cream cheese filling in the middle of the dough. With the dough laid in front of you vertically (so that the smaller 9-inch end is facing you), make 1-inch diagonal cuts down the left and right sides of the dough (imagine you are making a Christmas tree). Once you have reached the bottom, cut away two triangle pieces, so that the dough now has a tree trunk. Fold the tree trunk flap over the apples, then go back to the top and fold each strip over the cheese filling, alternating from left to right and moving towards the bottom.Preheat the oven to 400º F.
  6. Gently lift the parchment paper and the braid onto a baking sheet. Brush the top of the pastry with an egg wash (one egg white and a teaspoon of water). Bake for 15 to 20 minutes, or until brown on top.
  7. In a small bowl, whisk the powdered sugar, 1 tablespoon of milk, and vanilla until you get a desired consistency. Add a tablespoon more milk if the icing is too thick. (It should be pourable, but not so thin that it drips off of the pastry.) Drizzle over the top of the braid and sprinkle with powdered sugar. Serve warm. The danish lasts for 3 to 4 days. It's best to store in the fridge, covered in plastic wrap, and then reheated in the oven or microwave before eating.

*NOTE: Option for Flakier Dough: Before cubing butter, set aside 1/2 cup of butter. Cut into 4 squares, sprinkle with a little flour and roll to a 1/4" width between 2 sheets of parchment paper. Refrigerate till ready to use in Step #5.

Apple Fritter Quick Bread

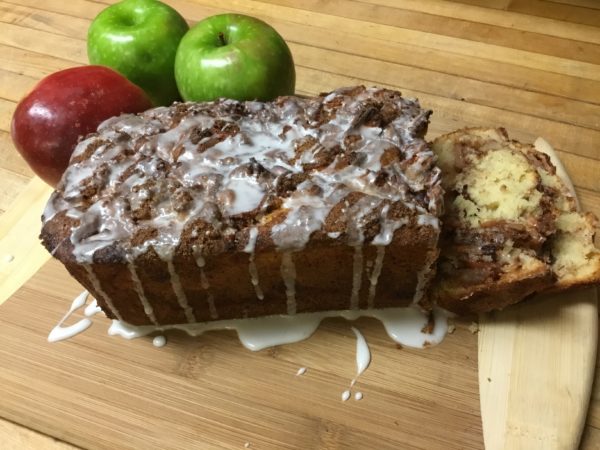
Several of us Sisters were recently sharing our favorite fall doughnut flavors, and it seemed the most popular Fall favorite was Apple Fritters. As a child, I remember getting these as a treat at our Fall fairs – crispy on the outside and slathered with creamy frosting, it just takes one quick bite to sink your teeth into the most delightful apple pieces covered with cinnamon. Yum! Just writing about it now makes my mouth water! Since our waistlines aren’t exactly what they were when we were kids, but still just dying to bring the memory back, I stumbled upon an Apple Fritter Bread. With a few modifications, this bread, although slightly healthier, still has those magical flavors. It’s a perfect recipe for young children to participate in making. And the aroma it brings into your kitchen…you don’t want to miss it!

Print Recipe
Votes: 4
Rating: 5
You:
Rate this recipe!
Apple Fritter Quick Bread
SERVINGS
8servings
CHANGE SERVING SIZE
servings
COOK TIME
1hr
PREP TIME
15mins
READY IN
1 hr15 mins

Ingredients

Instructions

  1. Preheat oven to 350 degrees. Use a 9x5 -inch loaf pan and spray with non-stick spray or line with foil and spray with non-stick spray.
  2. Mix brown sugar and cinnamon together in a bowl. Set aside.
  3. In another medium-sized bowl, beat white sugar and butter together using an electric mixer until smooth and creamy.
  4. Beat in eggs, 1 at a time, until blended in; add in vanilla extract.
  5. Combine flour, baking powder and salt together in another bowl and add into creamed butter mixture and stir until blended.
  6. Mix milk into batter until smooth.
  7. Pour half the batter into the prepared loaf pan; add half the chopped apple mixture.
  8. Sprinkle 1/2 of the brown sugar/cinnamon mixture you set aside earlier, on top of apple layer.
  9. Pour the remaining batter over apple layer and top with remaining chopped apples, then the remaining brown sugar/cinnamon mixture.
  10. Lightly pat apples into batter; swirl brown sugar mixture through apples using knife or spoon.
  11. Bake in the preheated oven until a toothpick inserted in the center of the loaf comes out clean, approximately 60 minutes.
  12. To make a glaze, mix powdered sugar and milk or cream together until well mixed.
  13. Let cool for about 15 minutes before drizzling with glaze.

(add chopped walnuts or pecans if you'd like)

Refrigerator Dill Spears

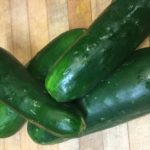
Bumper crop! Our community has several gardens, an orchard, and a vineyard, and every year
seems to have a harvest highlight. So far this has been the year of the cucumber. After serving
cucumber salad in numerous forms, and making at least two multiple batches of sweet
refrigerator pickles, I have to admit that I sighed when I saw the next tub of cucumbers arrive in our kitchen. Garden bumper crops are faith building but can offer a challenge for speedy
processing and creative recipes. One year it was plums, and we saw plum pork, plum sauce,
plum butter, plum muffins, plum cakes, and frozen plums in the freezer for quite some time.
We found ourselves praying for a peach!

But this year – it’s the cucumber! Someone mentioned refrigerator dill pickles, and although I
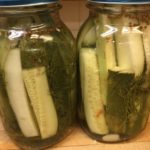
was initially daunted by the idea, I found myself researching several different recipes and quite taken by lovely images on the internet of homemade dill pickles. With the beautiful ingredients in this recipe, you’ll end up with colorful jars of refrigerator pickles to give as gifts, or to keep on hand for eating. Once opened and served, expect them to disappear quickly! This recipe also can be multiplied out easily. (I made two gallons of pickles.) However, if multiplying, do use less garlic.

Rumor has it that this will also be our year for the apple. The initial drops and first fruits have already started to roll in….stay tuned.

Print Recipe
Votes: 0
Rating: 0
You:
Rate this recipe!
Refrigerator Dill Spears
SERVINGS
21-quart jars
CHANGE SERVING SIZE
1-quart jars
COOK TIME
10mins (plus refrigeration time)
PREP TIME
20mins
READY IN
24hrs

Ingredients

Instructions

  1. Combine the vinegar, salt, and sugar in a stainless steel or Teflon pan over high heat. Whisk until the salt and sugar are dissolved.
  2. Transfer the liquid into a bowl and whisk in the cold water. Refrigerate brine until it has cooled enough to add to the cucumbers (approx. 30 minutes).
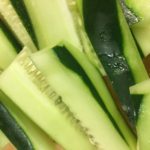
  3. While brine is cooling, place cucumbers into two clean 1-quart jars, leaving a little room to add the dill and spices.
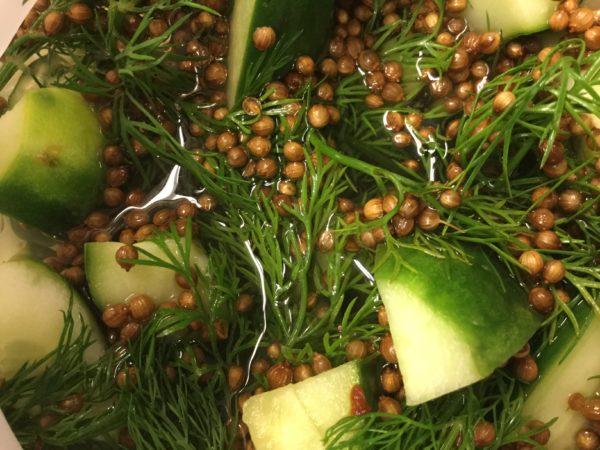
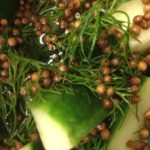
  4. Then, when brine is cooled, add the coriander seeds, garlic cloves, mustard seeds, red pepper flakes, dill sprigs, and chilled brine into jars, dividing evenly.
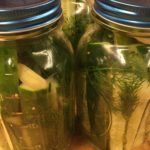
  5. This is the fun part, as the finished product looks lovely! If necessary, add a bit of cold water until the brine covers the cucumbers.
  6. Cover and refrigerate about 24 hours, then serve. Cucumbers will keep in the refrigerator for up to one month.

Harvest Muffins

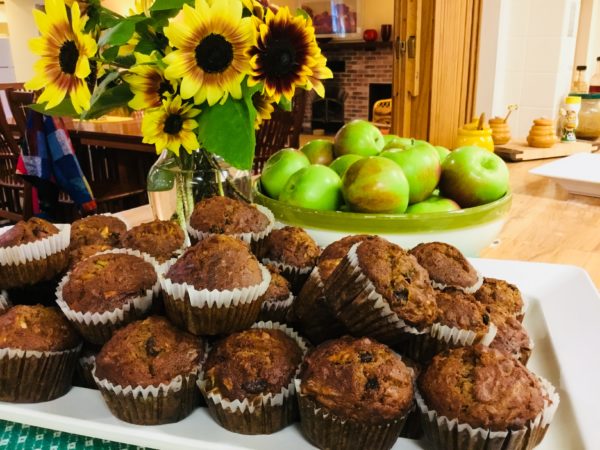
There’s a crispness to the air, a welcome relief to the humidity and heat of our 2018 Cape Cod summer! This past Saturday, our entire community joined in a “beehive” of activity as we
tackled a daunting list of tasks and projects, left in the wake of a busy summer. Digging out attic spaces, weeding gardens, scrubbing the bell tower floor, getting the barn clean and ready to house animals for winter, and cooking meals ahead for an upcoming choir recording were some of the projects accomplished last weekend. But it was also the beginning of harvest time. We culled apples and pears and gratefully recognized what a bountiful harvest it was going to be. The Sisterhood celebrated with brunch on Sunday. And since I was “in the mood,” I whipped up some ingredient-packed muffins that had all the essence of Fall – complete with cinnamon!

Print Recipe
Votes: 1
Rating: 2
You:
Rate this recipe!
Harvest Muffins
SERVINGS
20muffins (approx.)
CHANGE SERVING SIZE
muffins (approx.)
COOK TIME
20-25mins
PREP TIME
15mins
READY IN
35mins

Ingredients

Instructions

  1. Preheat oven to 375 degrees F.
  2. Grease muffin cups with non-stick spray and line with muffin papers
  3. Beat eggs, oil, orange zest and vanilla in a bowl to blend
  4. Combine flour, sugar, baking soda, cinnamon and salt together in a bowl
  5. Separately, mix carrots, zucchini, apple, raisins, coconut, and almonds together - add the egg and oil mixture
  6. Sift flour mixture into the vegetable mixture and mix all together by hand until well blended.
  7. Using an ice cream scoop, fill each muffin cup with one scoop of batter.
  8. Bake until center of muffin springs back to touch - about 20-25 min.
  9. Serve warm or at room temperature.