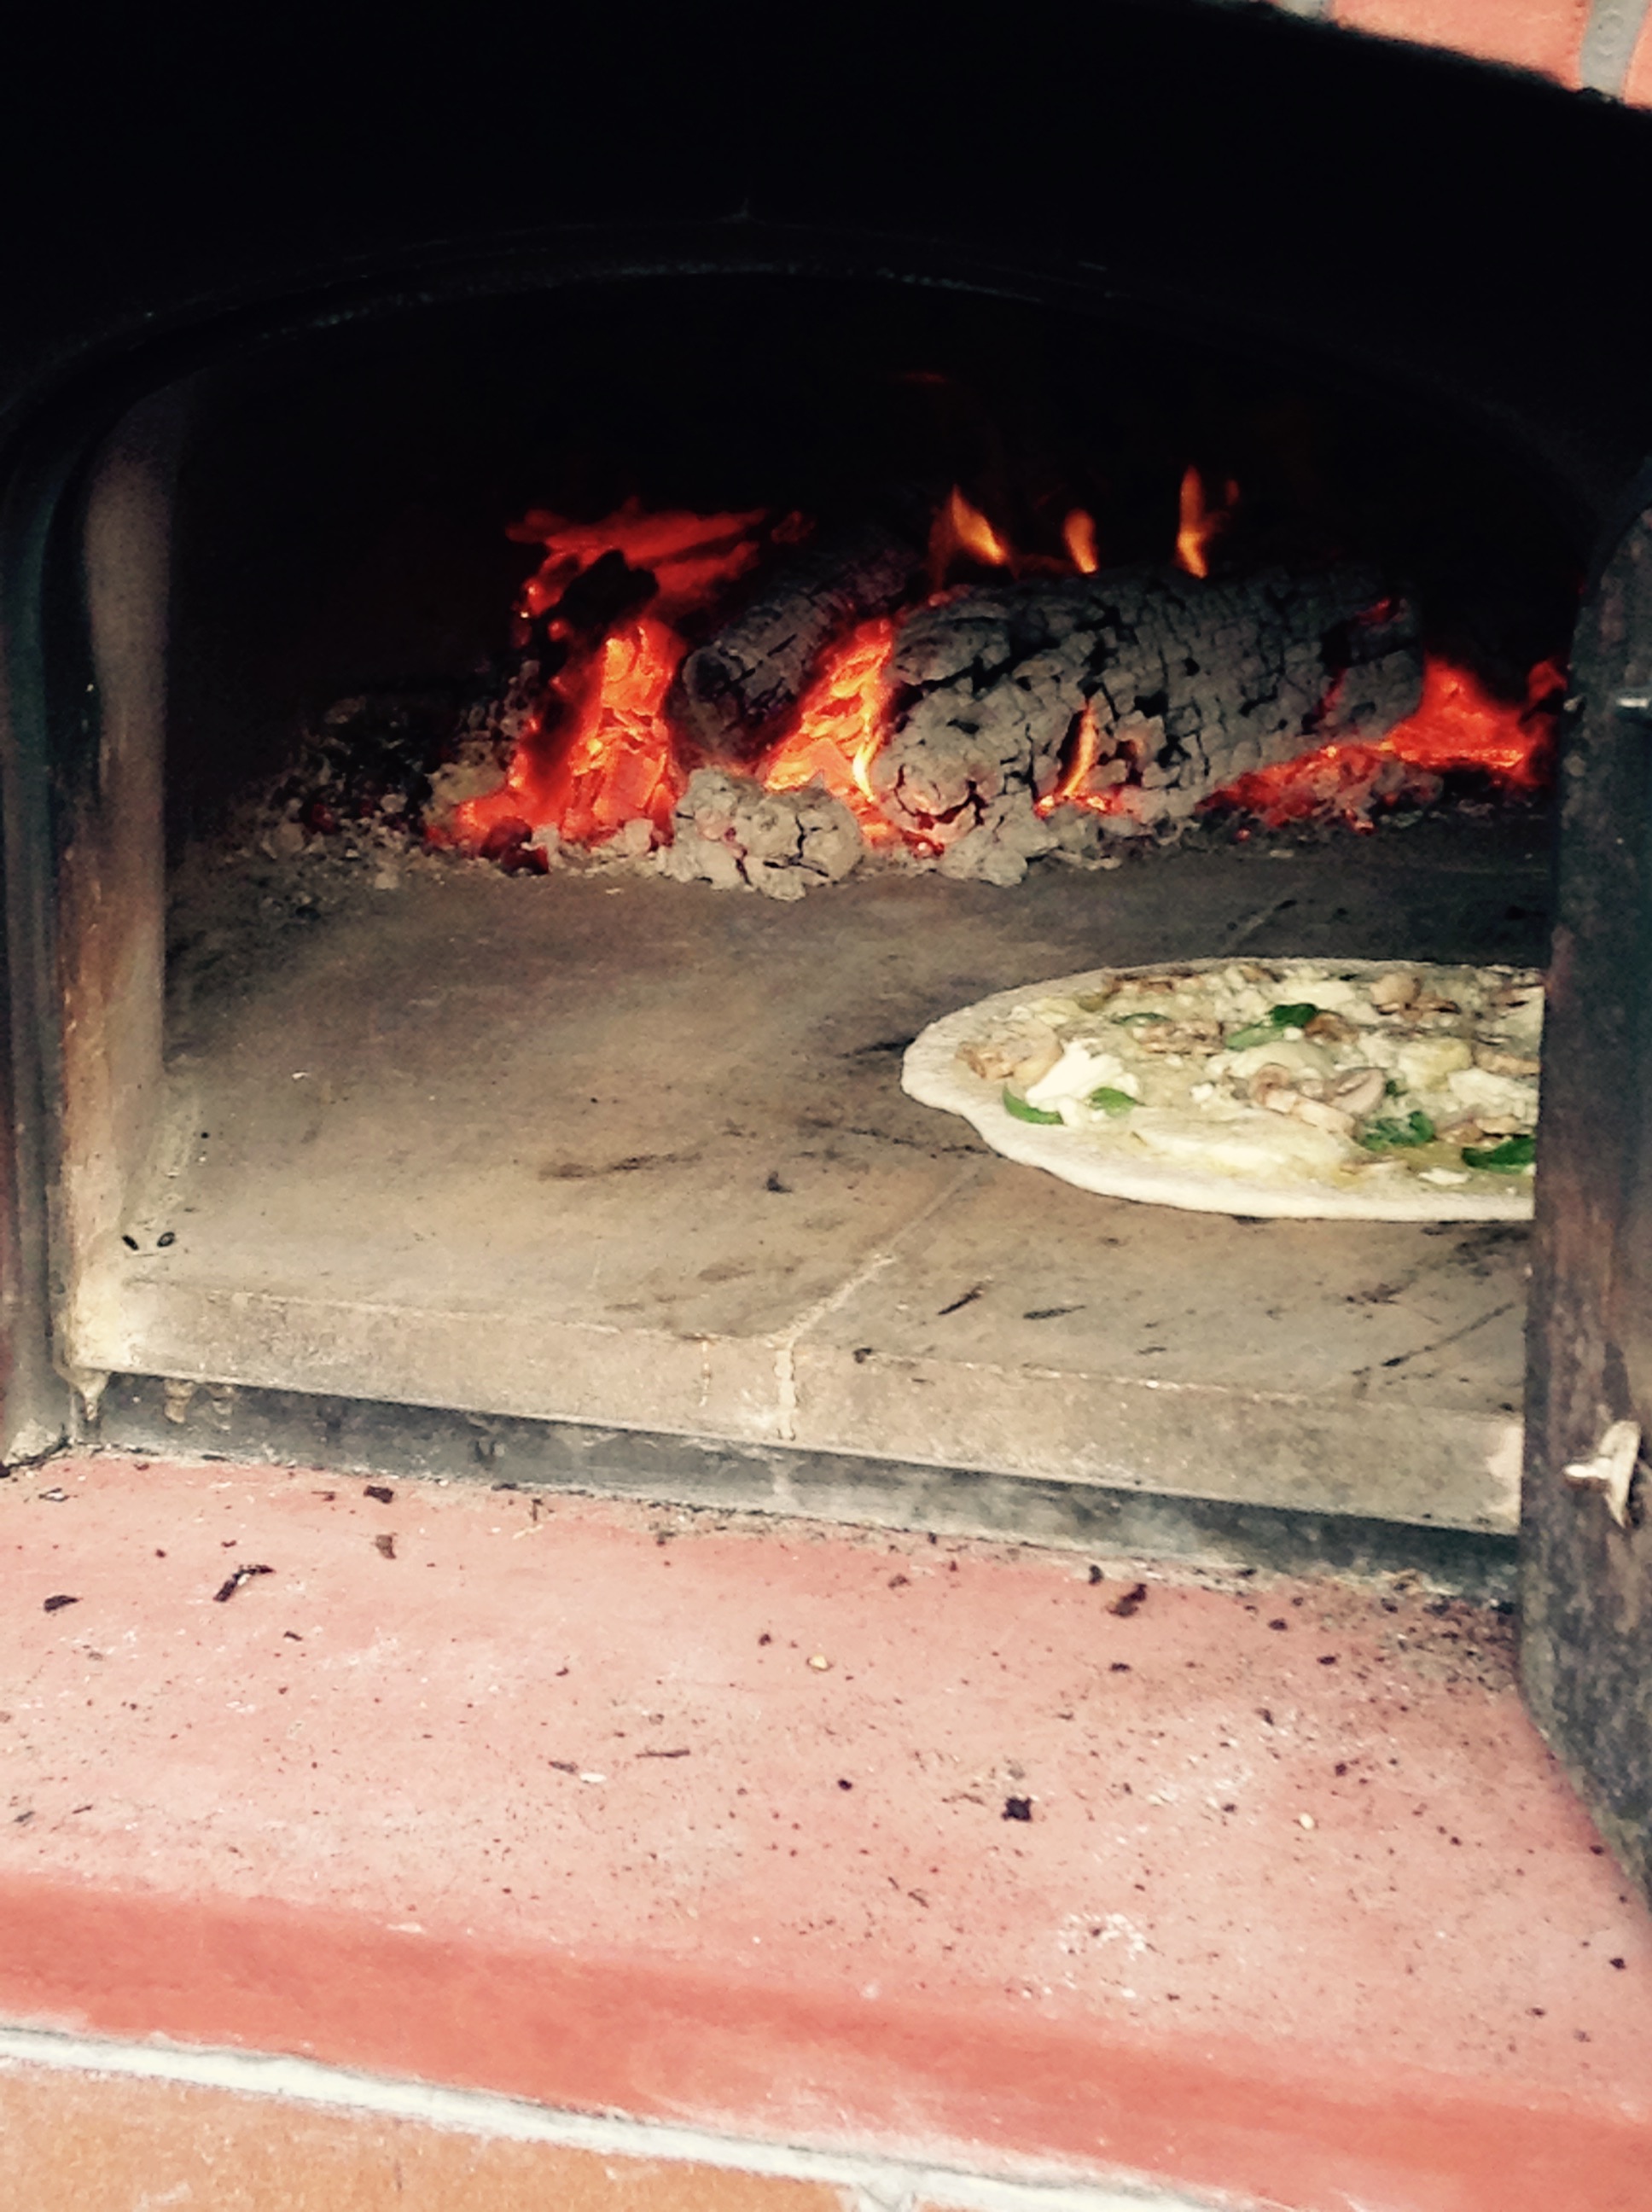
This past spring, the brass group of our community built us an amazing outdoor kitchen and wood fire oven inspired by the one we have at Villa Via Sacra, our mission house in Barga, Italy. All summer long and even now into the colder months of fall, we’ve been able to fire up the oven and make one of our favorite foods, amongst other things, pizza!
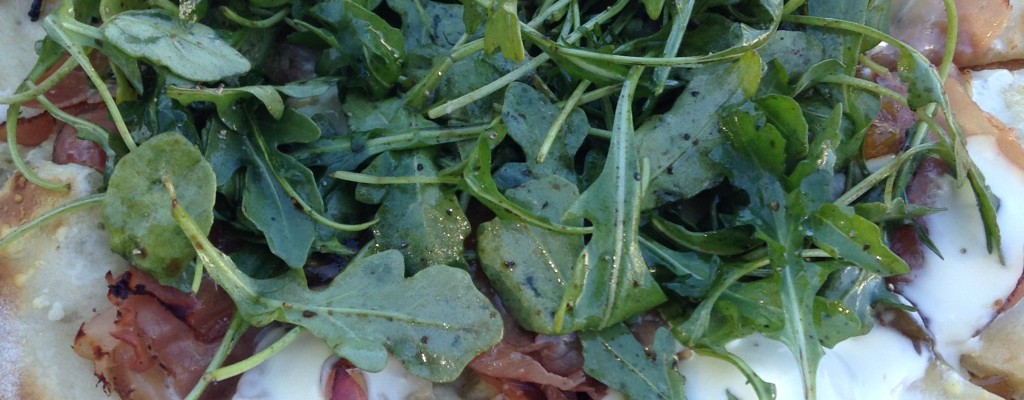
When I served at Villa Via Sacra, I invented a Tuscan pizza of gorgonzola and prosciutto with fig jam that we had made from our gorgeous fig tree. It was delicious – almost like dessert – and we quickly adopted it as one of our “house pizzas”. This past weekend, we hosted a men’s retreat at our community, so I thought it might be fun to make some adaptions to this recipe and really perfect it – once and for all. I am so happy with the results! Thin crust pizza with a mixture of sweet and salty ingredients topped with a salad of crisp nutty arugula that’s been tossed in a balsamic vinaigrette. Heaven begins here! It doesn’t get much better than this! Now that figs are readily available in the market (get green fresh ones, not dried) and certainly are a treat to many, you just might want to fire up your oven and give this a try.
Andiamo mangiare!
Print Recipe
Votes: 5
Rating: 4.8
You:
Rate this recipe!
Prosciutto, Fig and Gorgonzola Pizza with Arugula Salad
SERVINGS4-6
|
COOK TIME5minutes |
PREP TIME20minutes |
READY IN4hours |
Ingredients
Instructions
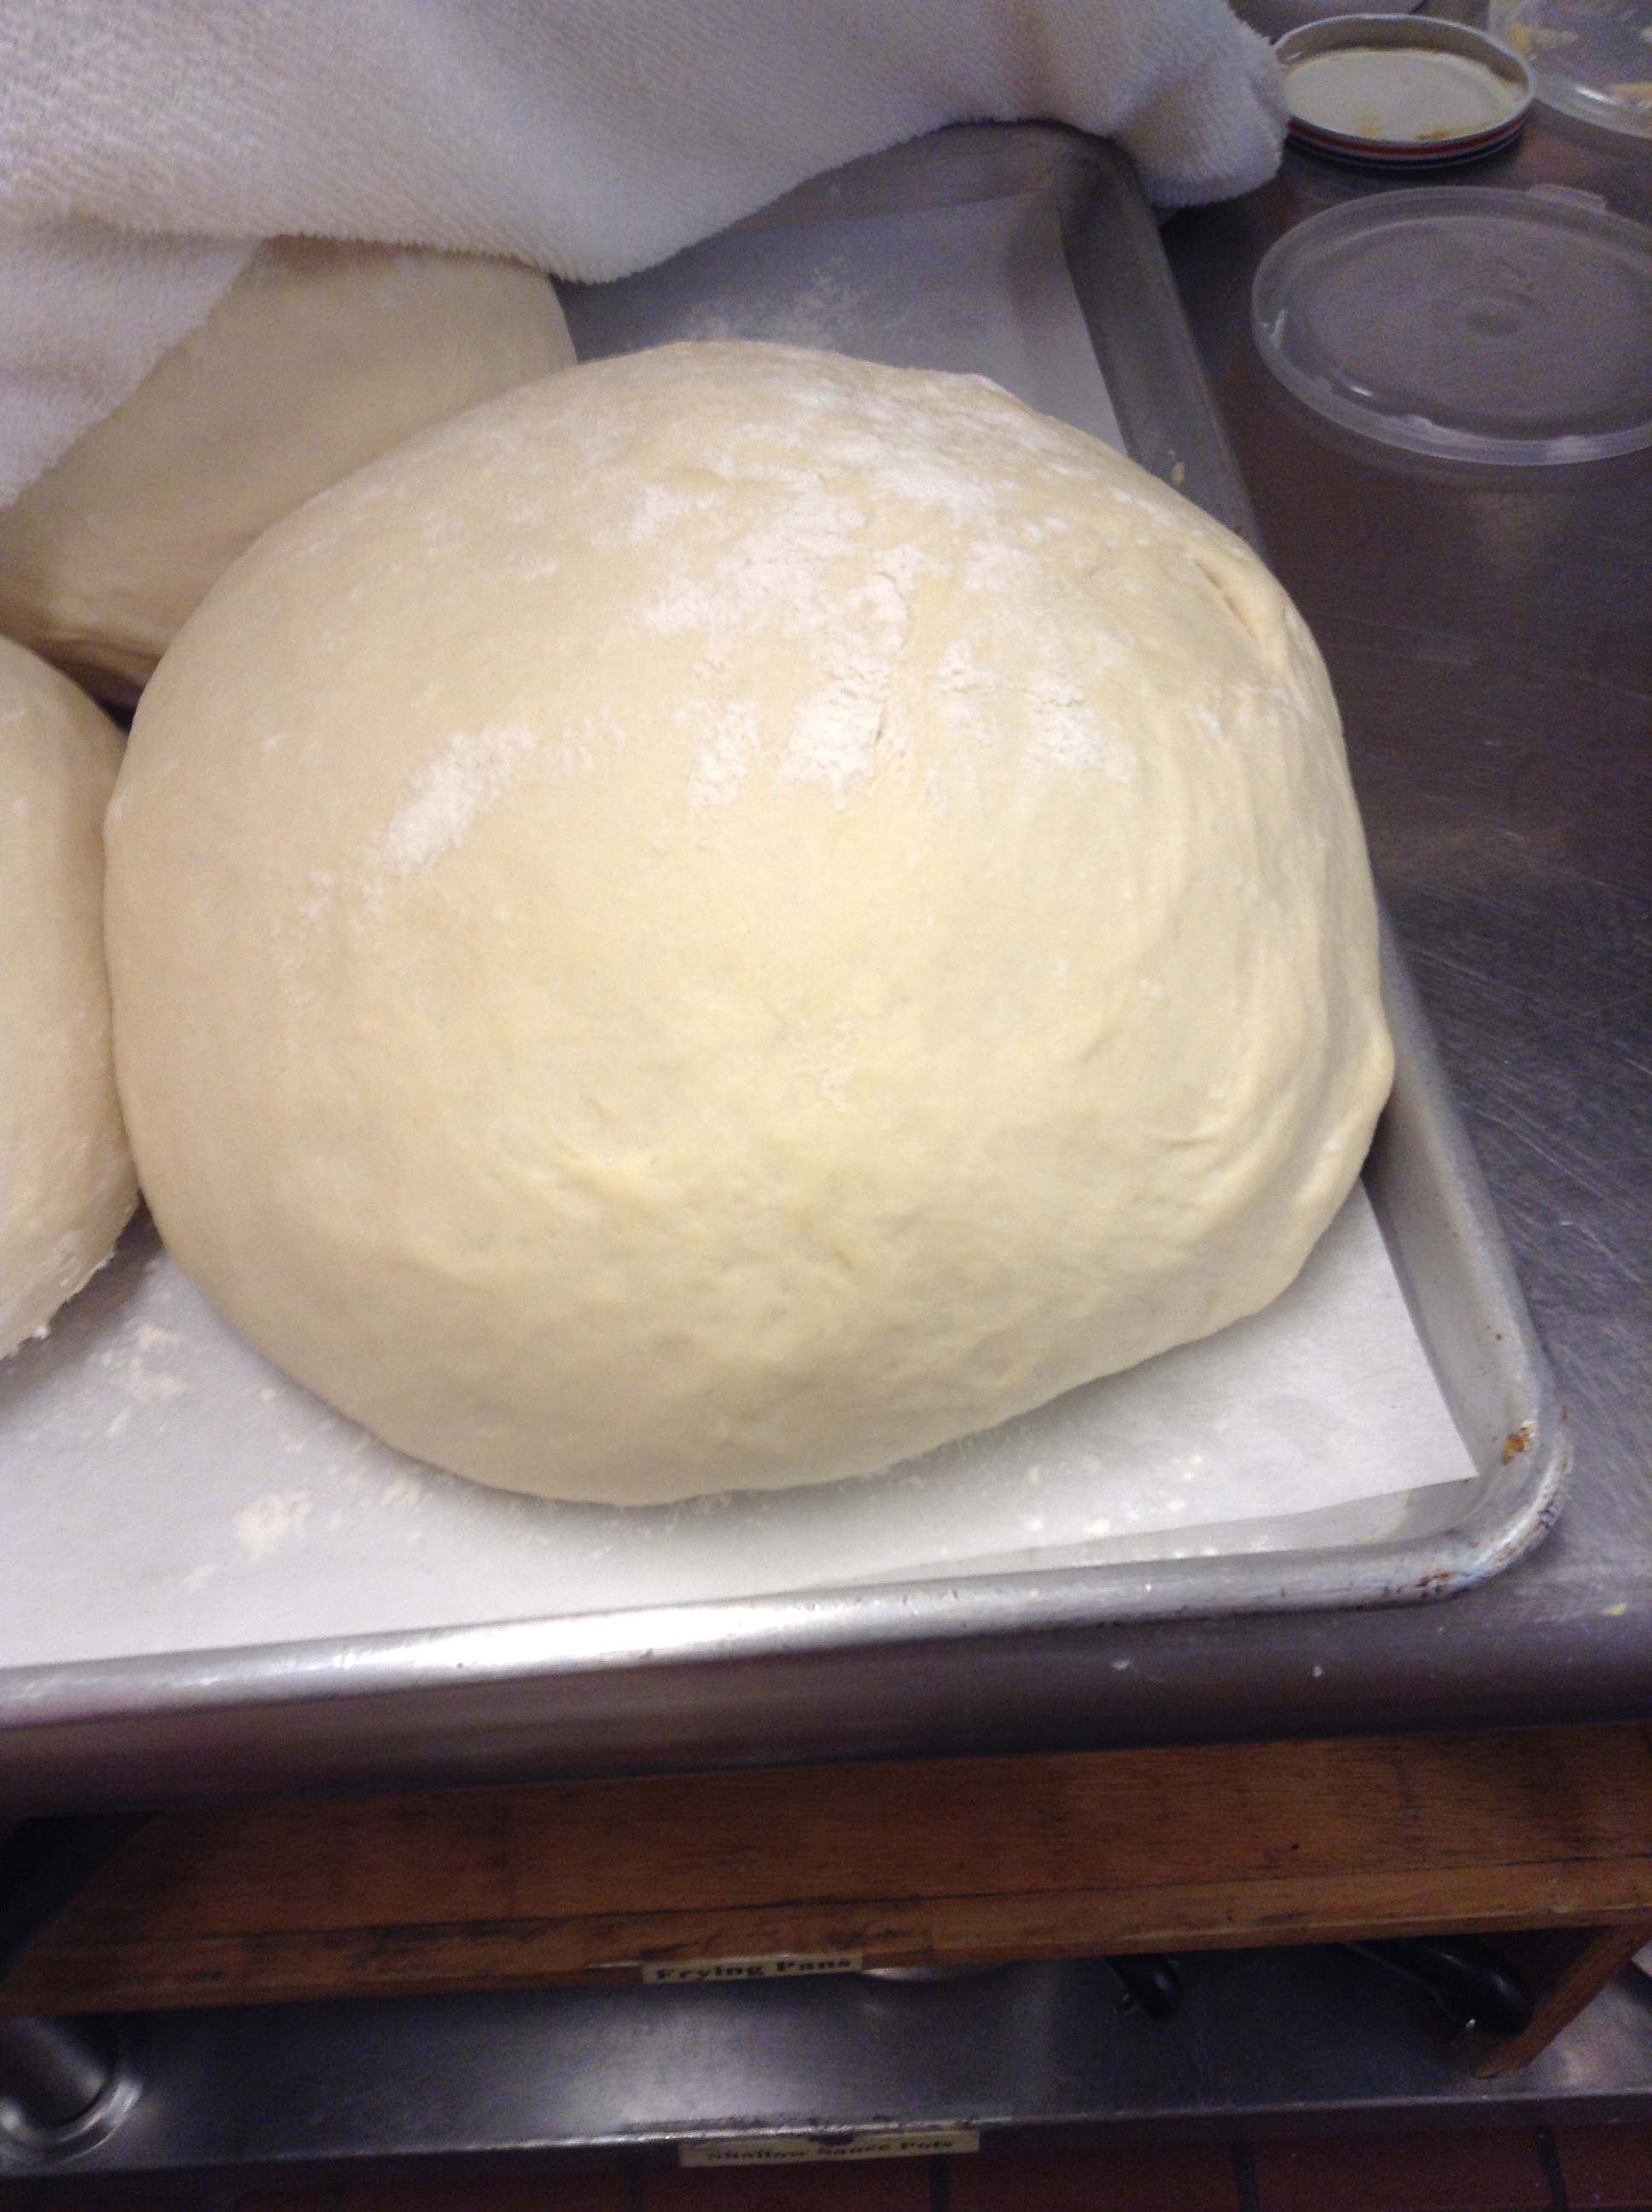
Dough:
- Place ¼ cup very warm water in a small bowl and sprinkle with the yeast. Let sit for 5 minutes or until yeast is hydrated and creamy (This will allow the yeast to be quickly absorbed by the flour).
- Place flour, salt, yeast mixture, and remaining water in mixer bowl fitted with a dough hook.
- Mix on low speed for 2 minutes to combine. If the dough appears too wet and sticky and is not combining, add flour 1 tablespoon at a time while mixing until dough takes on a “shaggy” appearance.
- Drizzle with oil and mix for 2 minutes more. Dough should form a smooth ball and clear the sides of the bowl.
- Turn mixer off, cover top of bowl with plastic wrap, and let rest for 20 minutes.
- Resume mixing on medium low speed for 3 minutes, or until dough forms a smooth ball, clearing sides of bowl.
- Place in a lightly oiled bowl and cover with plastic wrap.
- Let sit at room temperature for 2 ½ hours. It will double in size. Dough may be used immediately.
Instructions for Assembly:
- Preheat oven to 500 degrees or highest setting
- Cut dough into 4 – 8 oz. balls
- Dust both sides of dough with flour and roll out to make a thin crust
- Drizzle with Olive oil
- Sprinkle generously with Gorgonzola
- Place into a wood fire oven (or regular preheated oven – preferably on a pizza stone)until the crust is starting to golden
- Remove from oven and quickly distribute on top of the pizza: sliced fresh figs, cover with slices of prosciutto and dot with fig jam and mascarpone cheese – don’t get too heavy on any one ingredient or your end result will be soggy and the individual flavors will be lost.
- Drizzle with olive oil
- Place back into oven for about another minute – watch carefully
- Meanwhile, dress a bunch of fresh arugula with an aged balsamic vinegar, olive oil, salt and pepper
- Once out of oven, top with the dressed arugula, slice and enjoy!
Last week we started “putting the gardens to bed” for the season.
This end of an era always seems to creep up on us before I expect it
to. For me it is always accompanied with a certain sadness. No more
beautiful early morning sights of garden tubs overflowing with choice red
tomatoes, crisp green lettuce and chard, gorgeous shiny eggplants and
colorful summer squashes ushering in the new day. What did arrive
this morning were some wonderful prizewinning heads of cabbage, a goodly
amount of green beans and plenty of assorted tomatoes. So tonight we
will enjoy a favorite old world classic for our dinner: Stuffed
cabbage rolls with fresh garden tomato sauce along with tender whole
green beans.
Print Recipe
Votes: 0
Rating: 0
You:
Rate this recipe!
Stuffed Cabbage Rolls
SERVINGS4-6
|
COOK TIME1hour |
PREP TIME30mins |
READY IN1.5hours |
Ingredients
Instructions
- Cut up tomatoes and simmer with olive oil, onion salt, oregano and sugar until reduced to 1 cup or 8 ounces of sauce. Can be done while preparing cabbage.
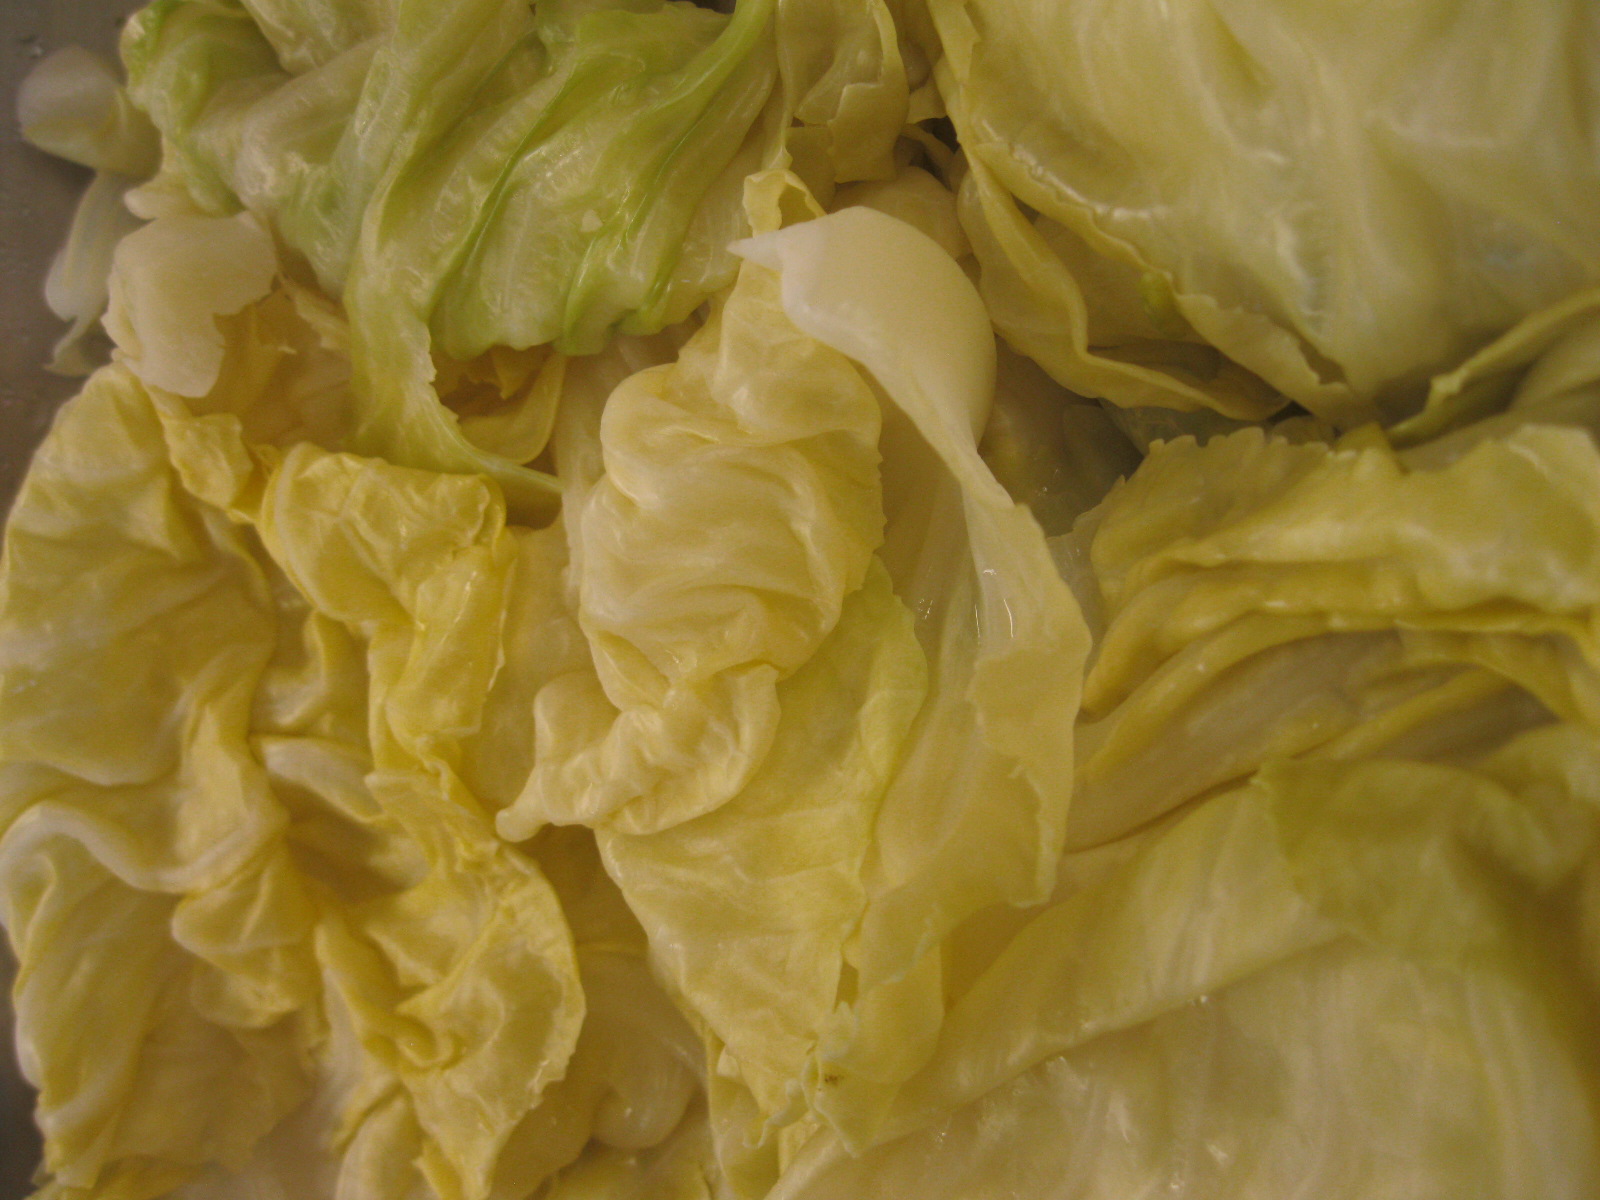
- Leave cabbage whole, but cut around the stem, and parboil for 5 minutes; let steep for another 5 minutes. Remove cabbage from water and drain; separate cabbage leaves. Chop the small inside leaves and the core and use to line a Dutch oven.
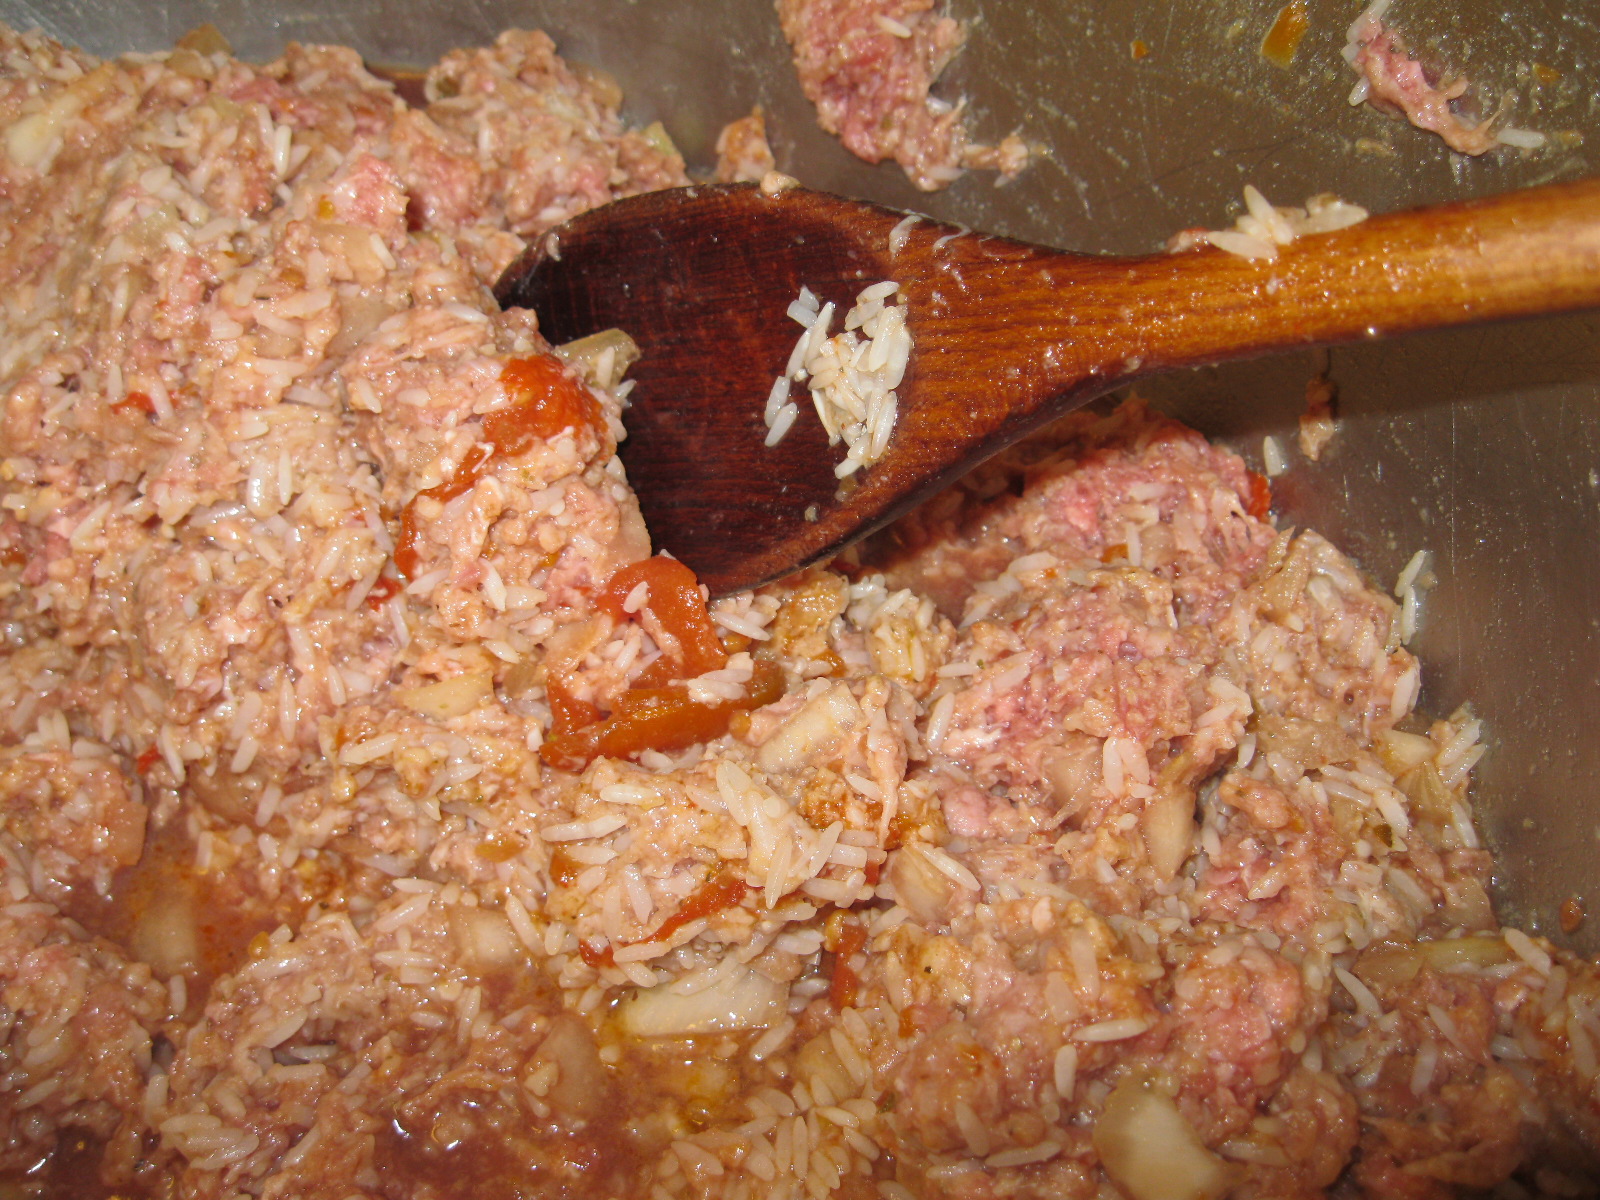
- Combine all the stuffing ingredients and mix thoroughly. Season with salt and pepper to taste. Place 1 tablespoon stuffing on each of the larger cabbage leaves, fold ends of leaves over the stuffing, and roll leaves.
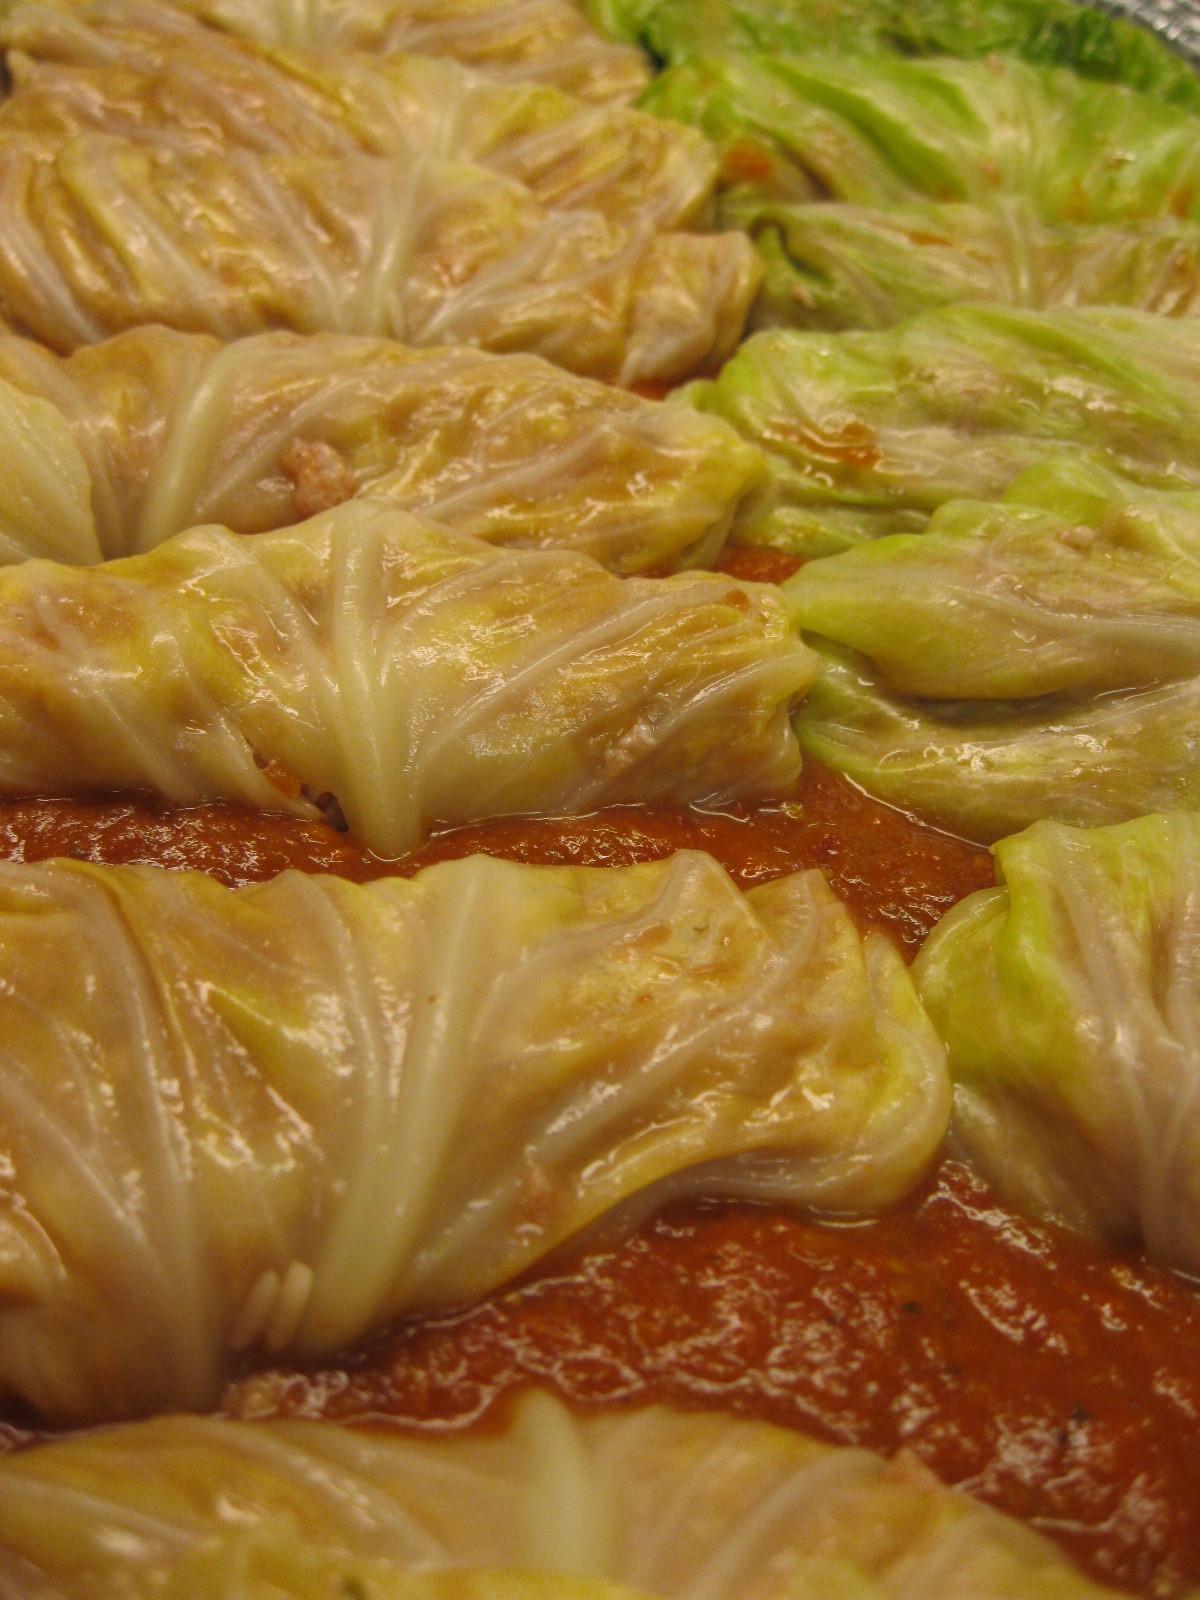
- Arrange the stuffed cabbage leaves in rows in Dutch oven; sprinkle each layer with olive oil, tomato sauce, and crushed bay leaf. Sprinkle lightly with salt and pepper; add remaining tomato sauce, beef broth and enough water to cover. Place a plate on top of cabbage rolls, and simmer over low heat for 1 hour. Serve the cabbage rolls with the pot sauce pored over them.
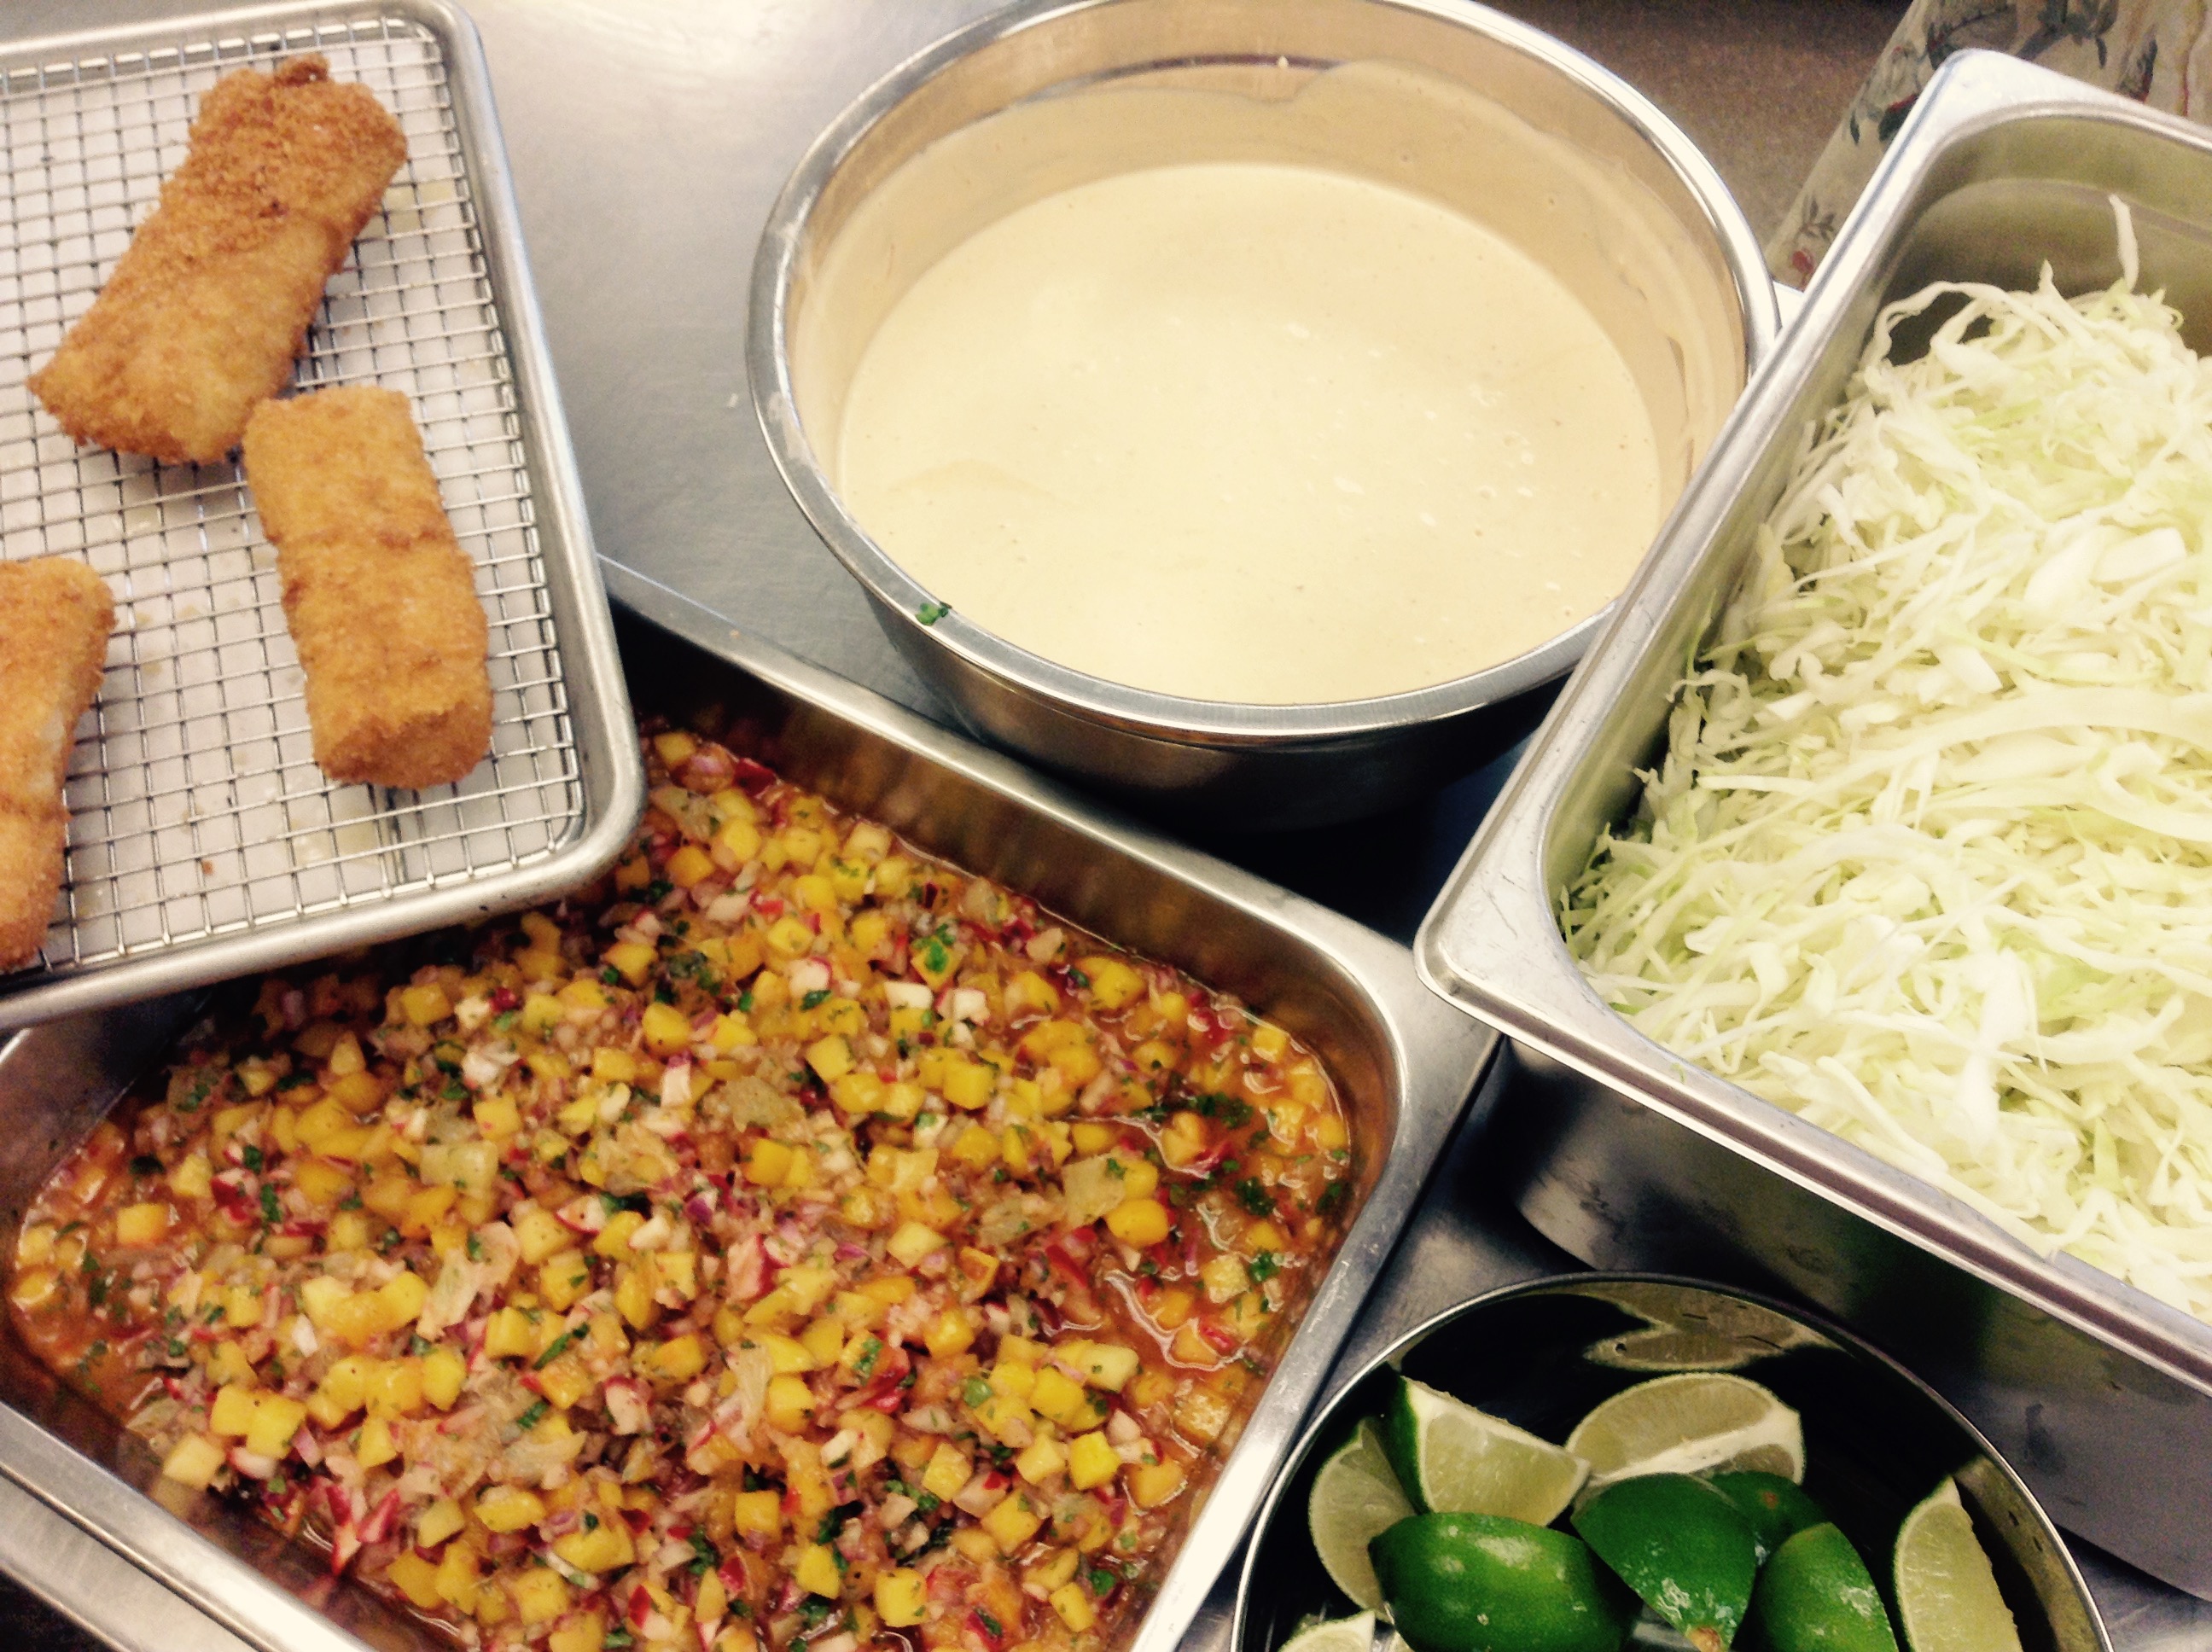
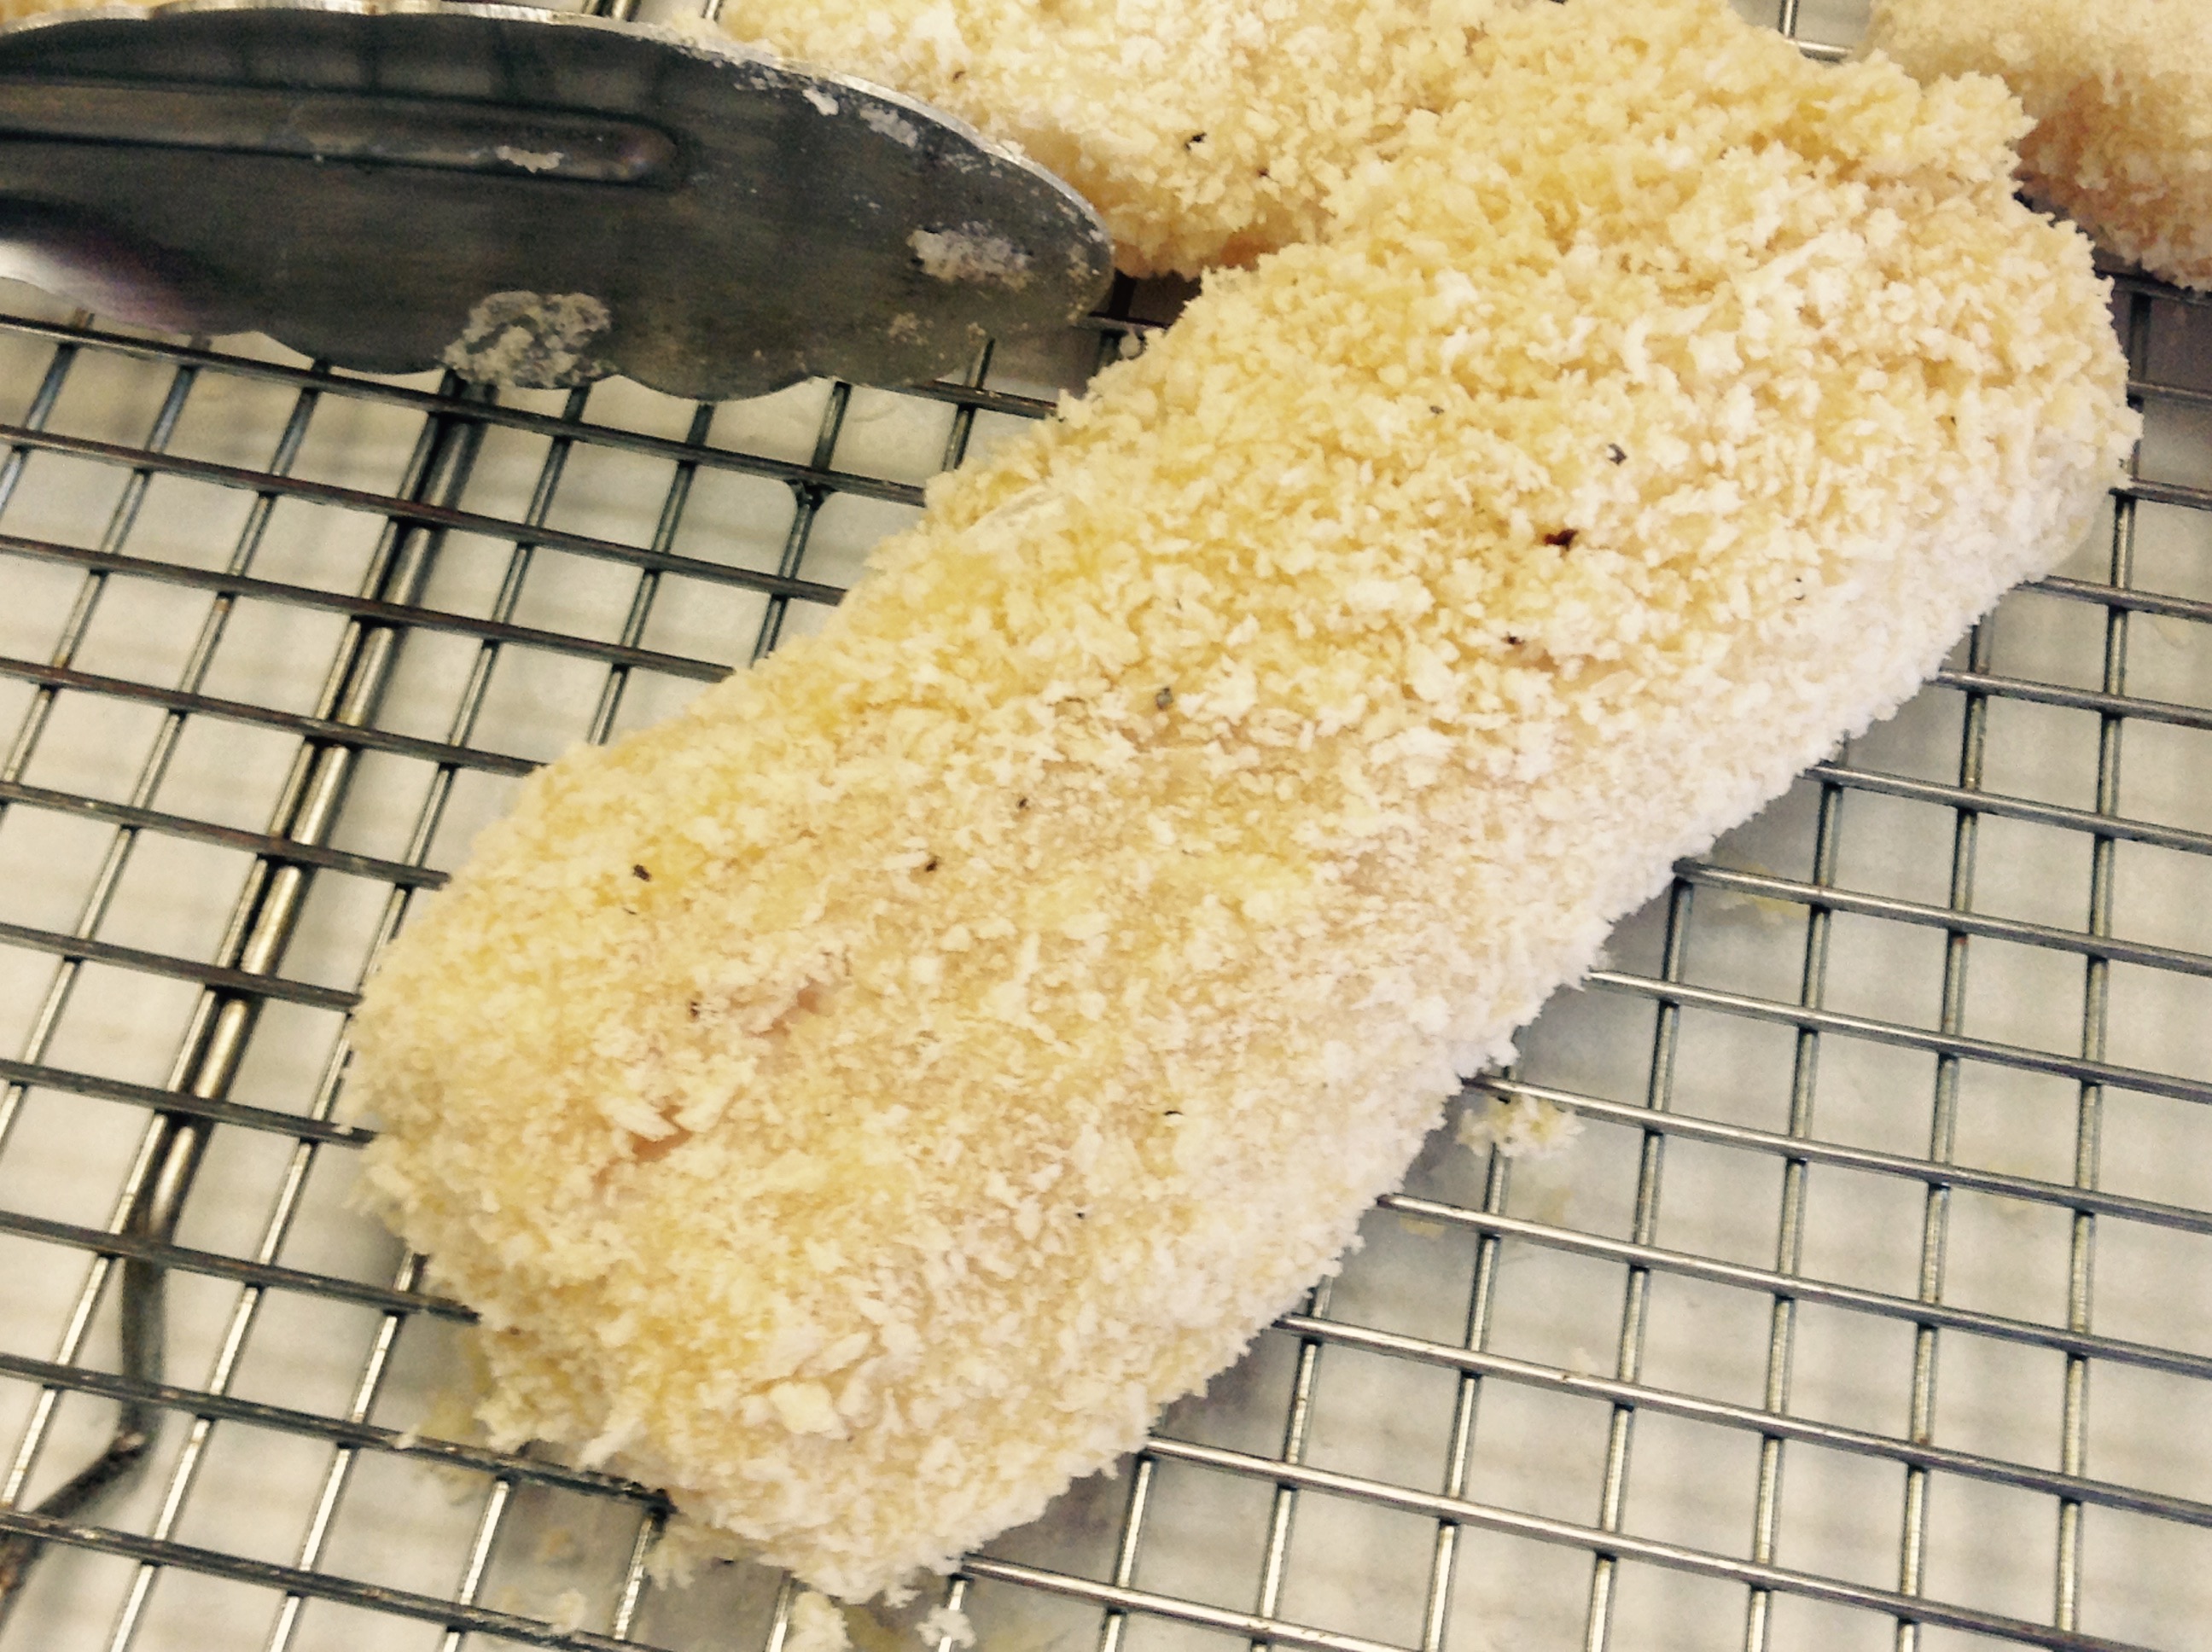
For some time now, our theater group, Elements Theater Company, has been doing their theater productions with a dinner added prior to the show. Traditionally, this has been a plated meal tying in with themes from the play. This summer, the show was unique – Alan Bennett’s Talking Heads. This award-winning series of solo pieces is considered a classic of contemporary drama, universally hailed for its combination of razor-sharp wit and deeply felt humanity. The menu for this production conjured up images of an upscale Cape Cod pub food feel with a classy fish taco. I started searching for recipes, and the one I hit on was just the right one. The result was a colorful “box” dinner with the best fish taco I have ever tasted. Filled with crunchy cabbage, spicy mayonnaise, sweet and sassy mango salsa and a light and crispy panko- crusted cod – this is party food at its best – all served up in a glossy black box. Accompaniments included sweet potato fries, fresh corn and bacon salad and a homemade coleslaw. I’d recommend this for any summer gathering.
Print Recipe
Votes: 1
Rating: 5
You:
Rate this recipe!
The Ultimate Fish Taco with a Twist
SERVINGS8-10
|
COOK TIME20min |
PREP TIME45min |
READY IN1hr |
Ingredients
Instructions
- Prepare the mango-radish salsa. Remove the peel and pith from the limes and cut between the membranes to remove the segments. Put these "supremes" into a bowl and squeeze over the juice from the membranes. Add the remaining ingredients and mix. Season and refrigerate until ready to use. You can also place all of the ingredients into a food processor and puree for a smoother salsa.
- Prepare the pink chile mayonnaise. Put the chipotles in a blender and puree until smooth. Add the sour cream, mayonnaise, adobo sauce and lemon juice and continue to process until the mixture is consistent and creamy. Season with salt and pepper and refrigerate until ready to use.
- Prepare the fish. Cut the pieces of fish into 1-ounce strips or to your liking. Set up a breading station of flour, lightly beaten eggs with water, and seasoned panko bread crumbs. Season all with salt and pepper. Dredge the pieces of fish in flour, egg then bread crumbs. Once all the fish is breaded, deep-fry in small batches in (375 degrees F) oil. Drain on paper towels and season with salt. Keep warm until ready to serve.
- Place tortillas on a damp towel on a single layer on a cookie sheet, cover with another damp towel and place in a warm oven until ready to use.
- To serve, set up the tacos "family-style". Start with your warmed flour tortillas, assemble the fish in a pile on a plate; the pink chile mayonnaise in a bowl; and mango-radish salsa in another. Set a pile of shredded cabbage, cilantro leaves (opt) and lime wedges next to the fish. Have fun building your own tacos.
recipe adapted from Tyler Florence
One of my favorite flavors of Italy is balsamic vinegar (aceto balsamico). In Tuscan homes it is a staple ingredient. Dark, glossy, sweetly sour, balsamic vinegar is the perfect condiment for both salads and desserts. Or try the lighter version, an aged white balsamic vinegar, almost like honey — it can transform any dish with just a little dash. If you are after the richest, most complex balsamic vinegar flavors, look for an aceto balsamico tradizionale DOP.
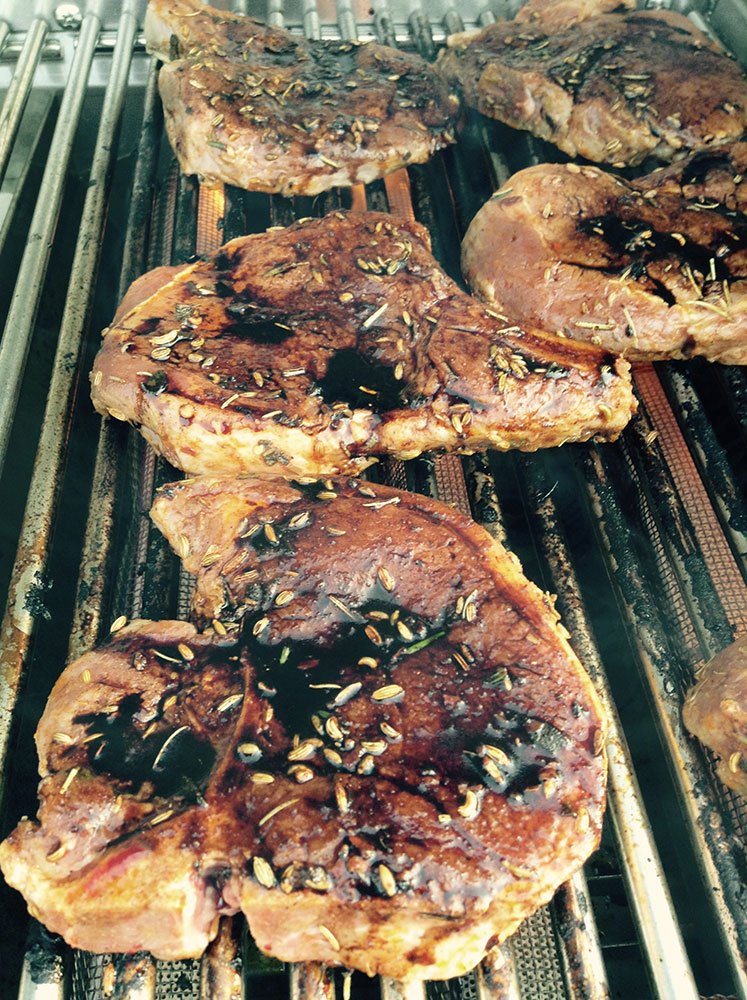
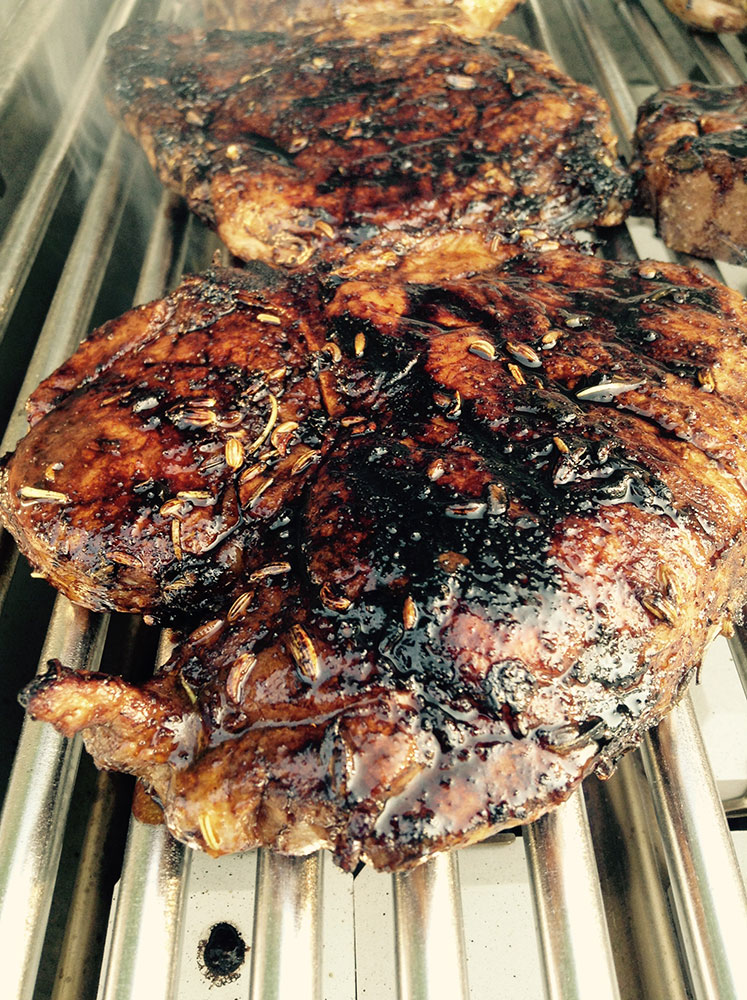
When I came across this recipe, originally for ribs, I knew I had to try it. The blend of spices in the rub adds a complex layer of flavors that doesn’t overwhelm the meat, but simply raises it to a new level. This past weekend, we served these to a group of foodie enthusiasts who had hob-knobbed all over the world. When I heard them explain, “these are the best ribs I’ve ever put in my mouth! Sister, I must have the recipe,” I felt pretty pleased! If it worked for ribs, why not transform an ordinary pork chop into a culinary masterpiece? Fresh off the grill, they are juicy and sweet with the balsamic glaze kicking it up that extra notch.
andiamo mangiare!
Print Recipe
Votes: 10
Rating: 3.5
You:
Rate this recipe!
Tuscan-Style Grilled Pork Chops with Balsamic Glaze
SERVINGS4
|
COOK TIME7 mins |
PREP TIME10mins |
READY IN2.5hrs |
Ingredients
Instructions
- In a small bowl, combine the olive oil, rosemary, kosher salt, fennel, black pepper, sage, thyme, paprika, crushed red pepper, coriander and allspice. Rub the spice paste all over the pork chops and let stand at room temperature for 2 hours or refrigerate overnight.
- Preheat your gas grill. Brush both sides of your pork chops with the balsamic vinegar and place on the hot grill and grill for 4 min. on one side, or until the pork releases from the grill. Brush again with the balsamic vinegar and flip over. Grill for 3 min. on the other side. Remove from grill and serve immediately.
Note: If using this recipe to make ribs, follow step 1. Preheat the oven to 325°. Arrange the ribs on a large, rimmed baking sheet or roasting pan, meaty side up. Roast the ribs for 2 hours, or until tender. Preheat the broiler. Brush the meaty side of the ribs with the balsamic vinegar and broil 6 inches from the heat until browned, about 2 minutes. Let stand for 5 minutes, then cut between the ribs and serve.
This salad is a lovely and light “one platter” meal for those hot summer days. The warmth of the cutlets over the chilled baby spinach, cooks the leaves slightly, allowing you to bite into a refreshing combination of textures — soft and crunchy. I first served this on a hot day in Italy, and was taken by not only the beauty of the fabulous colors on the platter, but also the lemony and nutty flavors of the greens. Arugula can be substituted for the spinach, which will give it a more “peppery” flavor. Accompanied by a freshly made basket of rolls, you now have an elegant lunch. Andiamo Mangiare!
Print Recipe
Votes: 0
Rating: 0
You:
Rate this recipe!
Summertime Spinach and Turkey Cutlet Salad
SERVINGS6
|
COOK TIME20mins |
PREP TIME20mins |
READY IN1hr |
Ingredients
Instructions
- Make your coating for the cutlets according to instructions above
- Salad Dressing: Mix all ingredients in a jar and shake well to combine. Taste and adjust seasonings as needed.
- Coating for Cutlets: Combine all of the above in a blender until fine crumbs are made – adjust seasonings to taste
If cutlets are thick, pound with meat hammer until the cutlets are about ¼” thick. Put coating mixture in a small pan and coat both sides of the cutlets well with the crumbs.
- Coat the bottom of a cast iron or other heavy duty skillet with olive oil and 1 Tablespoon of butter (to prevent burning) and heat. Once sizzling, reduce the heat to medium, add the cutlets and brown on both sides. Tip: don’t turn the cutlets over until they are ready to “release” from the pan or else all the coating will come off the cutlet!
- Meanwhile, prepare your vegetables and fruit for the salad (slicing etc)
- Fill the bottom of your serving platter w/ the baby spinach and toss lightly with the dressing and then a sprinkling of onion salt and fresh parmesan cheese (or dress in a bowl and transfer to platter afterwards).
- Once the cutlets are cooked and while they are still warm, lay them over the bed of baby spinach, overlapping slightly to create some height in the center of your platter. Your baby spinach is going to cook slightly from the heat of the warm cutlets.
- Creatively, arrange your fruit and vegetables on top of the meat, and finish with a sprinkling of freshly grated parmesan cheese and red onion.
- Serve while the cutlets are still warm.
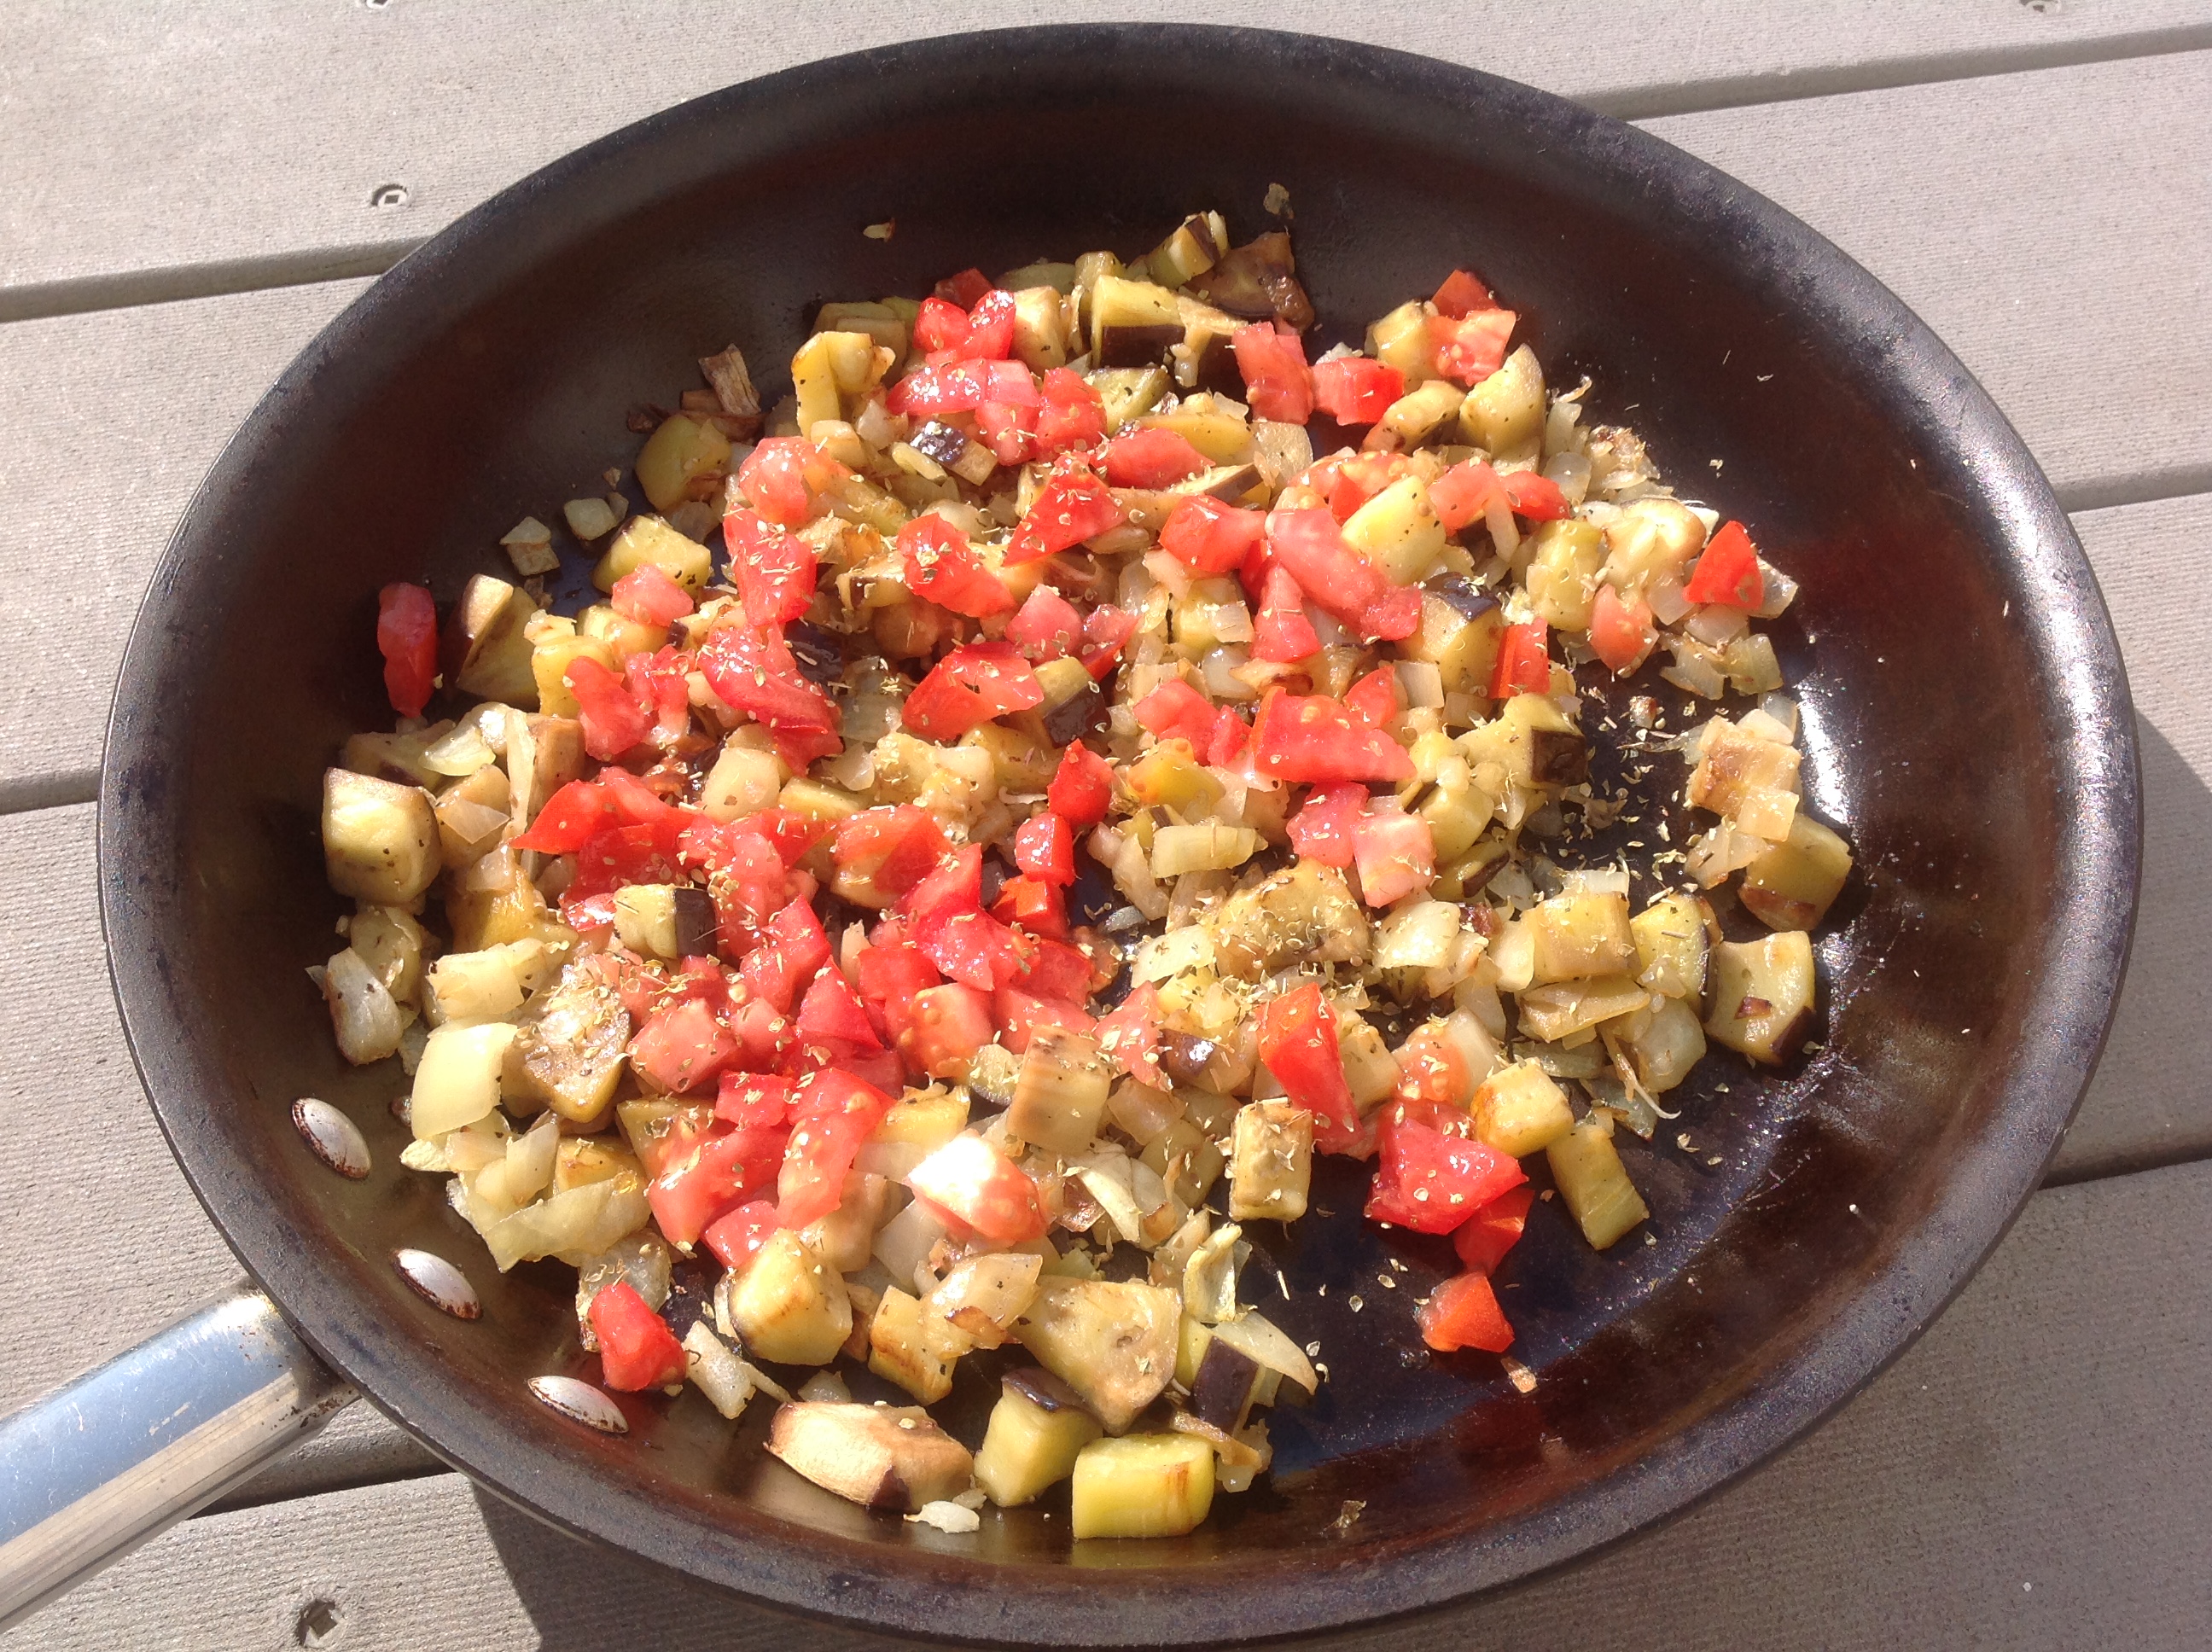
The current revival of iconic American diners stirs my teenage memories, when I spent as much time as possible in my father’s restaurant which had its beginning as a small diner. A local landmark in our town, it grew into a large upscale dining establishment complete with banquet facilities, catering to many special events.
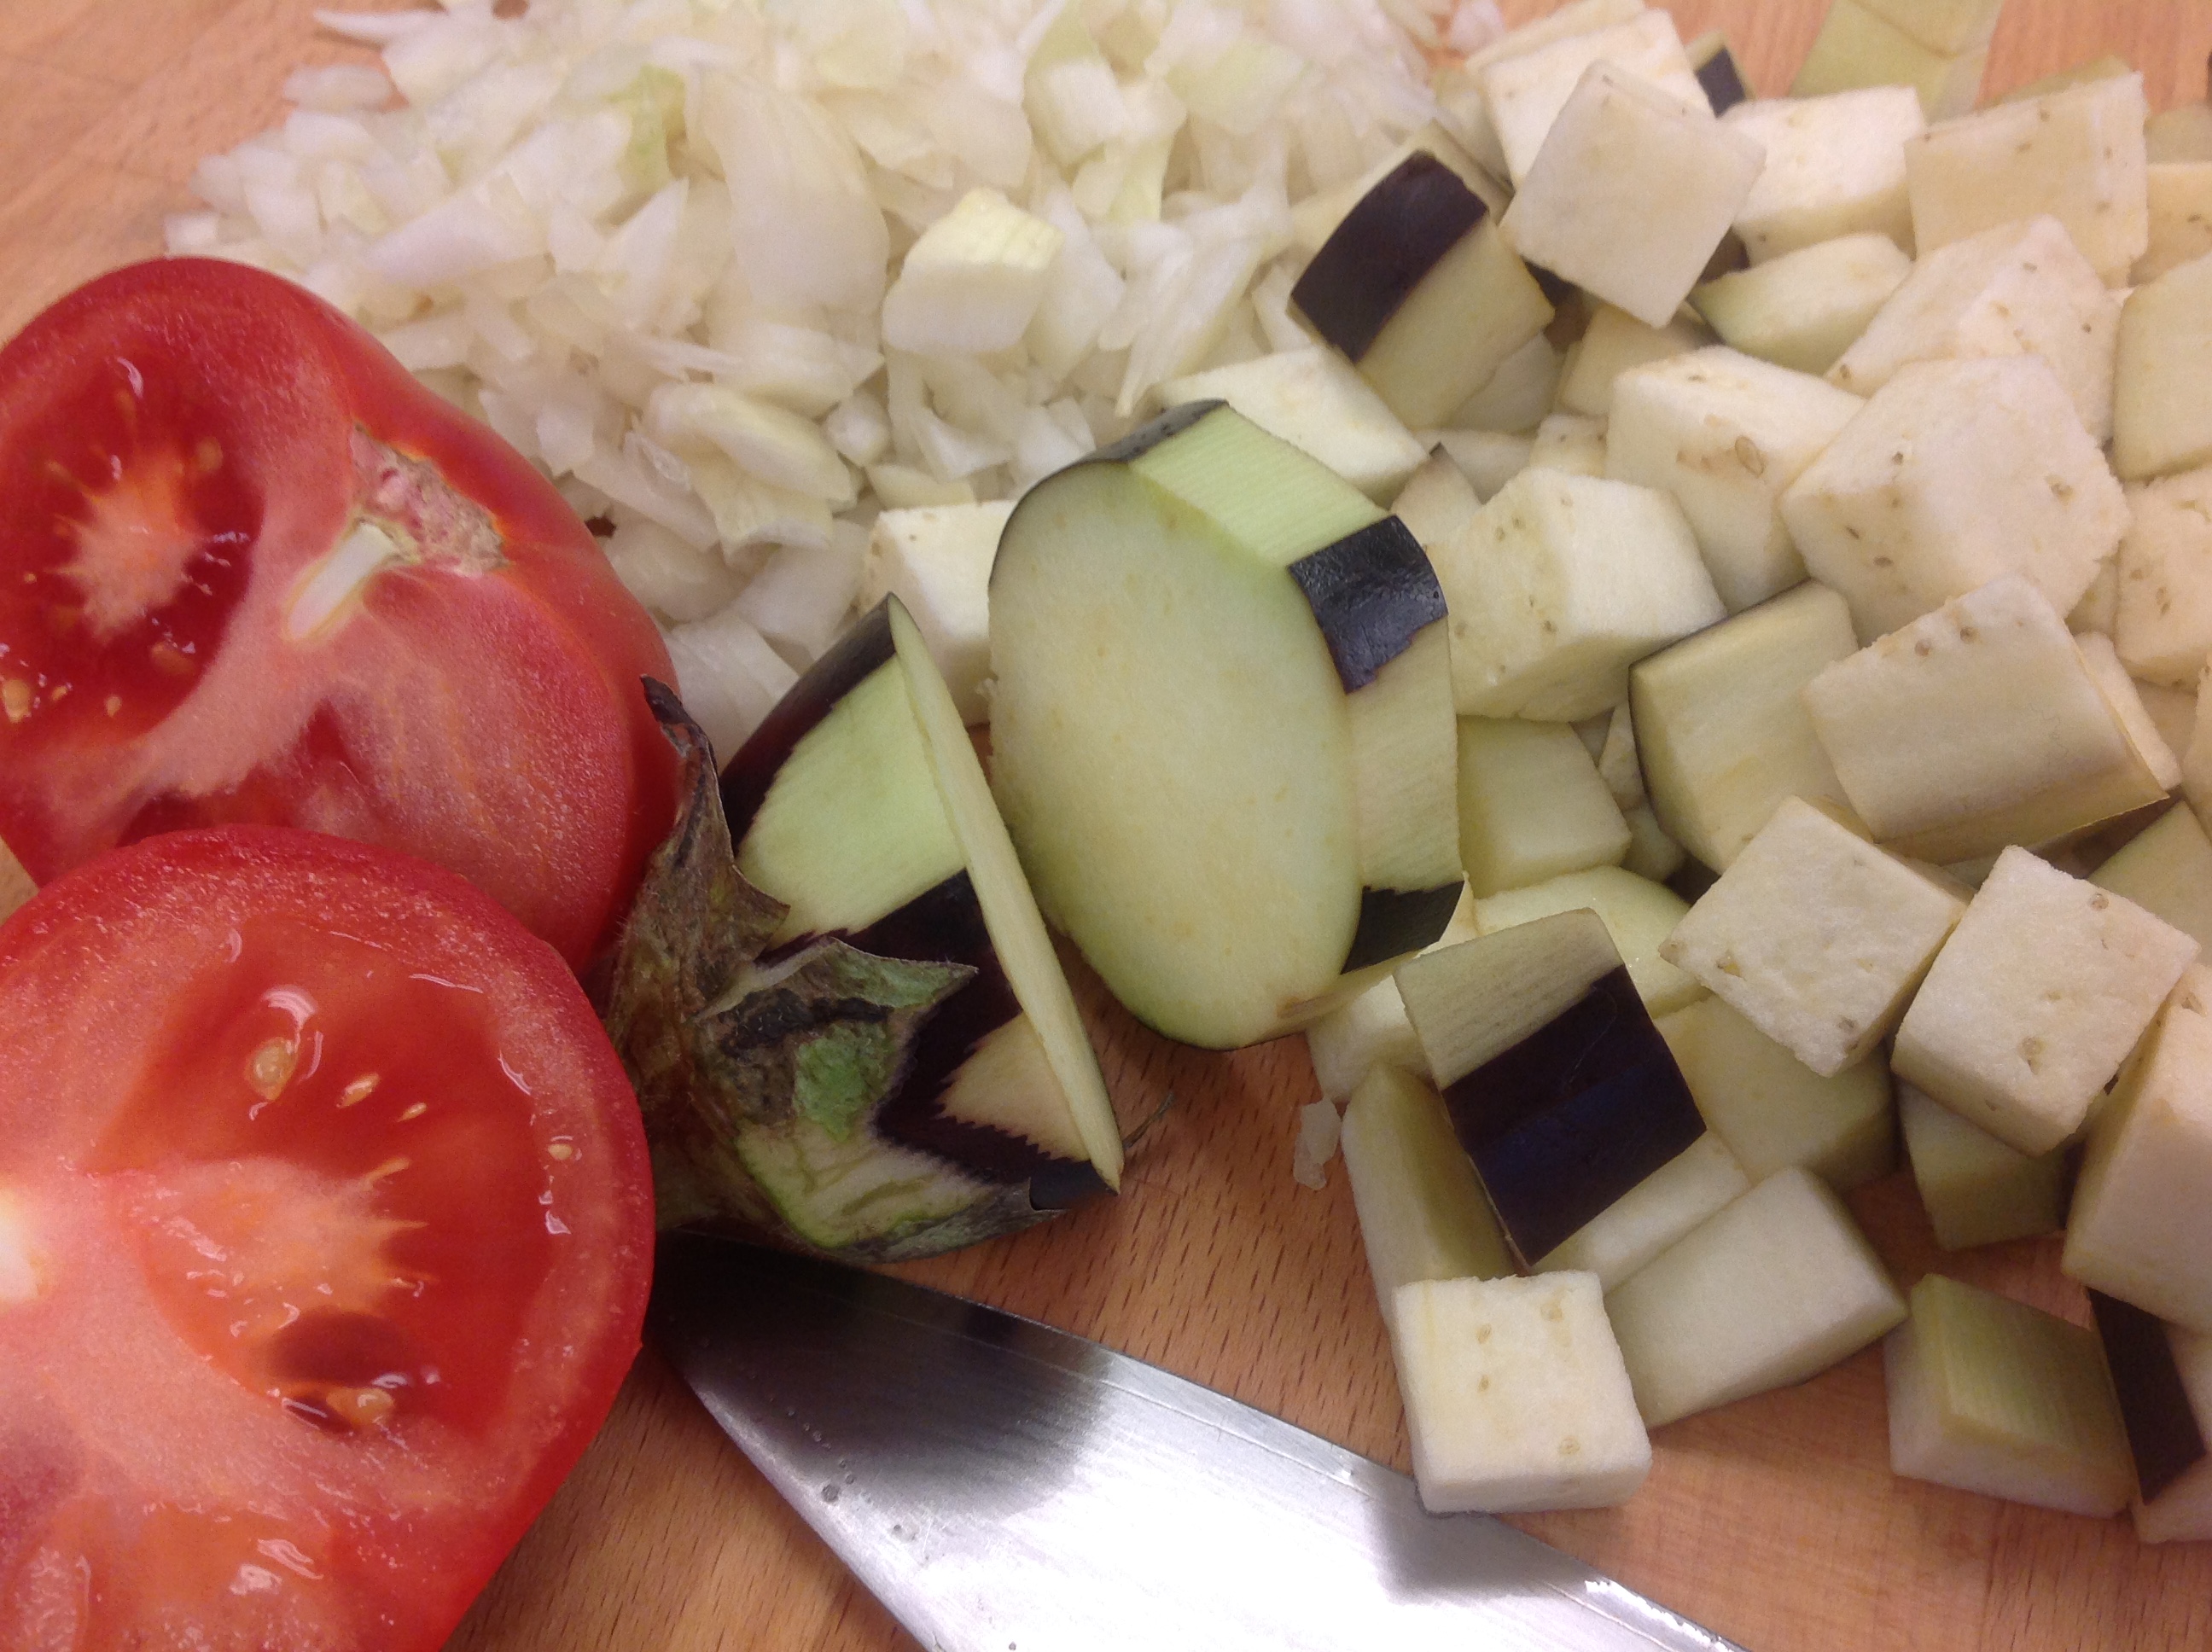
As a diner his menu consisted mainly of American favorites with a sprinkling of Greek and Mediterranean dishes. One of the most popular luncheon specials was a phyllo crusted meat,spinach,feta cheese pie similar to spanikopita, baked and served in an oblong dish. This is a revision of that dish which includes eggplant, fresh tomatoes and Parmesan cheese. The filling can be made and frozen in advance for a time when a quick emergency meal may be needed.
Print Recipe
Votes: 0
Rating: 0
You:
Rate this recipe!
Meat and Spinach Pot Pies
SERVINGS6
|
COOK TIME35mins |
PREP TIME15mins |
READY IN50mins |
Ingredients
Instructions
For the filling
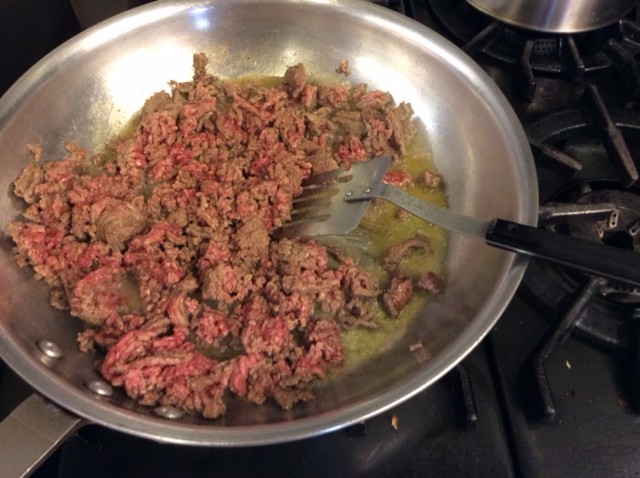
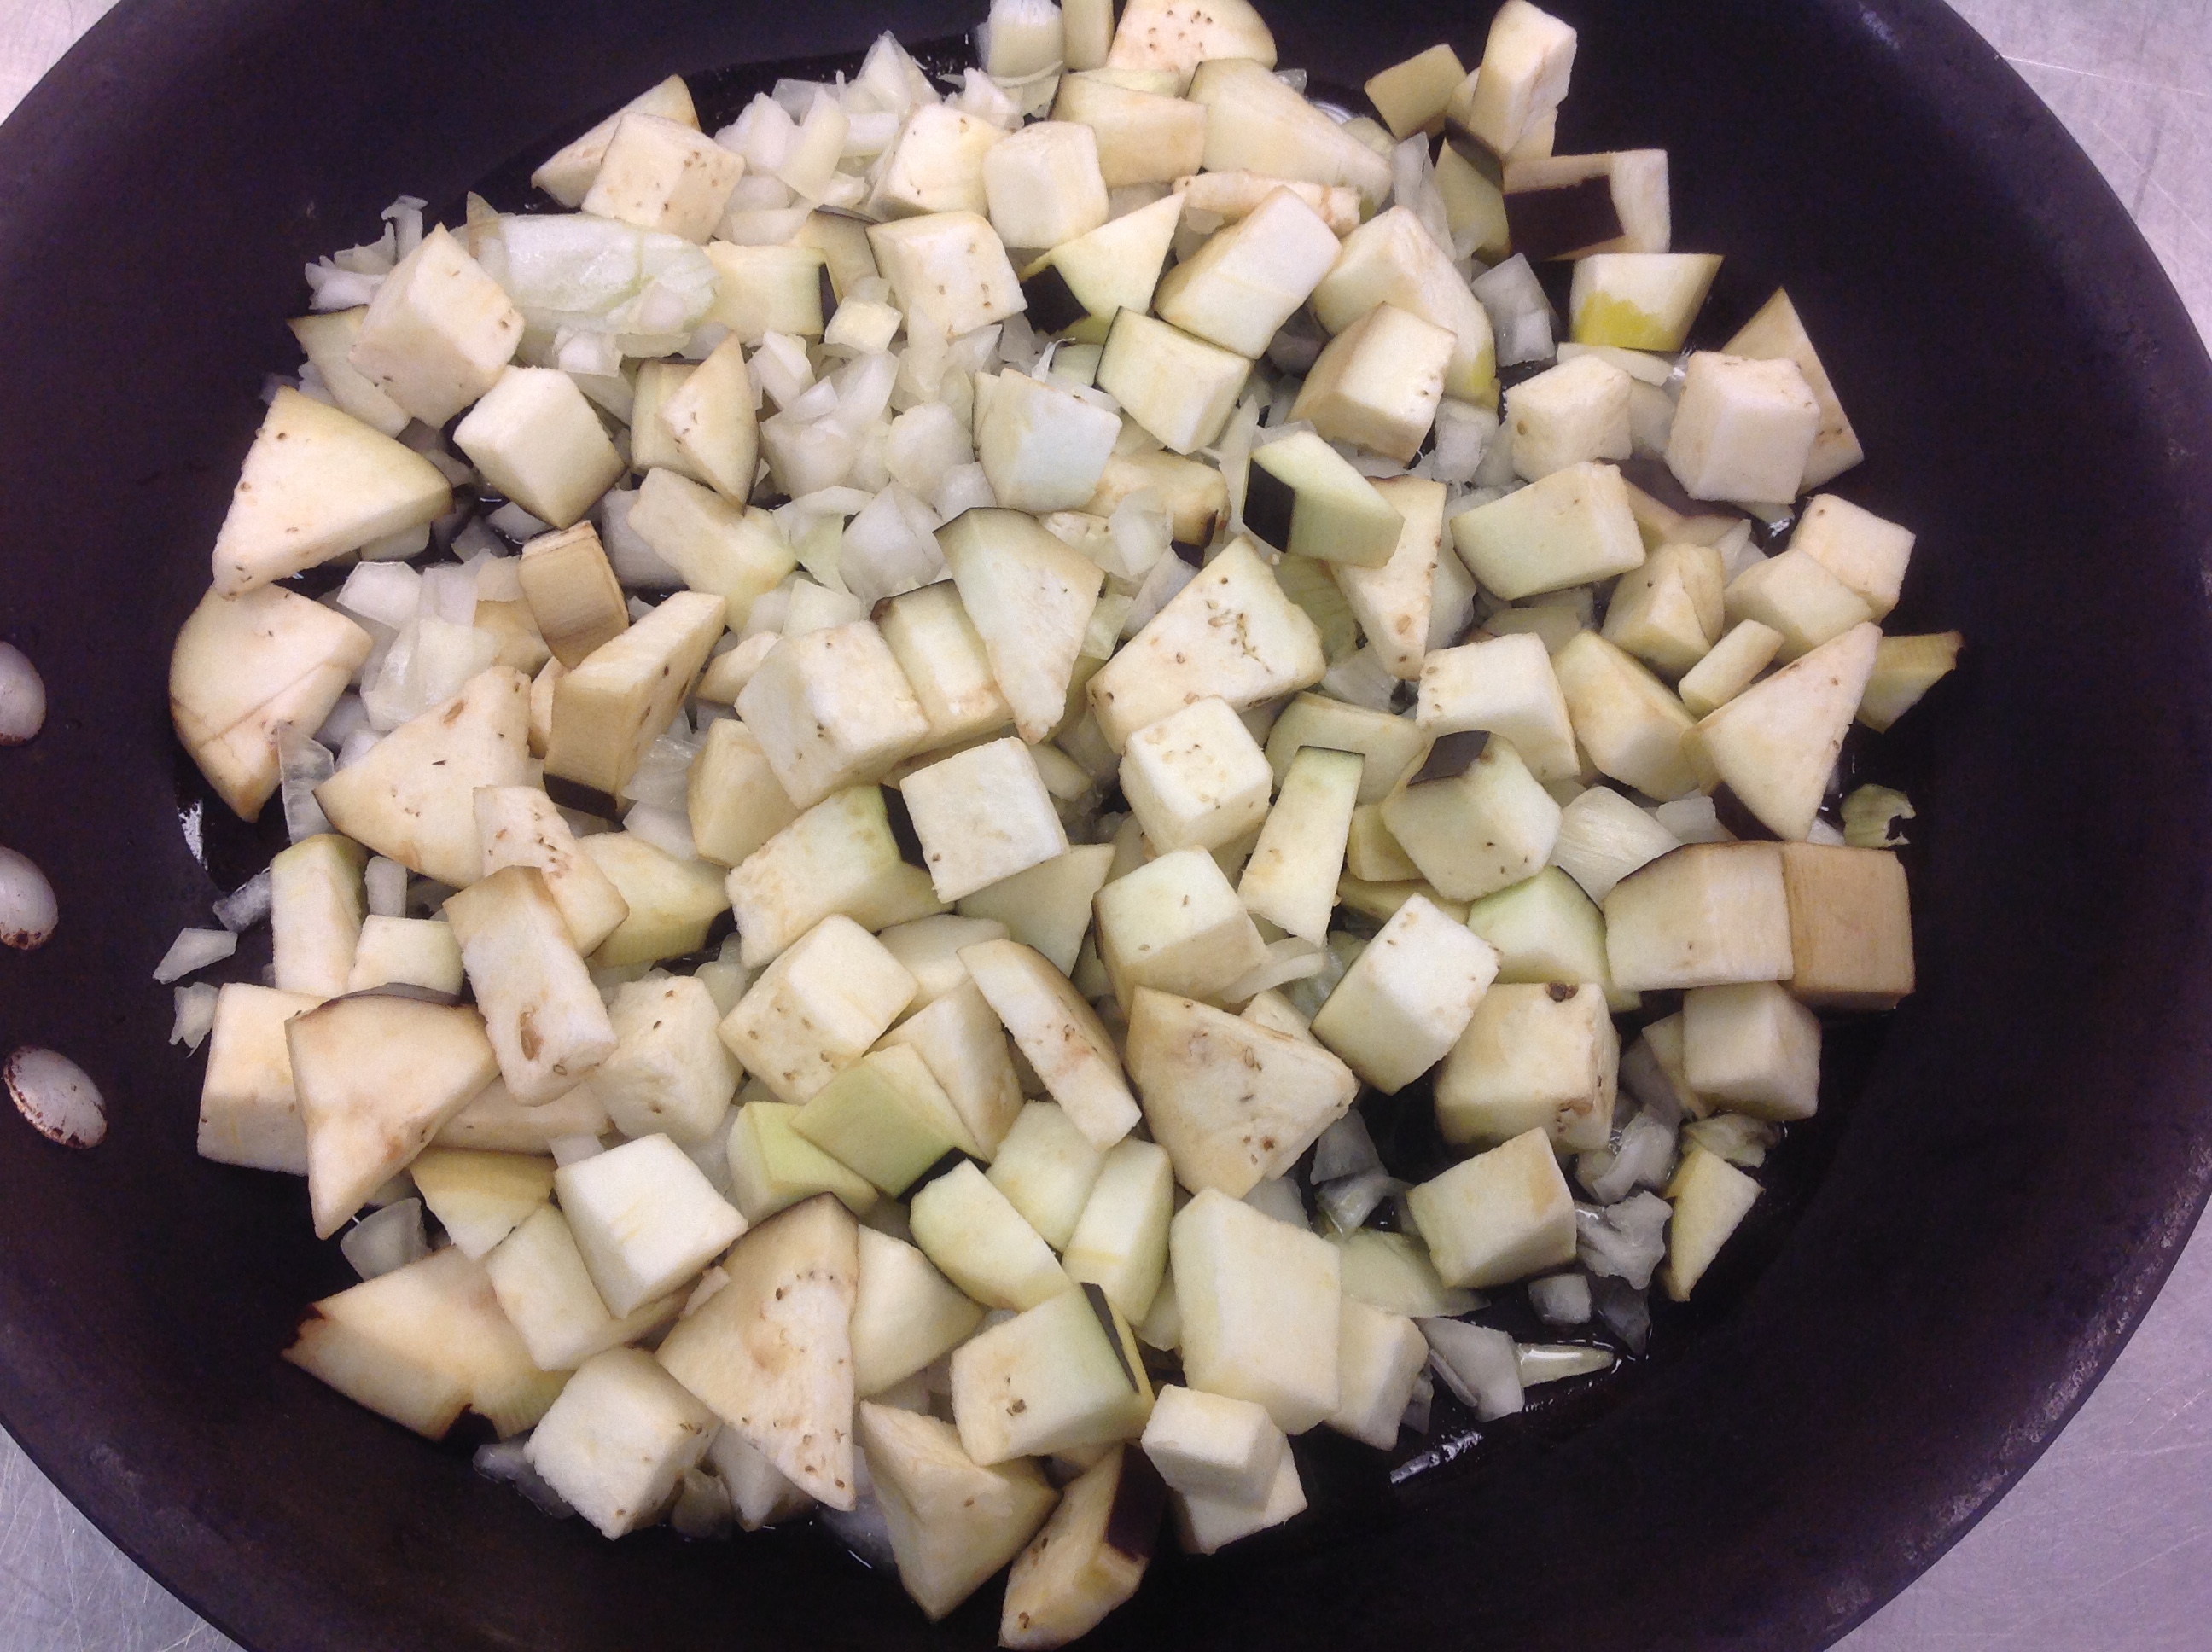
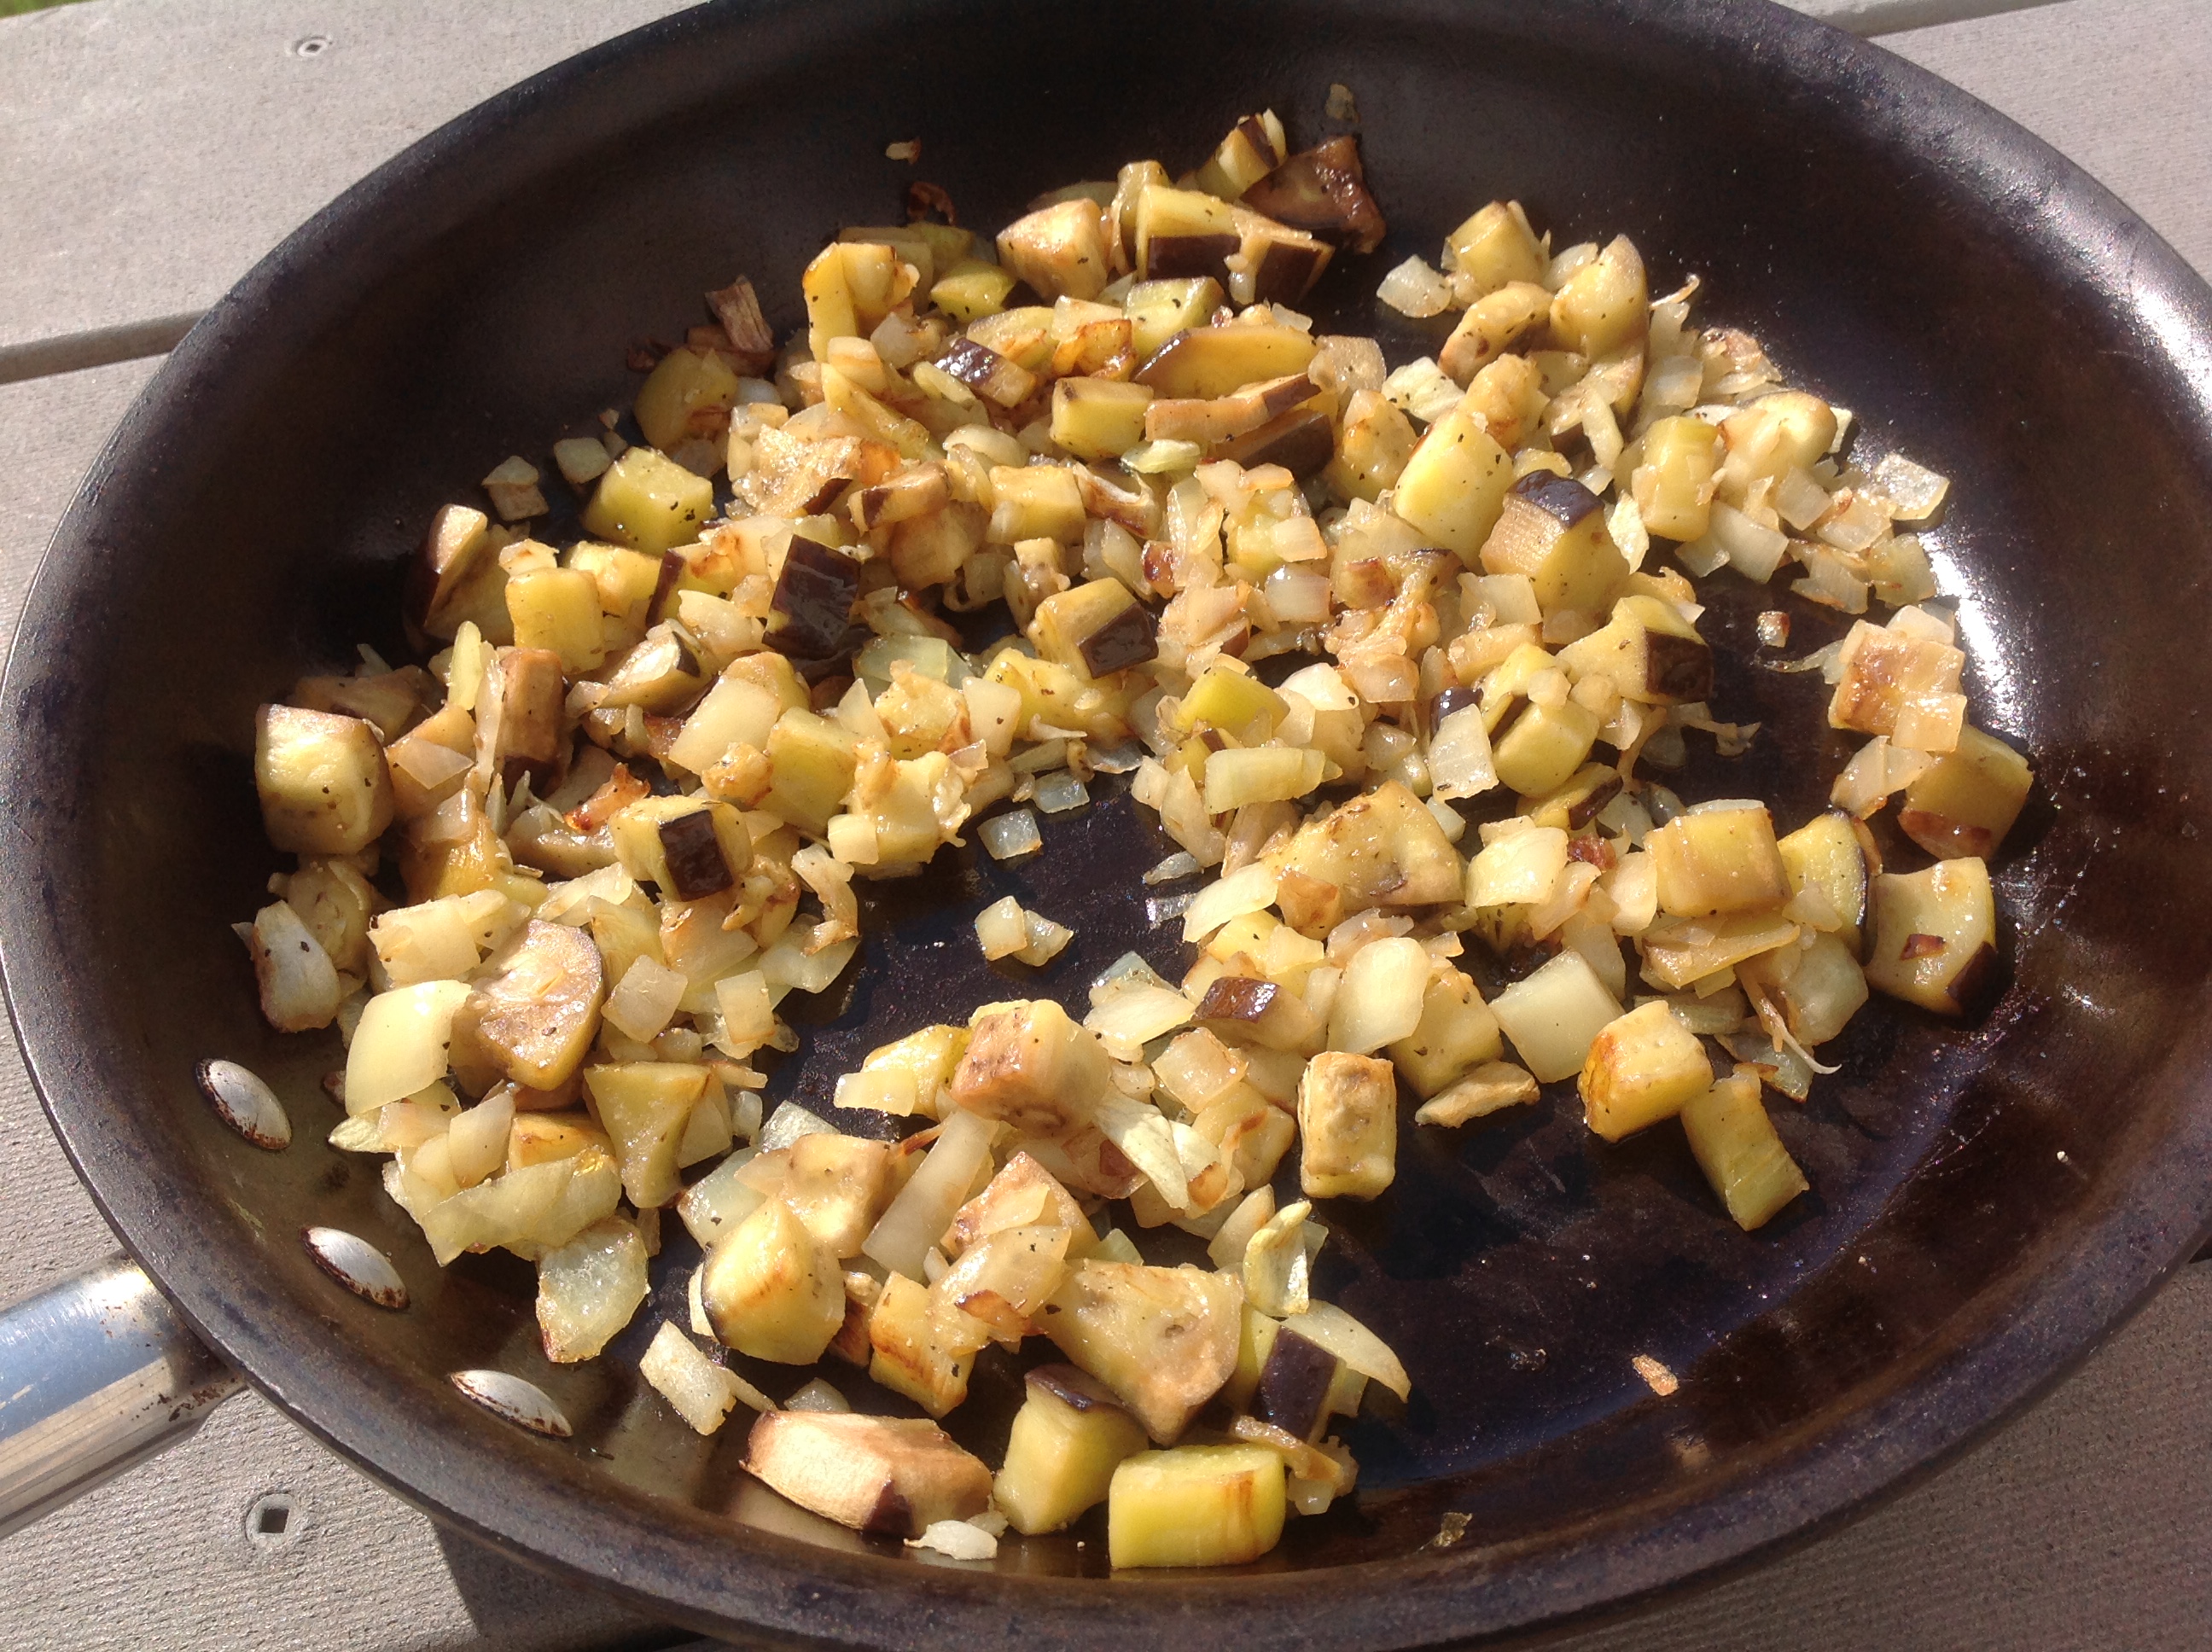
- Brown and crumble meat in olive oil. Add onions, eggplant, seasonings and cook till tender 12 to 15 min. Then add spinach, garlic, tomatoes and fresh herbs, simmer for 5 min. Pour in sauce, simmer until all ingredients are well blended.
For the puff pastry topper
- Preheat the oven to 425 degrees Fahrenheit. Flour a work surface and lightly roll out the puff pastry. Cut the size and shape of 1 large casserole or up to 6 individual bowls or large ramekins, using sharp paring knife. Place the dough on a nonstick baking sheet and wash with egg.
Place the hot filling into selected baking dishes sprinkle cheeses over all- top with crust and bake til golden...


")