When I was preparing for my first time to serve at Mount Tabor Center for Art and Spirituality in Barga, Italy, I knew that I needed to immerse myself in learning all I could about Tuscan cooking. Cooking “Italian” had always been one of my favorite methods, but come to find out, there are many different regions in Italy with vastly different cooking styles. I searched the internet for articles, recipes and cookbooks and came up with a real gem – The Twelve by Tessa Kiros, which is twelve months of Tuscan cooking. She organizes the book according to the months and the fruits, vegetables and meats that are available and in season. This is the great thing about Tuscany – there is what there is – you cook what is in season. You learn to appreciate and savor the flavors.
So, this cookbook became my bible of sorts and I cooked my way through it in the three months I was there, and then again, when I went back for another three months. Every recipe was unique, simple and thoughtful, not to mention the beautiful photography and lessons she taught about seasonal cooking.
So, as we were looking towards our grand opening, I knew that I needed a little help to put together truly Tuscan meals for such a special event. That’s when I started my correspondence with Tessa. She was happy to give me input, suggestions, and even serving ideas. It was a joy to learn from such a great master.
Her travels have taken her all over the world. She was born in London to a Finnish mother and Greek-Cypriot father. She has worked in restaurants and with families in London, Sydney, Mexico and Athens – and chose to work with people who really inspired her. They were mentors in her journey through the world of food. On a trip to Italy to study the language and food, she met her husband, and together they have two beautiful daughters.
In 2016 she won the Edward Stanford Travel Writing Book of the Year in food and travel.
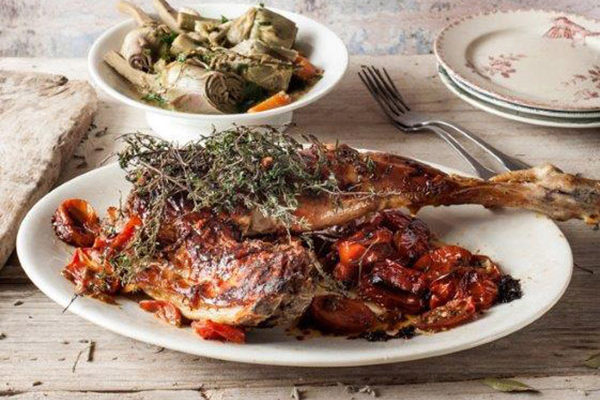
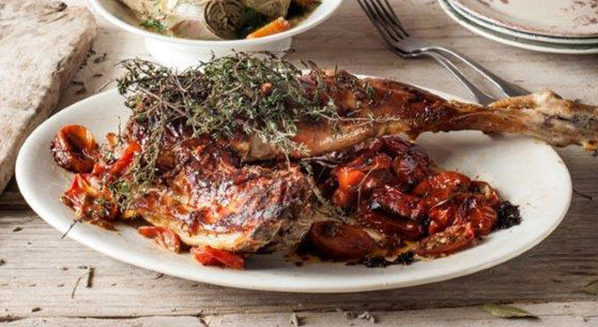
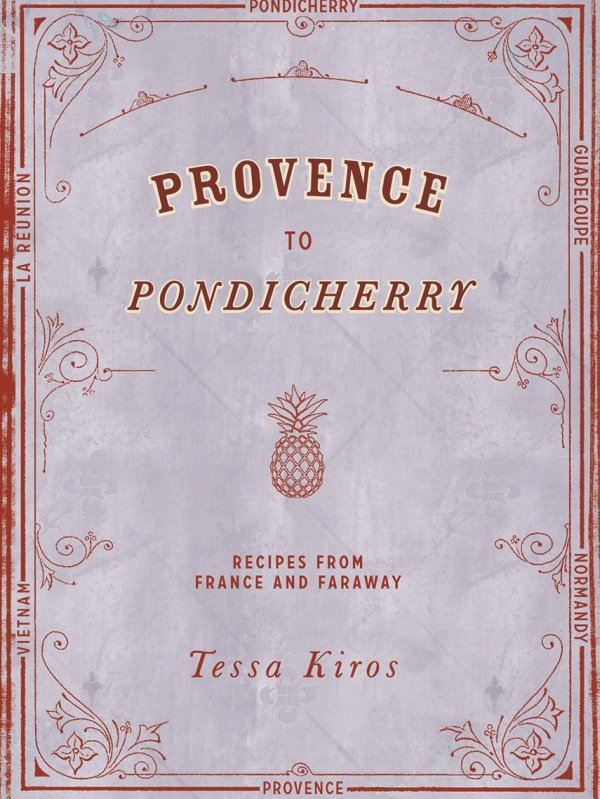
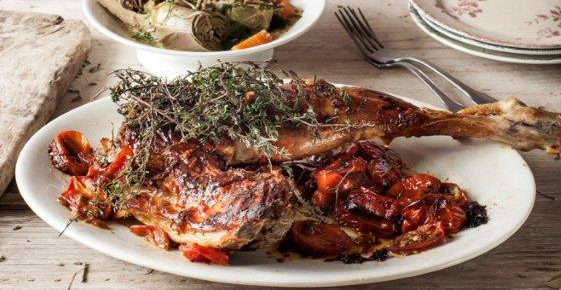
Tessa is delighted to be sharing this recipe for Easter with us from her new cookbook ‘Provence to Pondicherry‘ published by Quadrille, Gigot d’Agneau aux Anchois (Leg of Lamb with Anchovies). Photo courtesy of Manos Chadzikonstantis.
“I have such a lovely memory of eating this deep in the countryside one sunny day, under a huge tree that provided shade for the masses…It is good served with a potato gratin or a vegetable tian. Braised artichokes are also very good served either as as starter to this or one side.”
SERVINGS6servingsCHANGE SERVING SIZEservings |
COOK TIME75minutes |
PREP TIME |
READY IN |
Ingredients
- 6 garlic clove(s) finely chopped
- 6 anchovy fillets in oil drained and chopped
- 2 Tbsp rosemary chopped
- 1 Tbsp thyme leaves
- 6 Tbsp olive oil
- 1 small leg of lamb (about 2 3/4 Ibs)
- 20 cherry tomatoes large, (21 oz in total), 10 halved and 10 left whole
- 3/4 cup white wine
- sea salt to taste
- freshly ground pepper to taste
Instructions
- Preheat the oven to 400 degrees. In a small bowl, mix the garlic, anchovies, rosemary and thyme leaves with 2 T. of the oil. Drizzle 3 T. of the oil into the base of a not too large roasting pan that will fit the lamb and tomatoes.
- Make 3 incisions, about 3/4 in. deep, on each side of the lamb. Stuff the herb mixture into the incisions and rub all over the lamb. Rub the surface with a little salt (not too much as the anchovies are salty) and a generous grinding of pepper, then put the lamb in the baking dish, presentation side down.
- Surround the lamb with the tomatoes. Lightly sprinkle them with salt and pepper and drizzle with the last tablespoon of oil. Roast for 30-40 minutes until the lamb is golden and the tomatoes are starting to look gooey.
- Turn the lamb over, move the tomatoes around if necessary and check that nothing is burning. Add 1/2 c. of the wine, turn the oven down to 350 degrees and roast for a further 30 minutes.
- Add the remaining wine to ensure that the sauce around the lamb is jammy and tomatoes are not blackening and roast for a final 10-15 minutes. The cooking time will depend on how well done you want the lamb, and on the size of the leg of lamb. I like this dish with the meat cooked through, and with a jammy, gooey sauce.
- Remove from the oven and leave to rest for 10 minutes. Transfer the lamb and tomatoes to a platter and serve warm.


")