About Gourmet Nun
There are actually two of us under the title of "Gourmet Nun!" One of us came at age 13, the other in her 30s. We have been sisters for 43 and 38 years respectively. One of use came with her mother (who felt called to this community), the other drove down in a red Carmen Ghia, leaving behind a job in a flower shop in Boston. Between us we have almost a century of cooking experience (that actually sounds kind of frightening!) having cooked since we were young. We have been in choir, wind ensemble, orchestra, painted, made quilts and both have been or are executive chefs in our events kitchen. We both love food; but especially the relationship between hospitality and the dining room, the Eucharistic table and the banquet table. Nothing makes either of us happier than a well-planned and well-executed meal that speaks of the love of God.
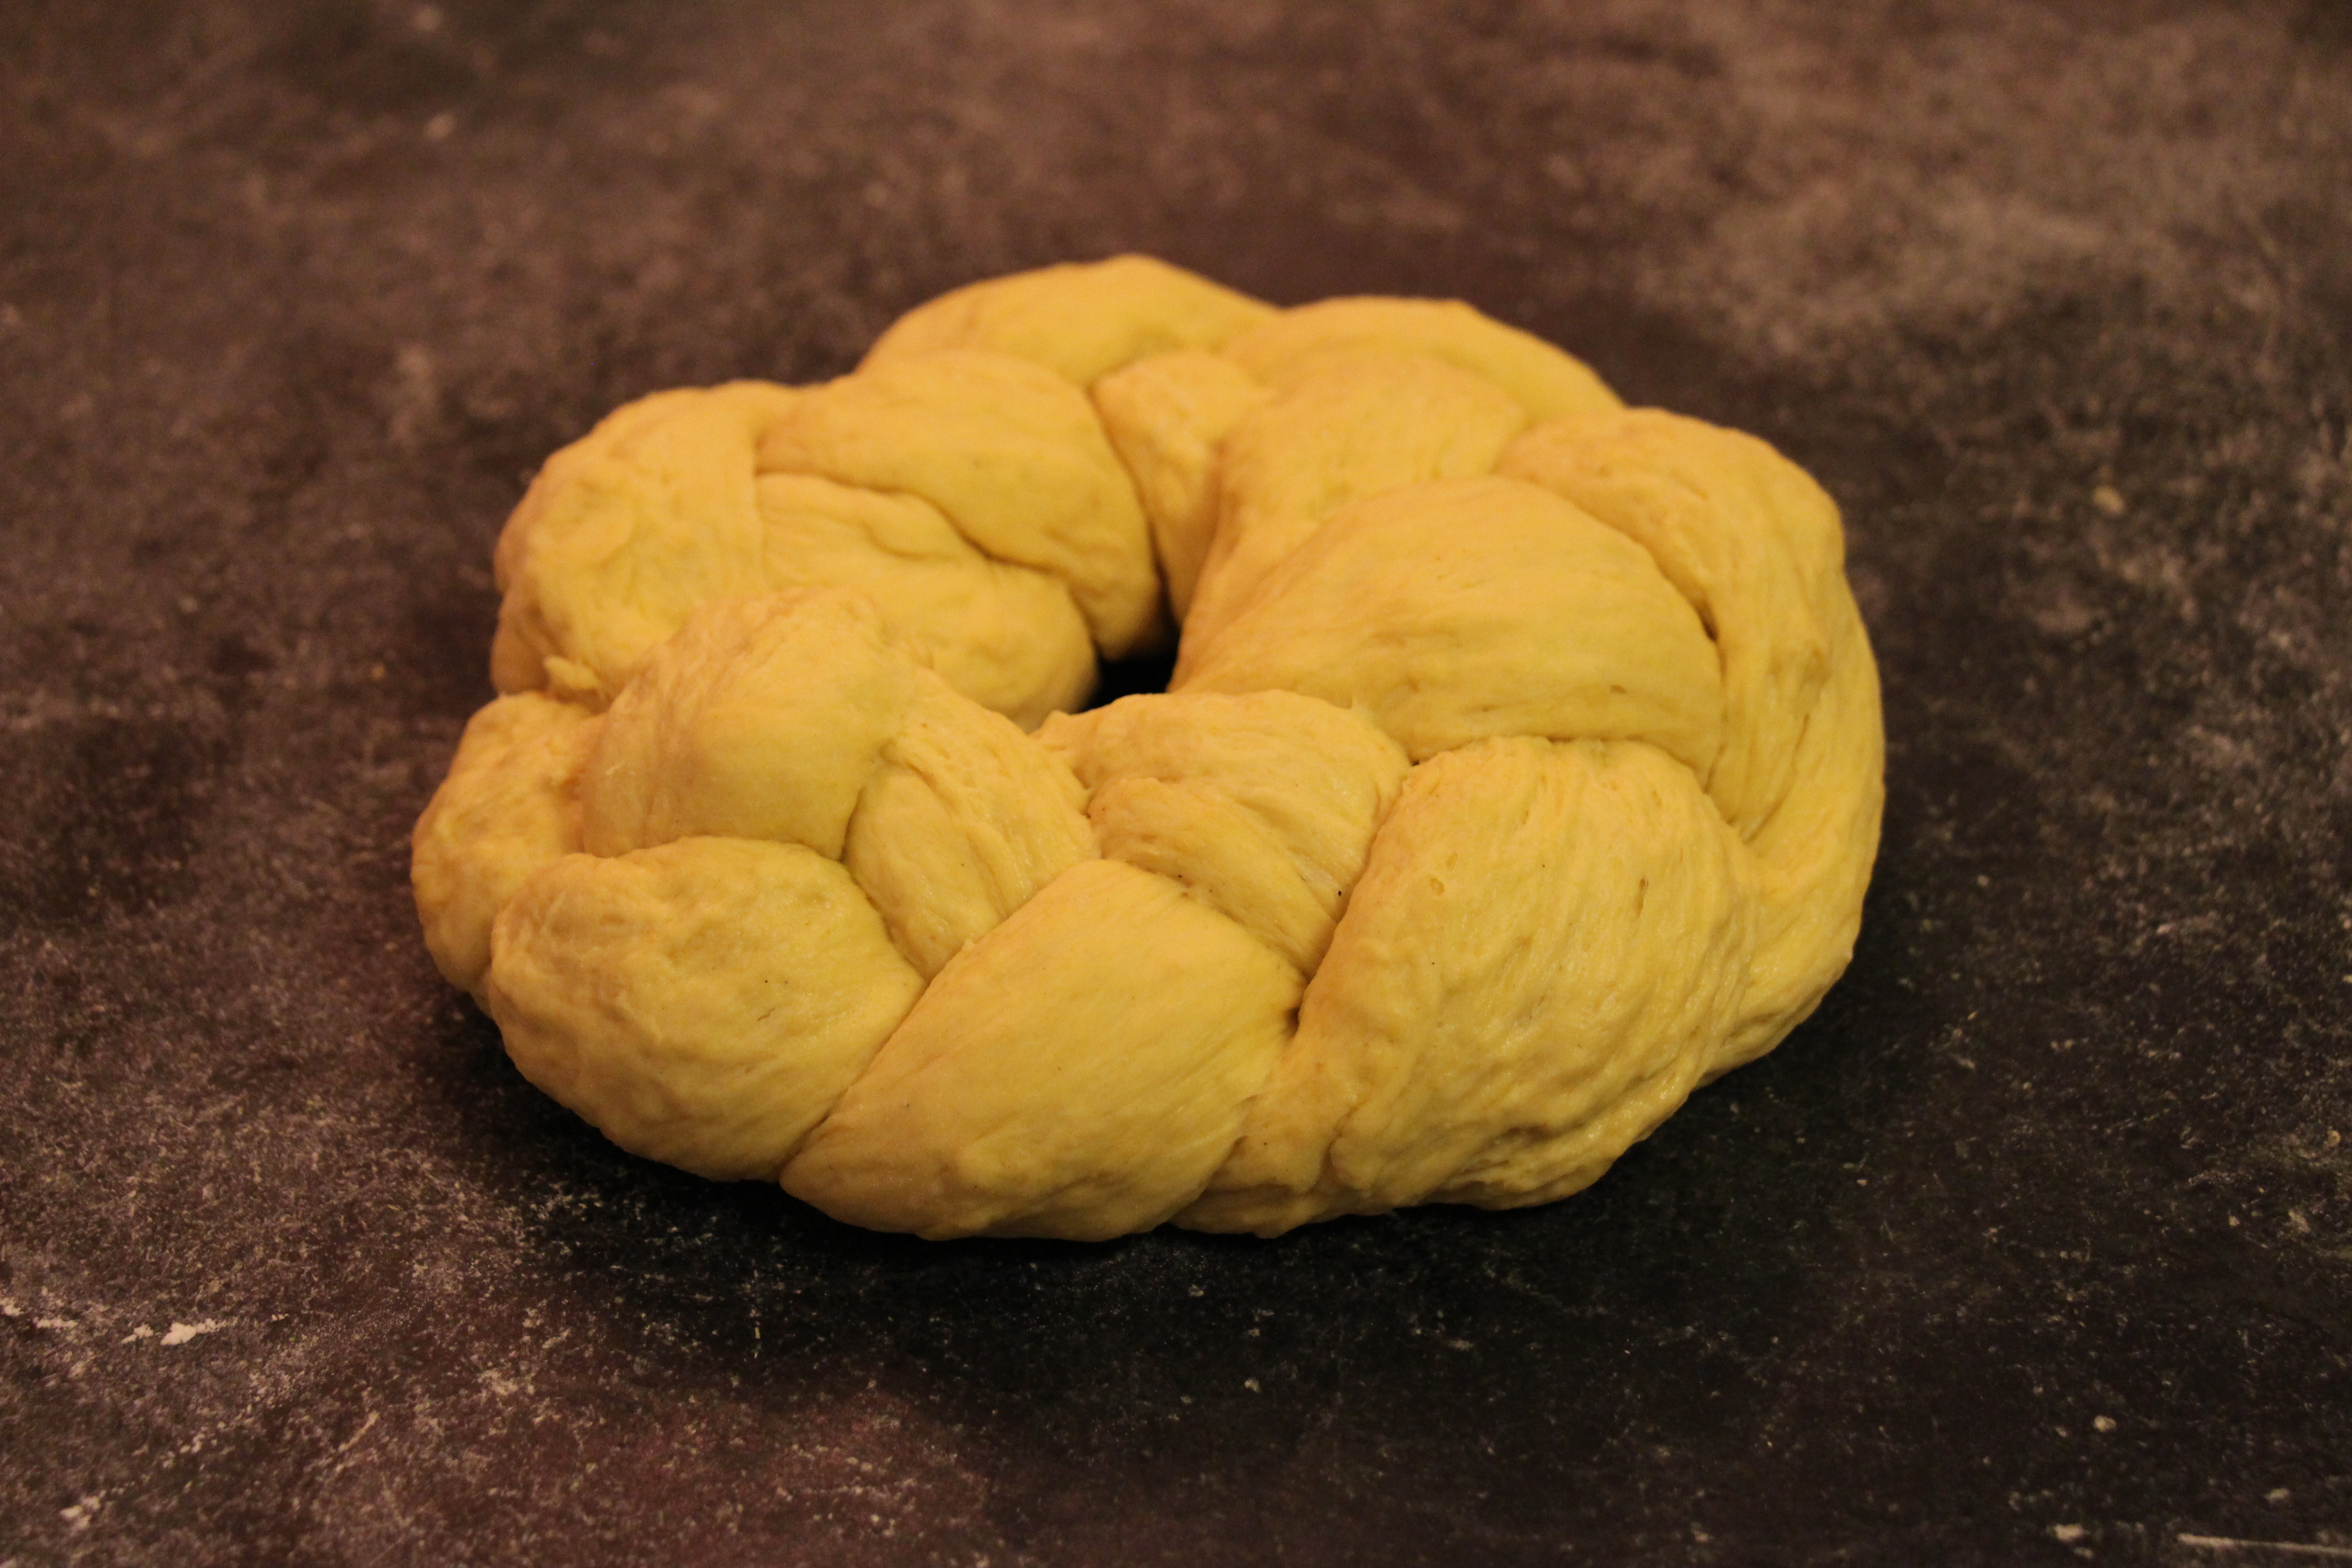
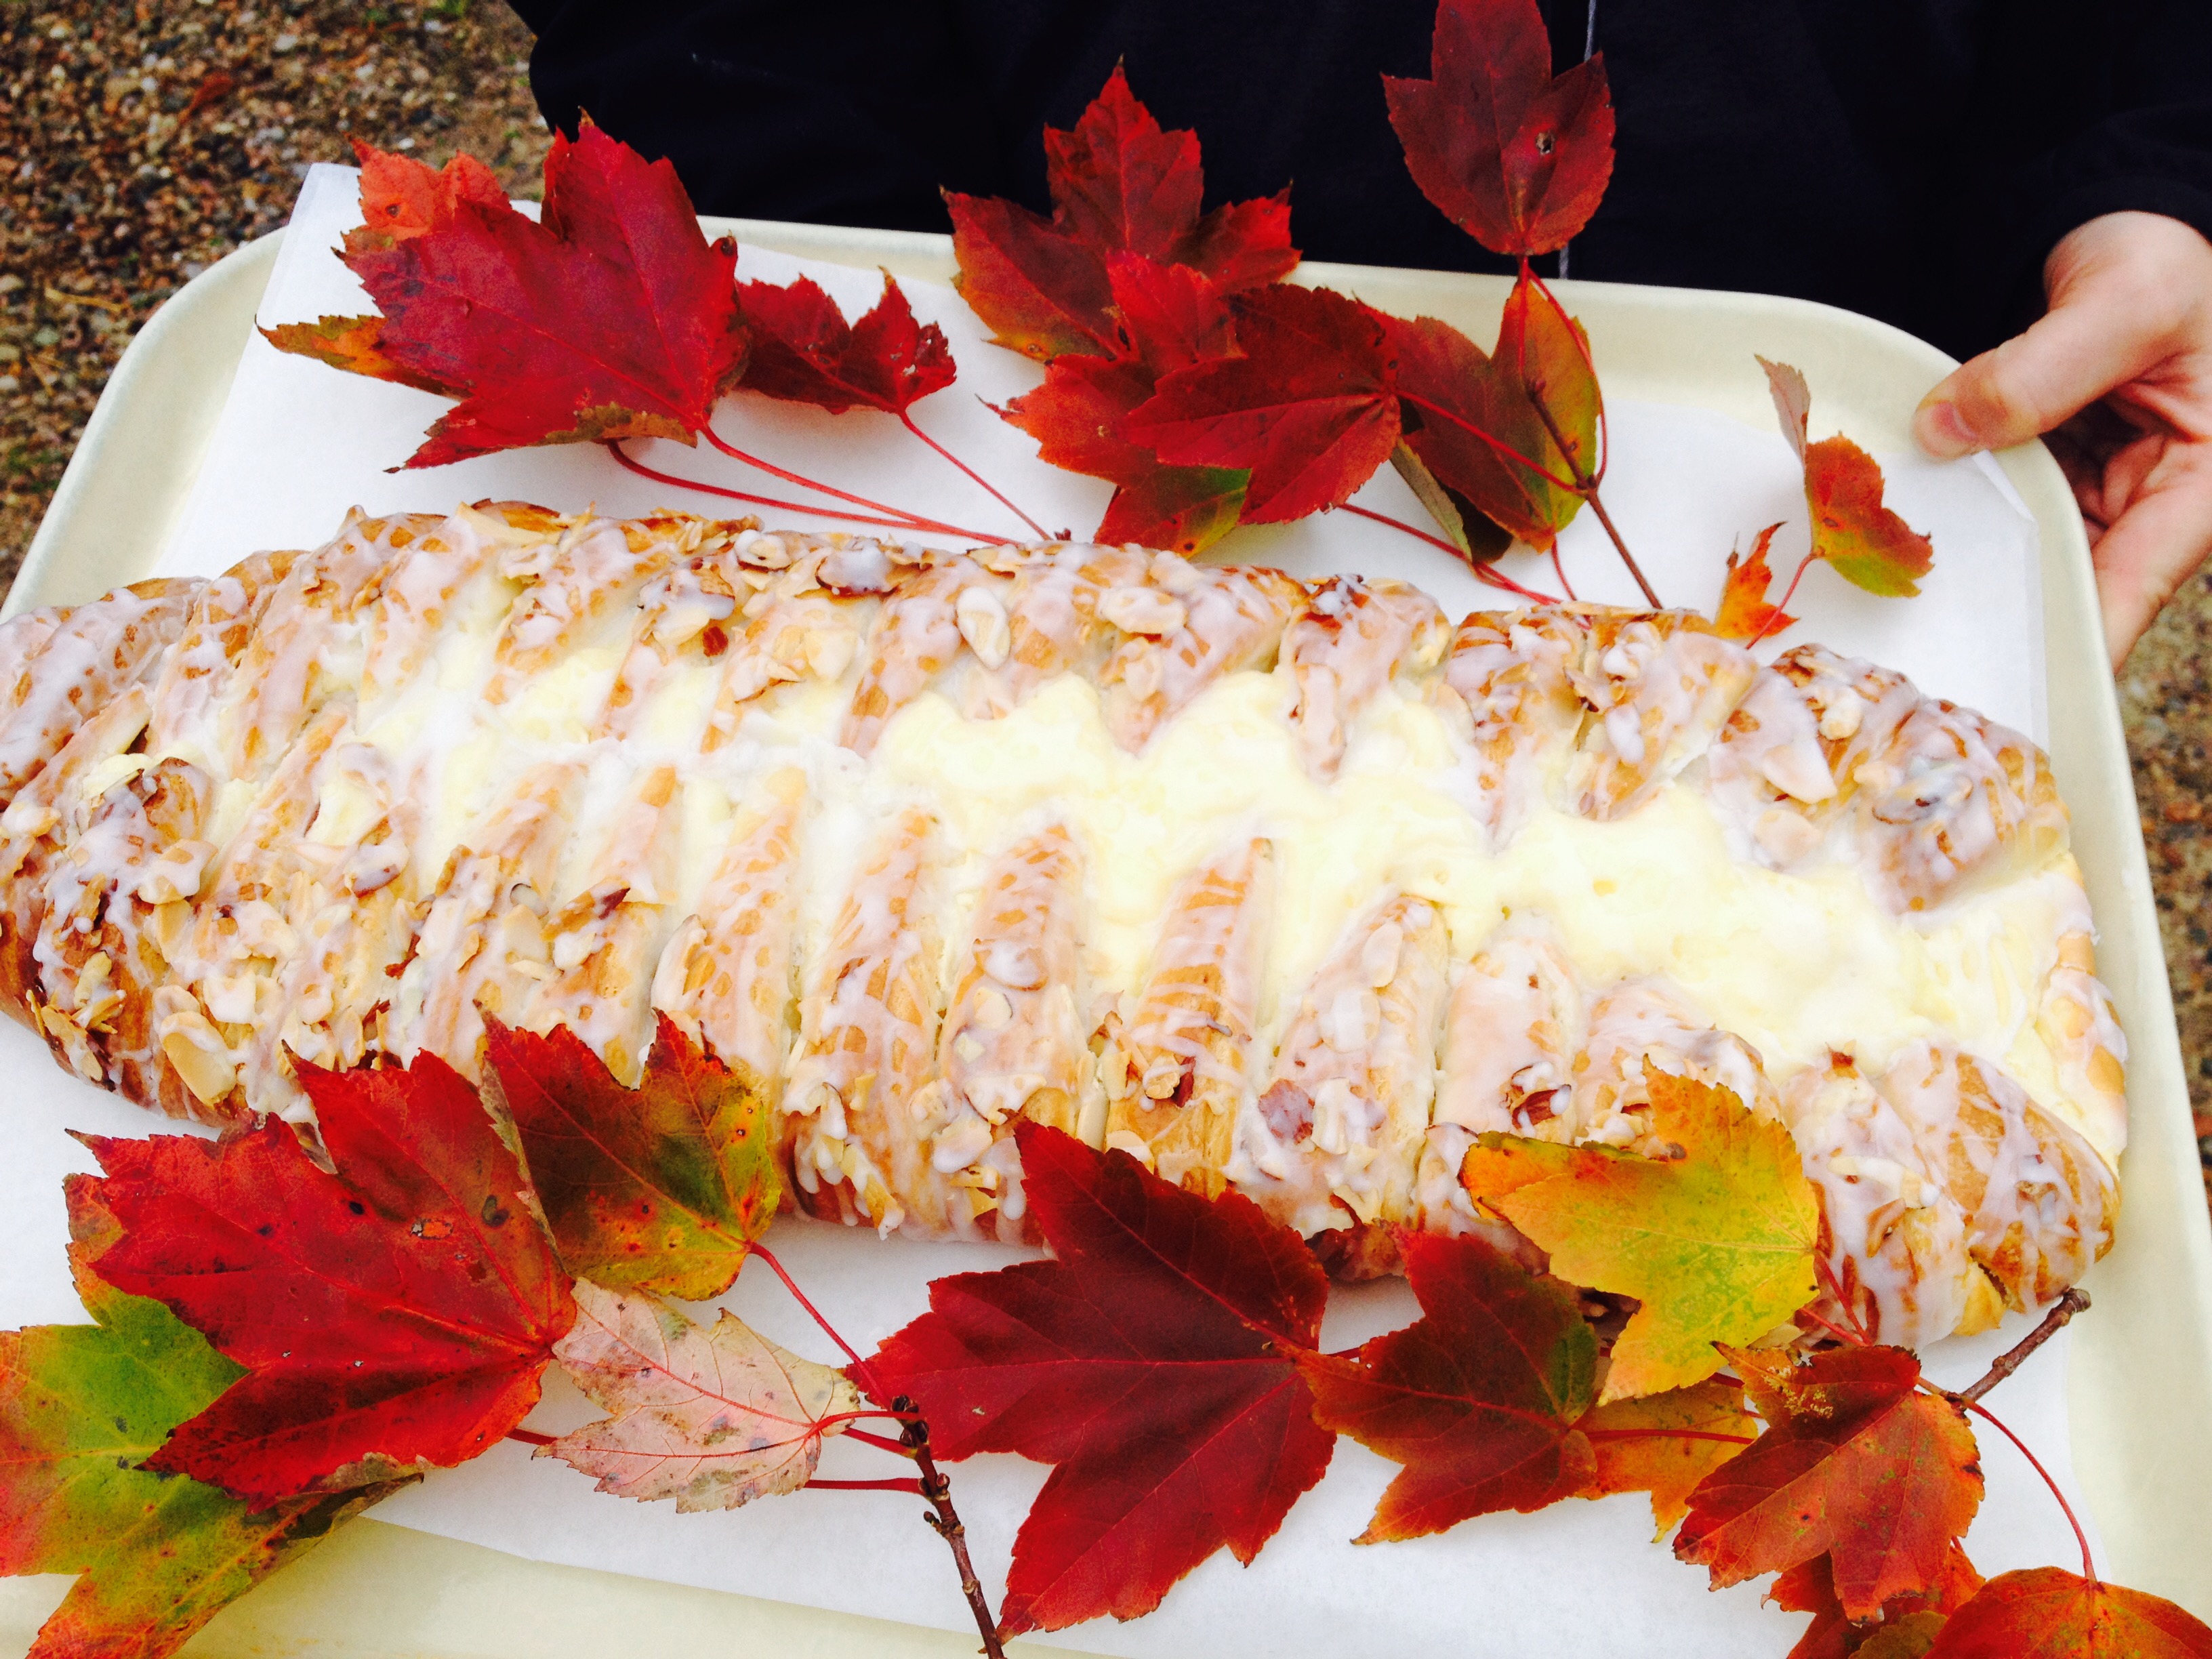
Since St. Lucia’s Day (or St. Lucy’s Day) is just around the corner on December 13th, we thought we’d share this special Swedish bread with you – fantastic for the Holidays. The celebration of the day comes from stories that were told by Monks who first brought Christianity to Sweden. “St Lucia was a young Christian girl who was martyred, killed for her faith, in 304. The most common story told about St Lucia is that she would secretly bring food to the persecuted Christians in Rome, who lived in hiding in the catacombs under the city. She would wear candles on her head, so she had both her hands free to carry things. Lucy means ‘light’ so this is a very appropriate name.” (see note below**)
December 13th was also the Winter Solstice, the shortest day of the year, in the old ‘Julian’ Calendar and a pagan festival of lights in Sweden was turned into St. Lucia’s Day. It is now celebrated by a girl dressing in a white dress with a red sash around her waist and a crown of candles on her head. Thus, the wreath of bread dotted with candied “berries.” If you’d like you can also add small candles to the cake as well for a more festive look.
** read more at https://www.whychristmas.com/cultures/sweden.shtml
Print Recipe
Votes: 0
Rating: 0
You:
Rate this recipe!
St. Lucia Bread
SERVINGS2loaves
|
COOK TIME20-25mins |
PREP TIME30mins |
READY IN2-3hrs |
Ingredients
Instructions
- In a large mixer, soften the yeast in the warm water
- Heat the milk until warm. Add the oil and sugar and stir to dissolve.
- Add this mixture to the yeast mixture in the mixer
- Add salt and saffron
- Add the 3 slightly beaten eggs and mix with dough hook.
- Add the lemon zest, citron and almonds and continue mixing
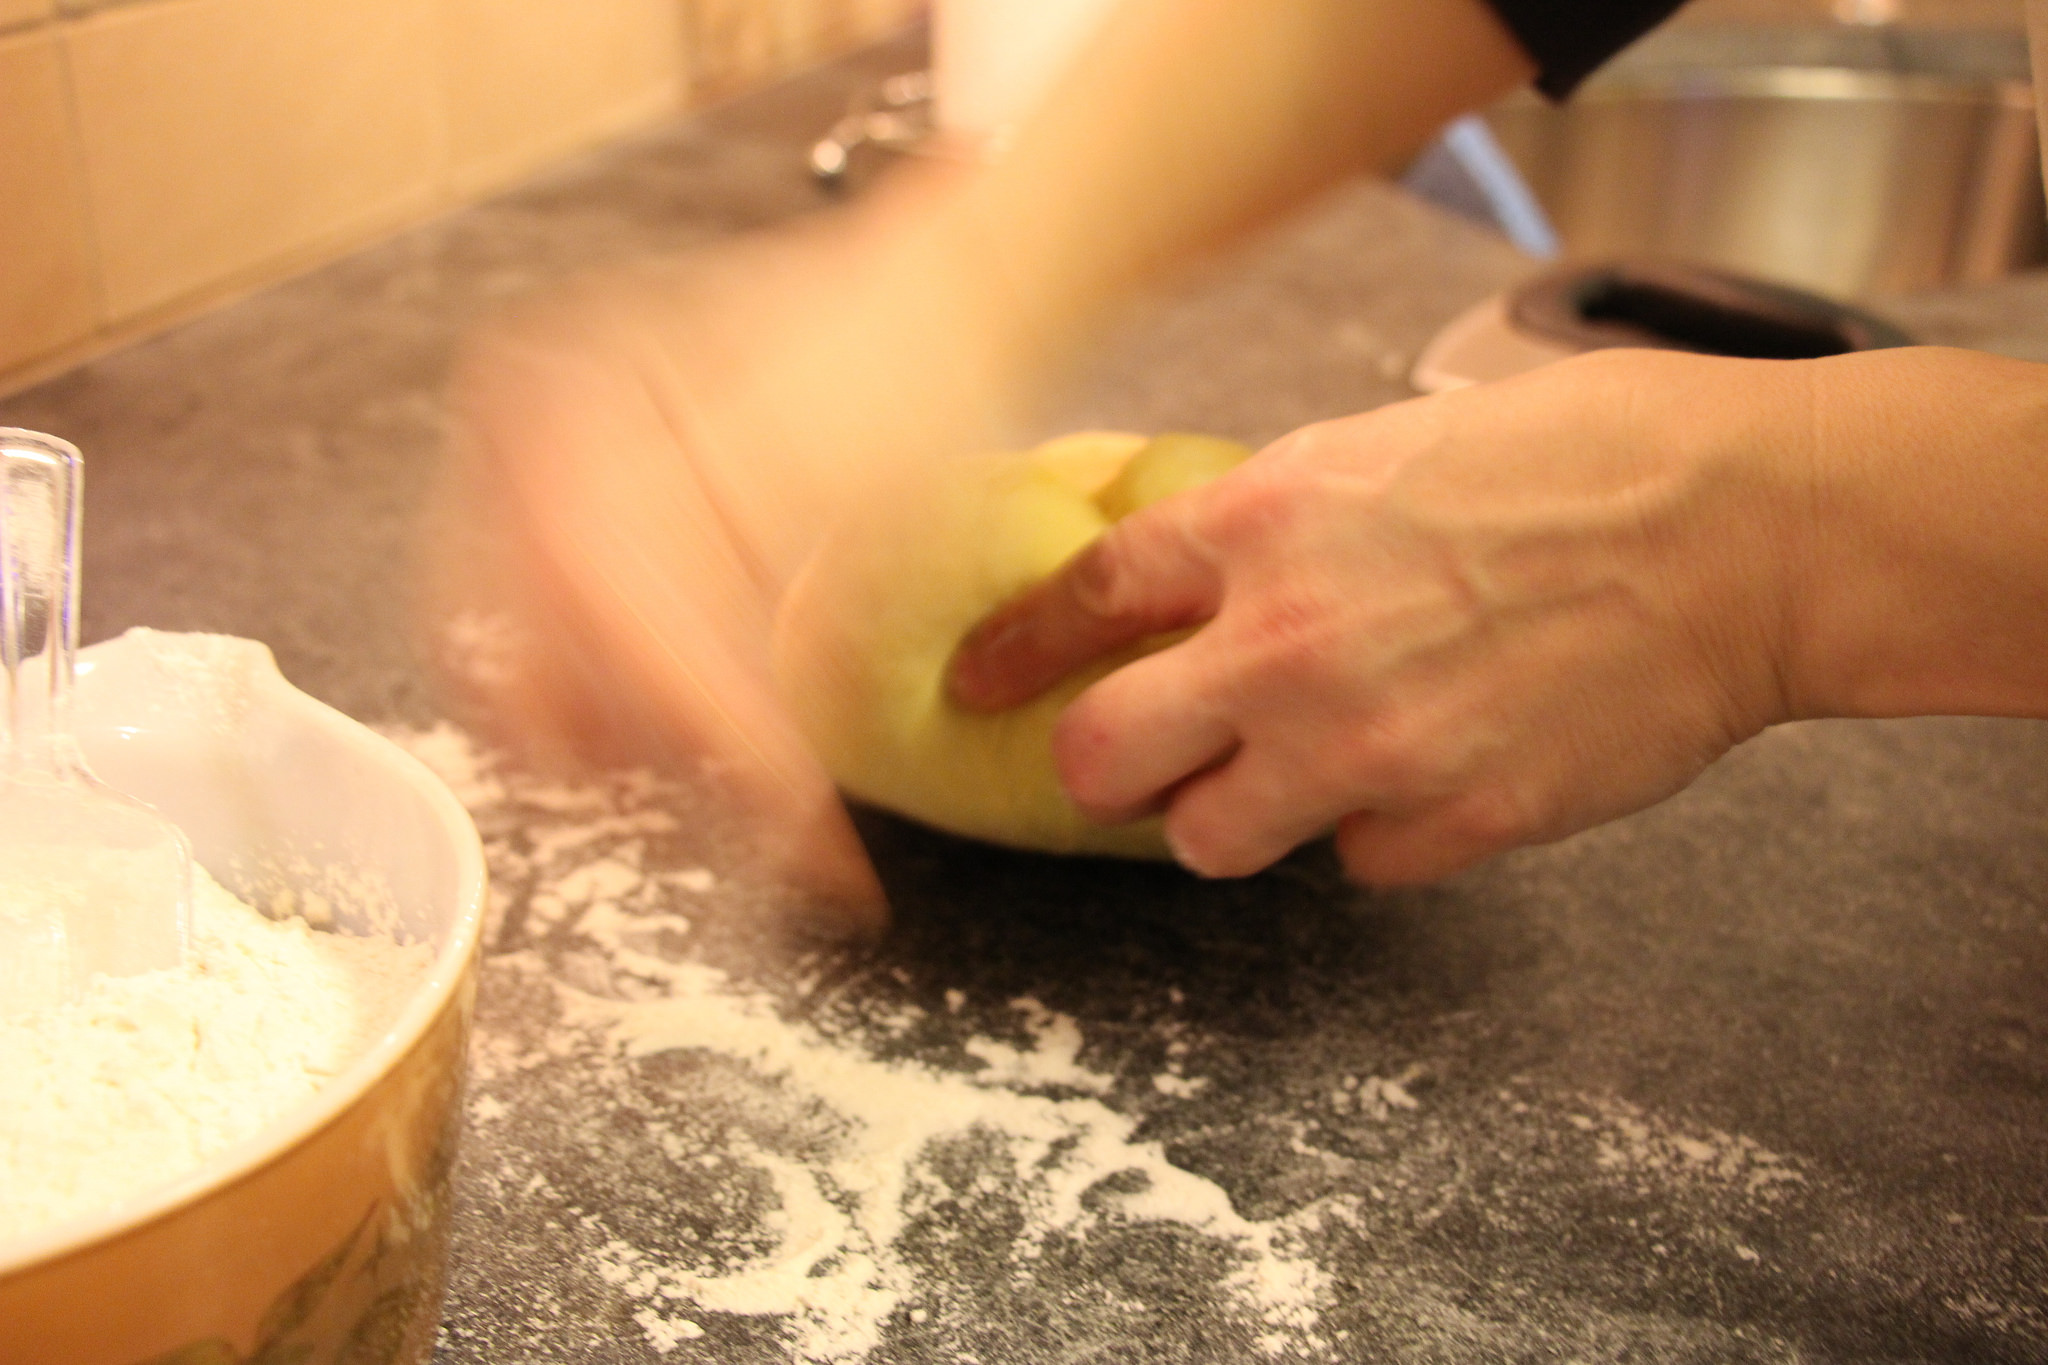
- One cup at a time, add the flour and mix well after each addition. Stop adding the flour when the dough starts pulling away from the side of the bowl. Adding more flour if necessary.
- Turn the dough out onto a floured board and knead for 5 min, or until dough becomes smooth and elastic; adding flour as necessary.
- Place the dough in a greased bowl, cover, and let rise in a warm place until almost doubled in size, about 1 hr. (At this point, you can refrigerate the dough, if you want to work with it later).
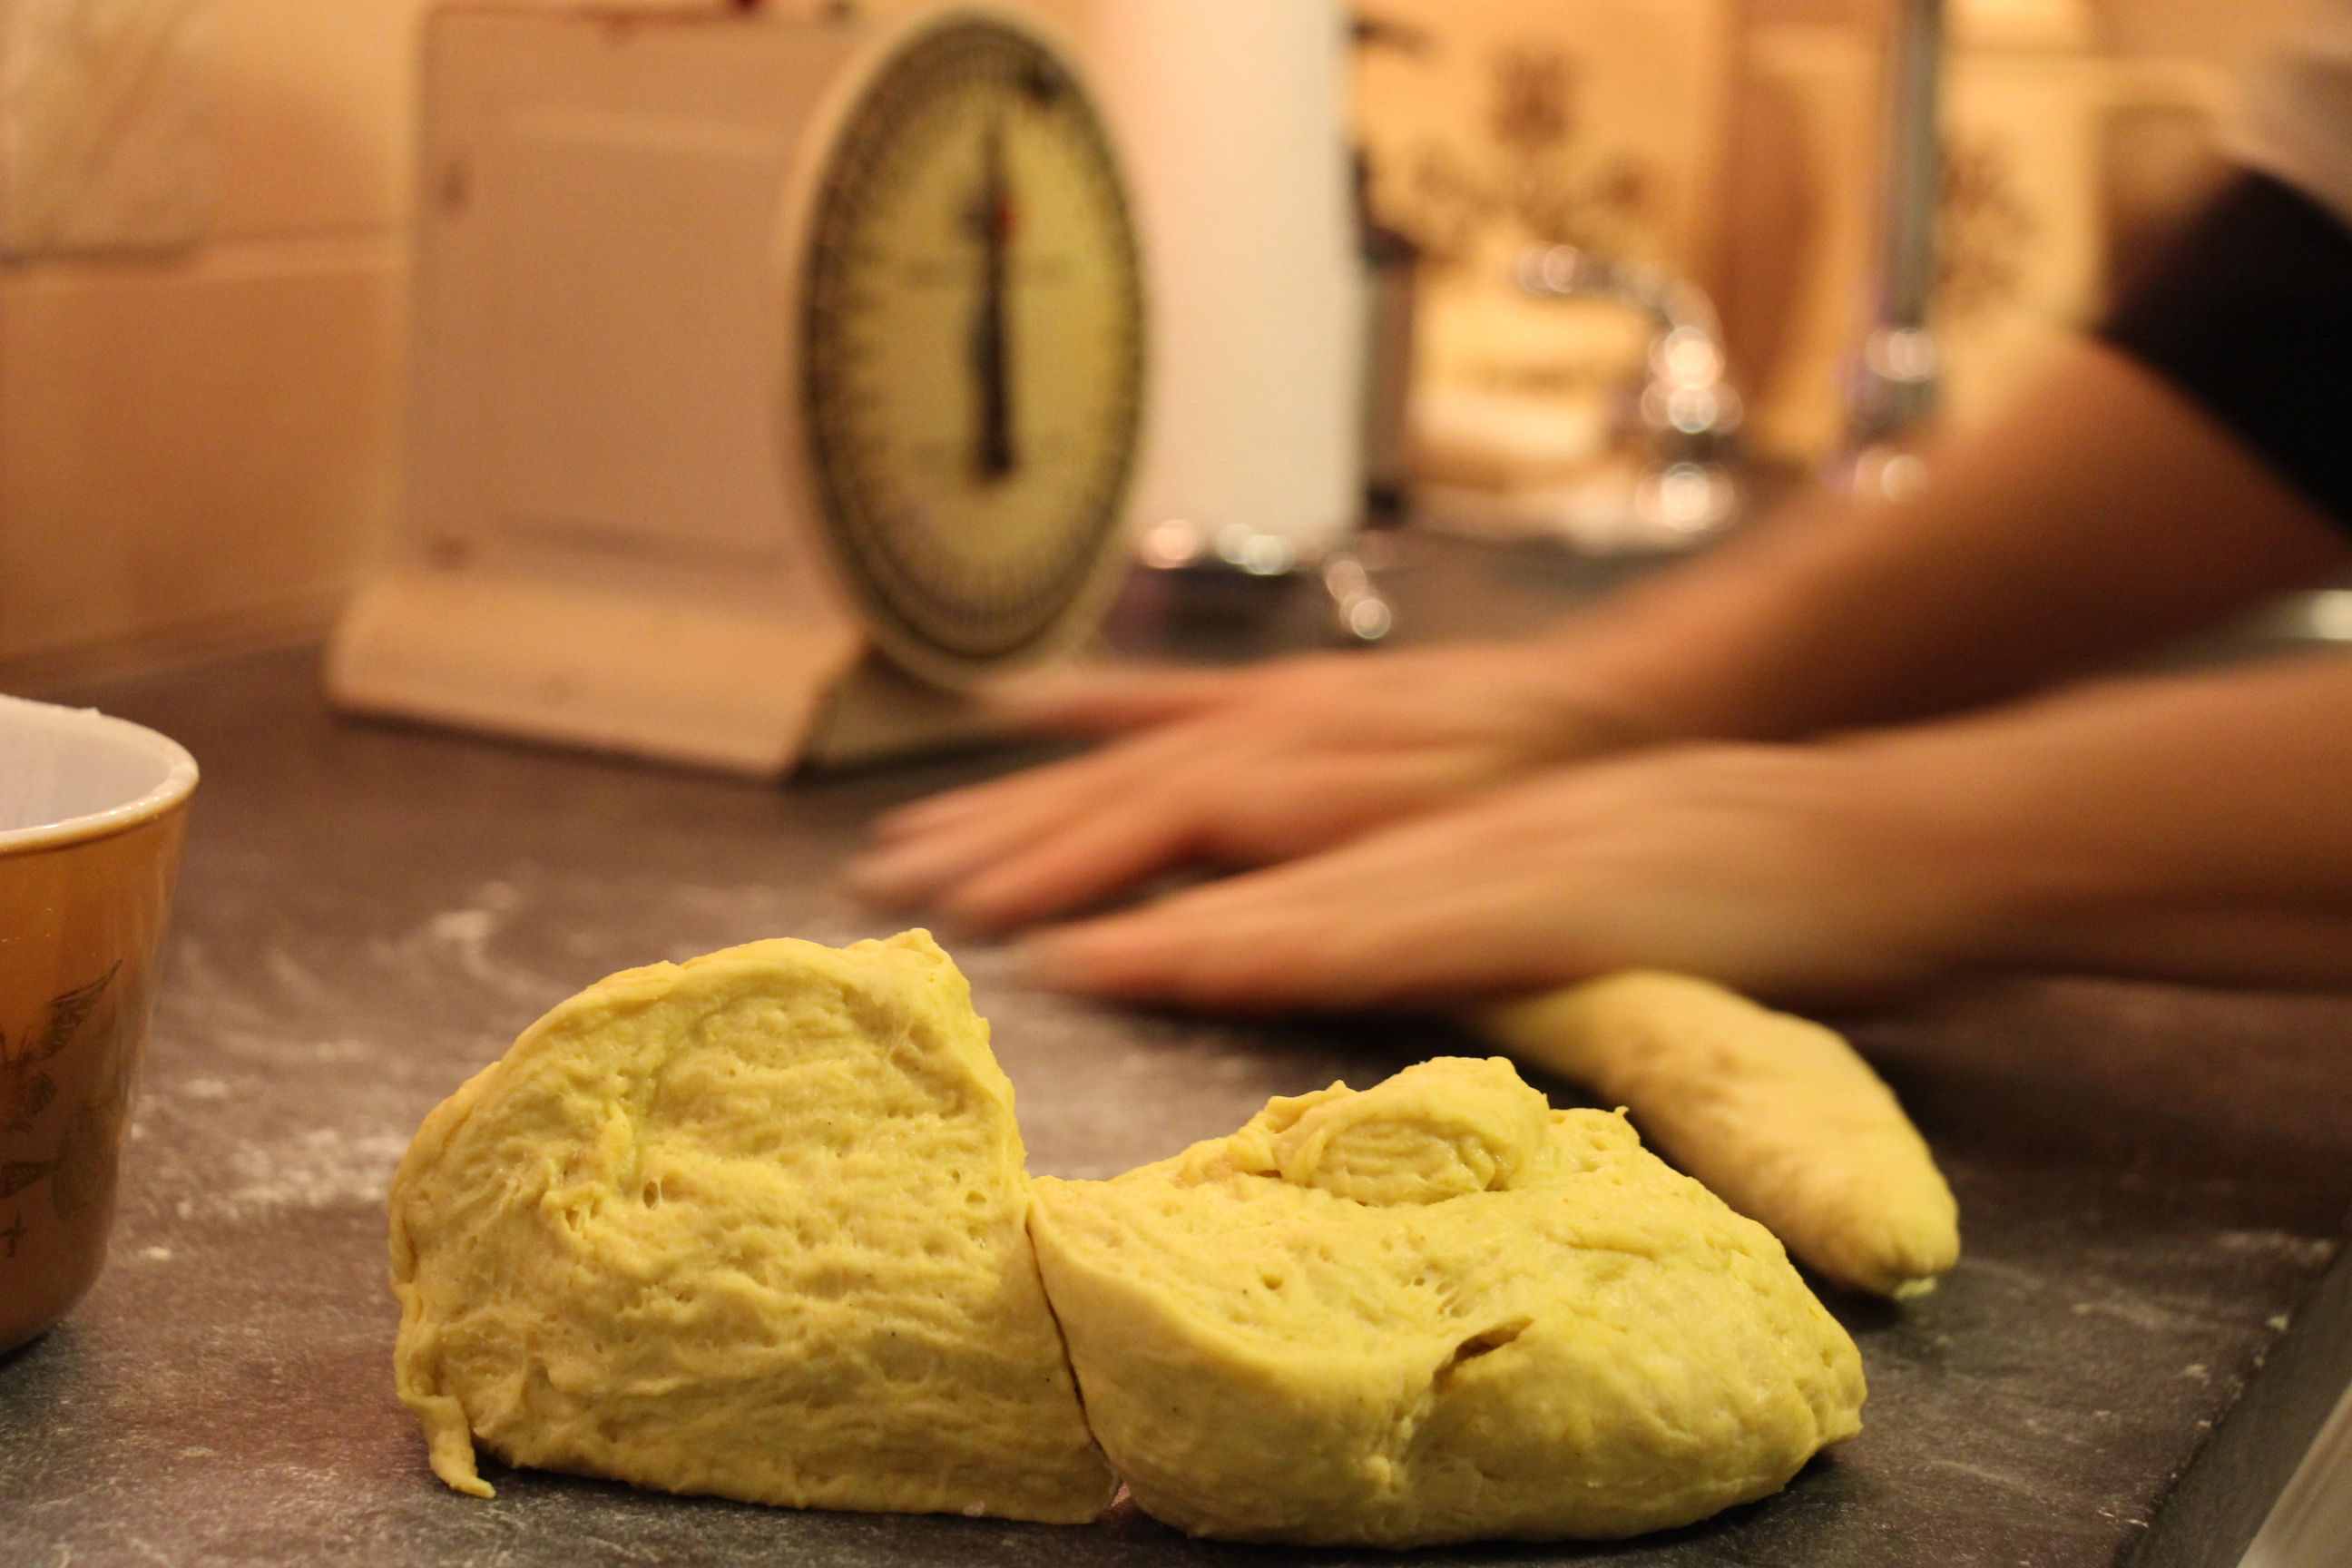
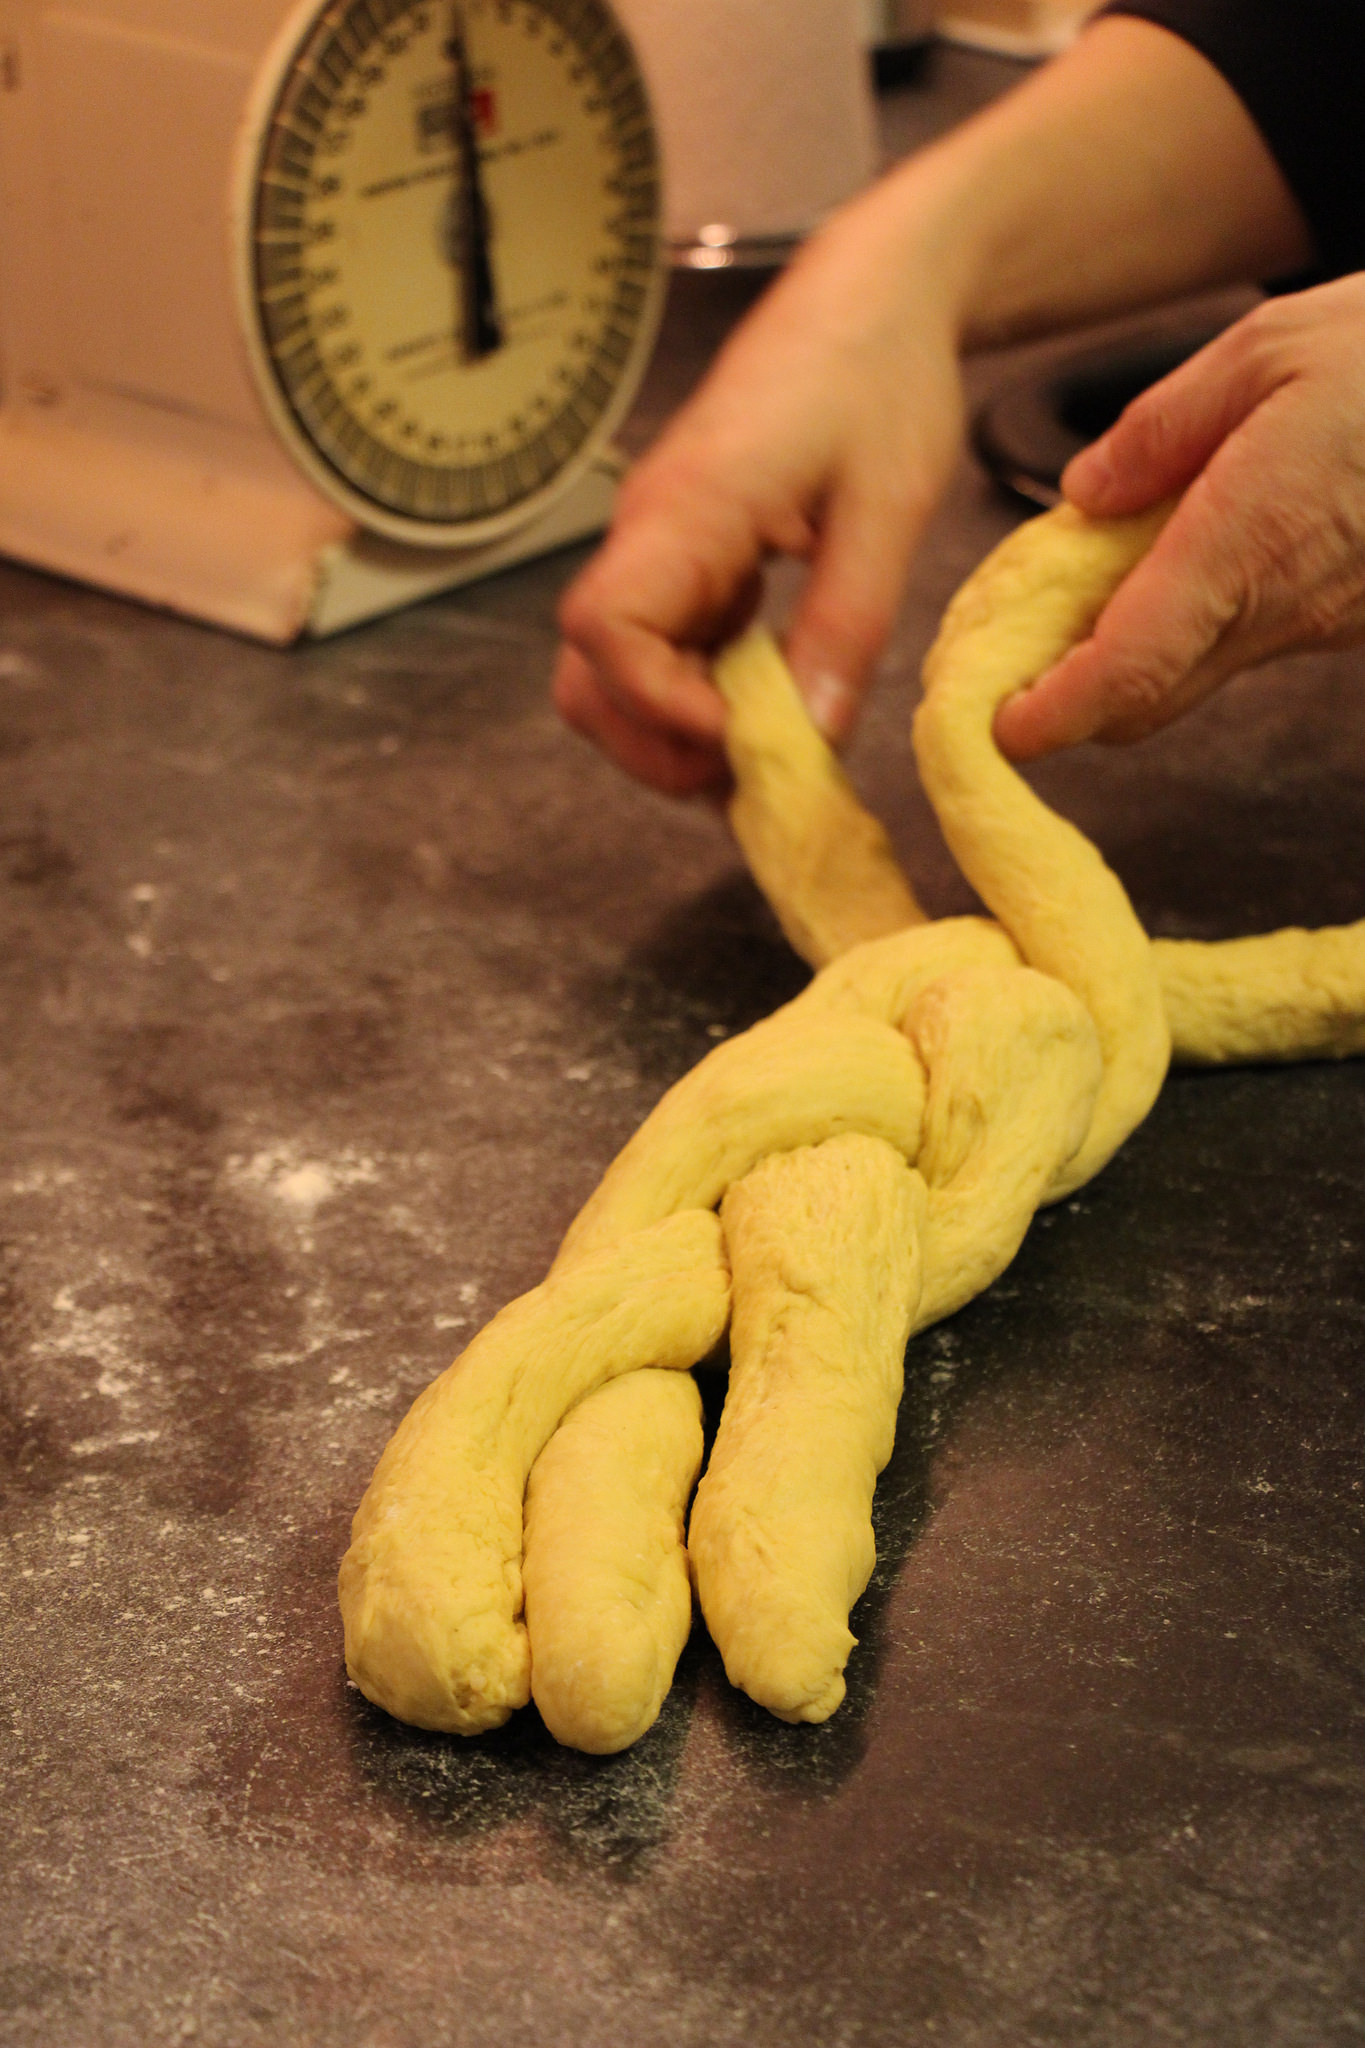
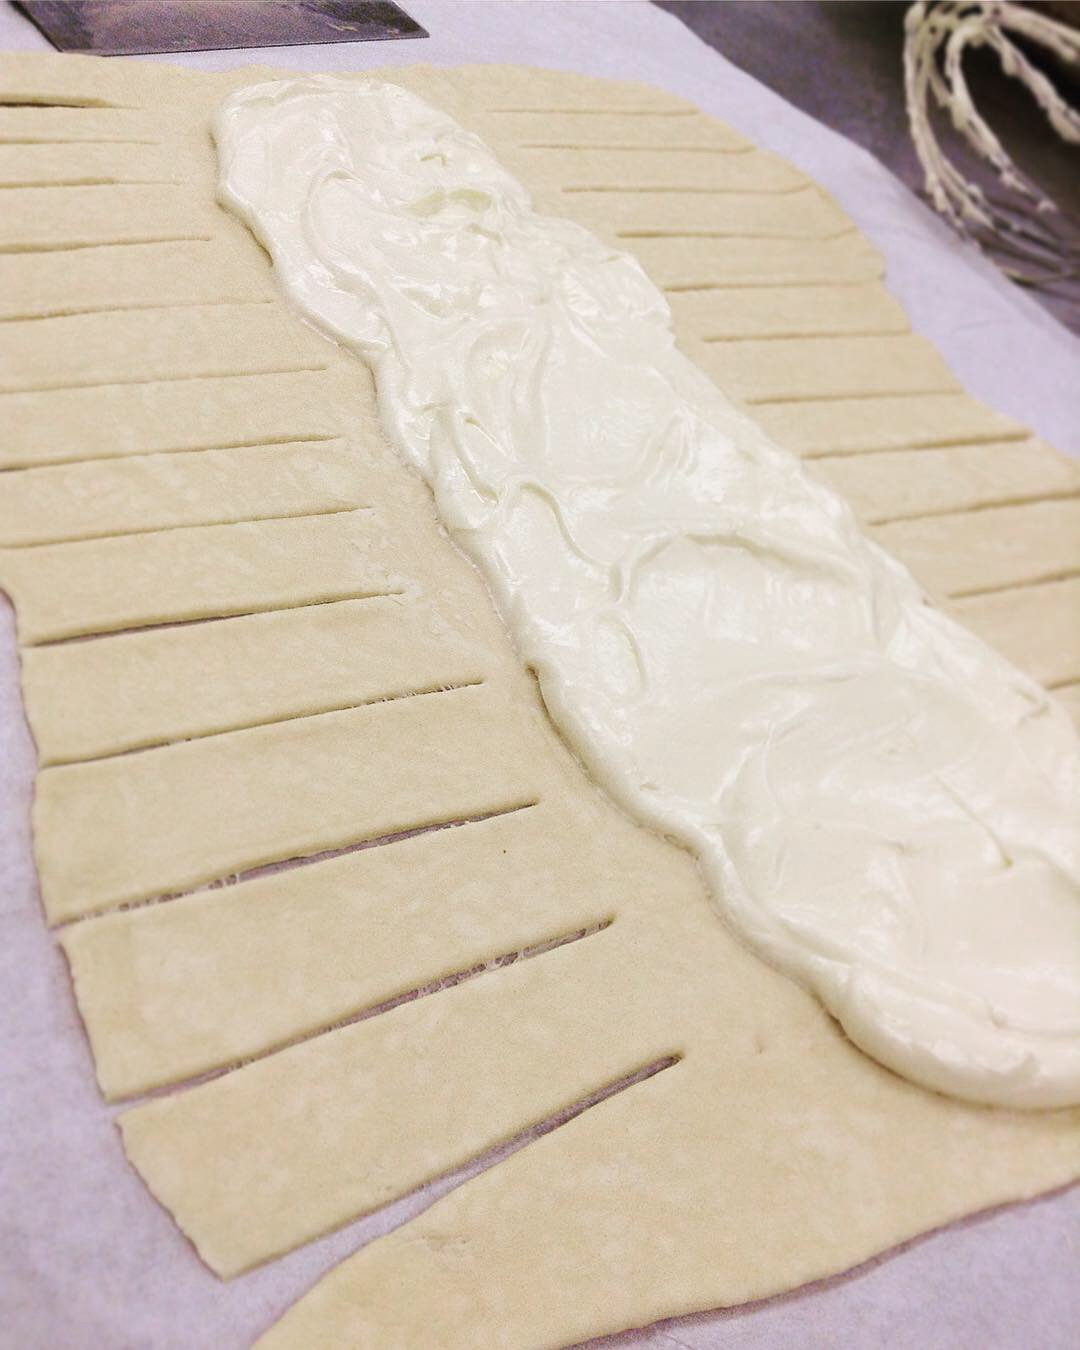
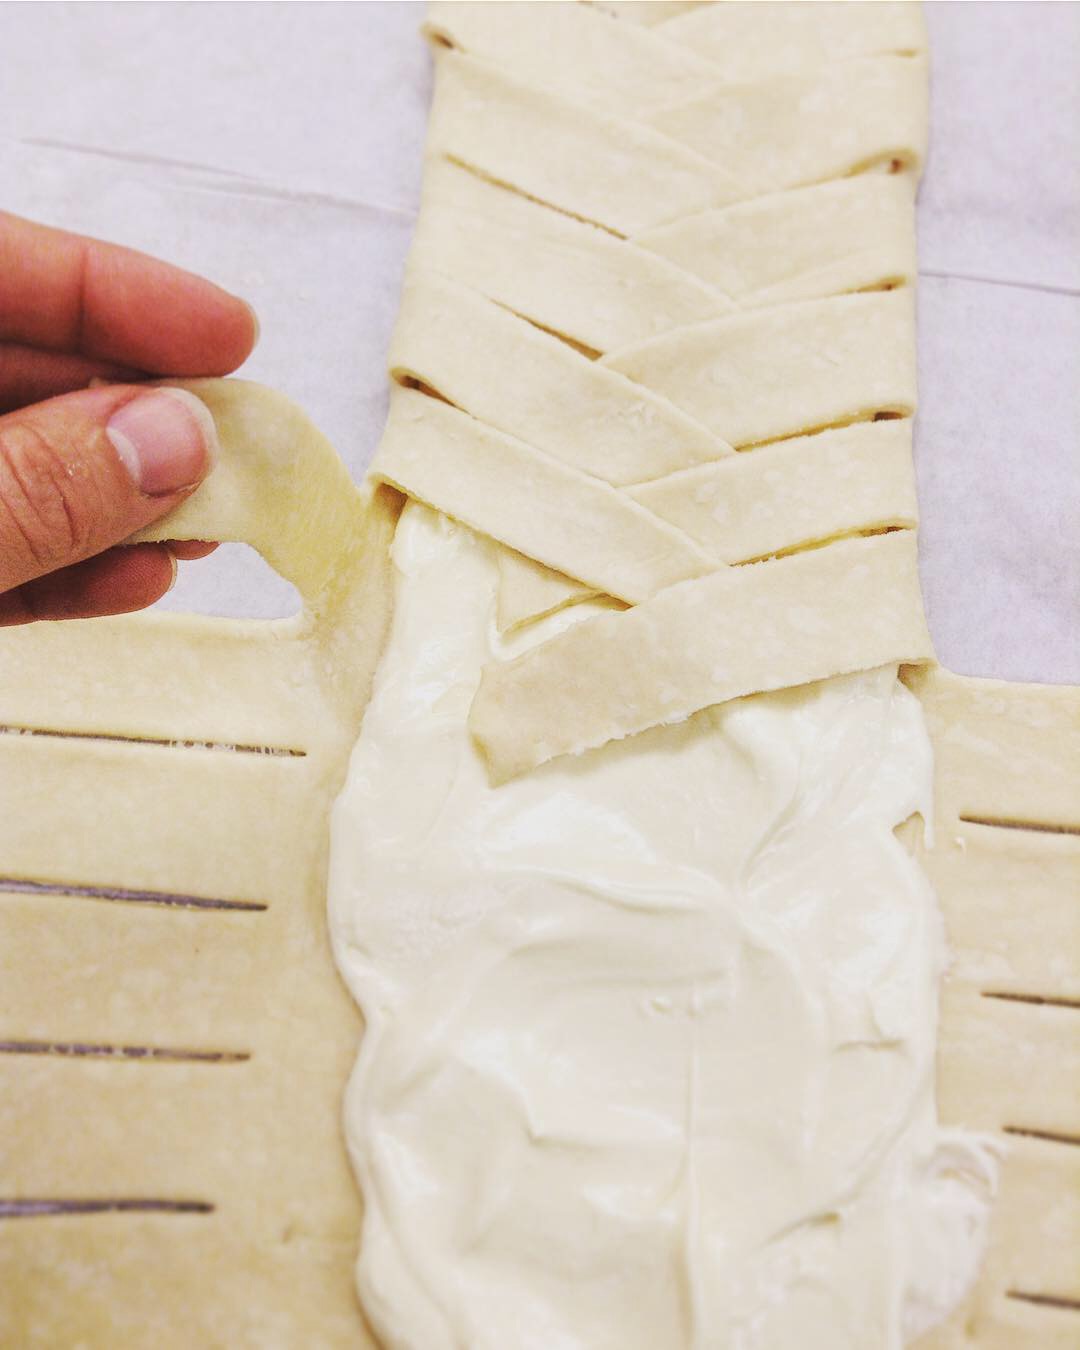
- Divide the dough into six equal balls and roll into large ropes and then braid three together, making two braids.
- Pinch the two ends together and tuck under, forming two circular loaves.
- Preheat oven to 325 degrees. Line two sheet pans with baking paper, or grease, and put a braided loaf on each pan.
- Cover and let rise in a warm place, until doubled.
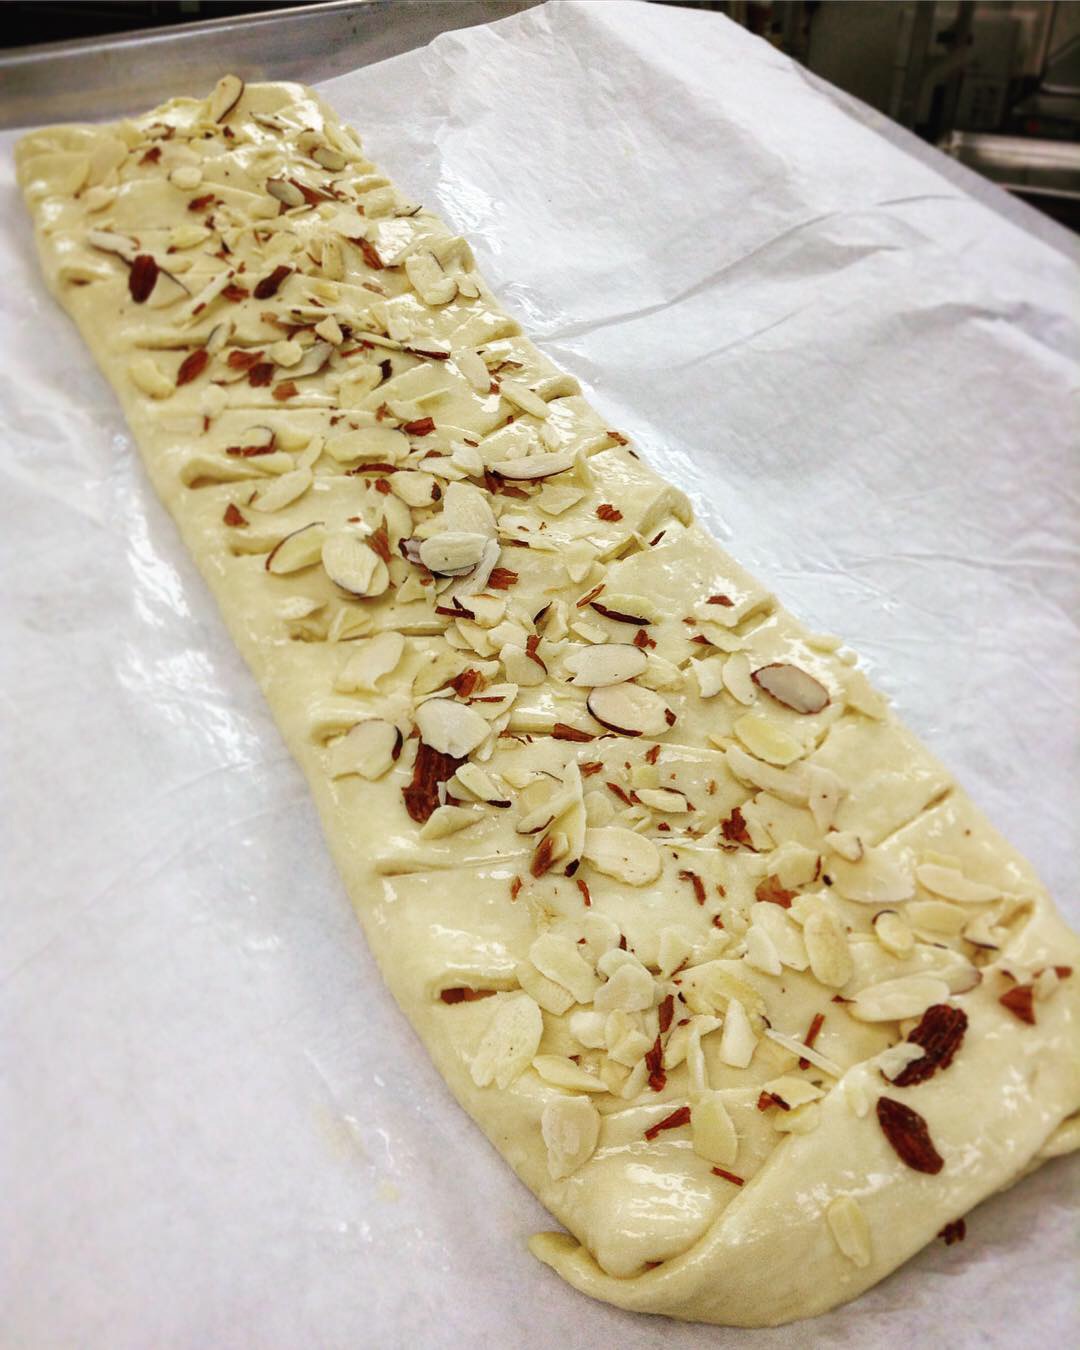
- Combine the remaining egg with a tablespoon of water to make an egg wash, and brush on the braids.
- Bake for about 20-25 min or until the loaf feels firm to the touch. If you would like to use a thermometer, the internal temperature should read about 190 degrees.
- While the bread is baking, prepare your frosting, mixing all ingredients until smooth and on the thicker side. Cut your cherries in half.
- Remove bread from the oven and cool slightly, then decorate, using the green cherries as leaves, and the red as berries.
Every year we rejoice with the abundant harvest of home-grown vegetables, stone fruit, apples and herbs from our gardens and this year is no exception! Last week’s Thanksgiving table featured leeks and other produce from our soil for which we are truly grateful.
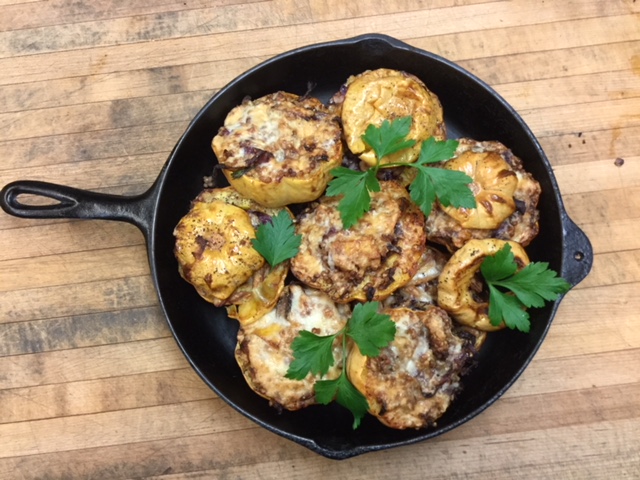
This year brought plentiful squash of several varieties: butternut, spaghetti squash, and of course, acorn squash. Roasted, steamed or stuffed, this yearly addition to our table is always welcome. If you’re planning a meatless meal–or cooking for a vegetarian friend or family member–consider today’s recipe and feel free to substitute ingredients and spices to suit your preferences. Thank God from whom all blessings flow!
Print Recipe
Votes: 2
Rating: 3.5
You:
Rate this recipe!
Stuffed Acorn Squash
SERVINGS4servings
|
COOK TIME1 hr10 mins |
PREP TIME20mins |
READY IN1 hr30 mins |
Ingredients
Instructions
- Preheat oven to 400 degrees.
- Place butternut squash in a large bowl with 3 TBSP of olive oil and sprinkle with salt and pepper. Toss until all the squash is coated and put on a baking sheet 1 layer deep for roasting and set aside.
- Cut the acorn squash in half width-wise and scoop out the seeds. Set the acorn squash on a baking sheet, brush with oil.
- Place all the pans of squash in the oven and roast for 1 hour until the squash can easily be pierced with a fork. Remove from oven and set aside to cool.
- As the squash is roasting, combine Israeli couscous, spices, and herbs in a large bowl.
- Add remaining olive oil to coat and salt and pepper to taste.
- Add the roasted butternut squash to couscous mixture and gently toss to distribute evenly in the bowl.
- Spoon the couscous and butternut squash into the bottom half of the acorn squash, and top with parmesan cheese (optional). Add the tops of the acorn squash and place on a platter of your choosing and enjoy!
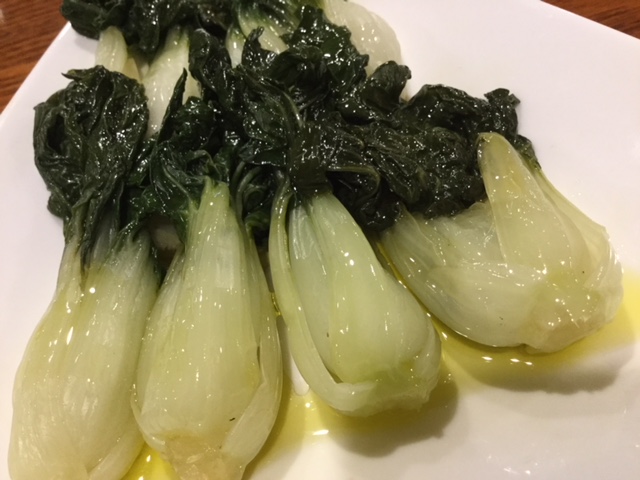
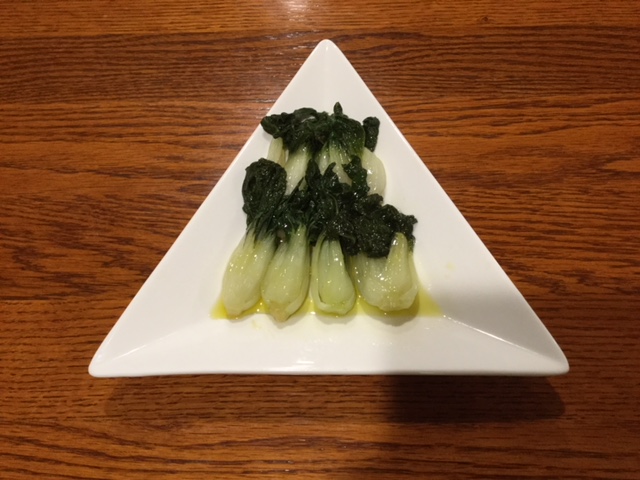
We are so fortunate to have a good friend and neighbor who grows vegetables for a nearby upscale restaurant. Whenever he has a surplus of a particular vegetable, we’re the happy benefactors. Yesterday morning, I cheered when walking into the Convent kitchen. I found three large flats of fresh, happy looking Baby Bok Choy on the counter. In no time at all, it was in and out of the sink and into the skillet for our noon meal. What a blessing!
Print Recipe
Votes: 0
Rating: 0
You:
Rate this recipe!
Simple (and delicious!) Bok Choy
Great anytime in the week, this easy recipe will turn a side dish into the star of the show on any table!
SERVINGS4servings
|
COOK TIME20mins |
PREP TIME10mins |
READY IN30mins |
Ingredients
Instructions
- Heat broth, butter, and garlic in a deep skillet, cast iron is preferred.
- Arrange the bok choy evenly in the skillet and simmer until tender--about 5 minutes.
- Remove the bok choy onto a serving dish and cover to keep warm.
- Return to the skillet and reduce the broth by half. Add sesame oil, salt, and pepper.
- Pour the broth reduction over the bok choy and enjoy!