For everything there is a season, and with this post on one of summer’s classic favorite fruits, we publish our final recipe. We know many of you loved trying out the recipes over the years and this post on creamy frozen strawberry squares will be no exception!
While this is the final new recipe/post for this blog – the entire searchable library of recipes will remain here on the site as always. The recipe search option can be used to find recipes that feature a certain ingredient, or perhaps an old favorite.
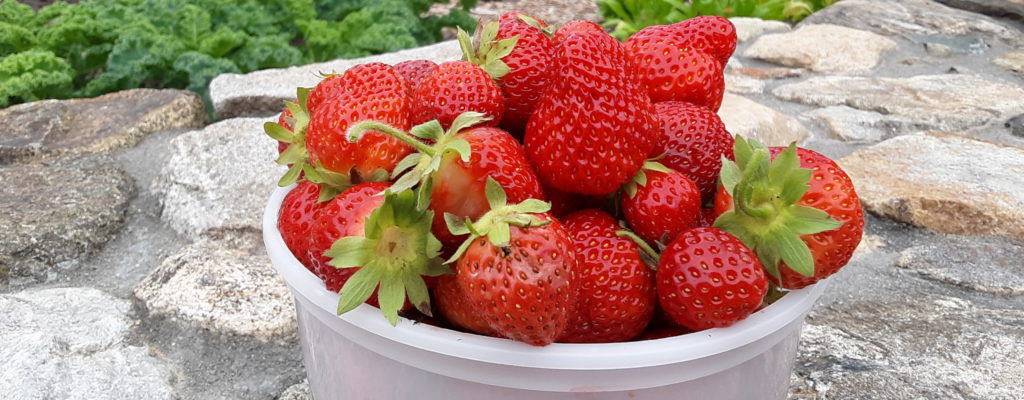
Today’s post features the strawberry – so abundant in the summer months!
Its surplus gives thoughts to strawberry rhubarb pie, a sisterhood favorite, the time honored classic strawberry shortcake, as well as other new ideas. A particularly bumper crop of strawberries this year has given us an opportunity to experiment and try some fresh ideas. After working with different combinations of crunchy crumbs and creamy strawberry fillings, this one proves to be a winner and captures the essence of Summer!
While the posts for this website are ending, we will be continuing to publish “Daily Bread” – a daily spiritual meditation on the Community of Jesus website that includes an excerpt from the Liturgy of the Hours, a meditation, a prayer and the lectionary readings. The “Daily Bread” can also be delivered to your mailbox.
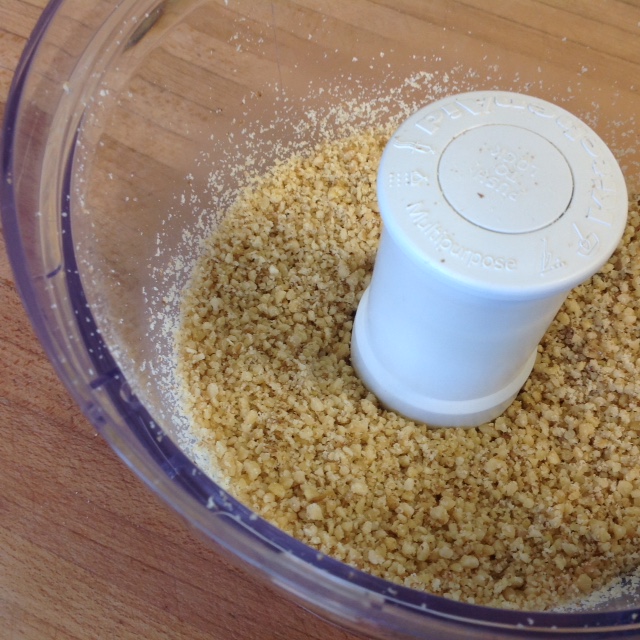
In a large bowl, toss together topping ingredients and then spread out on a baking sheet
Toast in oven until walnuts are fragrant and crumbs are golden. Set aside.
Creamy Strawberry Filling
Spray a 8x11 or 9x13 pan with nonstick spray
Place strawberries in blender and puree until smooth (saving a few whole ones aside for garnish)
In mixing bowl, beat heavy cream until stiff peaks form; set aside in another bowl
In same mixing bowl, beat cream cheese and powdered sugar until creamy, then add condensed milk, vanilla, pureed strawberries;mix slowly until combined
Fold in whipped cream, until partially blended
Spread half of the toasted crumbs into baking dish, followed by strawberry filling
Sprinkle remaining crumbs on top and place in freezer for 2 or more hours, until frozen
When thoroughly frozen, remove from freezer 1 half hour before serving; cut into squares and serve with whipped cream topping and fresh strawberry garnish
HANDS-DOWN, ONE OF OUR SISTERHOOD’S MOST FAVORITE TREATS!
This is a dessert / snack that I think is fair to say, always brings a smile and sparkle to the eye. Whether served as a plated reception option, a surprise snack for a hard-working crew, a dessert tucked into a bag lunch, it always hits the mark—and is never refused! And as a living testimony to this—today, I left the batch of fresh baked Carmelitas on the counter, only to find when I returned to do my blog “photo shoot”, that the Sister on duty saw them and couldn’t resist offering a few to some Brothers doing a spackling job; I’m still hearing how much they loved them!
It’s too easy to lose track of the origin of some of the many wonderful recipes that we all love–but have no idea where they came from!
One of our Sisters, known for her love for cooking and her creative culinary skills, has a great intro to one of her favorite recipes… that lives on to this day!
“My mother, who came to this country as a young girl, first obtained a job doing housework for a wealthy family on 5th Ave, N.Y. The lady of the house had a special liking for a tall, moist, three-layered cake from a nearby bakery—with a creamy custard filling, generous swirls of maple-flavored frosting and lavishly sprinkled with finely chopped walnuts. My mother soon cultivated a taste for this culinary wonder also—and developed her own recipe for the cake by taste and instinct.”
And now, through the years, it’s been passed on to us, with modifications and adjustments, and continues to be the quintessential dessert for the right occasion.
Beat in egg yolks and add milk alternating with flour mixture; mix well
Beat egg whites until stiff and fold into cake batter
Bake at 350 for about 30 minutes, or until cakes tests done, using a toothpick
Cool before filling and frosting
Filling
Scald milk and let cool slightly
Beat eggs and whisk into milk
Place milk back on medium heat and whisk in sugar, flour, cornstarch mixture
Slowly bring to a boil, stirring constantly. Remove from heat and add butter, vanilla and banana flavoring
Allow to cool and thicken before filling cake
Fluffy Maple Frosting
Melt brown sugar in the water and bring to a boil.
Gently continue boiling for about 15”, until it reaches the soft ball stage, about 240 degrees.. The thickness should be similar to maple syrup.
Beat egg white until stiff. While continuing to beat, slowly pour in brown sugar mixture. Add in maple flavoring to taste; continue beating until cool, and it appears to be of a spreading consistency.
As we were planning a reception for an upcoming Organ Concert, we all agreed on the perfect savories, but couldn’t make a decision about a complimentary sweet. “How about Thumbprint Cookies,” piped up a nearby sister, “but this time, try rolling them in chopped nuts.”
Great idea – they’re colorful, and above all, they’re an old-time favorite that everyone loves.
Butter, brown sugar, chopped nuts, and your jam of choice – a definite Yum!
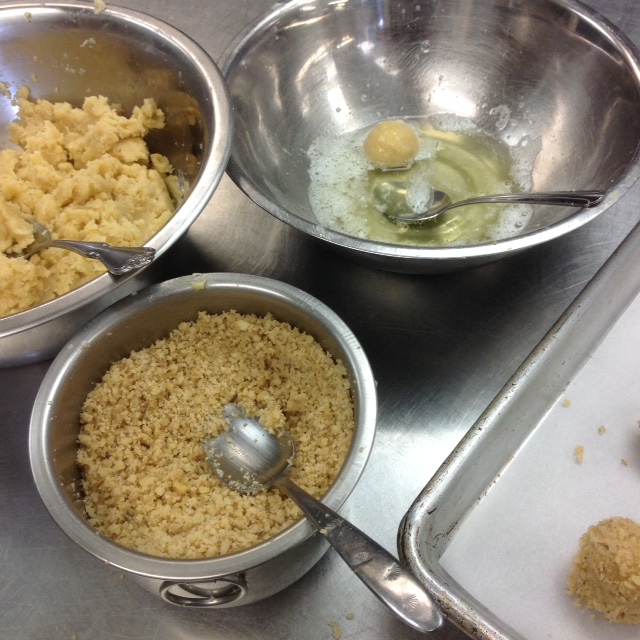
Cream butter and brown sugar until fluffy.
Add vanilla and egg yolk; keep egg white separate in a little dish.
Toss the flour and salt lightly together and then gently mix in.
Shape dough into 20 balls; dip in egg white and then in chopped nuts
Place on baking sheet about 2 inches apart; make a thumb indentation, and be sure the dough isn’t splitting apart.
Bake for about 15-17 minutes. When golden and done, remove from oven, and indent each cookie again. Then spoon a little of your favorite jam into each thumbprint. Cool completely.
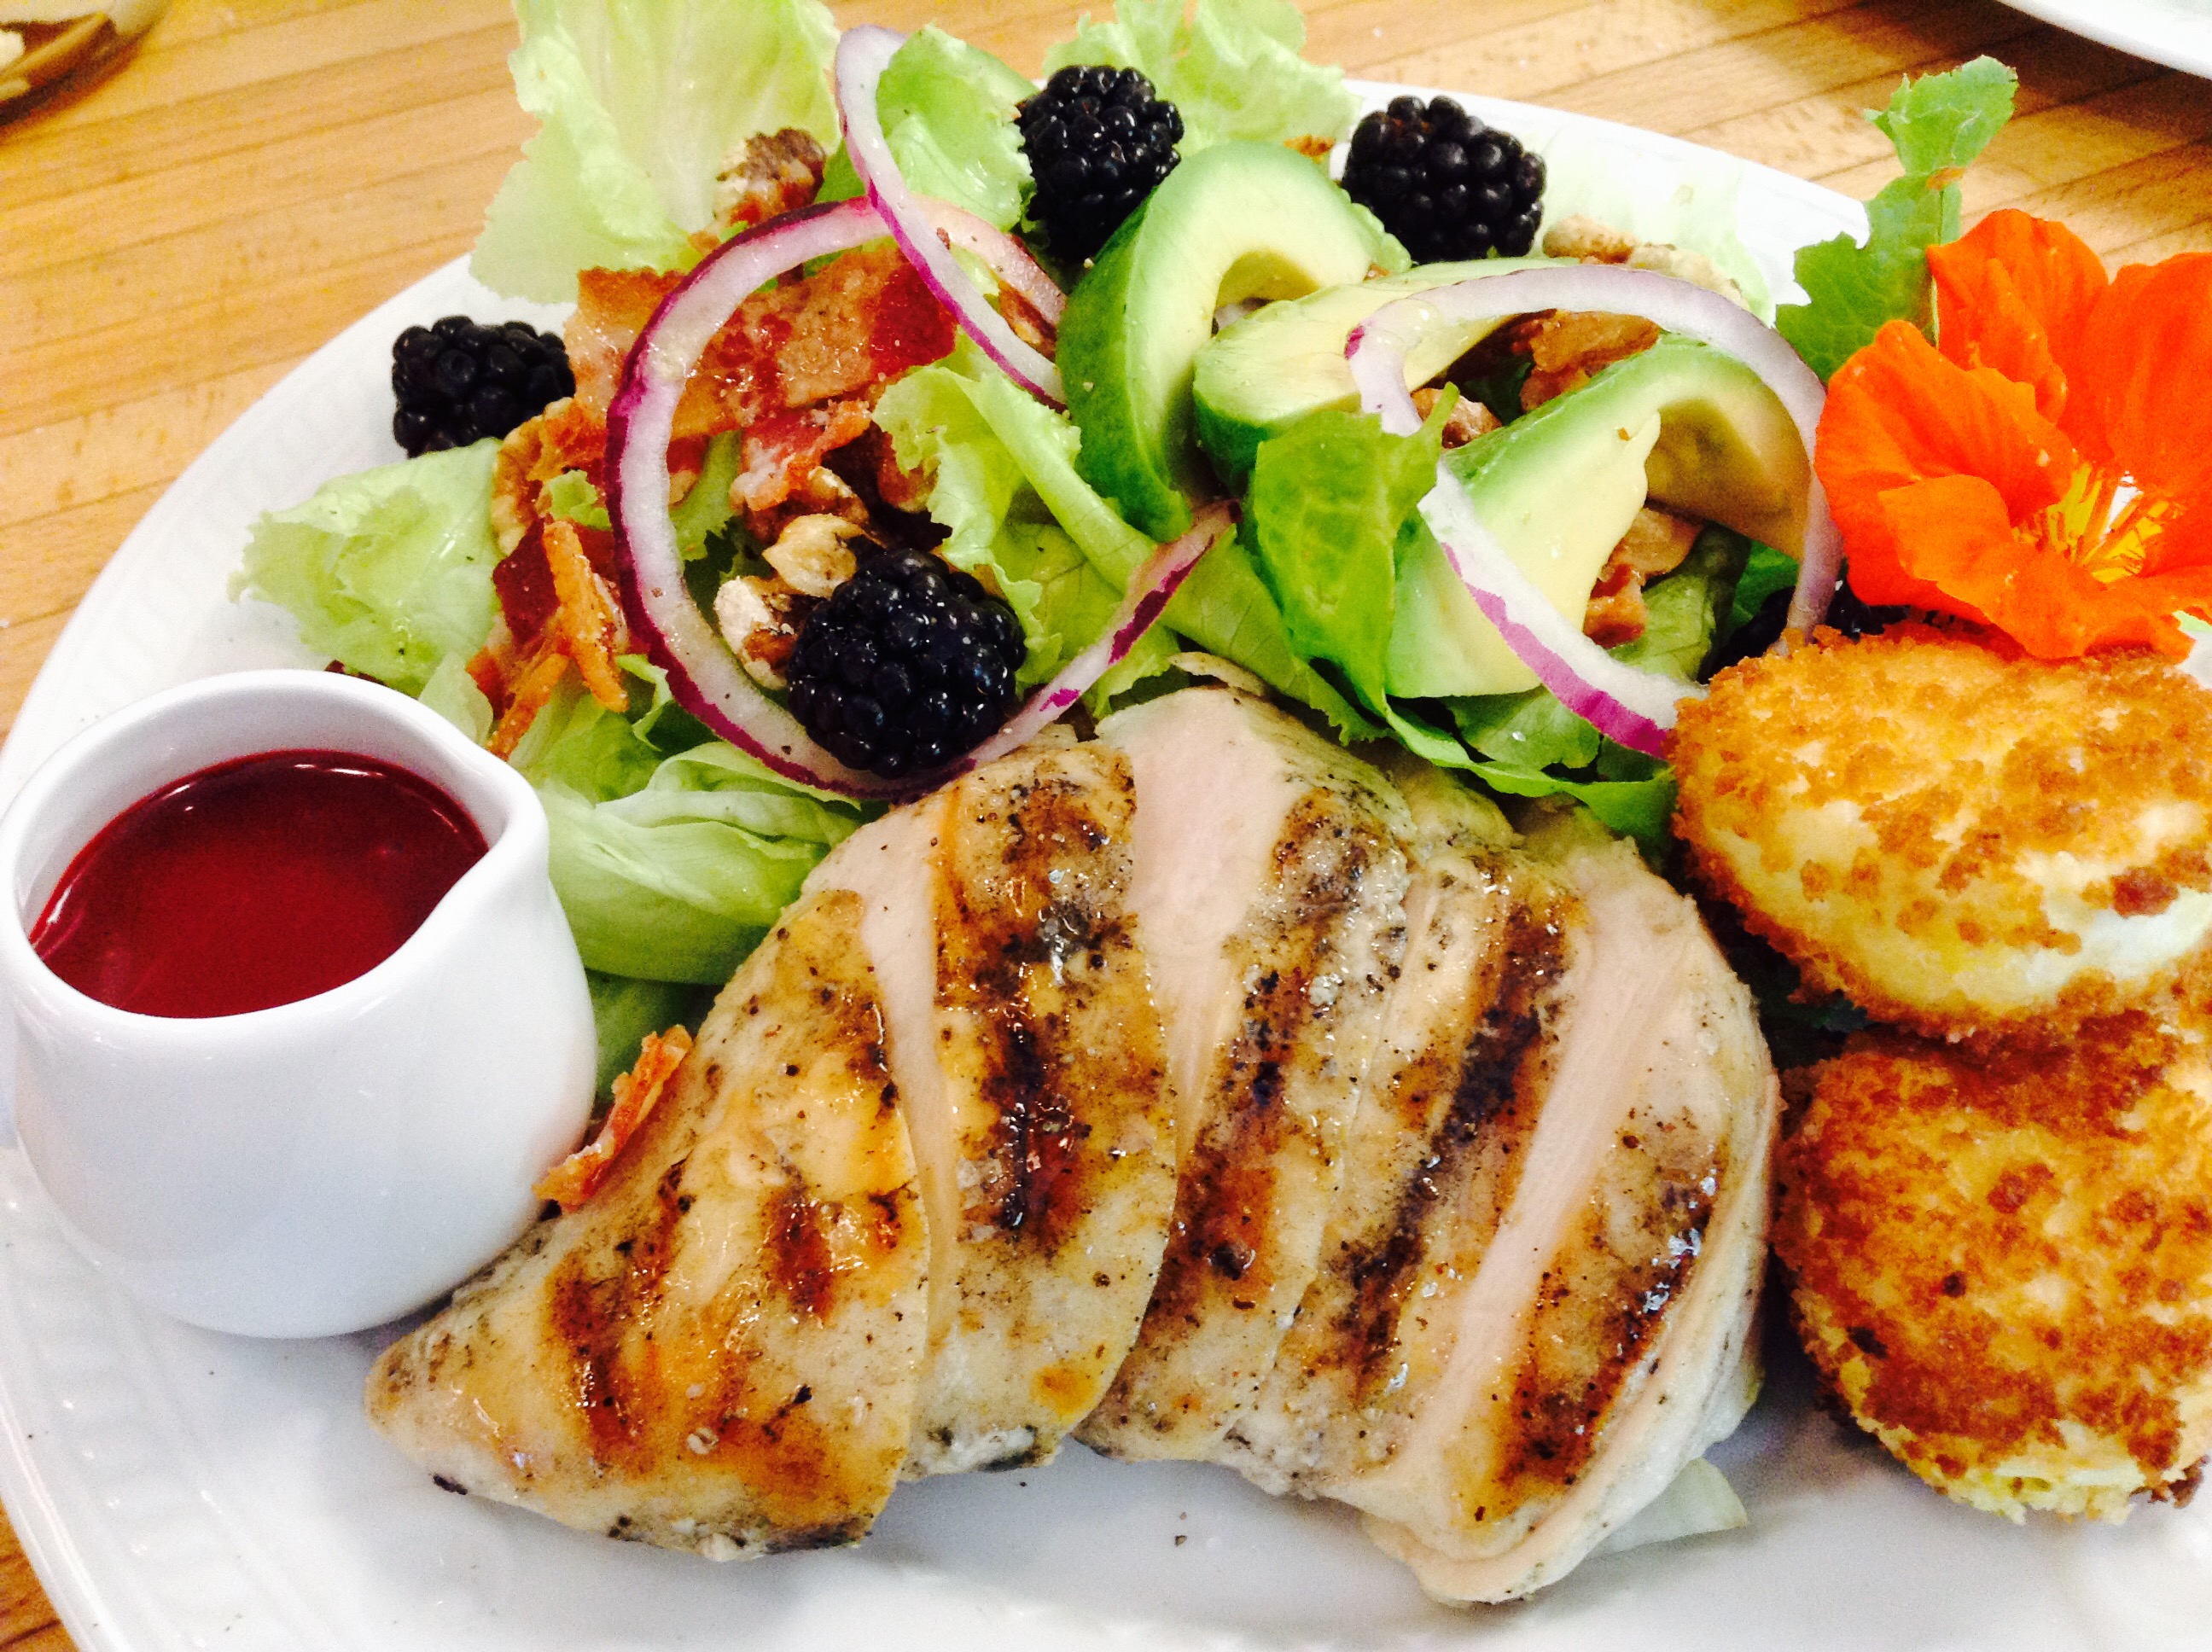
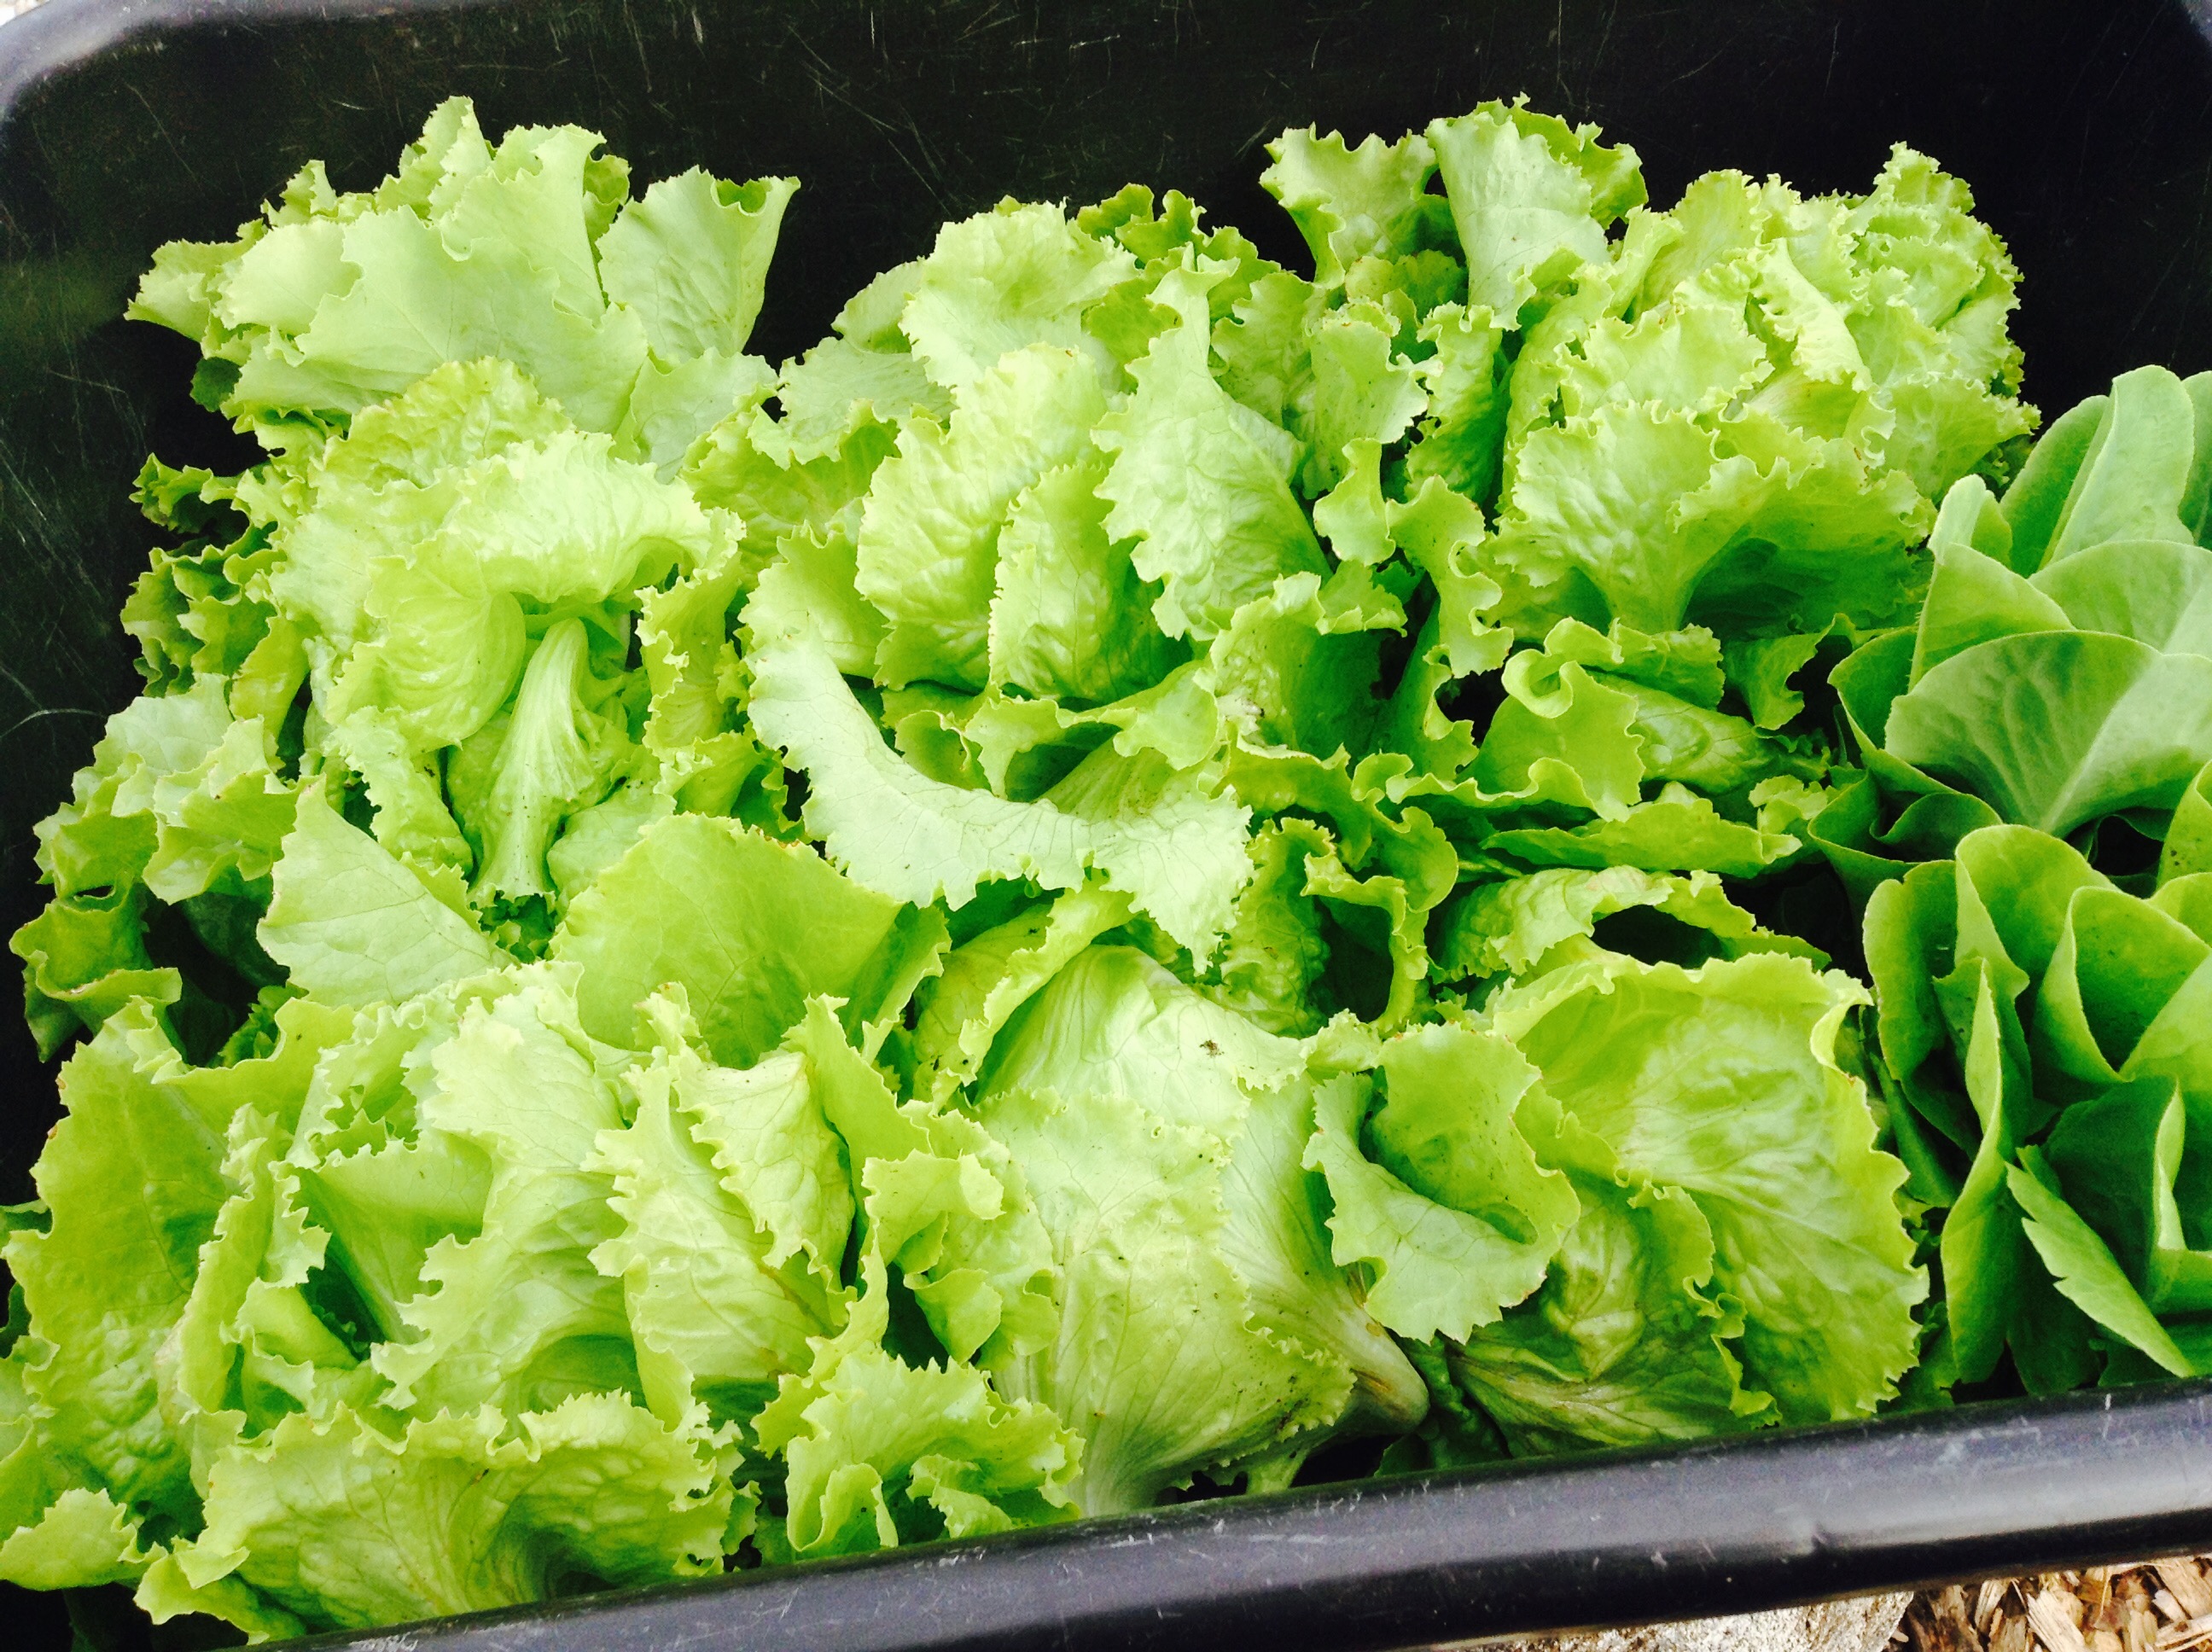
We continue to enjoy the harvest from our gardens over these summer months. This week we had an abundance of beautiful lettuce, so we expanded our repertoire and tried out some new combinations for our guests at Bethany. The crisp, salty, creaminess of the fried goat cheese paired with the sweet and pungent combination of the blackberry balsamic vinaigrette is the key here. Summer is a wonderful time to experiment with all sorts of combinations in a salad. “The colors of a fresh garden salad are so extraordinary, no painter’s pallet can duplicate nature’s artistry.” Have fun creating, eating, sharing, and enjoying nature’s storehouse!
Print Recipe
Votes: 2
Rating: 4.5
You:
Rate this recipe!
Blackberry Balsamic Salad with Crispy Fried Goat Cheese and Grilled Chicken
Mix everything well in the blender until smooth. Adjust seasonings to taste.
Fried Goat Cheese
Dredge the goat cheese slices/balls in the flour
Dip in the beaten egg
Dip in panko
Fry in oil over medium heat until lightly golden brown before setting aside on paper towels to drain.
Salad
Marinate the chicken in half of the vinaigrette for 30 minutes to over night before grilling over medium-high heat until golden and cooked through, about 2-5 minutes per side. Set aside to cool and slice.
Assemble the salad and enjoy!
Note: Best enjoyed while the fried goat cheese is still warm from frying!
One of the beautiful things that I am learning about Italian cooking is that each ingredient is to be savored. So many times, we take wonderful ingredients and throw them all together and miss appreciating them as they were meant to be.
As I walk along the streets of Barga with the dogs in the morning or on my way to the Pannificio to get our bread for the day, I often take photographs of the menus hanging on the restaurant windows. When I return to the Villa and have a moment, I try to find a recipe and recreate them.
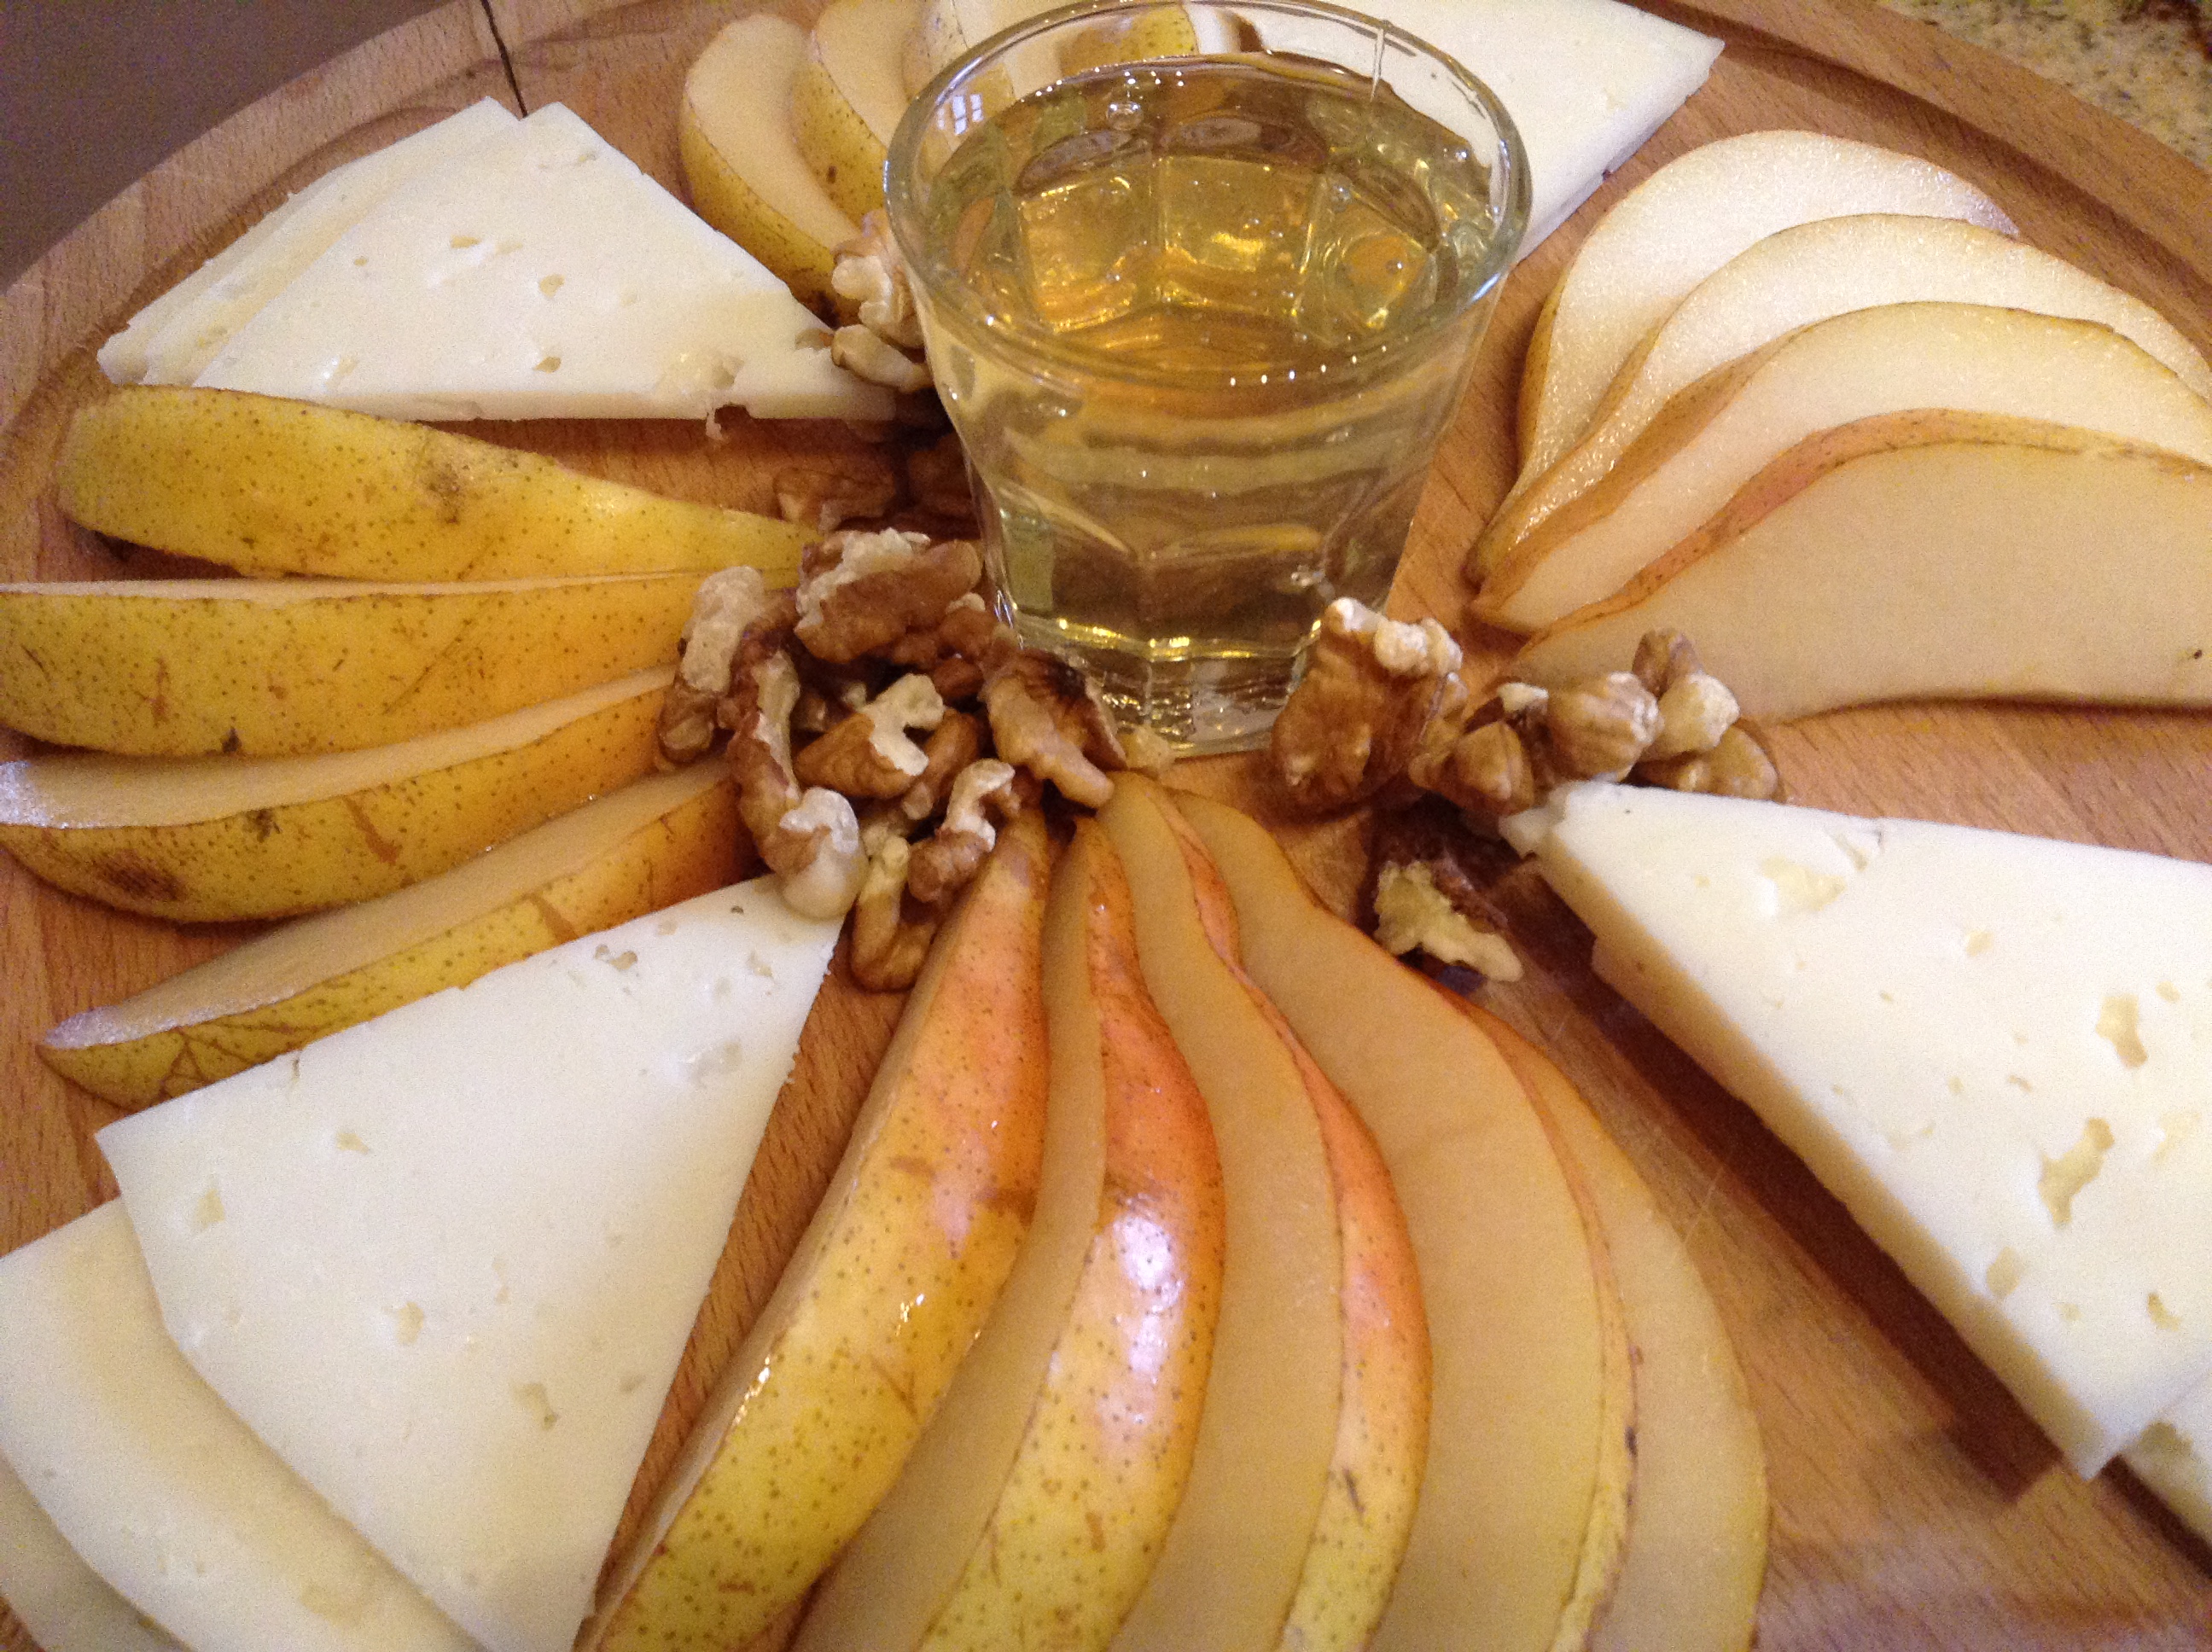
A featured item on the menu in the Garfagnana district, and much of Tuscany, is Pecorino pere e miele – Pecorino with pears and honey. Pecorino is a cheese made from sheep’s milk and each district or town here is very proud of their own version of the cheese. The taste of the cheese changes depending on what type of grass the sheep are fed and how the cheese is aged. Most popular and well known are those produced in Sardinia. A good Pecorino Stagionato is often the finish of a meal, served with pears and walnuts and drizzled with a strong chestnut honey or one of the lighter acacia honeys farmed locally. Their food is simple, but in this simplicity can be found tremendous beauty and taste. Savor the moment.
4-5 oz. pecorinofresco, semi-stagionato or stagionato (fresco is a mild and soft form, semi-stationato is also soft but sharper and stagionato is the hardest and sharpest form)
walnutseither in the shell or toasted halves - as many as you prefer
Instructions
Slice the pear in quarters from top to bottom and remove the core carefully with a pairing knife. Then slice each quarter into three or four thin slices, depending on the thickness you prefer.
Slice the cheese into small thin wedges.
Fan the pears on the cutting board or serving plate with the cheese slices in between the pear.
Set a dish of honey in the center of the board and place your walnuts around.
Enjoy sharing this with your friends and family. Andiamo mangiare!


")