For everything there is a season, and with this post on one of summer’s classic favorite fruits, we publish our final recipe. We know many of you loved trying out the recipes over the years and this post on creamy frozen strawberry squares will be no exception!
While this is the final new recipe/post for this blog – the entire searchable library of recipes will remain here on the site as always. The recipe search option can be used to find recipes that feature a certain ingredient, or perhaps an old favorite.
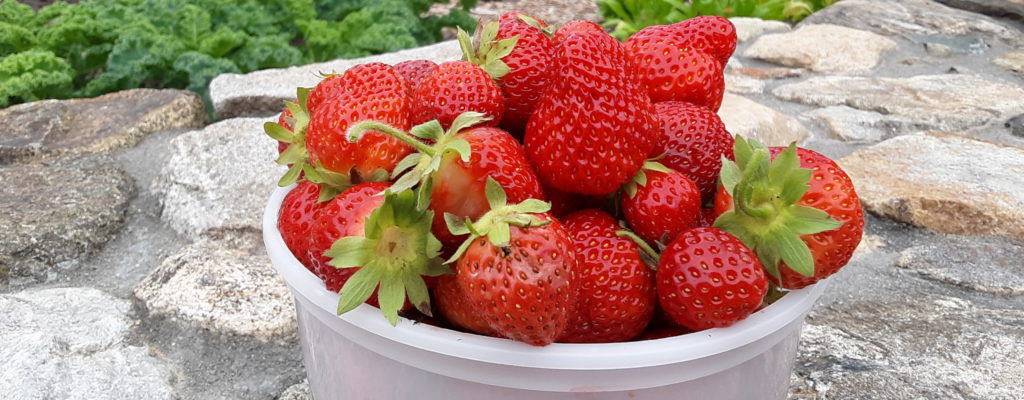
Today’s post features the strawberry – so abundant in the summer months!
Its surplus gives thoughts to strawberry rhubarb pie, a sisterhood favorite, the time honored classic strawberry shortcake, as well as other new ideas. A particularly bumper crop of strawberries this year has given us an opportunity to experiment and try some fresh ideas. After working with different combinations of crunchy crumbs and creamy strawberry fillings, this one proves to be a winner and captures the essence of Summer!
While the posts for this website are ending, we will be continuing to publish “Daily Bread” – a daily spiritual meditation on the Community of Jesus website that includes an excerpt from the Liturgy of the Hours, a meditation, a prayer and the lectionary readings. The “Daily Bread” can also be delivered to your mailbox.
In a large bowl, toss together topping ingredients and then spread out on a baking sheet
Toast in oven until walnuts are fragrant and crumbs are golden. Set aside.
Creamy Strawberry Filling
Spray a 8x11 or 9x13 pan with nonstick spray
Place strawberries in blender and puree until smooth (saving a few whole ones aside for garnish)
In mixing bowl, beat heavy cream until stiff peaks form; set aside in another bowl
In same mixing bowl, beat cream cheese and powdered sugar until creamy, then add condensed milk, vanilla, pureed strawberries;mix slowly until combined
Fold in whipped cream, until partially blended
Spread half of the toasted crumbs into baking dish, followed by strawberry filling
Sprinkle remaining crumbs on top and place in freezer for 2 or more hours, until frozen
When thoroughly frozen, remove from freezer 1 half hour before serving; cut into squares and serve with whipped cream topping and fresh strawberry garnish
What encouragement from God as we move through these challenging days! Hope coming up against fear; love and care for one another, binding us together. And often, this can take place in the simplest of ways. Sometimes a group of our Sisters prepares a surprise treat in the middle of a hard day. The sharing of time, generosity, and love in the form of delicious food reminds us of this essential truth: God is Victor over all—He is with us in all circumstances!
Preheat oven to 350 degrees. Line a baking sheet with parchment paper
Whisk flour and dry ingredients together and set aside.
In an electric mixer, with the paddle attachment, beat butter and sugars until light and fluffy. Add eggs, one at a time, beating well after each addition. Blend in vanilla.
Gradually add dry ingredients until just combined; fold in grated carrots.
Using a tablespoon, scoop out 12 generous “balls” onto a baking sheet. With dampened fingers dipped in brown sugar, gently flatten,
Frosting Instructions
Beat together butter and cream cheese until smooth
Add powdered sugar and beat until creamy and lump-free
Add vanilla, coconut and coconut flavoring and salt
When the cookies have cooled, match up sizes and fill with frosting!
HANDS-DOWN, ONE OF OUR SISTERHOOD’S MOST FAVORITE TREATS!
This is a dessert / snack that I think is fair to say, always brings a smile and sparkle to the eye. Whether served as a plated reception option, a surprise snack for a hard-working crew, a dessert tucked into a bag lunch, it always hits the mark—and is never refused! And as a living testimony to this—today, I left the batch of fresh baked Carmelitas on the counter, only to find when I returned to do my blog “photo shoot”, that the Sister on duty saw them and couldn’t resist offering a few to some Brothers doing a spackling job; I’m still hearing how much they loved them!
I’ve had my eye on this recipe for quite a while now and decided to whip it up for Thanksgiving. I added a bit of orange zest to the original recipe because I love the combination of those flavors. The pie is like a little jewel, bursting with flavor and color. Sweet and tart at the same time. The curd on its own would be wonderful in many other ways as well. I hope you enjoy it this Holiday season. Blessed Advent!*
Put the gingersnaps in a food processor and process until they are fine crumbs or place in a ziplock bag and crush with a meat hammer. (this should be a heaping cup) Add the pecans and sugar and process again until everything is finely ground (or finely chopped the pecans and add to the fine crumbs with the sugar.) Add the butter and combine.
Pat the crust into a 9 inch pie plate, and up the sides. Bake for 10-12 minutes. Set aside to cool.
Put the cranberries, 1 cup of the sugar, and 1/4 cup water to a simmer in a saucepan. Lower the heat and simmer the cranberries, uncovered, for about 15 minutes until they've popped and the mixture is quite thick. Let cool slightly and then puree until completely smooth (I did this in a blender)
Whisk the puree, the eggs, yolks, salt, lemon juice and 1/2 cup sugar together in a saucepan and set over medium heat. Cook, stirring constantly, until the mixture thickens and coats the back of a spoon, this will take about 10 minutes or so. It can burn easily, so keep a good eye on the mixture and don’t keep your heat too high.
Push the curd through a mesh strainer, using the back of a spoon to get it all through.
Let the curd cool for a few minutes and add the room temperature butter in, bit by bit, while you stir to melt it. Add the mandarin zest.
Pour the curd into the pie crust and smooth out evenly. Chill the pie until it is firm, about 2 hours or so.
Decorate with sugared cranberries if you like. To make sugared cranberries, roll damp cranberries in granulated sugar and let dry.
It’s too easy to lose track of the origin of some of the many wonderful recipes that we all love–but have no idea where they came from!
One of our Sisters, known for her love for cooking and her creative culinary skills, has a great intro to one of her favorite recipes… that lives on to this day!
“My mother, who came to this country as a young girl, first obtained a job doing housework for a wealthy family on 5th Ave, N.Y. The lady of the house had a special liking for a tall, moist, three-layered cake from a nearby bakery—with a creamy custard filling, generous swirls of maple-flavored frosting and lavishly sprinkled with finely chopped walnuts. My mother soon cultivated a taste for this culinary wonder also—and developed her own recipe for the cake by taste and instinct.”
And now, through the years, it’s been passed on to us, with modifications and adjustments, and continues to be the quintessential dessert for the right occasion.
Beat in egg yolks and add milk alternating with flour mixture; mix well
Beat egg whites until stiff and fold into cake batter
Bake at 350 for about 30 minutes, or until cakes tests done, using a toothpick
Cool before filling and frosting
Filling
Scald milk and let cool slightly
Beat eggs and whisk into milk
Place milk back on medium heat and whisk in sugar, flour, cornstarch mixture
Slowly bring to a boil, stirring constantly. Remove from heat and add butter, vanilla and banana flavoring
Allow to cool and thicken before filling cake
Fluffy Maple Frosting
Melt brown sugar in the water and bring to a boil.
Gently continue boiling for about 15”, until it reaches the soft ball stage, about 240 degrees.. The thickness should be similar to maple syrup.
Beat egg white until stiff. While continuing to beat, slowly pour in brown sugar mixture. Add in maple flavoring to taste; continue beating until cool, and it appears to be of a spreading consistency.
The change of season is such a lovely time. The air is crisp, the trees are turning brilliant shades of reds and orange, leaves are piling on the ground, and pumpkins greet us on every doorstep. Walking through our community, and seeing these sights, I am inspired to pull these all into one big pot of wonderfulness. The magic that greets you when a delicious bowl of steaming soup appears in front of you is one of community and love.
Preheat oven to 375°F. Oil baking sheet. Place squash, cut side down, on baking sheet. Bake until squash is very soft, about 50 minutes. Using a wooden spoon, remove peel from squash; discard peel.
While the squash is cooking, heat oil in heavy large pot over medium-low heat. Mix in onion, brown sugar, ginger, garlic and cinnamon stick. Cover pot and cook until onion is tender, about 15 minutes, stir occasionally so that your onion does not burn but is slightly golden and caramelized.
Add the cooked squash and 4 cups chicken broth. Bring to a boil, reduce heat to medium-low and cover and simmer for 10 minutes. Take out the cinnamon stick but reserve.
Working in batches, purée soup in blender (or use an immersion blender.) Return soup to pot with the cinnamon stick. If desired, add heavy cream and/or half and half to thin it out to your desired consistency or add more chicken broth. Add the maple syrup to taste. If desired, include a bit of ground cinnamon to taste.
Season soup with salt and pepper. Bring to simmer and ladle into bowls and serve.
(Can be prepared 1 day ahead. Cool slightly. Cover and refrigerate.)


")


