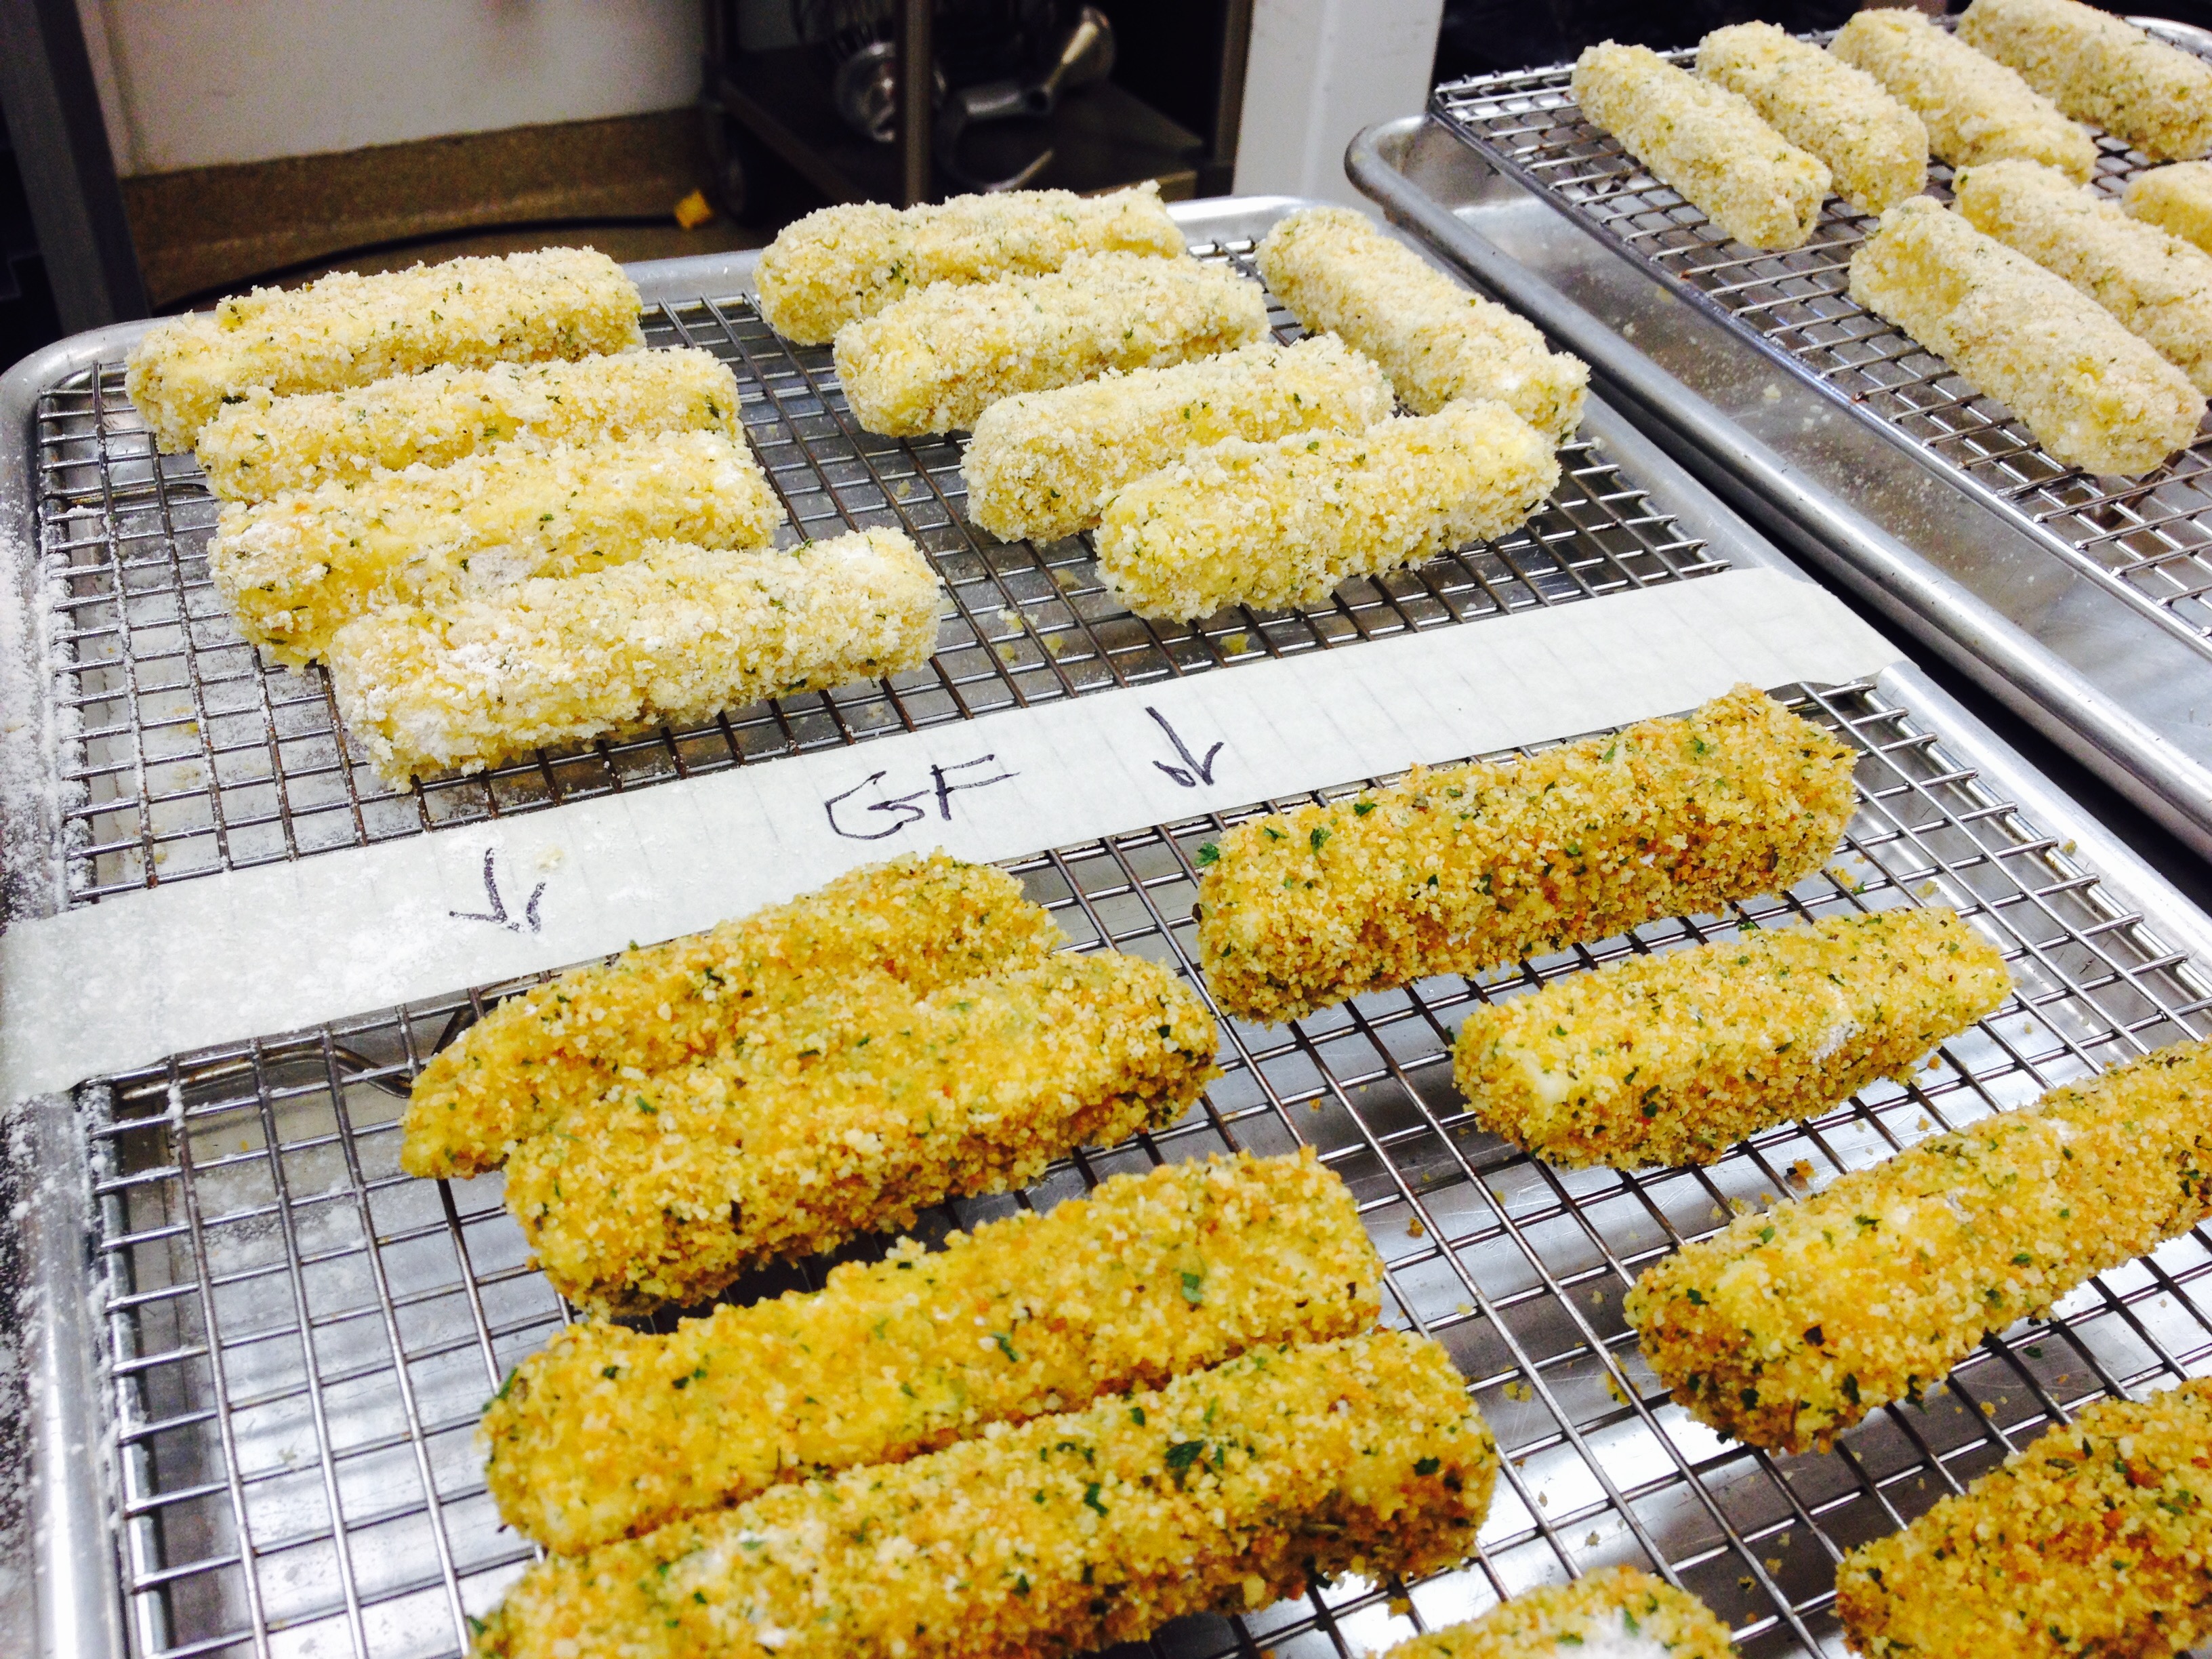
Looking for the perfect game day snack? How about warm and yummy Fried Mozzarella Sticks. For some reason, I always thought these to be a daunting task until I served them at several Christmas occasions that we catered. In reality, they were quite simple and fun, even when serving for twenty-five guests. I decided to try a gluten-free version so that everyone could enjoy them. They came out more golden and beautiful than the regular ones! Take time to prep them well and give them a good freeze and you’ll be happy with the results. (See tip below for other uses for this recipe.) For that next Big Game, consider trying these out with your favorite marinara sauce.
Print Recipe
Votes: 1
Rating: 5
You:
Rate this recipe!
Gluten Free Golden Fried Mozzarella Sticks
SERVINGS4servings
|
COOK TIME30mins |
PREP TIME20mins |
READY IN2hrs |
Ingredients
Instructions
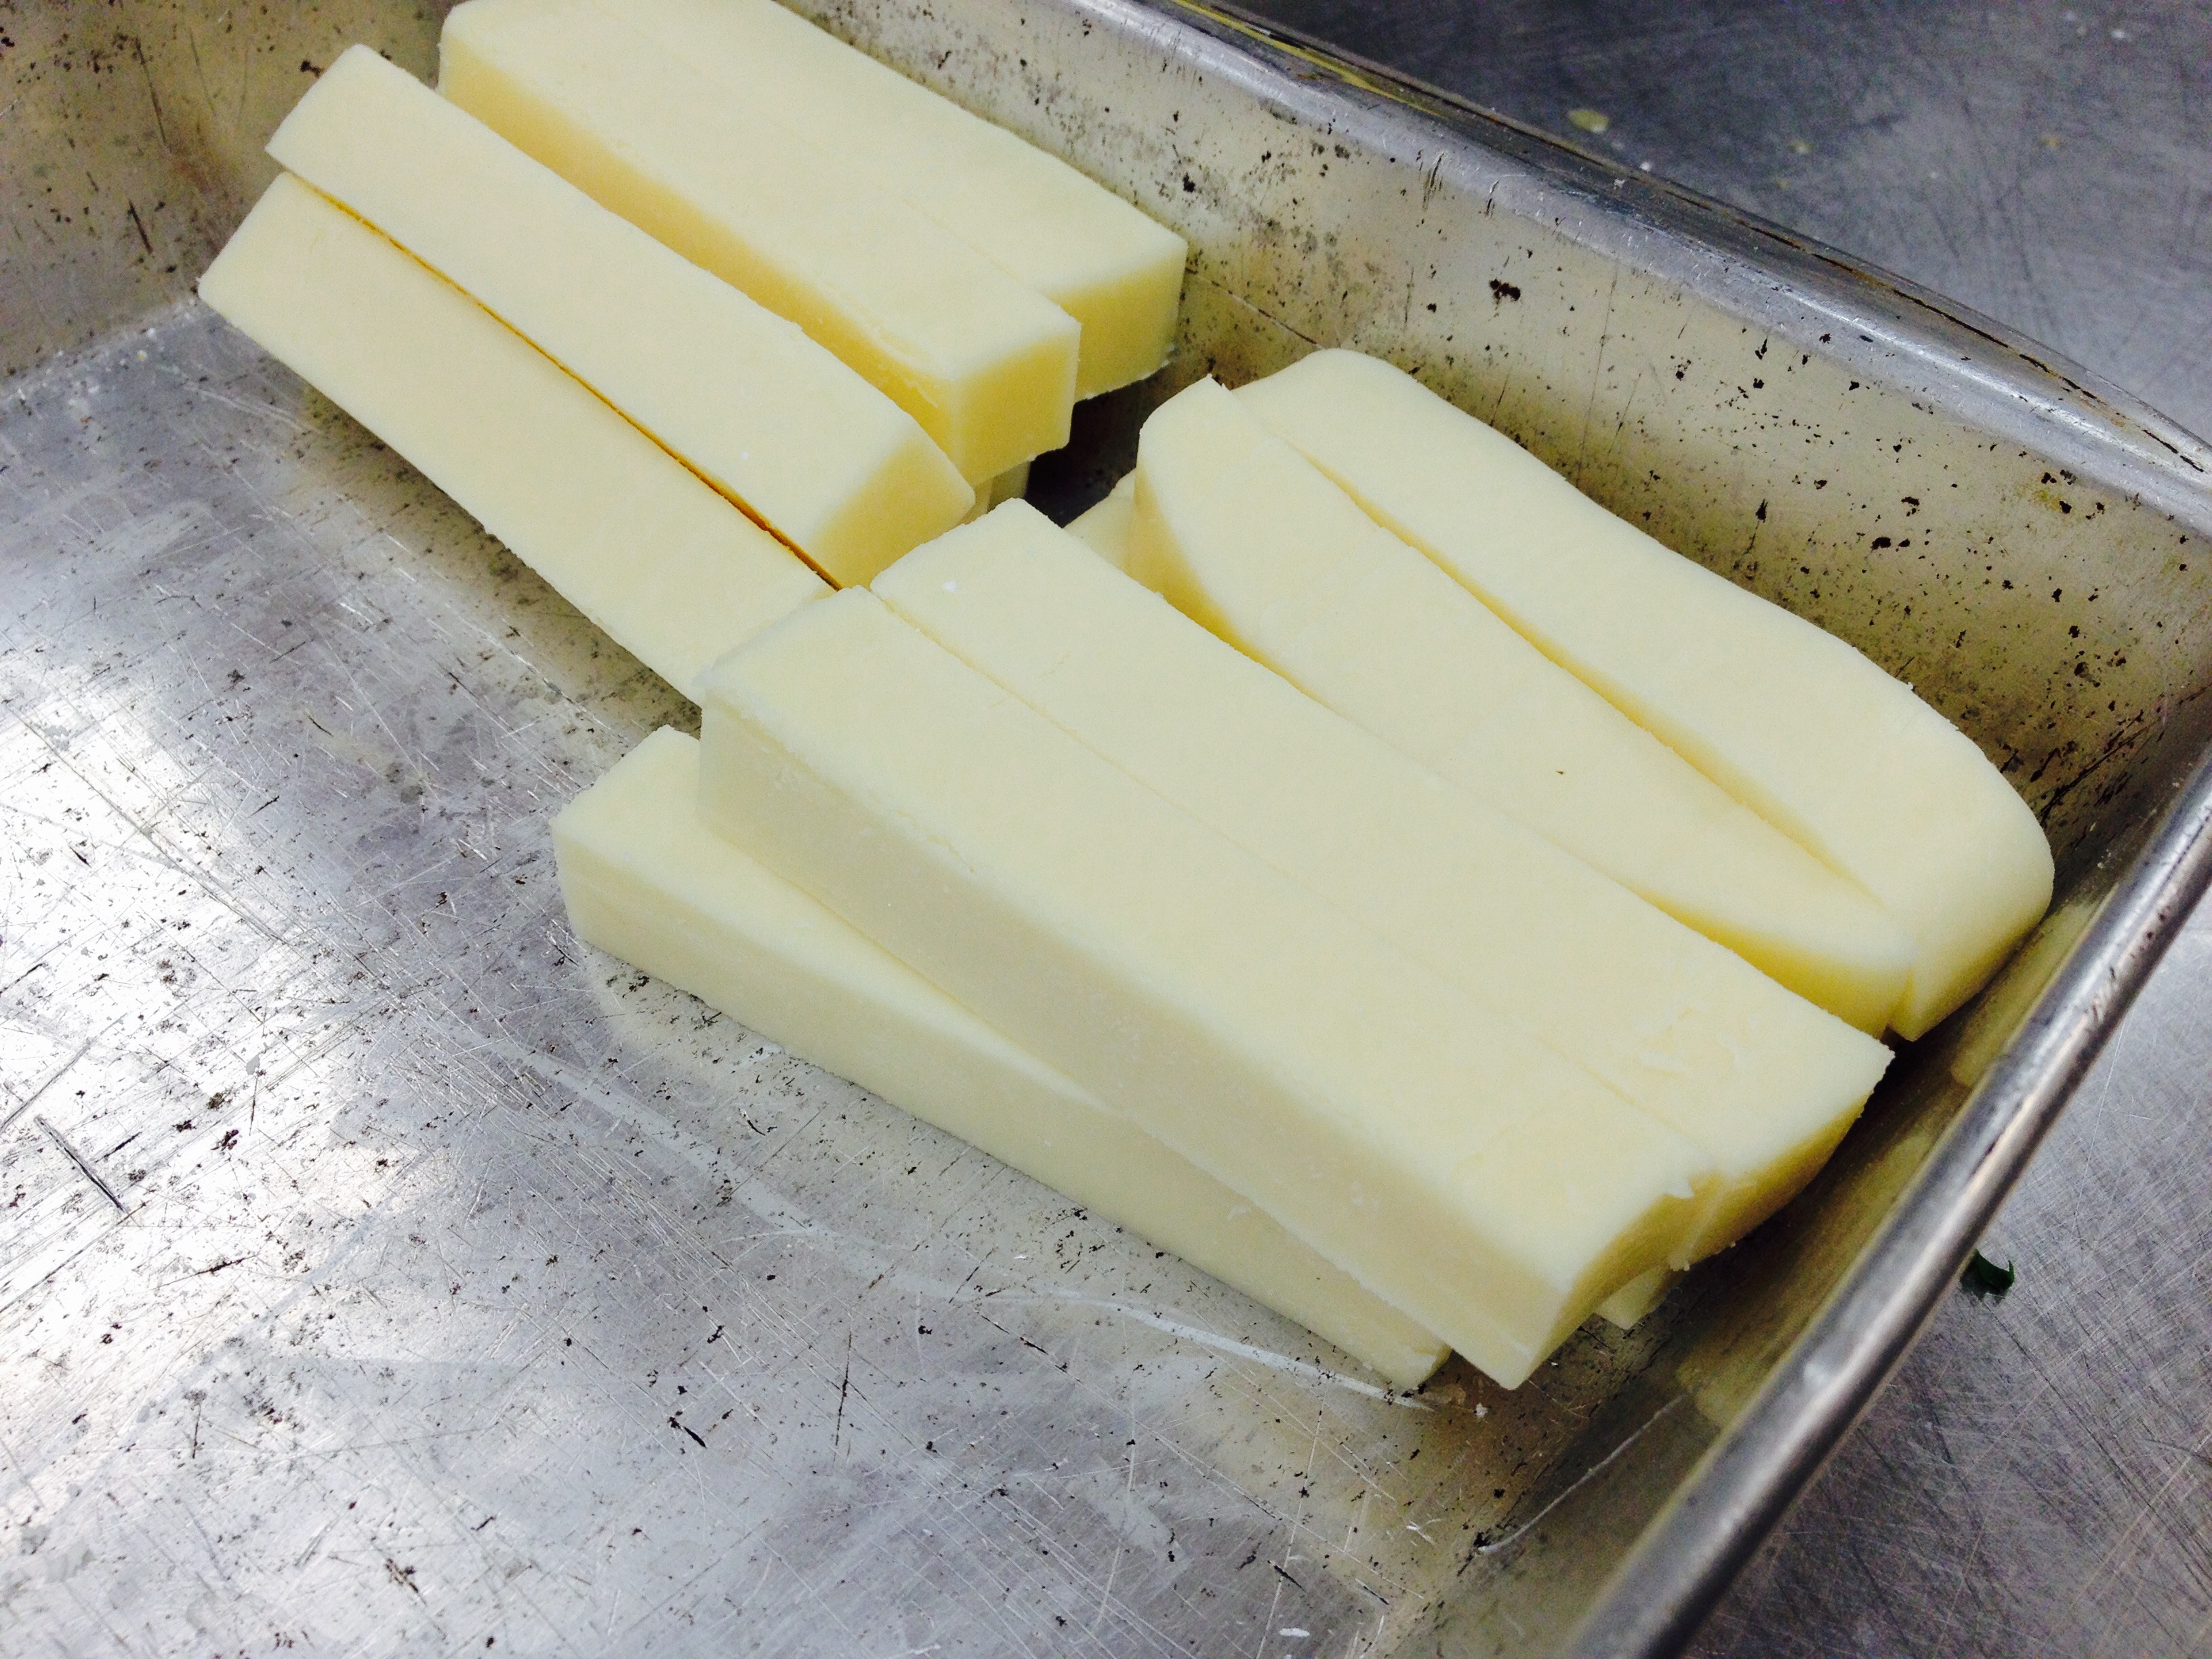
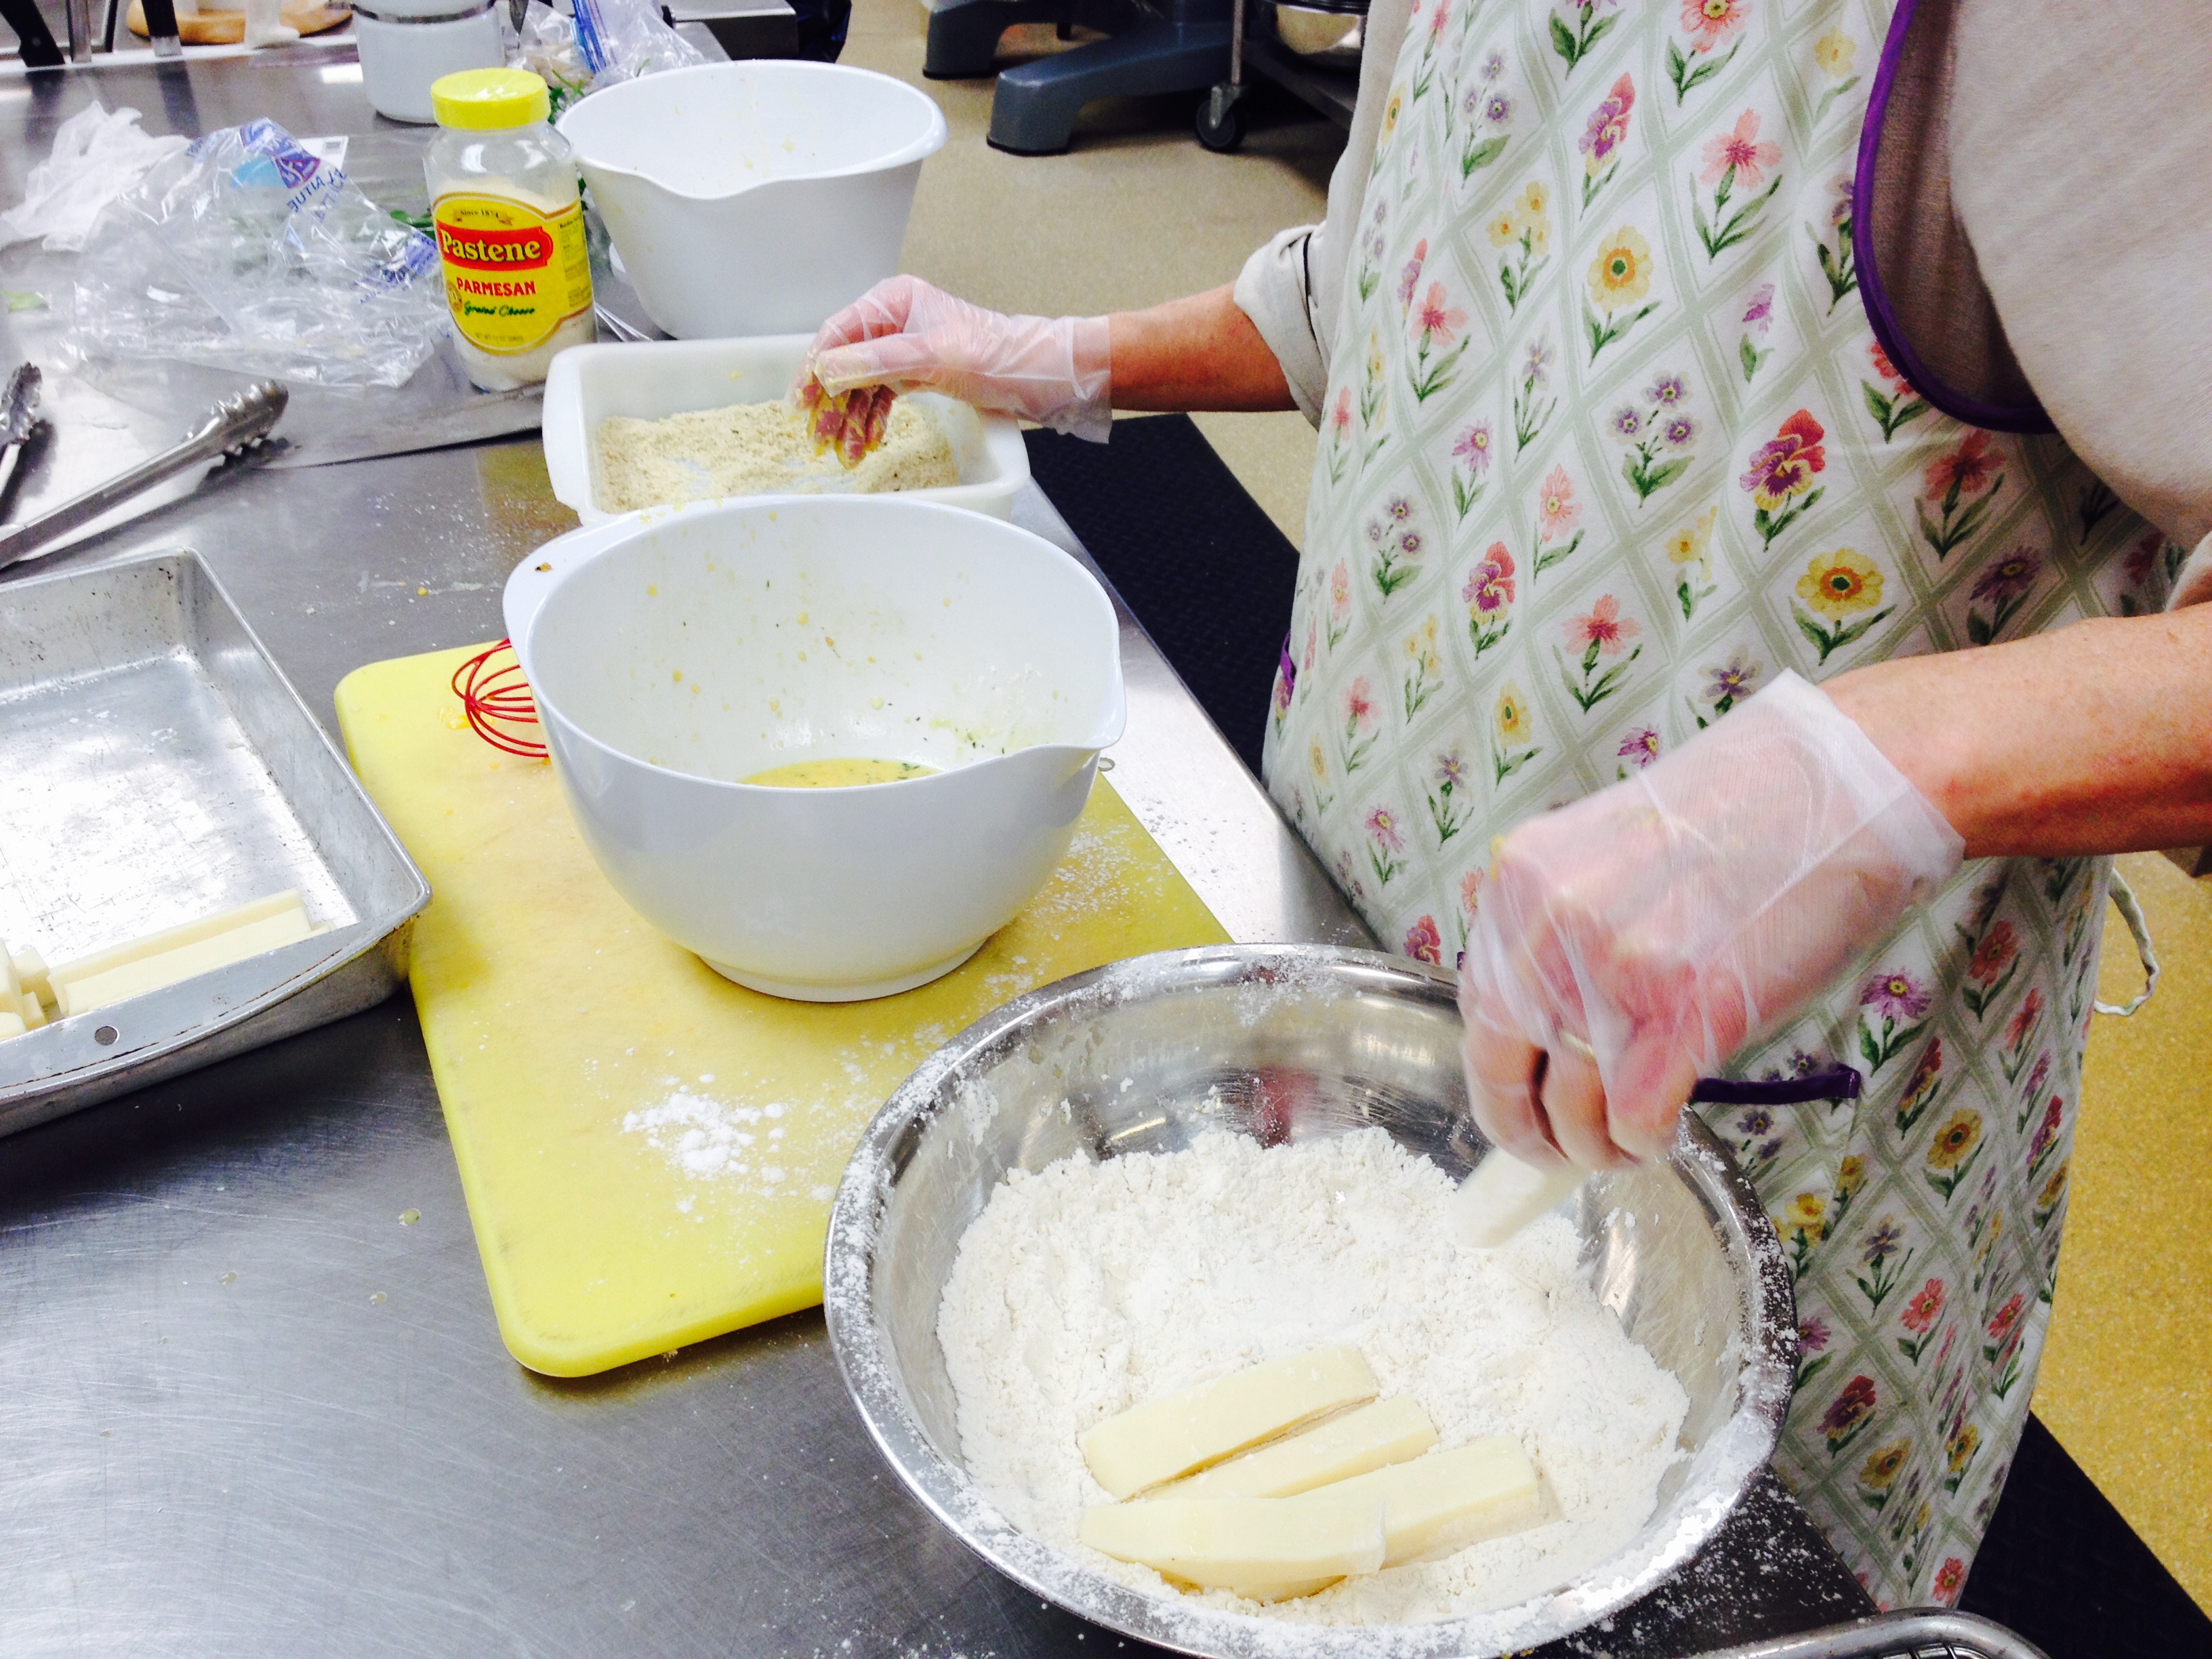
- Cut mozzarella into 3 x½" pieces. Place gluten-free flour in a shallow dish and add some salt and pepper to season. Whisk eggs and milk in another shallow dish. Put 1/2 gluten-free breadcrumbs (or panko) in a third shallow dish (refilling dish as needed with crumbs).
- Working with one piece of mozzarella at a time, dredge in flour, shaking off excess. Dip in egg mixture, then coat in breadcrumbs, pressing to adhere. (Tip: Keep one hand clean to transfer from one dish to the next to avoid clumping or keep a bowl of water handy to dip into a bowl between dipping) Repeat steps for a second coating. Transfer to a wire rack set inside a rimmed baking sheet. Repeat with remaining mozzarella. Transfer rack with mozzarella to freezer and freeze at least 1 hour and up to 3 days.
- Using a fry-daddy or a large pot pour in oil to come 2" up sides. Heat over medium-high until a deep-fry thermometer registers 350°. Working in batches (don't overcrowd the pan!), fry mozzarella, occasionally turning, until golden brown and crisp, 2–2½ minutes. Transfer to a paper towel-lined plate and season with salt while still hot. Serve with Marinara Sauce.
**Tip: This is a basic "dredging" technique that can be used for chicken, veal or pork cutlets as well. Simply follow the same steps going from seasoned flour to egg/milk mixture to panko or bread crumbs and fry. Delicious!
“Sr. Irene, you just have to taste this!” came a cry from the kitchen. One of our special event cooks had just tried out a new appetizer for an upcoming reception. I could tell from the sound of her voice she was quite happy with it.
“Be there in a minute,” I responded, unable to leave just then. The next day one of the kitchen sisters asked, “Wasn’t that new appetizer just the best?”
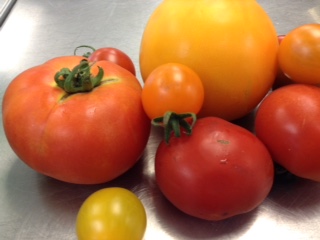
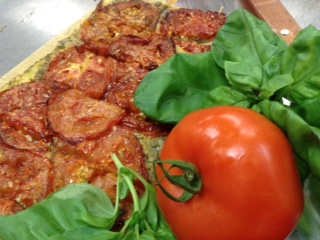
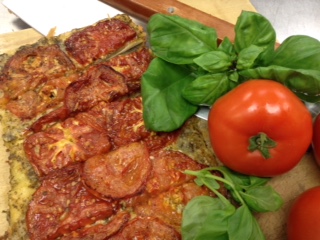
Oh no! How could I have forgotten? I chastened myself, vowing to get to the kitchen before the end of the day. When I finally arrived with much embarrassment and was able to locate and ravenously devour the one and only “Tasting Sample” that was left, I could only groan. The caramelized tomato bruschetta with fresh garden pesto was beyond delicious. Why oh why didn’t I get myself there the moment I was first called!
A savory twist on a summer classic, this bruschetta is a great way to enjoy both fresh garden tomatoes and basil!
Print Recipe
Votes: 0
Rating: 0
You:
Rate this recipe!
Caramelized Tomato Bruschetta
SERVINGS8-12servings
|
COOK TIME20mins |
PREP TIME15mins |
READY IN35mins |
Ingredients
Instructions
- Preheat oven to 400 degrees.
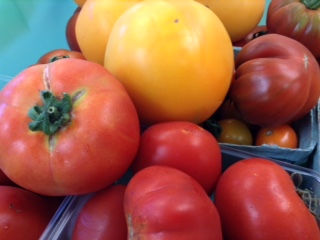
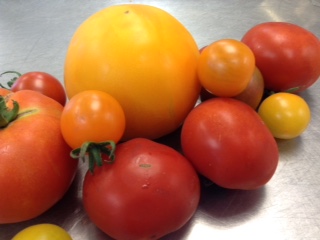
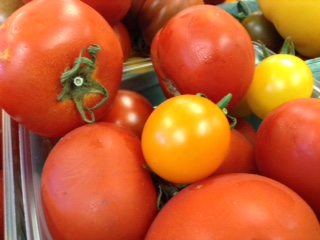
- Slice the tomatoes into 1/3 inch slices, brush with olive oil and sprinkle with salt, pepper and sugar.
- Place on a cookie sheet or sheet pan and roast in the oven until tomatoes turn a light to medium brown and the sugar is visually caramelized.
- While tomatoes are roasting, brush the flat bread with oil and spread the pesto overtop, then sprinkle with parmesan cheese.
- When tomatoes are finished, carefully remove them from the pan and arrange on top of the pesto and cheese. This is a delicate process as the tomatoes are likely to fall apart after roasting.
- Serve with a drizzle of balsamic reduction and enjoy a taste of summer!
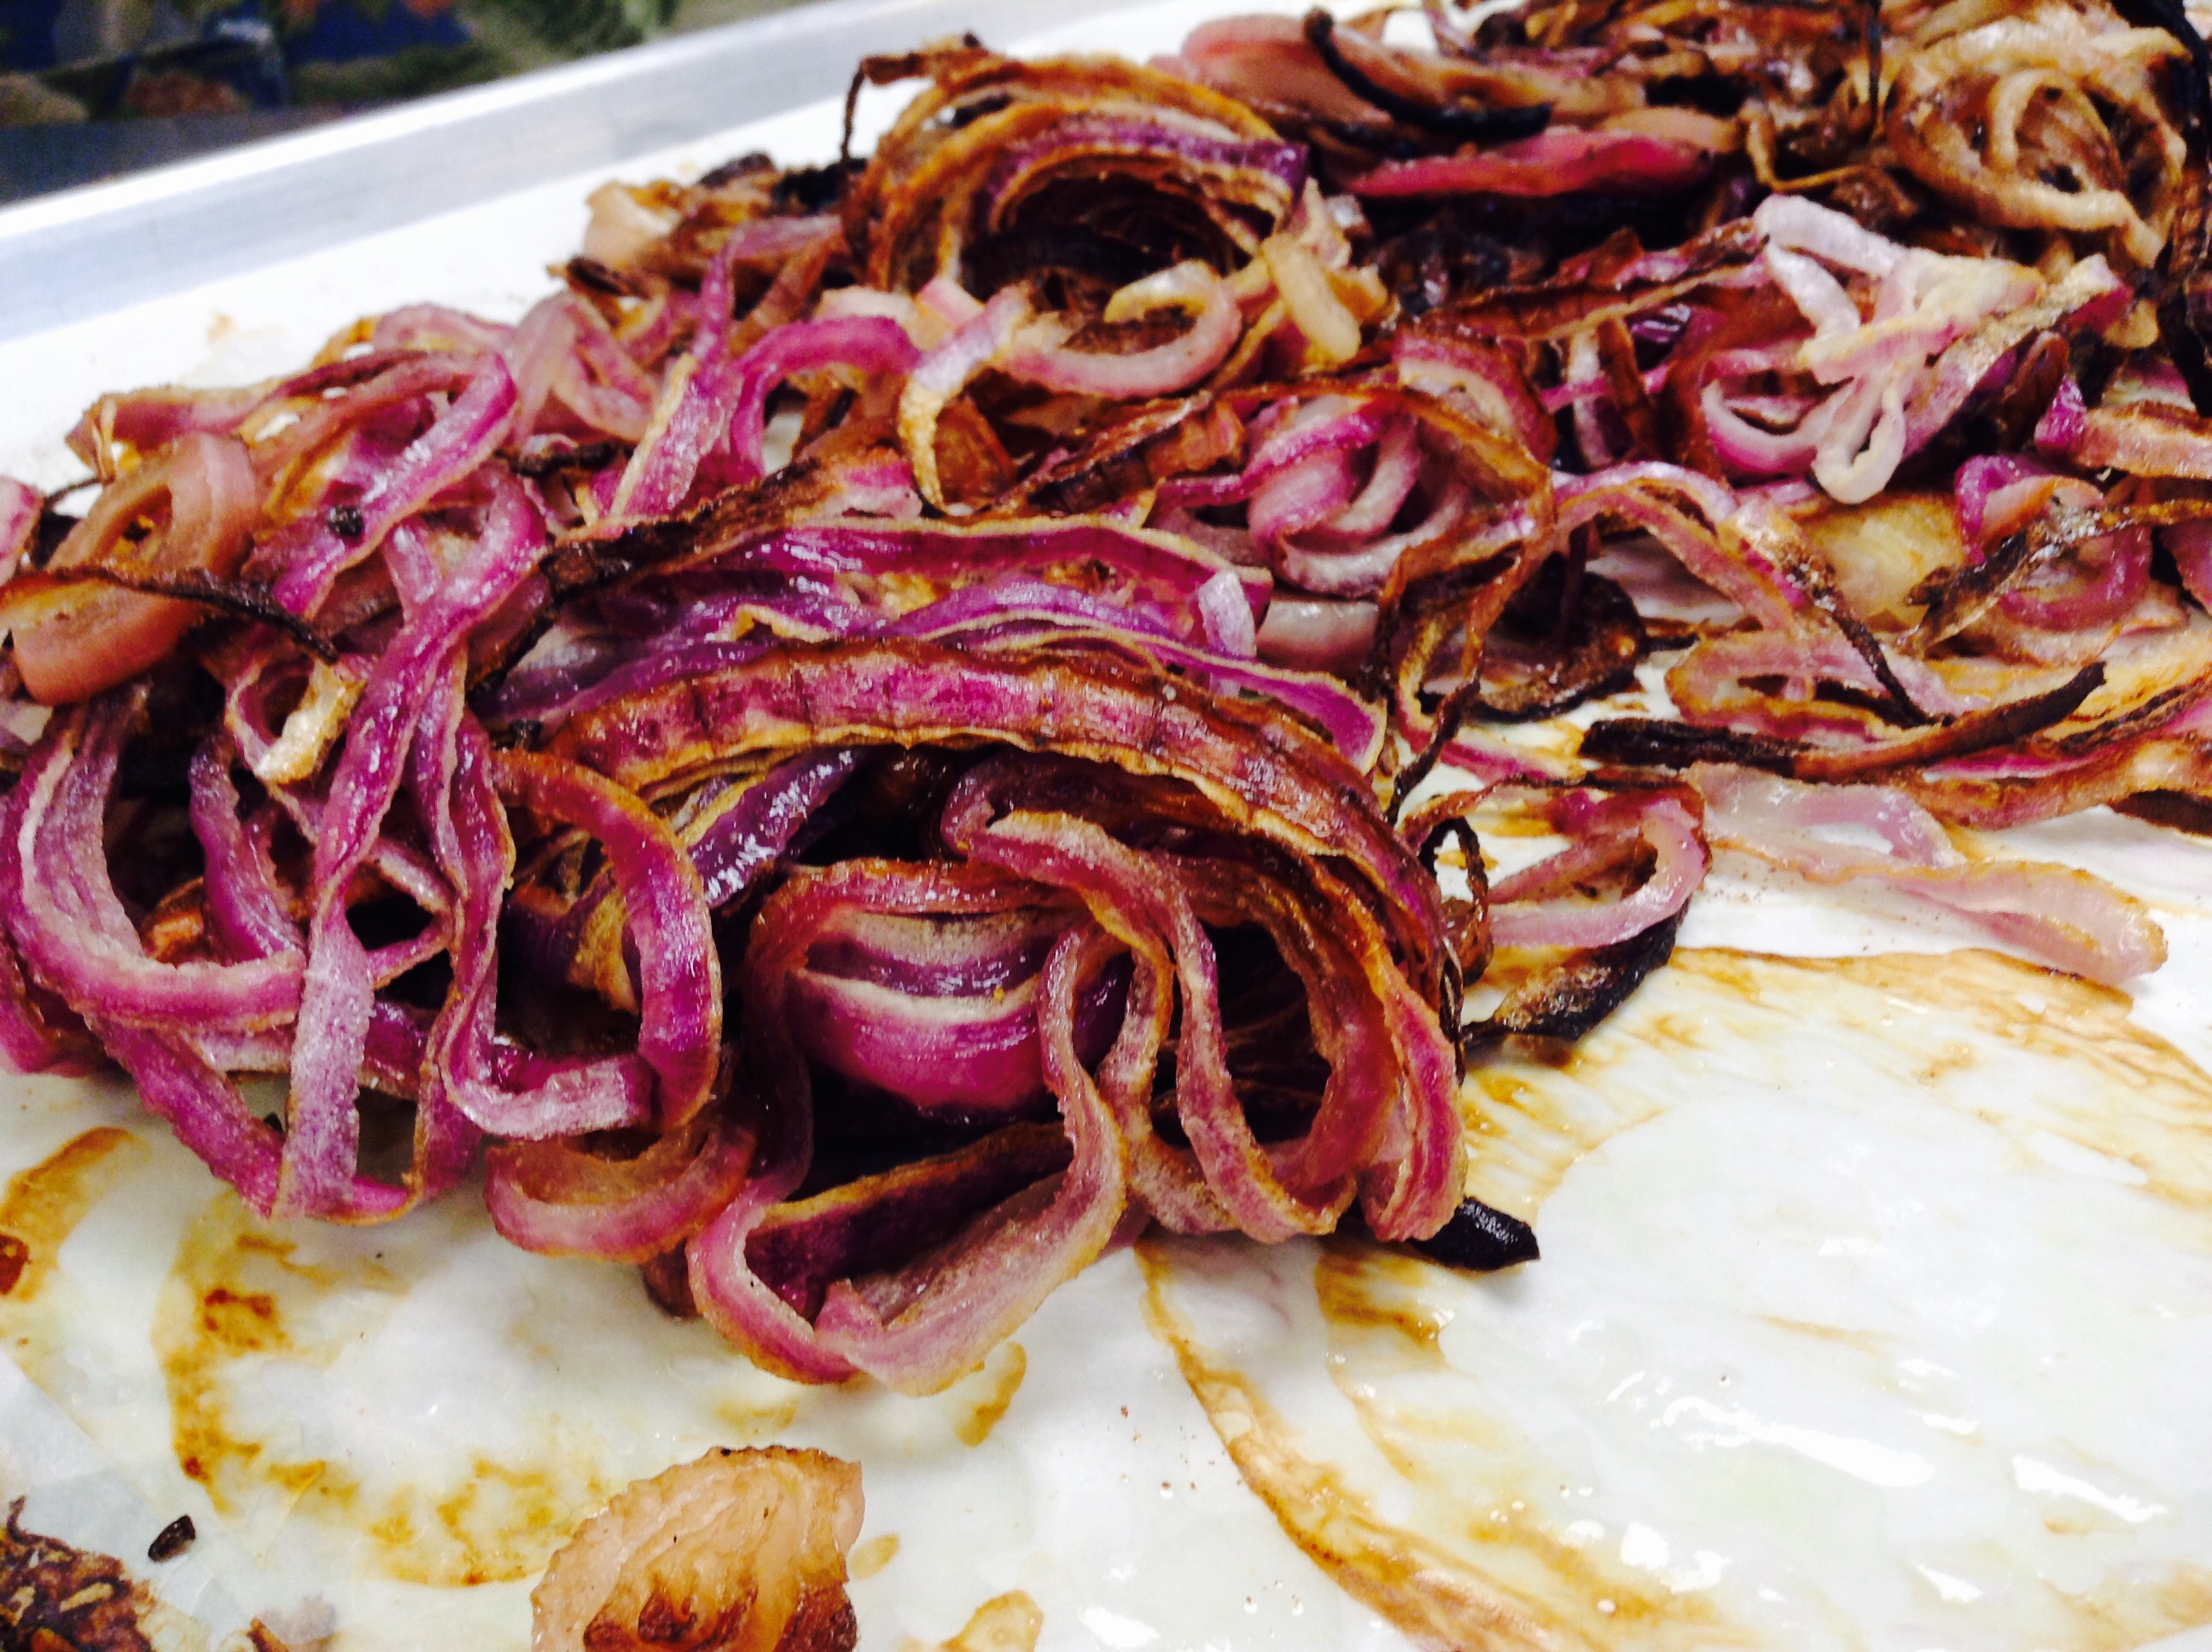
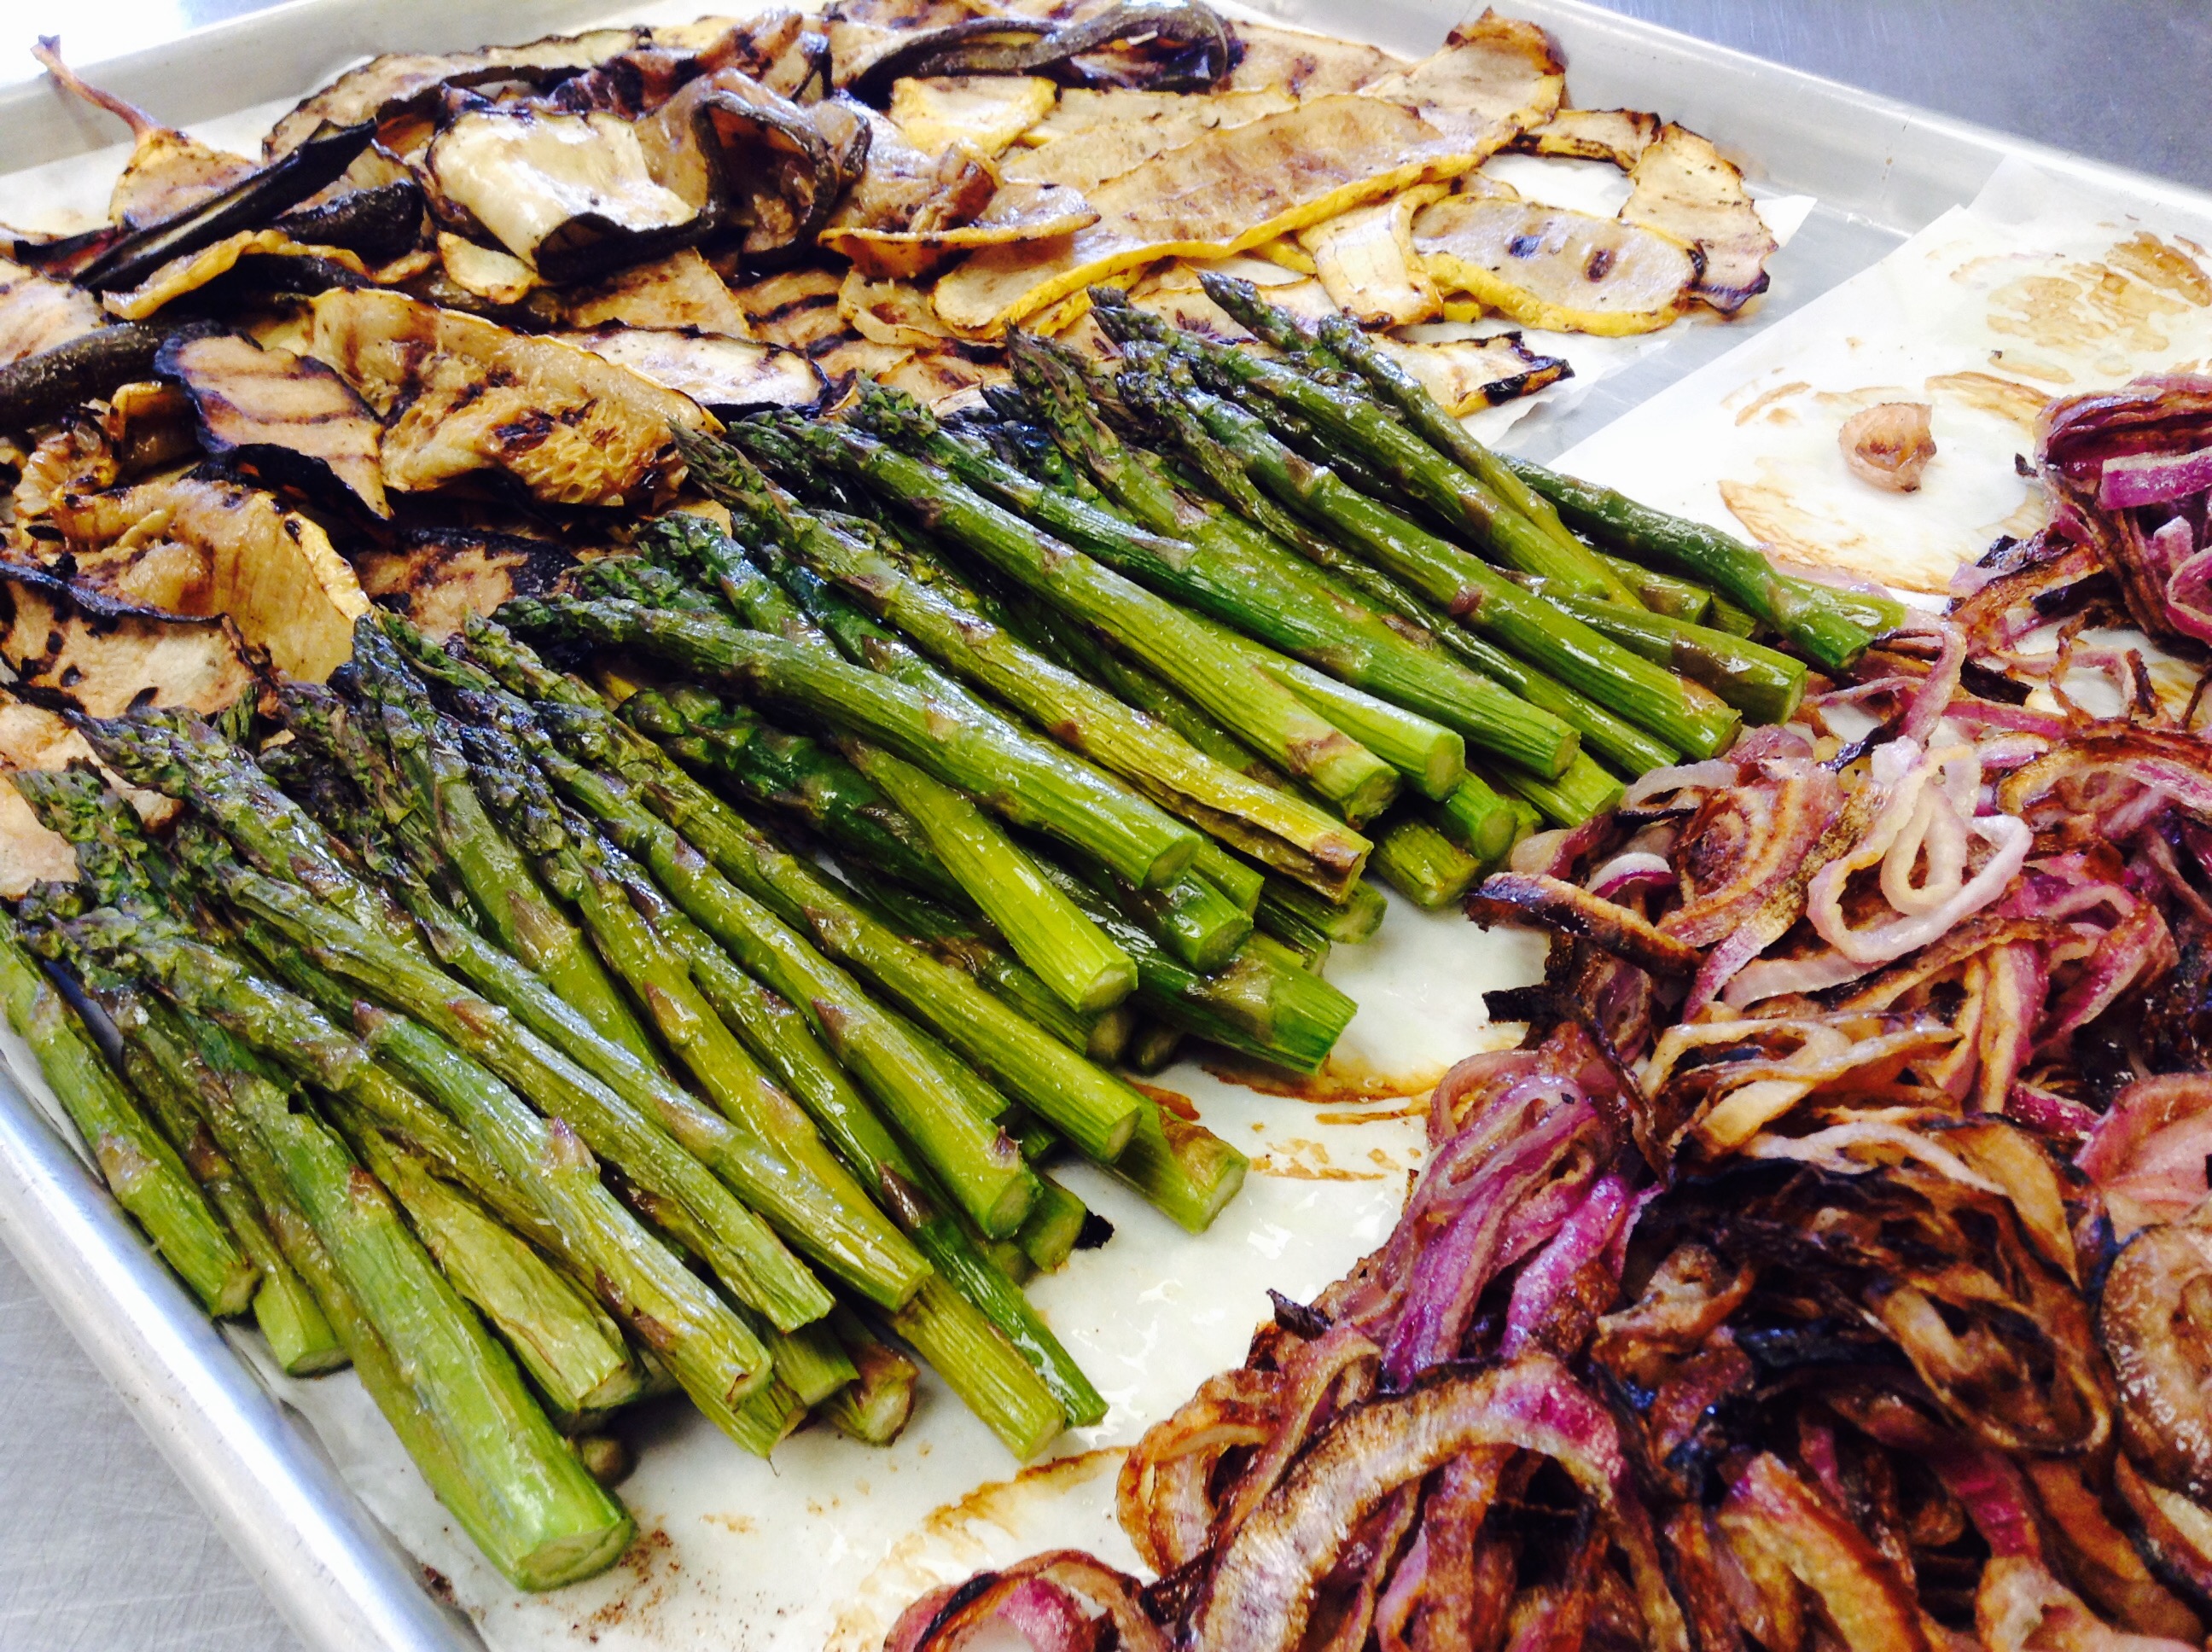
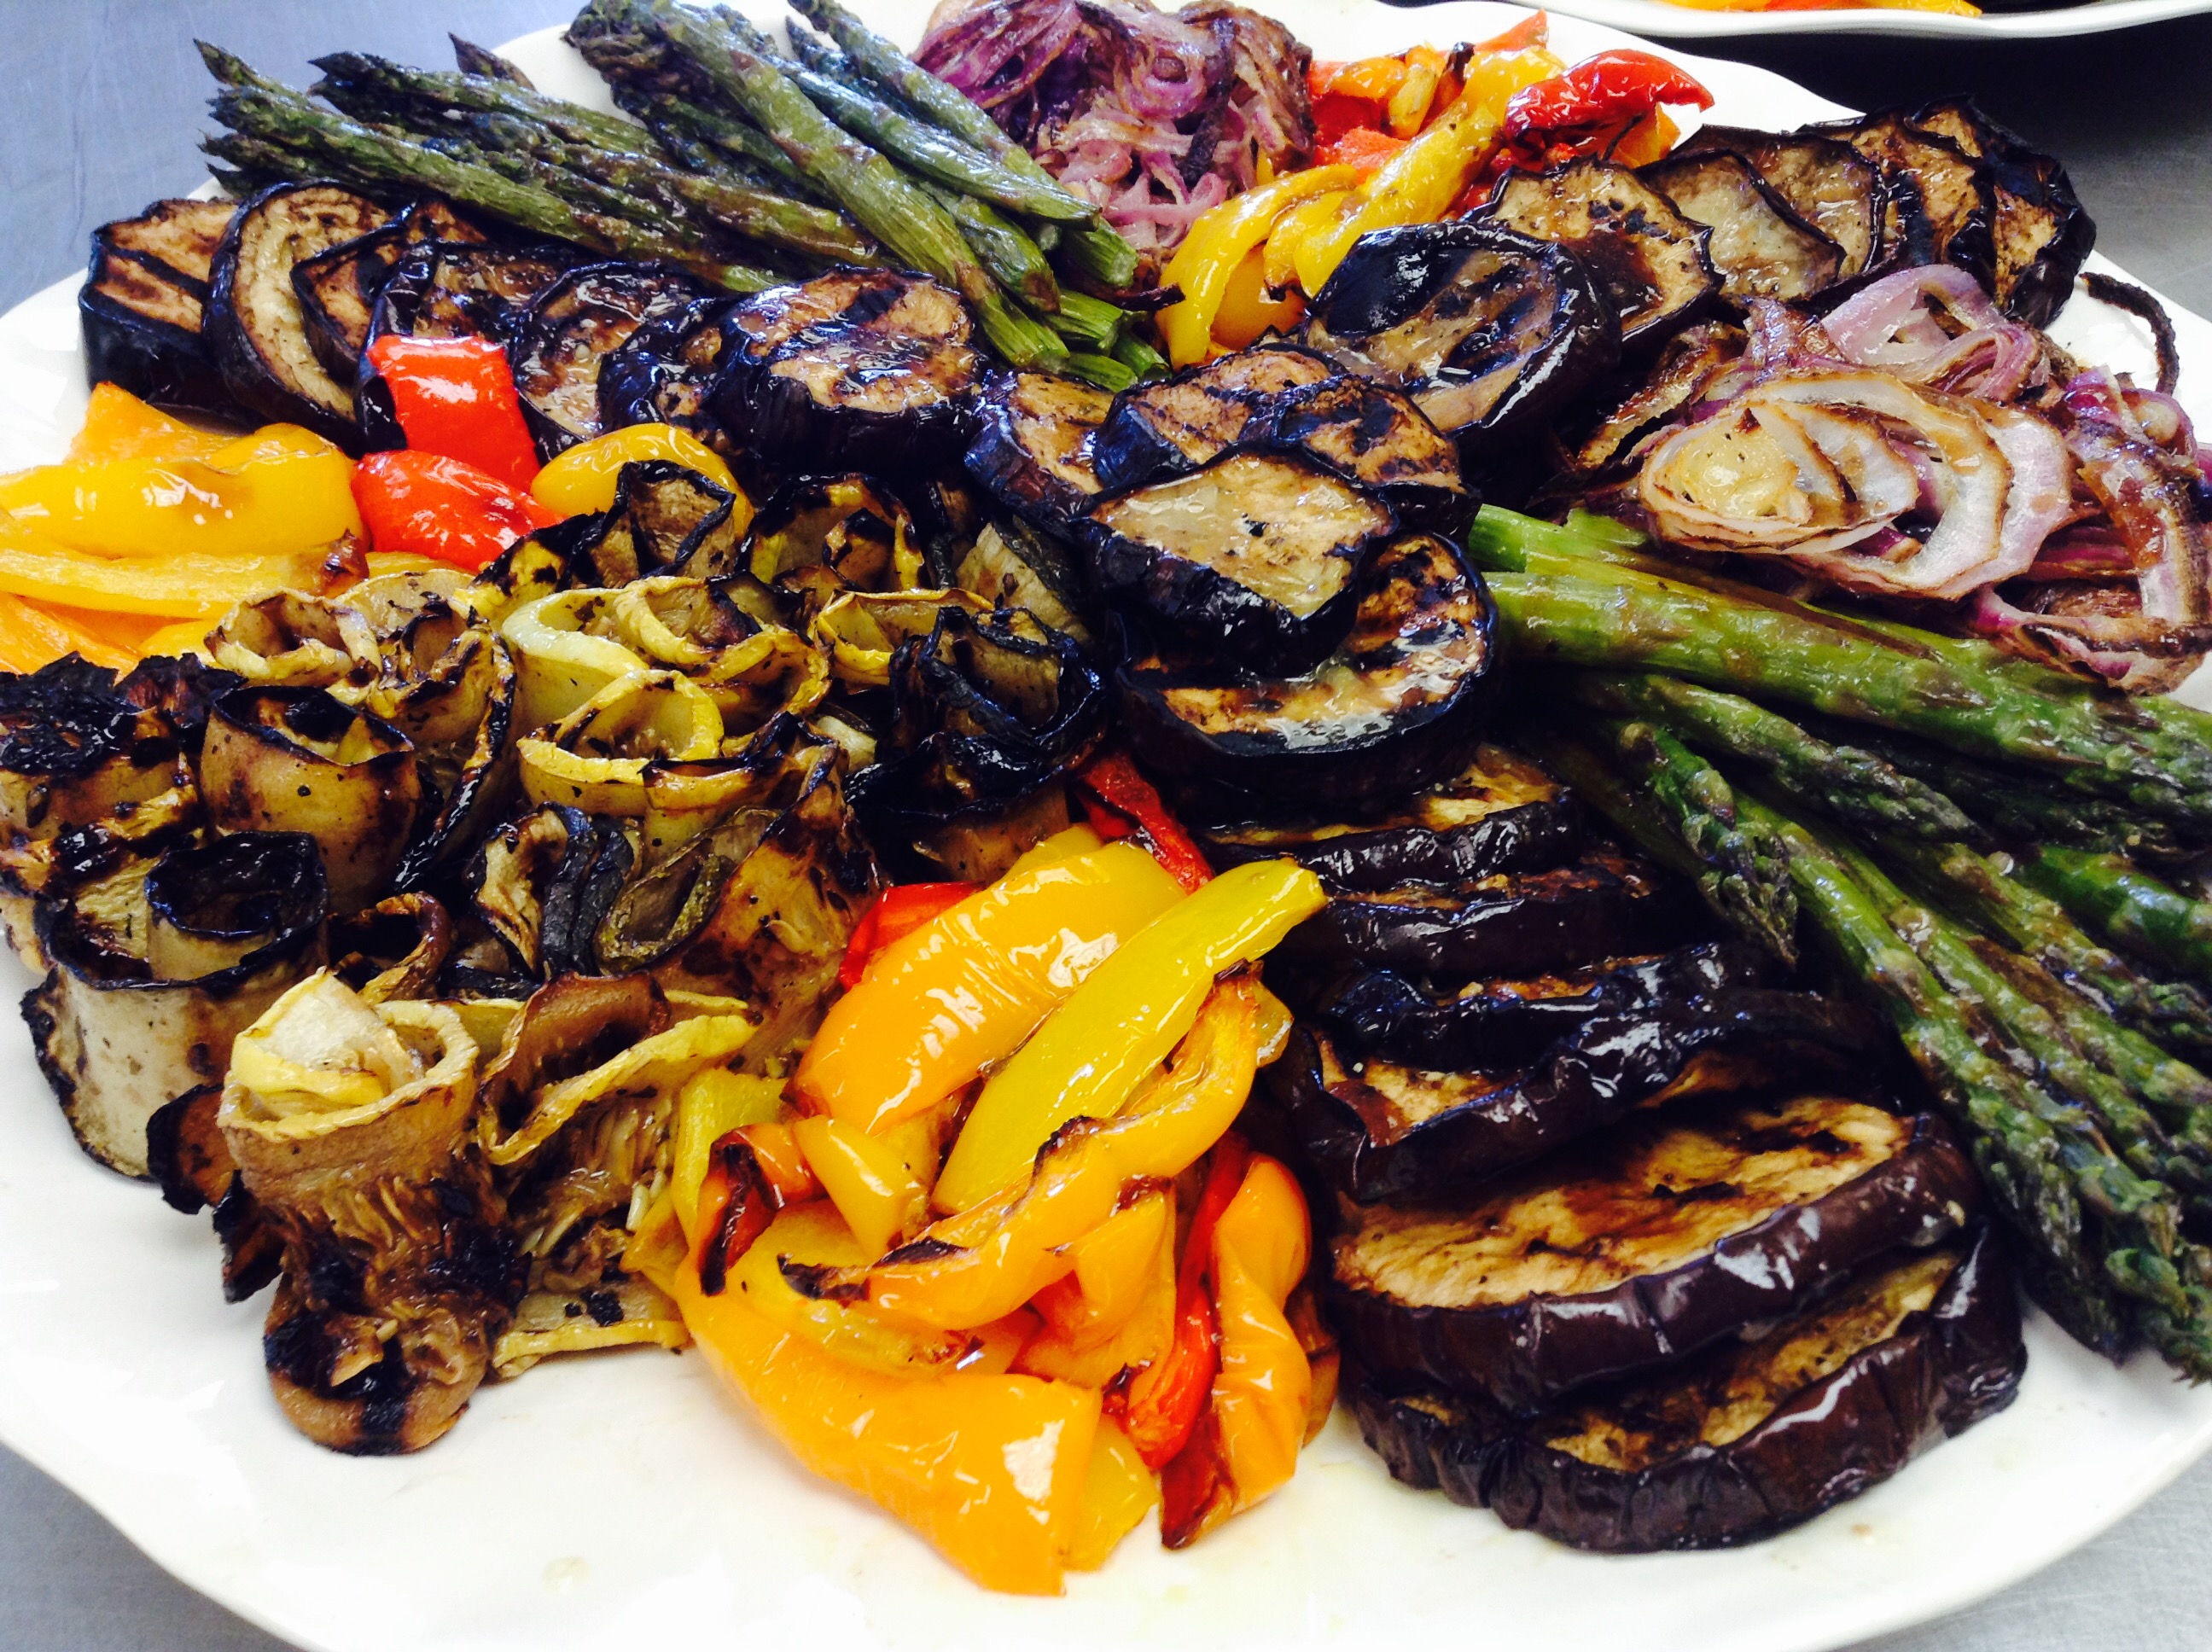
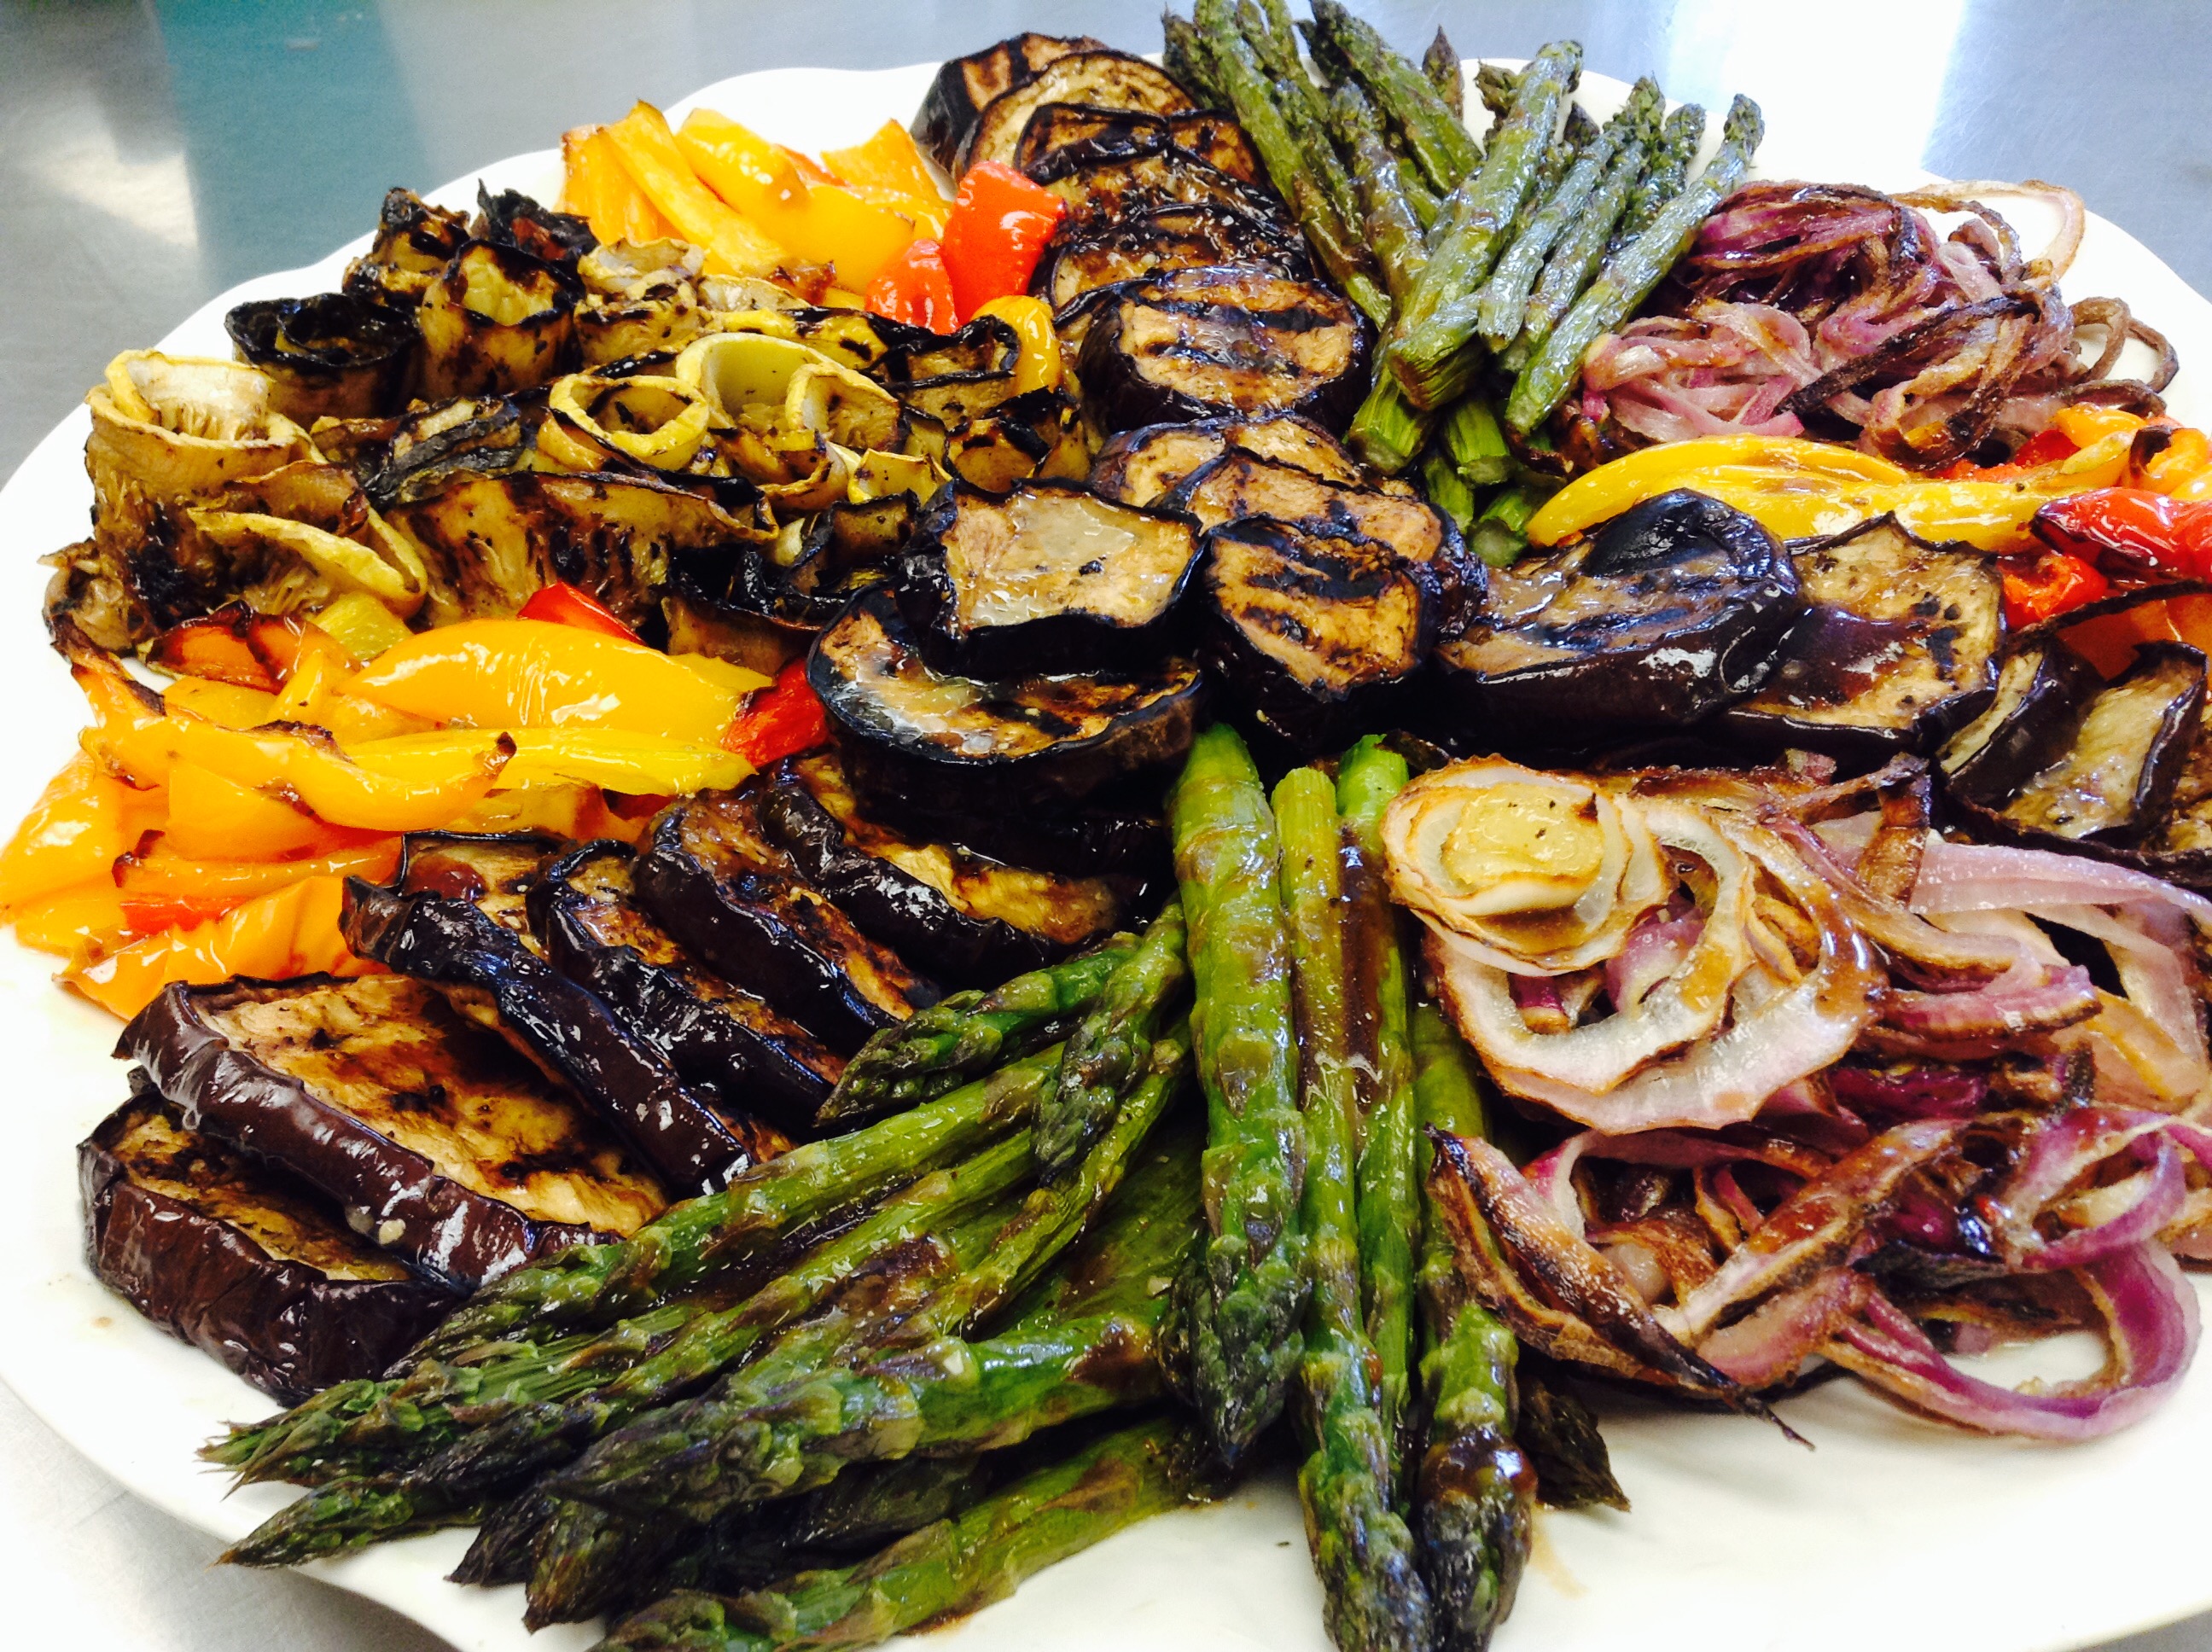
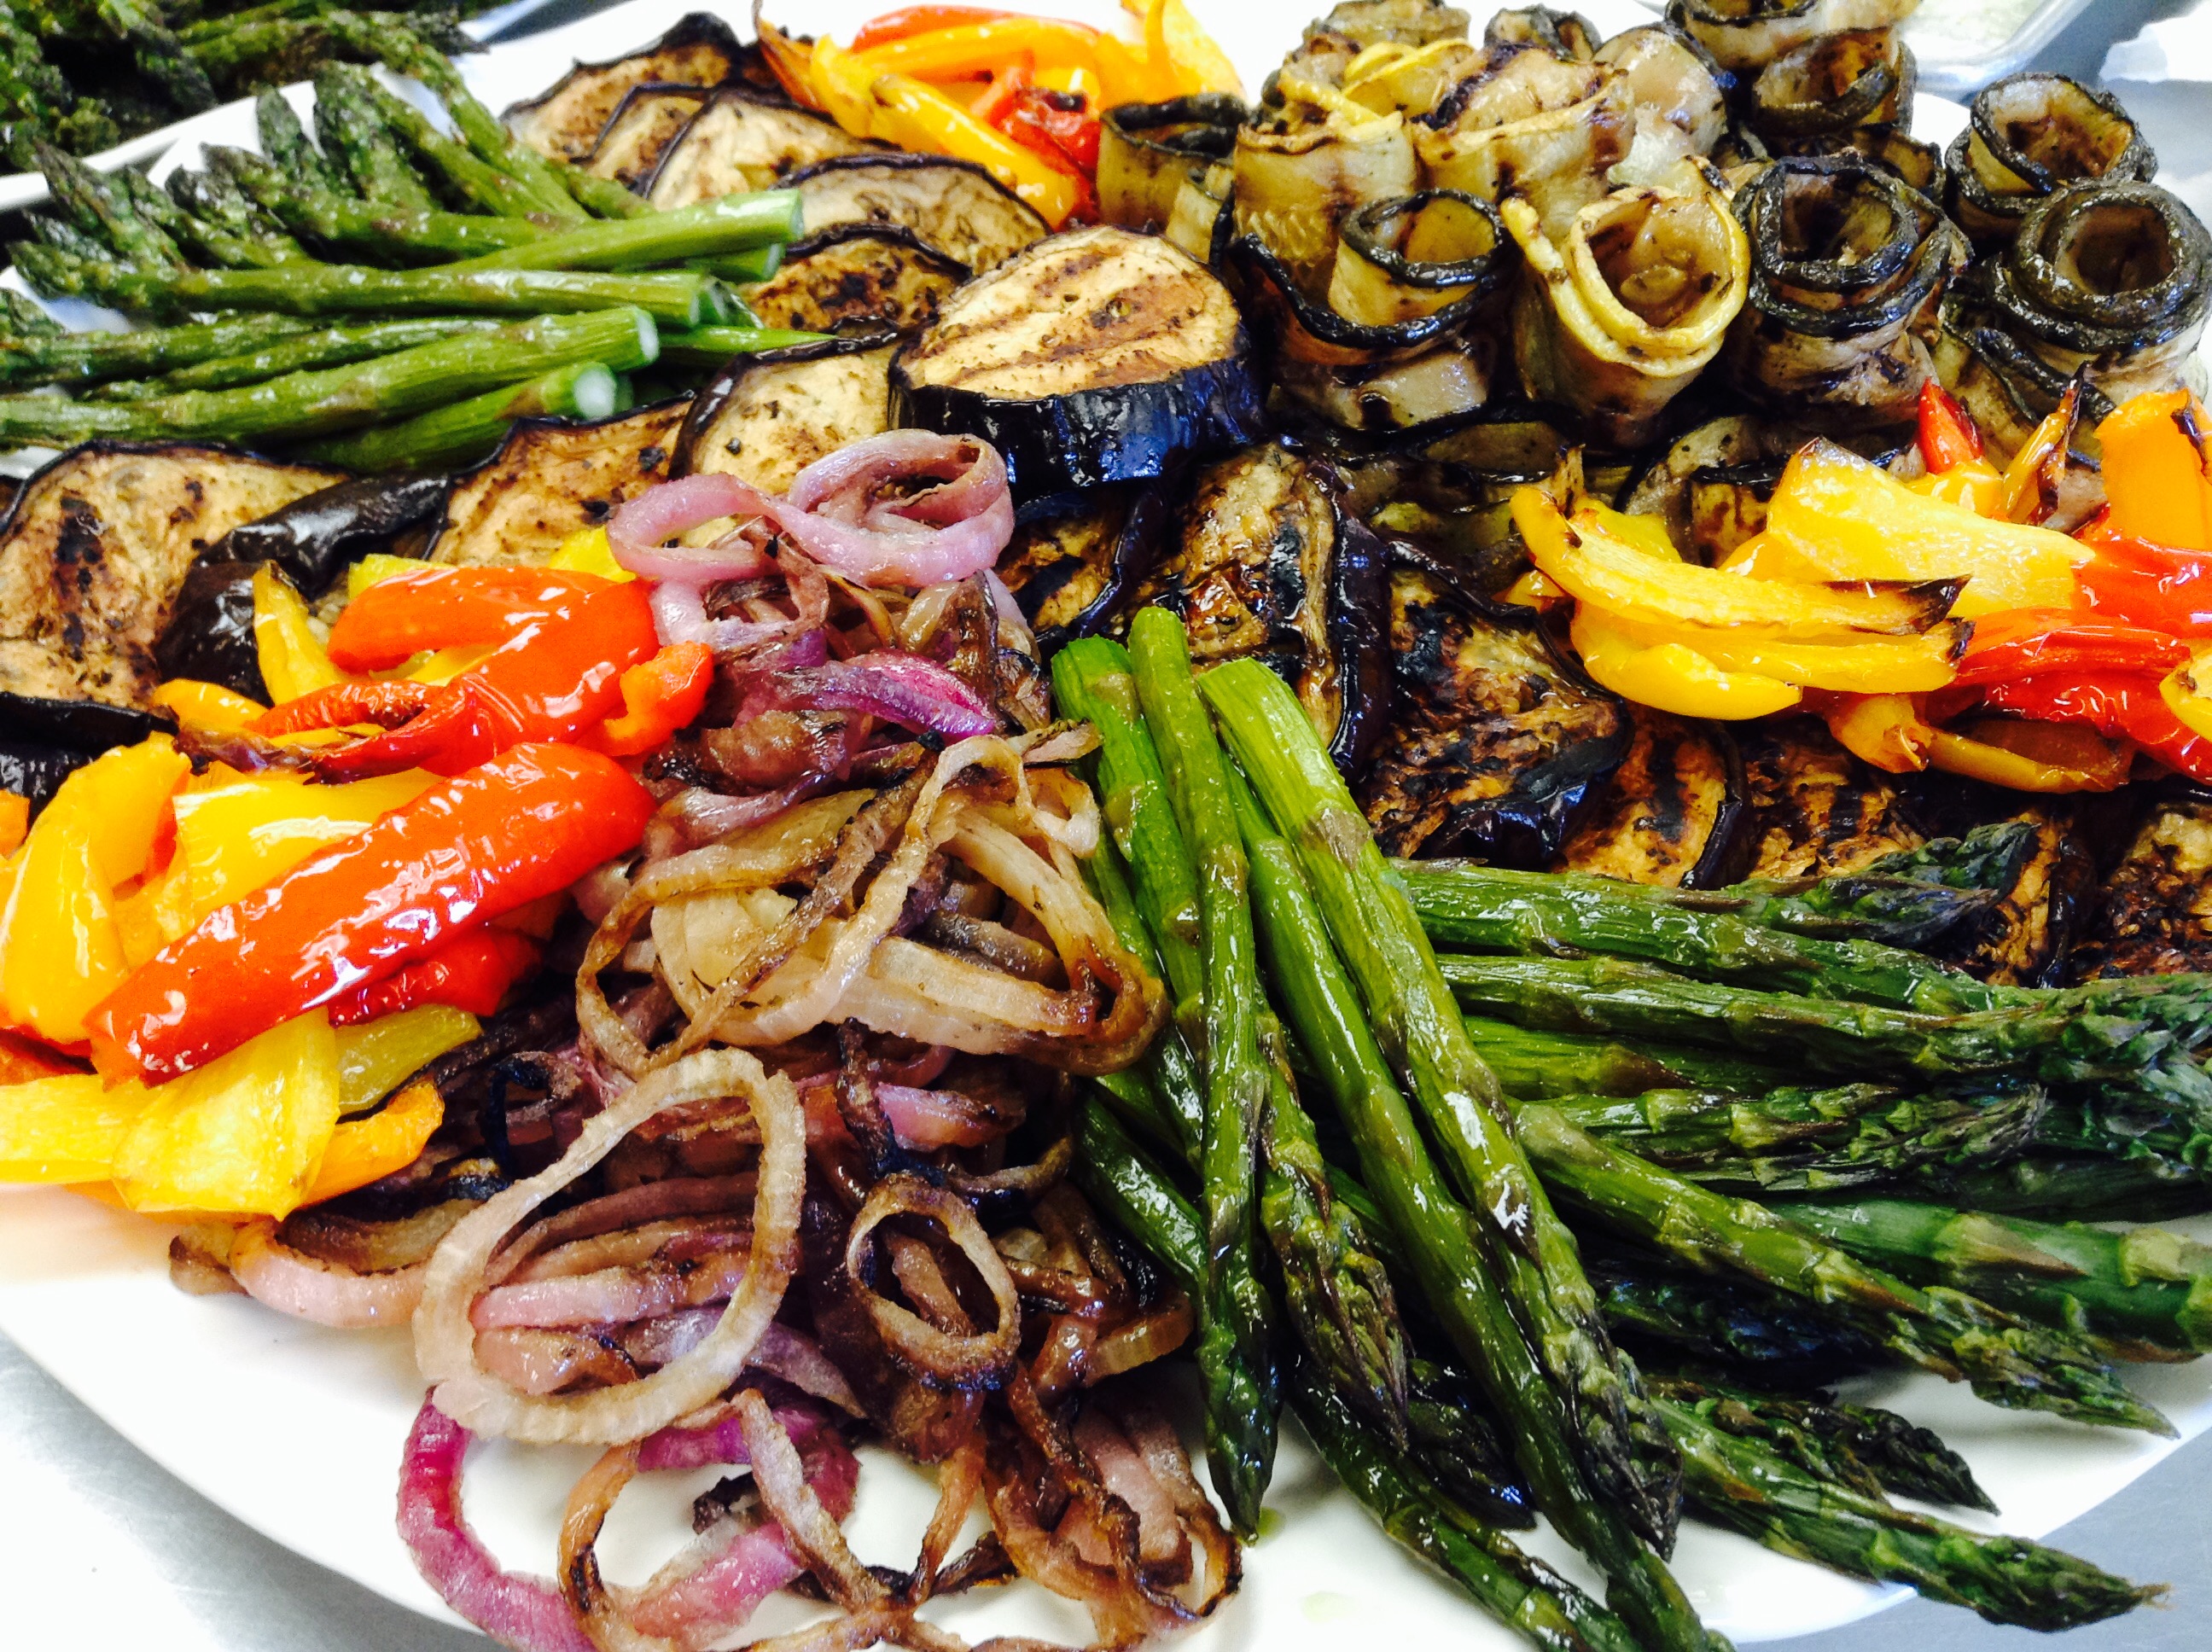
Time to get out the grill and put those fresh garden veggies to good use. This is a terrific recipe that makes a lovely party platter in a matter of minutes.
Eggplant, peppers, zucchini, asparagus, and red onions – marinated and grilled till soft on the inside and charred on the outside, then doused in garlicky marinade, and served with whipped goat cheese on the side.
Print Recipe
Votes: 0
Rating: 0
You:
Rate this recipe!
Marinated Grilled Vegetable Platter with Whipped Goat Cheese
SERVINGS8-10servings
|
COOK TIME20mins |
PREP TIME20mins |
READY IN40mins |
Ingredients
Instructions
- Cut eggplants, onions, and zucchini in 1/4-inch thick slices.
- Salt the eggplant slices, and leave in a colander for 20 minutes so the bitter juices drain out. Rinse and pet dry.
- Wash the peppers, and leave whole.
- Wash the asparagus, and cut the woody ends.
- Mix olive oil, balsamic vinegar, apple cider vinegar, garlic and chopped oregano, with onion salt and black pepper, and brush all vegetables liberally with the marinade.
- Grill veggies on medium heat, turning them over once or twice.
- Remove the charred outer skin from the peppers by rubbing off- slice the pepper in half, remove seeds and then continue slicing the peppers lengthwise into 1” slices. Set aside until ready to assemble.
- Remove the remaining vegetables to a plate and drizzle with the remaining marinade and more fresh oregano. Add more garlic if needed - they should have a distinct garlicky, tangy taste.
- With an electric mixer beat the whipping cream until soft peaks form. Add the goat cheese, and smashed garlic, and a pinch of salt, then beat until fluffy.
- Arrange the vegetables decoratively on a platter and serve with the whipped goat cheese on the side.
Place left over veggies in a container and pour over a marinade of equal parts apple cider vinegar and olive oil, plus lots of pressed garlic and salt. They will taste great the next day, and will keep in the fridge for a long time.
Recipe adapted from www.victoriastable.com
One of the beautiful things that I am learning about Italian cooking is that each ingredient is to be savored. So many times, we take wonderful ingredients and throw them all together and miss appreciating them as they were meant to be.
As I walk along the streets of Barga with the dogs in the morning or on my way to the Pannificio to get our bread for the day, I often take photographs of the menus hanging on the restaurant windows. When I return to the Villa and have a moment, I try to find a recipe and recreate them.
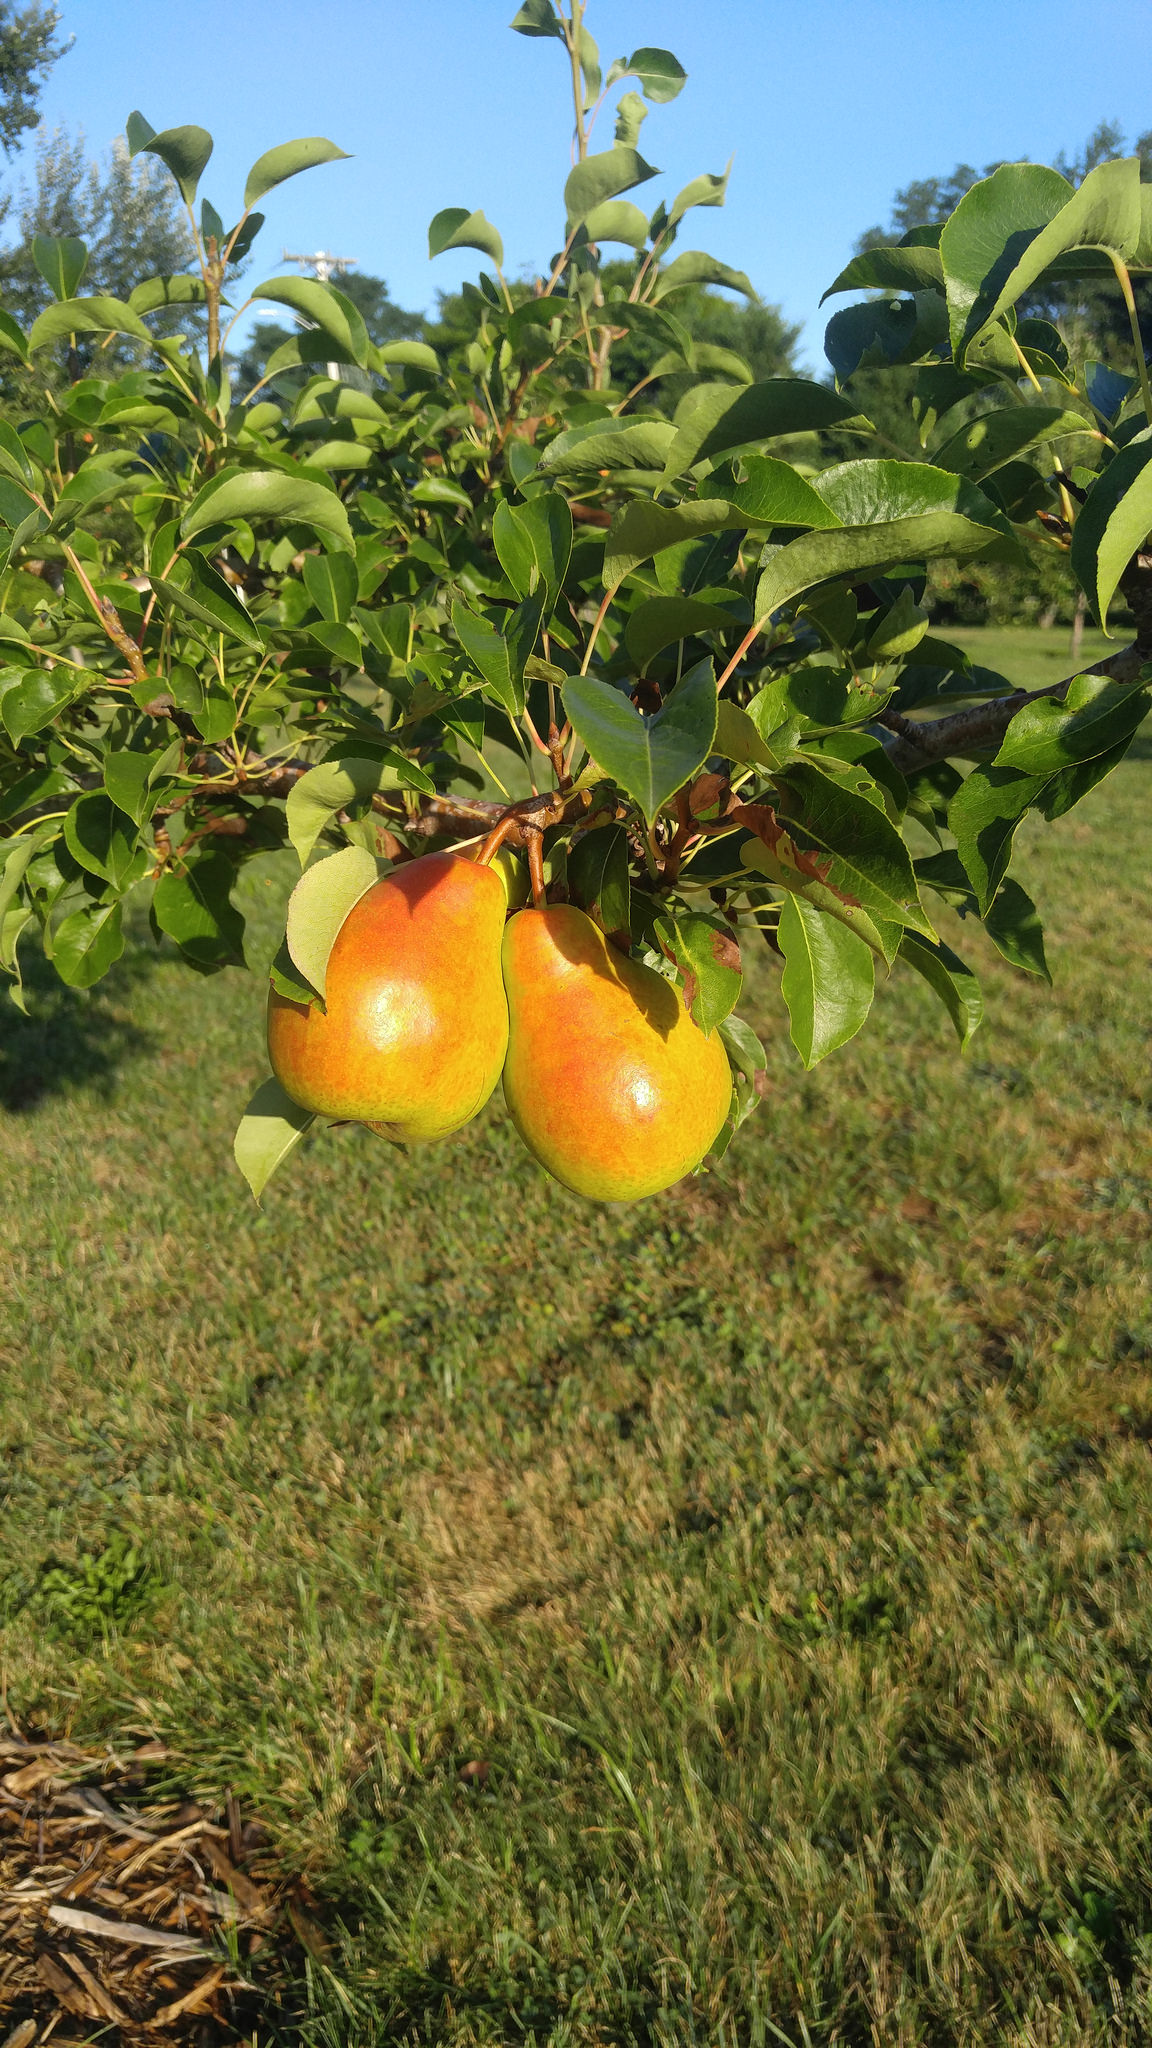
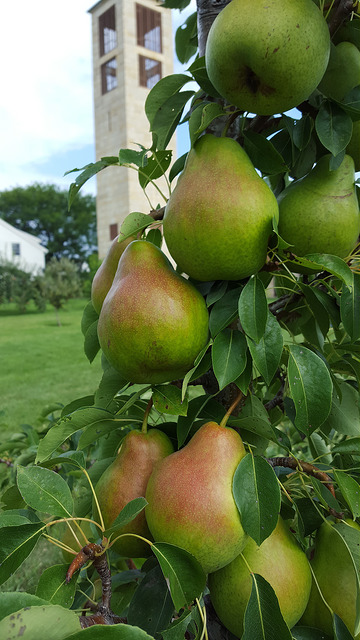
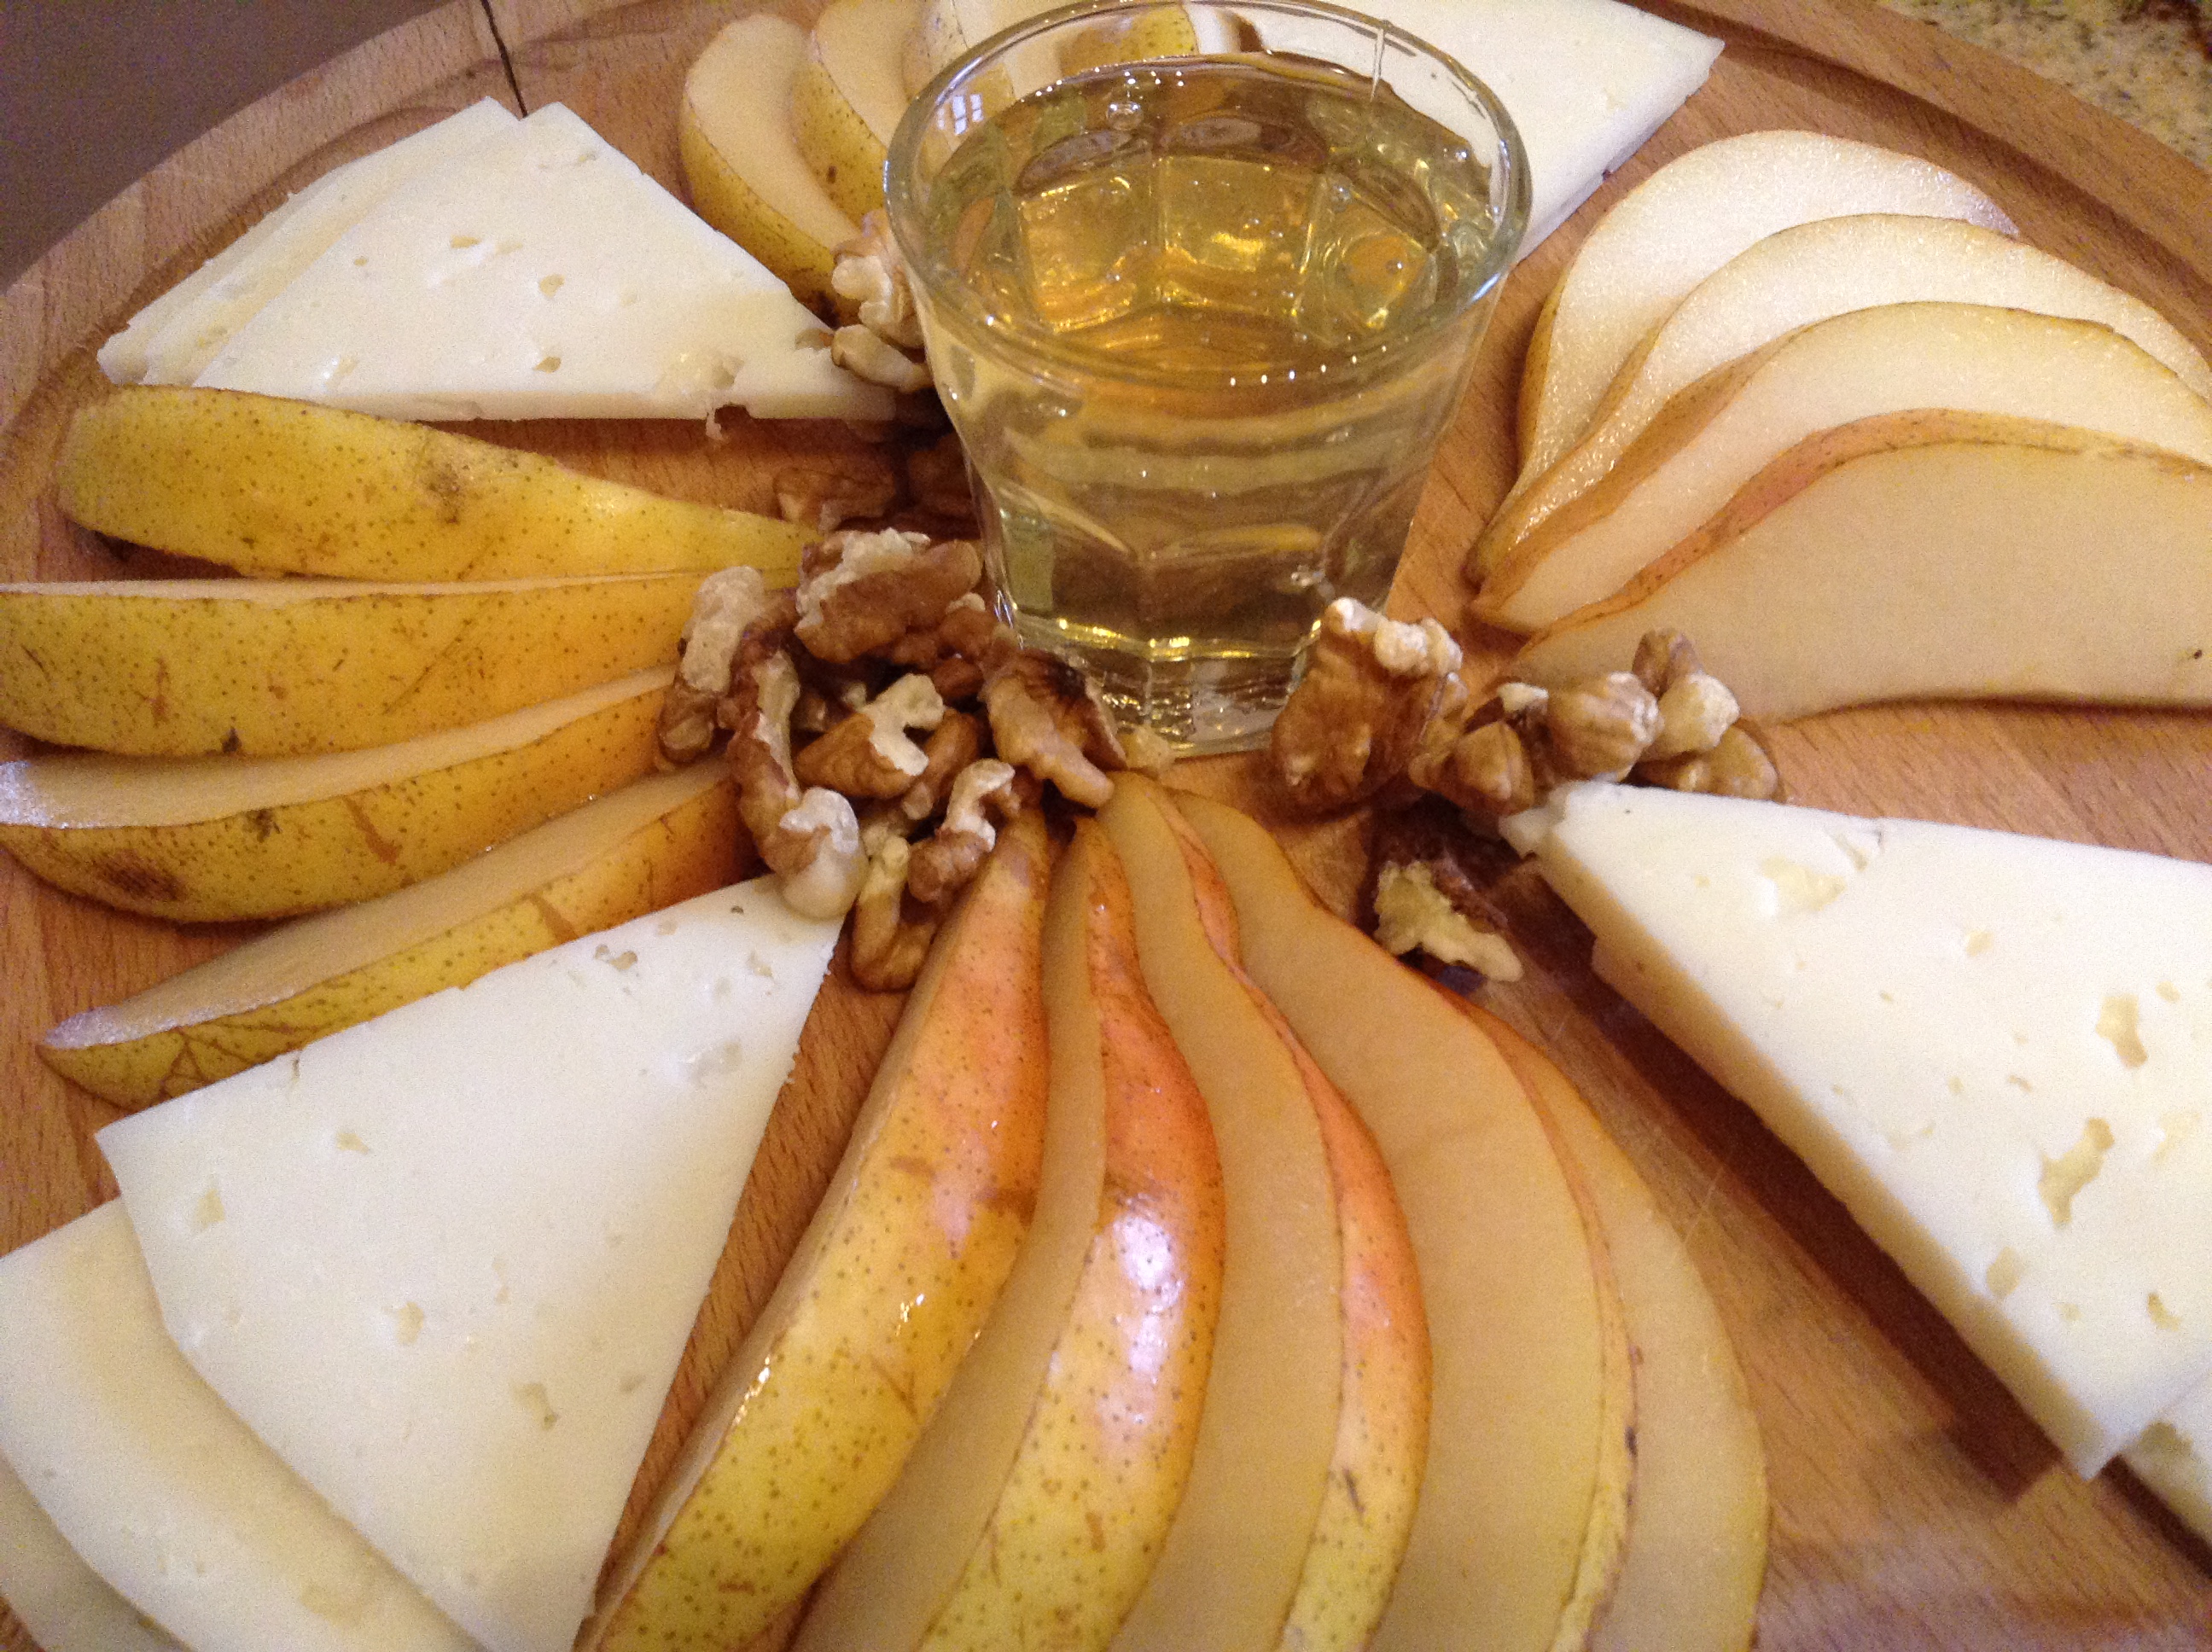
A featured item on the menu in the Garfagnana district, and much of Tuscany, is Pecorino pere e miele – Pecorino with pears and honey. Pecorino is a cheese made from sheep’s milk and each district or town here is very proud of their own version of the cheese. The taste of the cheese changes depending on what type of grass the sheep are fed and how the cheese is aged. Most popular and well known are those produced in Sardinia. A good Pecorino Stagionato is often the finish of a meal, served with pears and walnuts and drizzled with a strong chestnut honey or one of the lighter acacia honeys farmed locally. Their food is simple, but in this simplicity can be found tremendous beauty and taste. Savor the moment.
Print Recipe
Votes: 0
Rating: 0
You:
Rate this recipe!
Pecorino Pere e Miele
SERVINGS4people
|
COOK TIME0minutes |
PREP TIME10 minutes (or less..) |
READY IN10 minutes |
Ingredients
- 1 pears
- 4-5 oz. pecorino fresco, semi-stagionato or stagionato (fresco is a mild and soft form, semi-stationato is also soft but sharper and stagionato is the hardest and sharpest form)
- 1/4 cup honey
- walnuts either in the shell or toasted halves - as many as you prefer
Instructions
- Slice the pear in quarters from top to bottom and remove the core carefully with a pairing knife. Then slice each quarter into three or four thin slices, depending on the thickness you prefer.
- Slice the cheese into small thin wedges.
- Fan the pears on the cutting board or serving plate with the cheese slices in between the pear.
- Set a dish of honey in the center of the board and place your walnuts around.
- Enjoy sharing this with your friends and family. Andiamo mangiare!
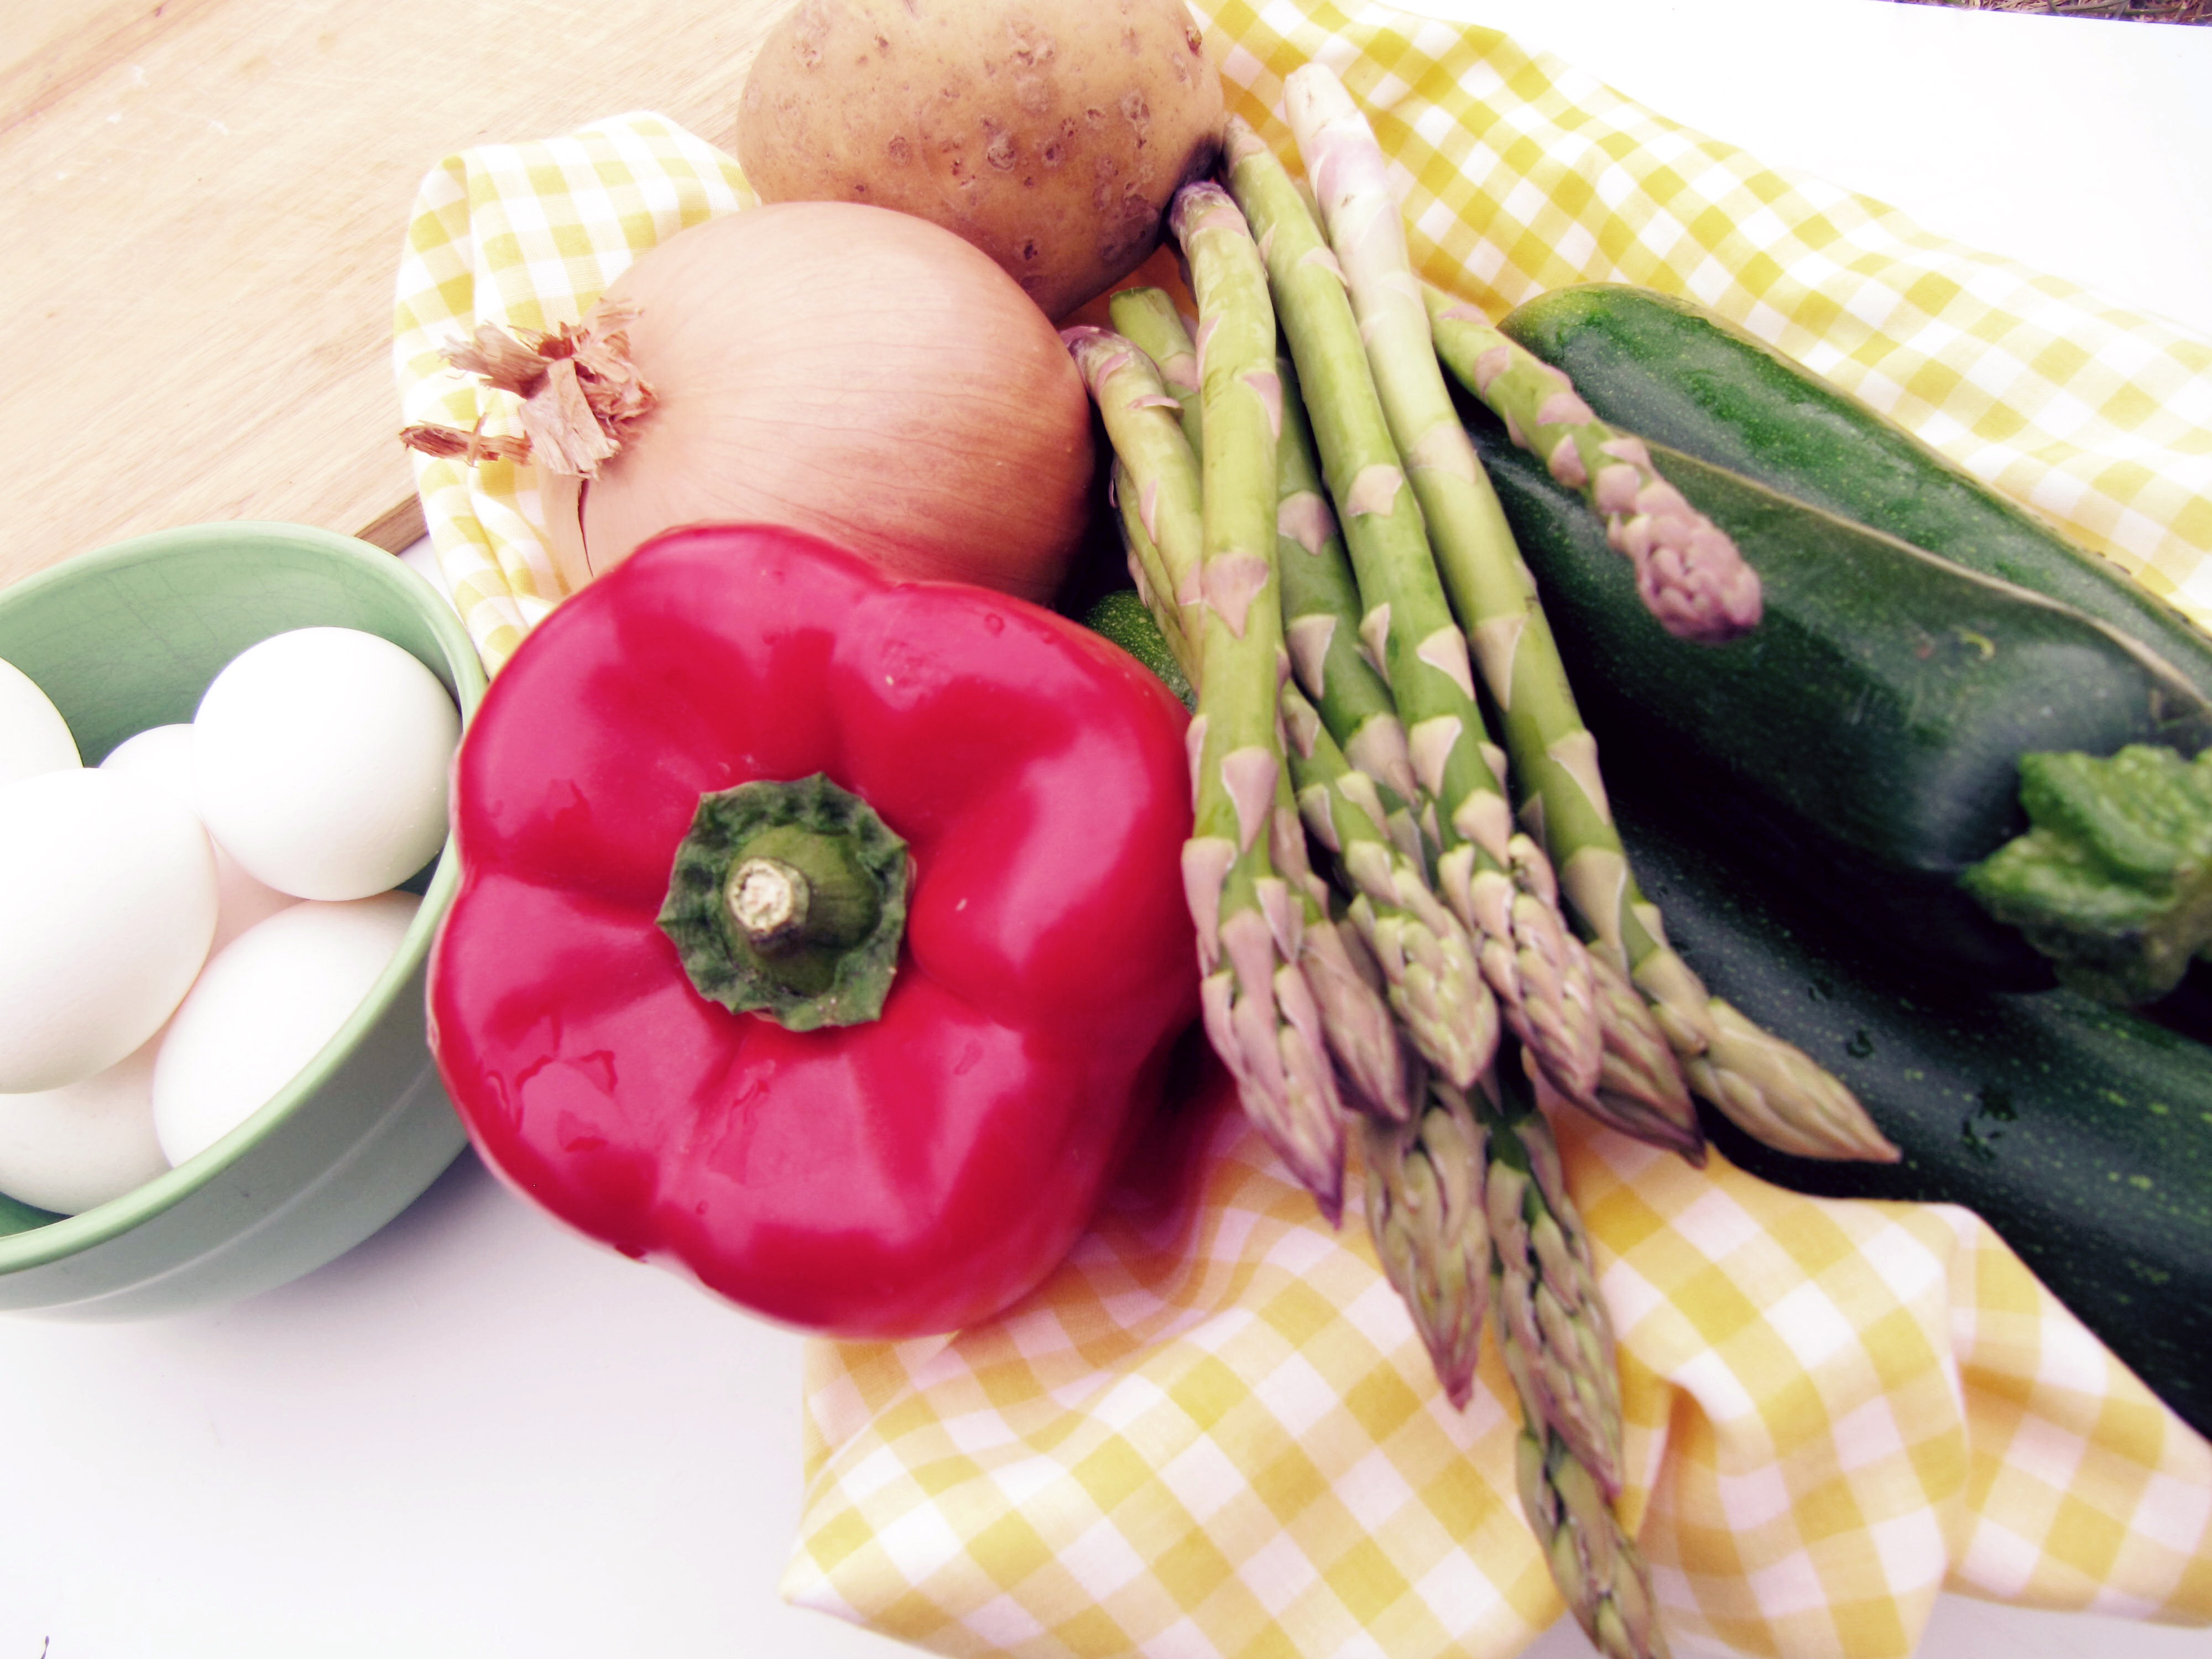
Easter! A day of joy! A day of celebration! That’s why we have been planning a festive Easter Sunday brunch this year. And that’s why we have been experimenting with a number of fresh new ideas to make this an uplifting meal of praise and thanksgiving that will set the tone for the week ahead.
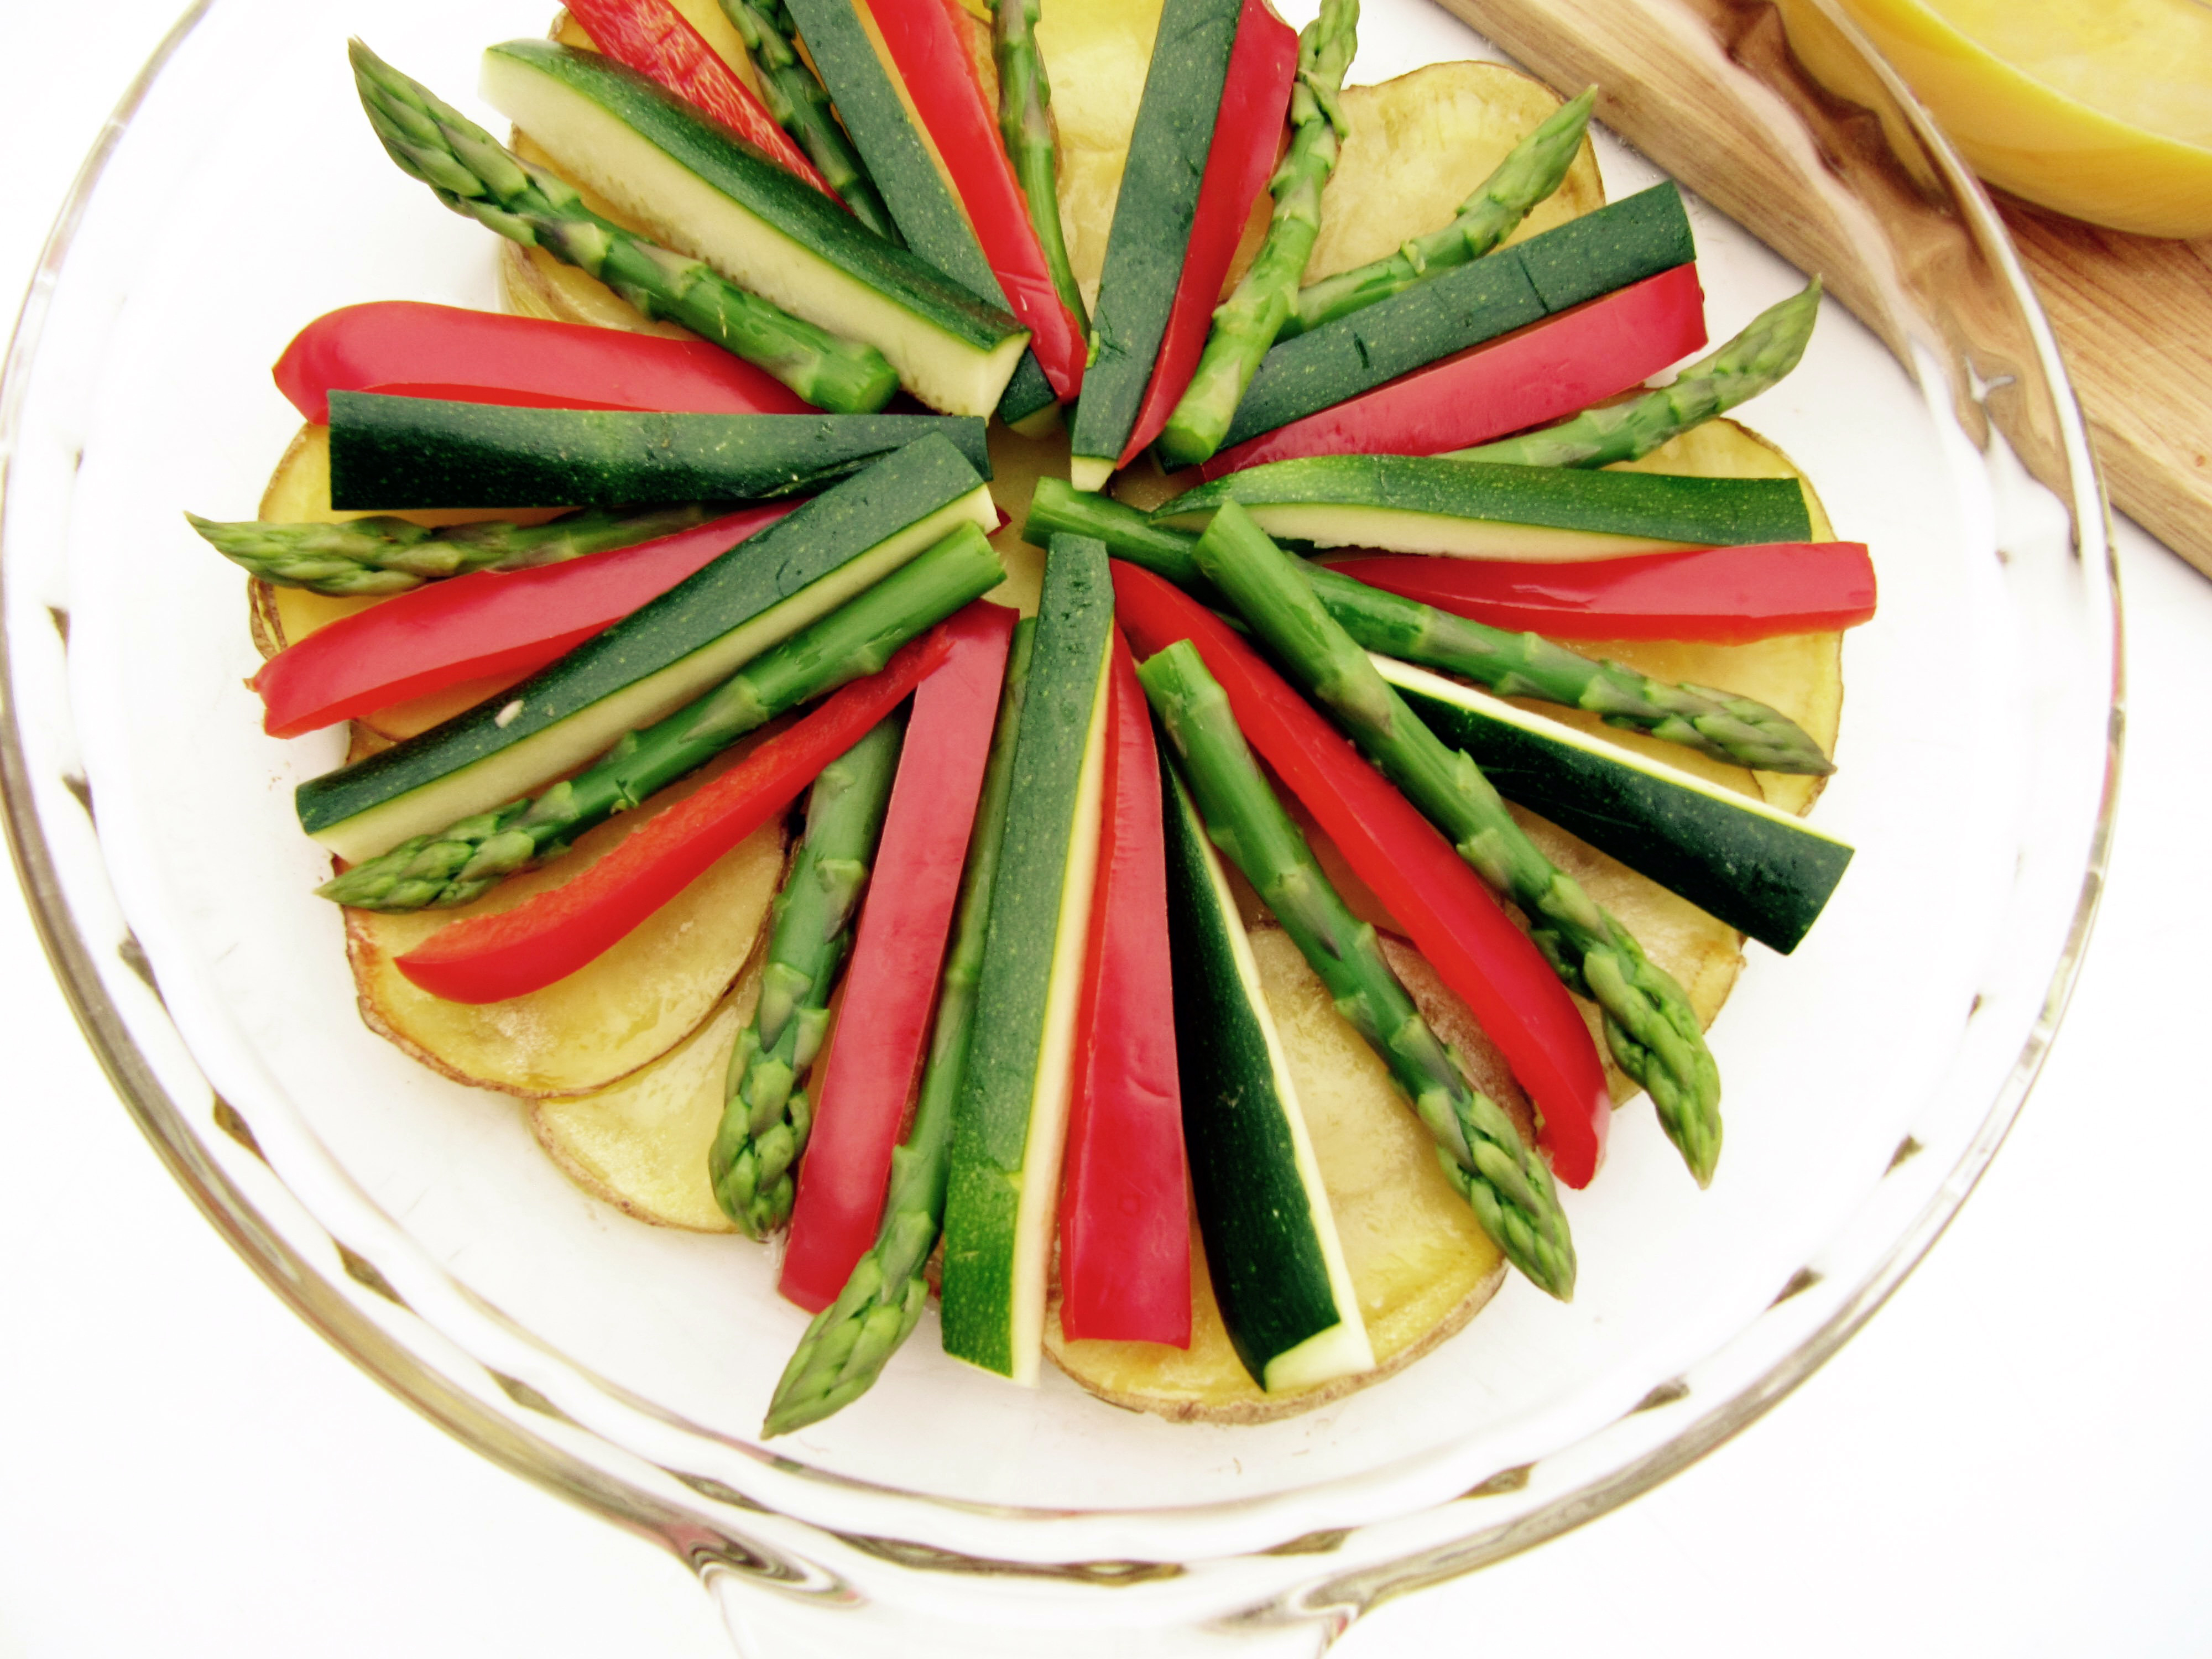
One of the new dishes we put together is a colorful asparagus fritatta. This starts with a tasty potato and onion crust that is filled with a mixture of eggs, cheese, and bacon bits, and then topped with fresh asparagus spears, strips of zucchini, and colorful peppers. To dress it up we garnished it with a couple of crisp bacon curls. We were very pleased with its appearance and we loved its combination of flavors. It is definitely now on our menu, and I am almost certain once it has made its debut in the convent on Easter Sunday it will return for many repeat performances in the days ahead — not only as a brunch or breakfast dish, but as a lovely spring lunch or light supper.
Print Recipe
Votes: 0
Rating: 0
You:
Rate this recipe!
Festive Asparagus Frittata
SERVINGS8people
|
COOK TIME45minutes |
PREP TIME20minutes |
READY IN65minutes |
Ingredients
Instructions
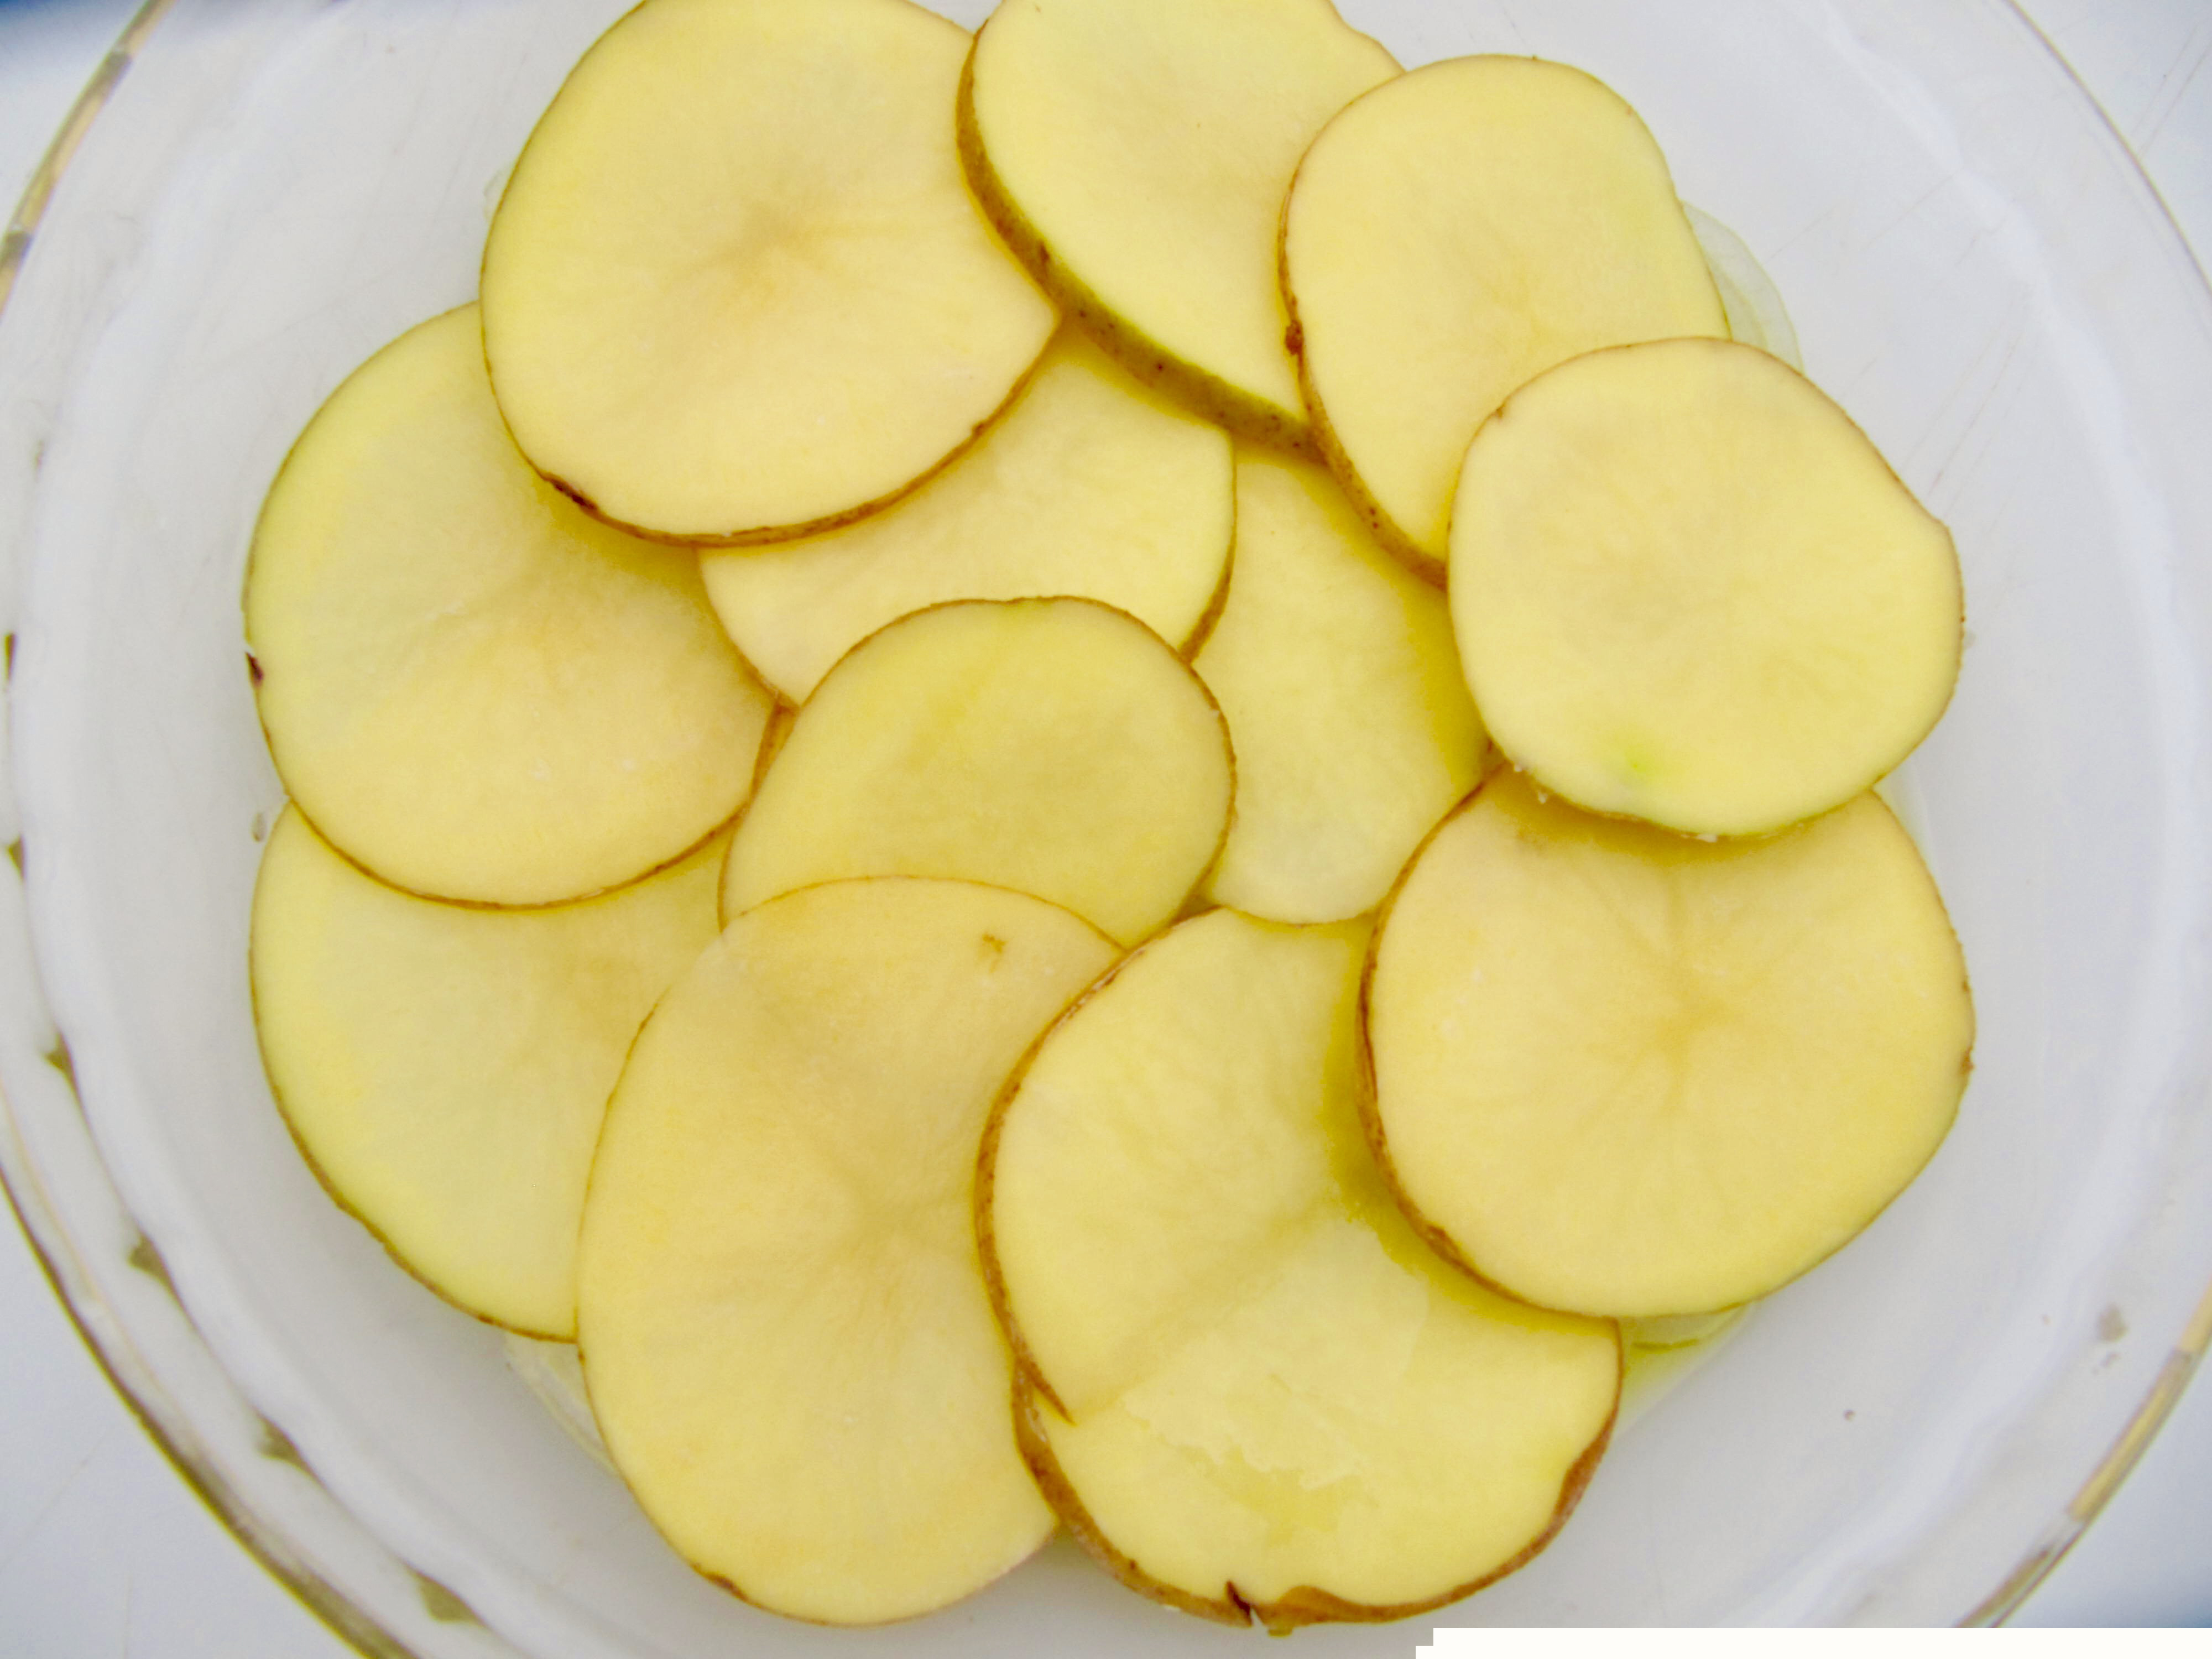
- Drizzle oil over the base of a 9 inch quiche dish, then spread with onions and top with potato slices.
- Cover dish with aluminum foil and bake for 30 minutes or until potato is tender.
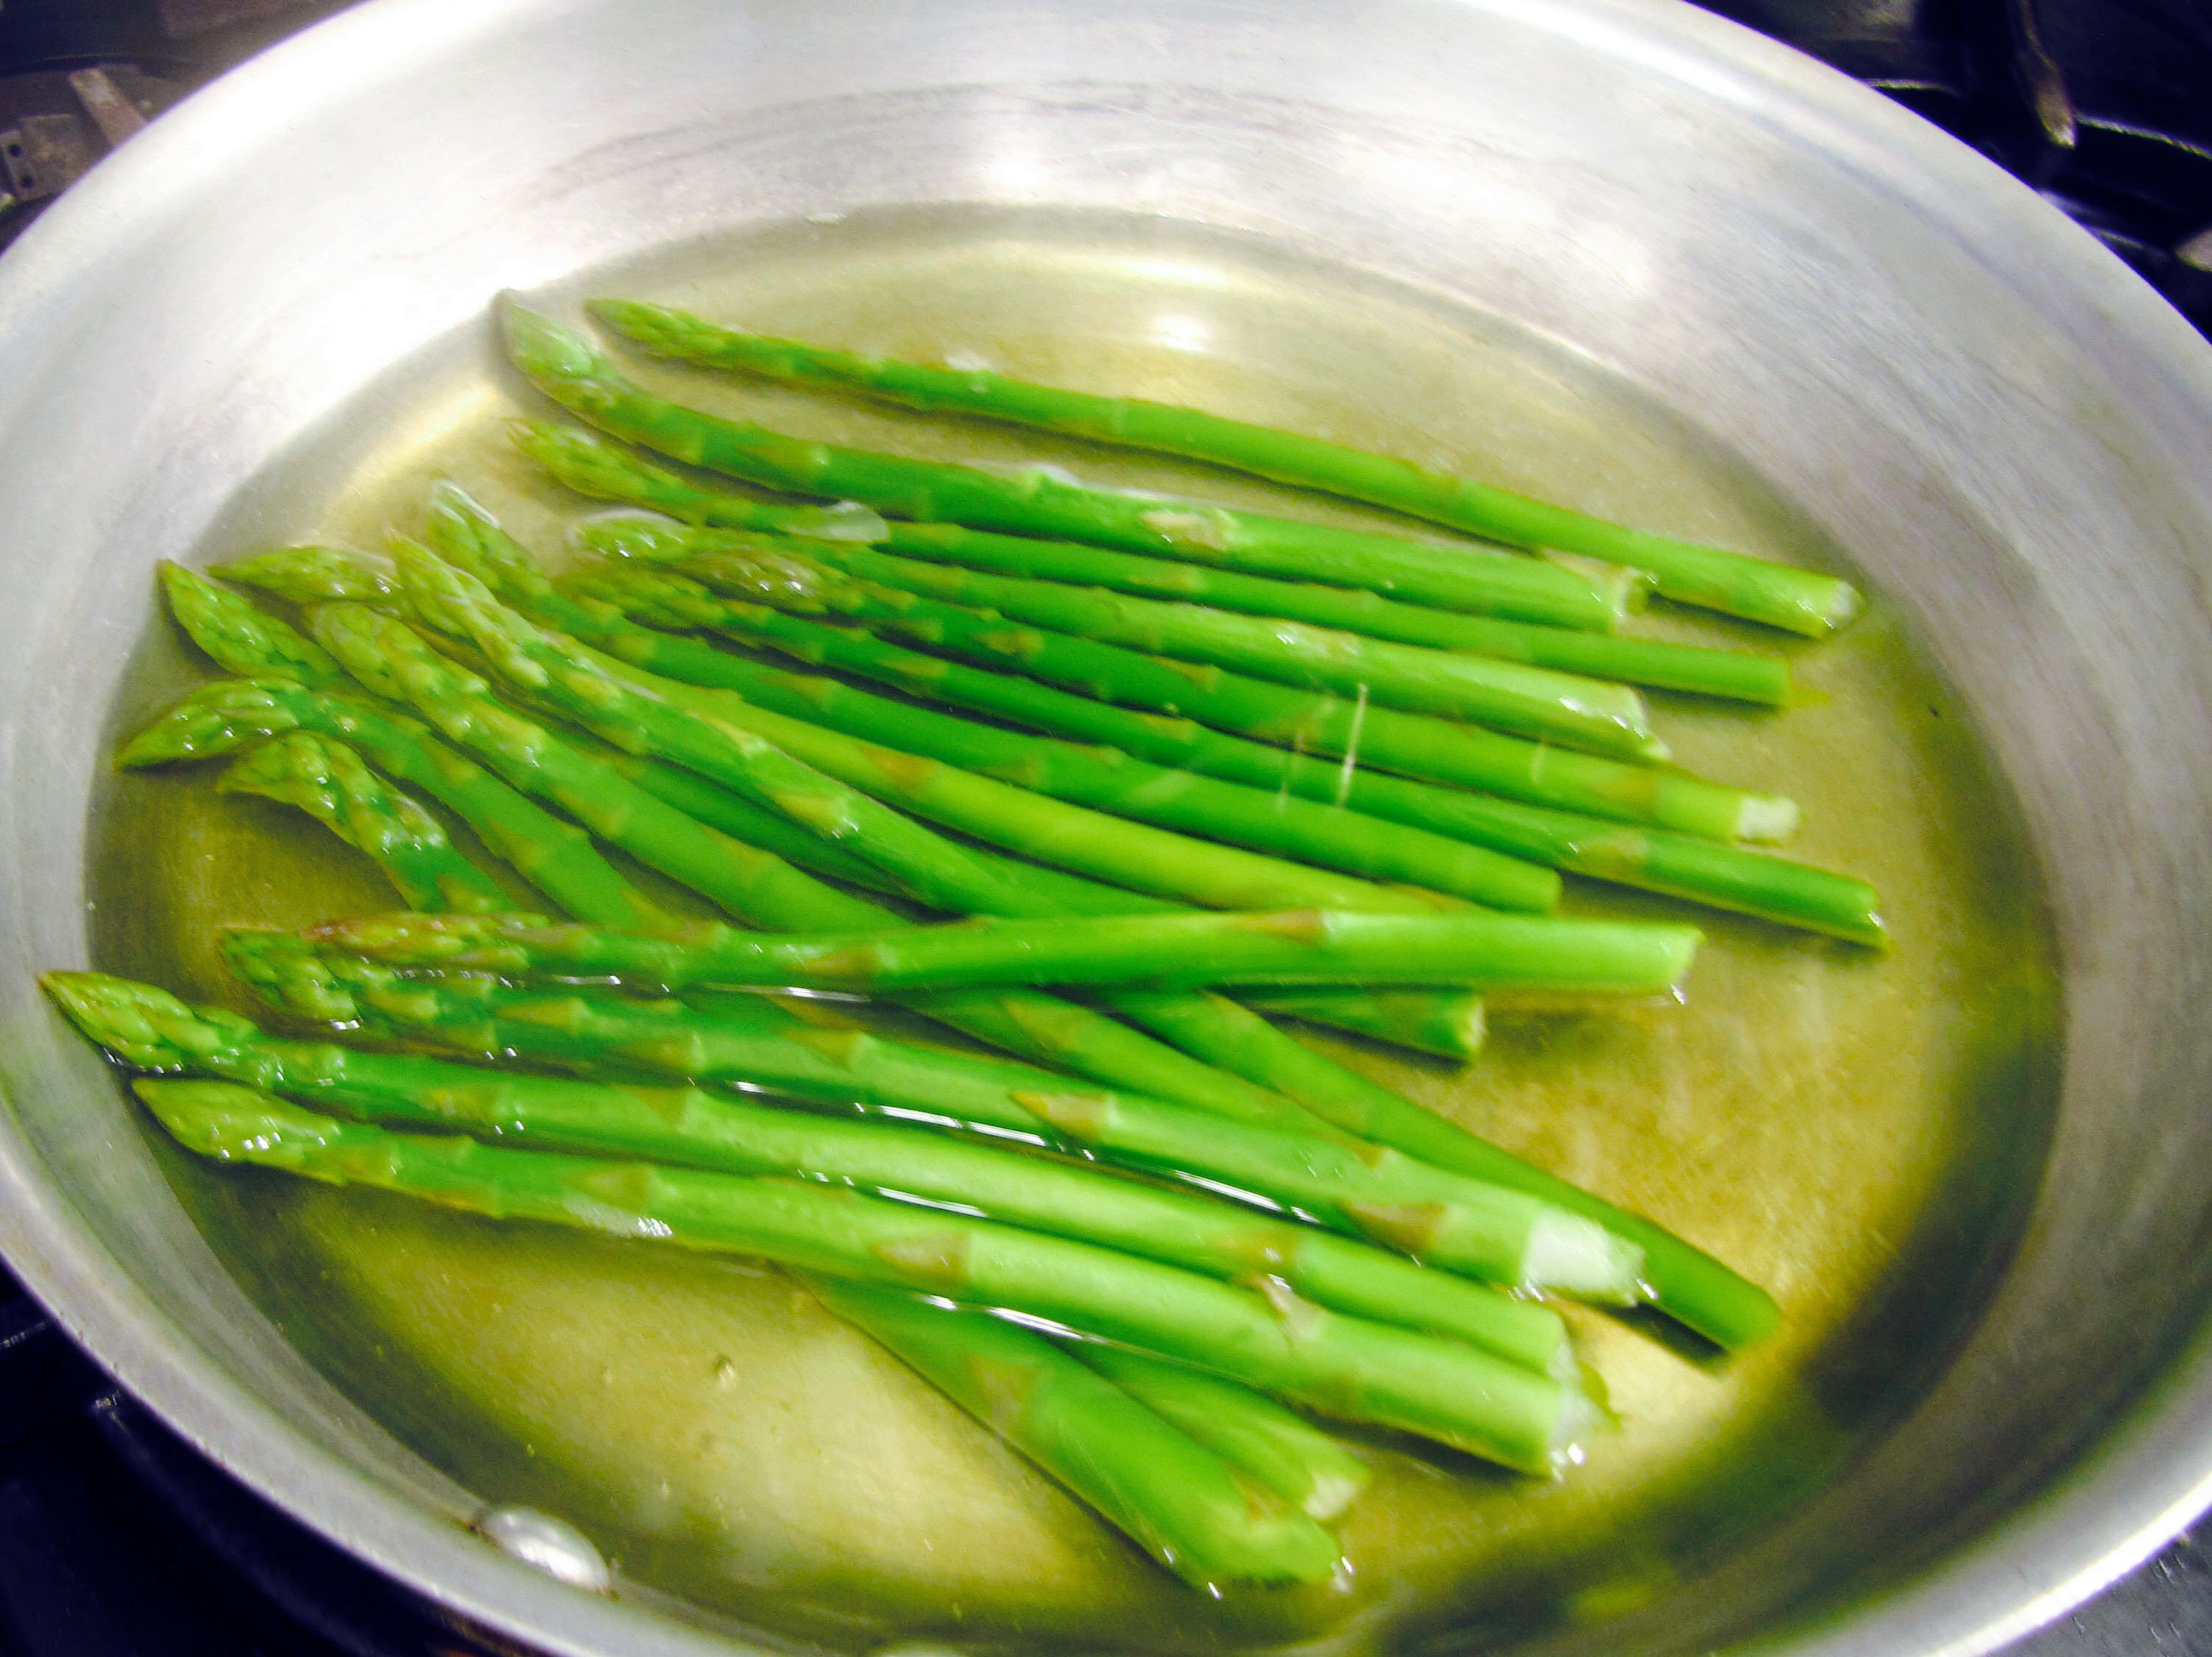
- Steam asparagus until tender.
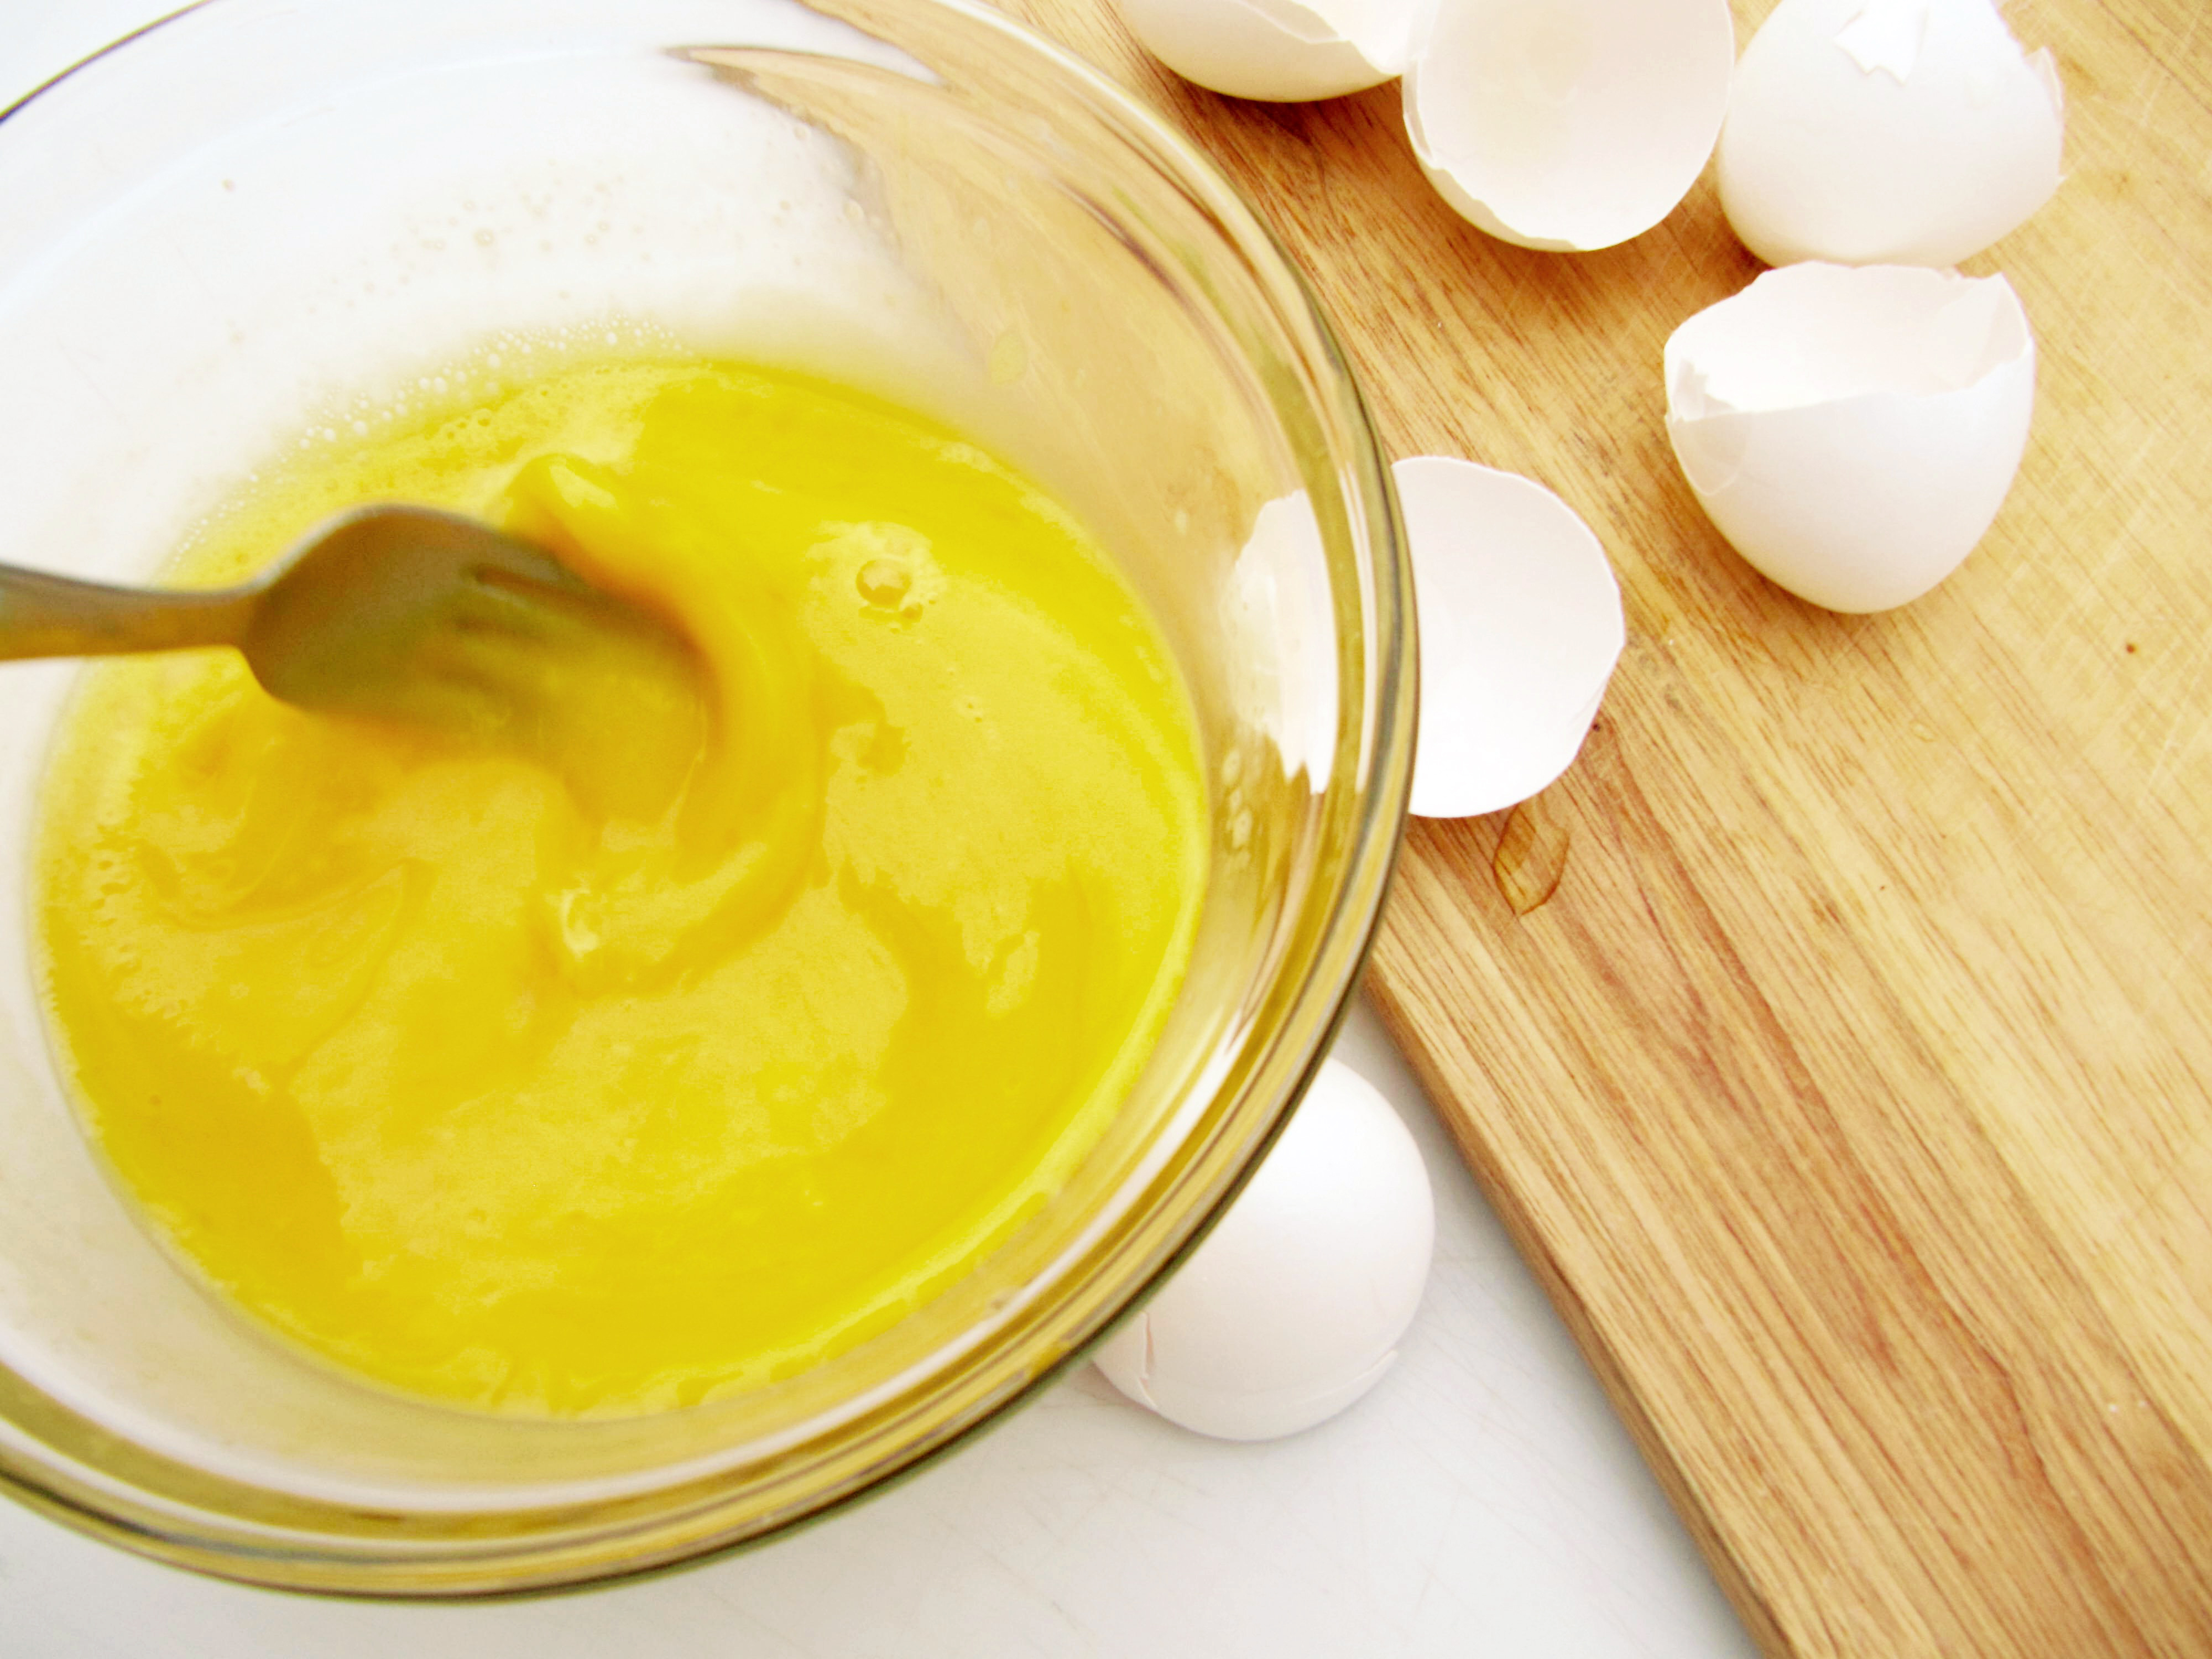
- Arrange asparagus spears and red pepper and zucchini strips like the spokes of a wheel onto top of potato, then pour over eggs and season with black pepper to taste.
- Scatter with Parmesan cheese. Bake uncovered for 15 minutes or until frittata is firm.