Advent is truly a wondrous time—so full of beauty, expectancy and hope. It’s also a time of expressing love and gratitude to those we work with all year long! Here’s a wonderfully simple recipe to serve at any kind of Christmas gathering, with minimal preparation, and with a delicious and lovely result!
In electric mixer, with paddle attachment, beat cream cheese, heavy cream and sugar until smooth. Add the lemon juice, zest and vanilla; continue beating until light and fluffy.
Add a layer of graham cracker crumbs to the bottom of shooters. (For a richer “crust”, mix in 4 tablespoons melted butter first)
Top the layer of cracker crumbs with cheesecake filling, spooning a slight indentation for strawberry topping
Strawberry Topping
Combine chopped berries, cornstarch/warm water mixture, sugar and lemon juice. Bring to gentle boil and allow to simmer until thickened, about 5 Minutes, adding food coloring if desired.
Allow to cool, about 10 minutes (or faster in refrigerator)
Spoon topping onto parfaits and serve, or refrigerate if desired
Note: Best served in 2 1/2 oz glass shooters!
Recipe adapted from "Just a Taste". - See the original recipe at the justataste.com website
As my mother tells it, I requested a chocolate mousse cake for my fifth birthday–and 30 years later it remains a favorite! This recipe appeals to my coffee-loving adult tastes, but with a kid friendly ingredient: Marshmallows.
Skipping the fuss of egg whites and gelatin used in other mousse recipes, this dessert can be prepared in minutes as a final touch to any festive gathering this holiday season. Enjoy!
The change of season is such a lovely time. The air is crisp, the trees are turning brilliant shades of reds and orange, leaves are piling on the ground, and pumpkins greet us on every doorstep. Walking through our community, and seeing these sights, I am inspired to pull these all into one big pot of wonderfulness. The magic that greets you when a delicious bowl of steaming soup appears in front of you is one of community and love.
Preheat oven to 375°F. Oil baking sheet. Place squash, cut side down, on baking sheet. Bake until squash is very soft, about 50 minutes. Using a wooden spoon, remove peel from squash; discard peel.
While the squash is cooking, heat oil in heavy large pot over medium-low heat. Mix in onion, brown sugar, ginger, garlic and cinnamon stick. Cover pot and cook until onion is tender, about 15 minutes, stir occasionally so that your onion does not burn but is slightly golden and caramelized.
Add the cooked squash and 4 cups chicken broth. Bring to a boil, reduce heat to medium-low and cover and simmer for 10 minutes. Take out the cinnamon stick but reserve.
Working in batches, purée soup in blender (or use an immersion blender.) Return soup to pot with the cinnamon stick. If desired, add heavy cream and/or half and half to thin it out to your desired consistency or add more chicken broth. Add the maple syrup to taste. If desired, include a bit of ground cinnamon to taste.
Season soup with salt and pepper. Bring to simmer and ladle into bowls and serve.
(Can be prepared 1 day ahead. Cool slightly. Cover and refrigerate.)
Many years ago when terms like “special diet,” “wheat-free,” etc. were seldom being used, I was introduced to a flourless chocolate cake by a friend whose good judgment regarding food I respected. She maintained that this cake had become a favorite of many whether or not they had any food restrictions. Her husband had some serious ones, but now loved and ate it whenever it was available.
Still skeptical, I put the recipe away until another time. When I’d given up some of my opinions, I made it myself and I became an avid believer!
Grease an 8-inch spring form pan and line the bottom with parchment paper and spray the parchment when in place.
Place the one pound of chocolate in a double boiler on medium-low heat and stir occasionally until the chocolate is melted.
Immediately stir in the butter, flour, sugar, coffee granules, and salt, whisking in the egg yolks until smooth.
Place the egg whites in the bowl of an electric mixer fitted with the whisk attachment and beat until they form soft peaks. Scrape the egg whites into the chocolate mixture and fold them in carefully with a rubber spatula.
Scrape the batter into the prepared pan, level the top, and bake for 15 minutes.
Turn the oven off and leave the cake in the oven, cracking the oven door open and allow the cake to cool in the oven for an hour.
Carefully remove the sides of the pan and slide the cake onto a flat serving plate.
Top with whipped cream, a dusting of cocoa powder, raspberries and a sprig of fresh mint for an elegant--and flourless--chocolate dessert!
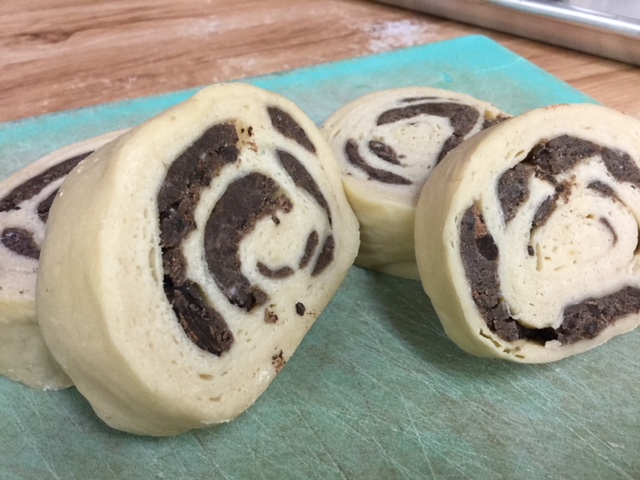
One of our sisters has a special interest in cooking the foods of other countries. Over time she has heard me repeat many stories of my Ukrainian mother’s experiences with food and what I learned about it through her.
Perhaps my favorite memory is that of packing our picnic boxes for our all-day blueberry picking excursions. These always contained fresh baked babka, lots of butter some fresh boiled eggs from our chickens and a little horseradish root from our garden. Today’s blog features a glorified babka bread filled with chocolate…enjoy!
Combine yeast with warm water and let stand until it begins to bubble, about 5-8 minutes.
Mix flour, sugar, yeast, and lemon zest in a mixer on a low speed until combined.
Add eggs and water, and mix on medium speed until dough comes together, 2-3 minutes. Add salt, then butter, adding a few cubes at a time, mixing until thoroughly combined. Continue mixing for about 10 minutes on medium speed, until dough is completely smooth,and pulls away from the sides of the bowl. Be sure to scrape the sides of the bowl during this step!
Place dough in a large greased bowl cover with plastic wrap. Let rise in a warm place until doubled in size.
Grease two 9x4 inch loaf pans with oil and line the bottom of each pan with waxed paper. Divide dough in half and keep one half covered in the fridge.
Filling and Baking
Whisk together powdered sugar, cocoa powder, chocolate, and butter until you have a spreadable paste.
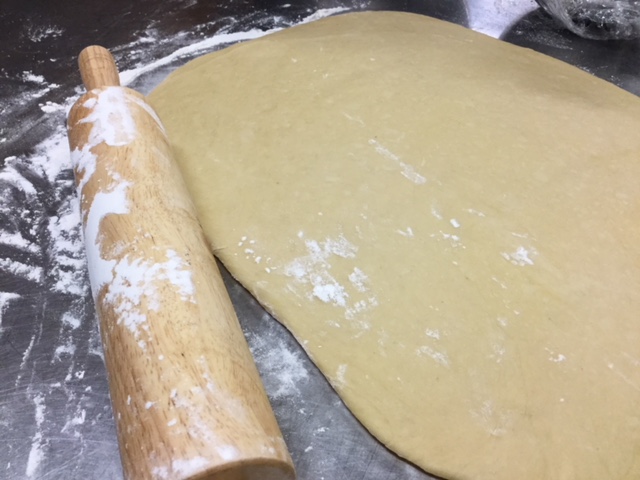
Roll out dough on a lightly floured surface and shape into a rectangle as wide as the pans are long.
Position dough so that a long side is closest to you and spread half of the chocolate mixture over the rectangle, leaving a ¾ inch/2 cm border all around.
Roll up the rectangle like a jellyroll, starting from the long side closest to you and ending at the other long end. Press to seal the dampened end, then use both hands to even out the roll into a uniform roll and place it on your surface seam side down.
Trim about ¾ inch/2 cm off both ends, and slice the loaf into even 1-inch segments. Cover the pan loosely with plastic wrap and leave to rise in a warm place for 1½ hours.
Preheat oven to 375°F. Remove plastic wrap and place loaves on middle rack of oven, and bake for about 25-30 minutes.
Remove from oven when done and let cool. Babka will stay fresh for 24 hours in an airtight container at room temperature or tightly wrapped--don’t place in the fridge.
Babka freezes well for up to 2 months. To thaw, leave on counter or overnight in the fridge, and leftovers make excellent bread pudding or fabulous French Toast!
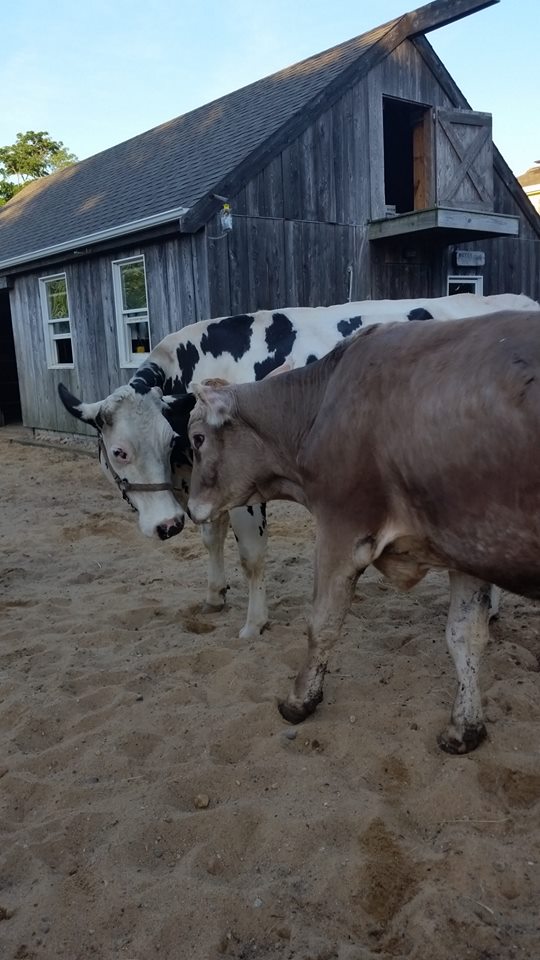
Our community is blessed with two dairy cows, and we enjoy fresh milk and yogurt each week!
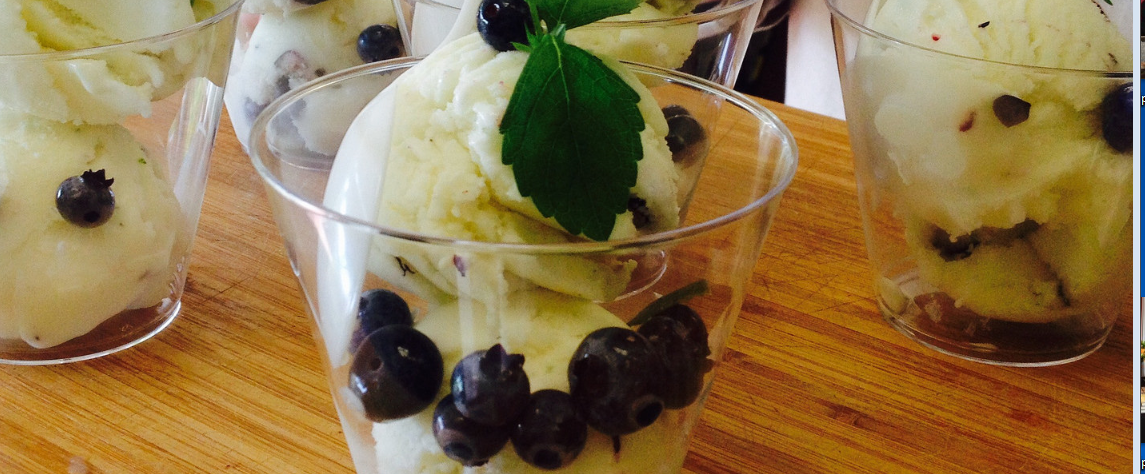
Sometimes we make ricotta for upscale recipes. My favorite? Fresh Ricotta Blueberry Ice cream.
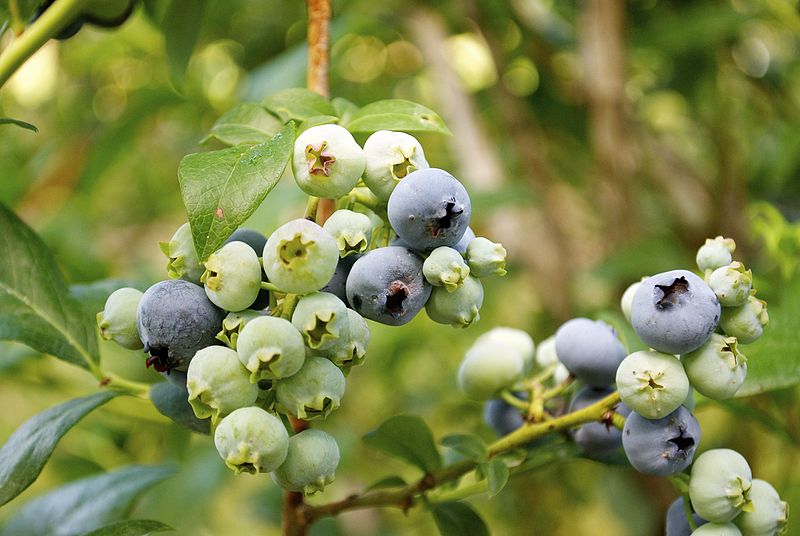
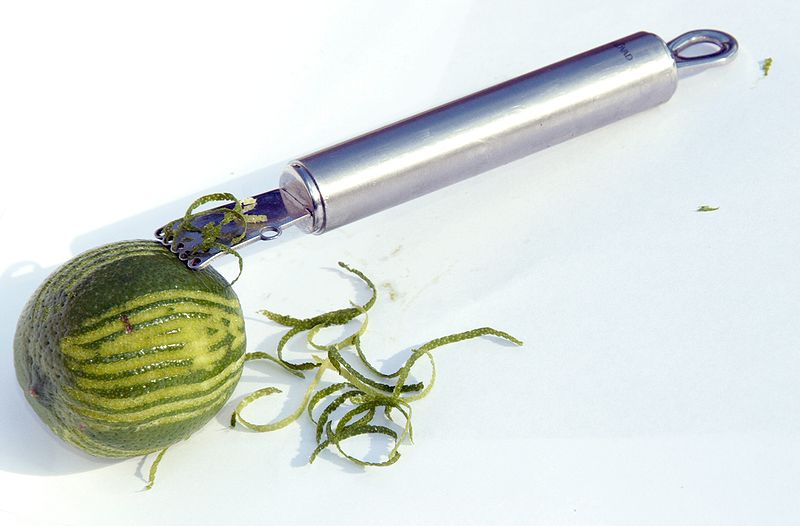
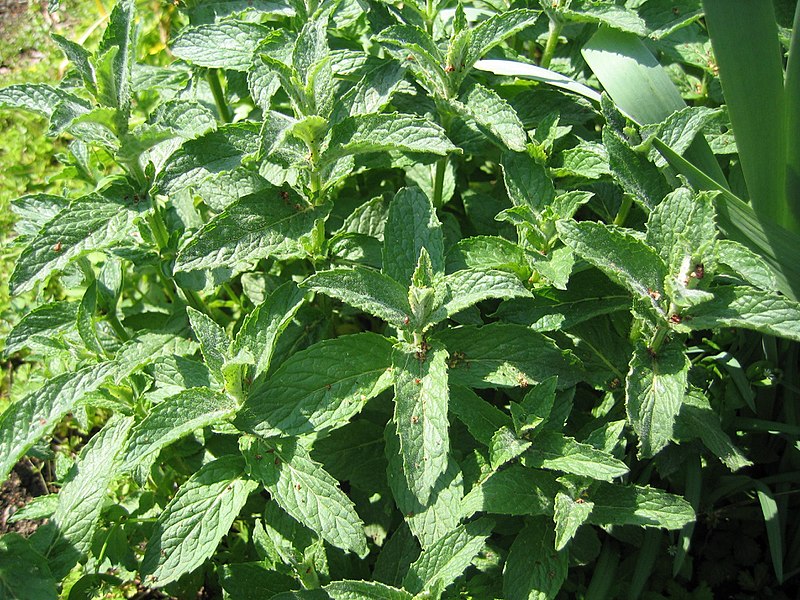
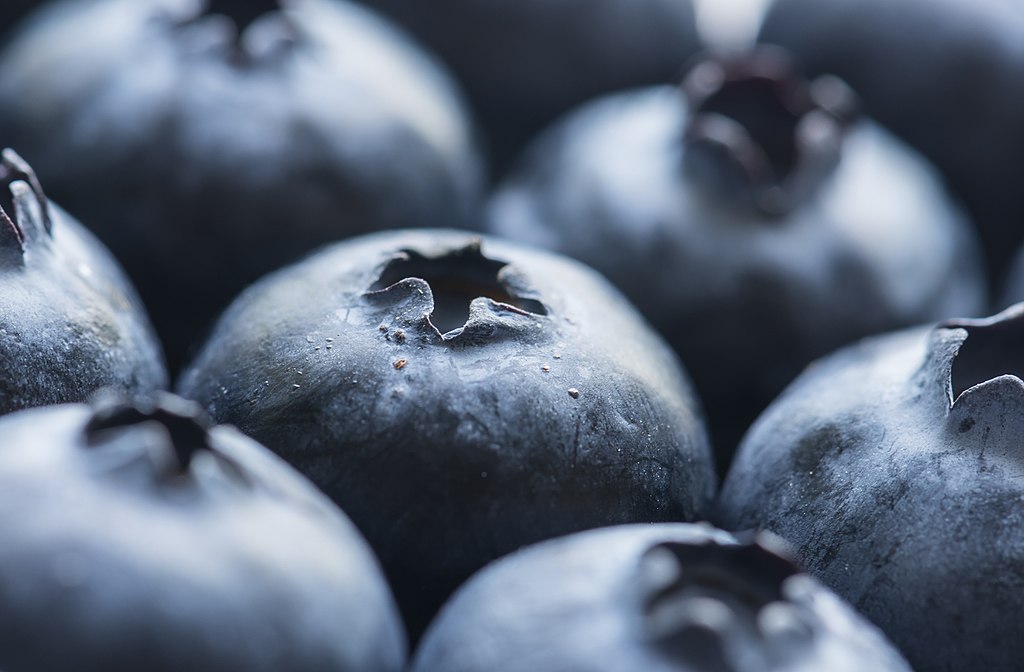
Last week, after enjoying delicious fresh ricotta, ham, and melon salad, I spotted some extra ricotta and remembered a recipe for ricotta ice cream. A friend from a nearby farm with blueberry bushes had invited us to pick berries earlier in the week, so our refrigerator also had a bucket overflowing with beautiful fresh blueberries. The ricotta, blueberries, and kosher salt turned out to be a delicious combination, but of course, this basic homemade ice cream recipe can be adjusted to include your favorite ingredients. At the last minute, I decided to add lime zest to this recipe — Blueberry Lime Jam is one of the favorites from the Monastery Kitchen line, so I thought that combination would be especially tasty. It’s also the season for fresh mint, which is a lovely garnish along with fresh blueberries.
Making homemade ice cream can seem daunting, but with an ice cream maker, it’s quite easy. The ingredients directly are mixed, placed in the ice cream maker for 30 – 60 minutes, then frozen for several more hours, or overnight in the freezer. This particular recipe was made to celebrate an exciting event, and would be perfect for a summer dessert for any special occasion!
Lay blueberries out on a tray and place in the freezer.
Blend ricotta, cream cheese, milk, sugar, vanilla and salt in a blender until smooth. Add lime zest & heavy cream. Blend until just combined.
Freeze in an ice cream maker according to instructions. Blend in frozen blueberries. Transfer to an airtight container and put in freezer to harden.
Scoop and enjoy!
Also - nuts, candied citrus peeled or chopped chocolate can be added, as well as fresh mint and blueberries for garnish.


")


")