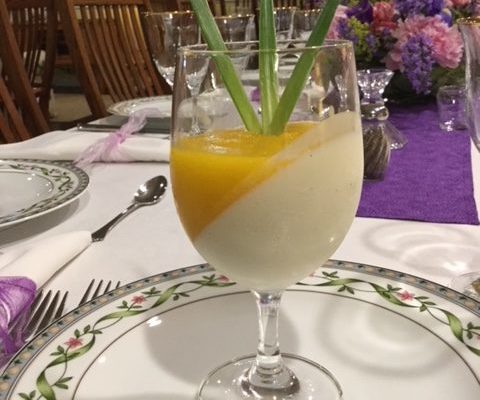
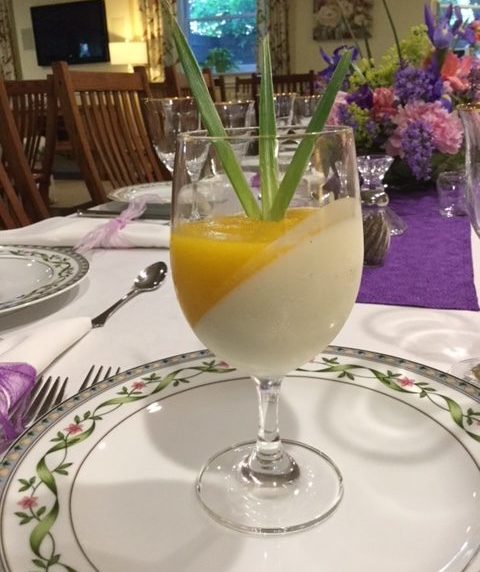
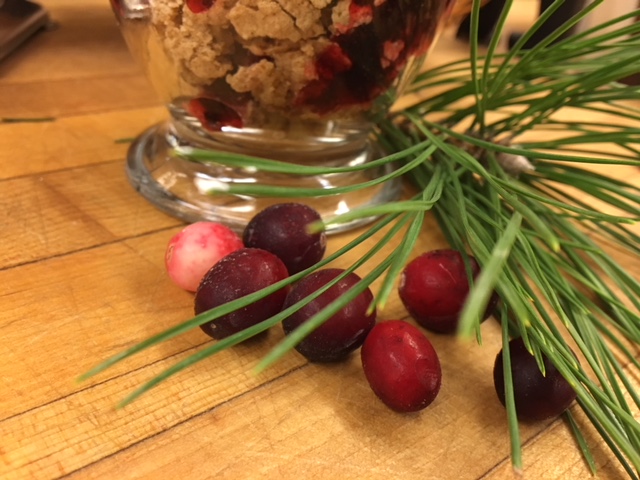
Birthdays are joyous occasions, and with so many Sisters in the Convent, there are bound to be several birthday celebrations each month. This is especially true with what we refer to as “big birthdays”, birthdays that mark a new decade in the life of a sister. Over the weekend, we celebrated the 70th birthday of one of our sisters with a beautiful dinner for all. The meal ended with one of our most favorite desserts: Vanilla Bean Panna Cotta. While not a traditional birthday cake, this was no less festive as it also featured a delicious mango puree.
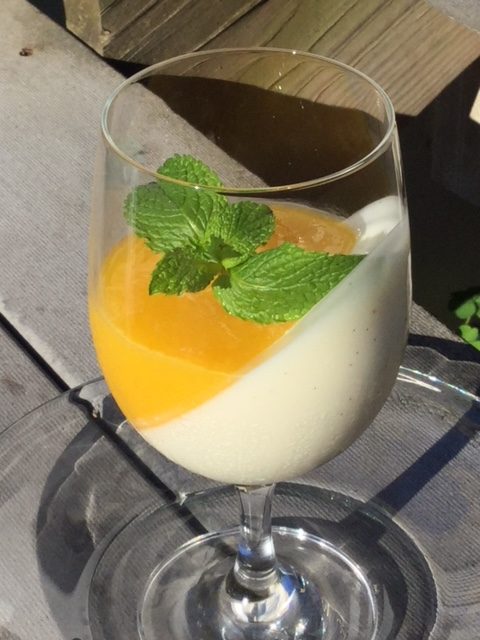
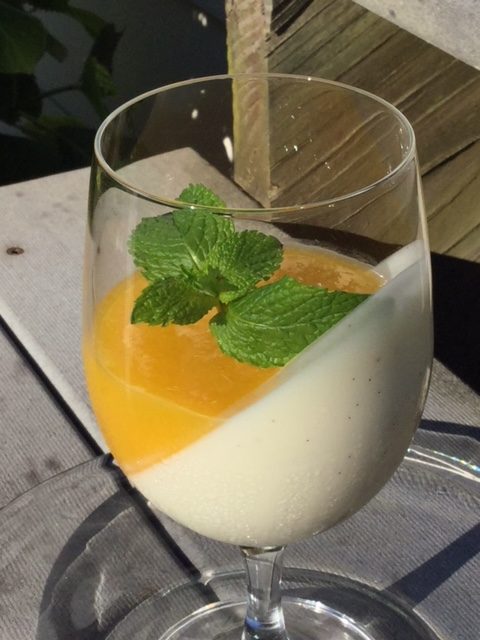
Dense, creamy and with minimal ingredients you most likely already have in your kitchen, this is a great way to mark special occasions this summer. Served chilled with fresh berries, this may well become a favorite with you and your guests!
Print Recipe
Votes: 0
Rating: 0
You:
Rate this recipe!
Vanilla Bean Panna Cotta with Mango Puree
SERVINGS6-8servings
|
COOK TIME15mins, plus chilling time (overnight/6hours) |
PREP TIME15mins |
READY IN30mins, plus chilling time |
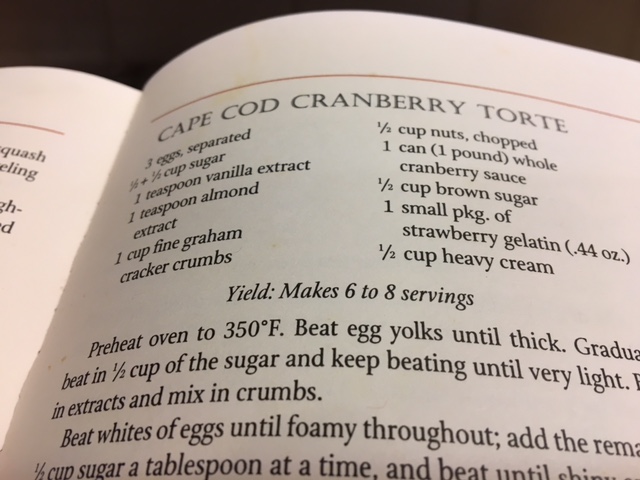
Ingredients
Instructions
- Place the cream in a saucepan and scrape out the seeds of the vanilla bean with a knife, adding the seeds to the cream.
- Add the sugar and bring to a simmer over medium-low heat, stirring occasionally.
- In a separate bowl, sprinkle the gelatin over the milk and let stand until the gelatin softens, about 5 minutes.
- Pour the gelatin mixture into the cream and vanilla bean mixture and stir until dissolved.
- Add the yogurt and stir to thoroughly incorporate.
- Pour evenly into six to eight ramekin and cover with plastic wrap. Chill for 6 hours or overnight for the panna cotta to set.
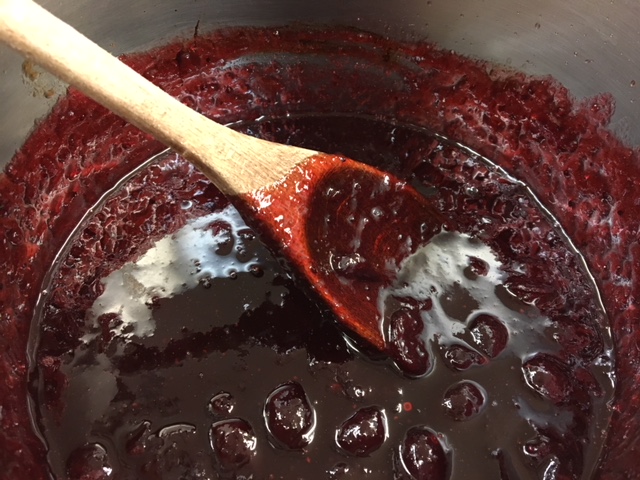
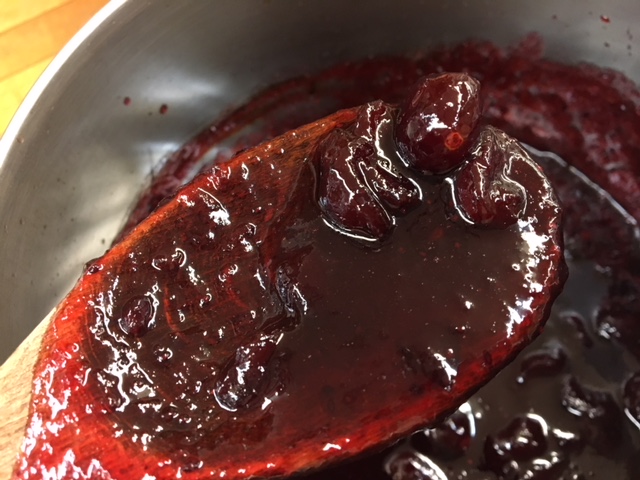
- As this is chilling, prepare the mango puree by combining the fruit, sugar, lemon juice and salt in a blender or food processor. Chill in a bowl until panna cotta is ready to serve.
To Serve
Note: There are several ways to serve this dessert. As shown, we chose to chill the panna cotta at an angle and serve in a clear water goblet for a pleasing visual effect. For the more ambitious, panna cotta can be served inverted on a plate, similar to flan. Below are two methods of serving this dessert--both are equally impressive!
Inverted Method
- Once the panna cotta has set, place each ramekin in warm water--the water should be halfway up the sides of the ramekin.
- Once this has been in the water bath 1-2 minutes, put your serving plate on top of the ramekin and invert the panna cotta onto the plate.
- Spoon the puree over the top and garnish with fruit and fresh mint as desired.
Angled Method
- Before making the panna cotta, prepare the glasses you will be serving in, tilting them securely at an angle on a tray. An egg carton works well for this.
- When pouring panna cotta mixture, use a funnel and gently fill the tilted glasses to the desired height.
- Carefully transfer the tray into the refrigerator, taking care not to bump or jostle the tray, as this will leave a milky residue on the side of the glass.
- When fully set (6 hours or overnight) stand the glasses upright and pipe in the mango puree. Piping helps control the puree and keep it from smearing on the glass.
- Garnish with fruit or mint and serve.
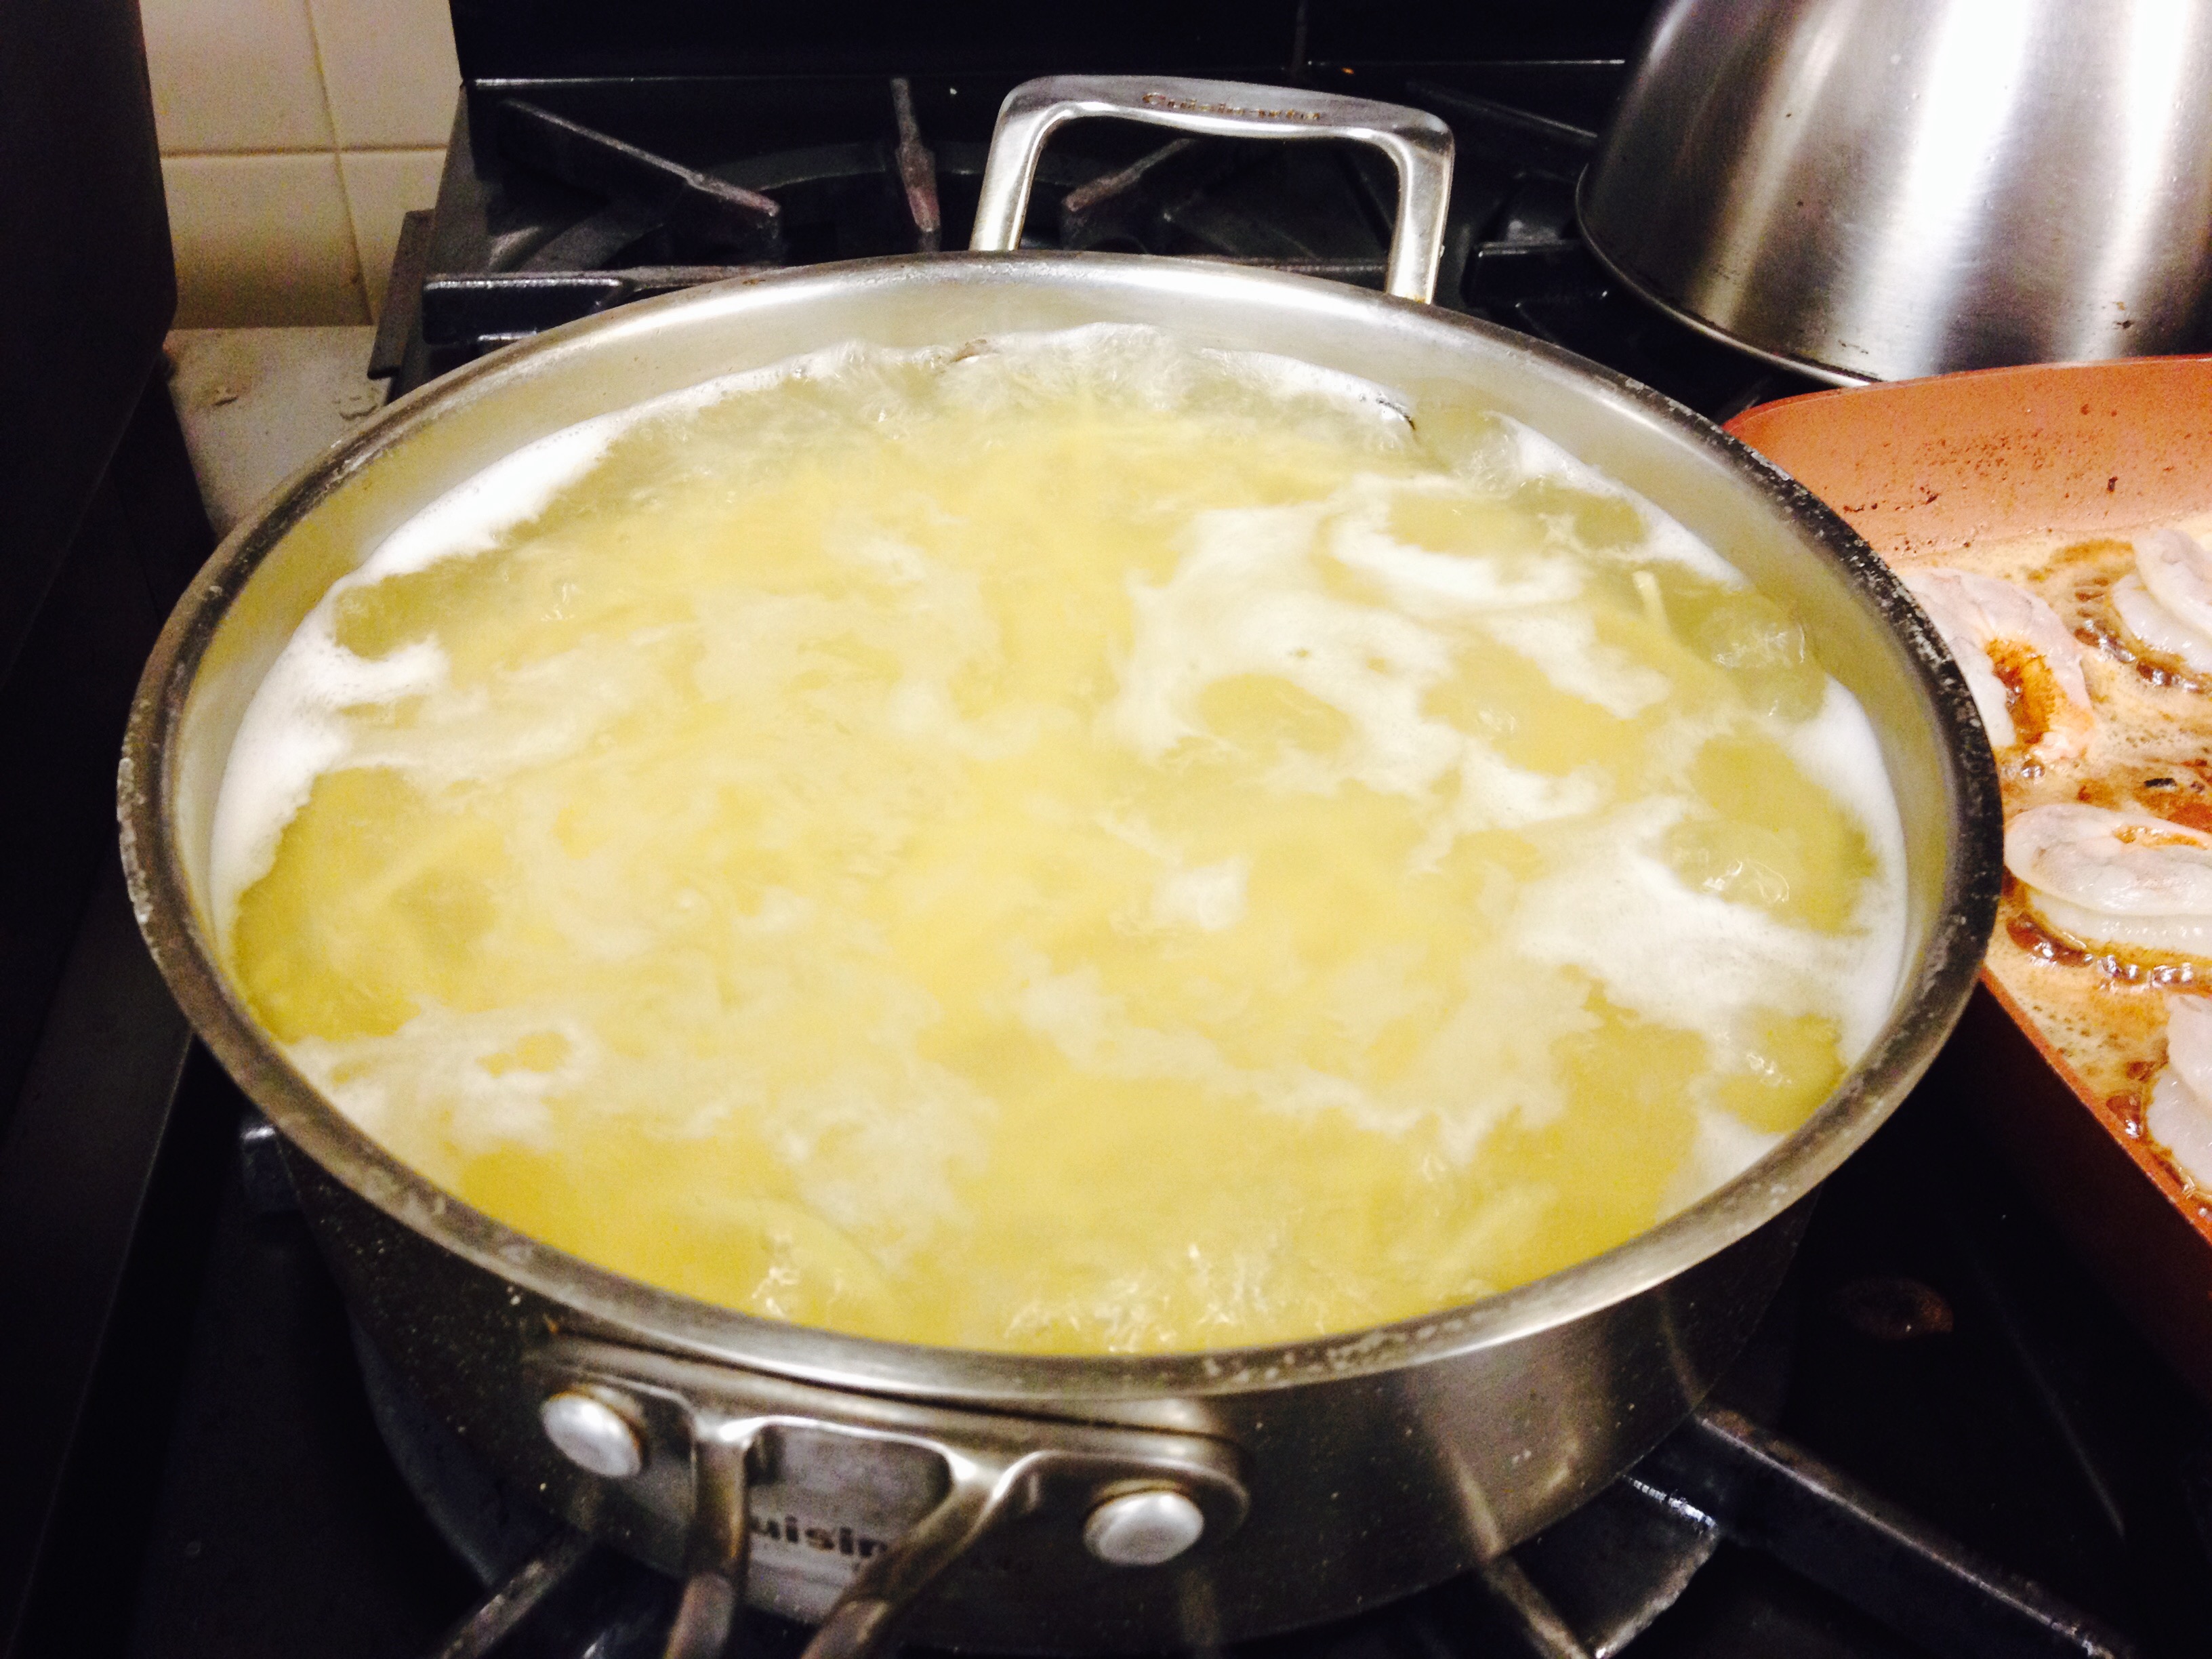
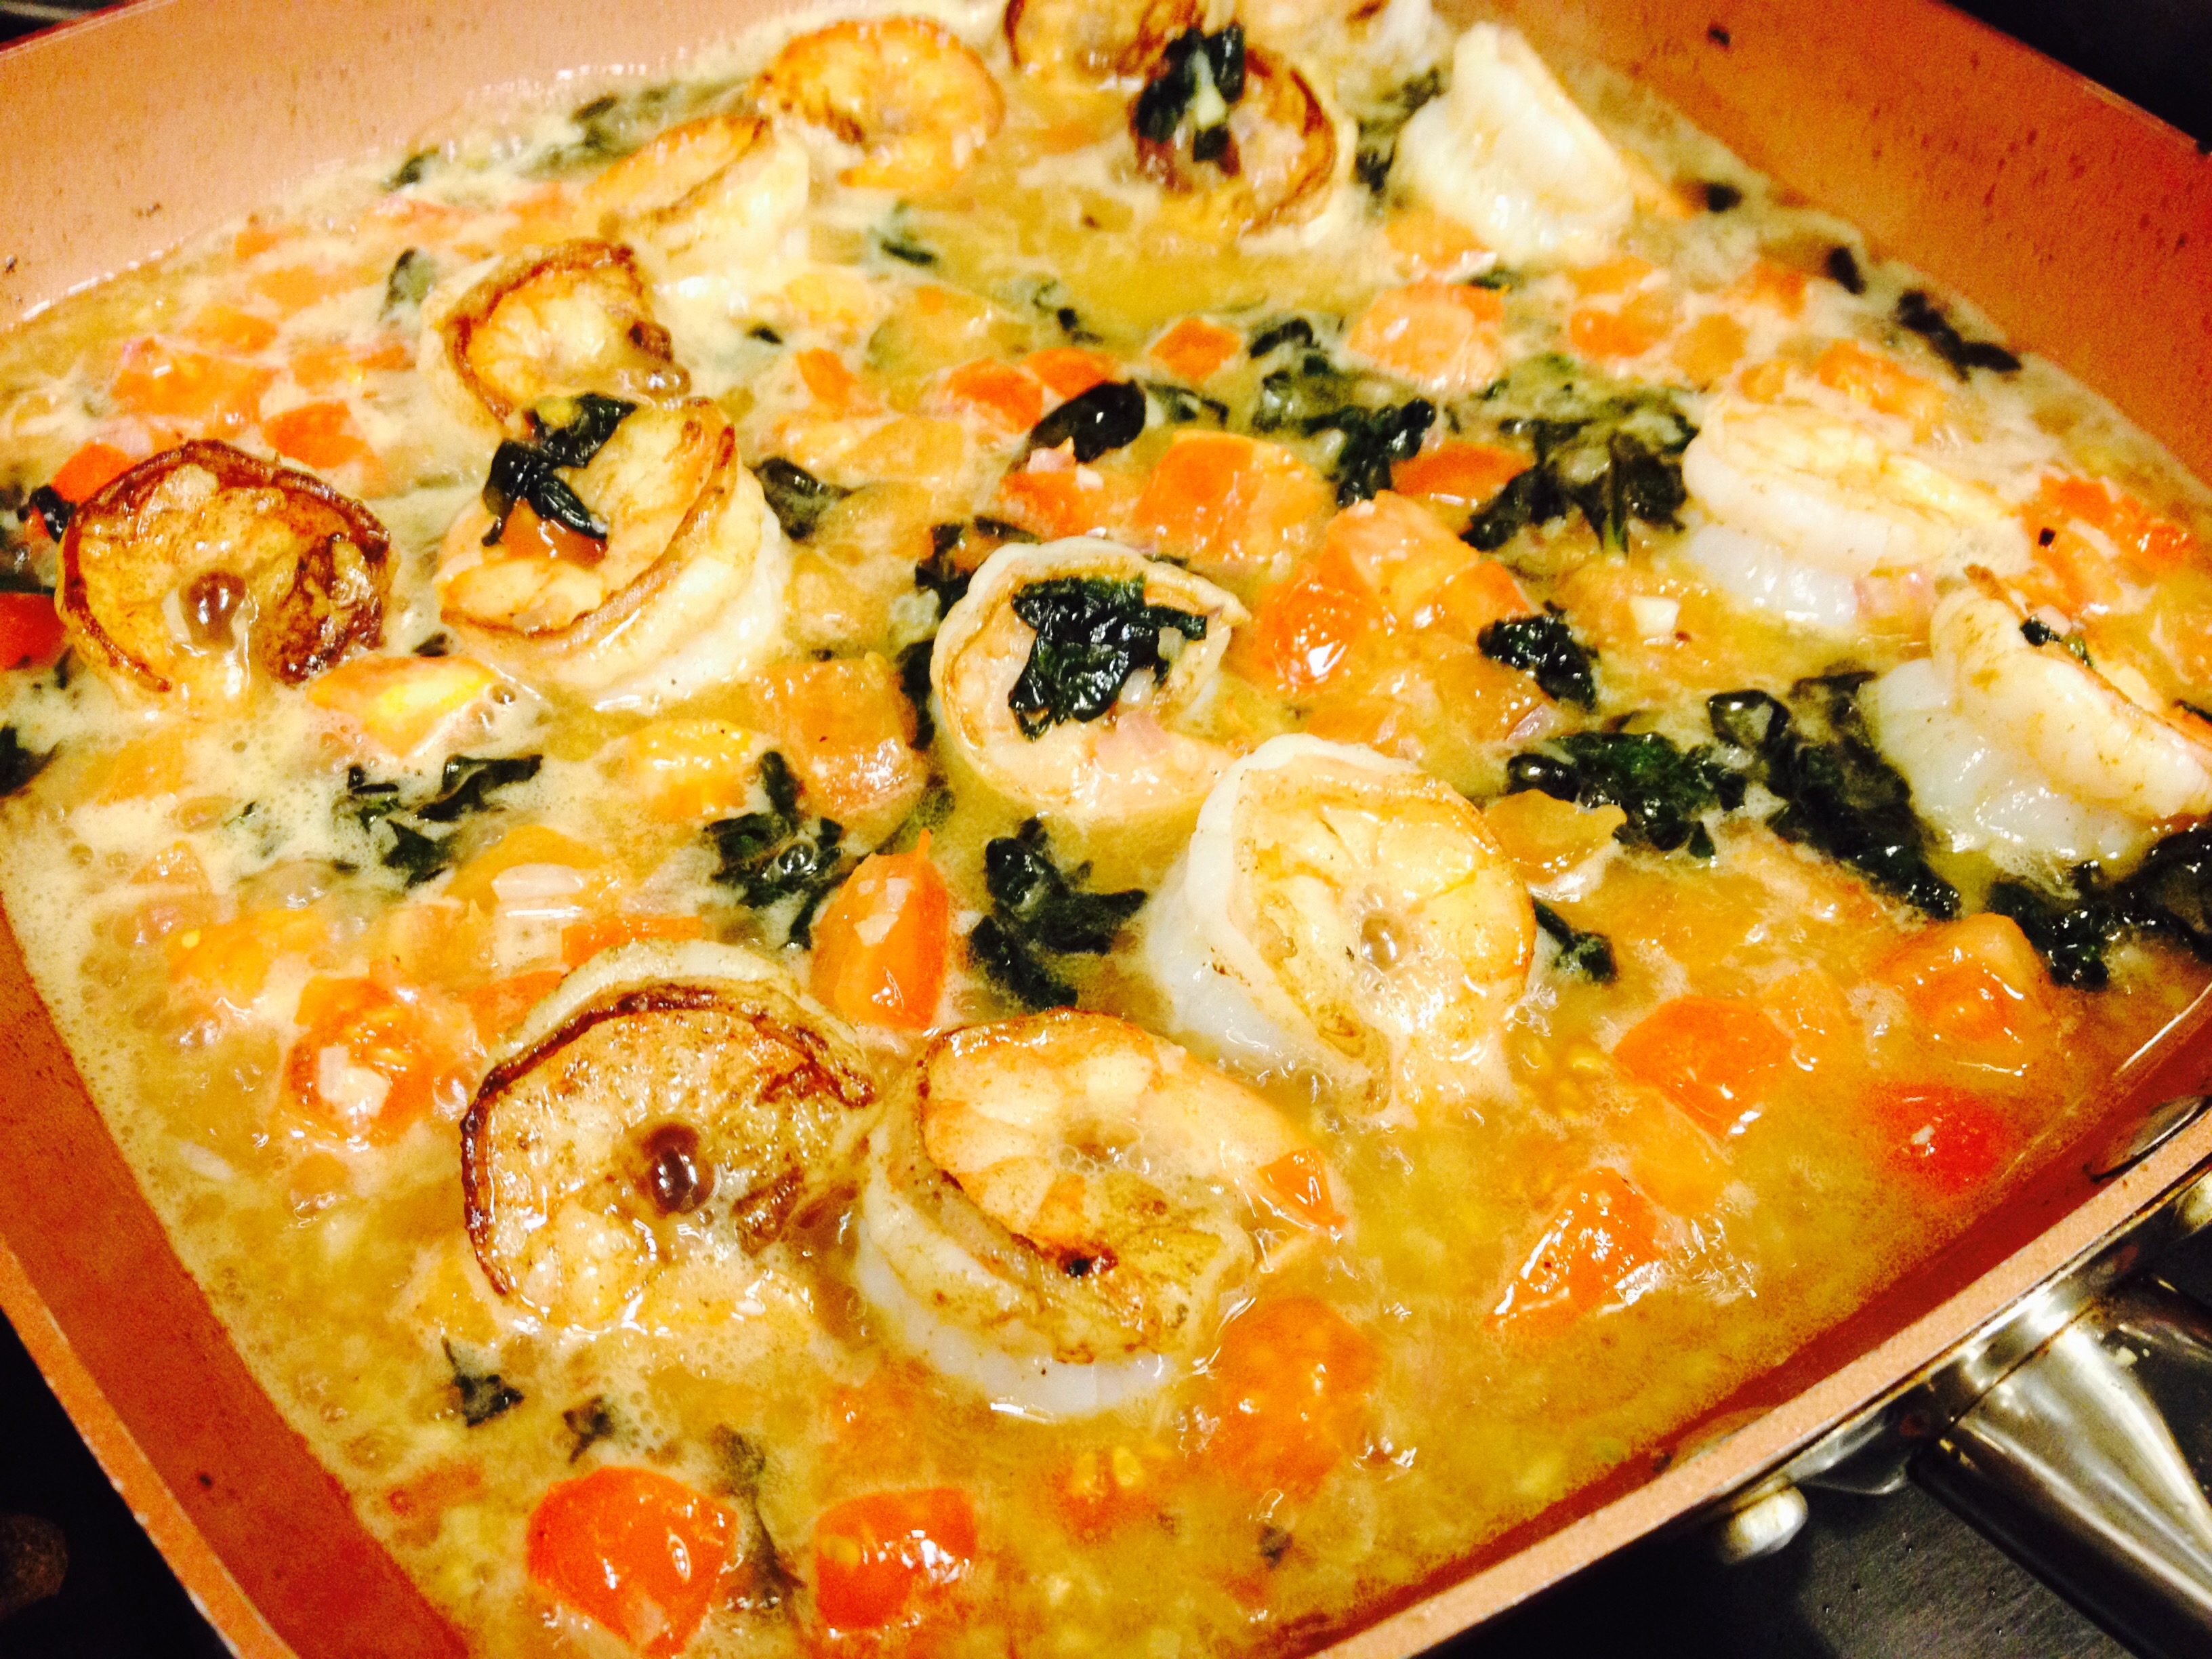
Sisters birthdays are a special day of celebration in our Convent. Much prayer and discussion goes into the place setting at the table, the beautiful word that is specially picked just for her and then a few carefully and lovingly wrapped gifts (which are usually a few treat foods that she rarely gets). The Sister gets to choose her dinner entree and dessert from a menu. It’s really such fun – some sisters take up to a week deciding what they’re going to ask for on their special day. This past week, I had the great fun of cooking for one such occasion. I made my signature shrimp dish – a little like a scampi, but made richer by the fettucine tossed with cream and parmesan. The fresh lemon in this recipe is a must – don’t skip it. The Sister slowly savored her meal, a smile emanating after every bite. What a blessing it is to bless others – that’s what I love so much about the gift of cooking.
Print Recipe
Votes: 2
Rating: 3
You:
Rate this recipe!
Stella's Shrimp and Fettuccine
SERVINGS2servings
|
COOK TIME20mins |
PREP TIME10mins |
READY IN30mins |
Ingredients
Instructions
- Boil salted water for pasta
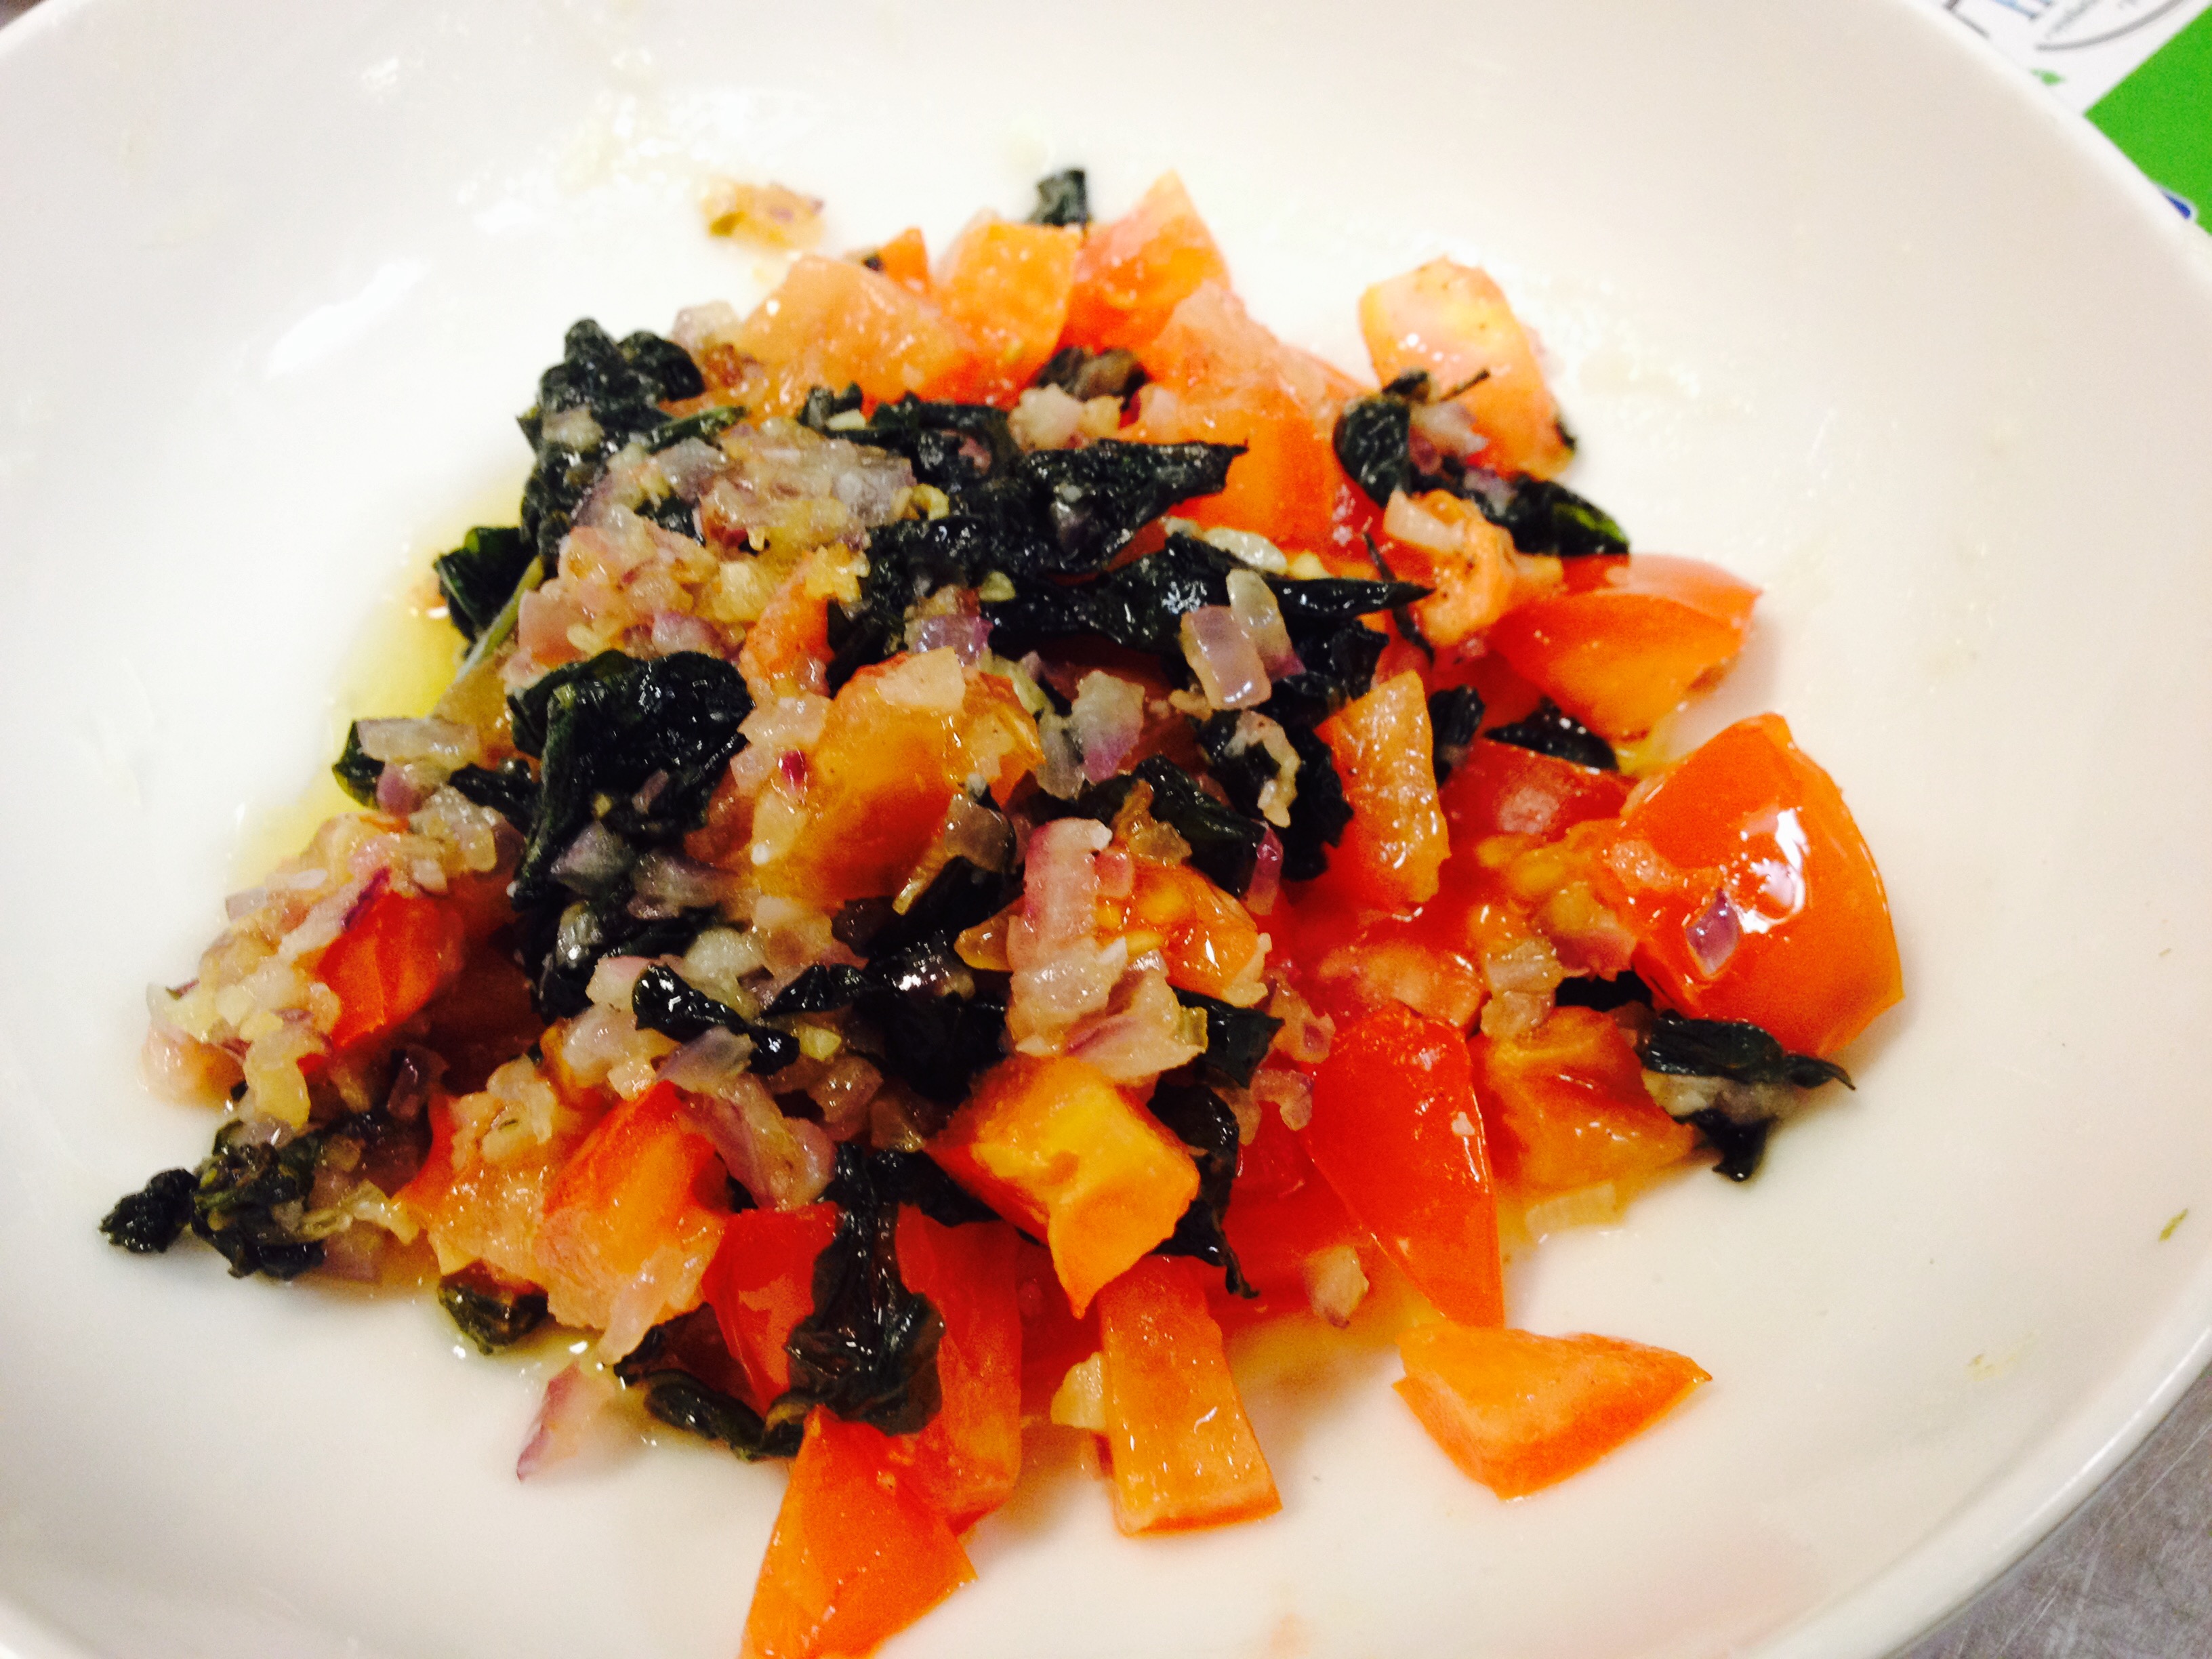
- Meanwhile, sauté ¼ c. diced onion and crushed garlic clove until translucent over medium low heat. Watch carefully so you don't burn the garlic. Add chopped basil leaves and chopped tomato – lightly toss, sauté and remove from heat and into a dish to hold.
- Cook your pasta and when finished, toss with 4 Tbsp. butter, warmed heavy cream and 1/2 cup fresh parmesan until you have an “Alfredo” – add onion salt and fresh ground pepper - seasoning to taste.
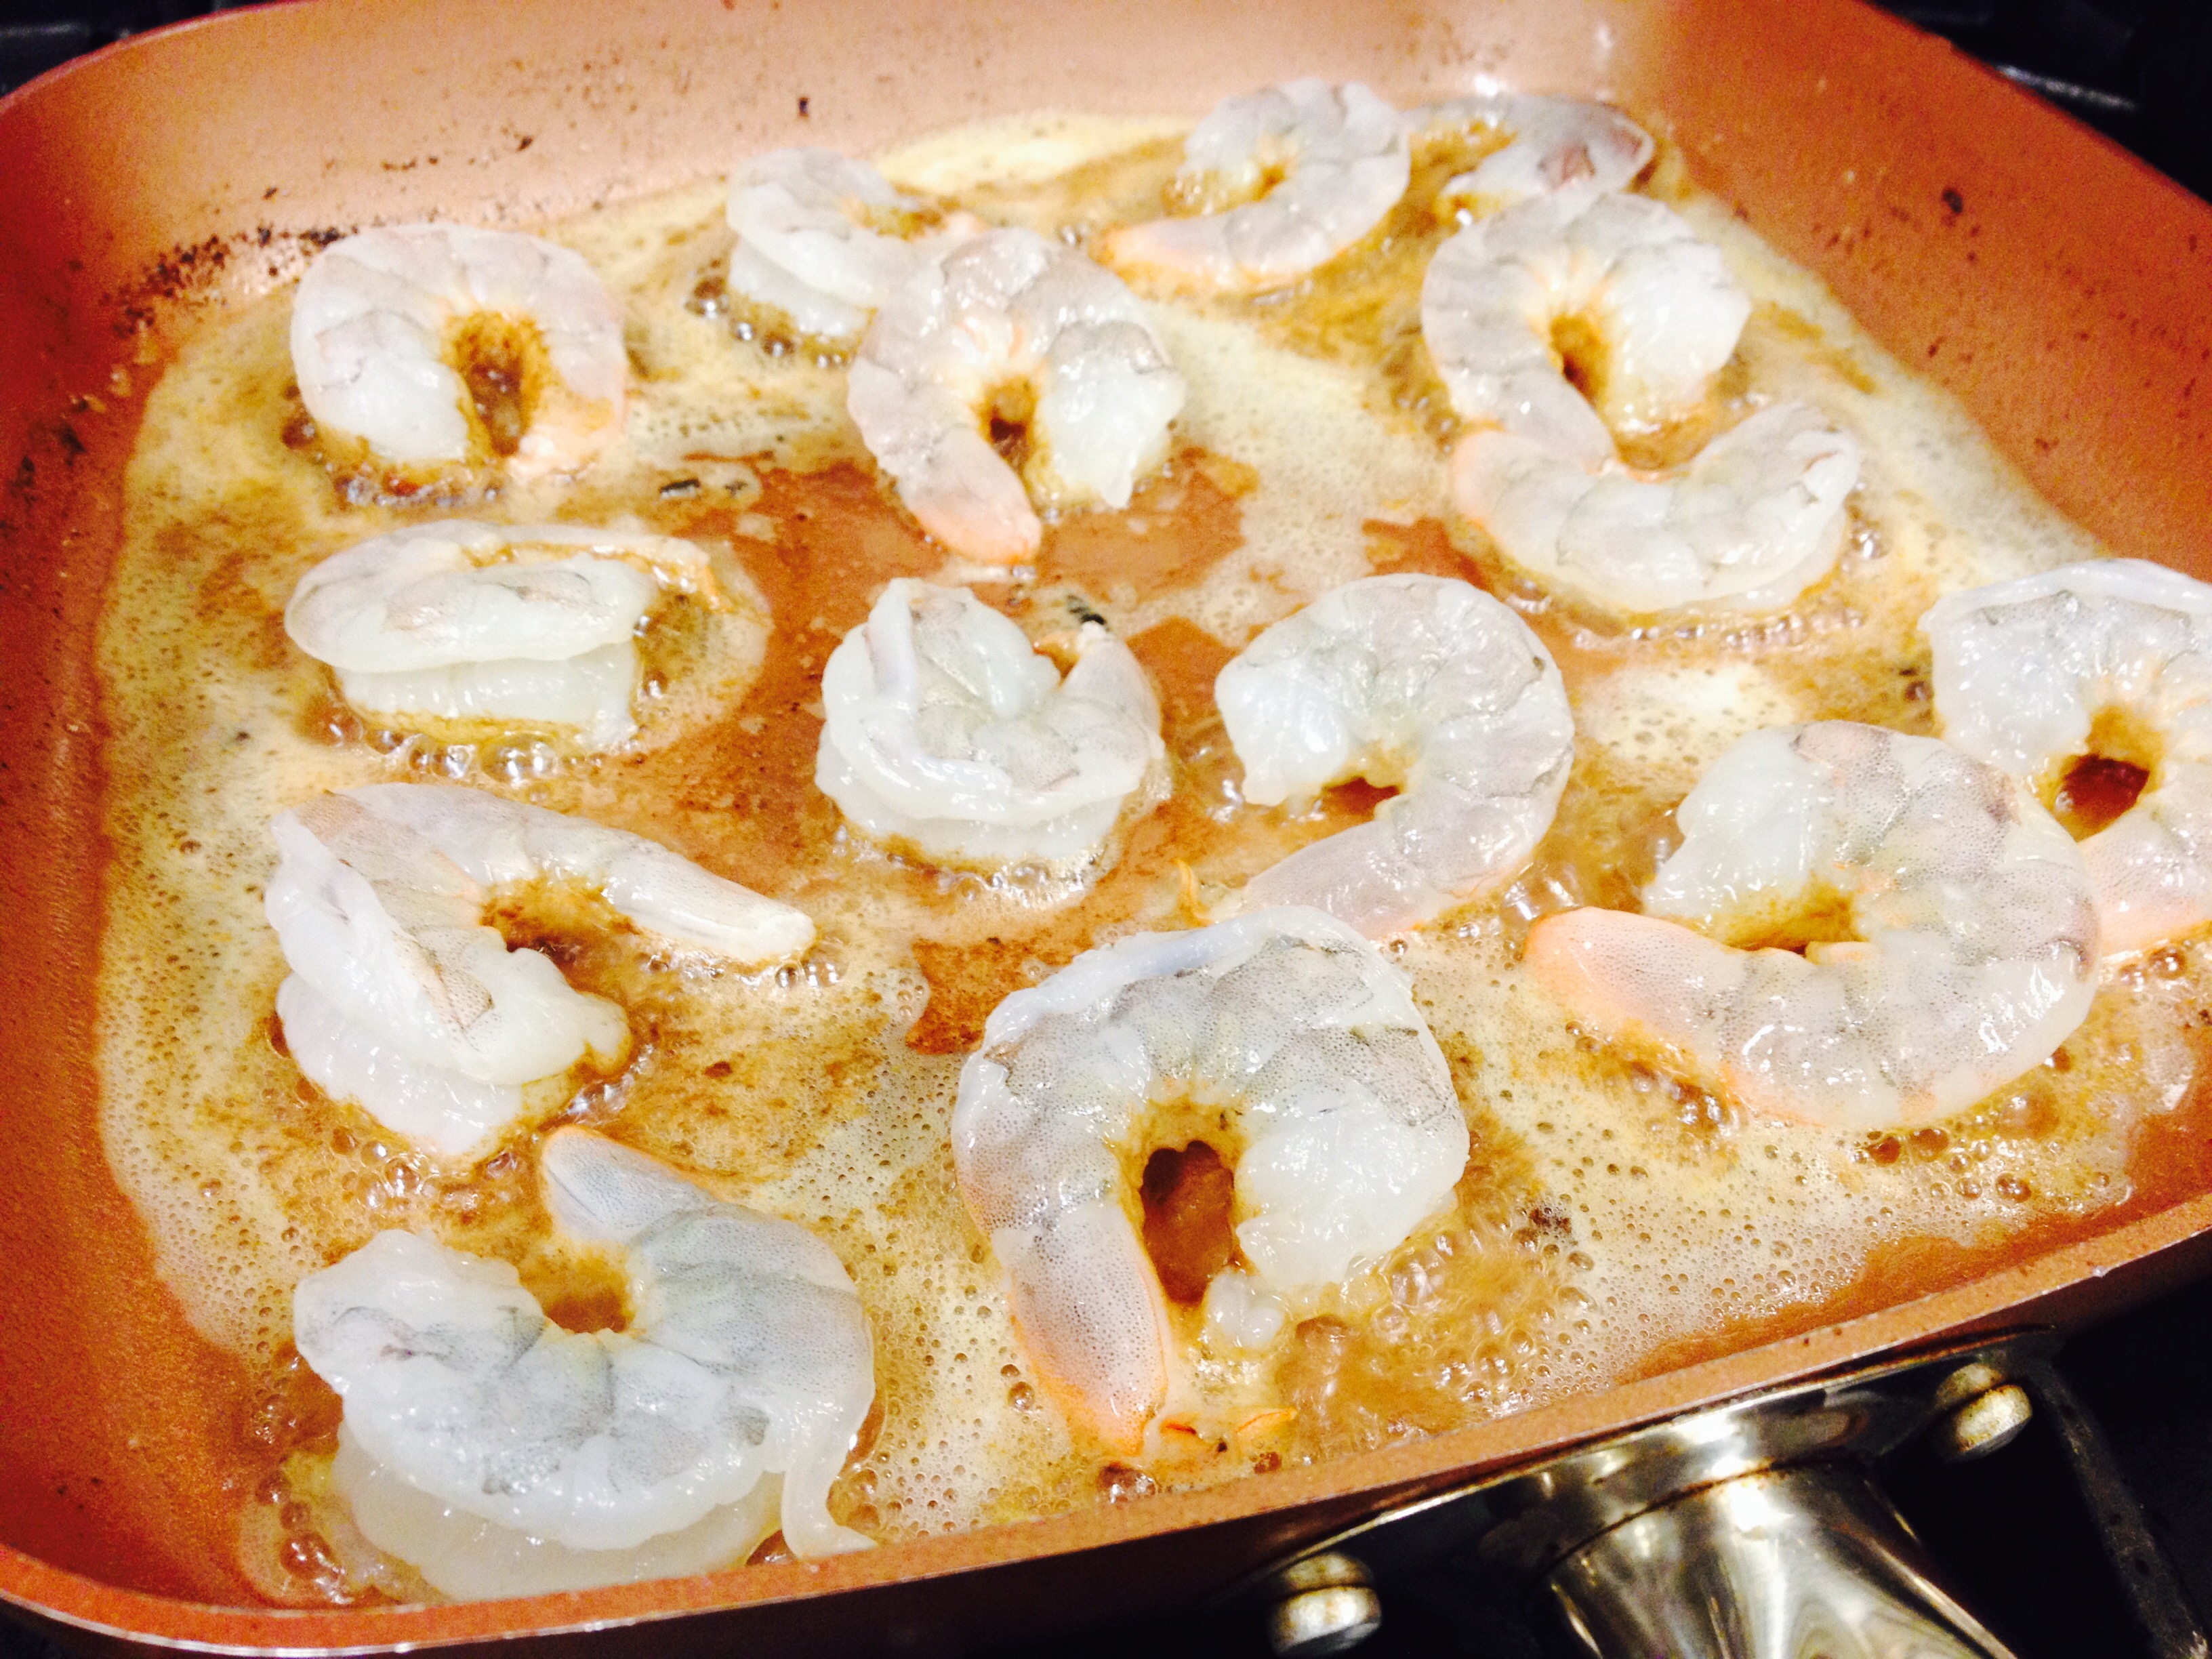
- Quickly sauté your shrimp in butter, once golden on both sides, add white wine and juice of one lemon. Simmer slightly and then add the tomato mixture back to the pan and combine - season to taste.
- Serve fettuccine with the shrimp tossed over – sprinkle with the lemon rind, freshly grated Parmesan cheese and chopped parsley.
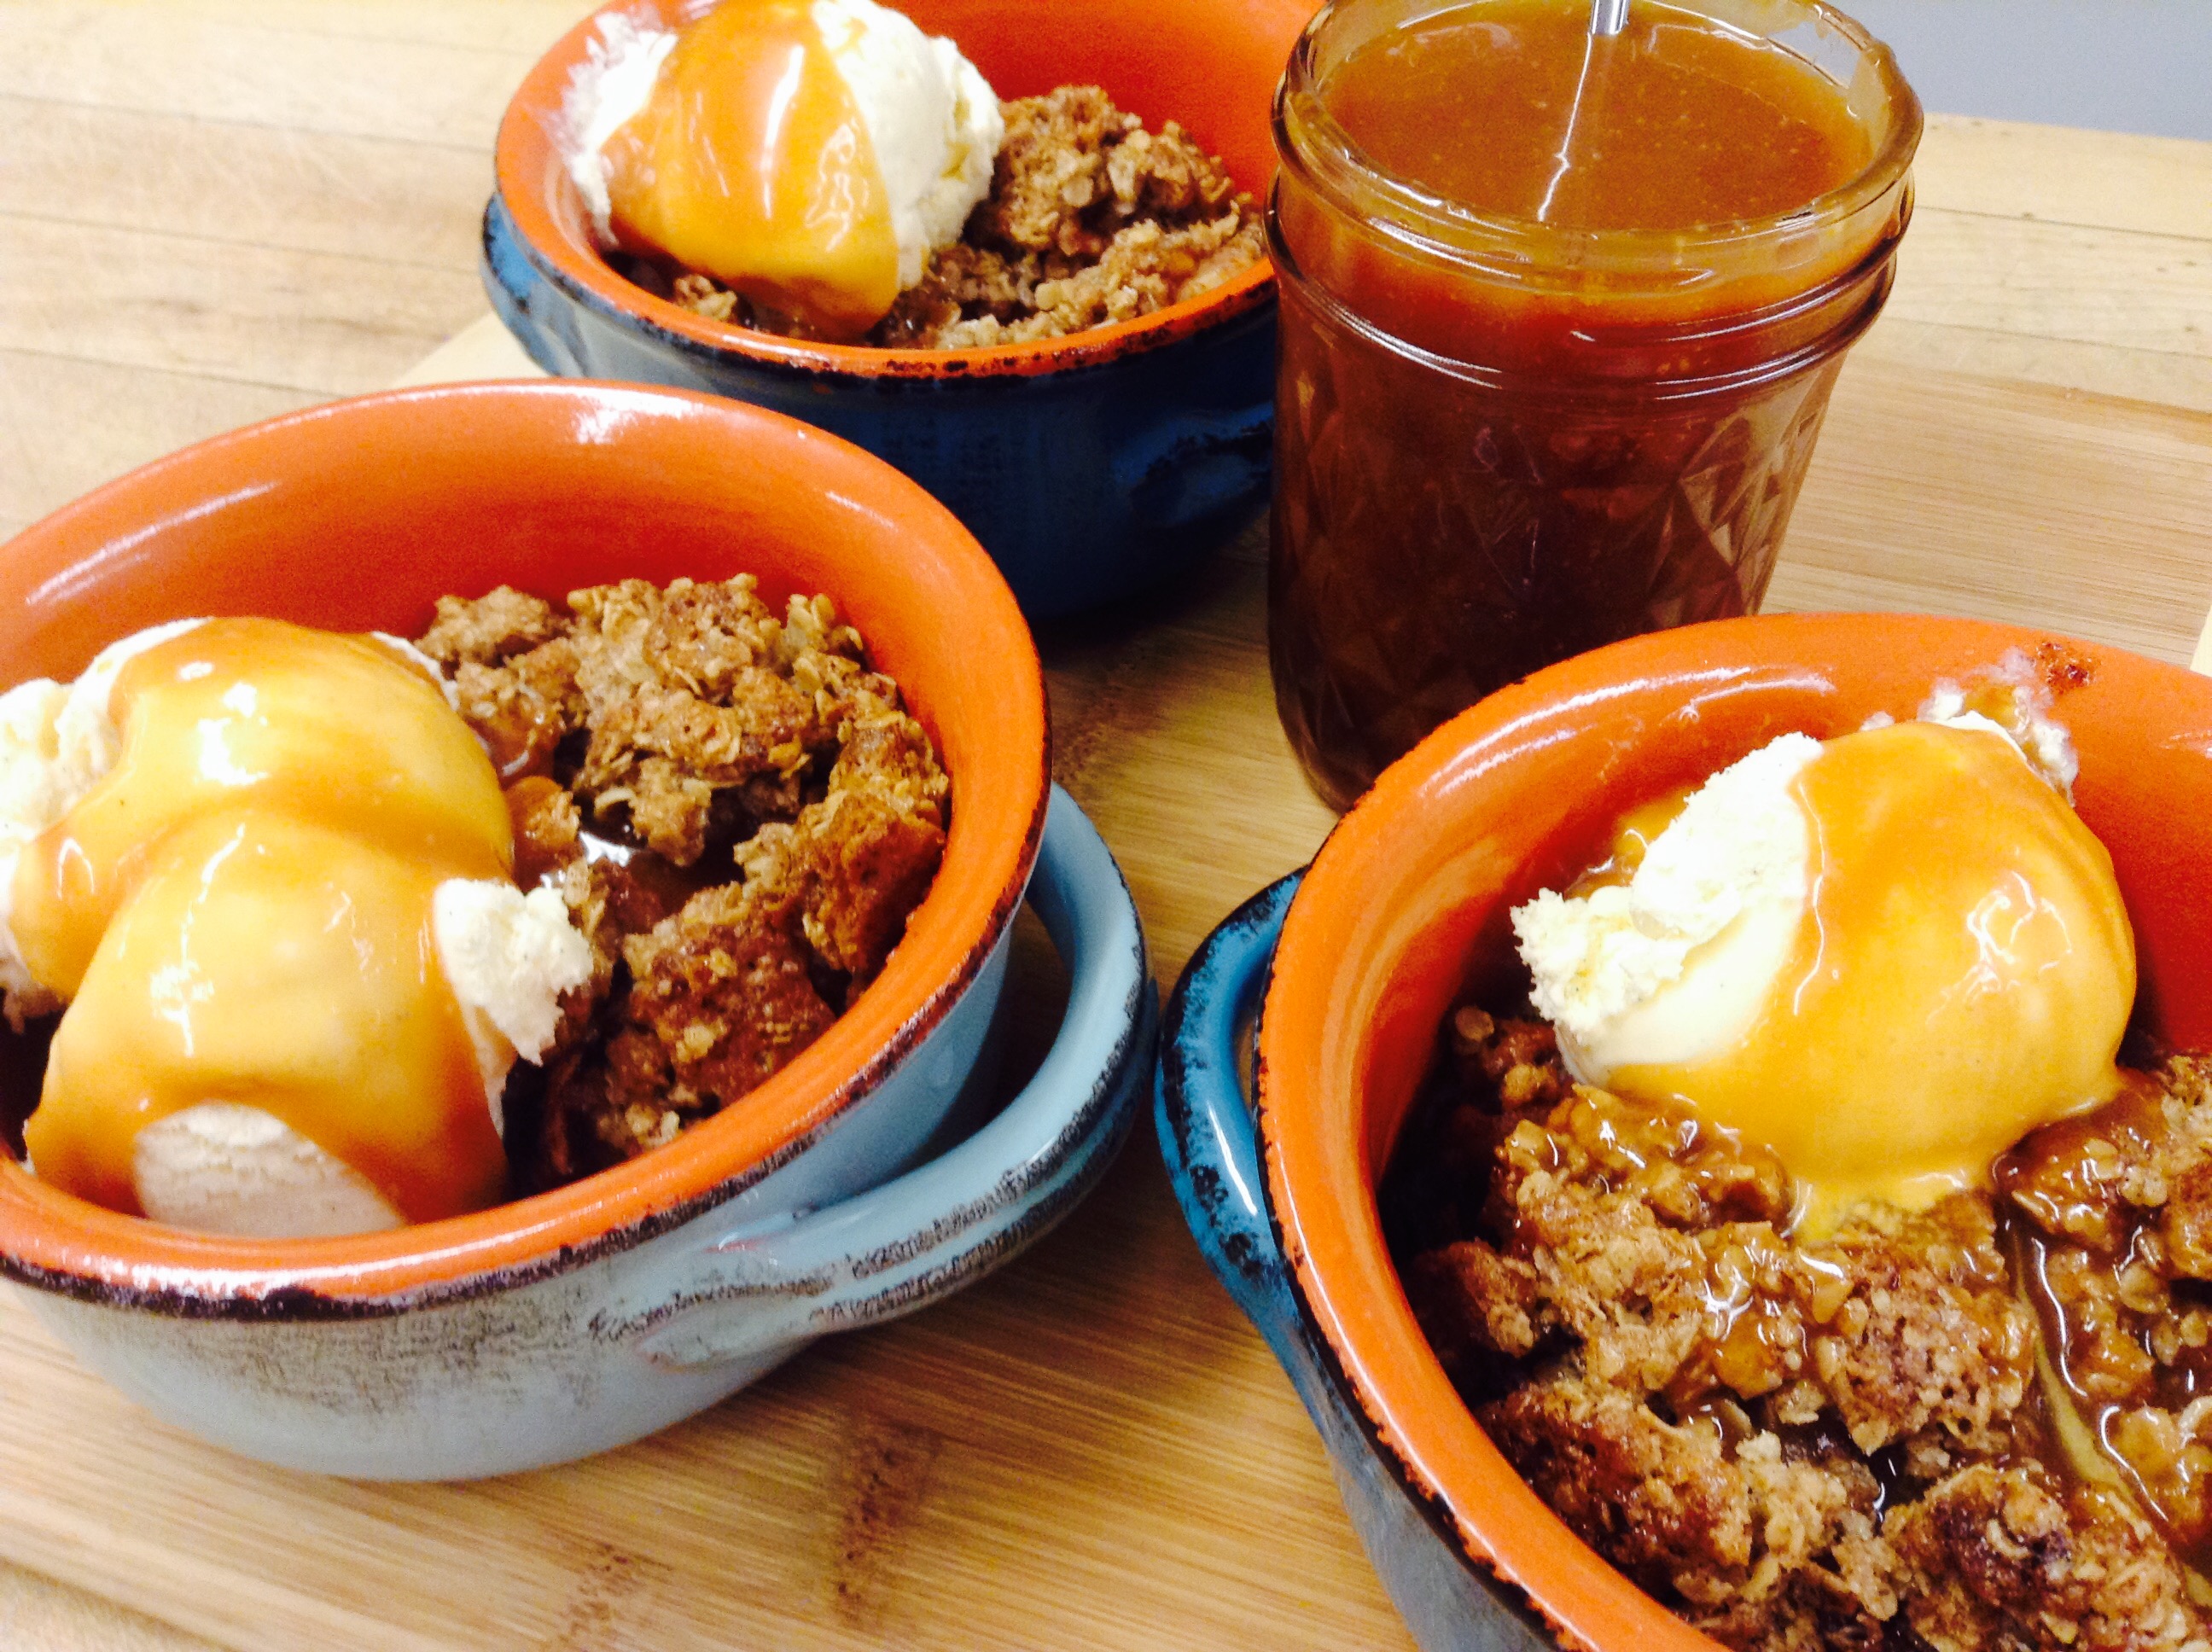
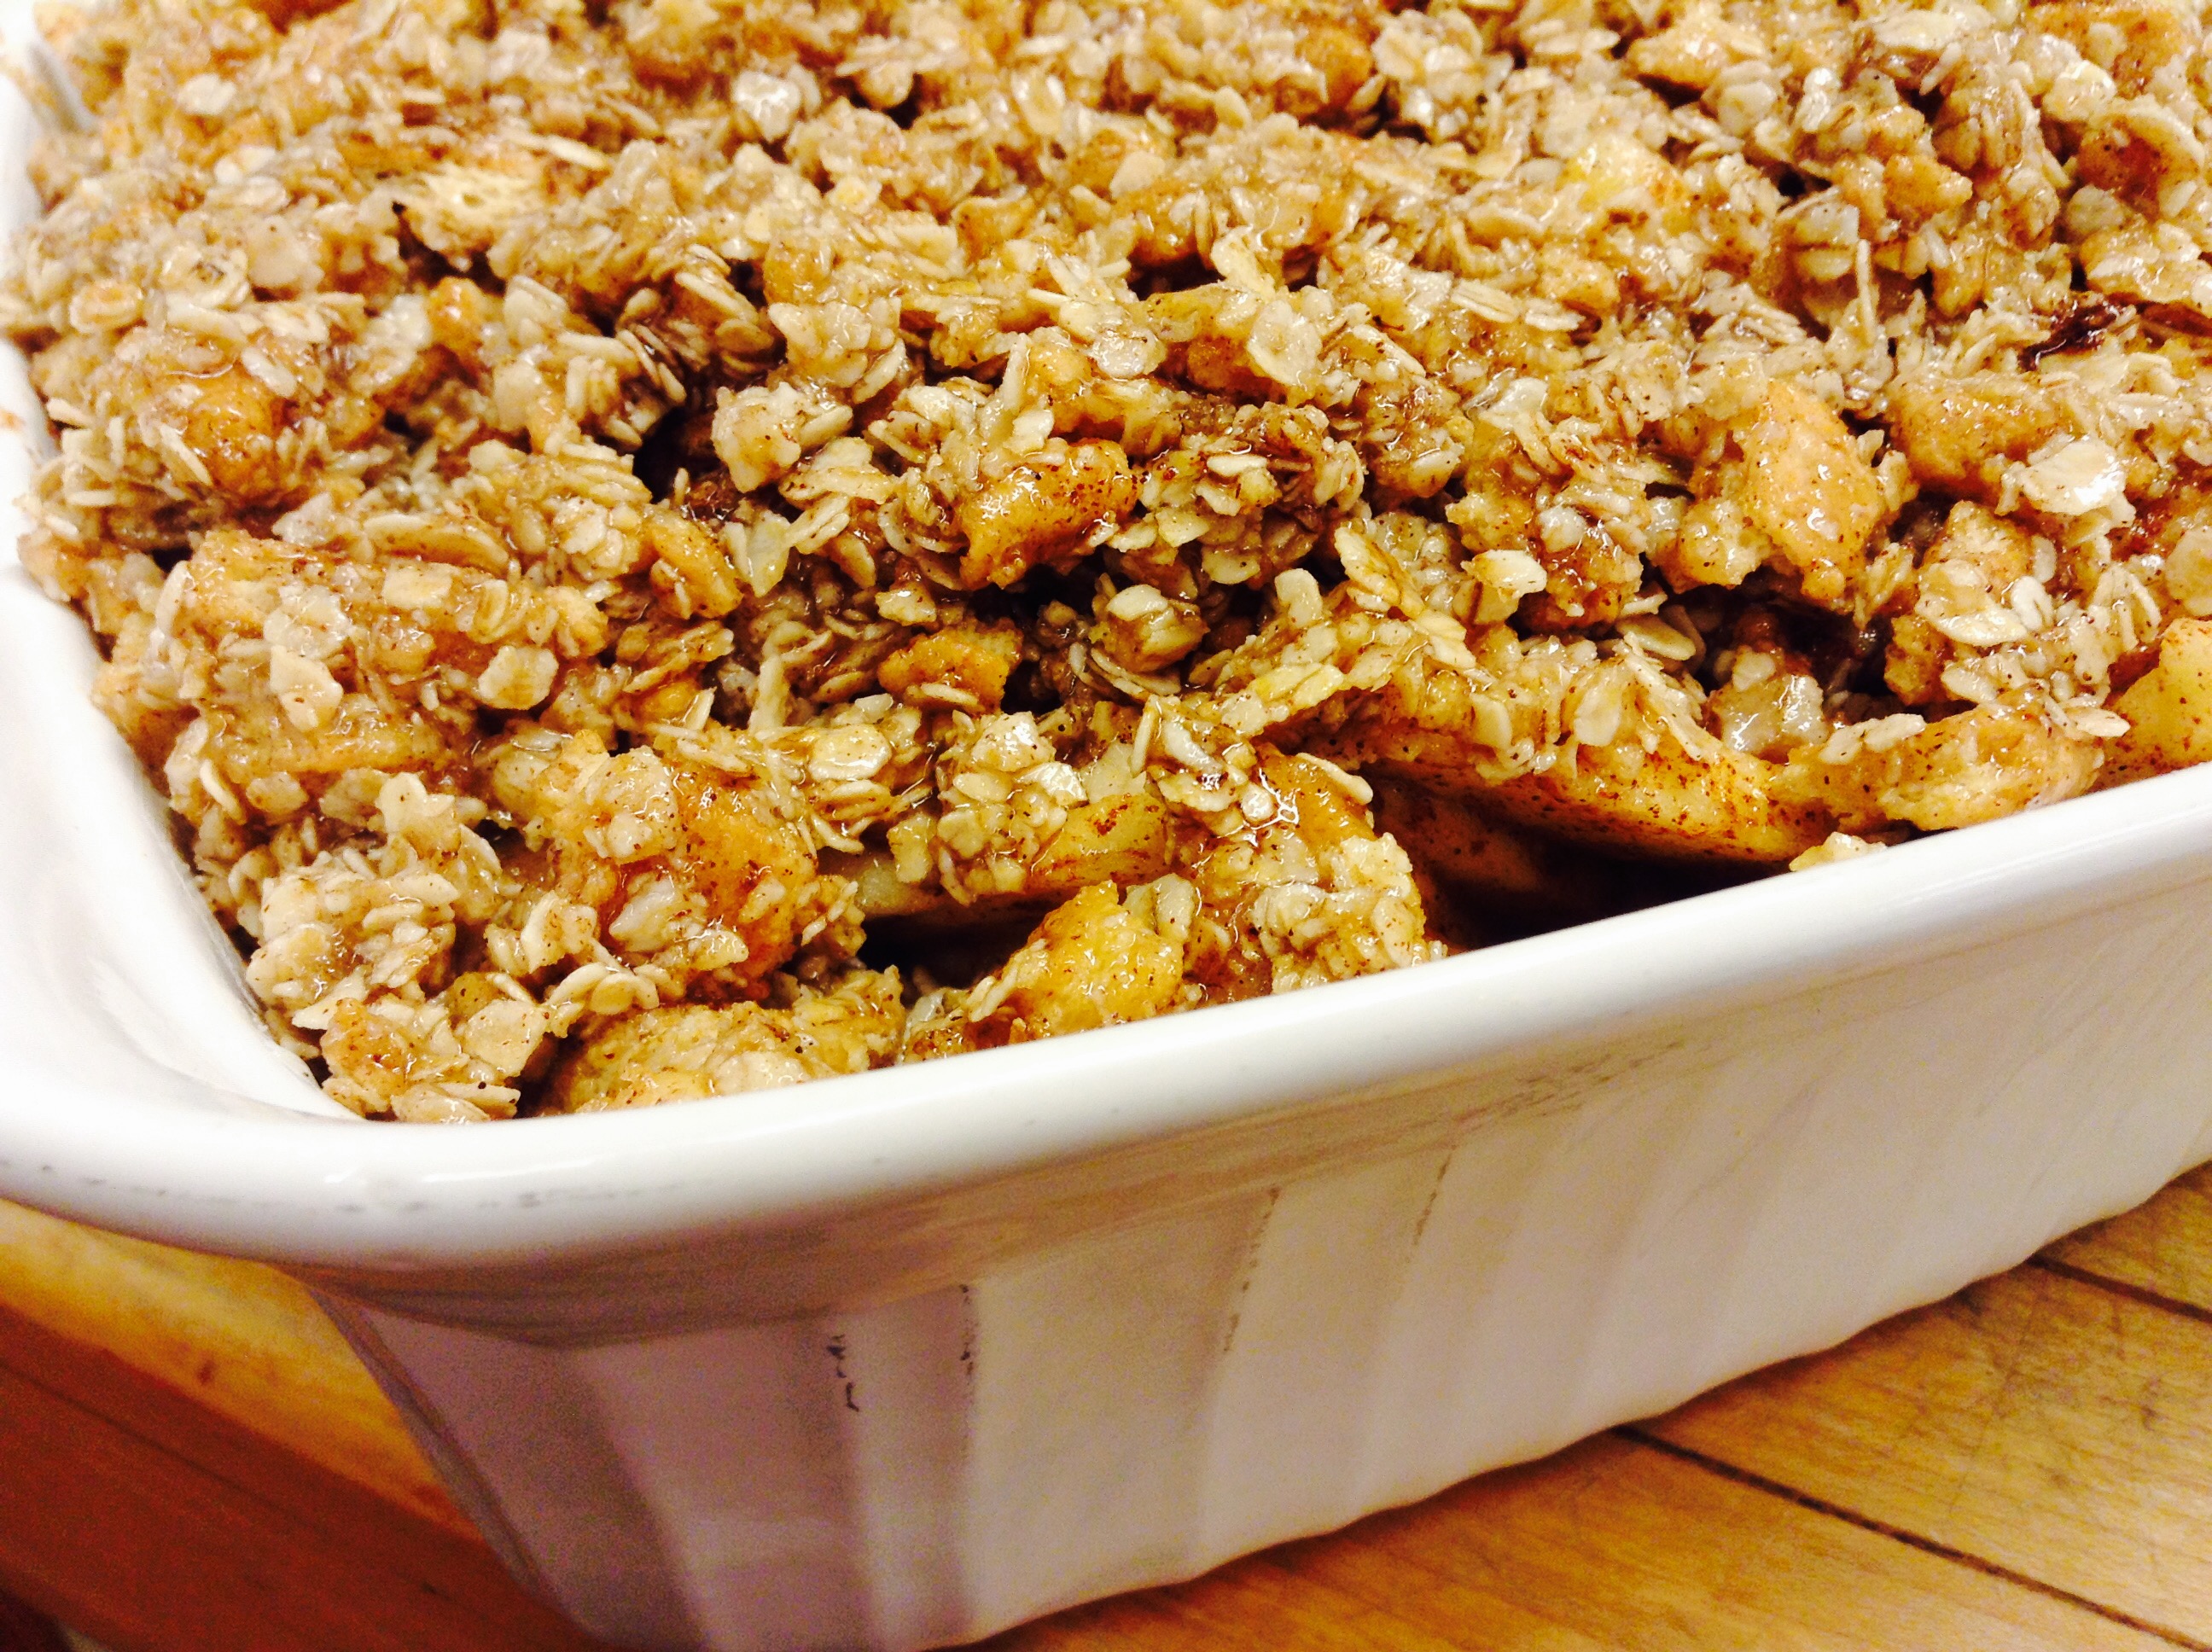
Many years ago, we had a cookbook from Maine that had the most extraordinary apple pie recipe. It had a layer of crushed graham crackers and caramel sauce underneath the apples. We lost that cookbook in the move to our new kitchen, but every fall when the apples are being harvested I think back to this recipe. This year, I decided to re-create it in an apple crisp. It sure took less time than making a pie, but the flavor combination was there.
For gluten-free cooking, try substituting gluten-free cookies for the graham crackers and brown rice flour for the flour. I think you might be pleased.
Print Recipe
Votes: 0
Rating: 0
You:
Rate this recipe!
Graham Cracker Apple Crisp with Homemade Salted Caramel Sauce
SERVINGS9servings
|
COOK TIME30-40mins |
PREP TIME20mins |
READY IN50-60mins |
Ingredients
Instructions
- Lightly grease 8x8” square baking dish
- Filling: Toss apples together with brown sugar, cinnamon, flour, salt, lemon zest, lemon juice and the melted butter.
- Topping: Melt butter in a medium bowl and add all other topping ingredients. Mix until crumbly and evenly mixed.
- Sprinkle over apples and pat down lightly. Bake at 350º for about 30-40 minutes, until apples are soft and the filling bubbles and the crisp is golden.
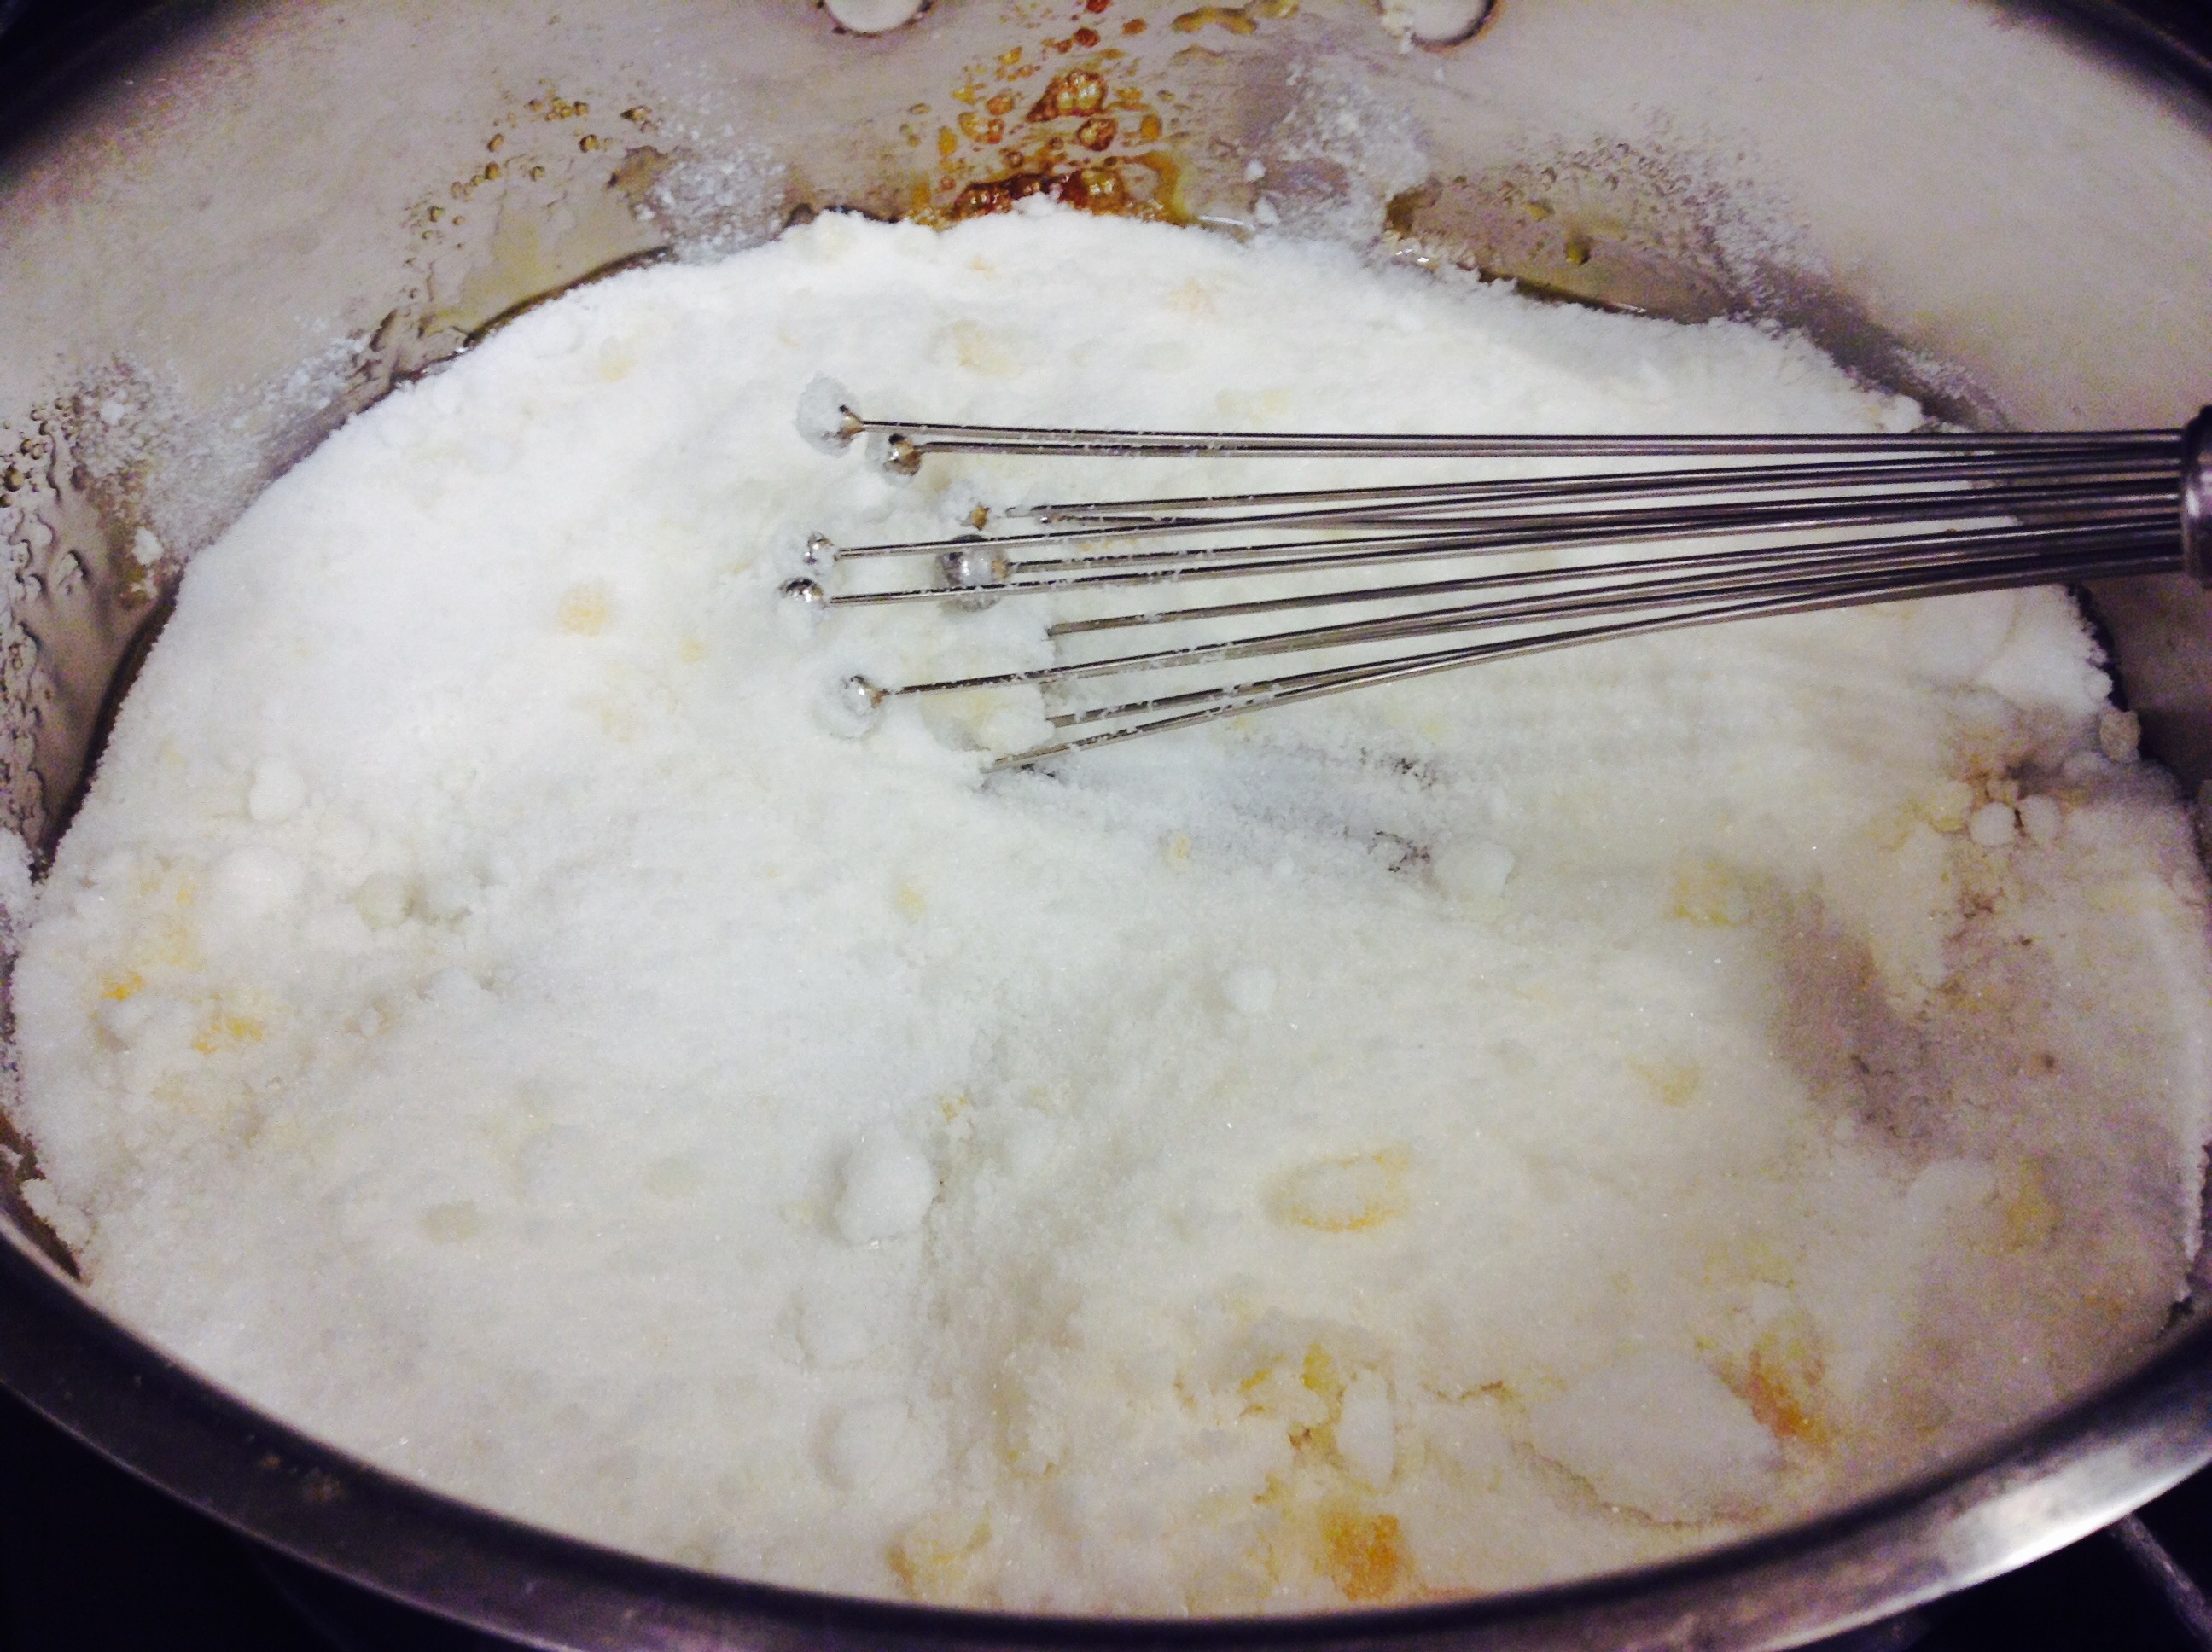
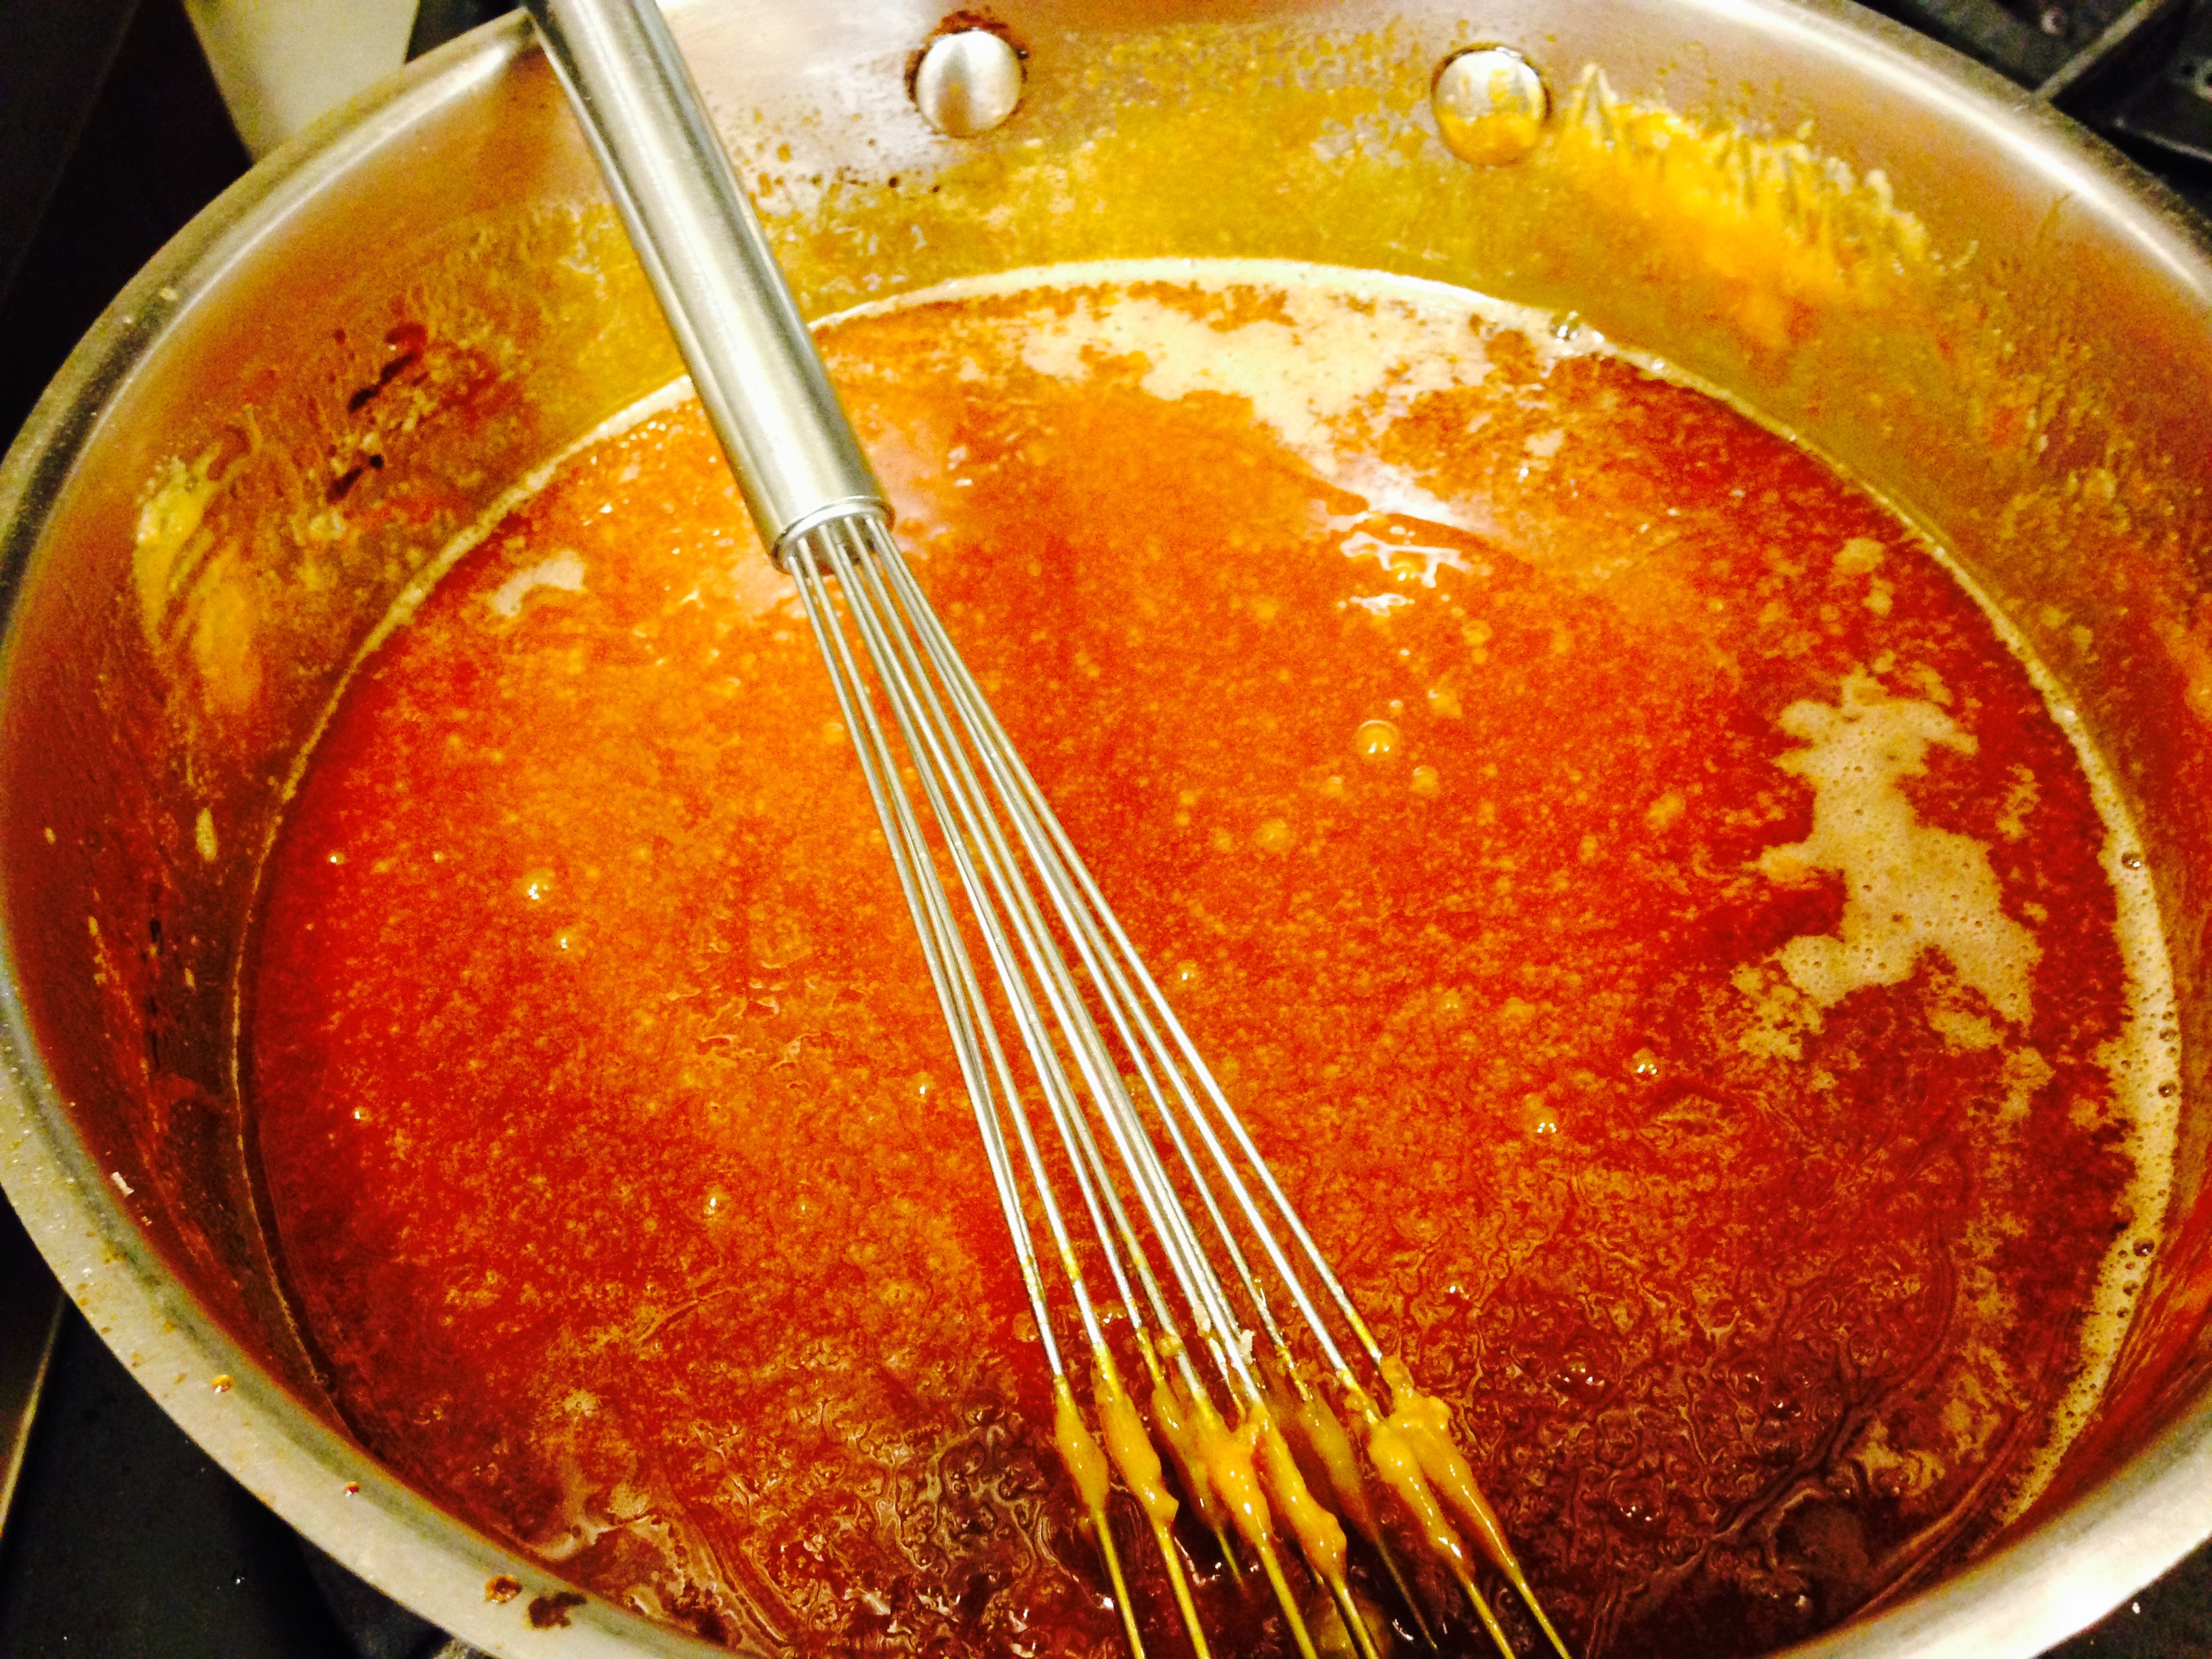
- Meanwhile make Salted Caramel Sauce: Add the sugar in an even layer over the bottom of a medium saucepan. Heat the sugar over medium-high heat, whisking it as it begins to melt. It's okay if the sugar begins to form clumps- keep whisking and as it continues to cook, they will melt back down. Stop whisking once all of the sugar has melted, and swirl the pan occasionally while the sugar cooks.
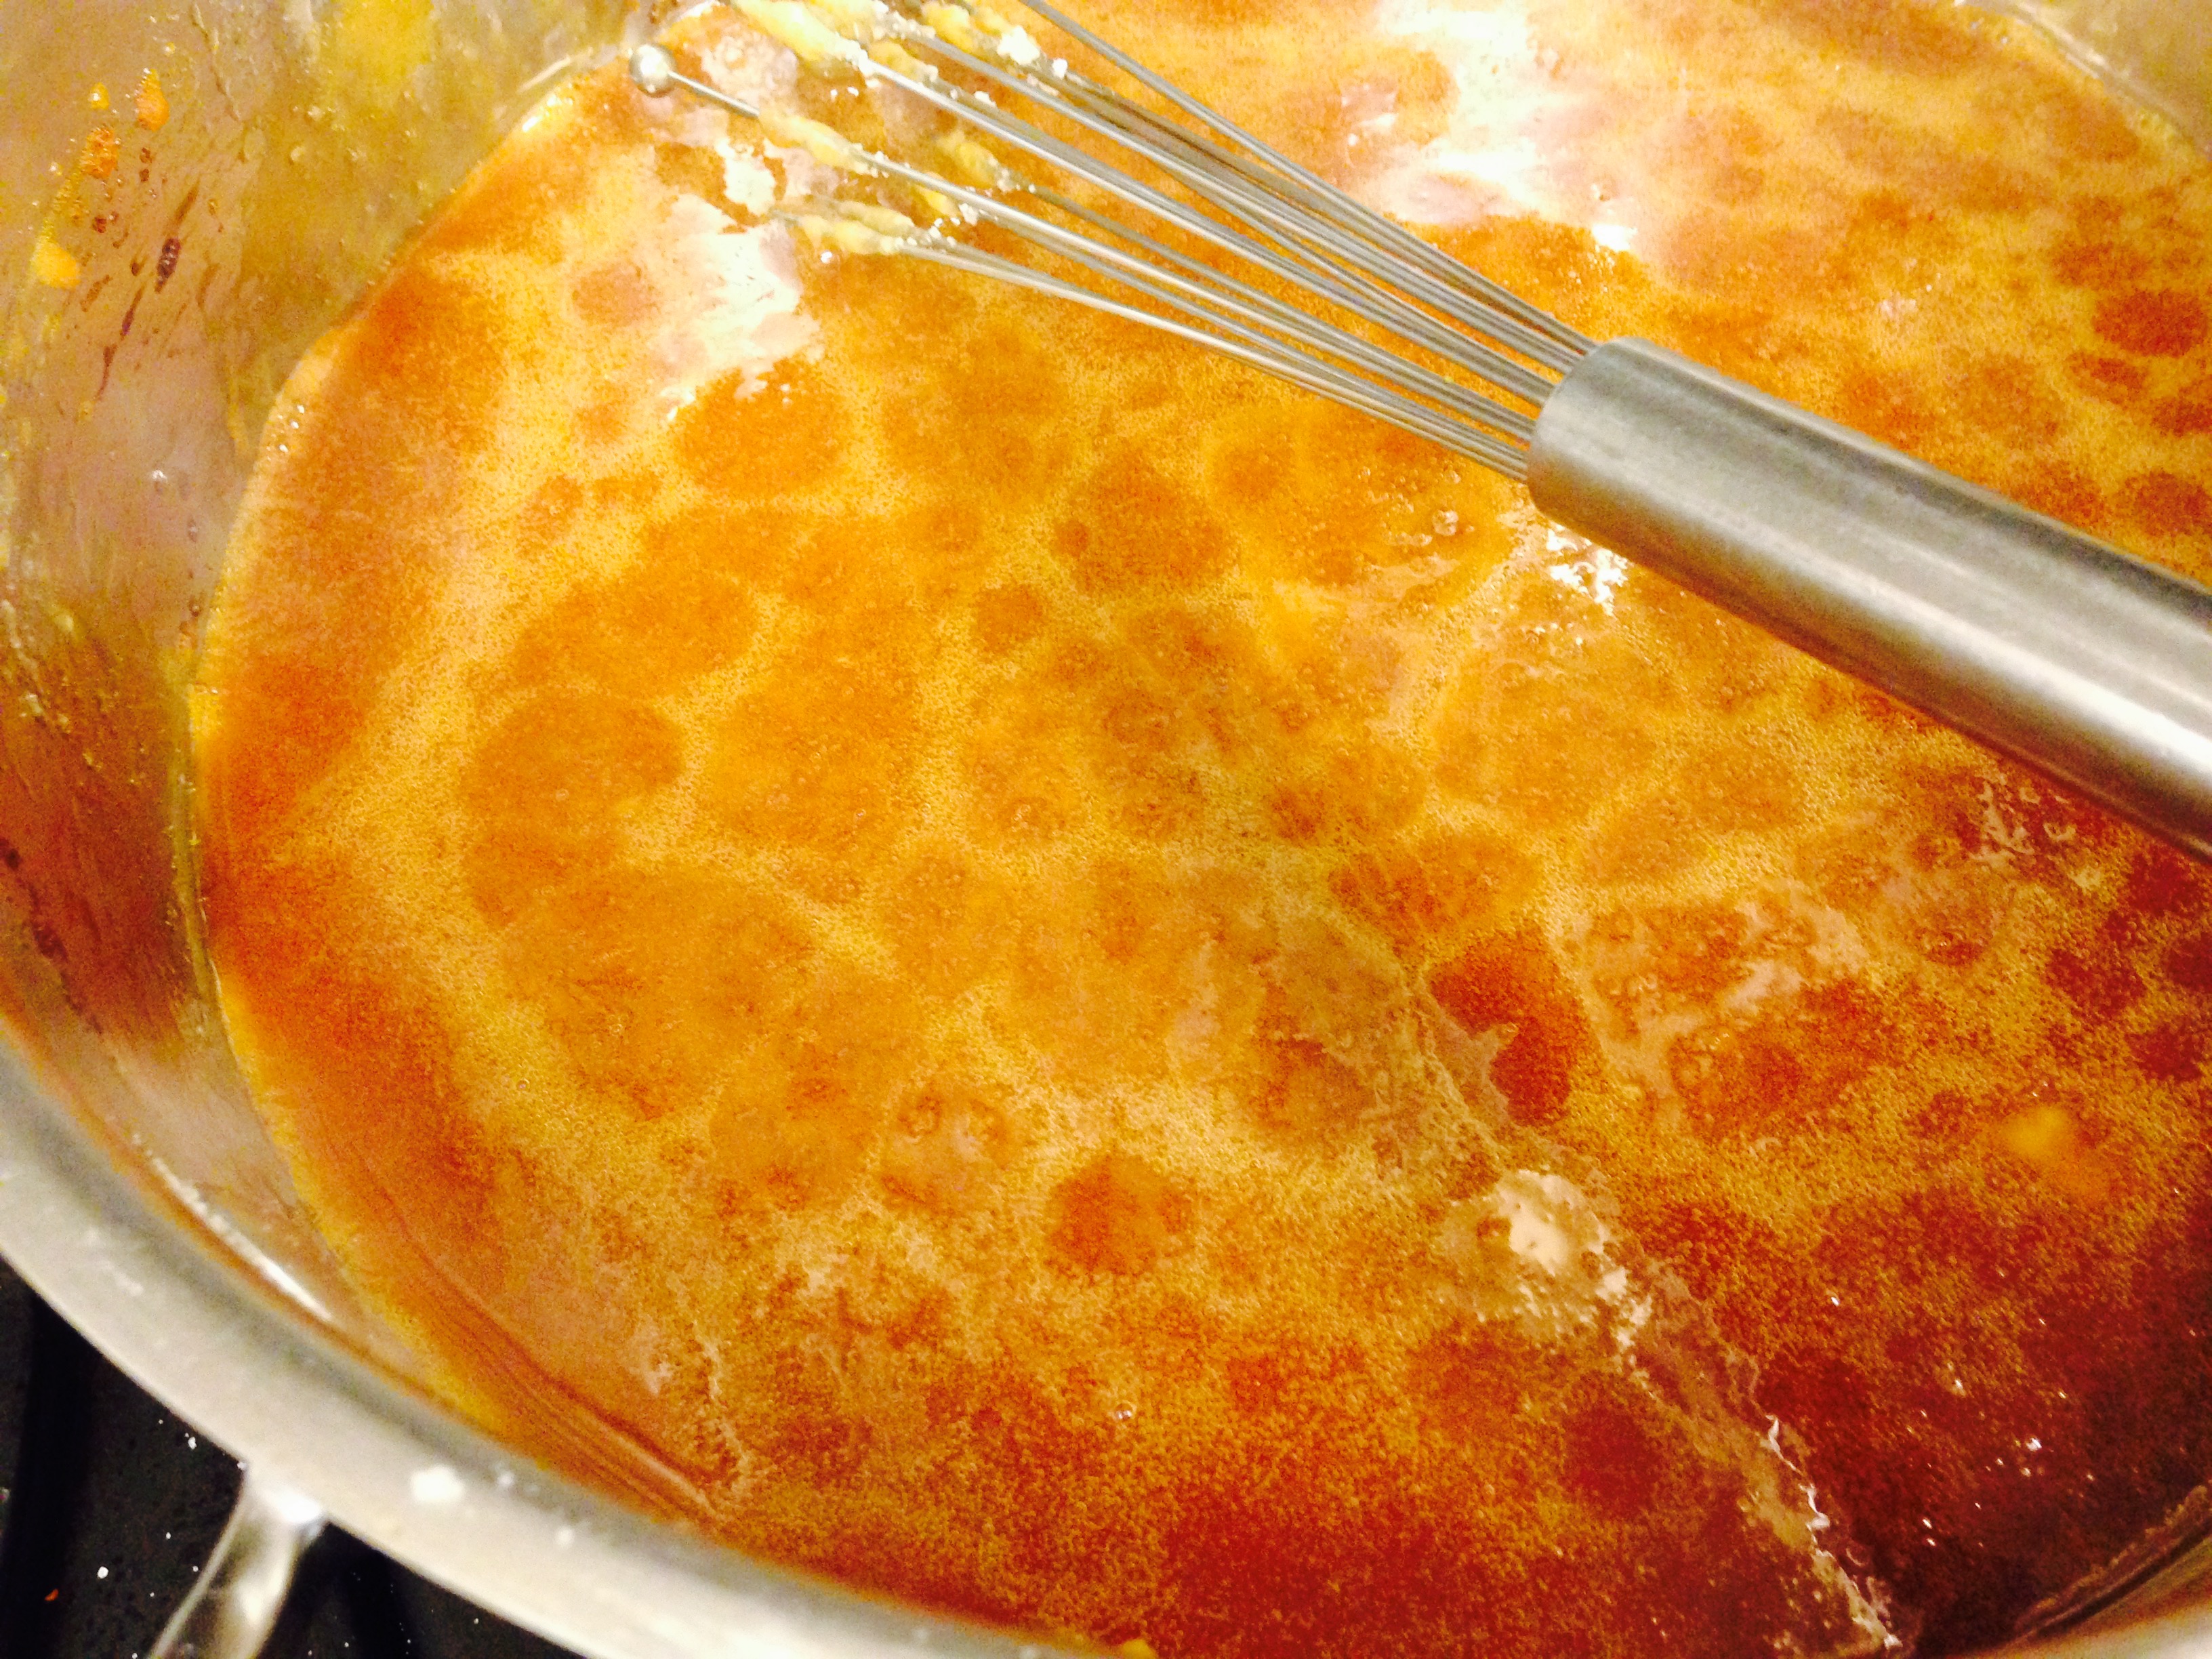
- Continue cooking until the sugar has reached a deep amber color. It should look almost a reddish-brown, and have a slight toasted aroma. This is the point where caramel can go from perfect to burnt in a matter of seconds, so keep a close eye. If you are using an instant-read thermometer, it will be around 350 degrees F. Watch this step very carefully!
- Remove the caramel from the heat and add the butter all at once. Be careful, as the caramel will bubble up when the butter is added. Whisk the butter into the caramel until it is completely melted.
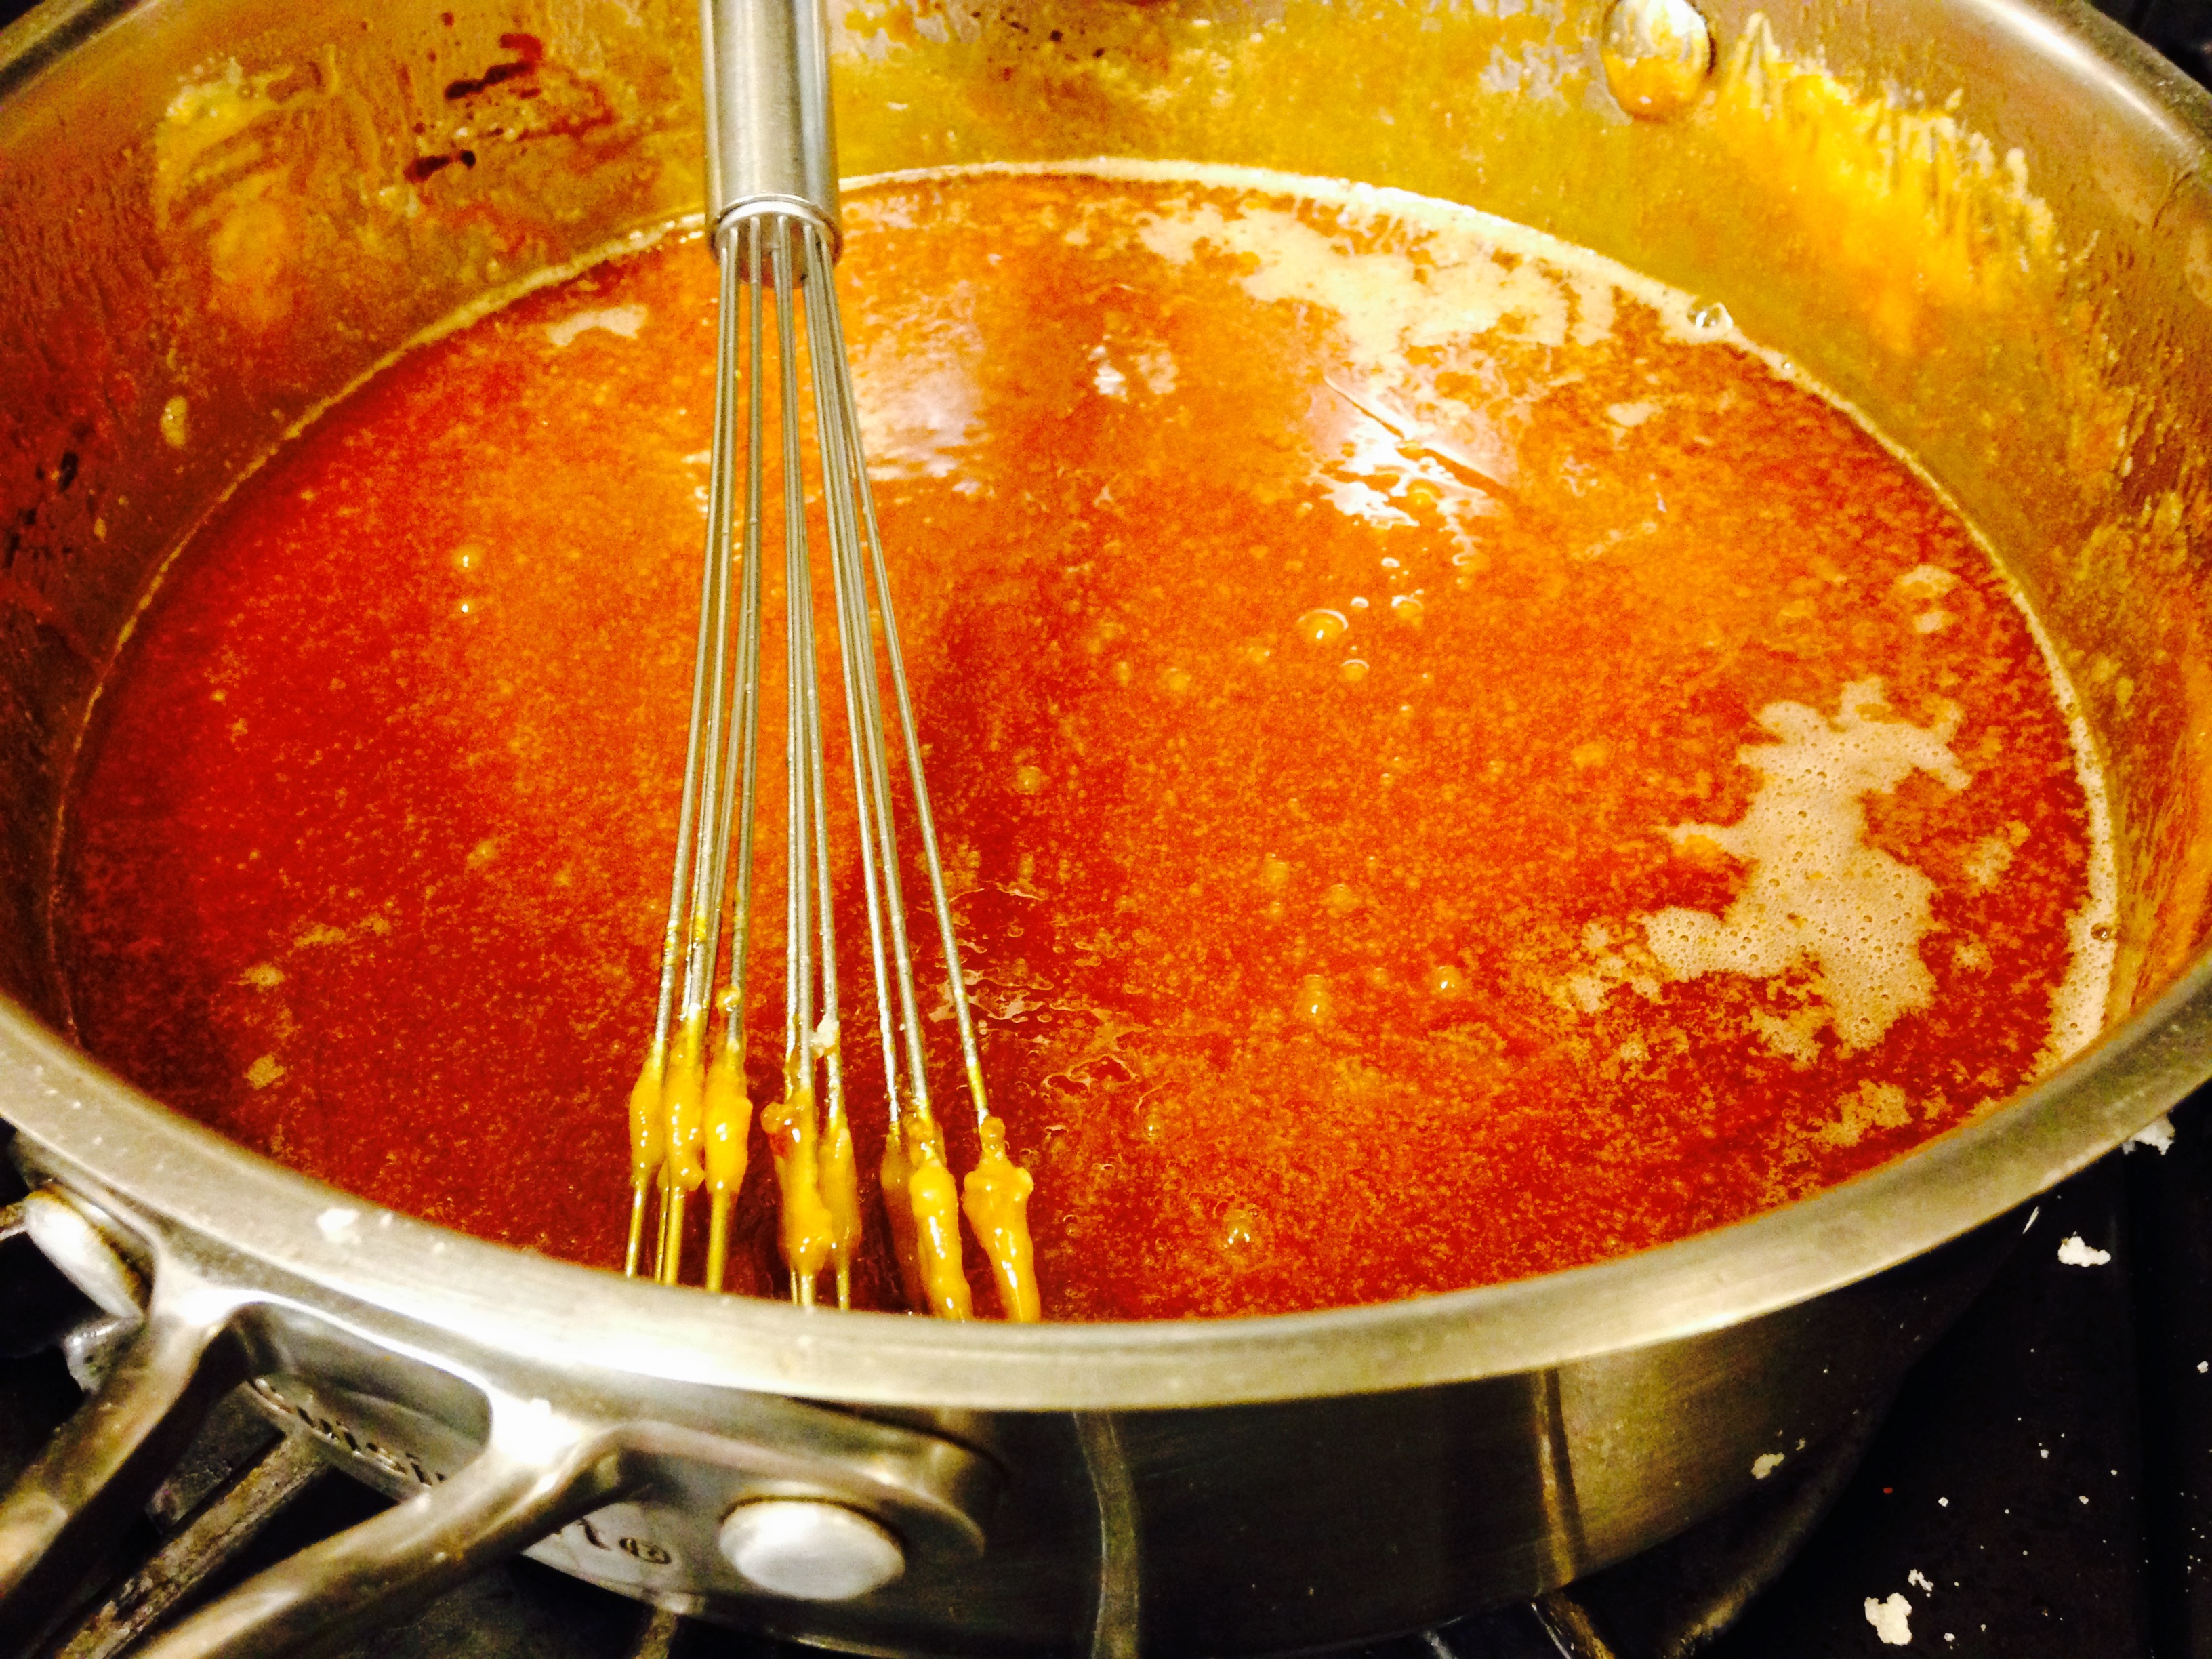
- Slowly pour the cream into the caramel. Again, be careful because the mixture will bubble up ferociously.
- Whisk until all of the cream has been incorporated and you have a smooth sauce. Add the fleur de sel or kosher salt and whisk to incorporate.
- Set the sauce aside to cool for 10 to 15 minutes and then pour into jars. The sauce can be refrigerated for up to 1 month.
- Serve crisp warm with a scoop of vanilla ice cream and salted caramel sauce.
Above the sounds of car doors opening and closing, luggage being loaded, and 30 women exchanging “goodbyes and well wishes,” comments regarding their retreat could be overheard. They were all very positive, especially those regarding their meals. Many of these women love to cook, and are very attentive to—and appreciative of—what they are served.
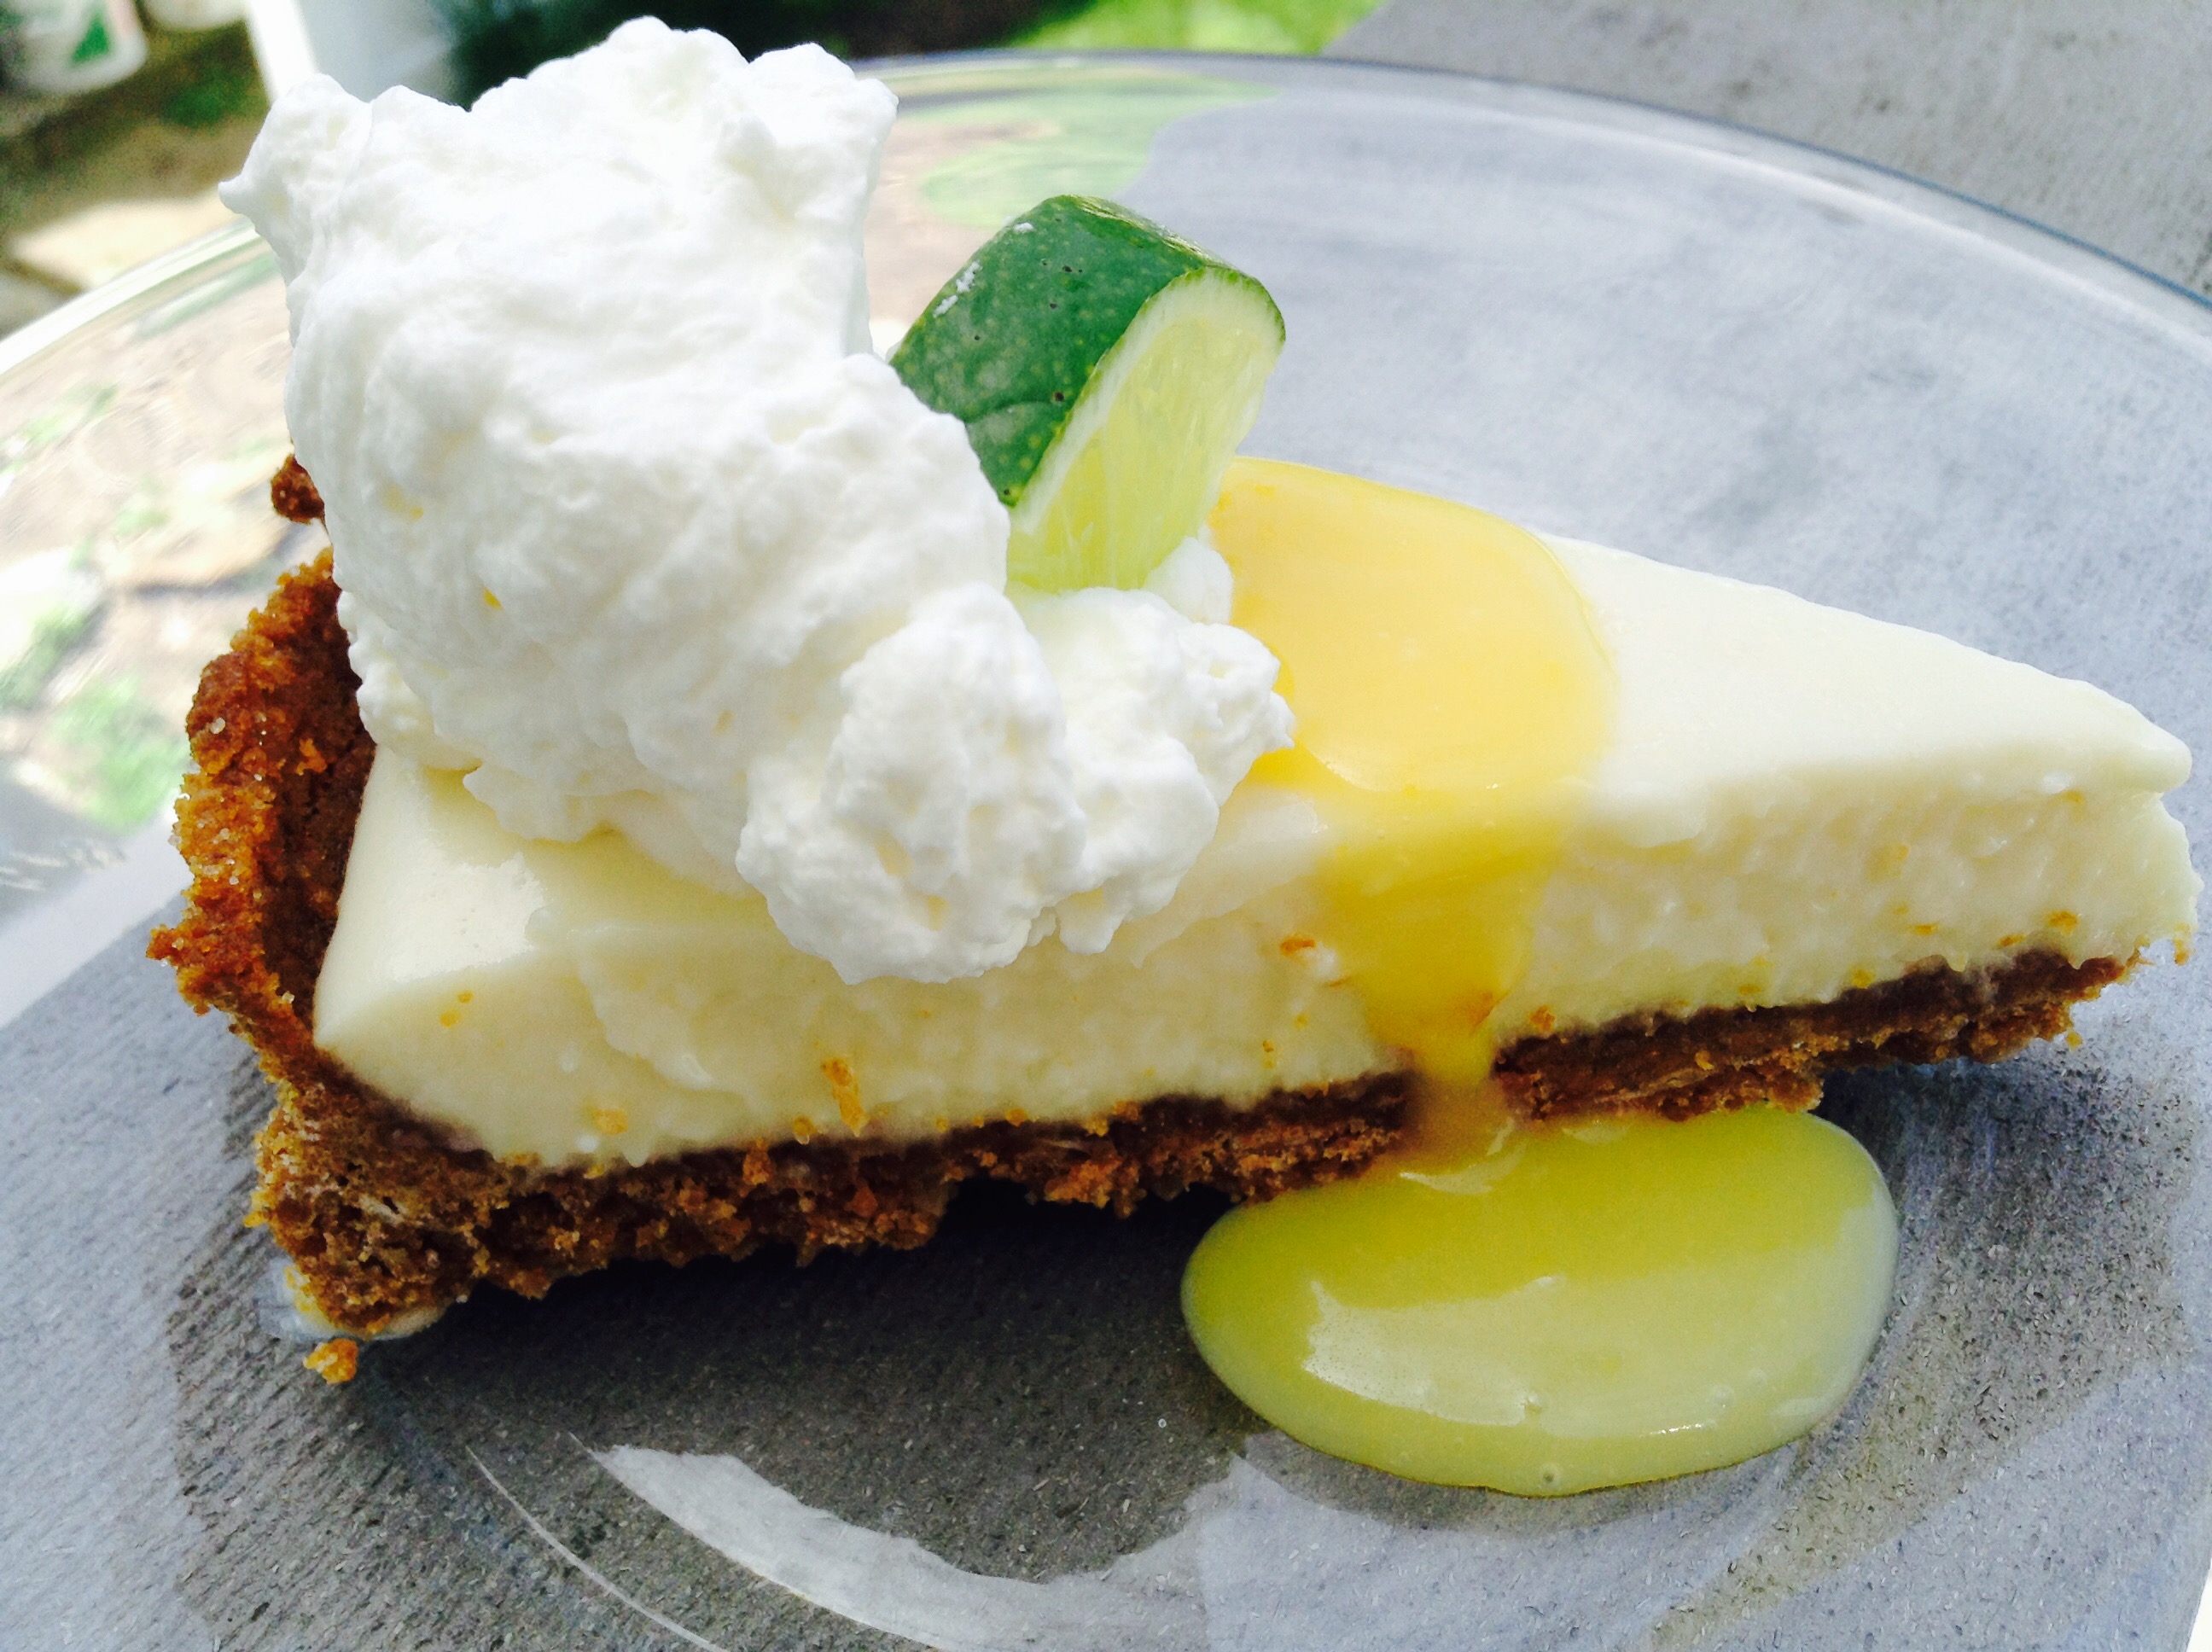
From what I overheard, their final dessert was the ultimate perfection, and had made quite an impact, sending them off on a high, happy note. As I thought on all of this someone quietly appeared offering me a luscious looking lime creation garnished with a fresh mint leaf and whipped cream on a crystal clear glass dessert plate. Suddenly I was reminded of a favorite verse of scripture in the Old Testament where God in referring to prayer says: “Before they call, I will answer.”
Print Recipe
Votes: 0
Rating: 0
You:
Rate this recipe!
Luscious Lime Tart
SERVINGS8servings
|
COOK TIME8mins |
PREP TIME40mins |
READY IN3hrs |
Ingredients
Instructions
Crust:
- Preheat oven to 350° Fahrenheit.
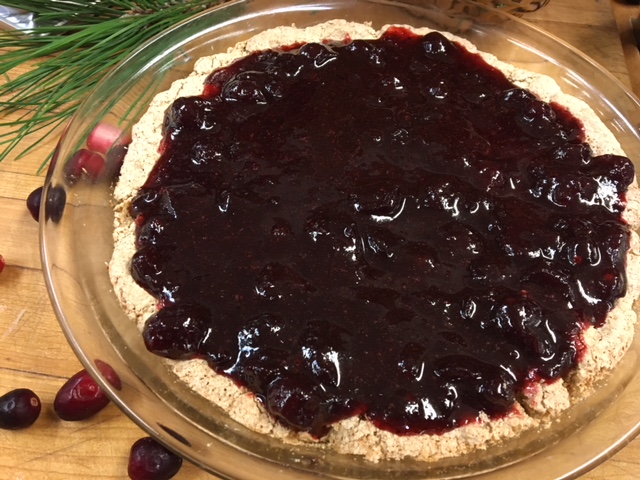
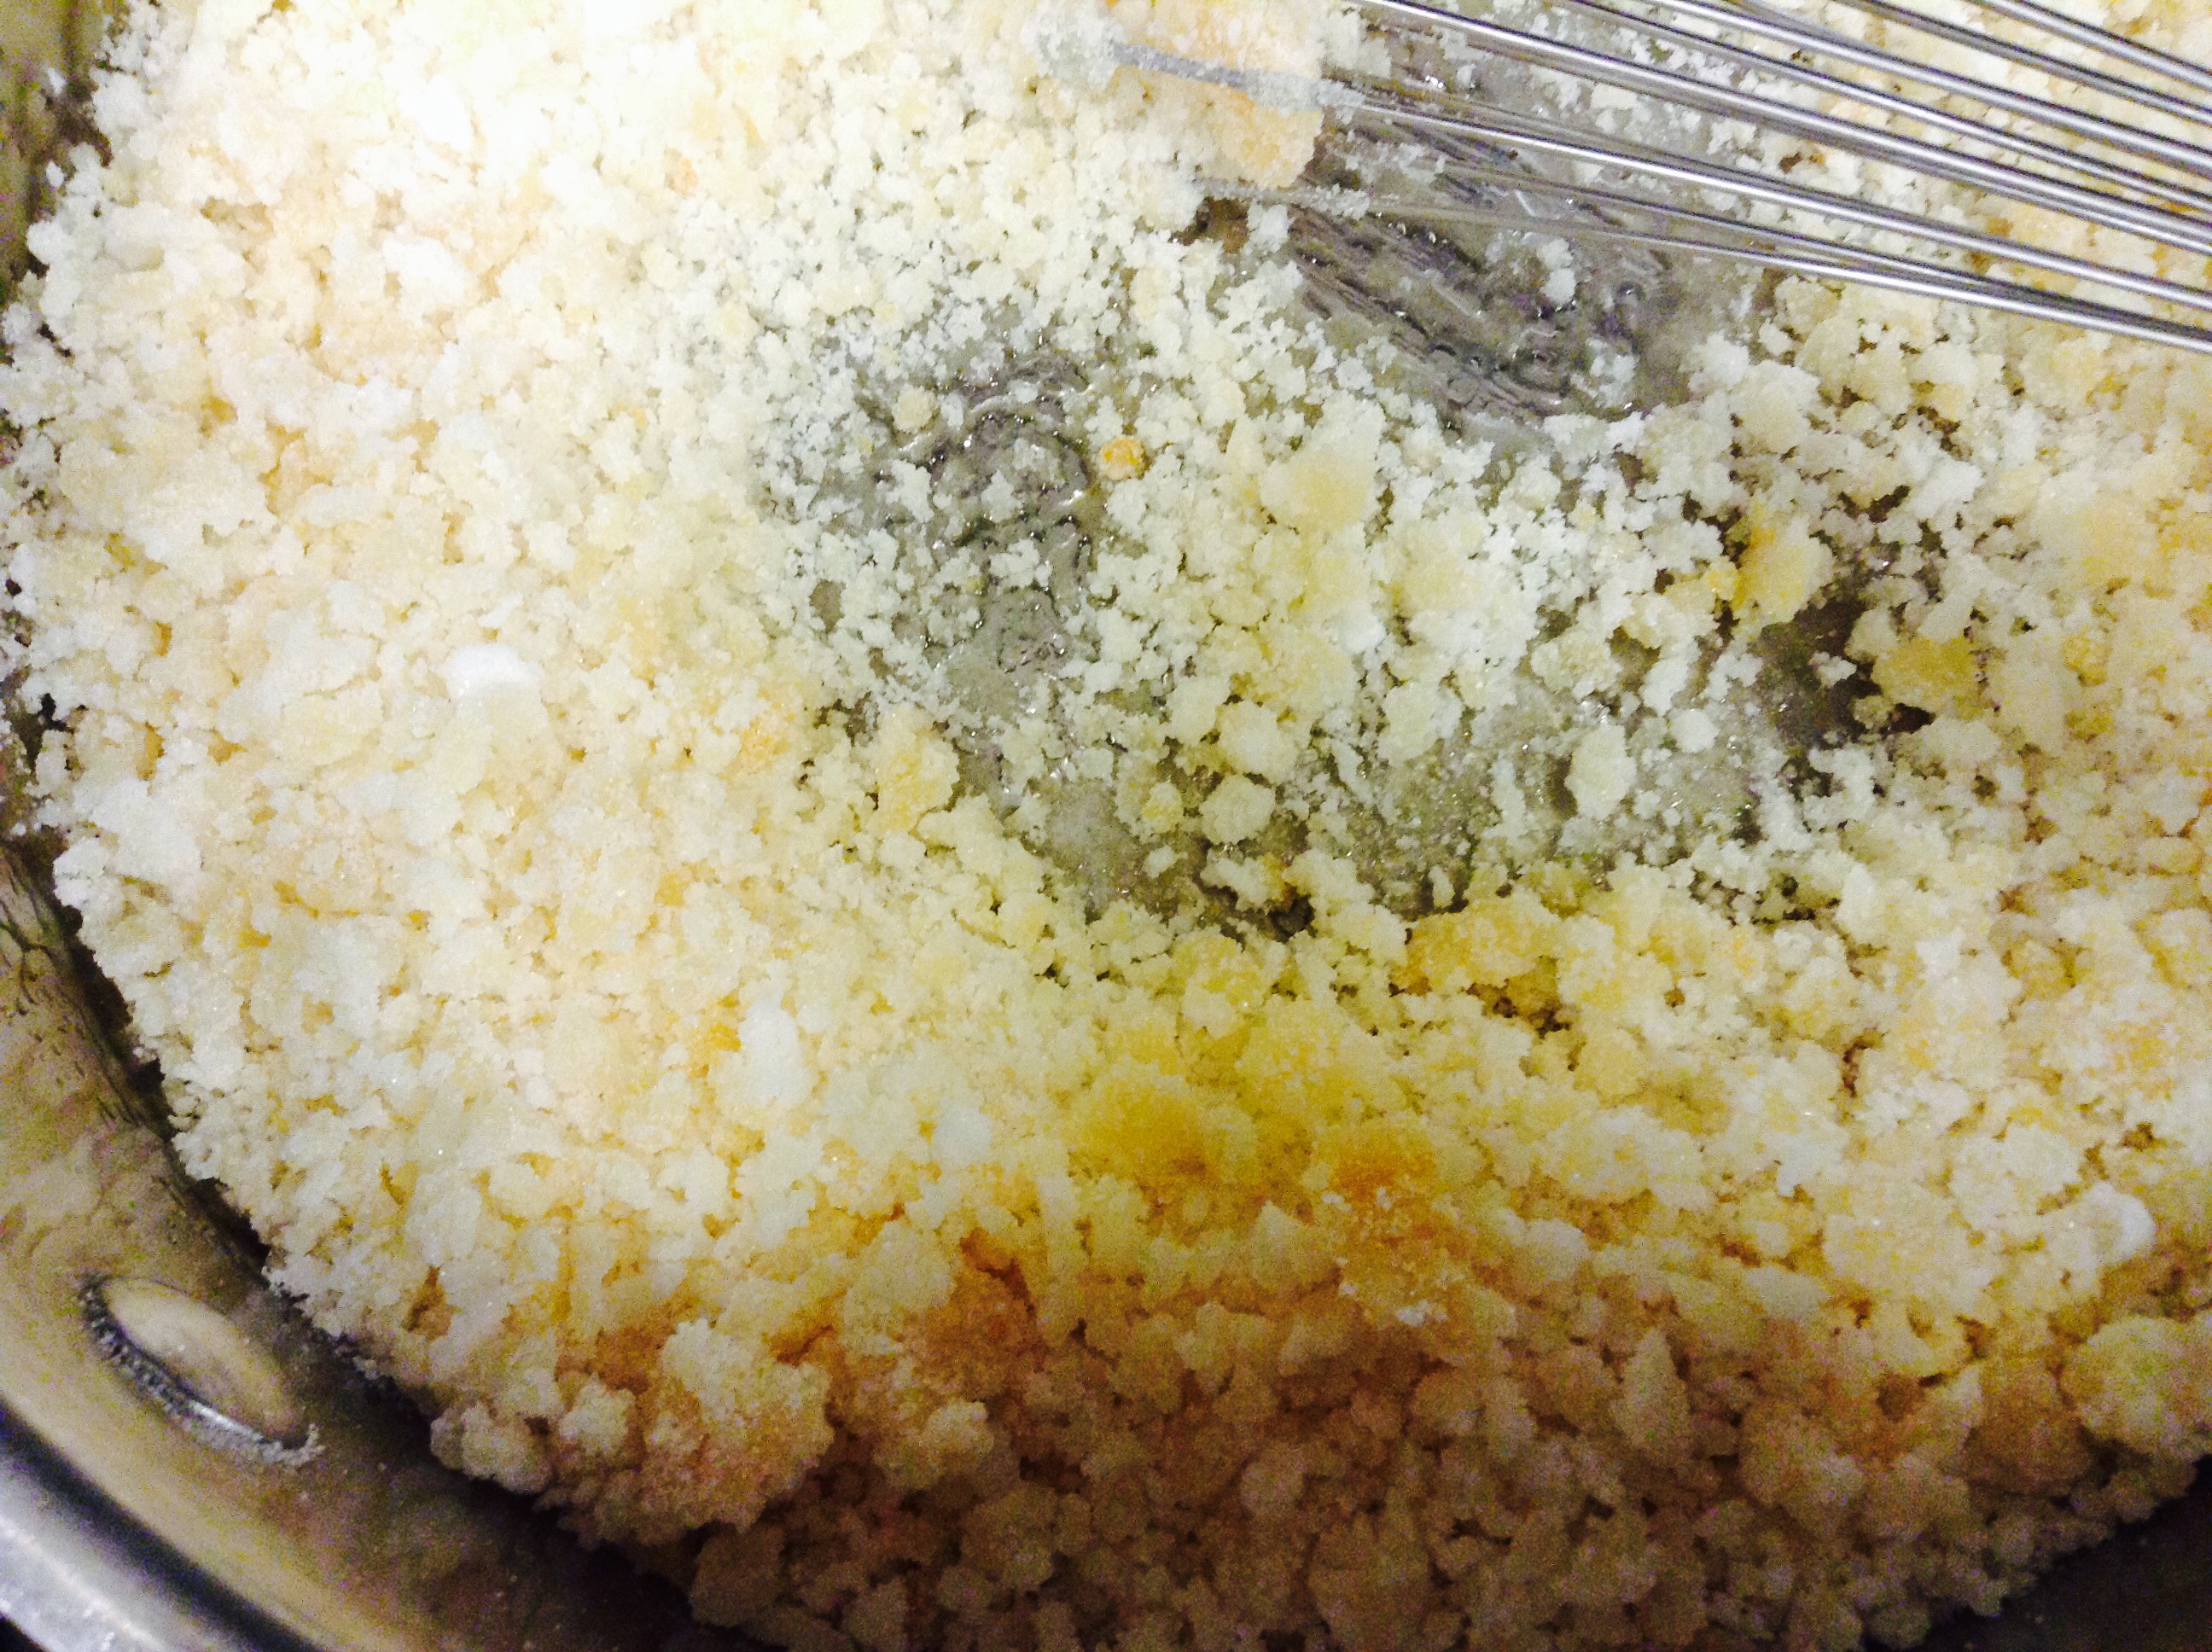
- Add graham cracker crumbs and sugar to the bowl of a food processor and pulse until blended. Transfer to a medium bowl and add coconut flakes and melted butter. Toss to combine completely. Pour the crumbs into an 8-inch tart pan with removable bottom. Press the crumbs into the bottom and sides of the pan. Bake for 8-10 minutes or until browned. Set aside to cool completely.
Filling:
- In a large bowl, combine the sweetened condensed milk and lime juice. Stir until thick and well incorporated. Set aside.
- Place the gelatin in a small bowl and cover with water. Let stand two minutes to bloom. Microwave in 10-second bursts until gelatin is dissolved. Cool the gelatin to near room temperature, but do not let it set—very important.
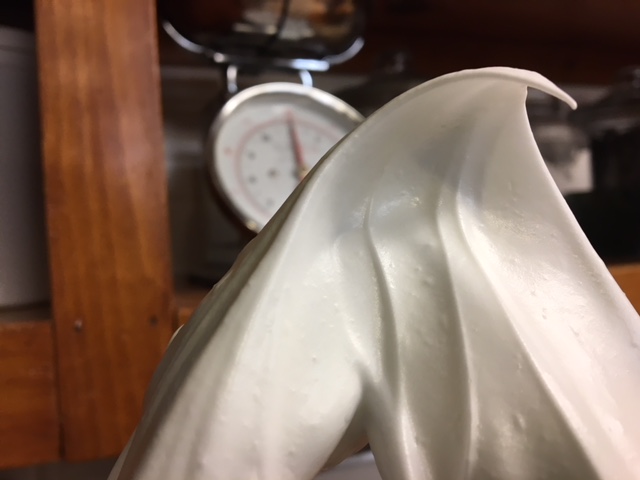
- Add the whipping cream to the bowl of a stand mixer. (If you don't have a stand mixer use a large mixing bowl and a handheld mixer.) Whip the cream for one minute on a medium speed. Slowly add the sugar to the cream. Turn off the mixer and check to see that the gelatin has cooled, but not set. Add the gelatin and continue to whip until stiff peaks form. Separately reserve about 1 to 1 1/2 cups of whipped topping for garnish.
- Spoon about 1/2 cup of whipped cream into the key lime filling and lightly stir to combine. Add the rest of the whipped cream and fold completely into the mixture, careful not to deflate the cream too much.
- Pour the filling into the cooled pie crust and smooth over with a spatula.
Topping:
- Garnish with whipped cream and thinly sliced lime as desired. Refrigerate for at least two hours for a cloud like dessert. For a frozen tart, freeze at least two hours.
- To serve, remove the tart from the freezer and let it sit out on the counter for 10-15 minutes to soften a little before slicing it.
This past week, we invited artists to step away for a few days of retreat as they enjoyed renewing their vision and sharing together, in an atmosphere of Benedictine hospitality on the shores of beautiful Cape Cod Bay. Each day was punctuated by two lectures given by renowned art historian, Msgr. Timothy Verdon. He shared his passionate love of art, with beautiful images—both familiar and unknown—in a series of seven post-Easter lectures. Art lovers had the opportunity to fellowship together, while Msgr. Verdon discussed what it means to see with artistic understanding. It was a treat for our entire community and a privilege to be behind the scenes creating meals for them to enjoy.
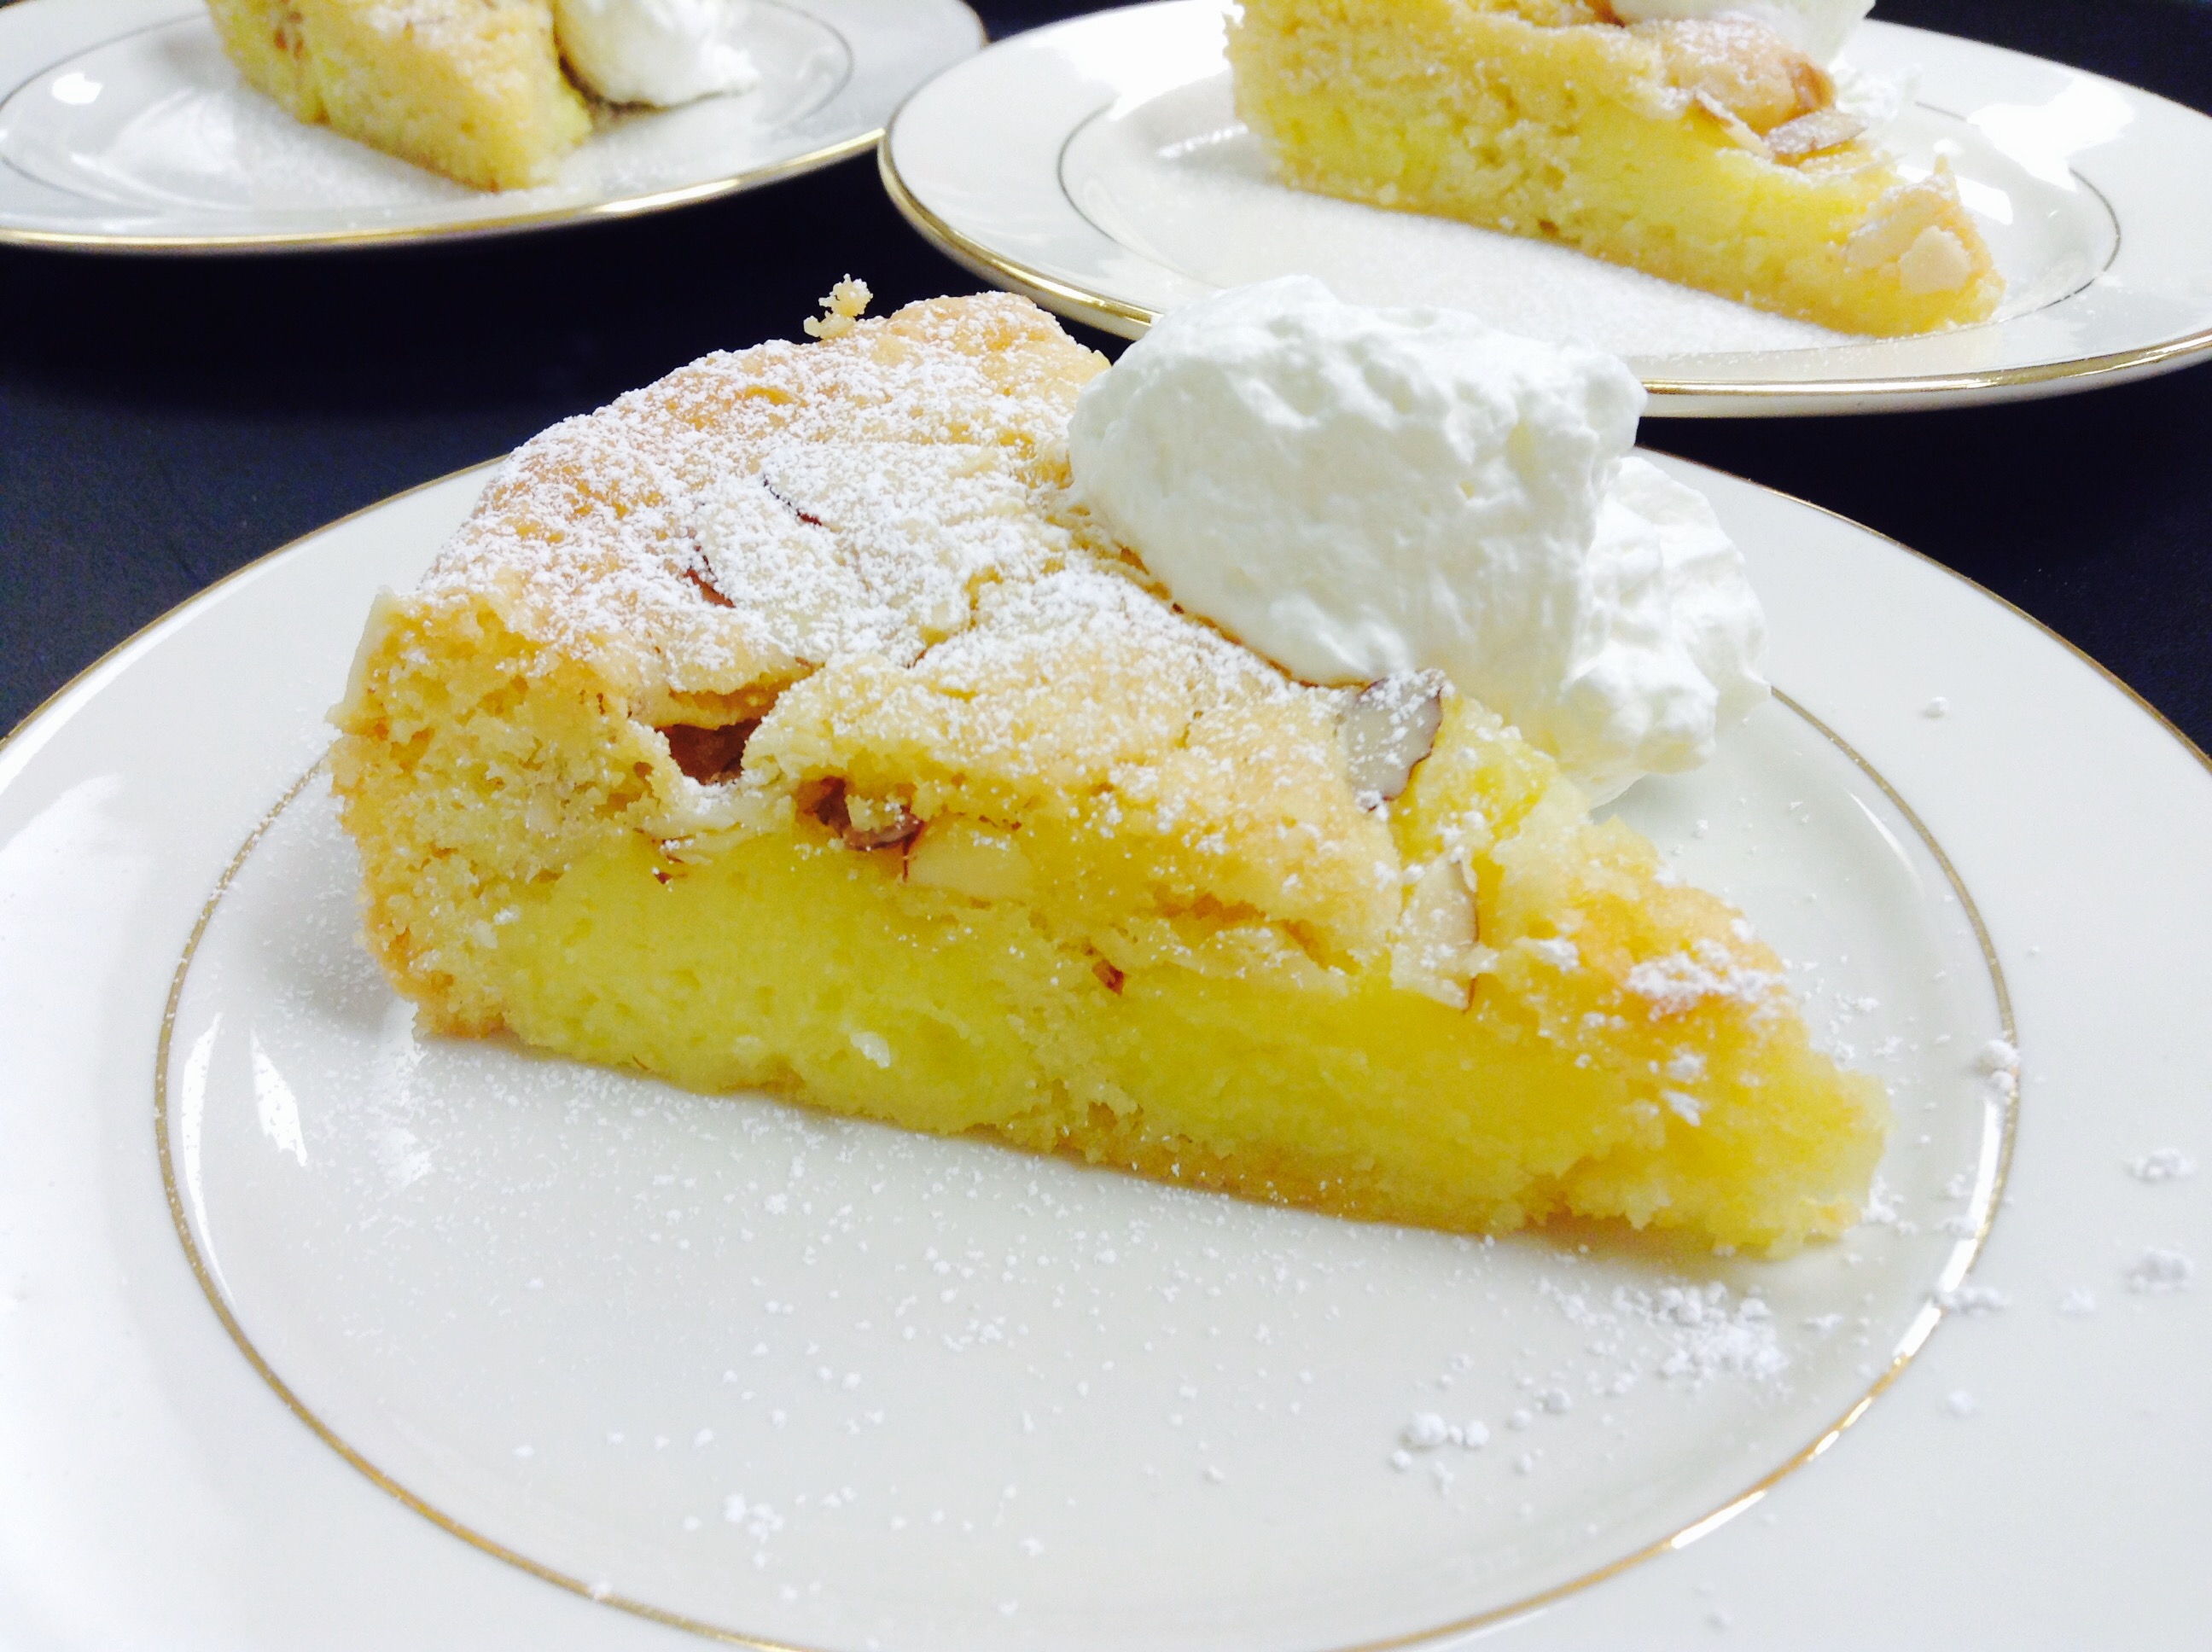
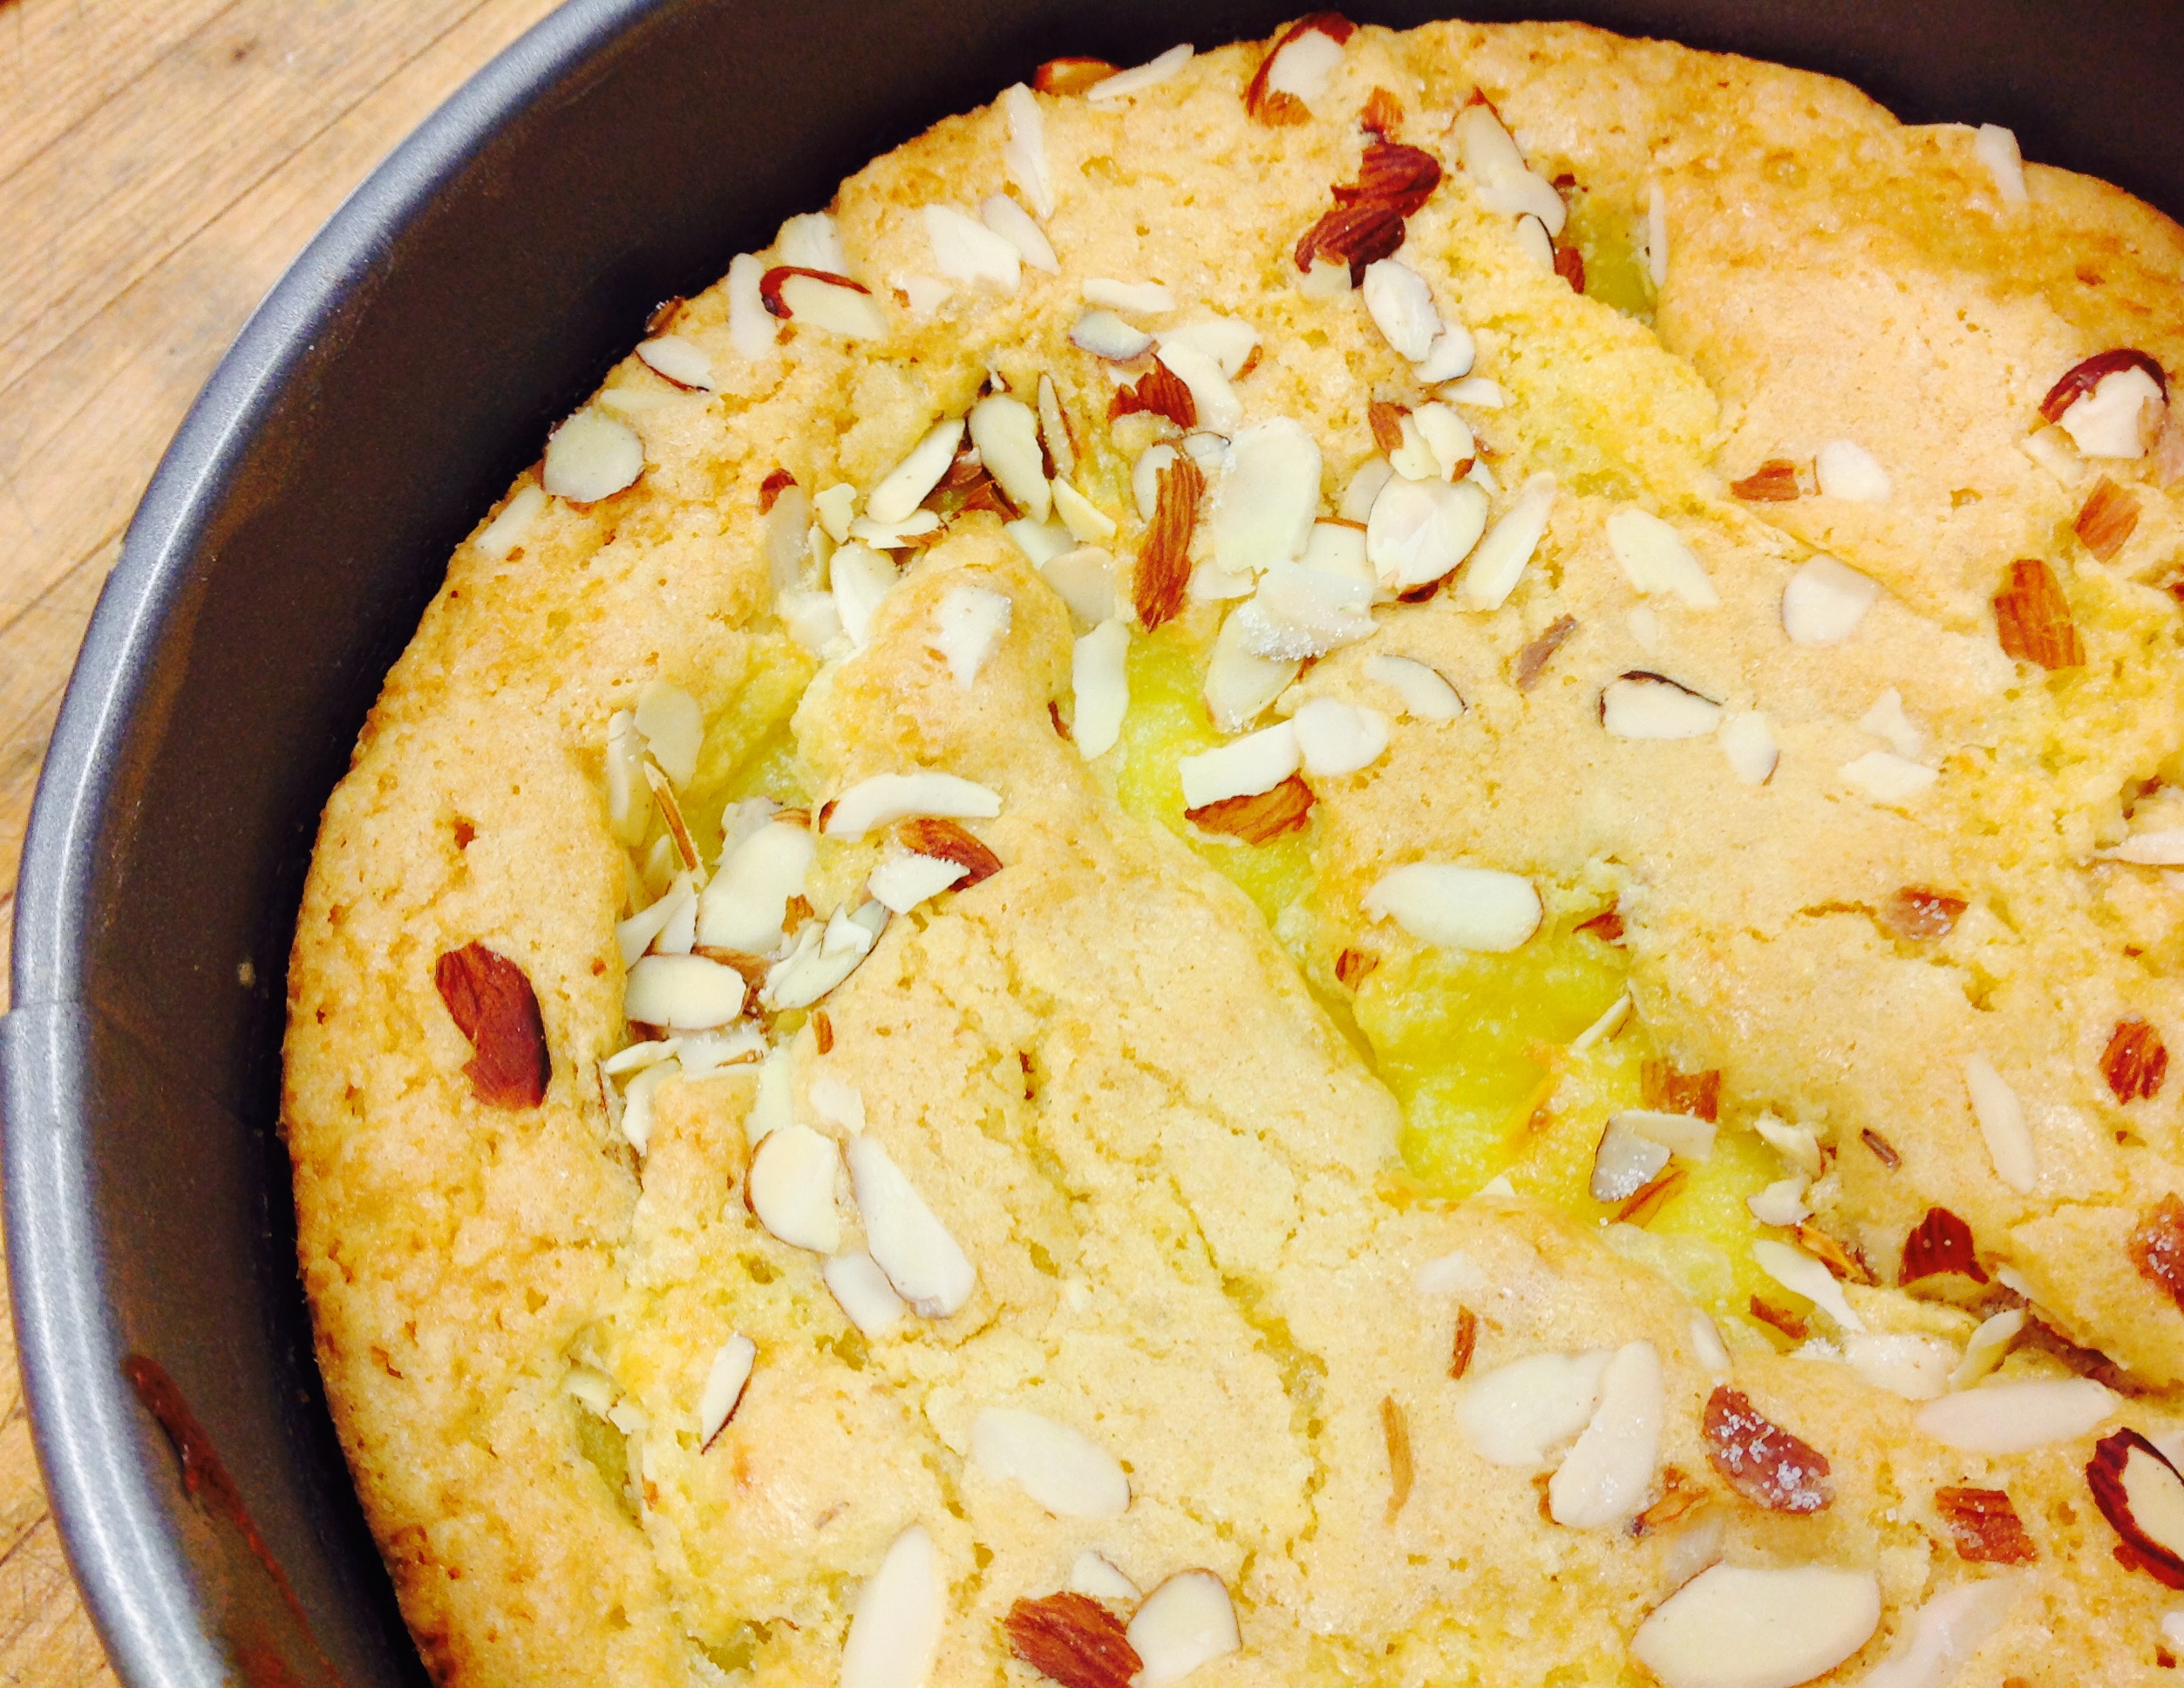
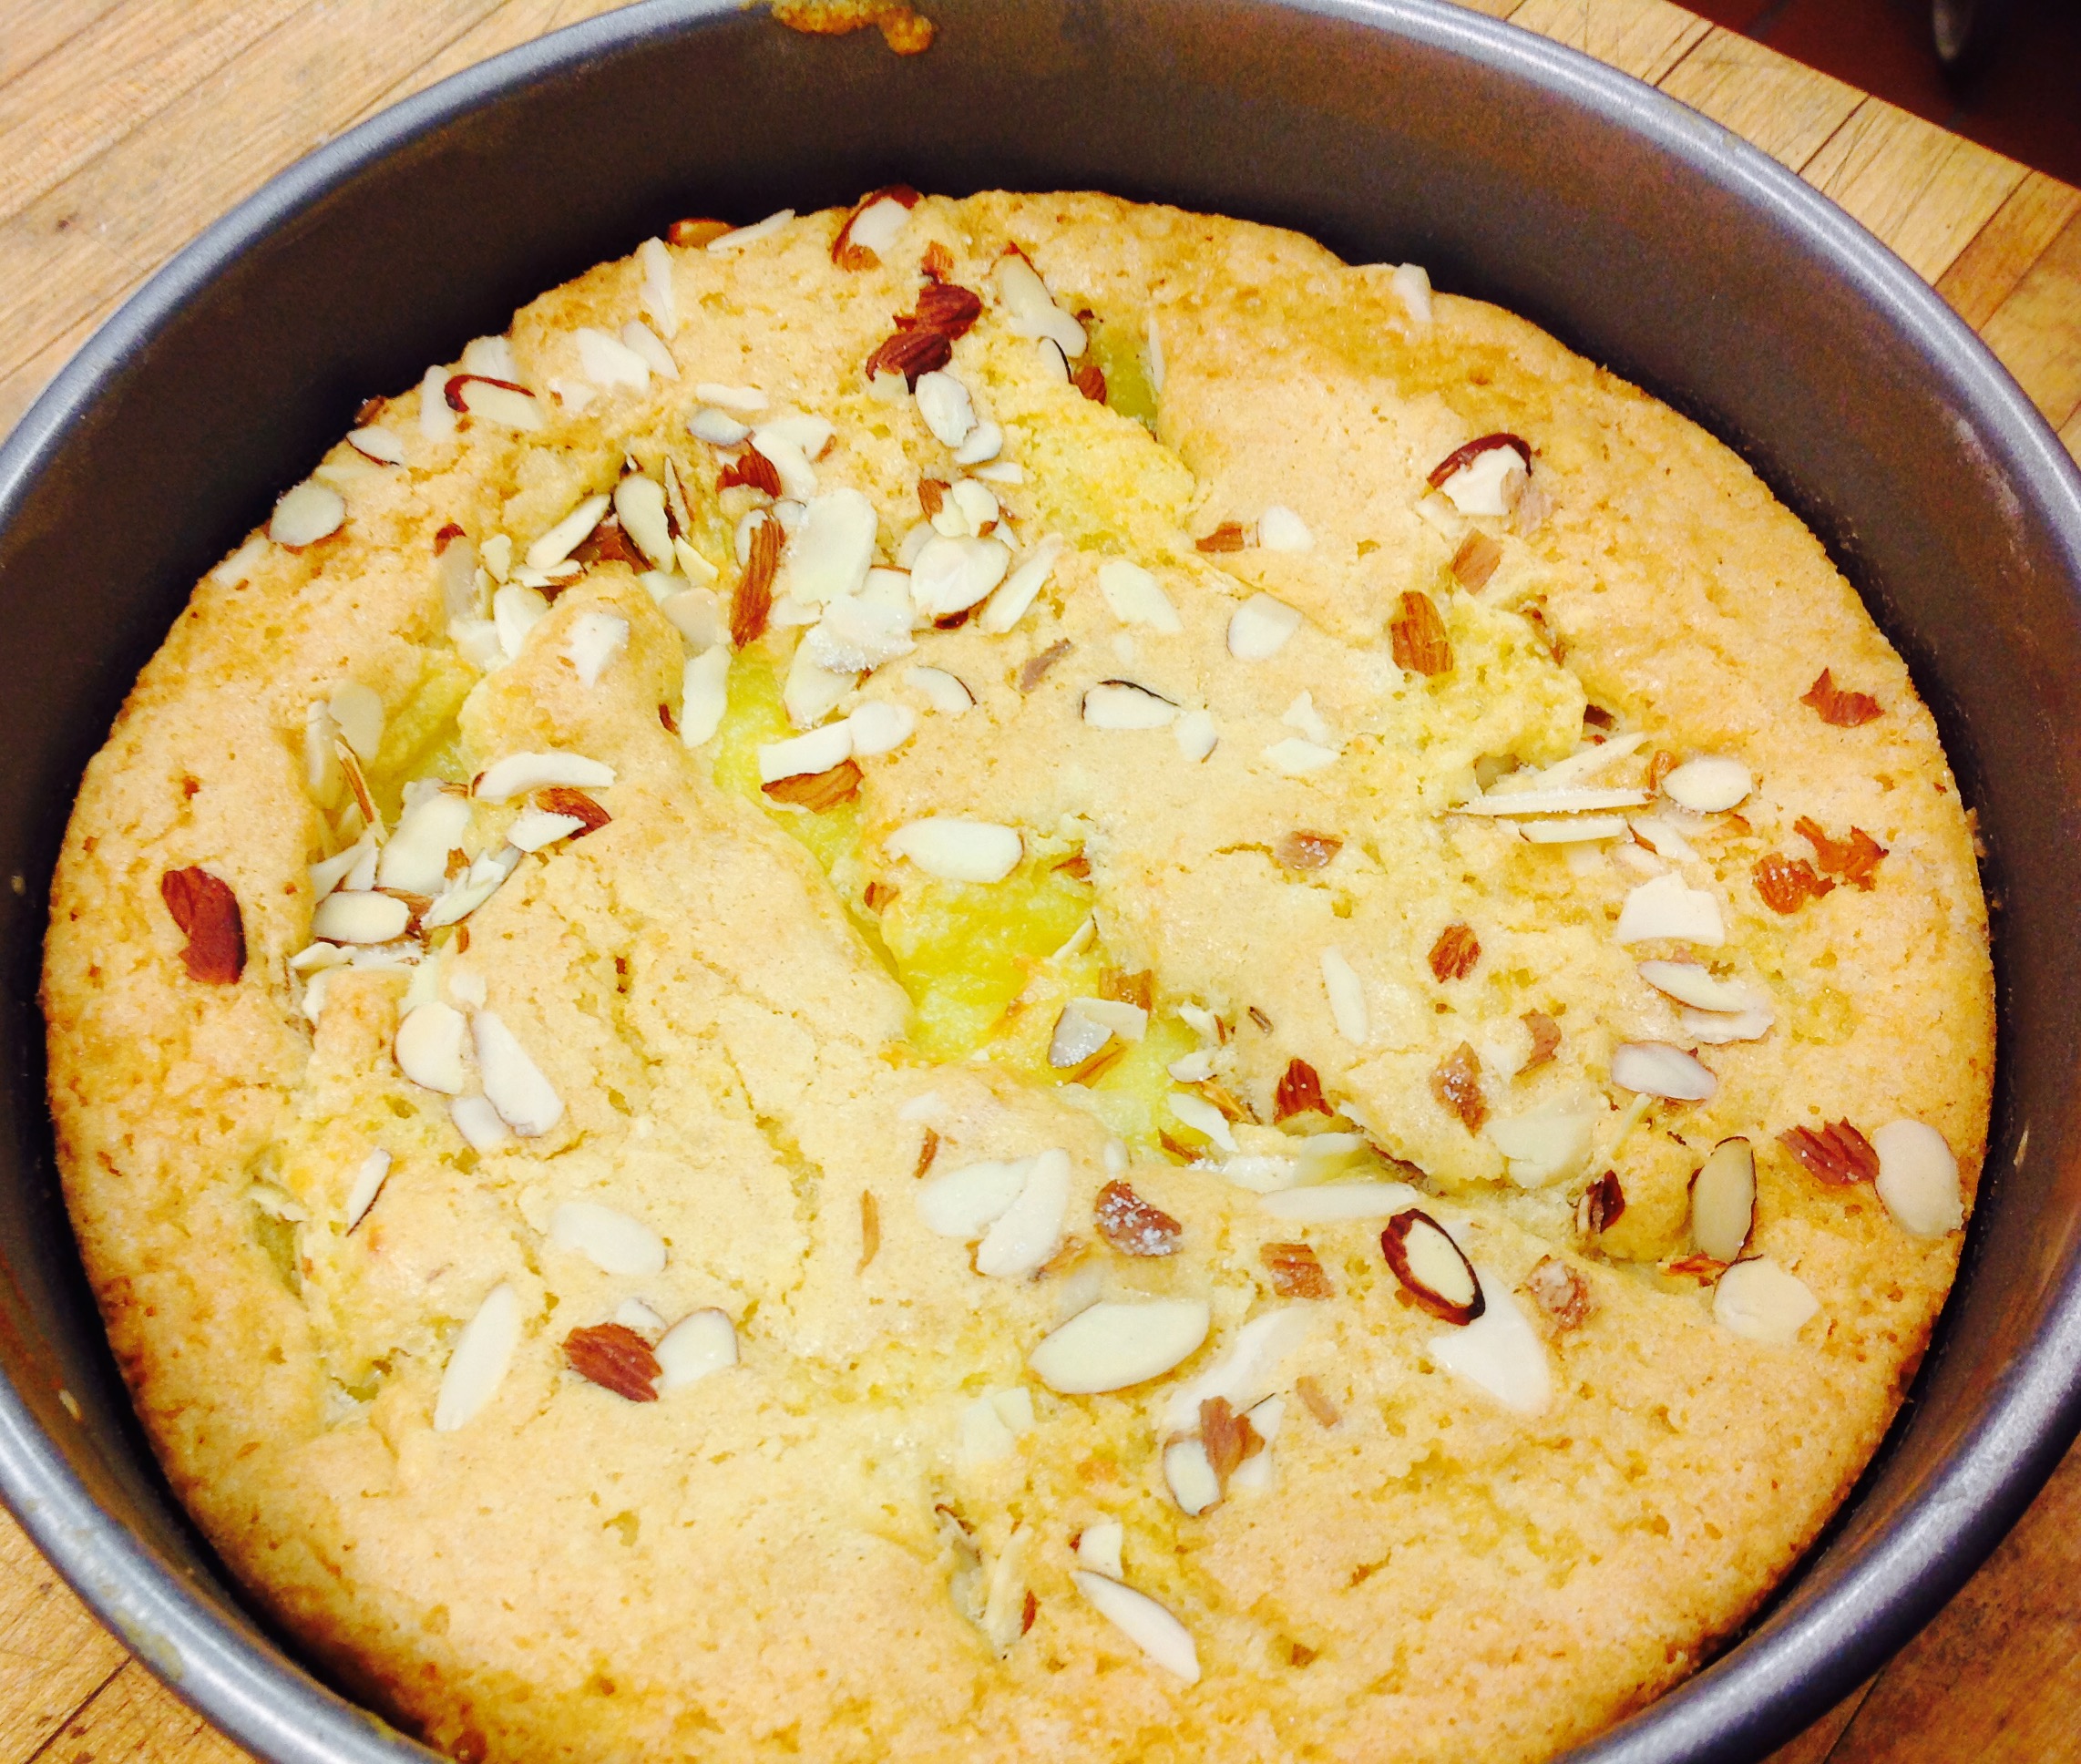
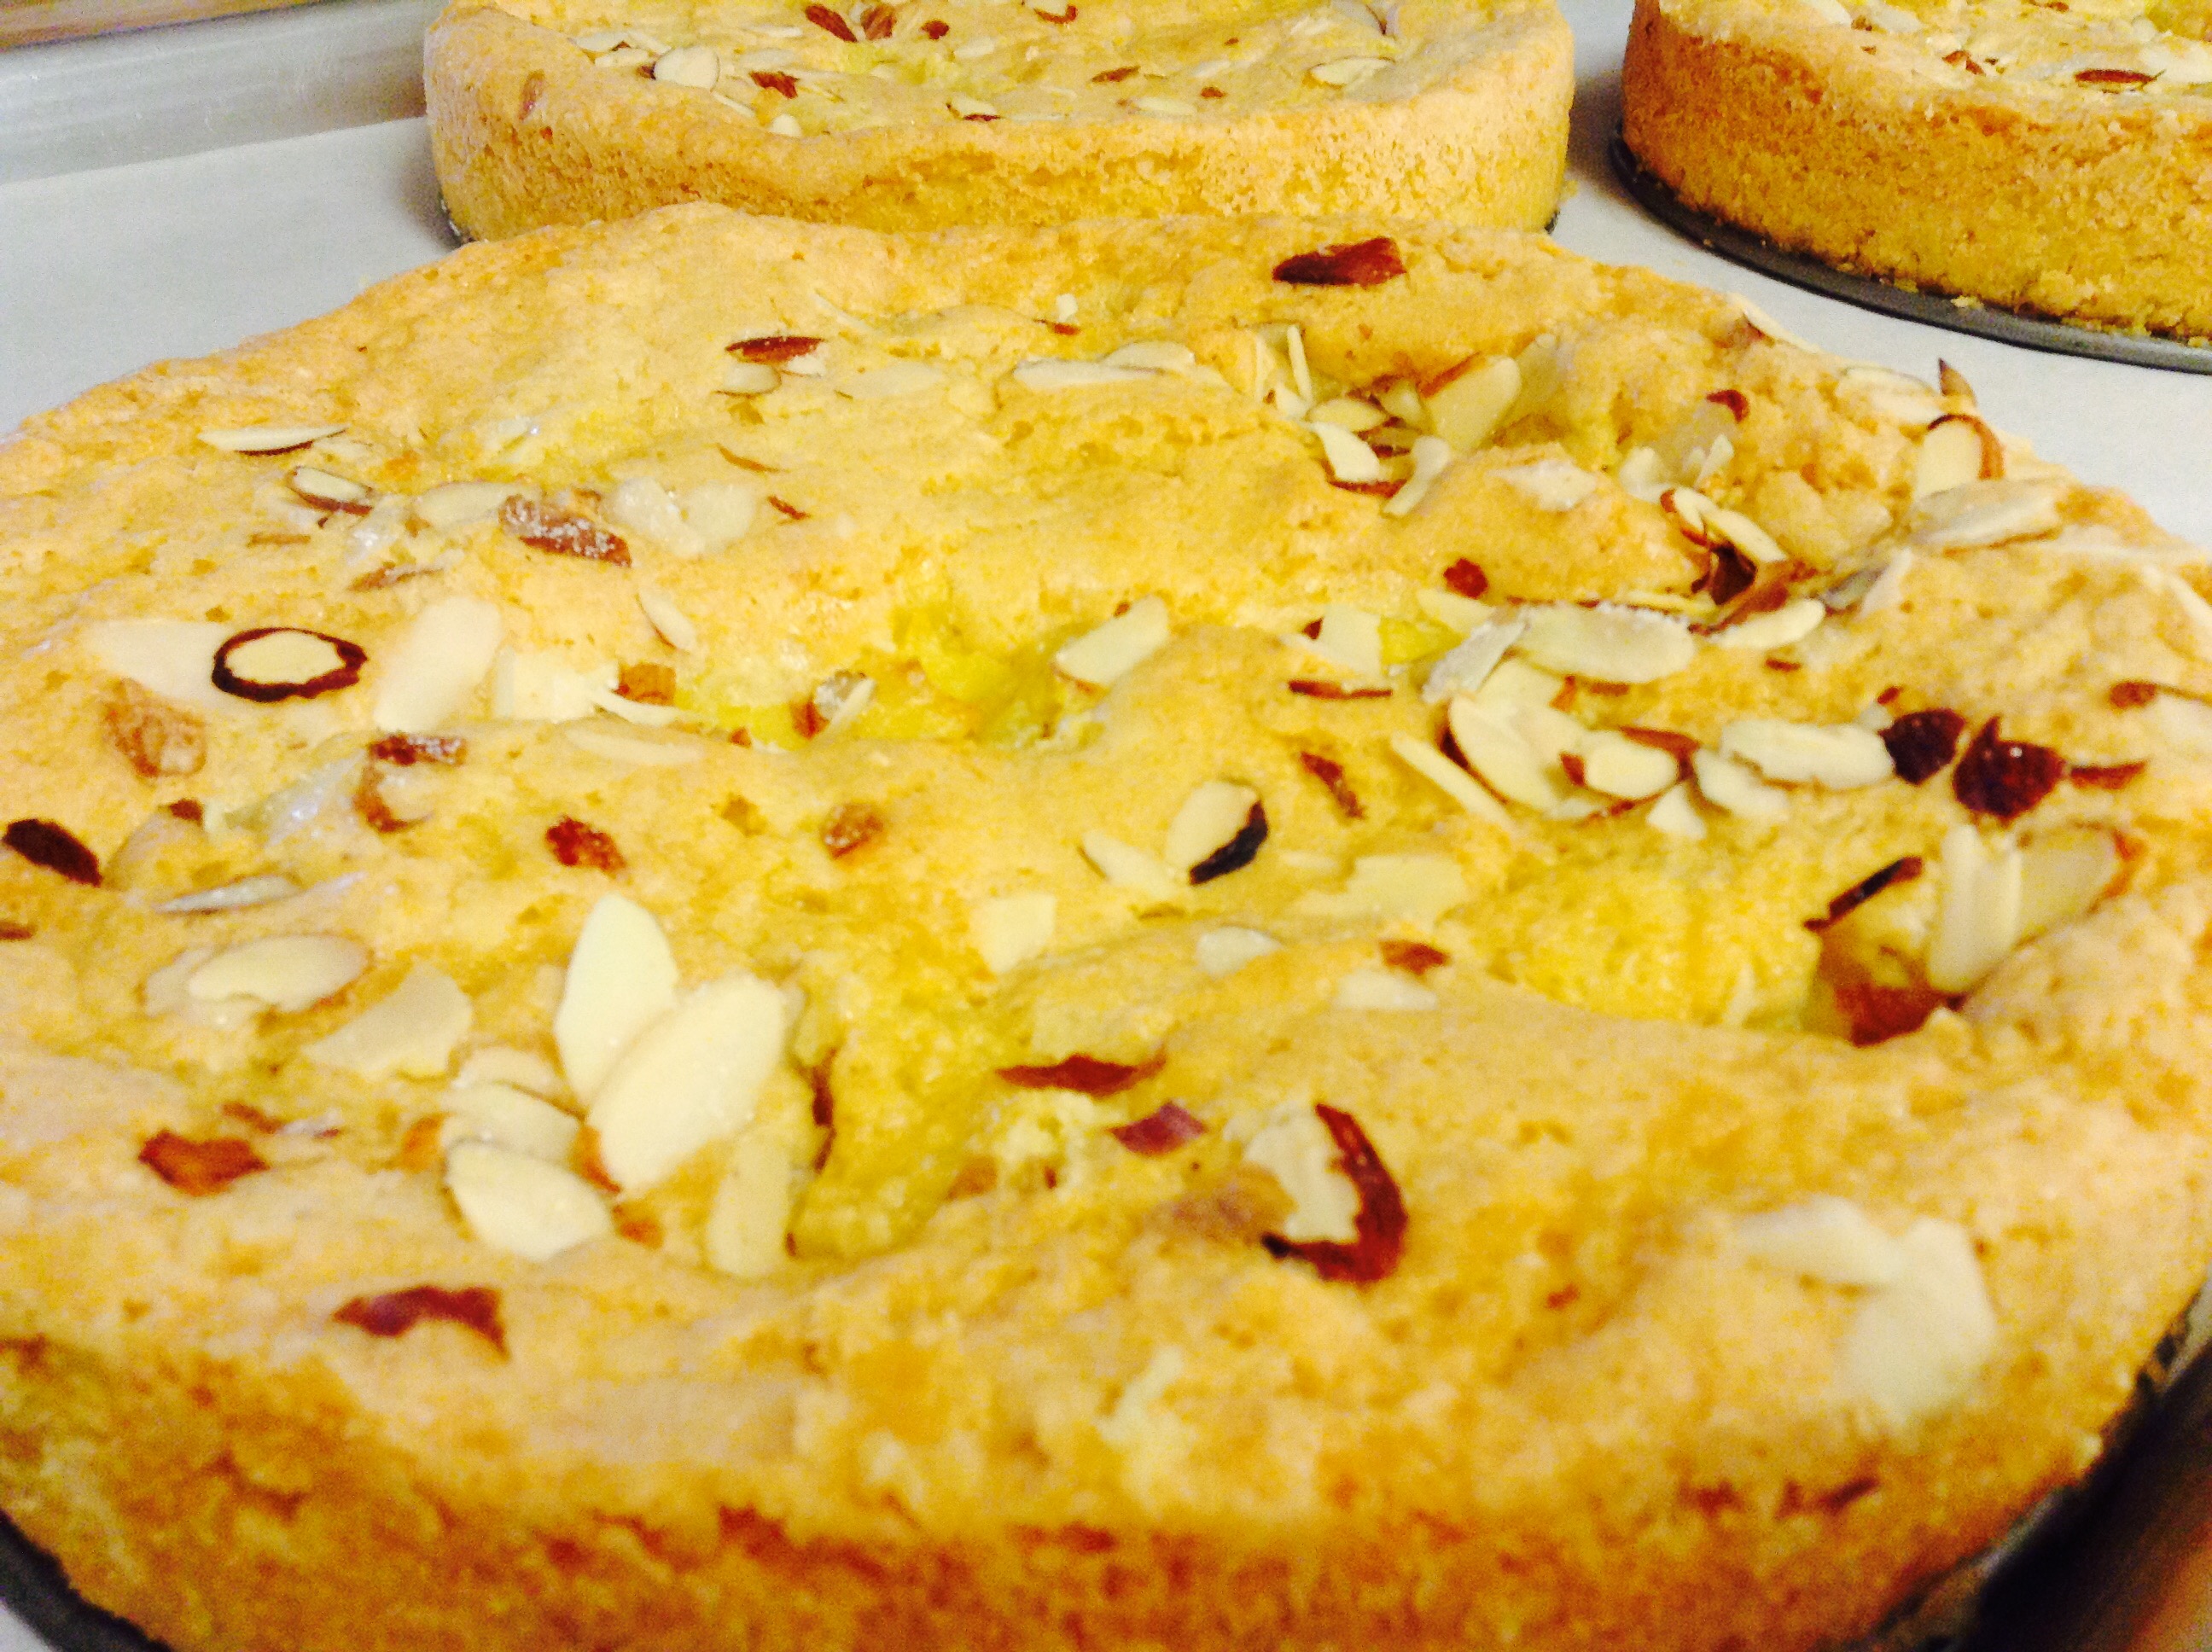
(Read more about the retreat here!)Oscar Wilde said, “The artist is the creator of beautiful things.” Even if you don’t consider yourself an artist, I believe that you are. Every one of us wishes to create beautiful things out of nothing. Take this Lemon-Almond Butter Cake for example…
Print Recipe
Votes: 0
Rating: 0
You:
Rate this recipe!
Lemon-Almond Butter Cake
SERVINGS19" tart
|
COOK TIME1hr |
PREP TIME20mins |
READY IN3hrs |
Ingredients
Instructions
- For the curd, combine zest, juice, sugar, salt and eggs in a heatproof bowl, and beat well.
- Add butter, and place over a saucepan full of simmering water. Cook, stirring constantly with a rubber spatula or wooden spoon, until mixture thickens into curd, about 5 minutes.
- Strain into a bowl, and press plastic wrap onto surface to keep skin from forming. Refrigerate until cool, at least 1 1/2 hours.
- Heat oven to 350 degrees. Grease 9-inch spring-form pan with 1 tablespoon butter, and dust with 1 tablespoon flour, shaking out excess.
- With an electric mixer, cream the remaining butter and 1 cup sugar together until light and fluffy. Sift together the remaining flour, baking powder and salt, and stir in.
- In a separate bowl, whisk eggs until they start to foam. Do not overbeat or the cake will be tough. Add eggs and ground almonds to batter, and mix well.
- Scrape batter into the prepared pan. Drop 8 individual tablespoons lemon curd around perimeter of batter, leaving a 1-inch border, and taking care to space drops evenly.
- Drop 3 to 4 tablespoons curd into center of batter. Refrigerate remaining curd for another use. Sprinkle cake with toasted almonds and 1 to 2 tablespoons sugar, depending on taste.
- Bake until cake is toasty brown on top and a toothpick inserted into cake (not curd) comes out clean, about 40 minutes.
- Let cool on rack 10 minutes, then remove sides of pan, and cool completely.
- Whip cream with almond liqueur. Present cake at table, and offer whipped cream on the side.
(Recipe adapted from the New York Times)