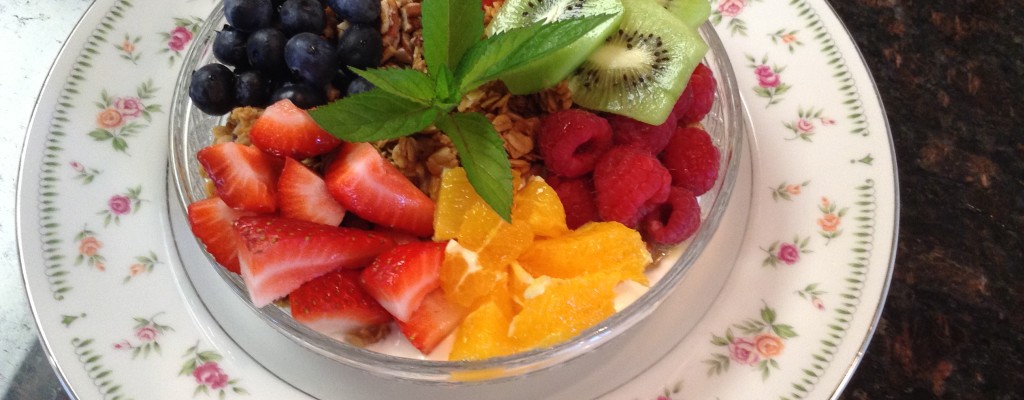
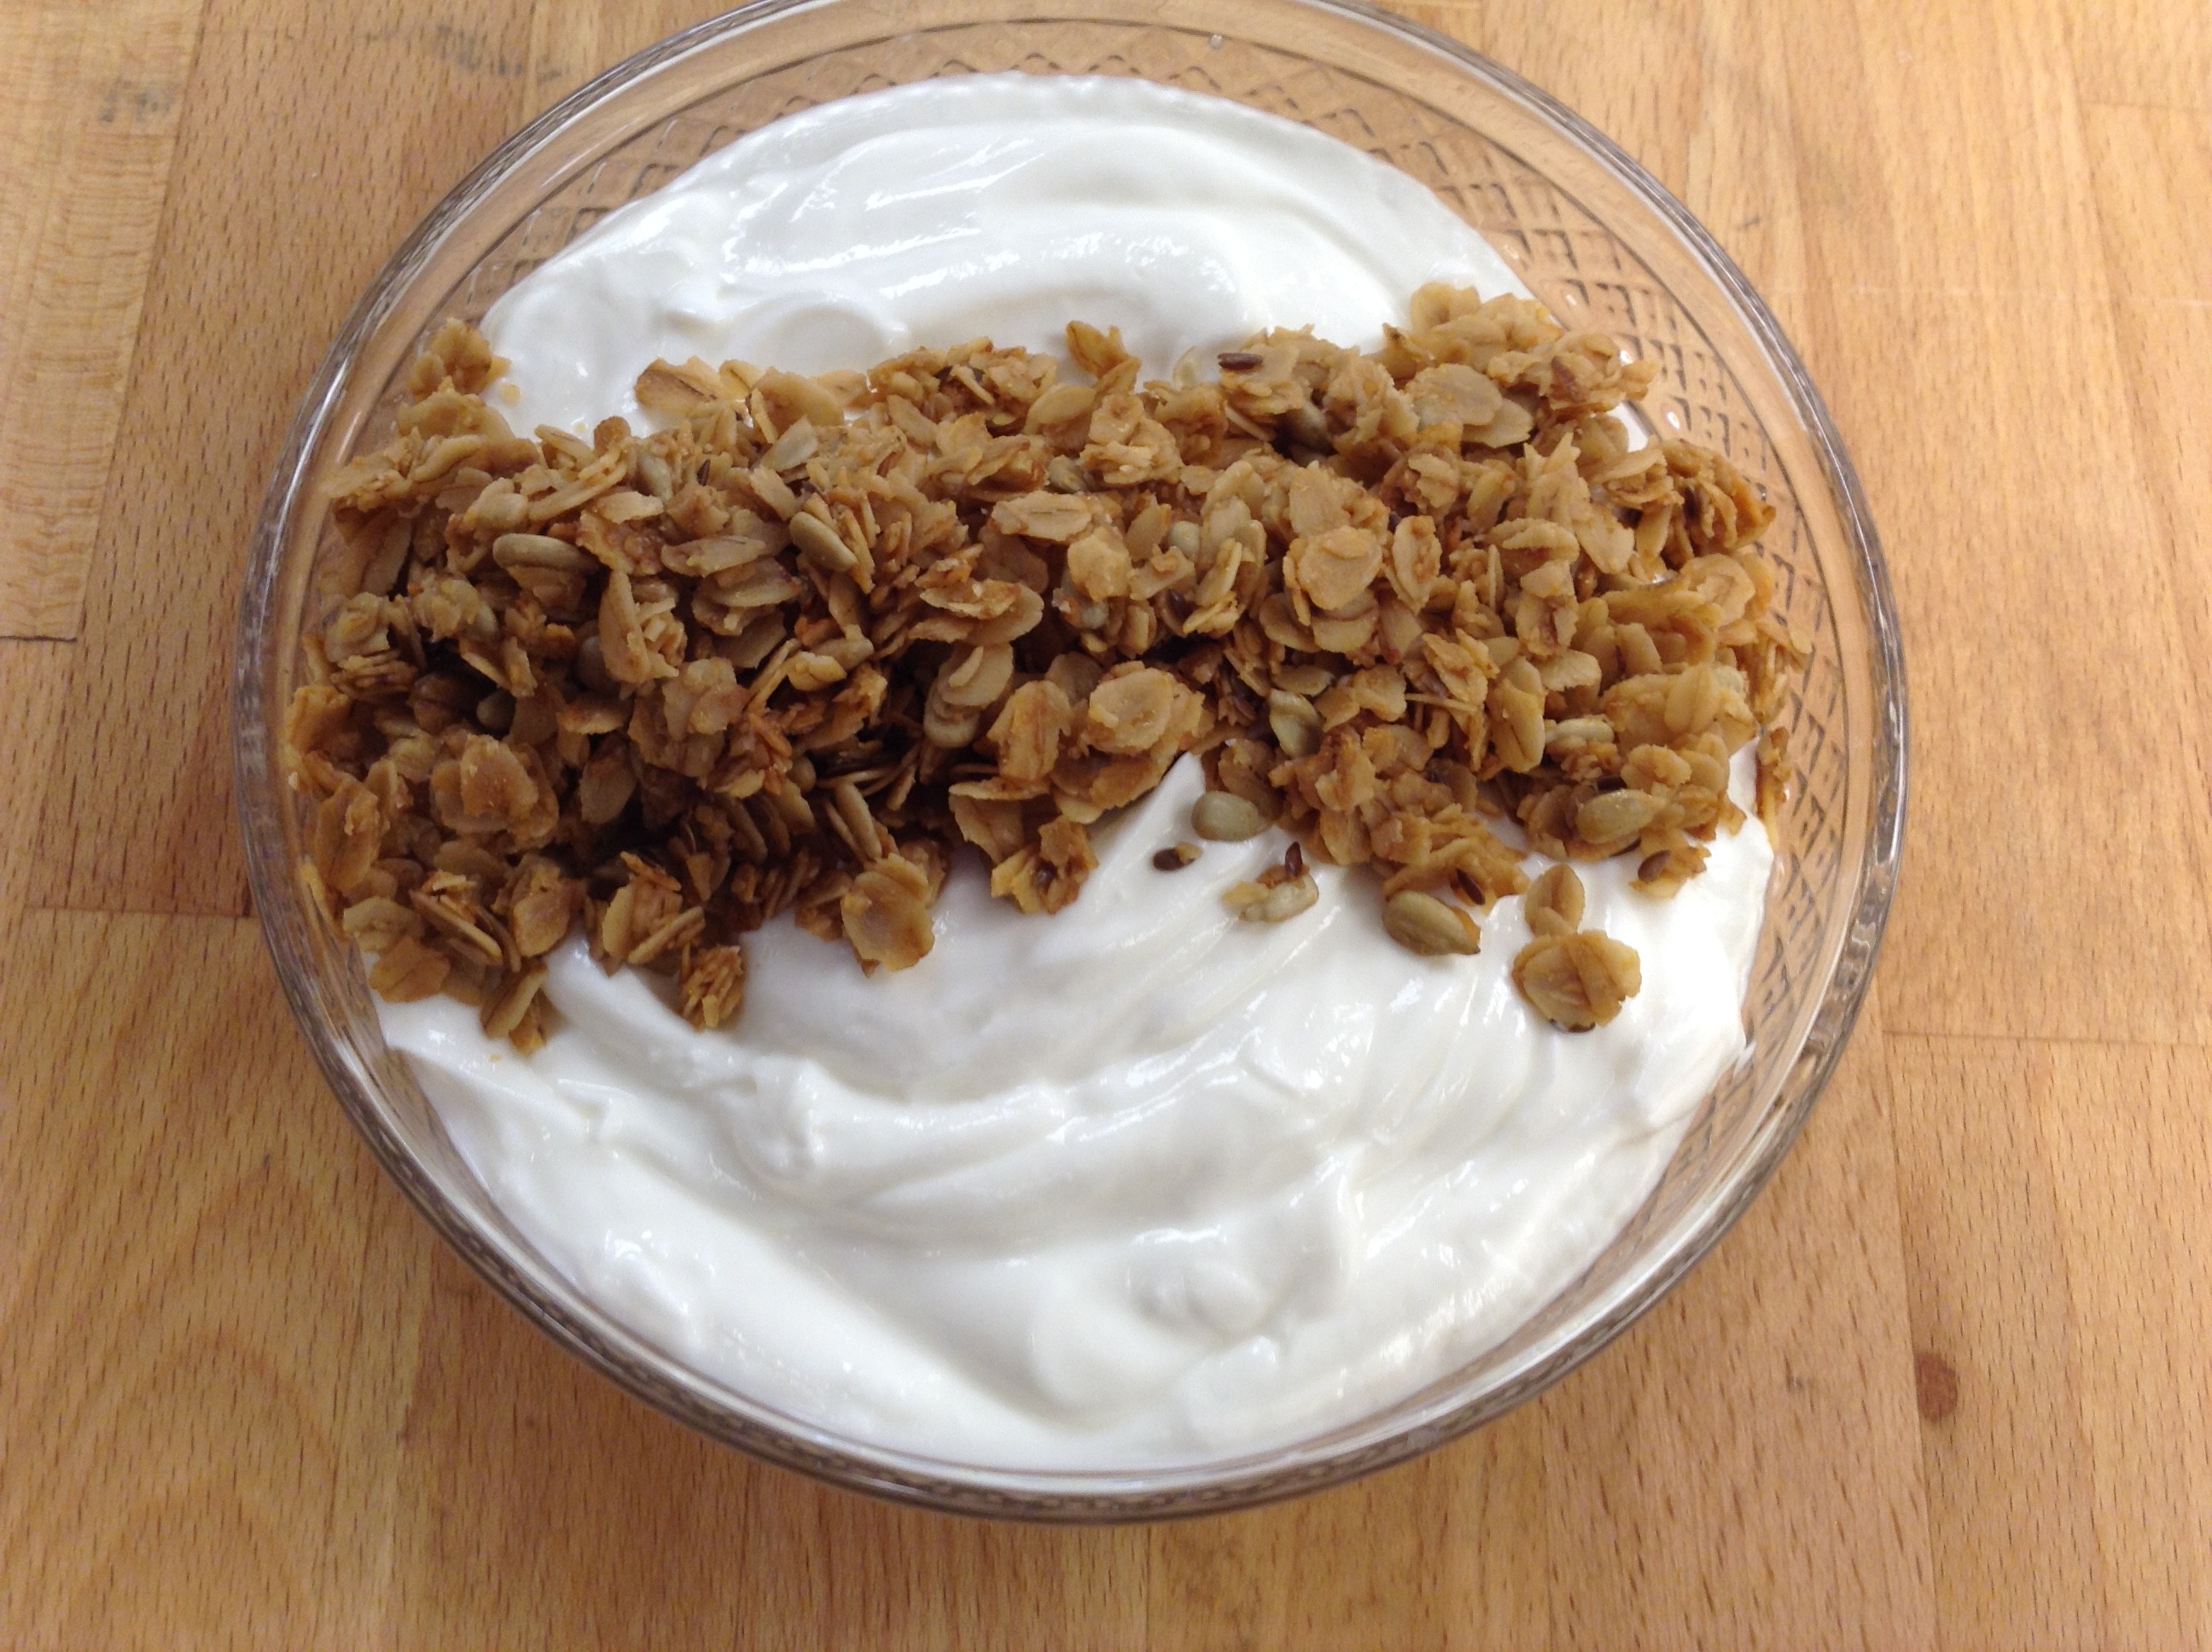
If you should be up and around at 5:30 every a.m. you are apt to see two young sisters making their way down the road to the barn to milk our 3 cows. These gorgeous brown guernseys keep us well supplied with quality fresh milk every day. This makes it possible for us to produce our own yogurt and soft cheeses which we have doing for some time. Only recently however, have we begun to use the Crockpot method which results in a wonderfully thick satisfying yogurt with little to no effort. Combine this with our homemade granola and some fresh fruit and you have a beautiful, bright, healthy breakfast that is a favorite at the convent.
We decided to offer it for our last oblate retreat and it was met with such overwhelmingly positive response from so many we have decided to serve it again in the near future. Perhaps you would like to give it try even if you don’t have any cows of your own. Healthy Summer Breakfast!
Print Recipe
Votes: 0
Rating: 0
You:
Rate this recipe!
Homemade Granola with Yogurt
Granola -
Serves: 12
Prep Time: 20 minutes
Cook Time: 1 hour 15 minutes
Cool Time: overnight
Ready In: Next day
Crockpot Yogurt -
Serves 16
Prep Time: 10 minutes
Cook Time: 20 minutes approximately
Cool Time: 3.5-4 hours
Cure Time: 10-12 hours
Drain Time: 2 -4 hours (if thicker yogurt is desired)
Ready In: Next day
What You will Need:
Electric Crockpot
Some Type of Cooking or Dairy Thermometer
A Wisk or Fork
A Colander
Muslin, Plyban Cheescloth or some woven type of woven cloth
Bath towel or woolen scarf
Oven or Other draft free warm location
SERVINGS12(for granola)
|
COOK TIME |
PREP TIME |
READY IN |
Ingredients
Instructions
Granola
- Heat the first four ingredients (through the vanilla) in a skillet,
then add the next 2 items (oats and cinnamon) and mix well
- Spread evenly on paper lined sheet pans. Bake 1 hr 15 min on 225 degrees Fahrenheit.
- Leave granola in oven overnight and package the following day --
mixing in the raising first and breaking up chunks
Crockpot Yogurt
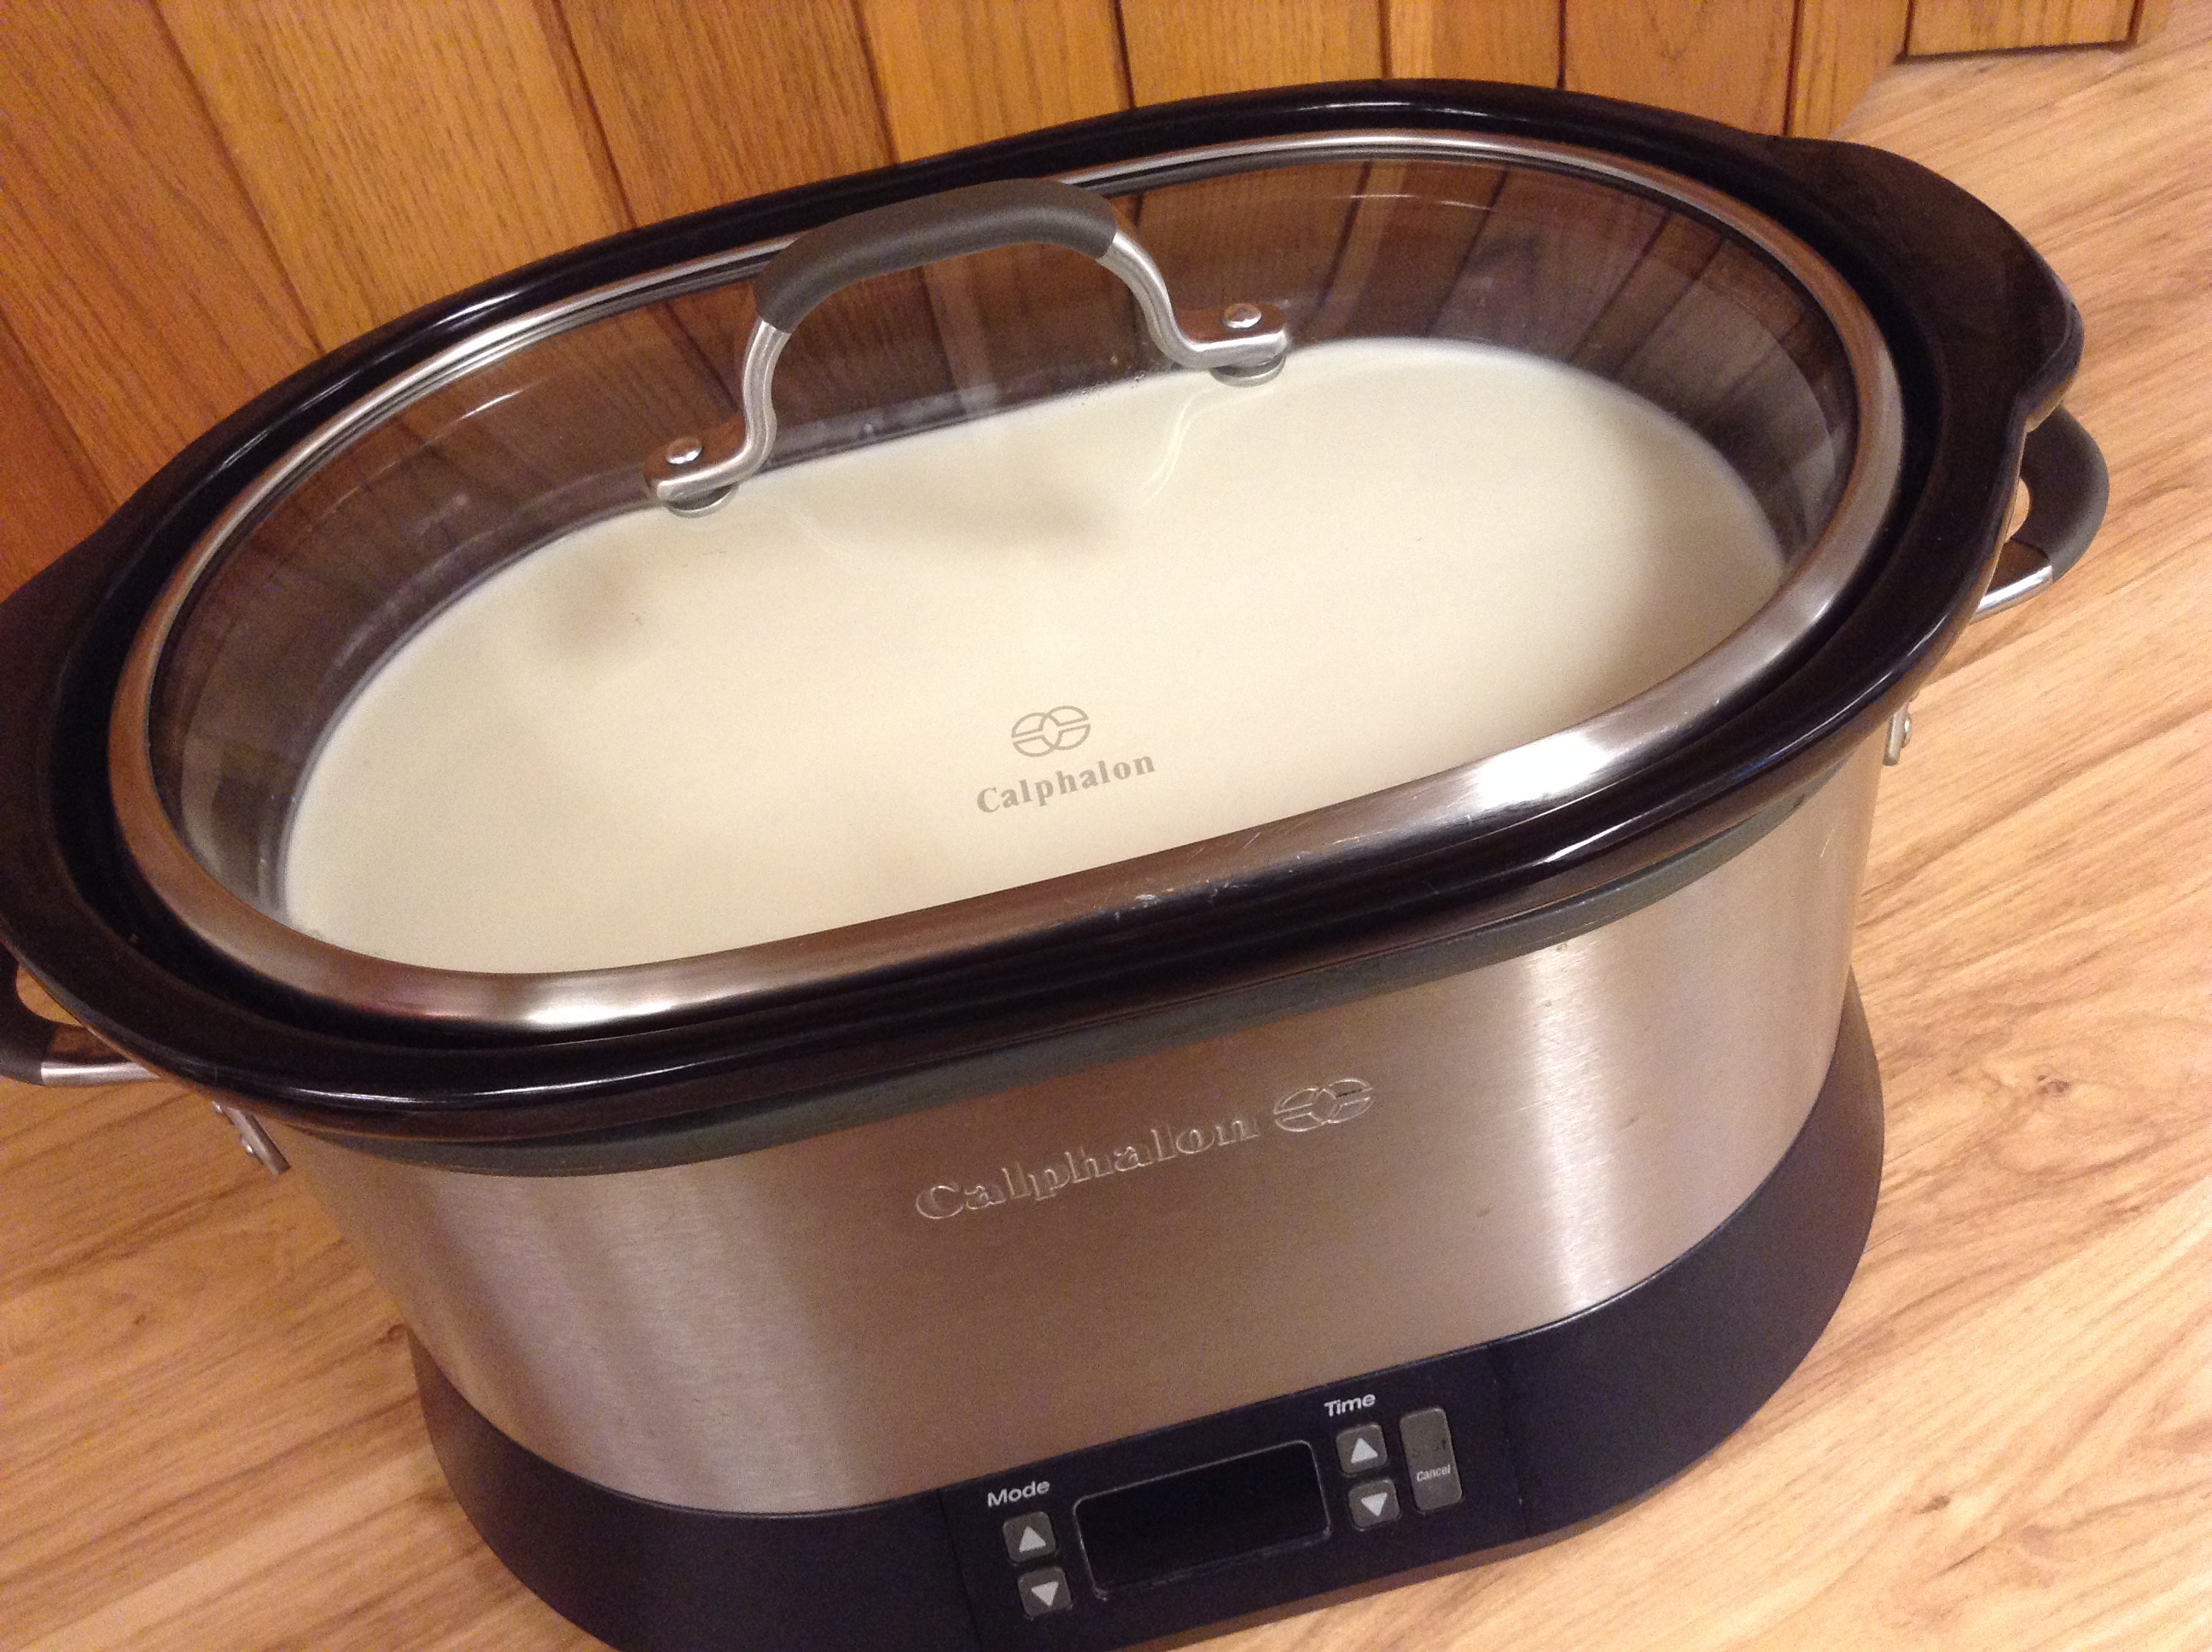
- Place the gallon of milk into the crock pot and cover. Heat the milk
slowly until the milk is between 180 Fahrenheit - 190 Fahrenheit it is vital to heat
the milk to at least 180 Fahrenheit.
- Allow the milk to cool to 110 Fahrenheit (takes 3.5 - 4 hours). Milk should not be
a higher or lower temperature. There may be a skin formed on the milk
(if you are using non homogenized or raw milk). If so, carefully remove it.
- Place 1 cup of the warm milk in a separate small bowl. Add 2 Tablespoons of
starter yogurt to the cup of milk. (no more than 2 Tablespoons - that is all you
need)
- With a fork or whisk, gently stir the starter yogurt into the milk.
- Next, pour the milk back into the crock pot and stir gently from side
to side. Do not stir in circles, use a careful and slow up and down
lifting motion across the length of the crock.
- Lift it out of the electric base and place it in a cool oven. Lay a
bath towel or shawl around the crock and leave it undisturbed
overnight or for 10 - 12 hours. You want the milk to stay nice and
warm. An oven with a pilot light or electric light turned on works
great. Do not disturb the milk and keep the oven door closed. After
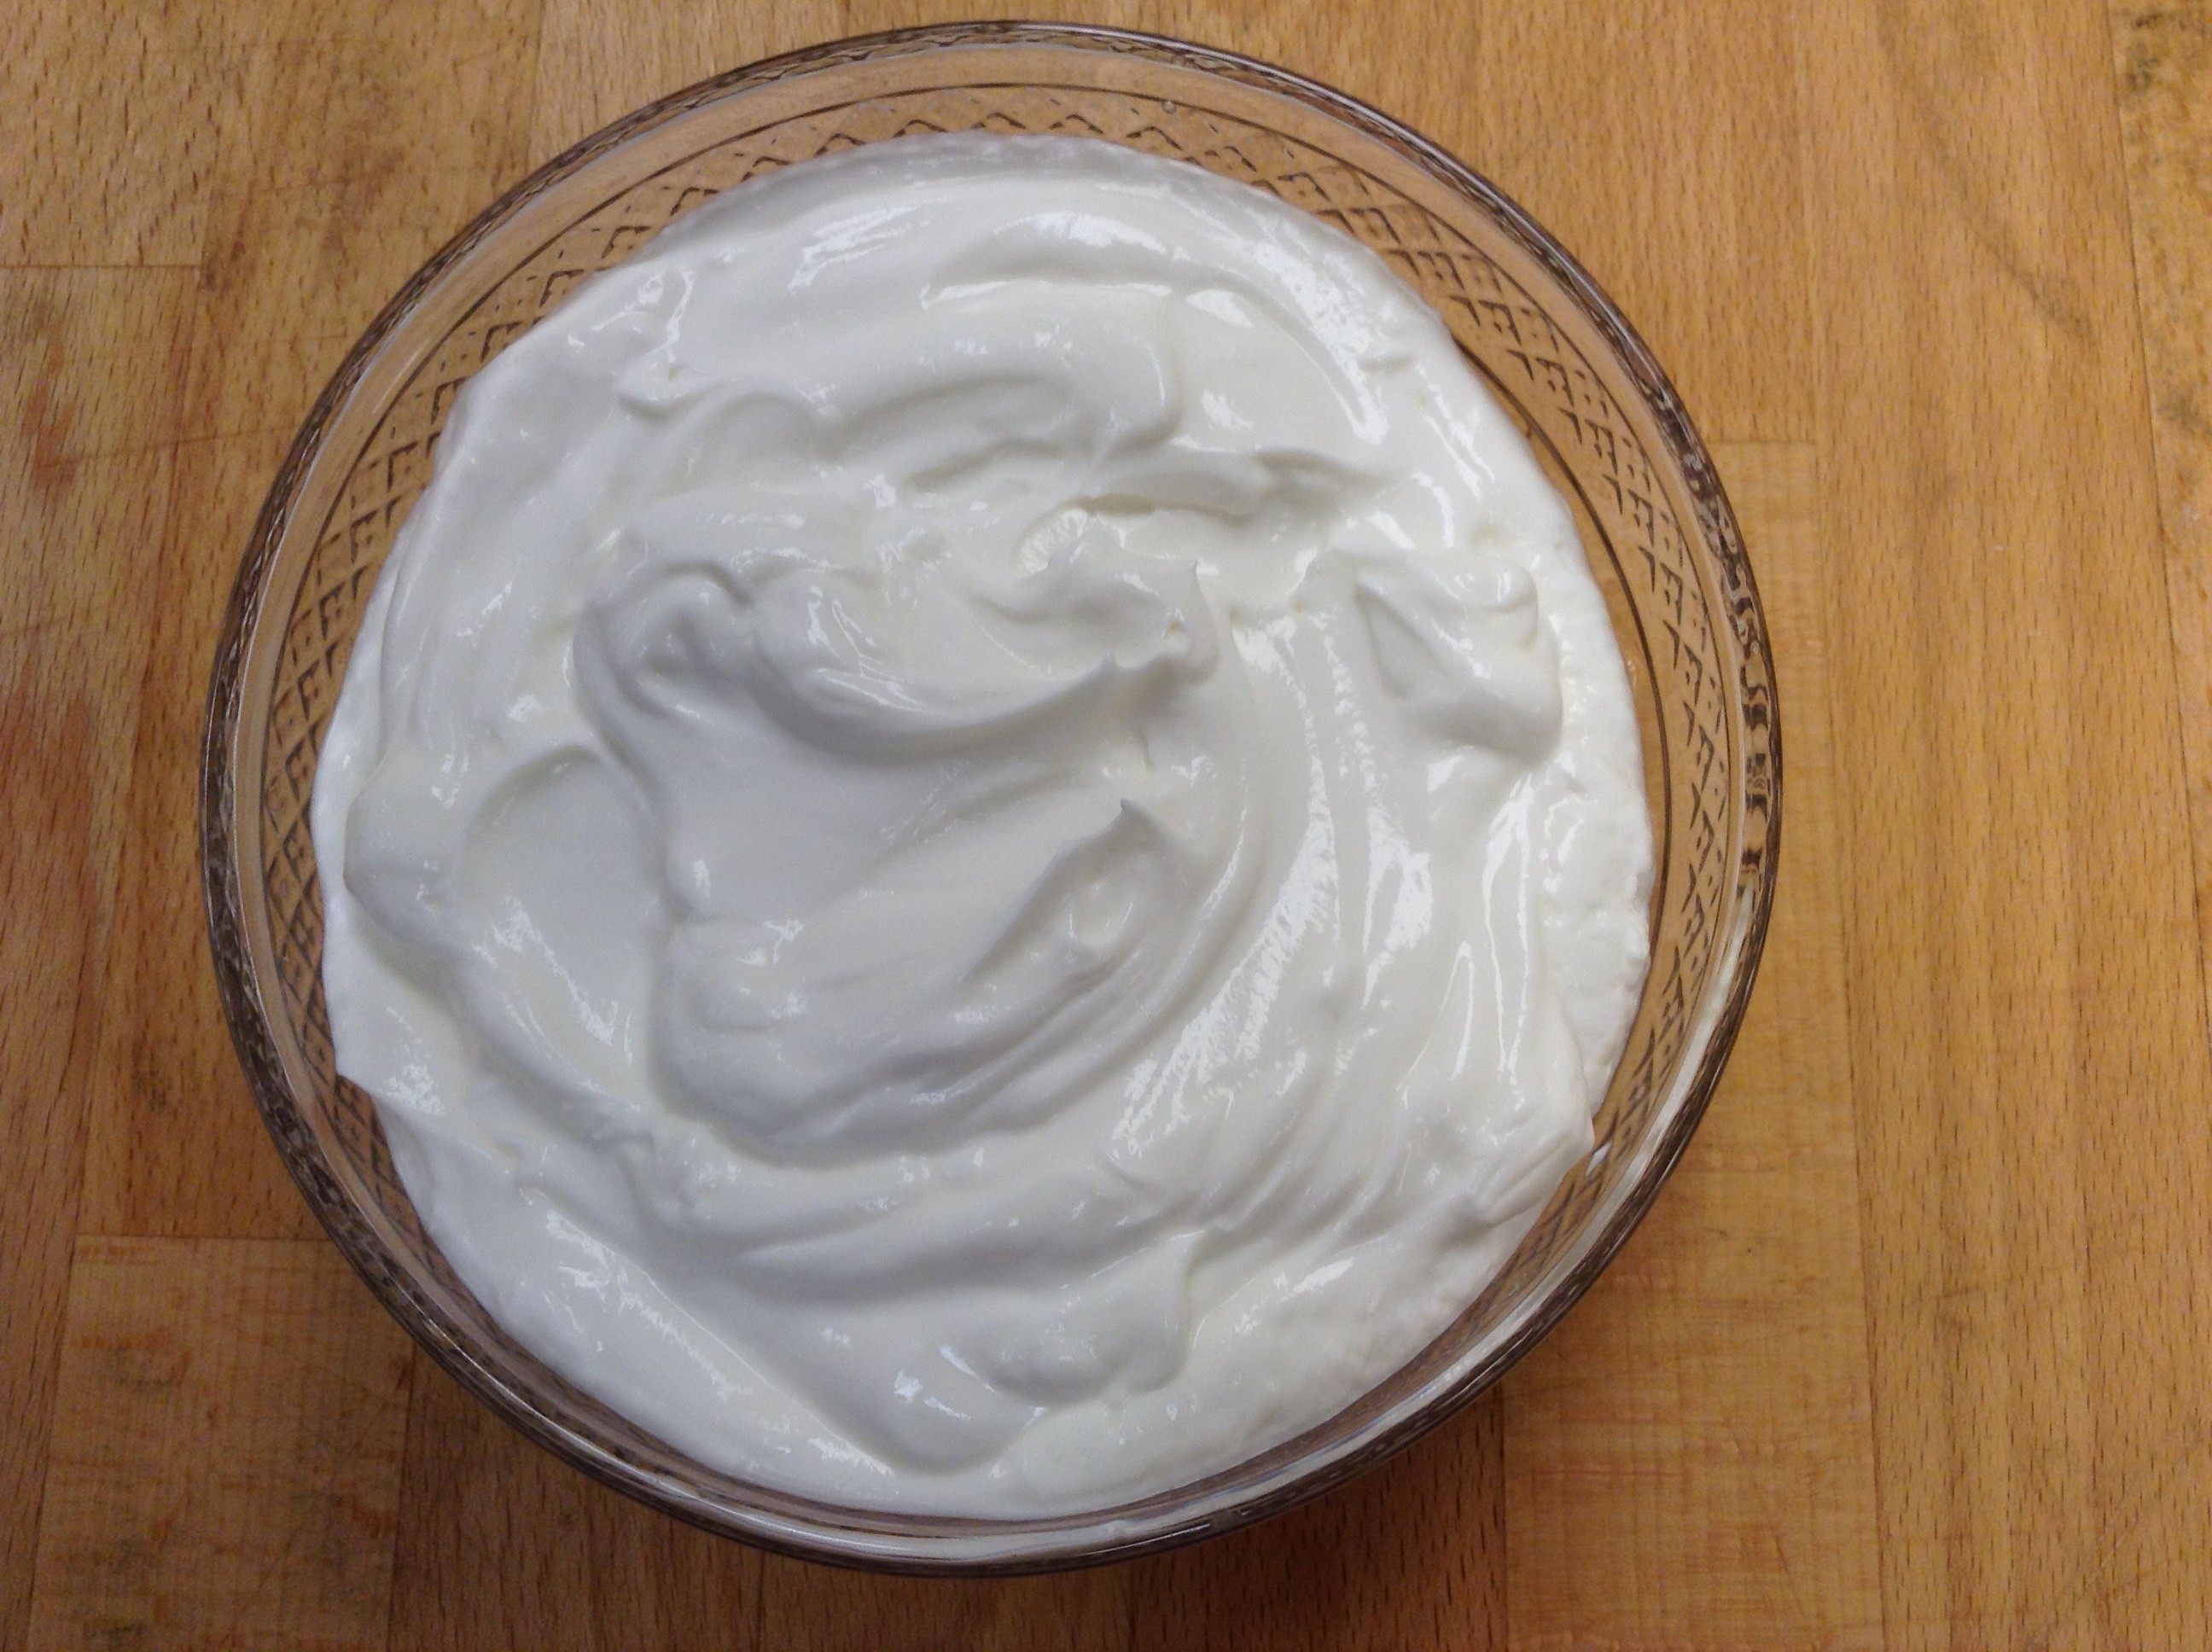
10 -12 hours your yogurt should be solid with a layer of whey on the
top. If you like thicker yogurt, you'll need to drain or carefully
pour off the whey by pouring it into a colander lined with cheesecloth
that has been set on top of a large pot.
- It takes about 2 hours of draining to make a thick natural yogurt, and
about 3 or 4 hours to make a Greek style yogurt. Next, yogurt can be
stored in a refrigerator or cooler to keep it sweet tasting. Some
people prefer a tart yogurt and leave it out at room temperature for
over 24 hours. The longer it stays at room temperature, the tarter it
will become. Save a little back for the next batch!
*(any kind of yogurt, but must have both the active
and live cultures of lactobacillus bulgaricus and streptococcus
thermophilus. Read the label to be sure that you have the right
starter bacteria)
Yogurt can be sweetened with jam, sugar, honey, or whatever you like.
At the convent, we received a wonderful donation recently of Agave
nectar. This natural sweetener has made some lovely batches of yogurt
for our guests!
I am a cold weather girl. Yesterday was one of those crisp fall days, and I was actually cold! It’s a promise of things to come — apples being picked and pumpkins rolling in — so I do look forward to it. I love autumn! This year we have a bumper crop of pears. Last year was plum year — we had hundreds of pounds of the purple beauties. I don’t think we have as many pears, but it is a respectable harvest, enough that one starts wondering how many pears a person can eat? I love pears off of the tree, and I love to make upside cakes, poached pears, and pear muffins…. I also love chutney, so I decided to make up a few jars of a fiery pear one. Perfect for pork, or ham, turkey or chicken. Great in a ham and cheese sandwich on the griddle, or in the oven. But be warned — this one has a kick!
Print Recipe
Votes: 0
Rating: 0
You:
Rate this recipe!
Golden Pear Chutney
SERVINGS
|
COOK TIME1hour |
PREP TIME |
READY IN |
Ingredients
Instructions
- Cook the pears in enough water to cover until they are medium soft.
- Drain, saving the water, then make a syrup of the water in which the pears were cooked and the brown sugar by boiling in a large nonreactive pot until thick, about 20 to 30 minutes.
- While the syrup is boiling, add the remaining ingredients to the pears, then mix everything together and cook for about 30 minutes or until the raisins are softened, the onions are transparent, and the chutney has a good thick consistency.
- Transfer to sterilized jars and seal, process in a boiling water bath for 10 minutes, or store in refrigerator.
- (Quatre – Epices: equal amounts of white pepper, nutmeg, ground cloves and ground ginger. Cinnamon can also be added, but for this recipe I left it out.
As I write this, it is raining. I think not too long ago I was writing about all of the rain and cold we were having. (I will never complain about that again!) It’s finally been so dry that the garden could be tilled, and the tomatoes are being planted. I feel like having a party! Its the time of year that I try and think of what I can cook with the least amount of stove or oven usage.
I was recently cooking for a group, and not in the kitchen I am used to, which did not have a fully stocked pantry. I wanted to make a broccoli salad, so found a couple of recipes that looked promising, but of course did not have exactly what was called for, especially in the vinegar department. So, of course I would have to improvise. It was a no cook broccoli salad with a mayonnaise, vinegar sugar dressing. I remembered that there was a bottle of white balsamic vinegar in the cupboard – ah sweet! I also wanted to cut down on the amount of mayonnaise, and use it more like the oil in the dressing, and I must say that balsamic can cover a multitude of sins. So, here is my version of fresh broccoli salad, improv style.
Improvised Broccoli Salad
Print Recipe
Votes: 0
Rating: 0
You:
Rate this recipe!
Improvised Broccoli Salad
SERVINGS7servings
|
COOK TIME |
PREP TIME |
READY IN |
Ingredients
Instructions
- Trim off the large leaves from the broccoli stem.
- Remove the tough stalk at the end and wash broccoli head well.
- Cut the head into bite-size flowerets and the stem into bite size pieces.
- Place in a large bowl.
- Add the bacon, onion, raisins, and carrot.
- In a small bowl, combine the dressing ingredients, stirring well.
- Add to broccoli mixture and toss gently.
- Last of all add in the tomatoes and toss again gently.
- Refrigerate until ready to serve.
This is a busy time of year for us in Paraclete House Kitchen. We are in the process of making baked goods and preserves for the holiday season, some of which will also be for sale in Priory Gifts. Most Saturdays there are about fourteen people of all ages in the kitchen — from 5 years to 80+ years — making jams, chutneys, baking loaves of bread, cookies, pies, and cakes, as well as putting together mid-morning snack for the 200 other people out working on various projects around the community. We have of course been making a lot of things with our plentiful apple harvest; caramel apple pies, apple harvest jam, and my favorite, apple carrot chutney. This is a delicious accompaniment to roast pork, ham, or chicken, and is also wonderful for ham and cheese sandwiches. It’s especially good with cheese on a cracker or mixed into a spread.
Apple Carrot Chutney
Print Recipe
Votes: 0
Rating: 0
You:
Rate this recipe!
Apple Carrot Chutney
SERVINGS5cups
|
COOK TIME3 - 5mins. |
PREP TIME |
READY IN |
Ingredients
Instructions
- In a heavy pot, sauté carrots in canola oil until almost tender, about 3 to 5 minutes.
- Add in all the other ingredients, bring to a boil, then reduce heat and simmer about one hour until slightly thick, stirring frequently.
- Ladle into hot, sterilized jars and seal, or transfer into a container and store in the refrigerator.
This is a busy time of year for us in Paraclete House Kitchen. We are in the process of making baked goods and preserves for the holiday season, some of which will also be for sale in Priory Gifts. Most Saturdays there are about fourteen people of all ages in the kitchen — from 5 years to 80+ years — making jams, chutneys, baking loaves of bread, cookies, pies, and cakes, as well as putting together mid-morning snack for the 200 other people out working on various projects around the community. We have of course been making a lot of things with our plentiful apple harvest; caramel apple pies, apple harvest jam, and my favorite, apple carrot chutney. This is a delicious accompaniment to roast pork, ham, or chicken, and is also wonderful for ham and cheese sandwiches. It’s especially good with cheese on a cracker or mixed into a spread.
Apple Carrot Chutney
Print Recipe
Votes: 24
Rating: 2.75
You:
Rate this recipe!
Apple Carrot Chutney
SERVINGS5cups
|
COOK TIME3-5mins. |
PREP TIME |
READY IN |
Ingredients
Instructions
- In a heavy pot, sauté carrots in canola oil until almost tender, about 3 to 5 minutes.
- Add in all the other ingredients, bring to a boil, then reduce heat and simmer about one hour until slightly thick, stirring frequently.
- Ladle into hot, sterilized jars and seal, or transfer into a container and store in the refrigerator.