Since St. Lucia’s Day (or St. Lucy’s Day) is just around the corner on December 13th, we thought we’d share this special Swedish bread with you – fantastic for the Holidays. The celebration of the day comes from stories that were told by Monks who first brought Christianity to Sweden. “St Lucia was a young Christian girl who was martyred, killed for her faith, in 304. The most common story told about St Lucia is that she would secretly bring food to the persecuted Christians in Rome, who lived in hiding in the catacombs under the city. She would wear candles on her head, so she had both her hands free to carry things. Lucy means ‘light’ so this is a very appropriate name.” (see note below**)
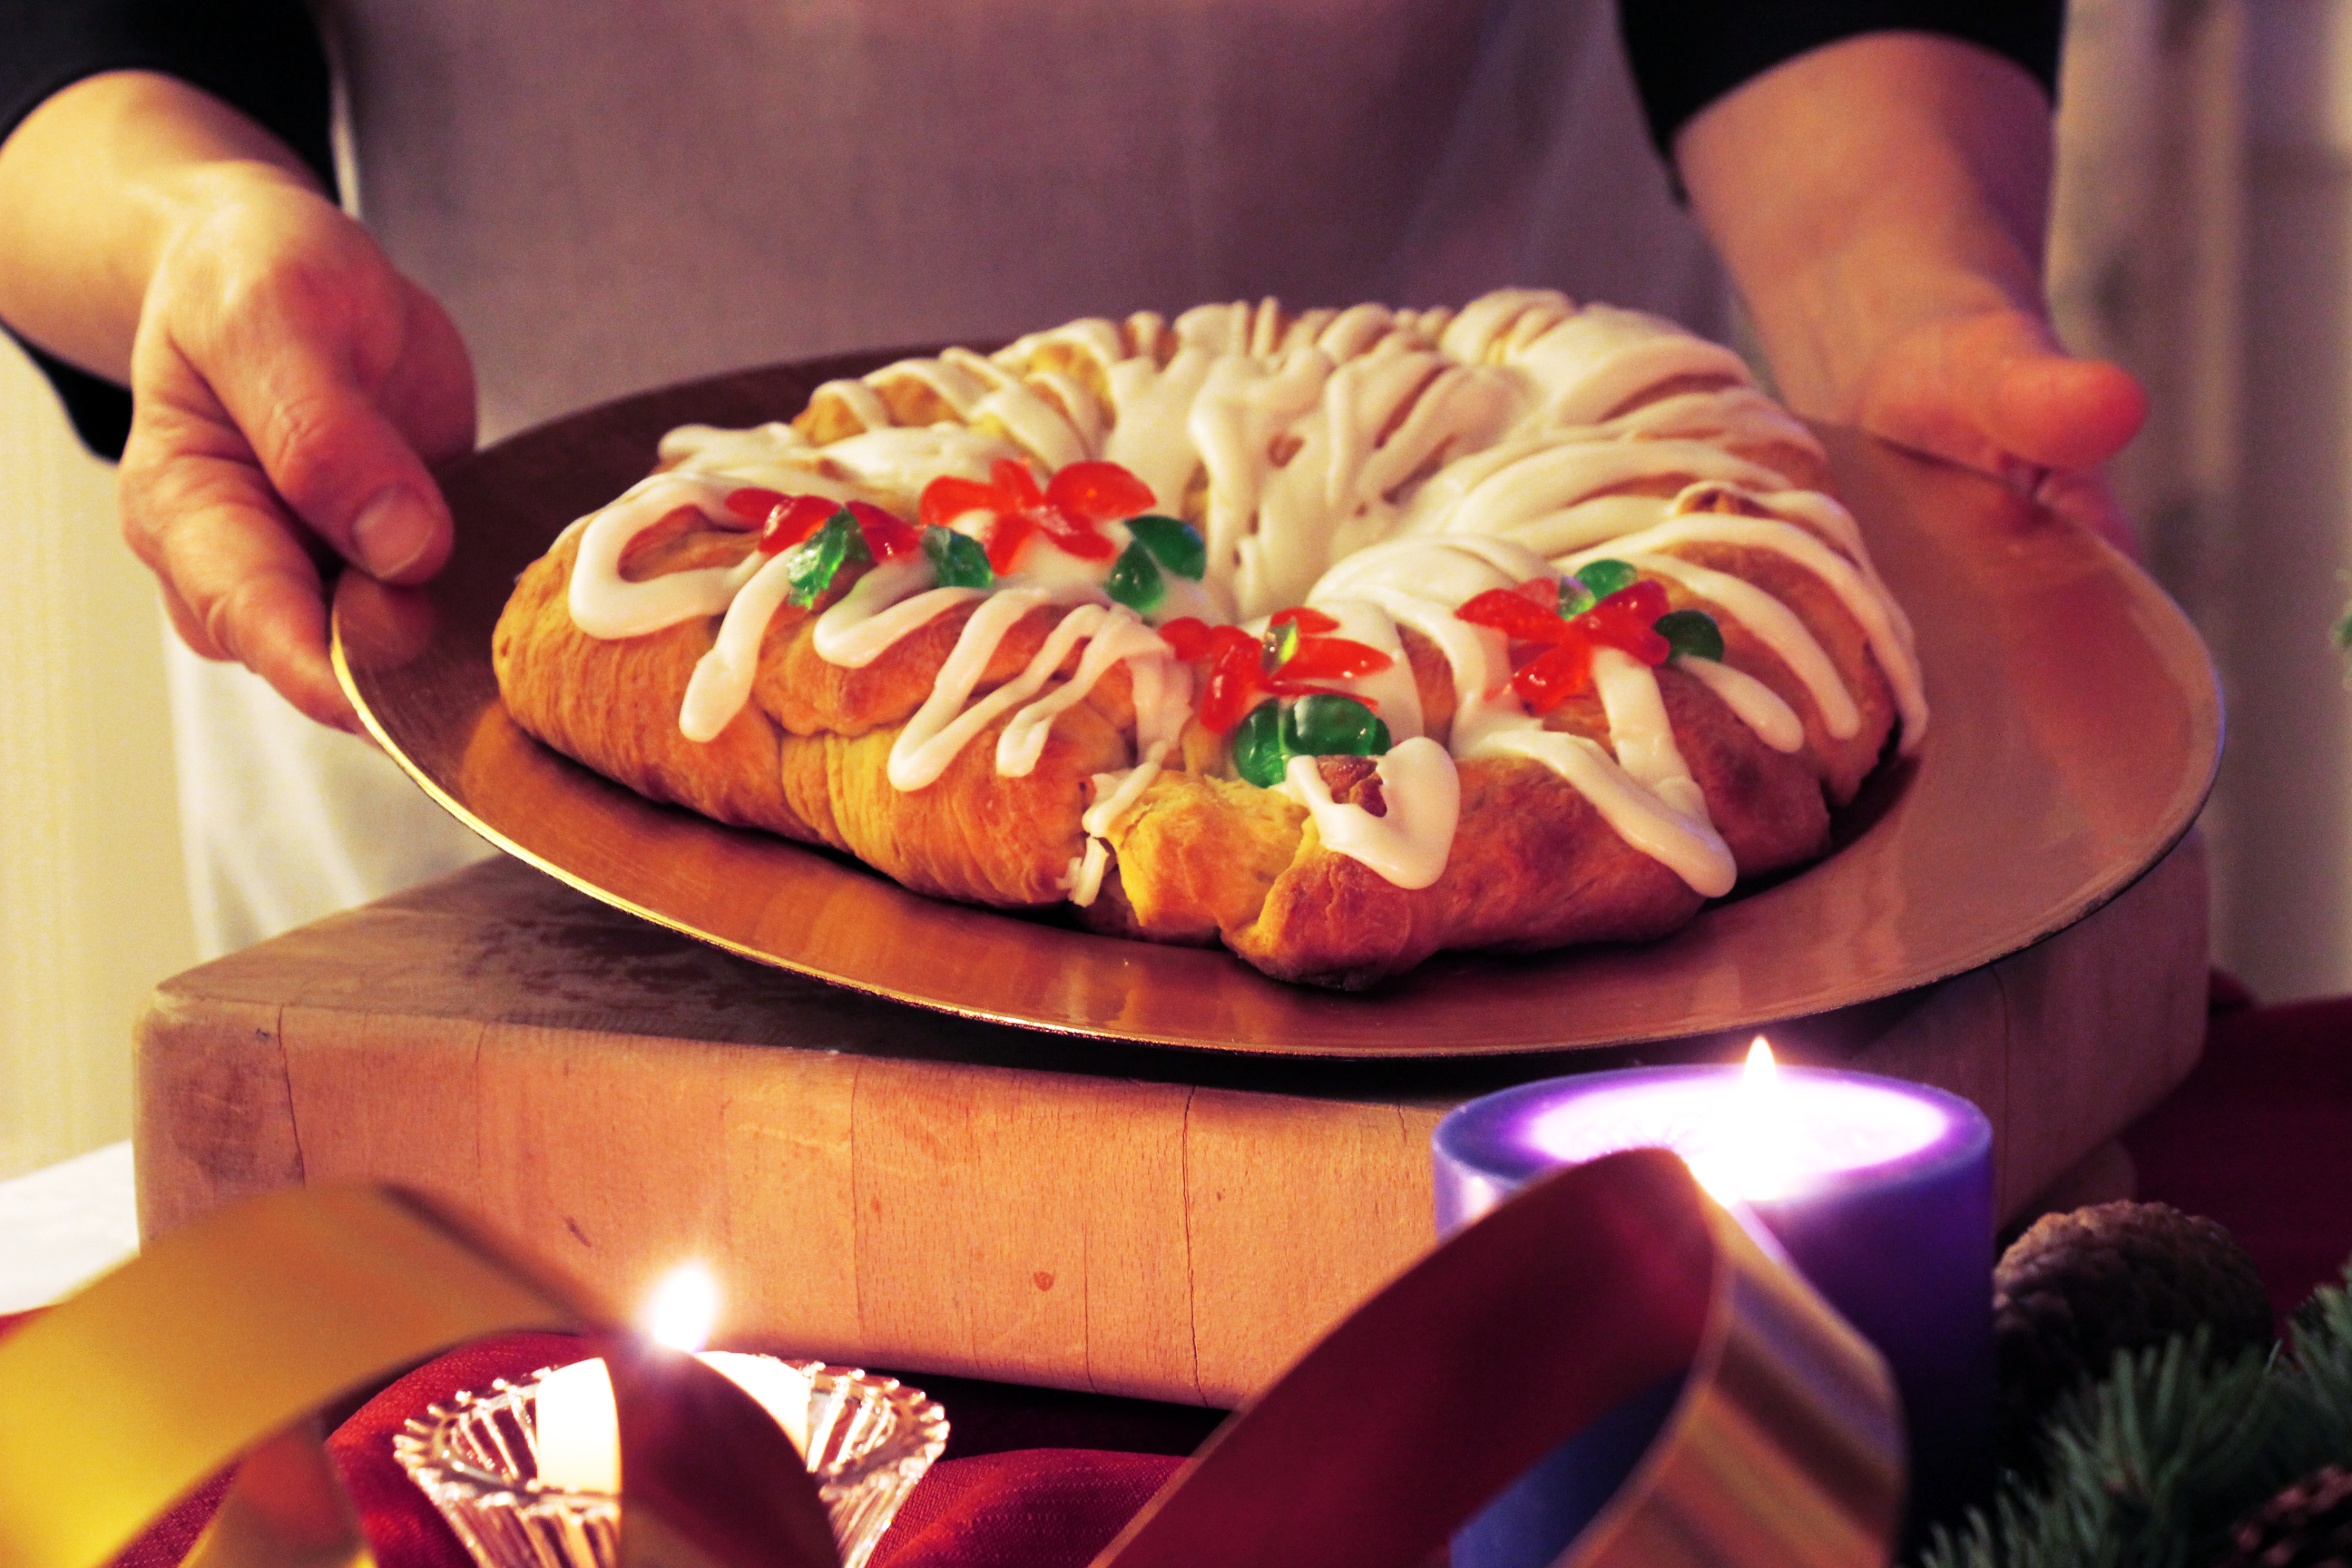
December 13th was also the Winter Solstice, the shortest day of the year, in the old ‘Julian’ Calendar and a pagan festival of lights in Sweden was turned into St. Lucia’s Day. It is now celebrated by a girl dressing in a white dress with a red sash around her waist and a crown of candles on her head. Thus, the wreath of bread dotted with candied “berries.” If you’d like you can also add small candles to the cake as well for a more festive look.
** read more at https://www.whychristmas.com/cultures/sweden.shtml
Print Recipe
Votes: 0
Rating: 0
You:
Rate this recipe!
St. Lucia Bread
SERVINGS2loaves
|
COOK TIME20-25mins |
PREP TIME30mins |
READY IN2-3hrs |
Ingredients
Instructions
- In a large mixer, soften the yeast in the warm water
- Heat the milk until warm. Add the oil and sugar and stir to dissolve.
- Add this mixture to the yeast mixture in the mixer
- Add salt and saffron
- Add the 3 slightly beaten eggs and mix with dough hook.
- Add the lemon zest, citron and almonds and continue mixing
- One cup at a time, add the flour and mix well after each addition. Stop adding the flour when the dough starts pulling away from the side of the bowl. Adding more flour if necessary.
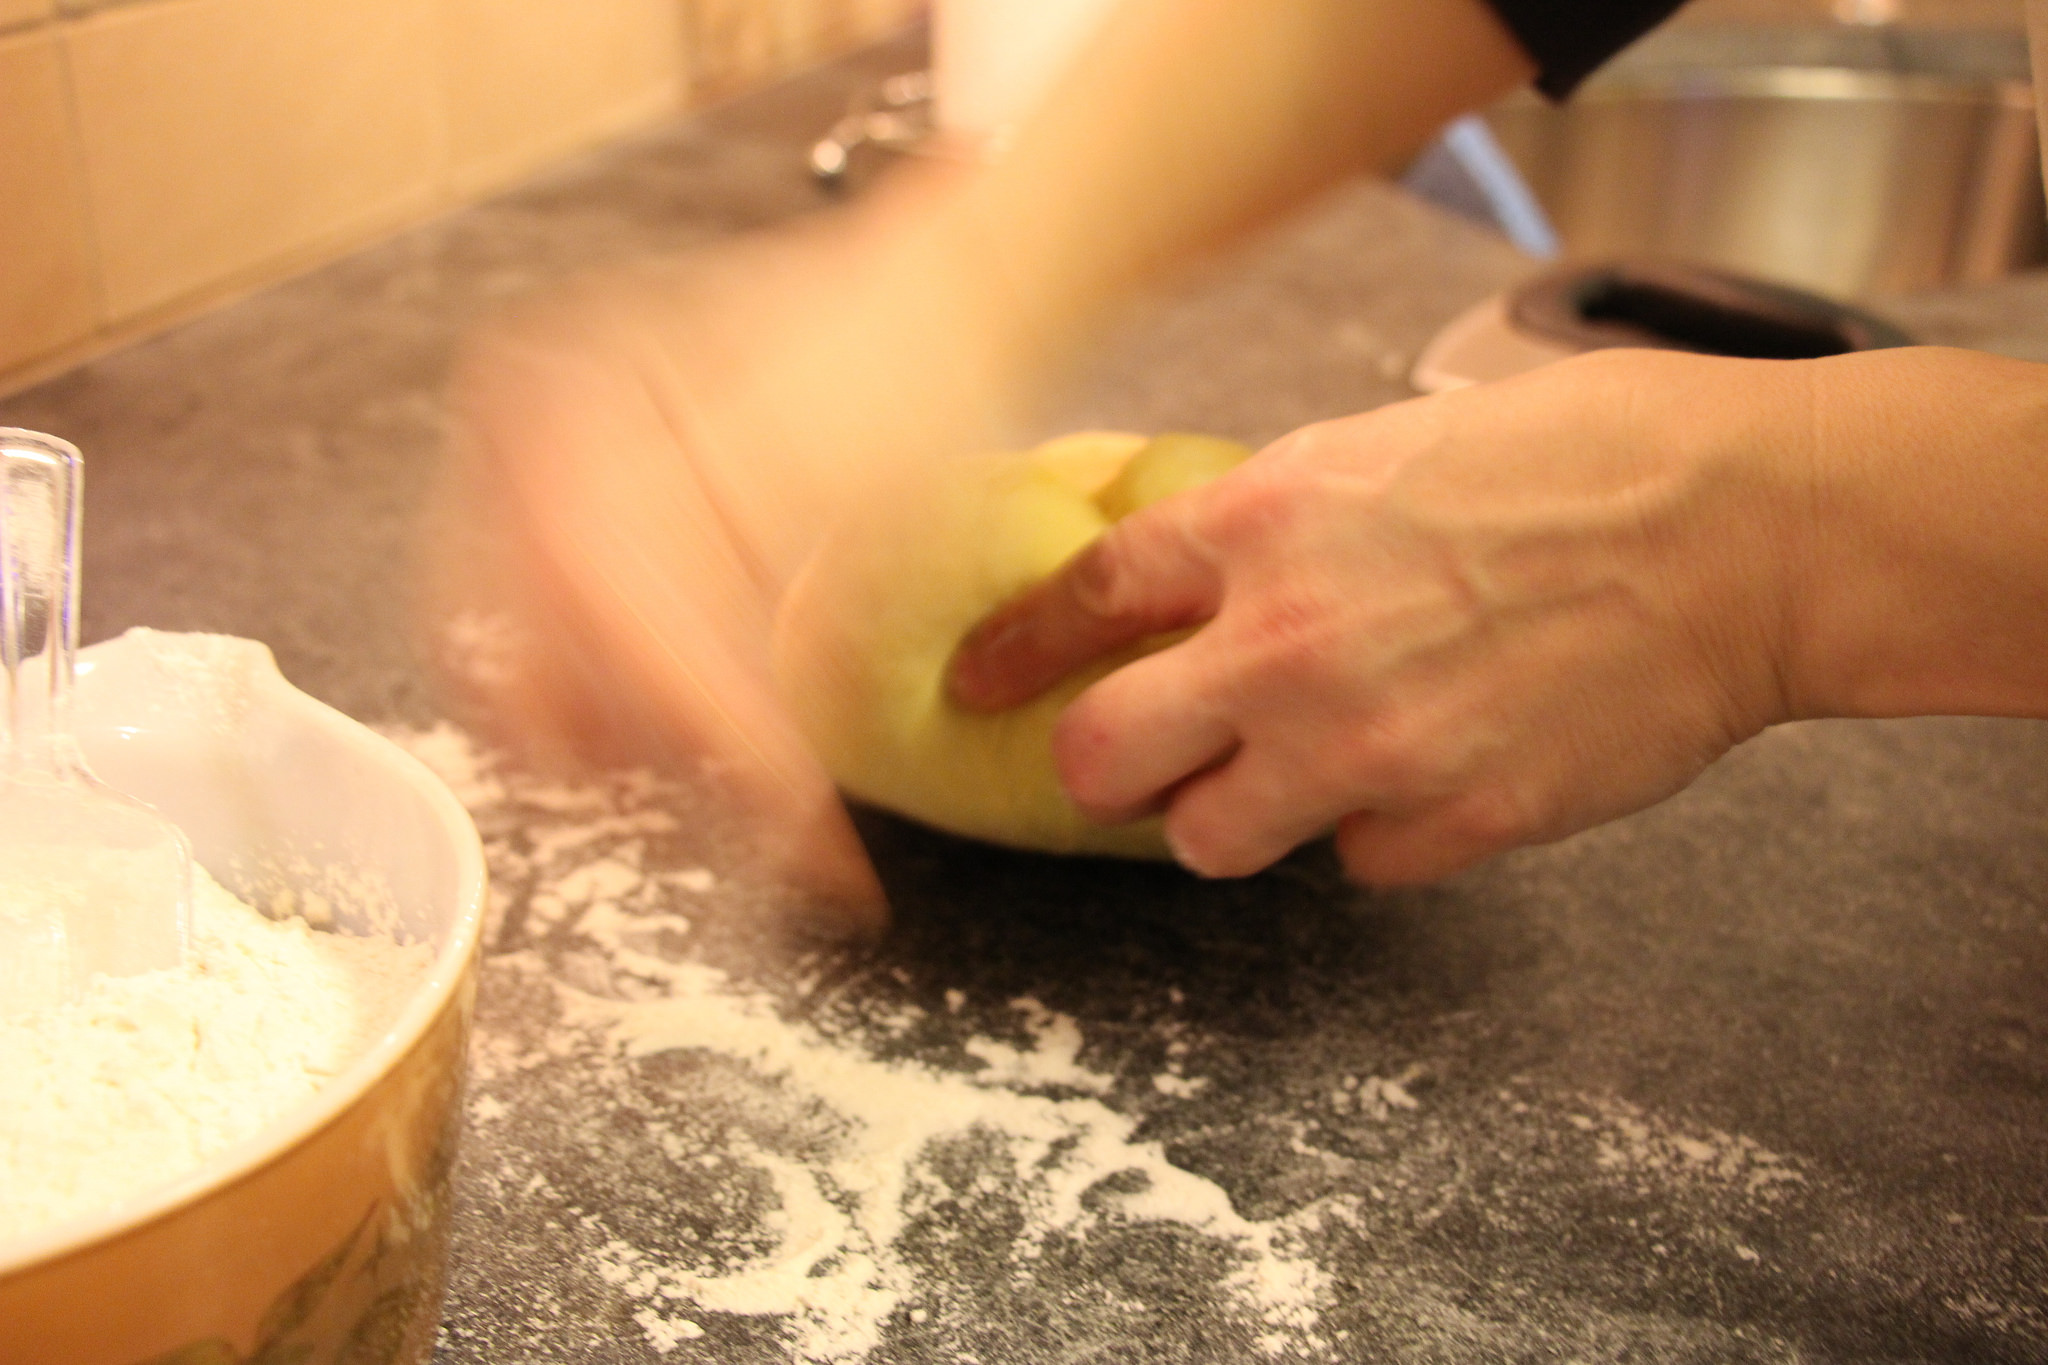
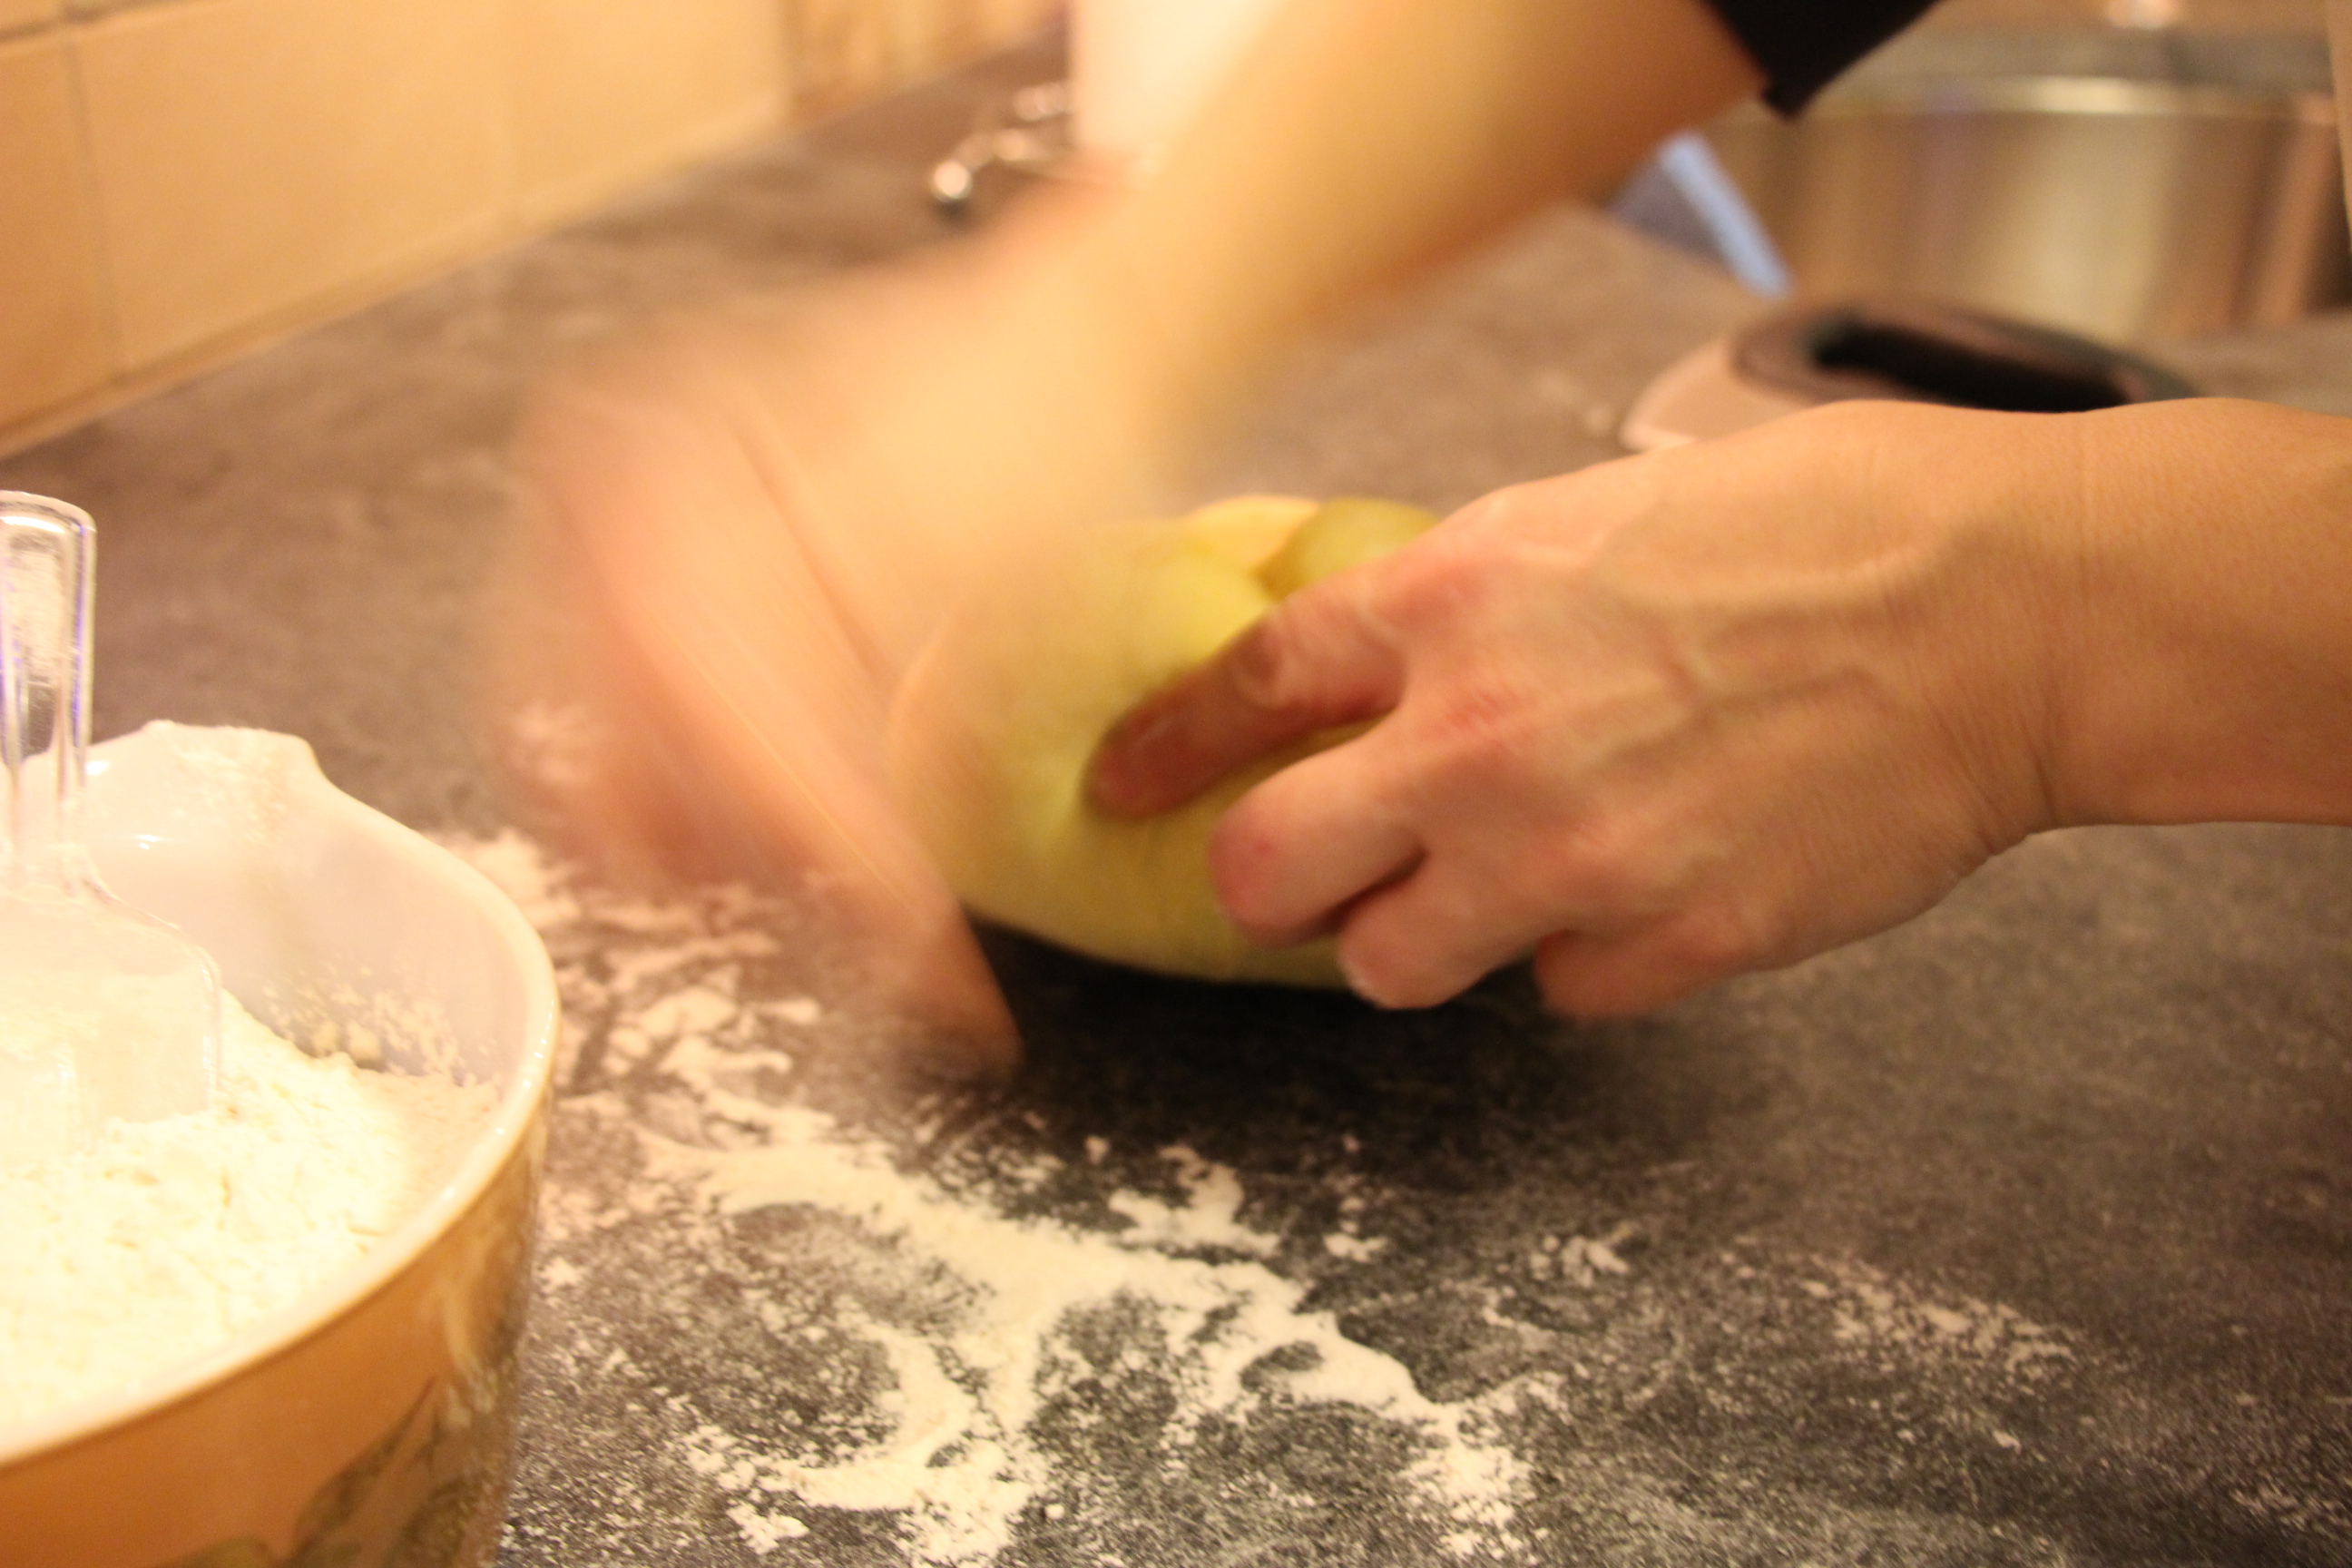
- Turn the dough out onto a floured board and knead for 5 min, or until dough becomes smooth and elastic; adding flour as necessary.
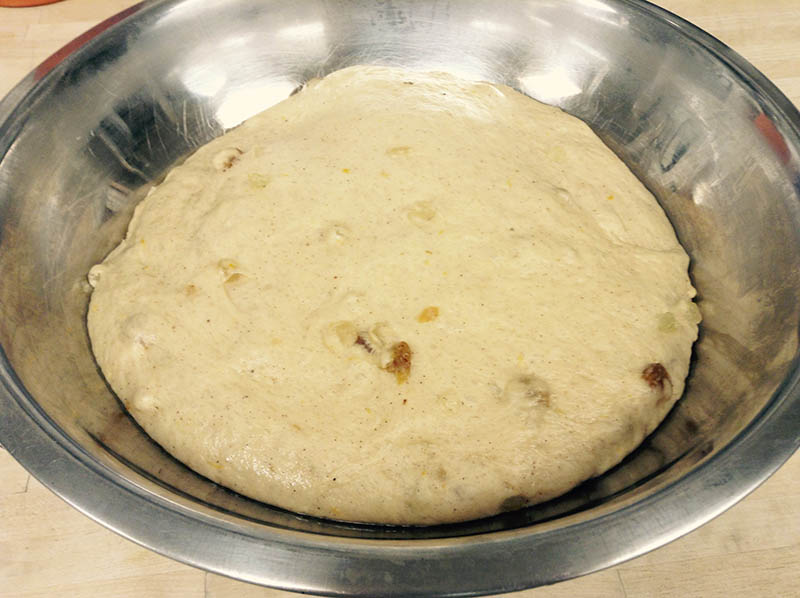
- Place the dough in a greased bowl, cover, and let rise in a warm place until almost doubled in size, about 1 hr. (At this point, you can refrigerate the dough, if you want to work with it later).
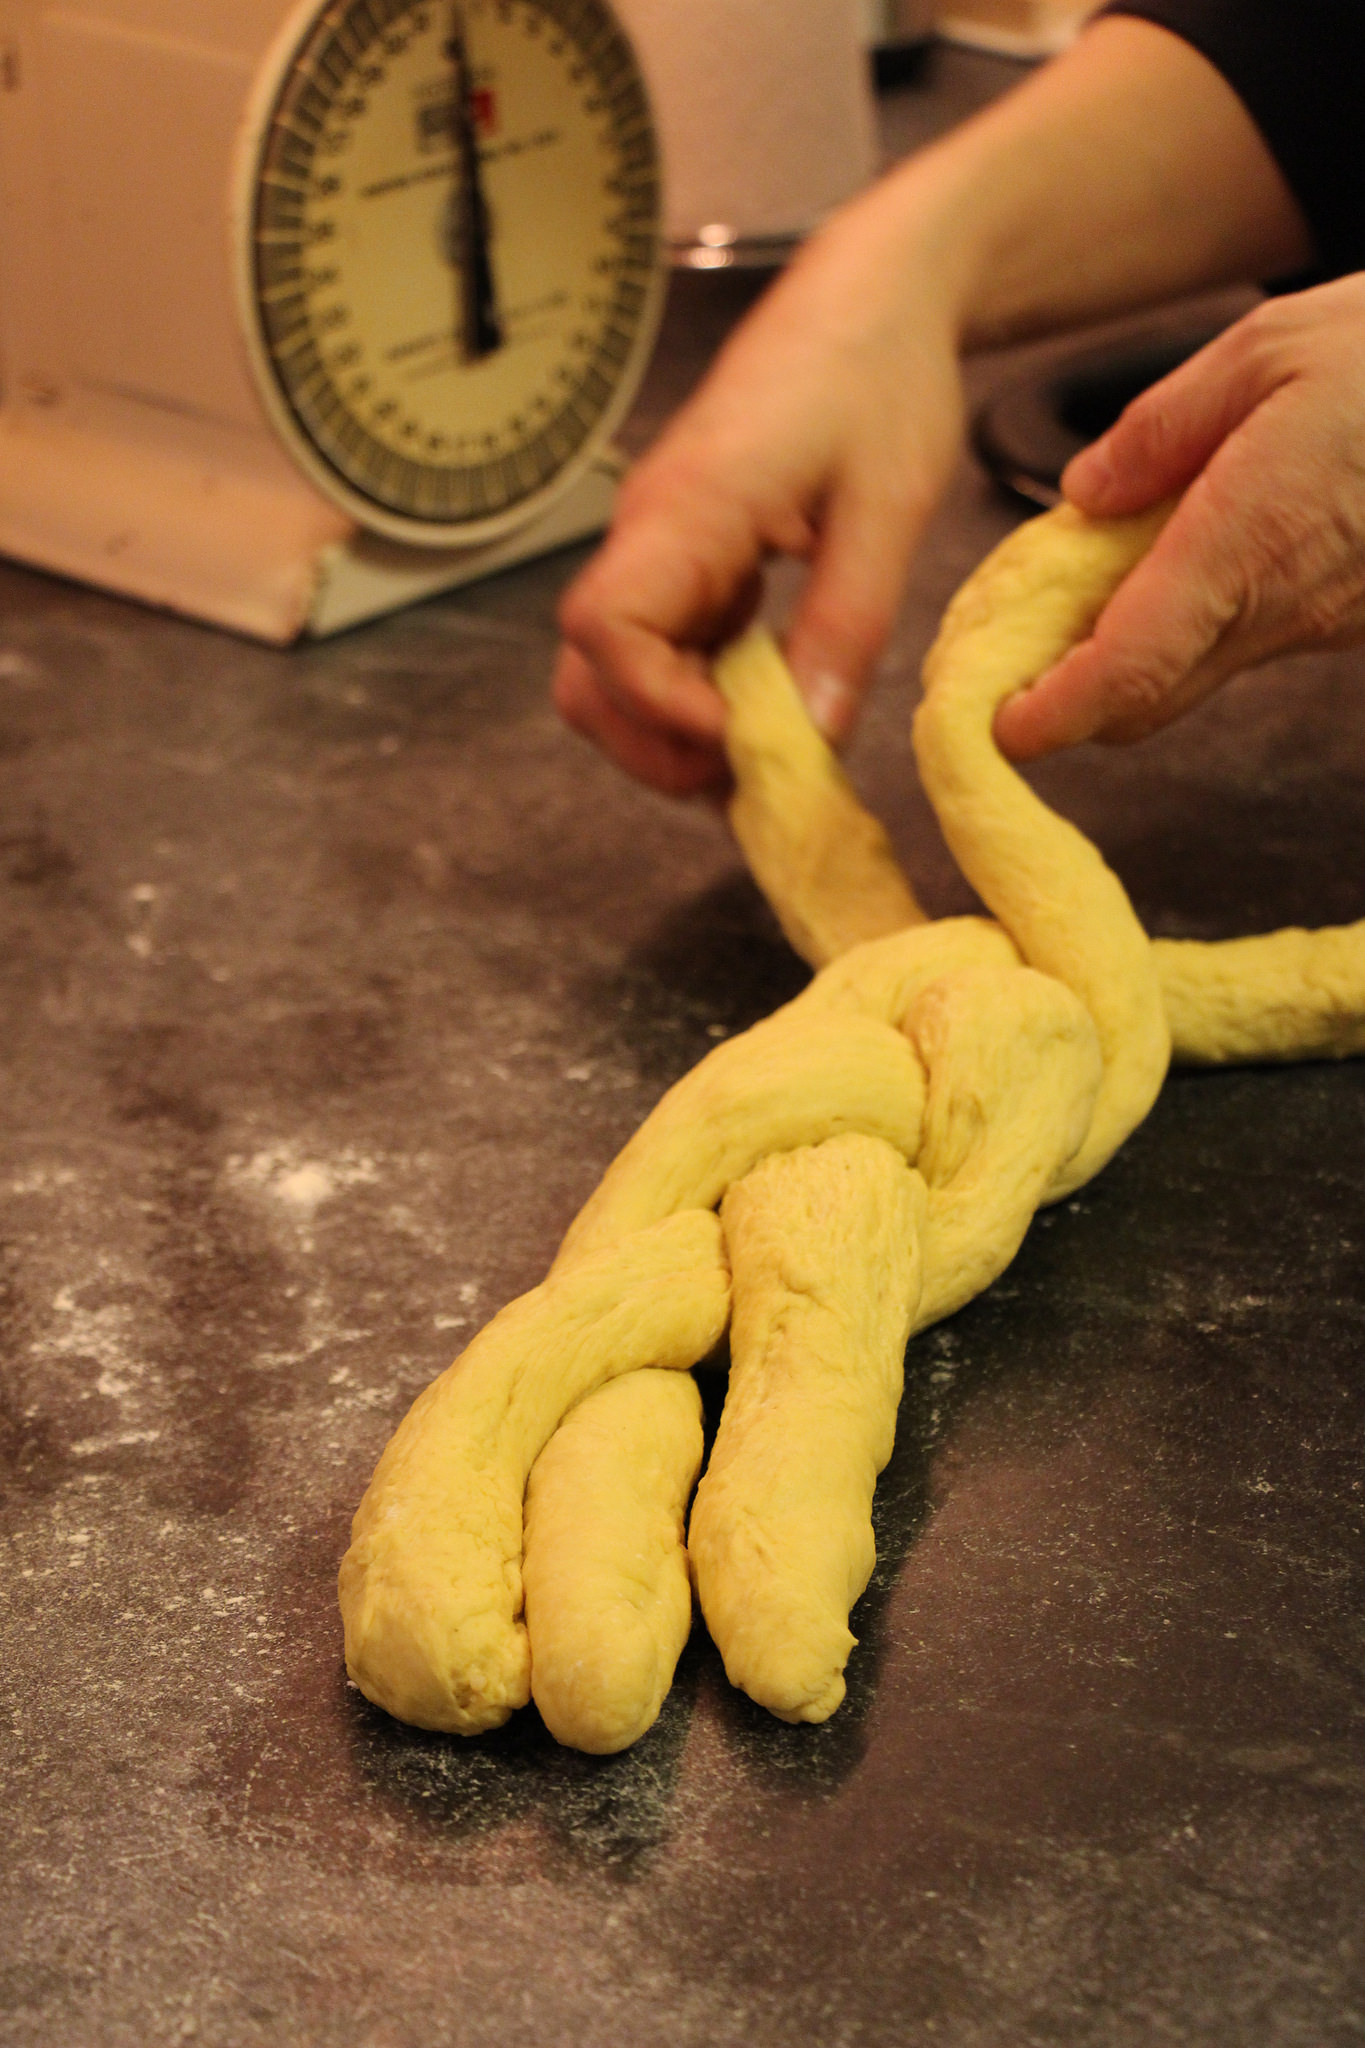
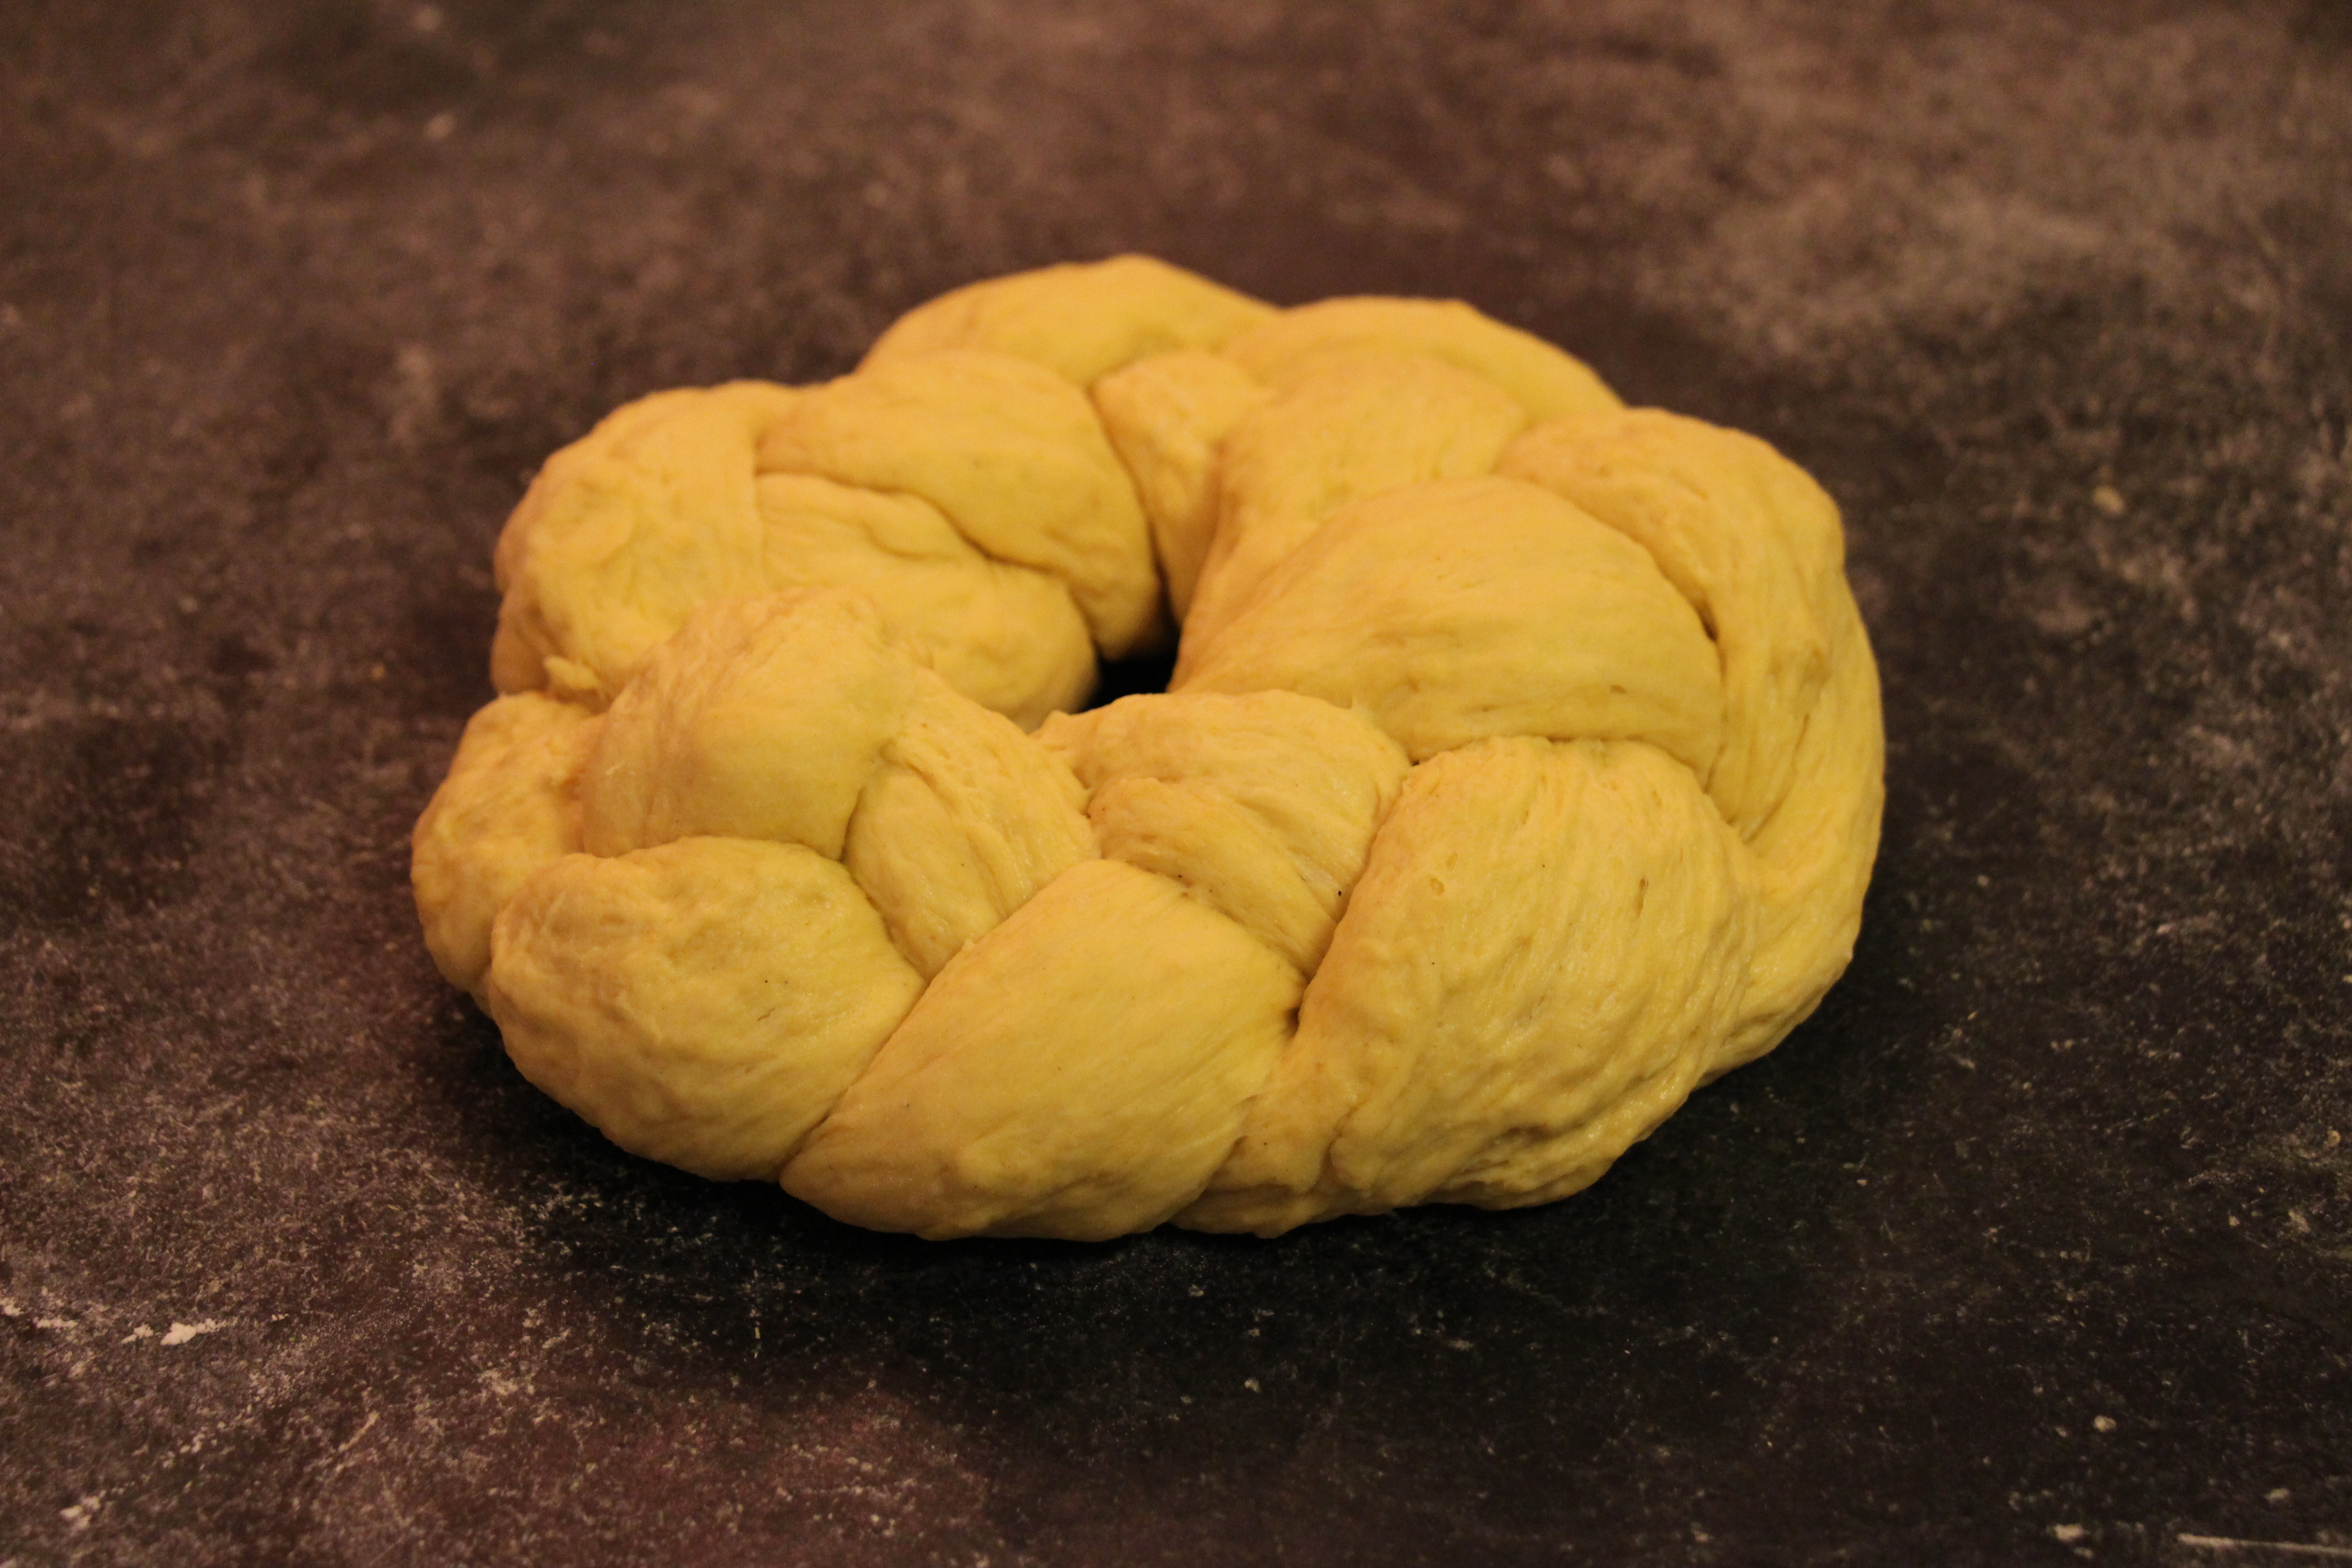
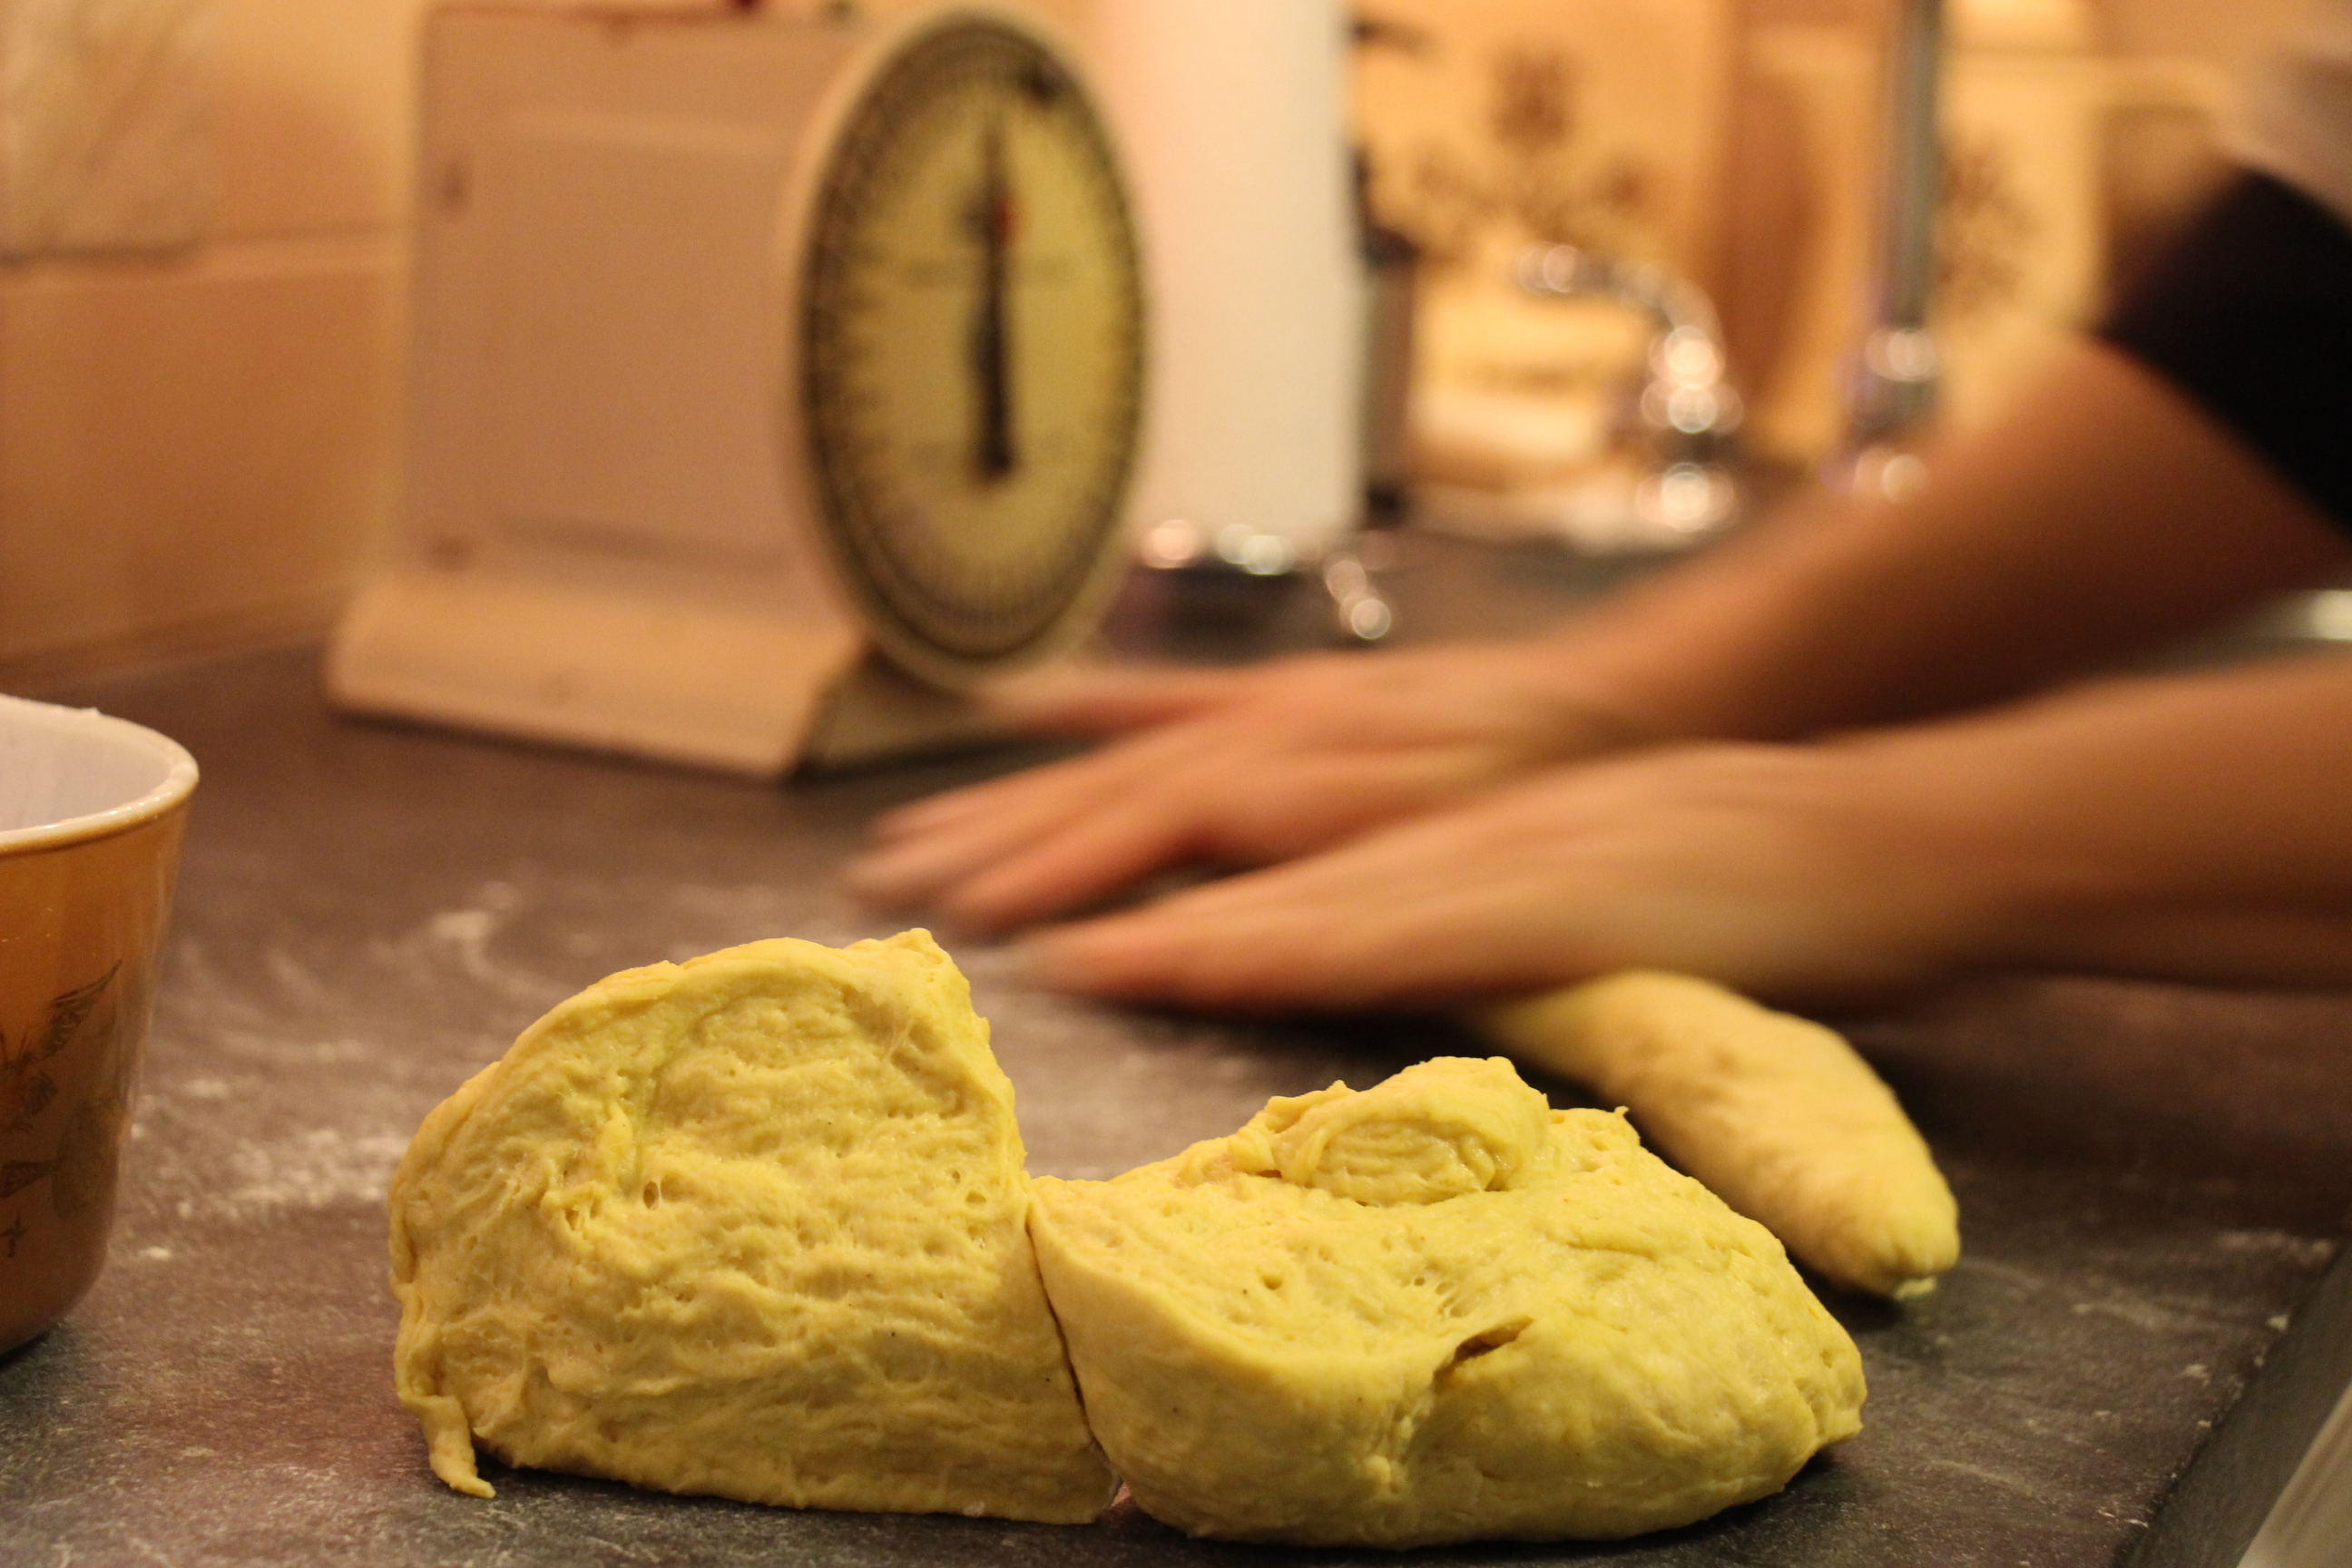
- Divide the dough into six equal balls and roll into large ropes and then braid three together, making two braids.
- Pinch the two ends together and tuck under, forming two circular loaves.
- Preheat oven to 325 degrees. Line two sheet pans with baking paper, or grease, and put a braided loaf on each pan.
- Cover and let rise in a warm place, until doubled.
- Combine the remaining egg with a tablespoon of water to make an egg wash, and brush on the braids.
- Bake for about 20-25 min or until the loaf feels firm to the touch. If you would like to use a thermometer, the internal temperature should read about 190 degrees.
- While the bread is baking, prepare your frosting, mixing all ingredients until smooth and on the thicker side. Cut your cherries in half.
- Remove bread from the oven and cool slightly, then decorate, using the green cherries as leaves, and the red as berries.
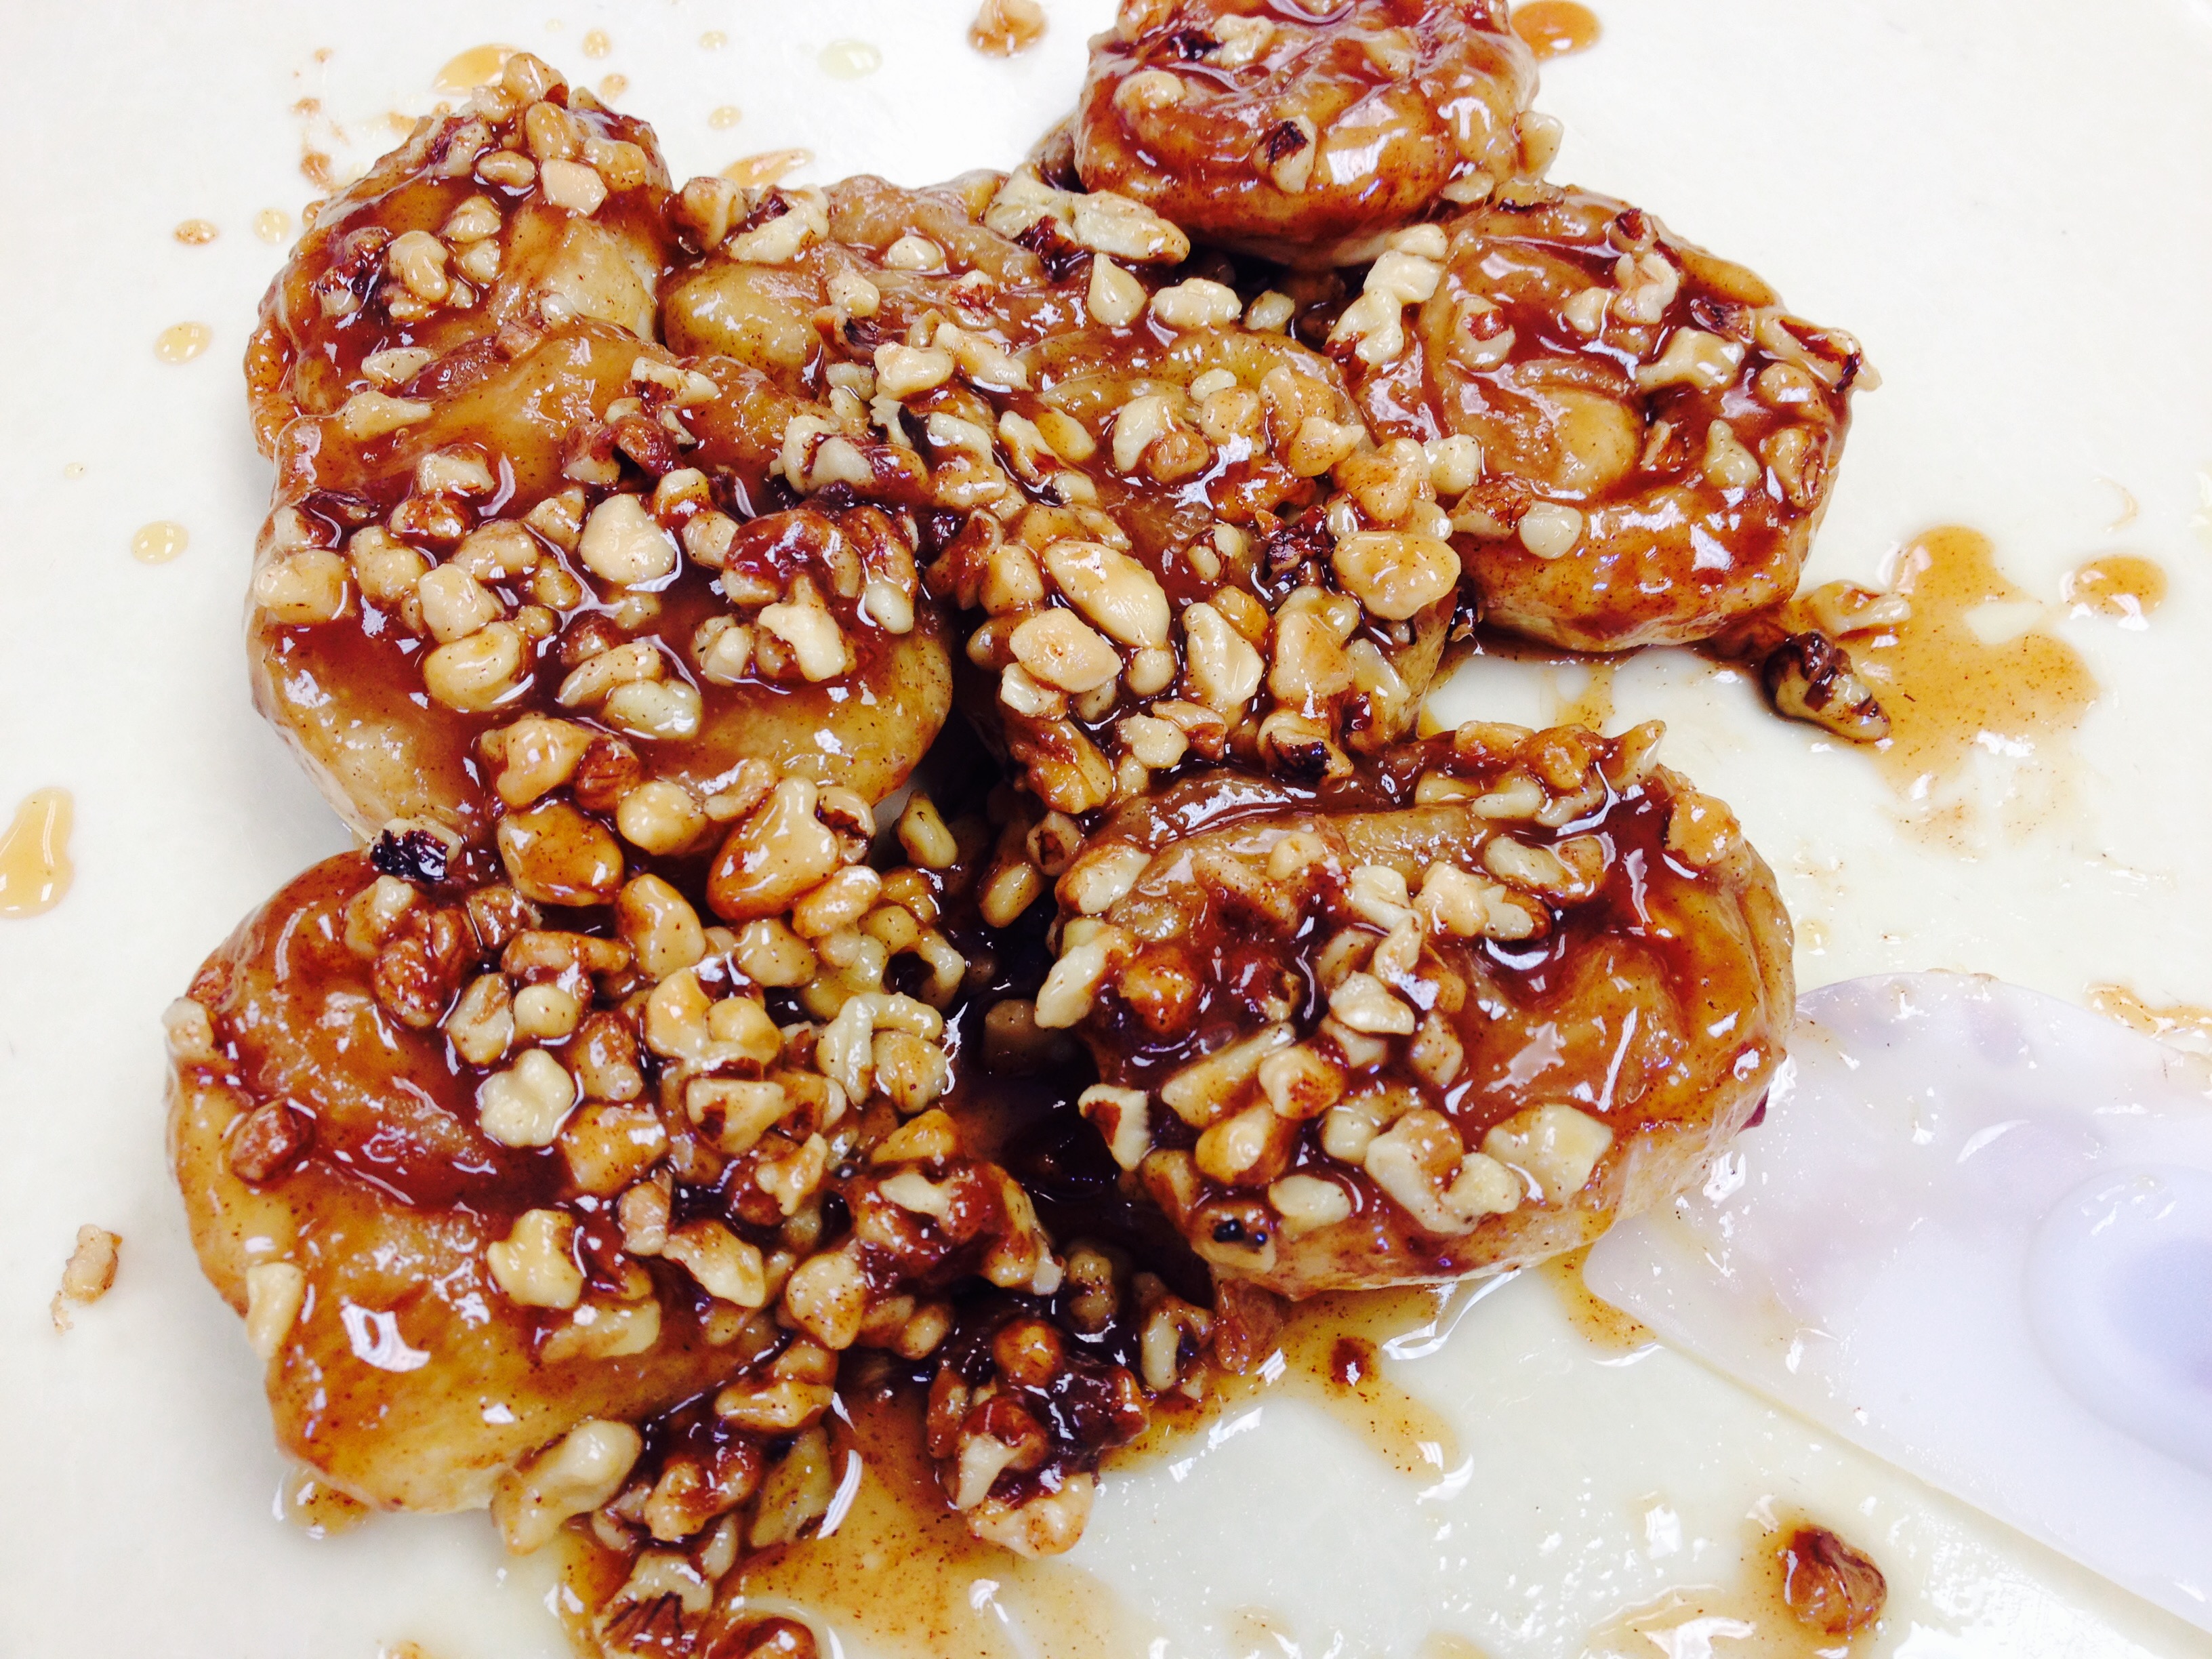
Nothing delights the Sisters more than warm, gooey sticky buns straight out of the oven on a Sunday morning. This year, we had the wonderful opportunity to offer baked goods to our community for Easter morning. We spent a good part of the weekend preparing over 50 pans of sticky buns. This year, I came up with a new recipe that we all decided was probably the very best sticky buns we have ever eaten. The comments back to us confirmed this was true. Even though I’d like to keep this recipe a secret, I thought we’d share it with you.
You won’t regret surprising your loved ones with these wonderfully fluffy and sinfully delicious breakfast treats! They are wonderful to eat year ’round!
Print Recipe
Votes: 0
Rating: 0
You:
Rate this recipe!
The World's Best Sticky Buns
SERVINGS24sticky buns
|
COOK TIME2hrs |
PREP TIME30mins |
READY IN2 hrs30 mins |
Ingredients
Instructions
For the Dough:
- Dissolve yeast in very warm water and let sit for 5 mins
- Add ingredients in order listed above.
- Add flour (dough will be slightly sticky, but should pull away from side of bowl).
- Mix together the yeast dough, cover and let rise, until doubled in size in a warm, draft free place (approx.1 - 1 1/2 hrs) or overnight, covered, in the refrigerator)
Assemble:
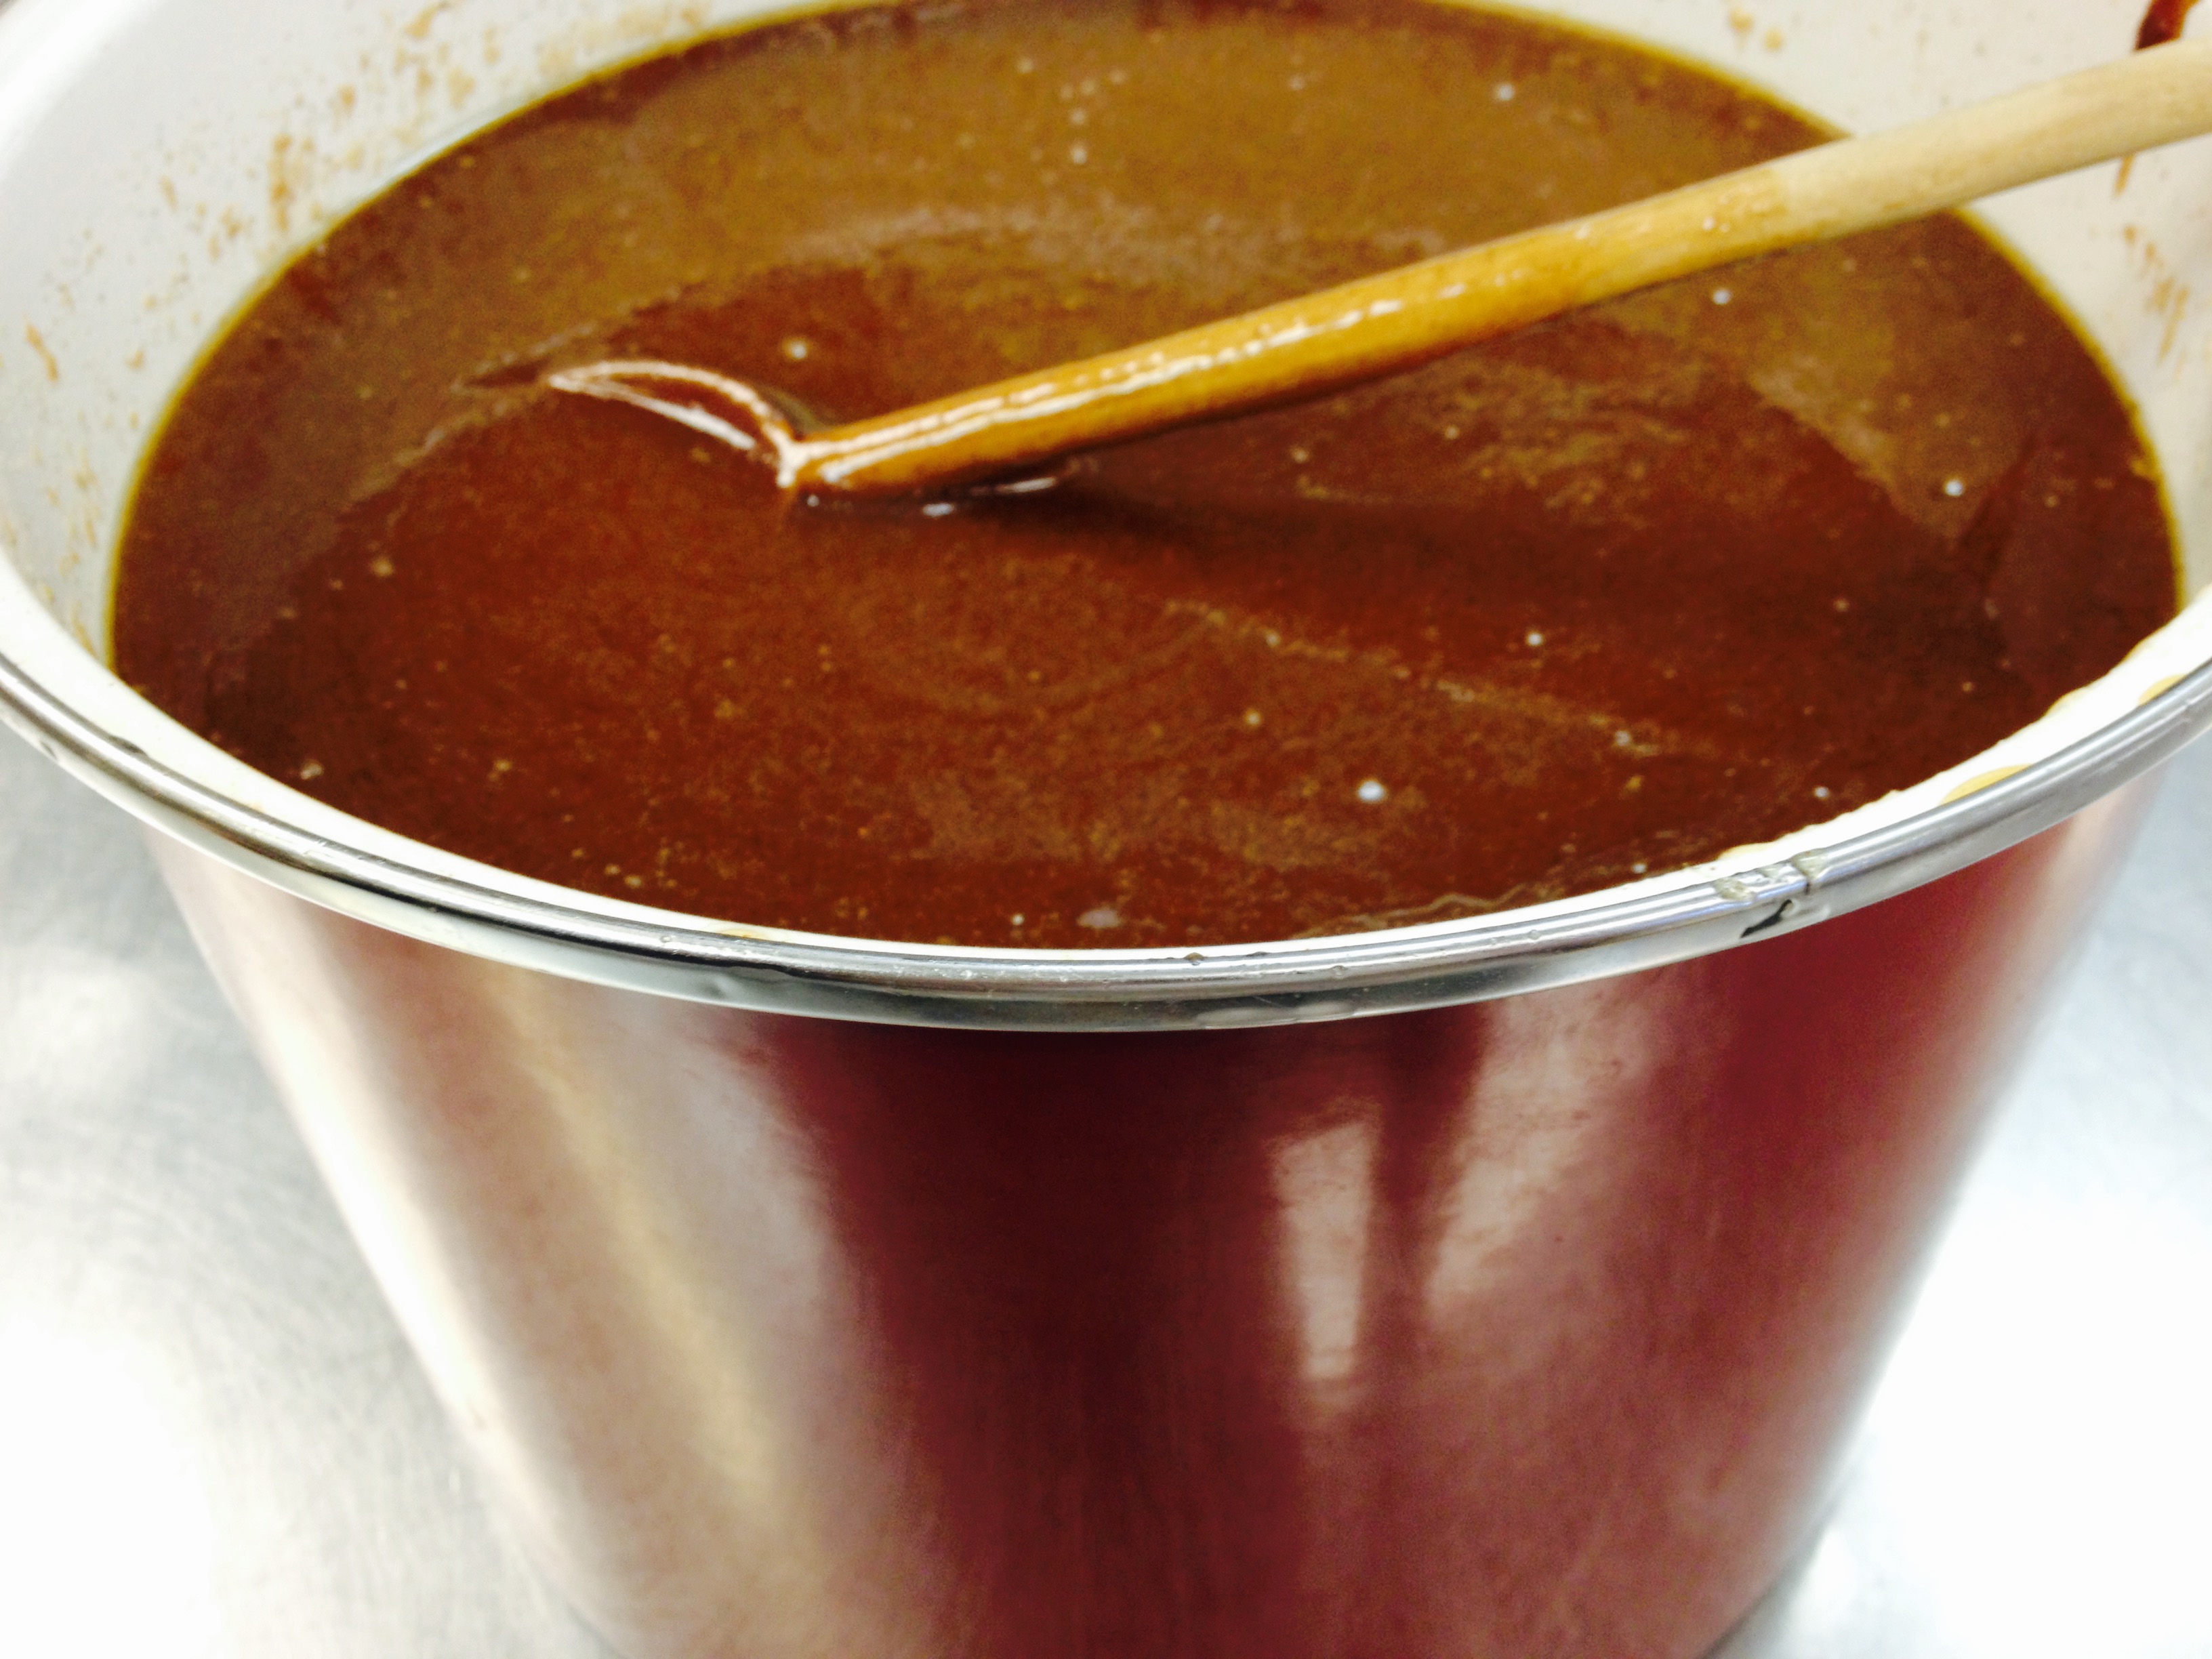
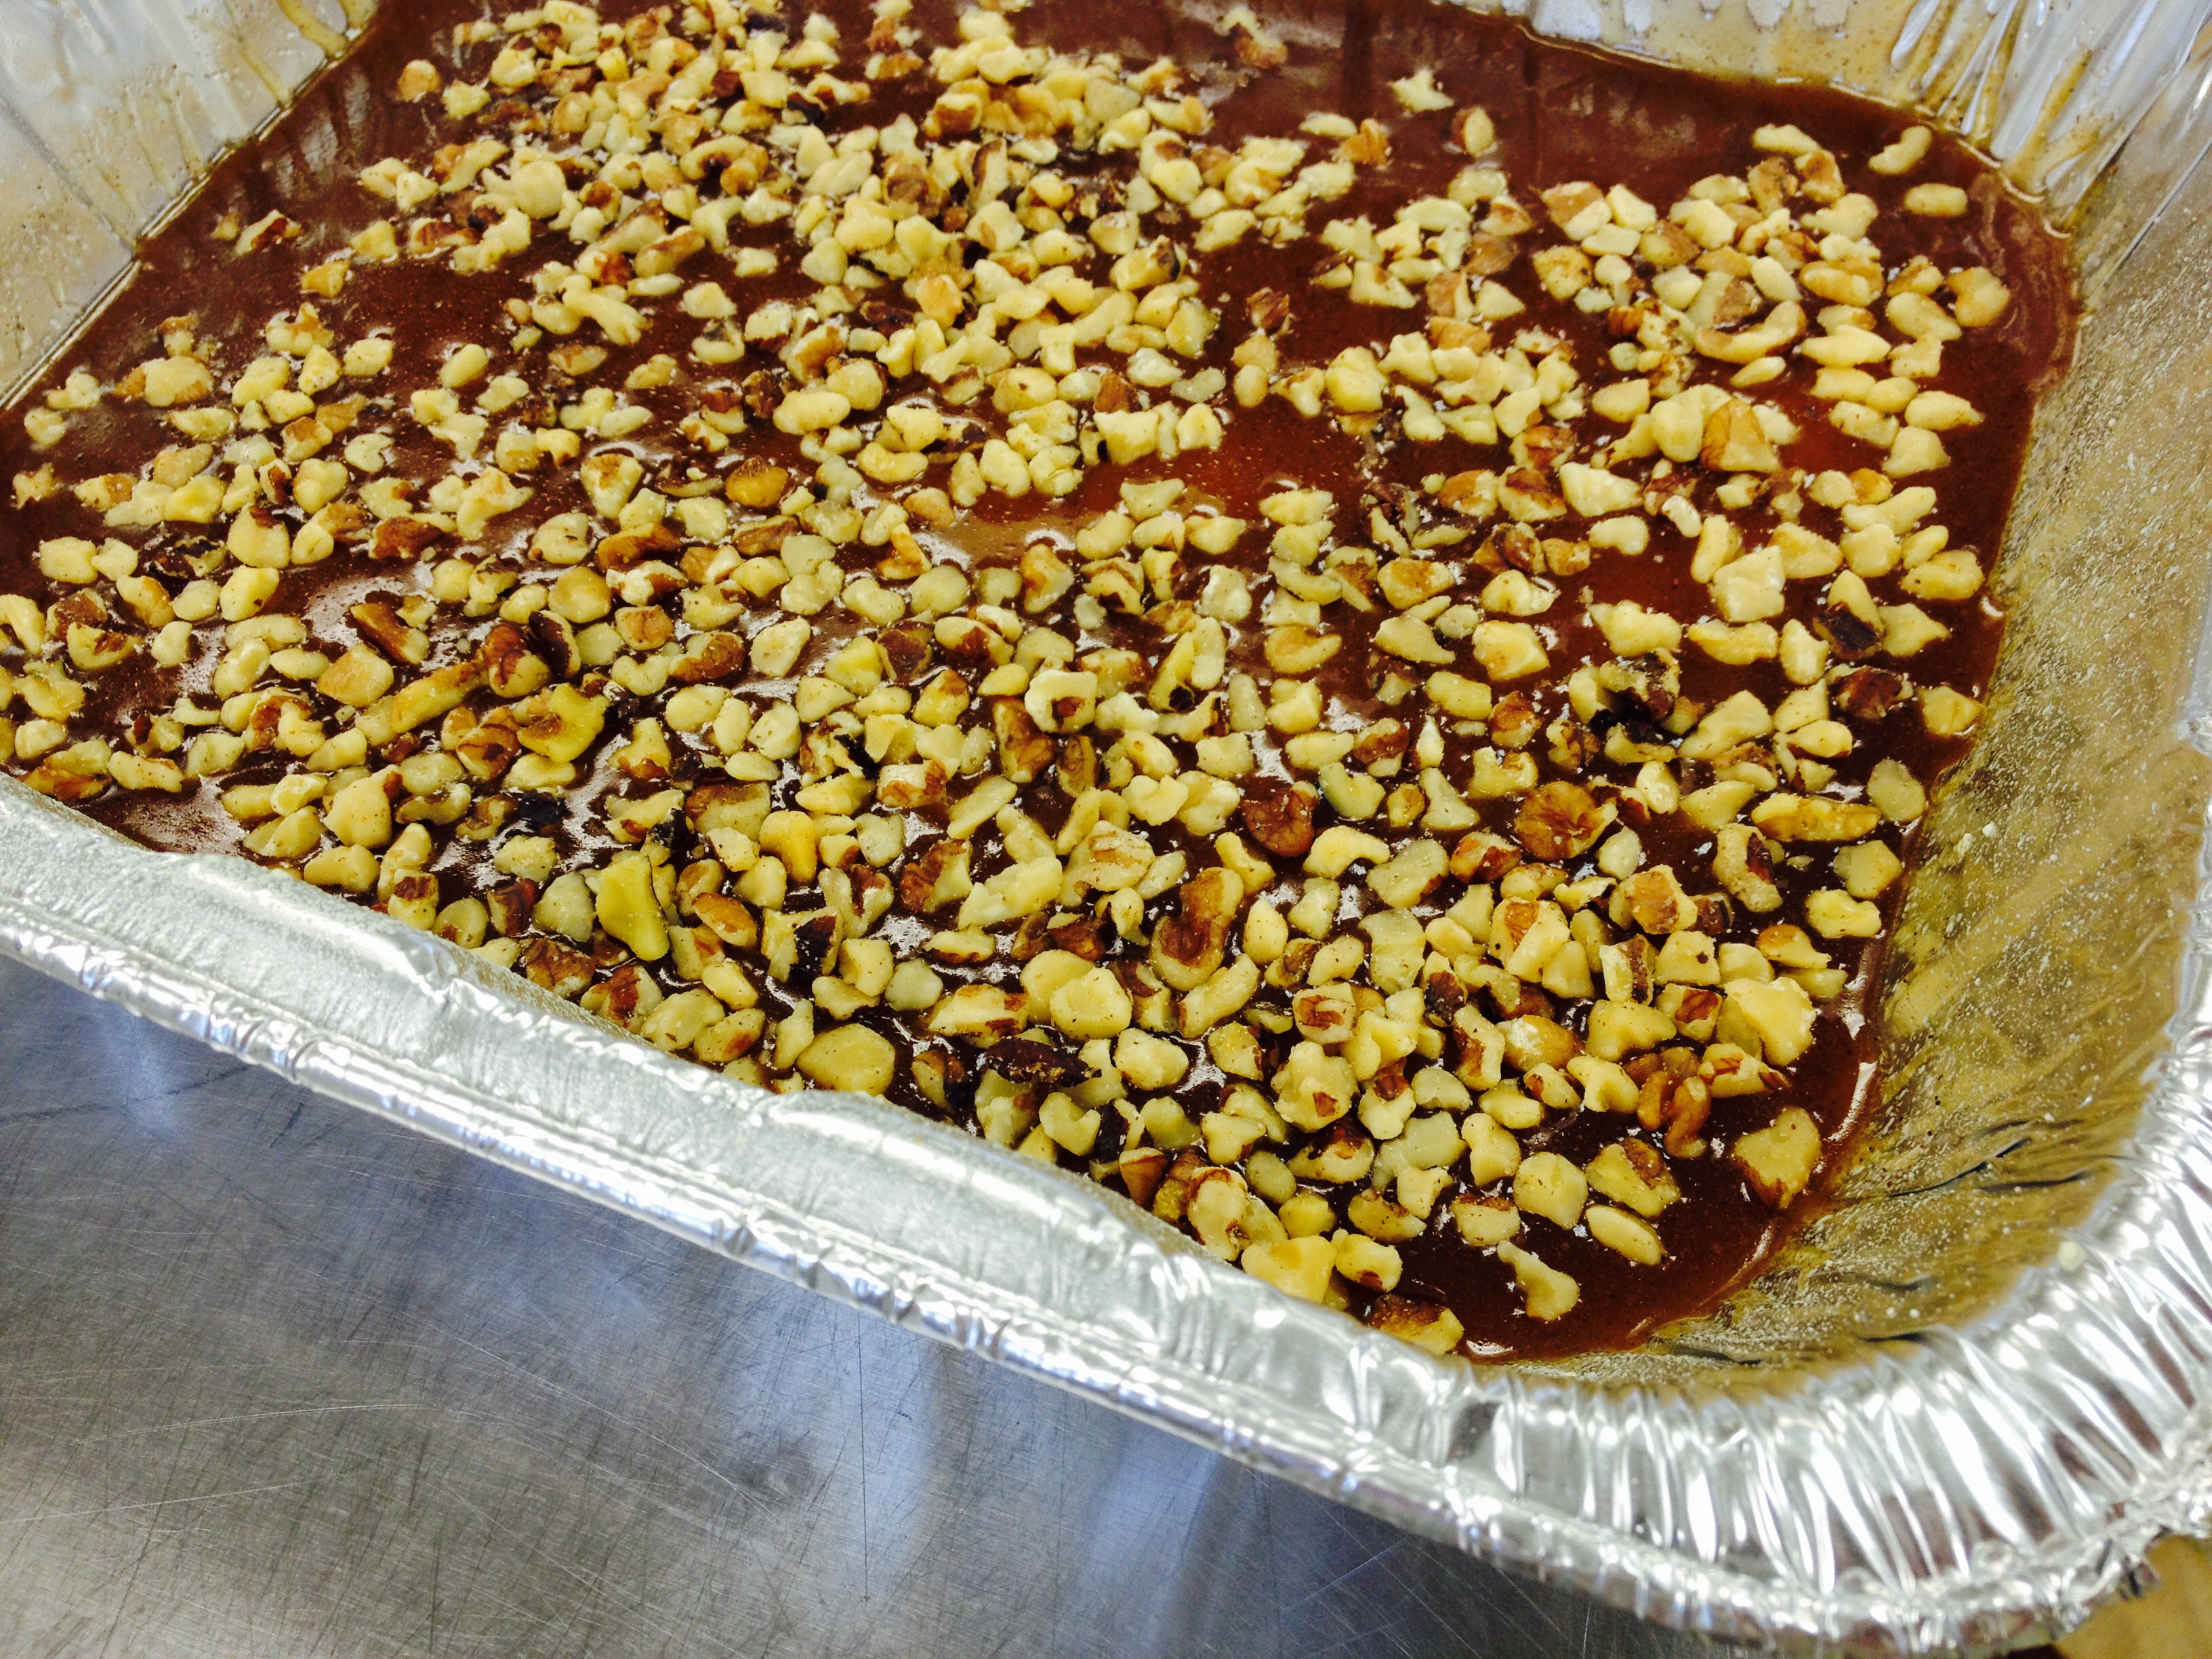
- For the filling: Mix together melted butter, brown sugar, honey and cinnamon. Divide in half, setting aside half the caramel for the filling.
- Using three 9-inch cake pans that have been sprayed with Pam, equally divide the rest of the caramel topping over the bottom of the pans. Scatter the pecans or walnuts over the caramel mixture and set aside.
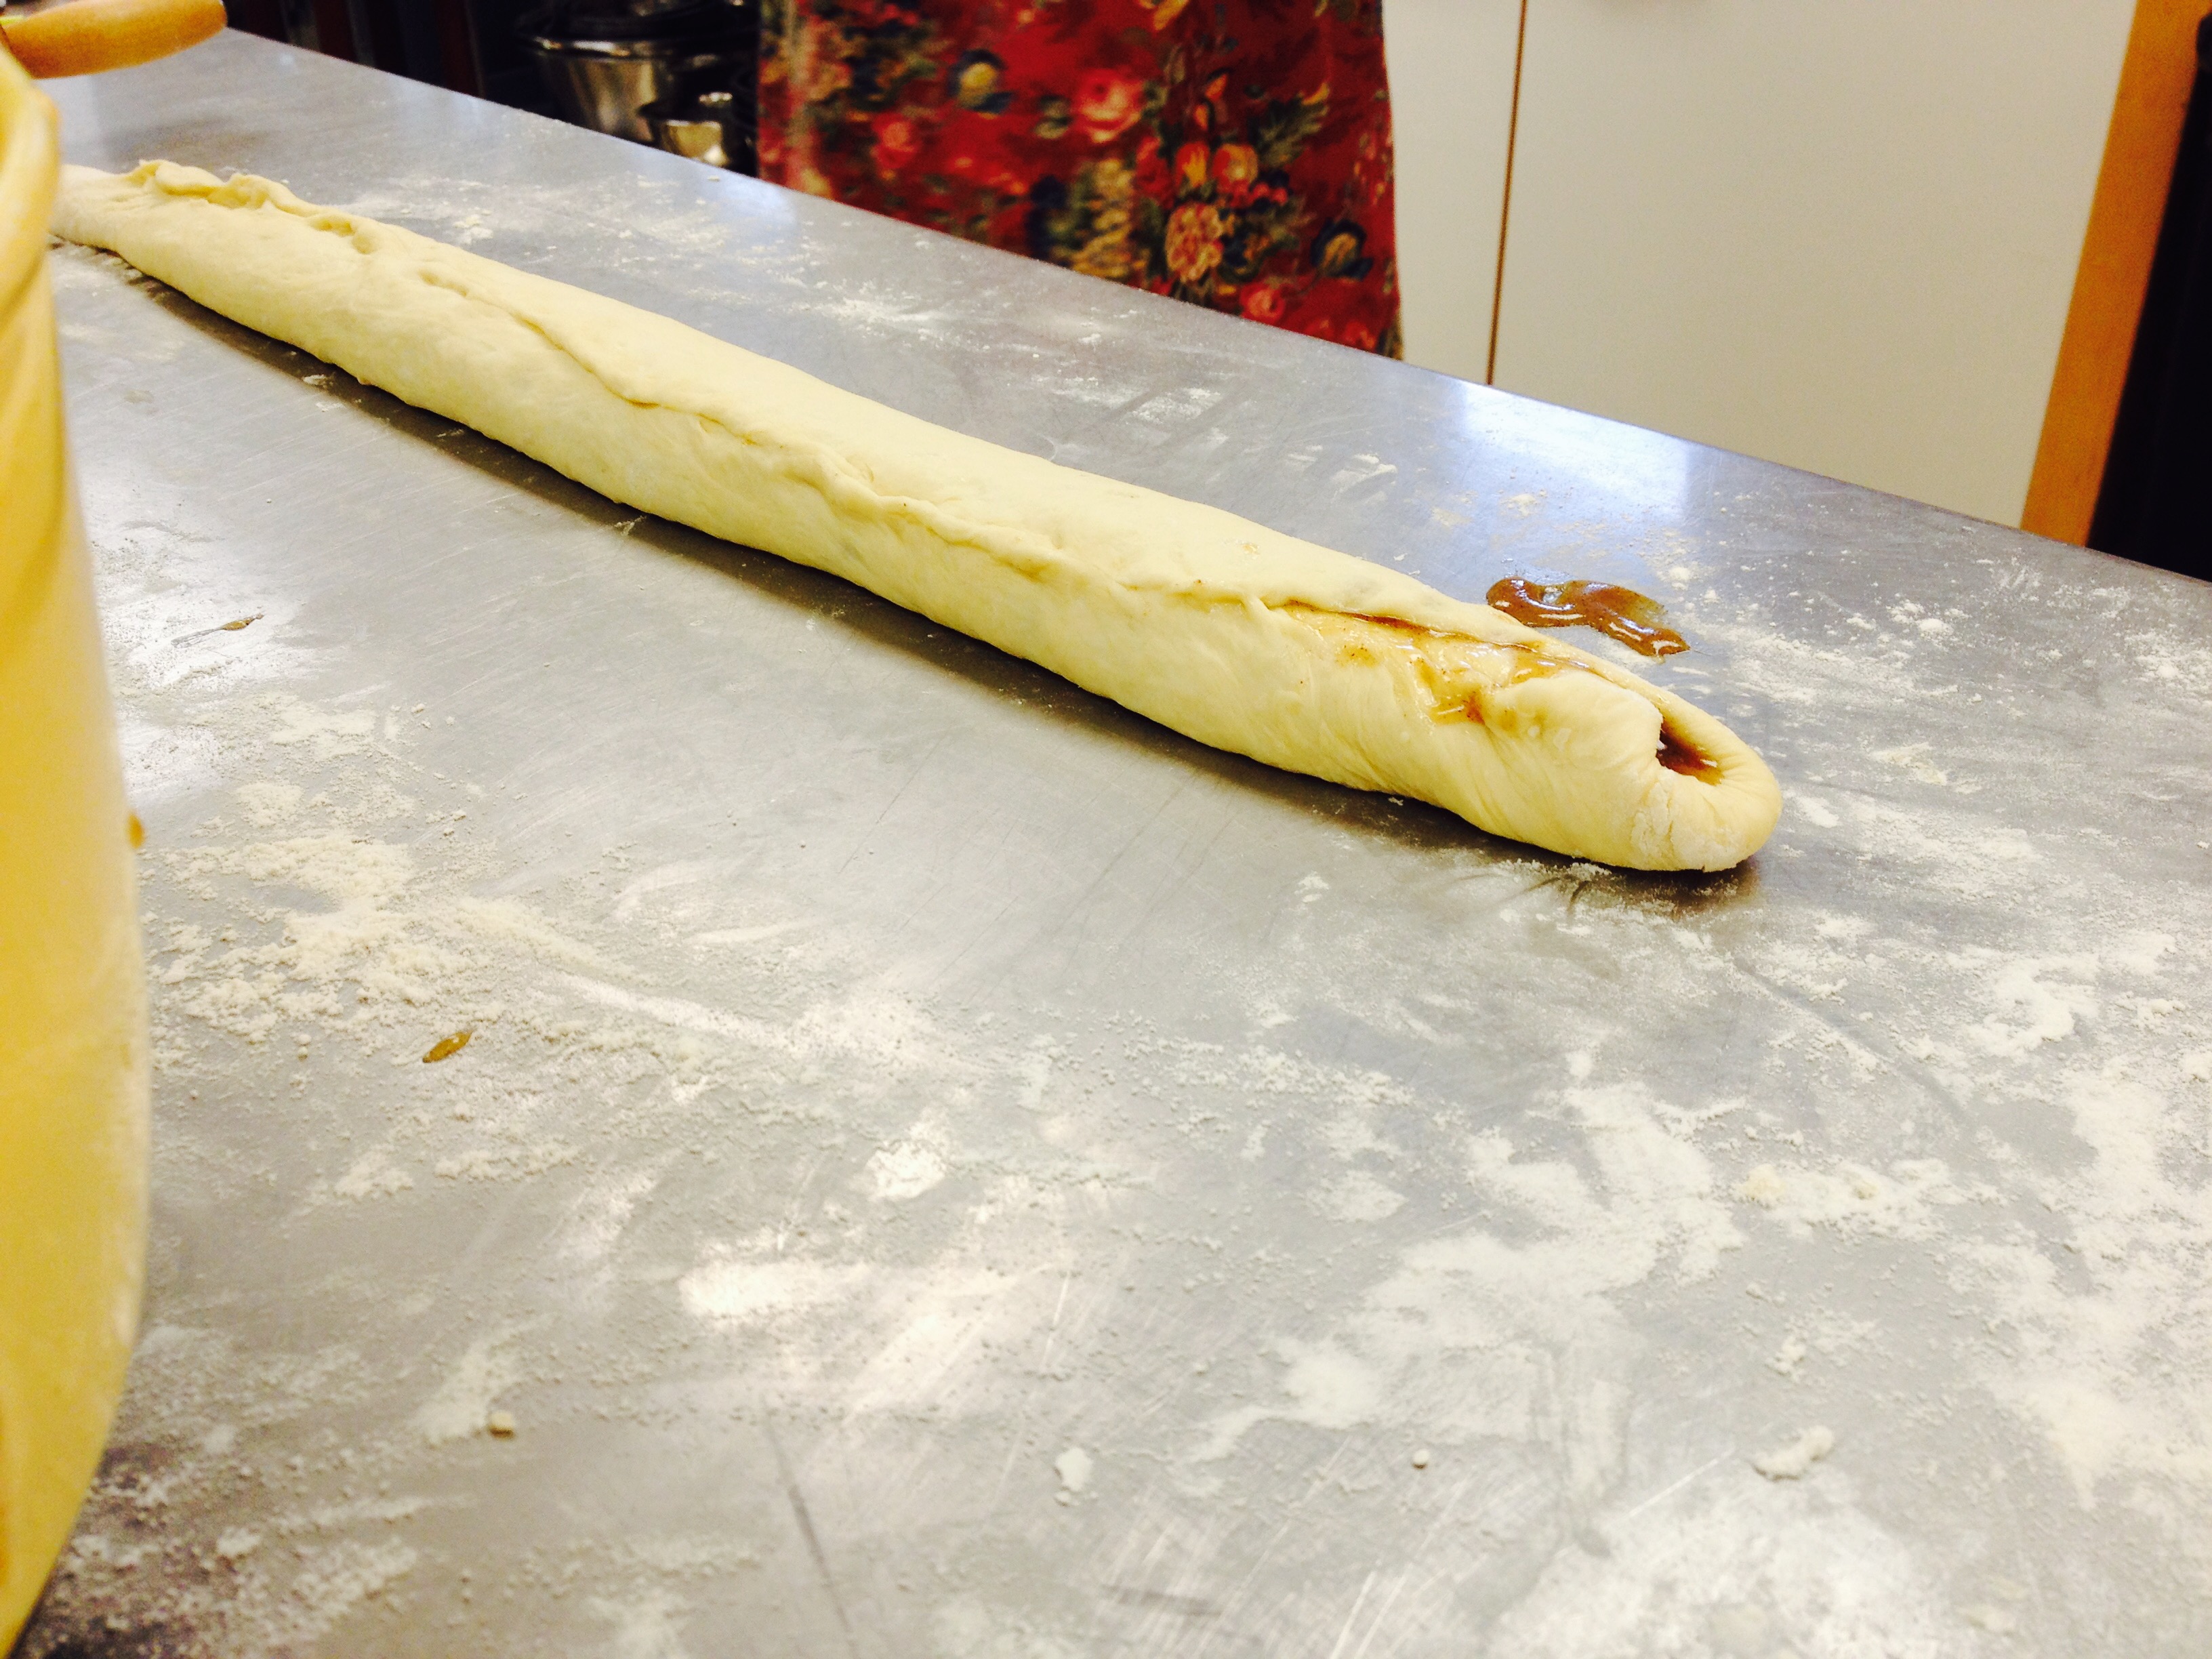
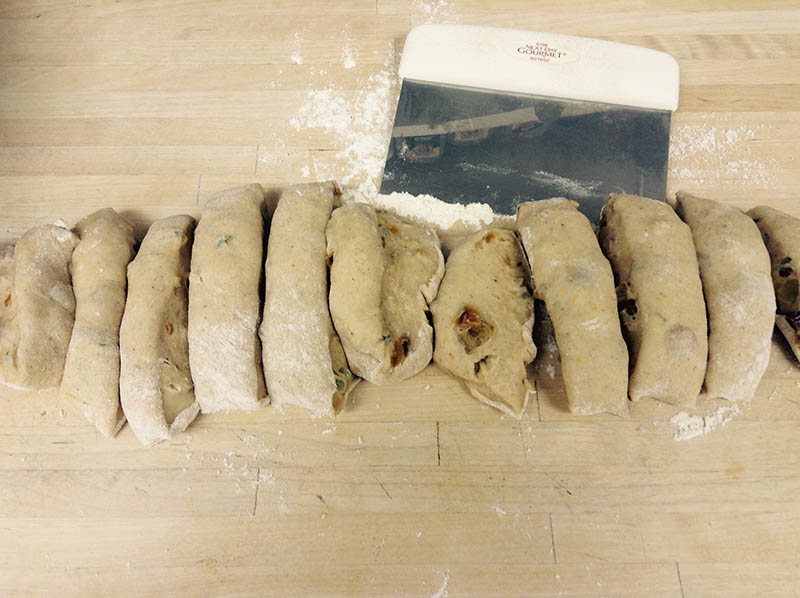
- Dust your work surface with flour. Divide the dough in thirds. Roll out the dough to a ⅛ -inch thick rectangle (around 20 inches long). As you roll out the dough, make sure there is enough flour to prevent it from sticking to the work surface
- Divide the remaining caramel mixture into thirds and evenly spread it over the rolled out dough leaving 1 inch around the edge of the dough without the filling.
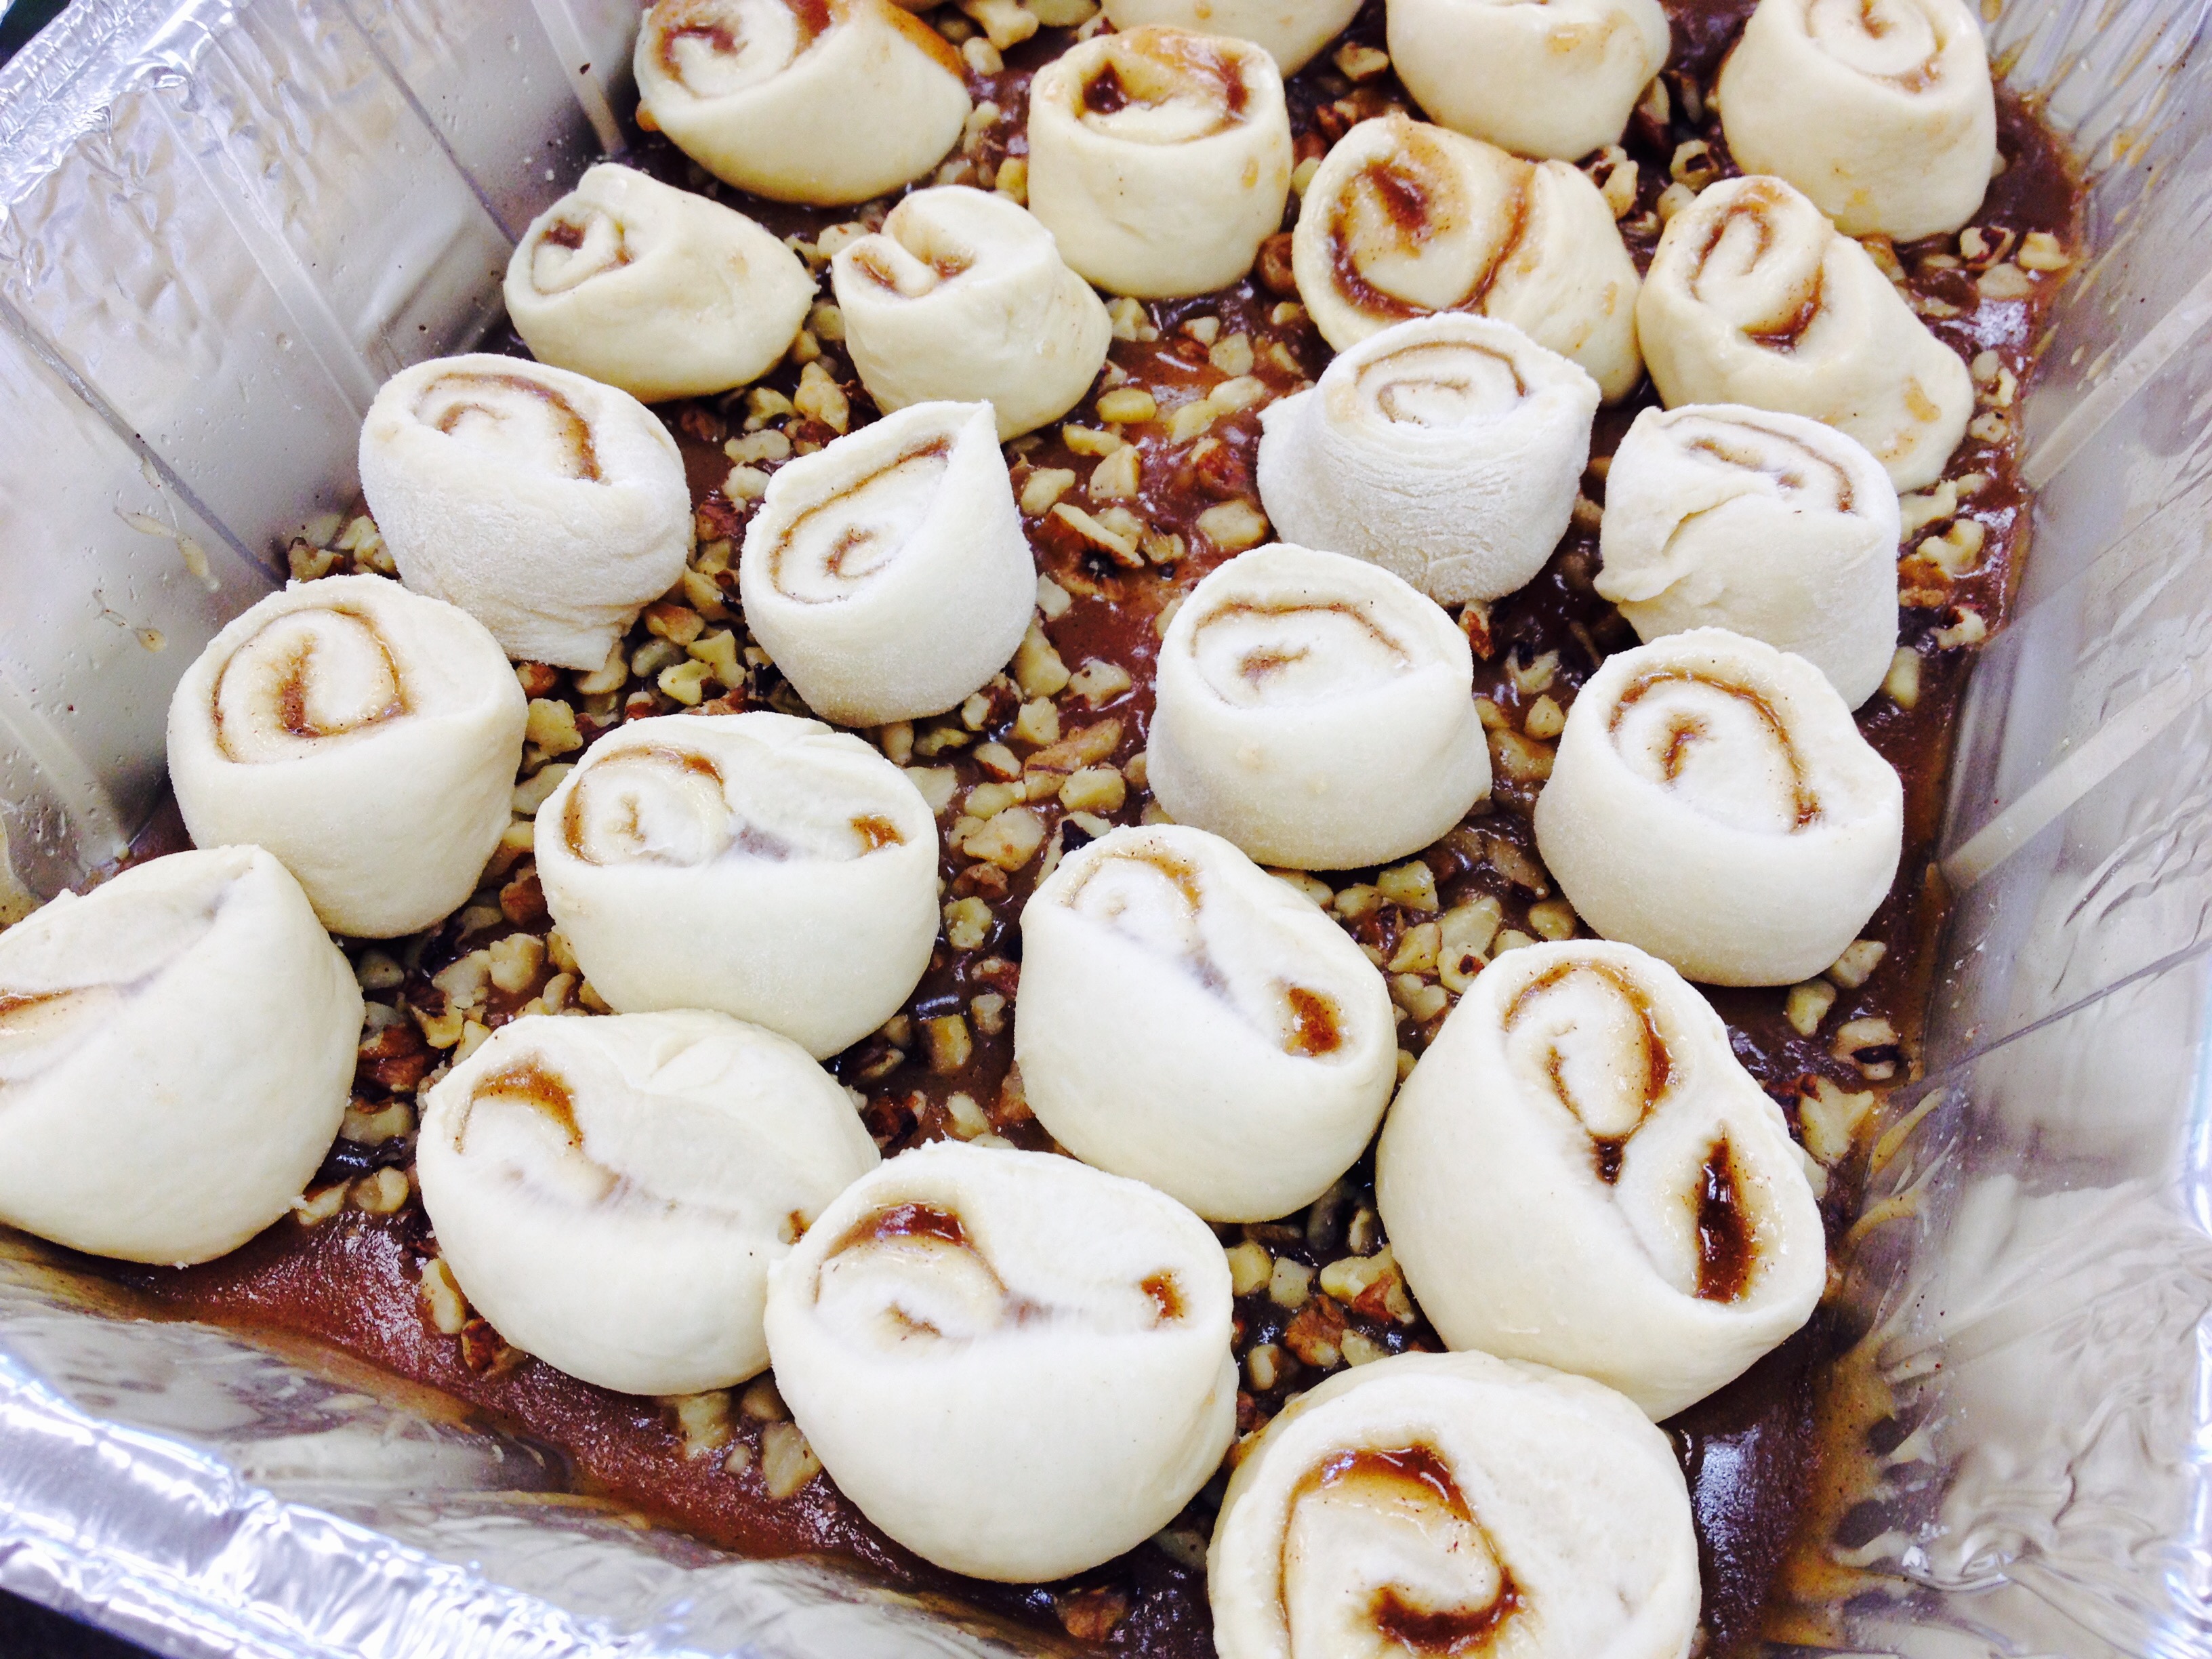
- Starting with the long side, roll the dough into a log. Roll it over until the seam is underneath. Pinch the seam together with your fingers
- Using a sharp knife, cut the log into 1 ½ -2 inch rolls.. Arrange the rolls over the nuts in the prepared pan, so that the swirled cut edge is facing upward.
- Repeat with the rest of the dough and filling.
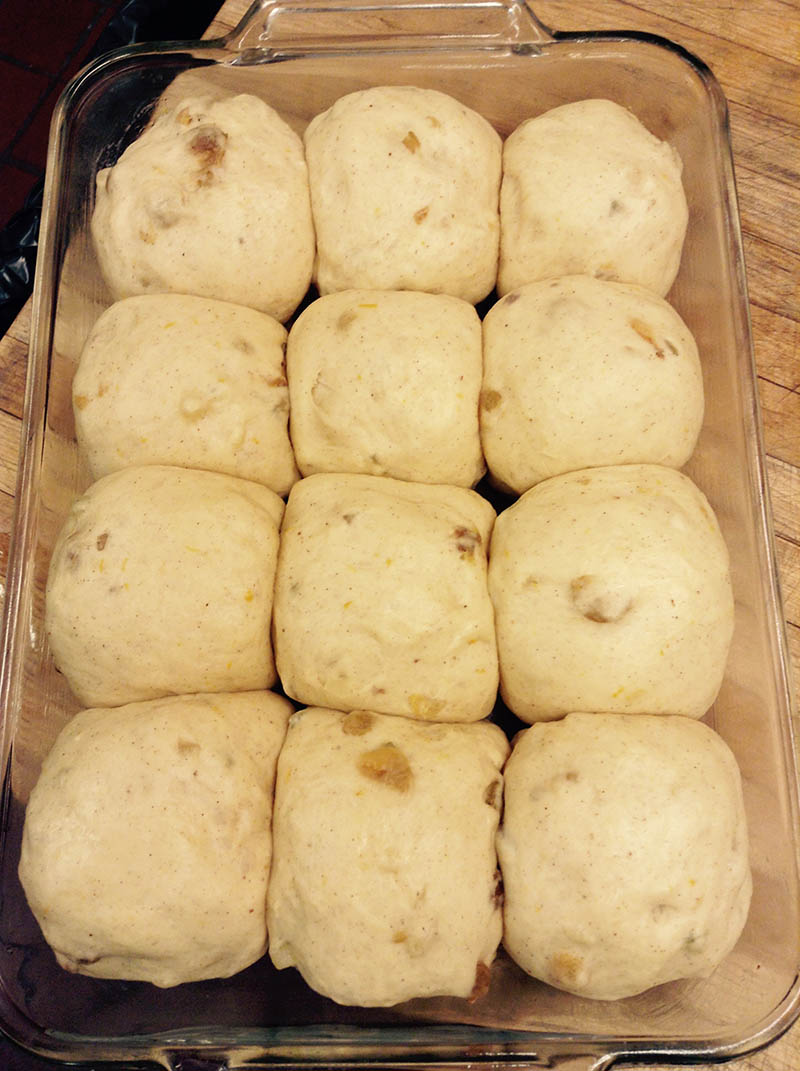
- Cover the tin with plastic wrap and allow to rest for 1 hour. During this time they will rise up to meet the tin and becoming bubbly.
- Once proofed, place the rolls on a baking sheet covered with parchment, in case the caramel bubbles over.
- Preheat the oven to 350 F and bake for roughly 35- 40 minutes, or until golden brown and firm in the center.
- While still hot, run a thin spatula around the outer edge of the pan to release the caramel rolls, and invert immediately onto a serving dish. Enjoy warm!
This year Good Friday and the start of Passover were on the same day—-a rare occurrence given the difference between the Gregorian calendar used by most Western countries and the lunar calendar observed by the Jewish faith. Indeed, the Seder plate used during the first night of Passover tells the dramatic story of the Israelites’ exodus from slavery in Egypt and includes reminders of their captivity: bitter herbs to signify the bitterness of slavery, haroset which is a reminder of the mortar used between bricks, a shank bone to remember the Passover sacrifice and an egg which represents the new life promised to them after the Red Sea crossing.
Borrowing from our Jewish roots, our own Good Friday dinner was a cross-section of the Judeo-Christian traditions that mark this holy season of the year. Beginning with a candle lighting and blessing at 6:45—the official start of the eight-day Passover festival—and continuing with the meal which included some dishes found at a traditional Passover Seder table including Matzo ball soup, roasted chicken (with haroset stuffing), marinated green beans, Israeli couscous and tabouleh salad. Also gracing our table was one of our year-round favorites: fresh Challah bread baked that afternoon. While Challah—and dishes containing yeast—are not eaten during Passover, we couldn’t help ourselves! This braided bread is so delicious and beautiful to look at and made an honorary appearance on our Good Friday Passover table. Best when eaten fresh, this versatile bread is also wonderful toasted the next morning day. Try out the recipe below and see for yourself!
With wishes for a joyful conclusion for the Passover and Easter seasons, we look forward to the promise of new life this spring!
Print Recipe
Votes: 0
Rating: 0
You:
Rate this recipe!
Challah Bread
SERVINGS3loaves
|
COOK TIME30mins |
PREP TIME15mins |
READY IN1 hr15 mins |
Ingredients
Instructions
- Combine the first three ingredients to dissolve the yeast. Let sit for 5 min. or until foamy.
- Add the next 4 ingredients and then the flour and salt, adding as much flour as you need for the dough to start pulling away from the side of the bowl.
- Remove to a floured surface and knead until the dough is no longer sticky.
- Place in an oiled bowl, turn over once, cover and let rise until doubled in bulk.
- Divide dough into 9 balls and roll each ball into a “rope” using your hands.
- Braid 3 ropes together into 1 braided loaf of bread and continue with the other 6 ropes, making 3 loaves in all.
- Let the bread rise again.
- Make an egg wash and brush on the bread and bake in a 325º oven until golden and cooked through, about 30 min.
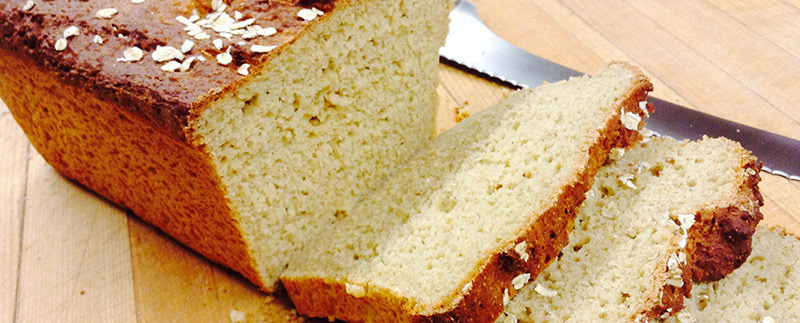
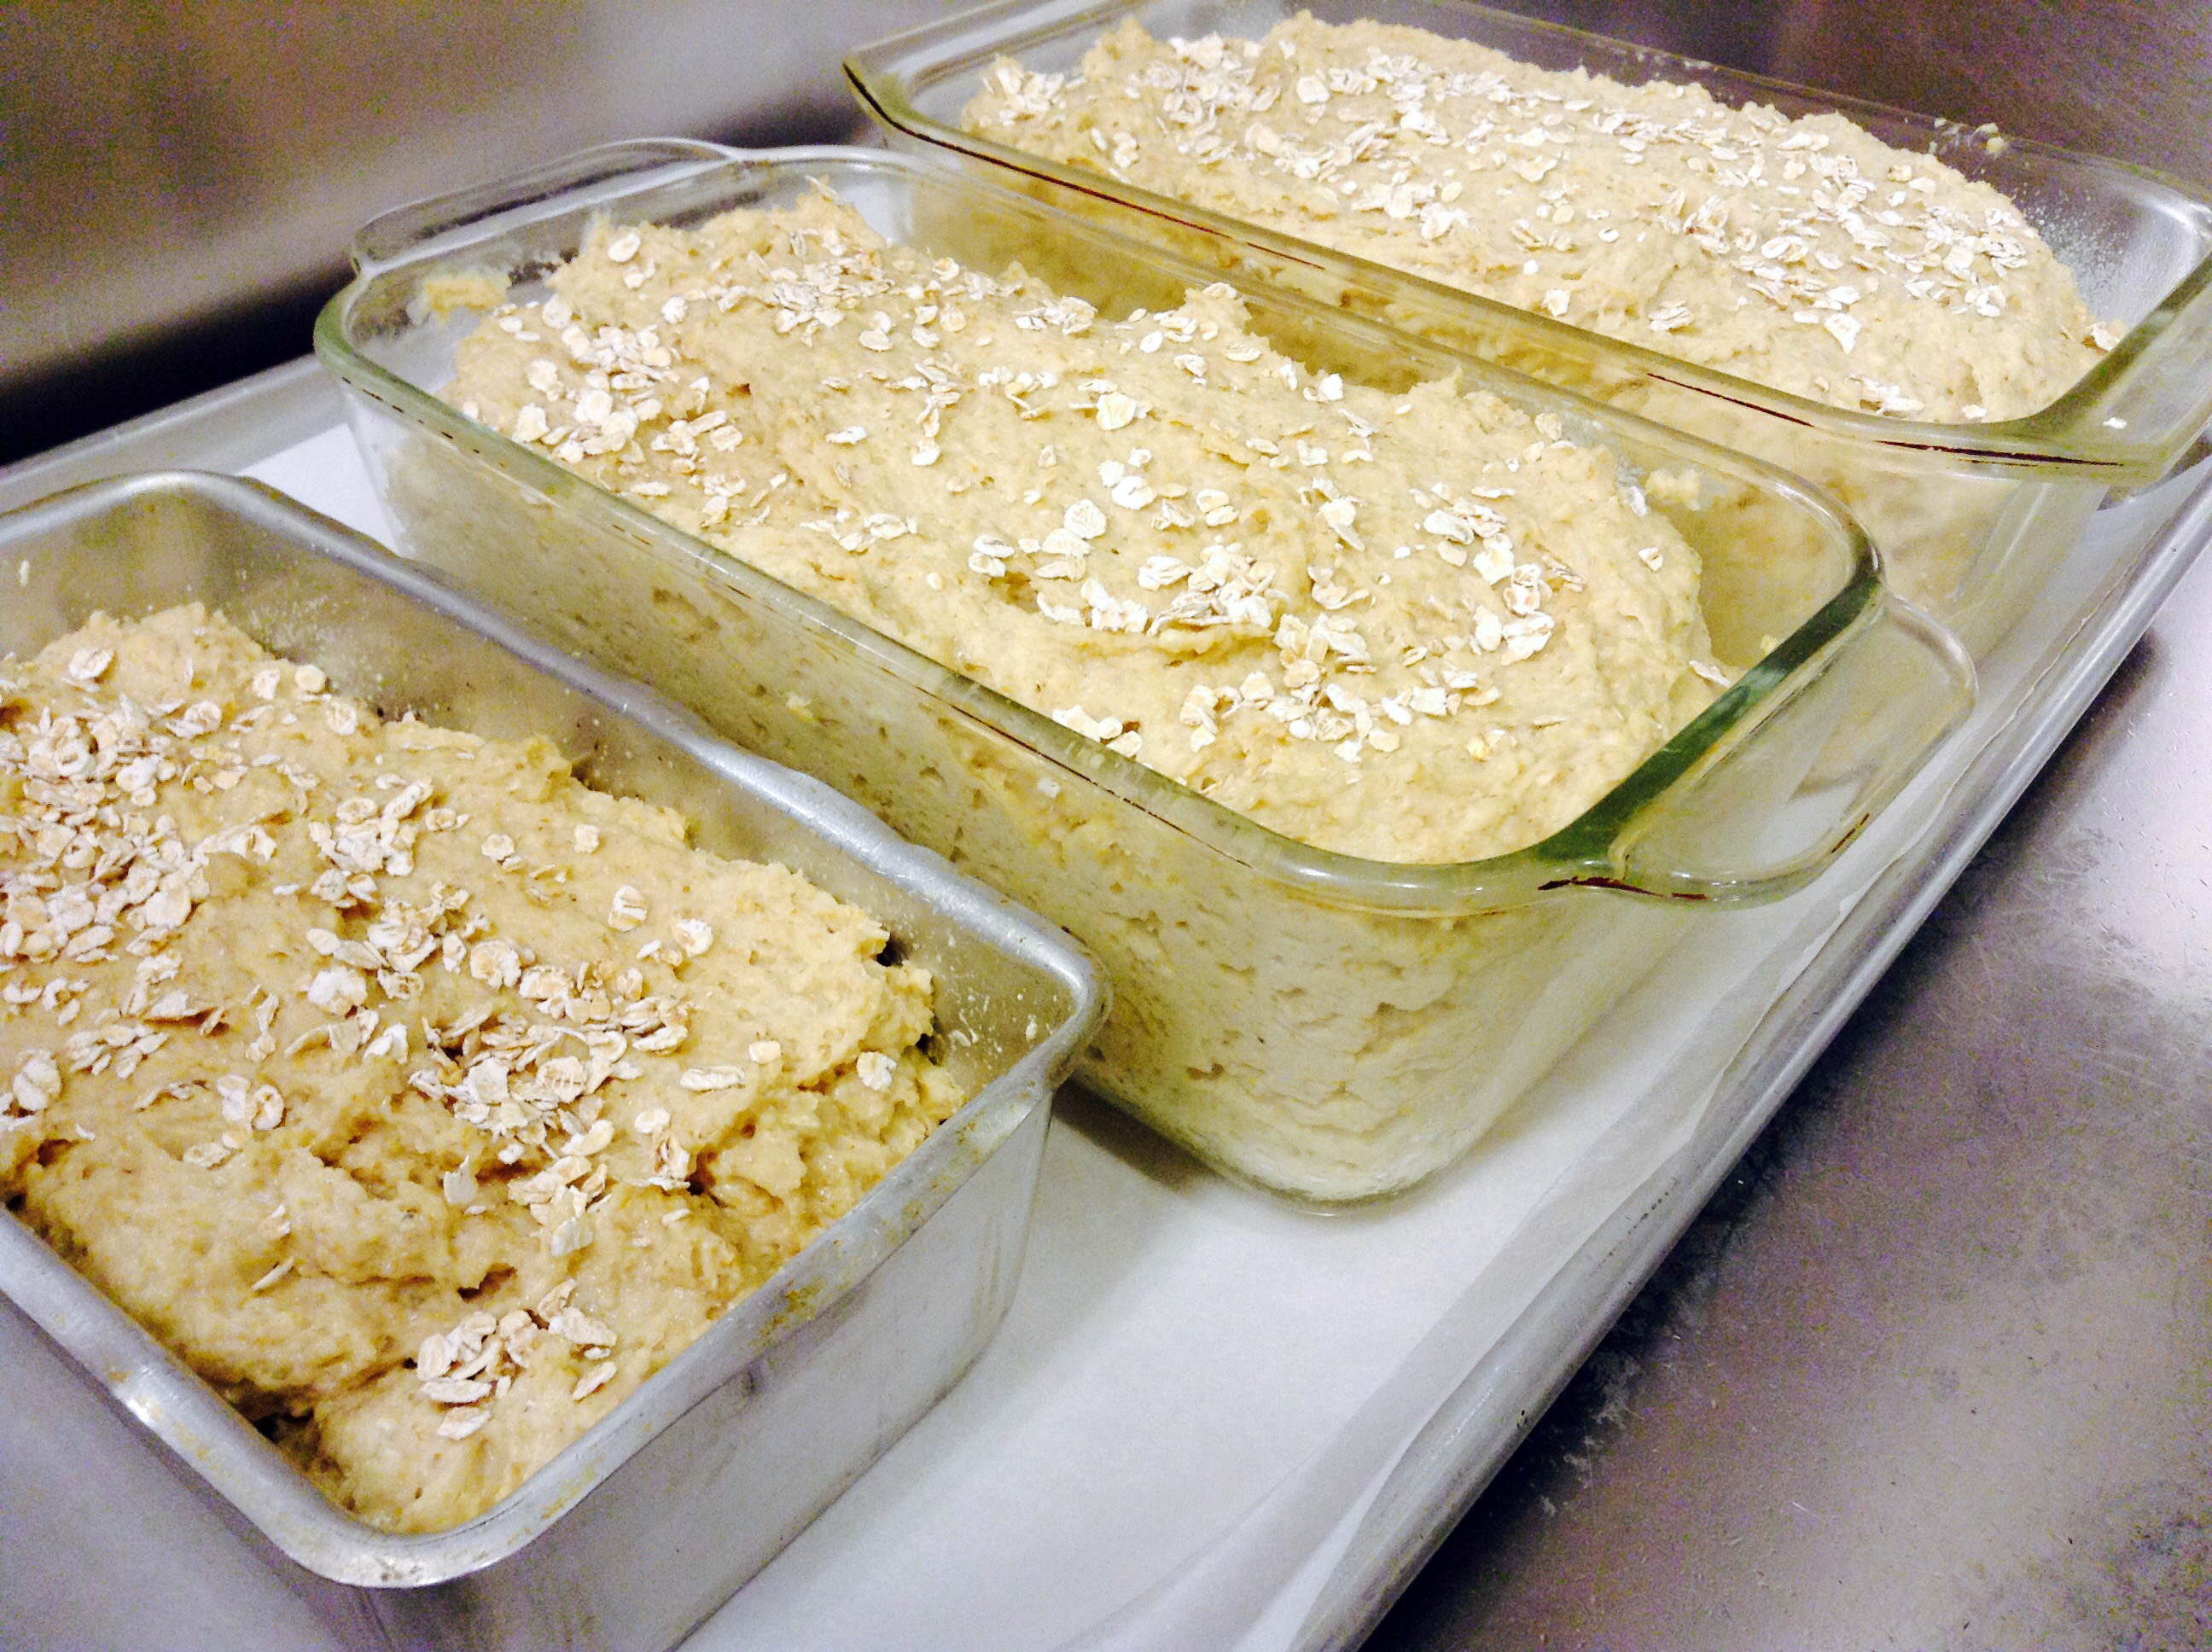
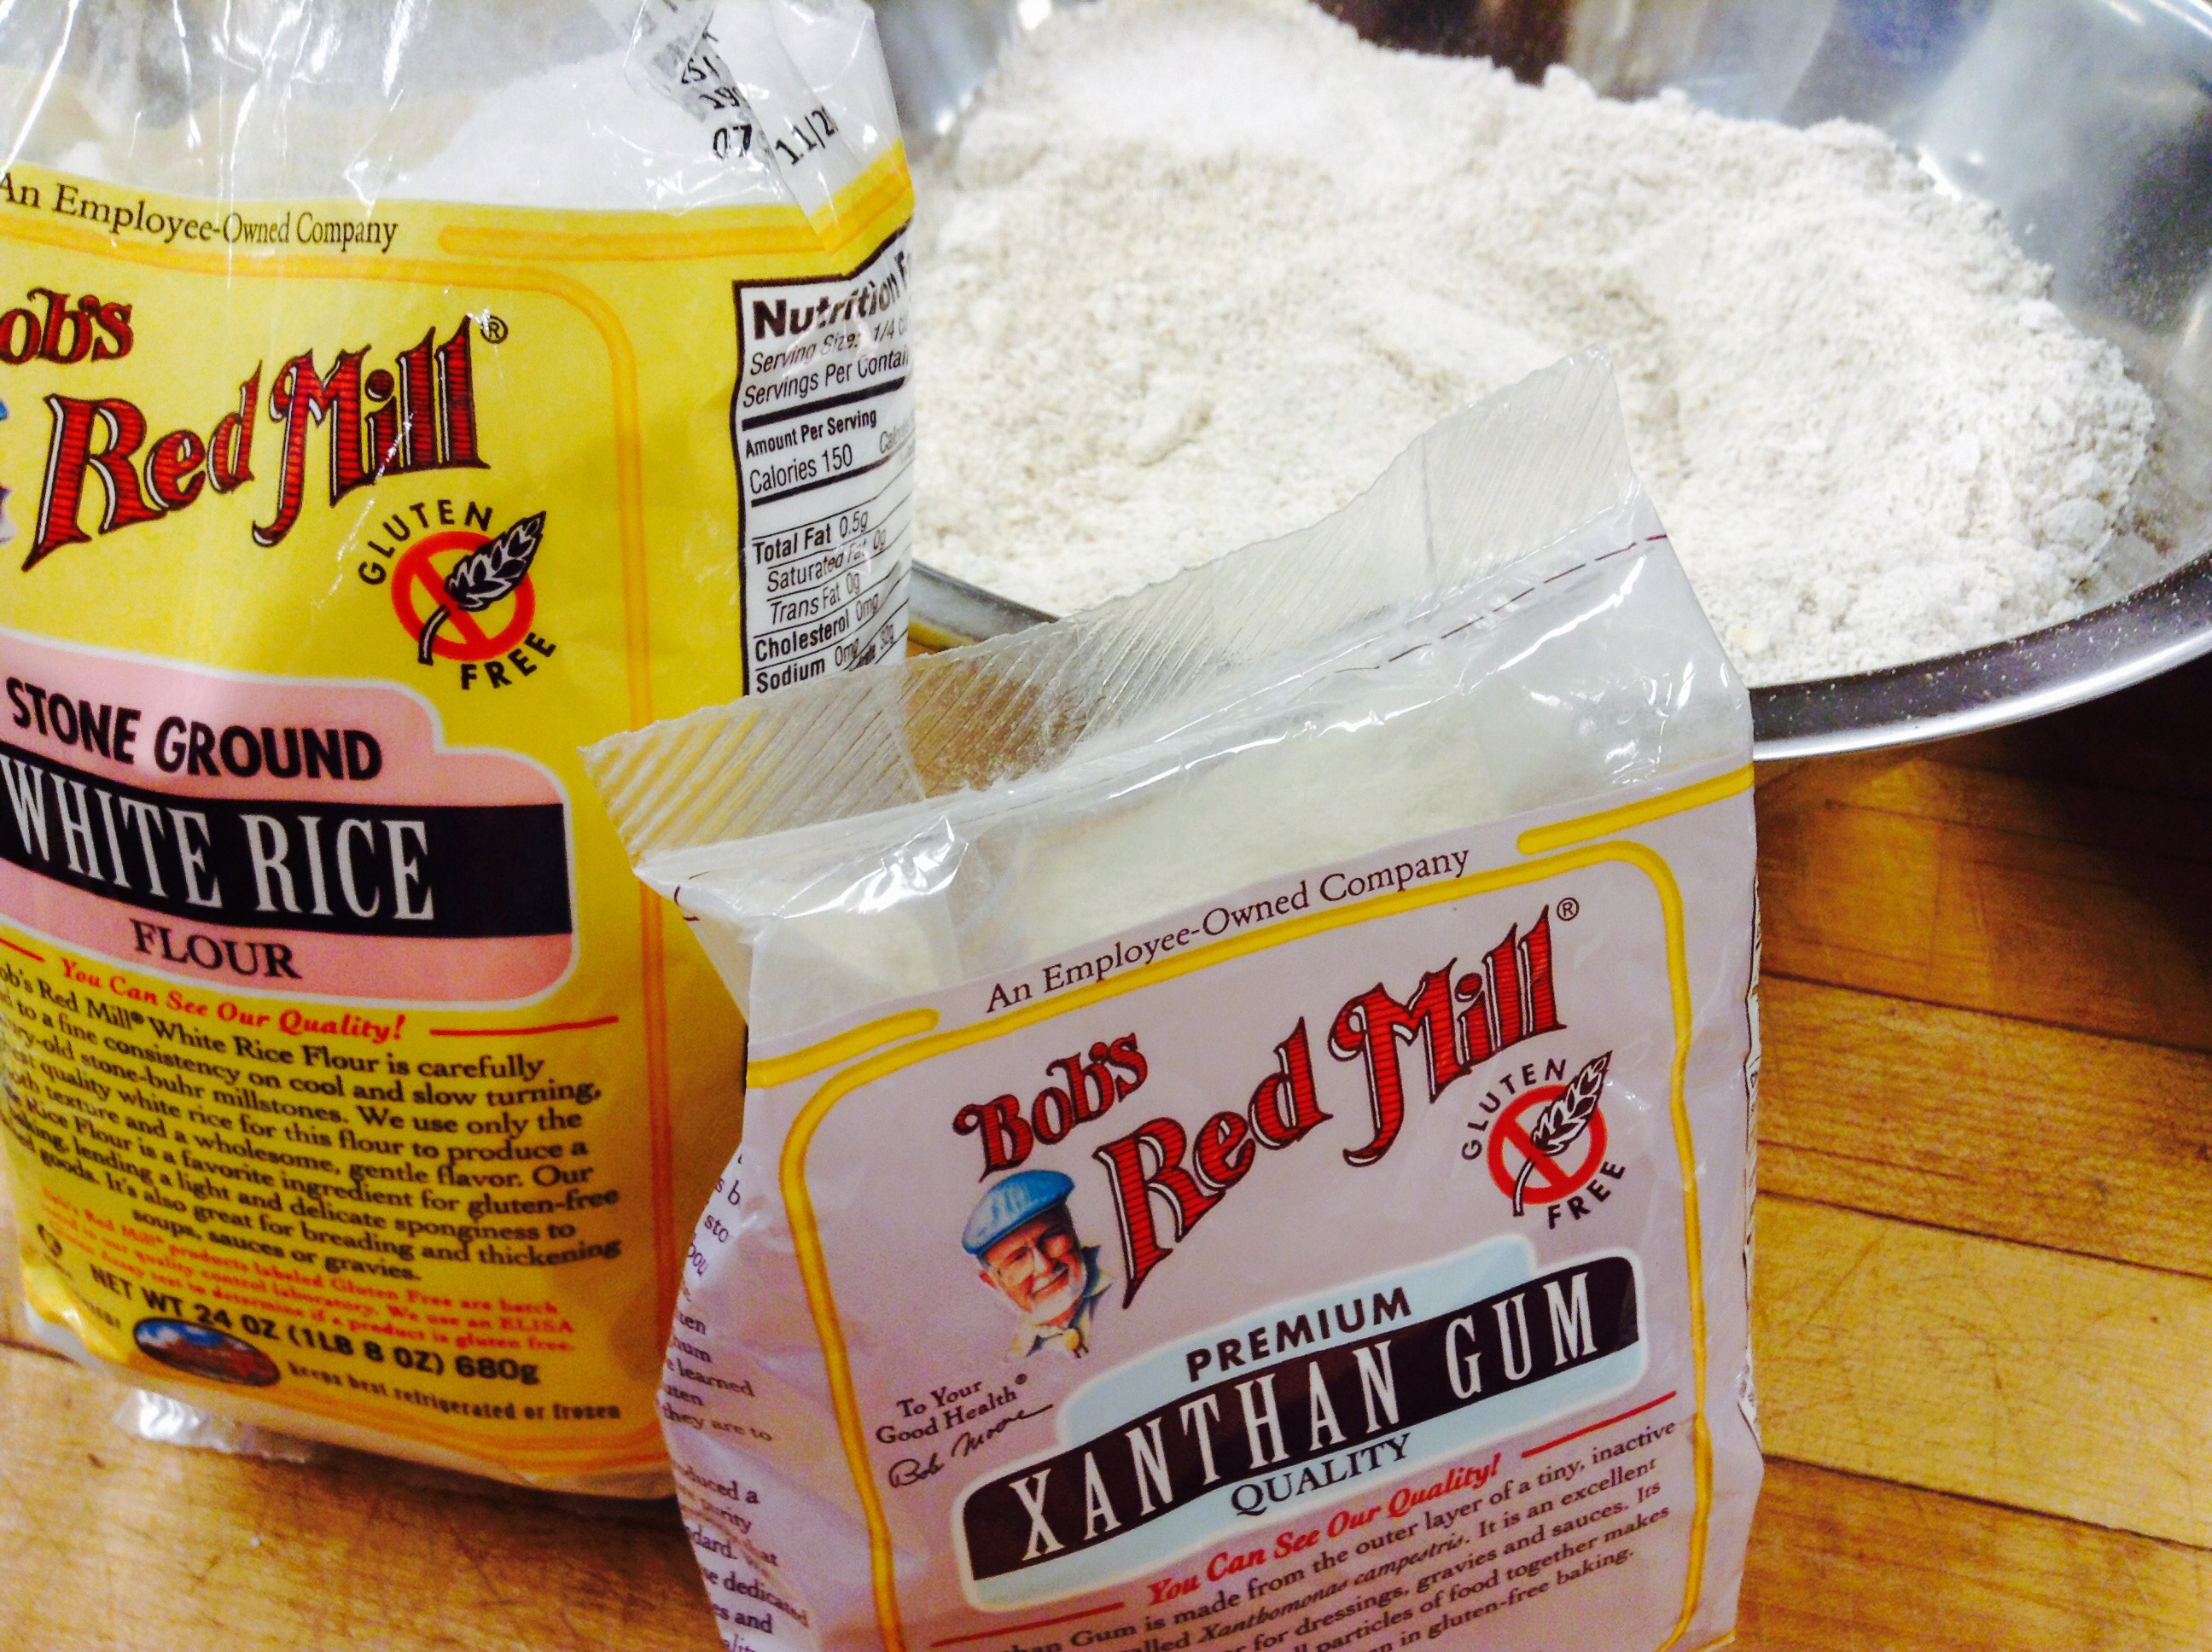
We have quite a number of Sisters in the Convent who have celiac-sprue or gluten allergies. Buying gluten free bread can be extremely expensive and well, frankly, you might as well be eating cardboard! We have wanted to find a recipe for quite a while that is healthy, inexpensive to make and tastes like real homemade bread. This recipe fits the bill. It’s high in fiber from the oat content, easy to make and tastes wonderful! It’s especially lovely toasted with butter and jam. Most oats are gluten free — check the label to be sure. The only reason they wouldn’t be is if they are manufactured in a factory where they also make products with gluten. We are so fortunate to have a company that supplies us with oats, so this bread costs literally nothing to make. You can find xanthum gum in the health food aisle of the supermarket — don’t leave it out — it’s an “all natural” emulsifier and you need it as a binding agent when baking without gluten.
Print Recipe
Votes: 31
Rating: 3.97
You:
Rate this recipe!
Gluten-free Honey Oat Bread
SERVINGS2loaves
|
COOK TIME45minutes |
PREP TIME20-30minutes |
READY IN2hours |
Ingredients
Instructions
- Sprinkle the yeast over the hot tap water in the bowl of a standing mixer and let sit for a few minutes, until the yeast is active and bubbles start to form on the surface.
- If you're using whole oats, blend them in a food processor or blender until they're pretty fine (as fine as you can get them) to make the oat flour.
- Once the yeast is active, add the oil, honey, corn starch, white rice flour, xanthan gum, and oat flour to the mixer and beat until combined.
- Add the salt and eggs and beat for a few minutes until fluffy.
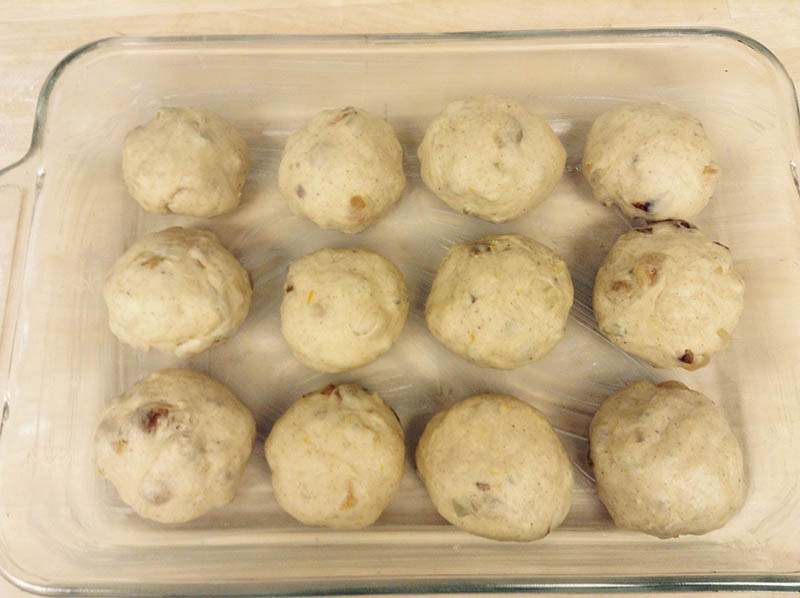
- Pour into two well greased 9 inch loaf pans and allow to rise for about 45 minutes until doubled (only fill the loaf pans about 2/3 - 3/4 full - any excess can fill up a smaller loaf pan). Sprinkle the top of the loaves with some oats.
- Preheat the oven to 350ºF. Once the loaves have risen, cut a few slits in the top with a serrated knife.
- Bake for about 45 minutes. Allow to cool before slicing.
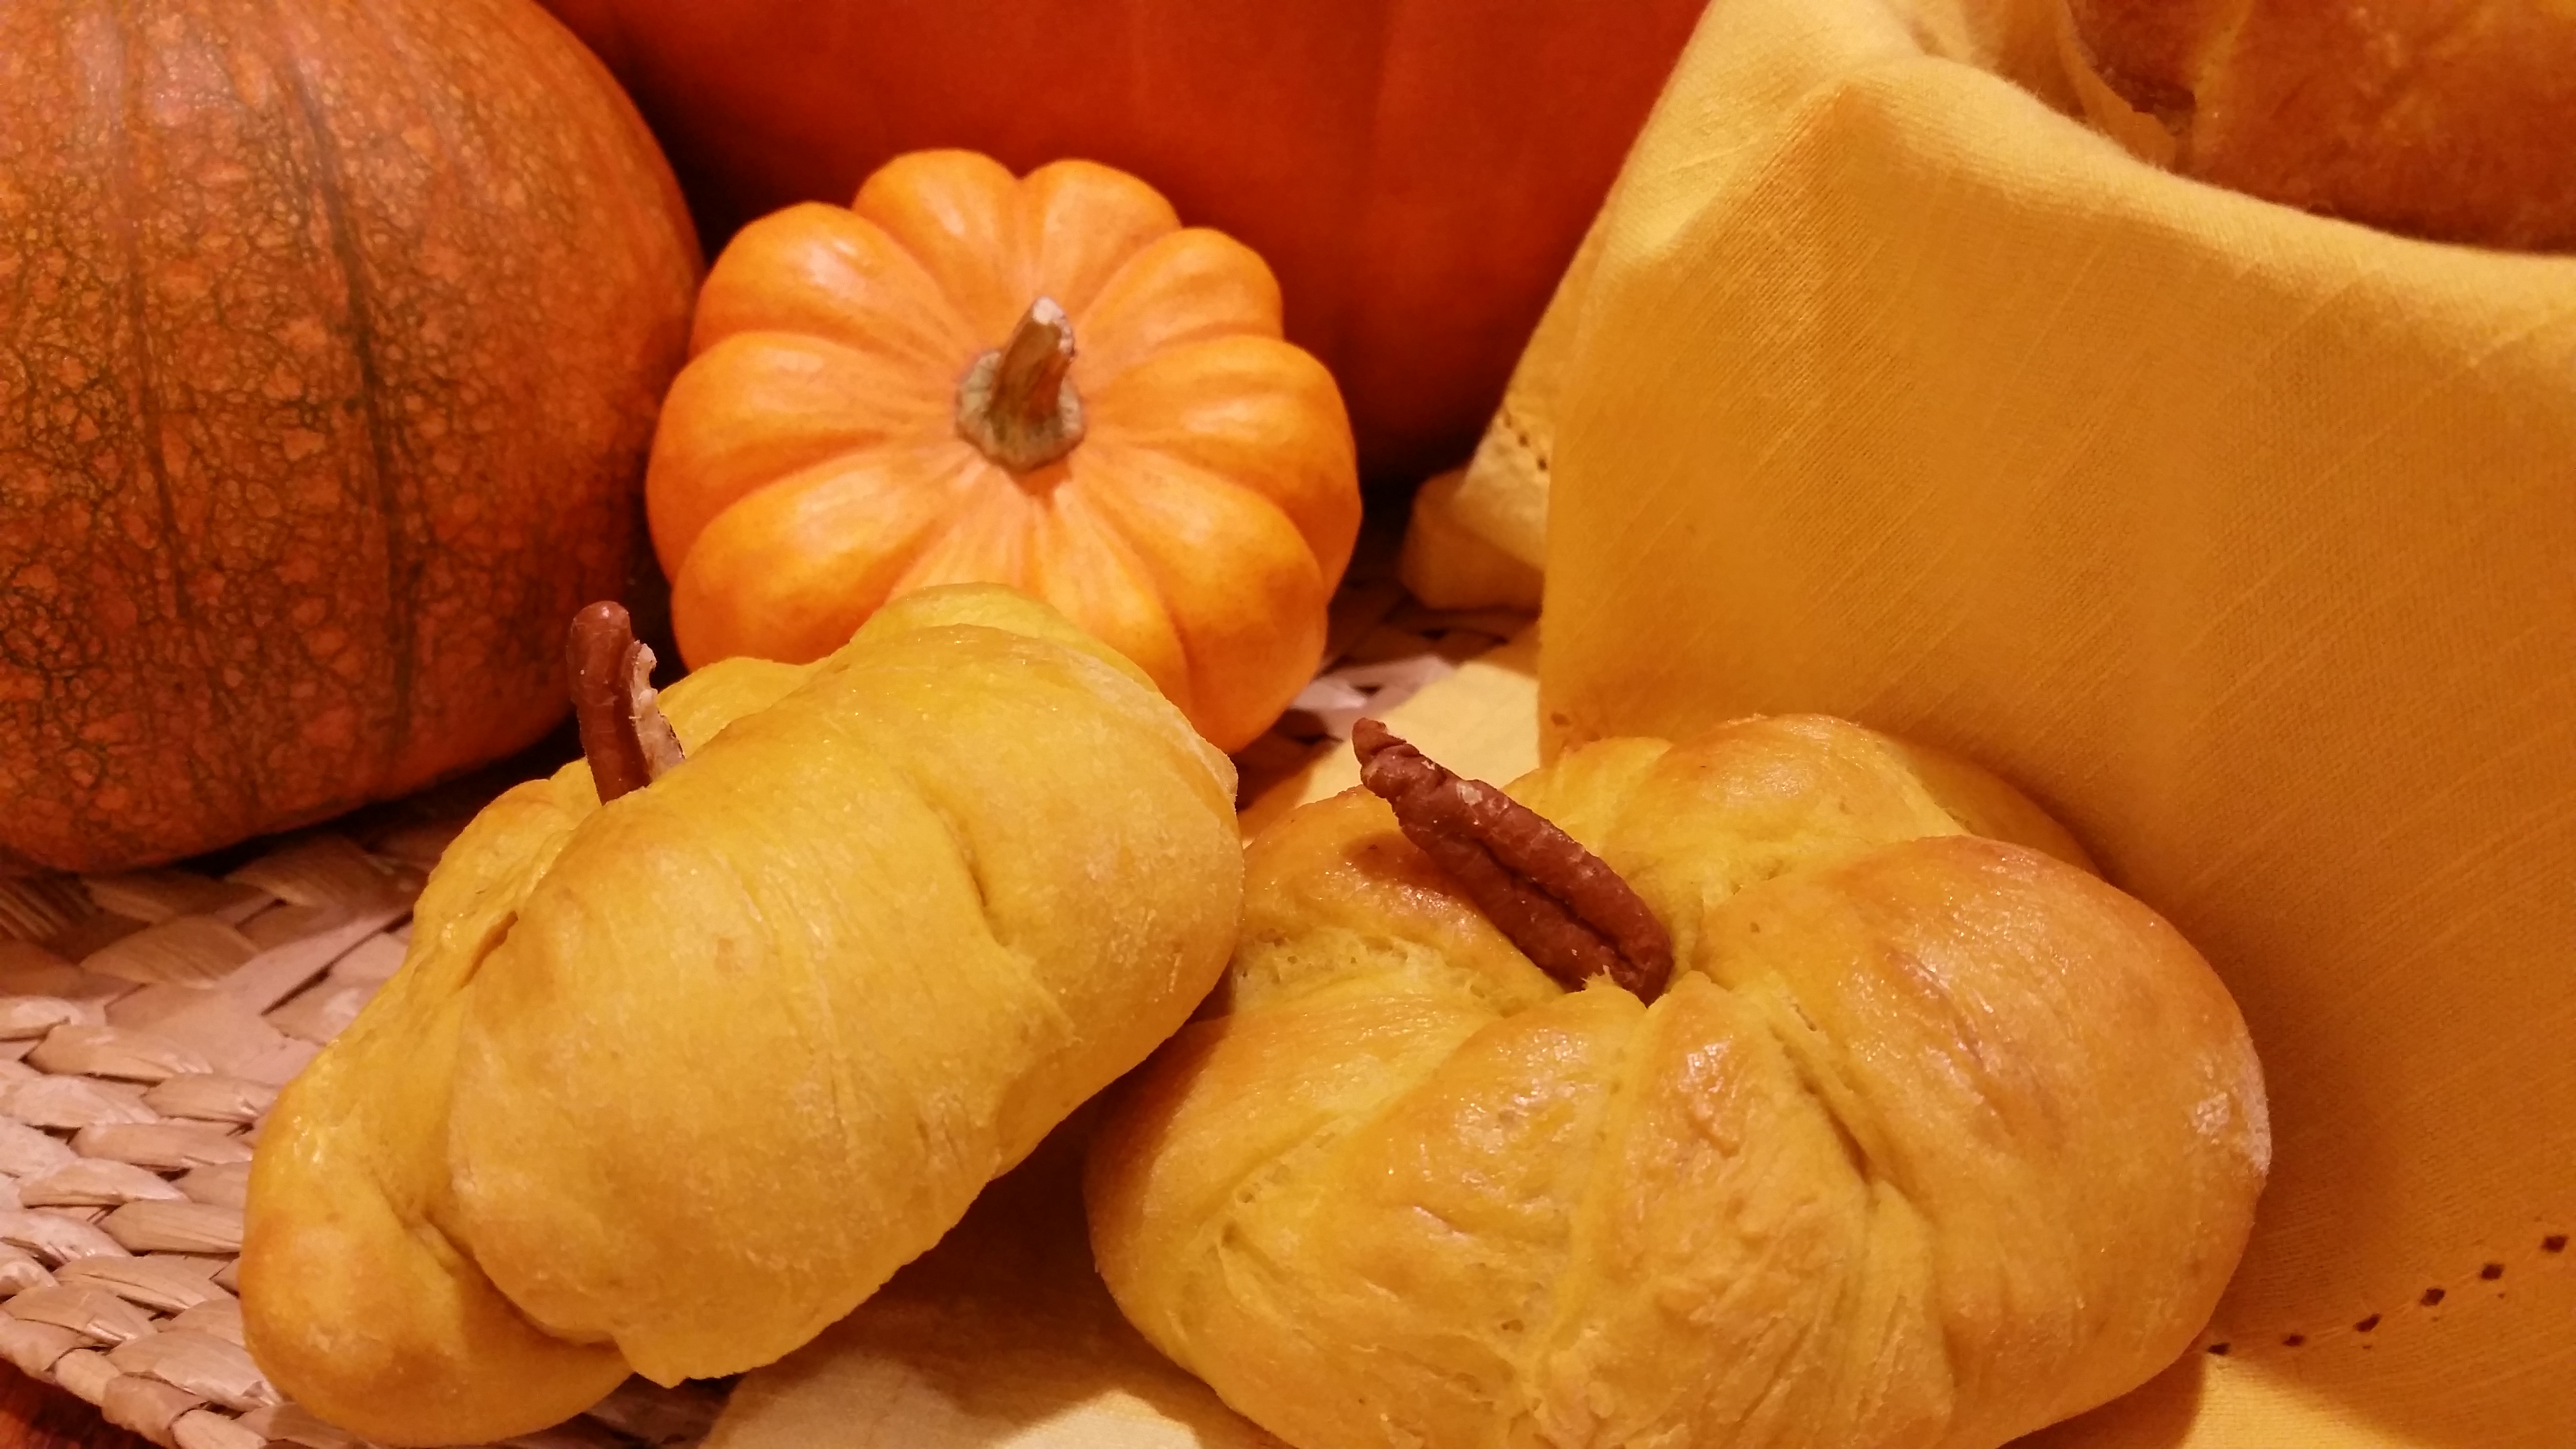
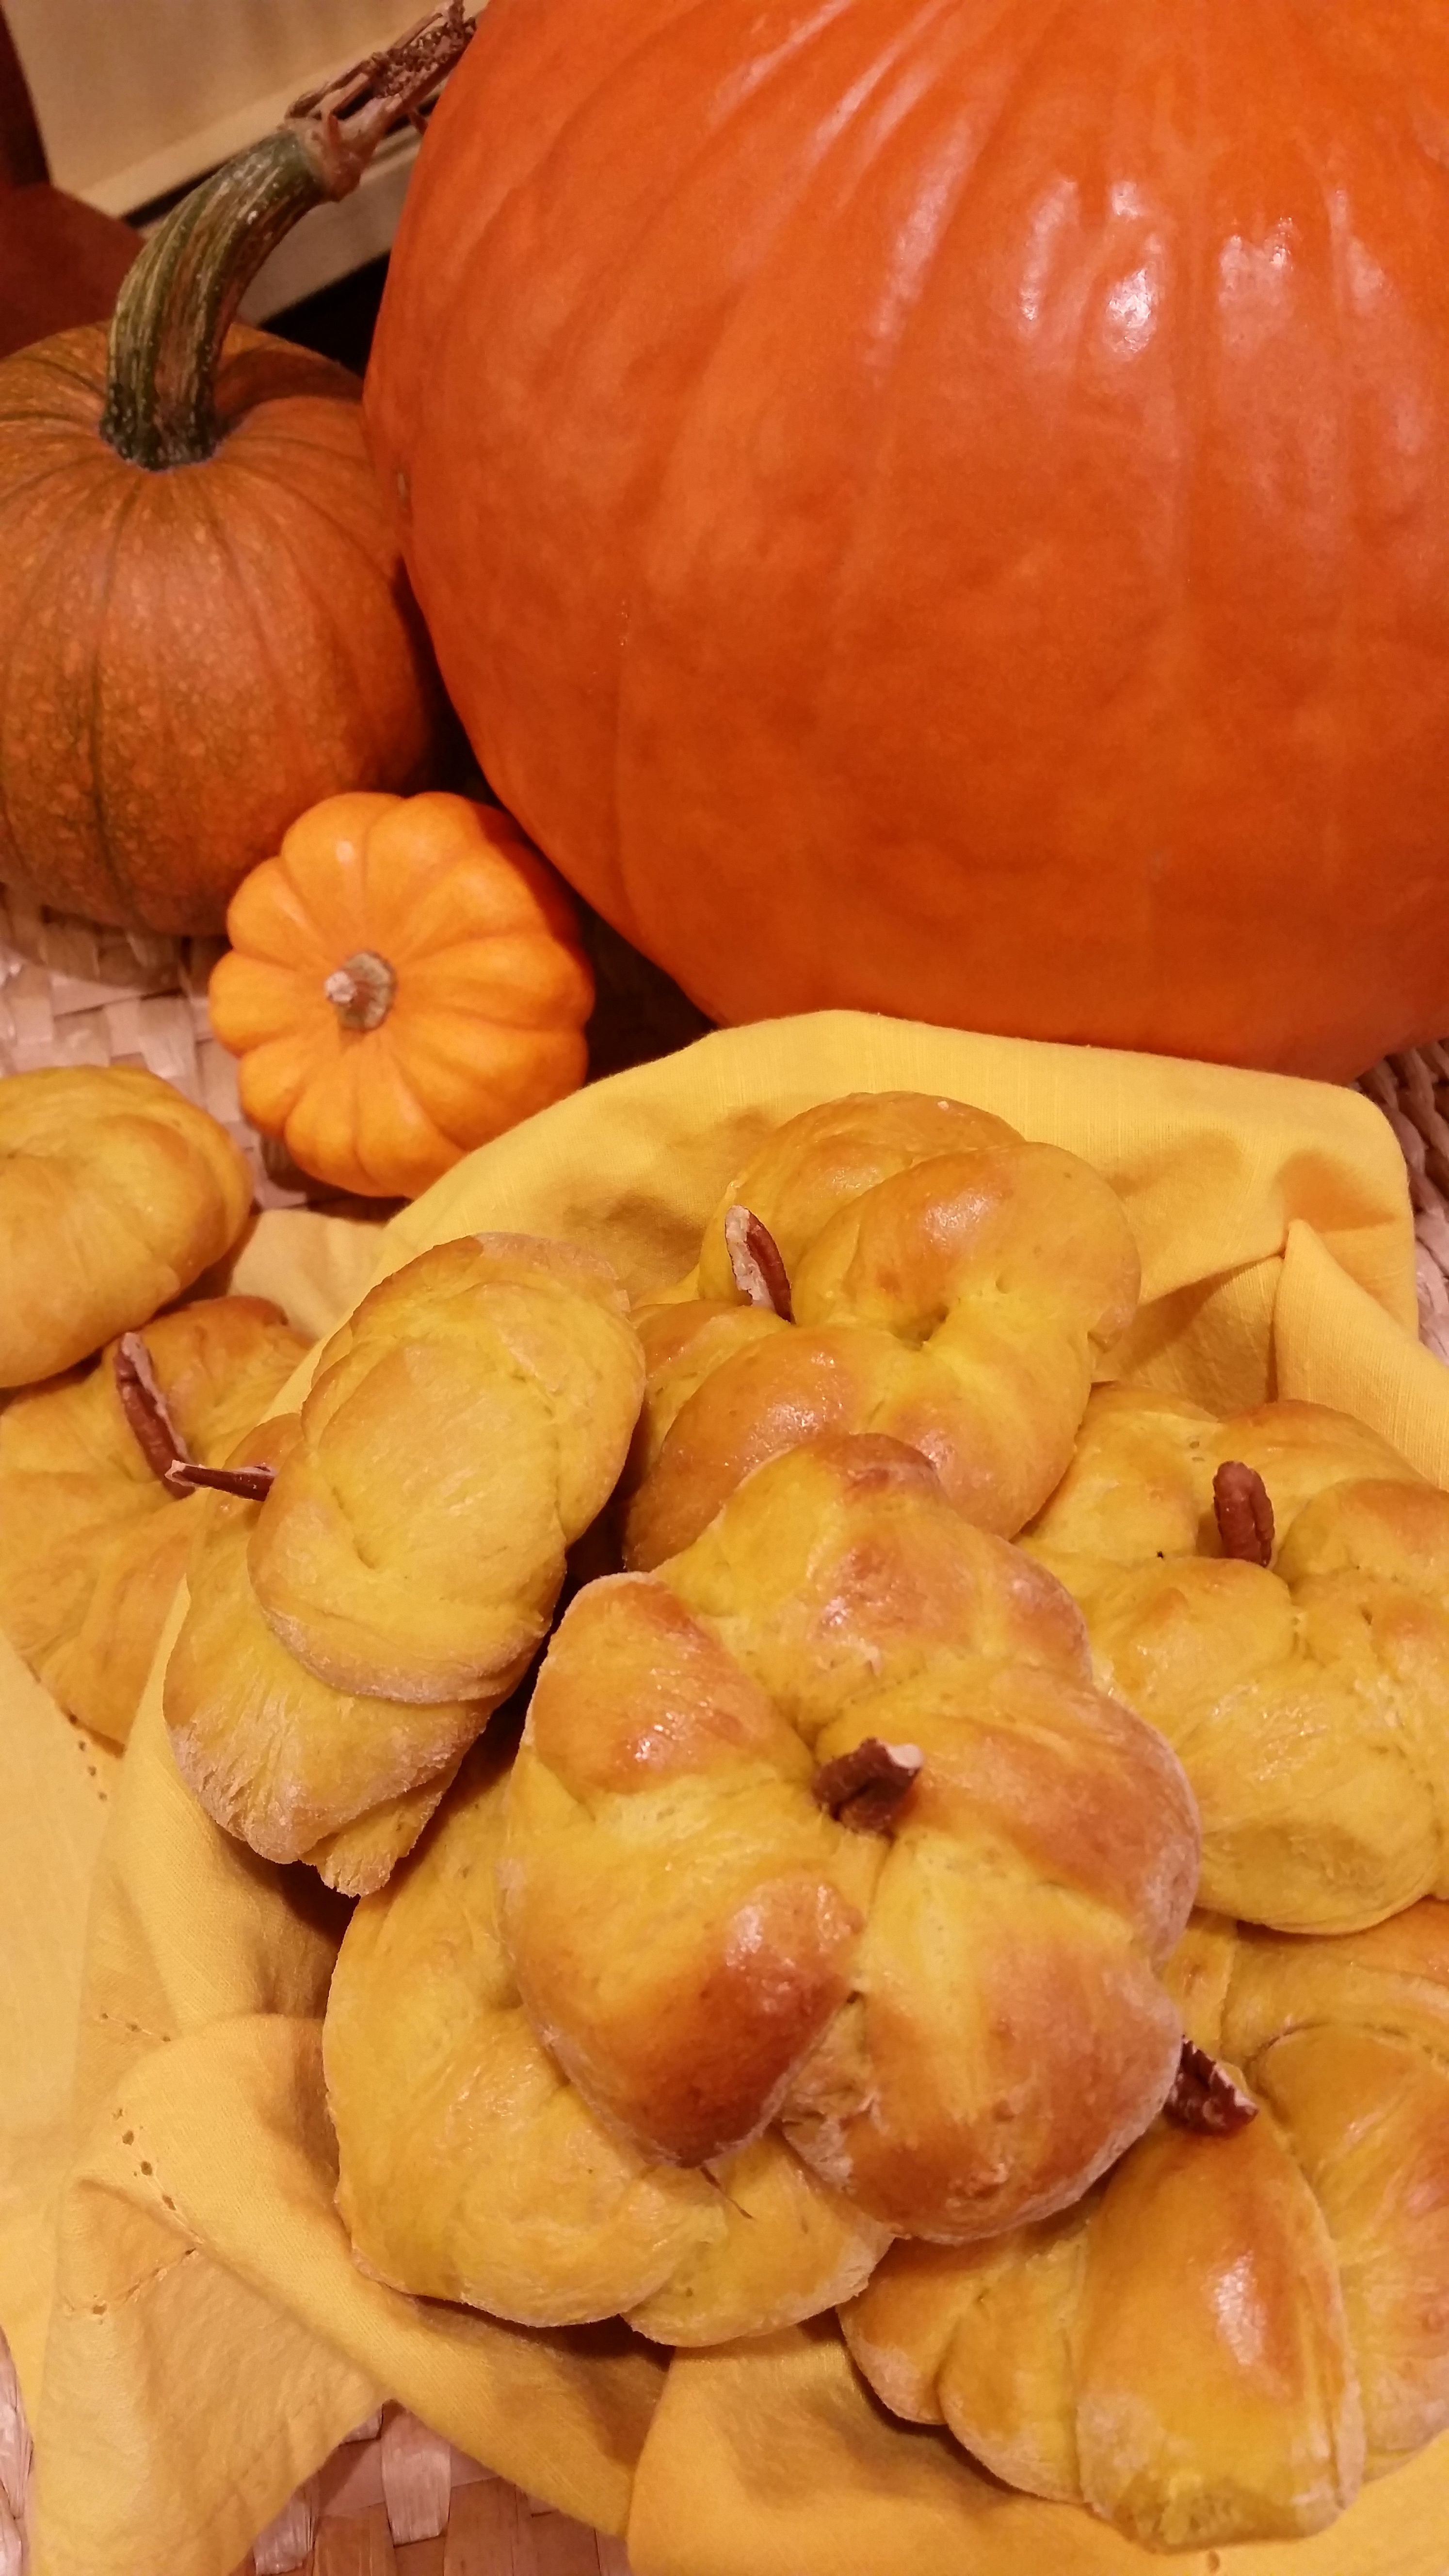
Our Convent bakers are always thinking ahead and experimenting — their thoughts and ideas are often very innovative! This week they were totally into Thanksgiving and enjoying it thoroughly. They assured me that I would be pleased with the final outcome of their efforts and how right they were! I had heard pumpkin being mentioned so I was expecting a pumpkin dessert of some sort. Instead they produced the tastiest dinner rolls which could not have pleased me more — whimsical little pumpkin-shaped creations, each complete with its own stem. I can’t wait to see the smiles on every person as they gather around the table this year.
Print Recipe
Votes: 1
Rating: 3
You:
Rate this recipe!
Tasty Pumpkin Rolls
SERVINGS2dozen
|
COOK TIME12-15 minutes |
PREP TIME40min + rising |
READY INapprox. 2hours |
Ingredients
Instructions
- In a bowl, dissolve yeast in warm water. Sprinkle with sugar; let stand for 5 minutes. Add milk, brown sugar, pumpkin, butter, salt, spices and 2 cups flour; beat until smooth. Stir in enough remaining flour to form a soft dough. Turn onto a floured surface; knead until smooth and elastic, about 6-8 minutes. Place in a greased bowl, turning once to grease top. Cover and let rise in a warm place until doubled, about 1 hour. Punch dough down.
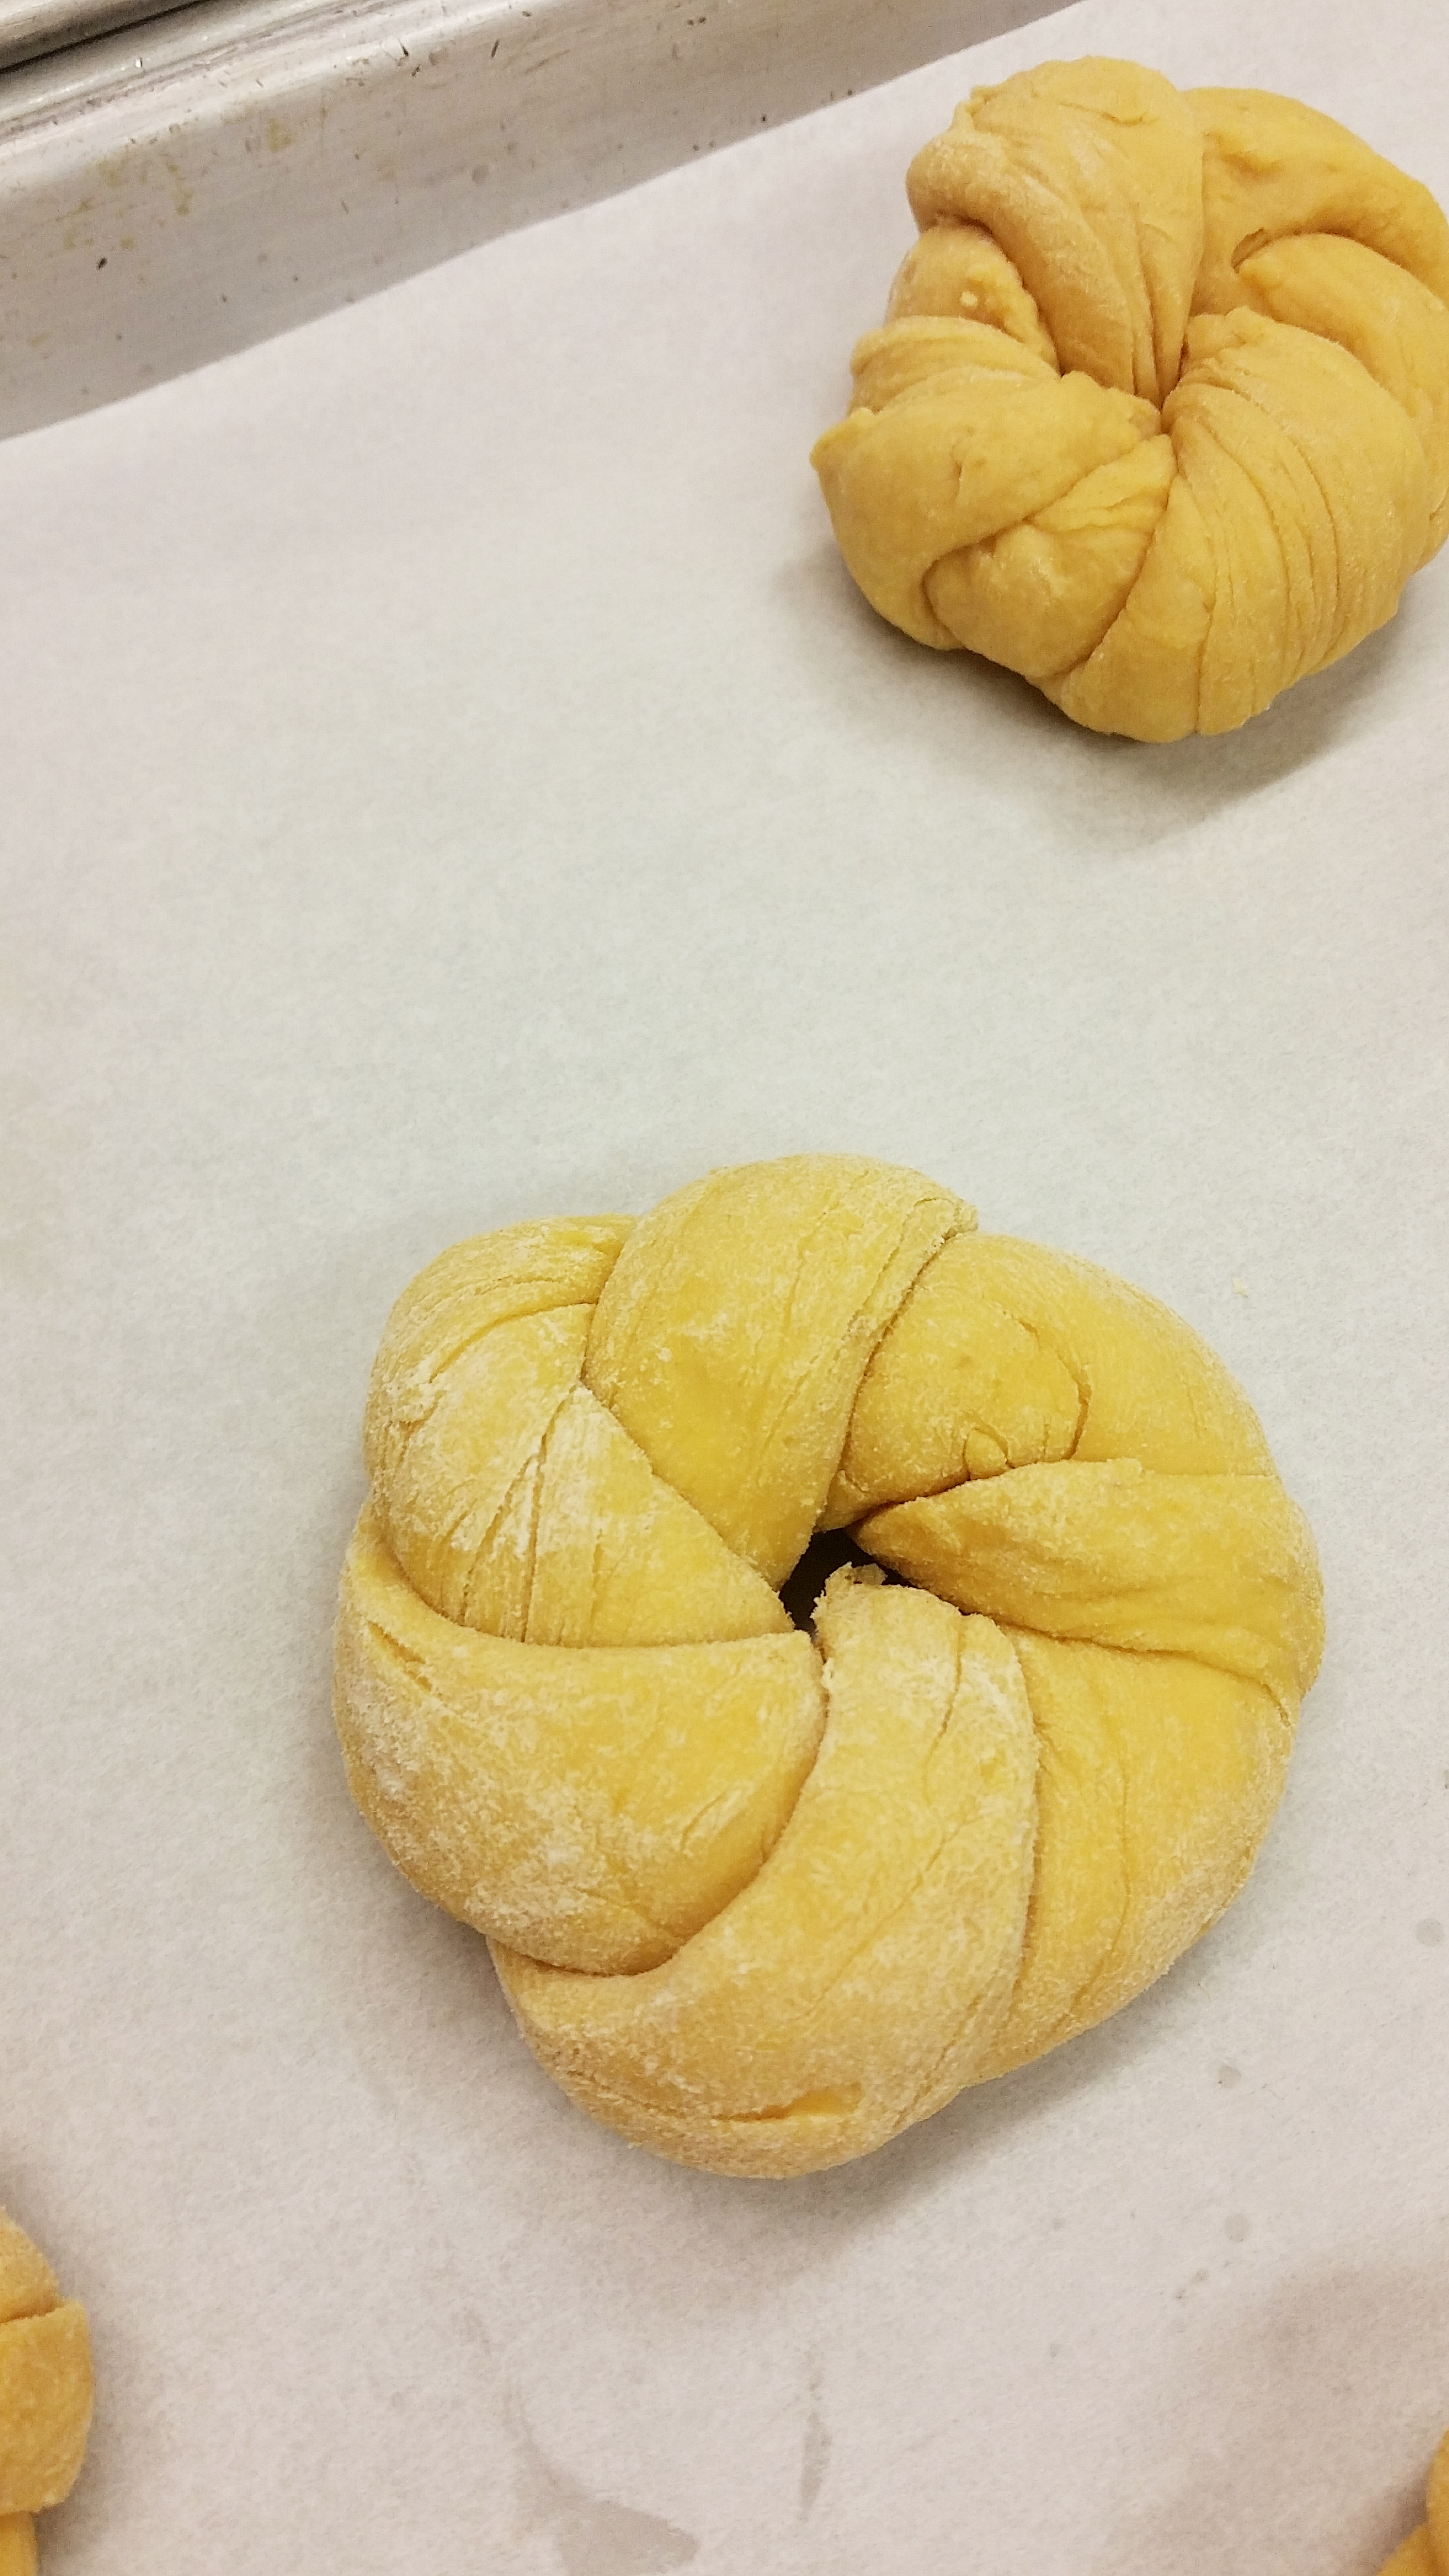
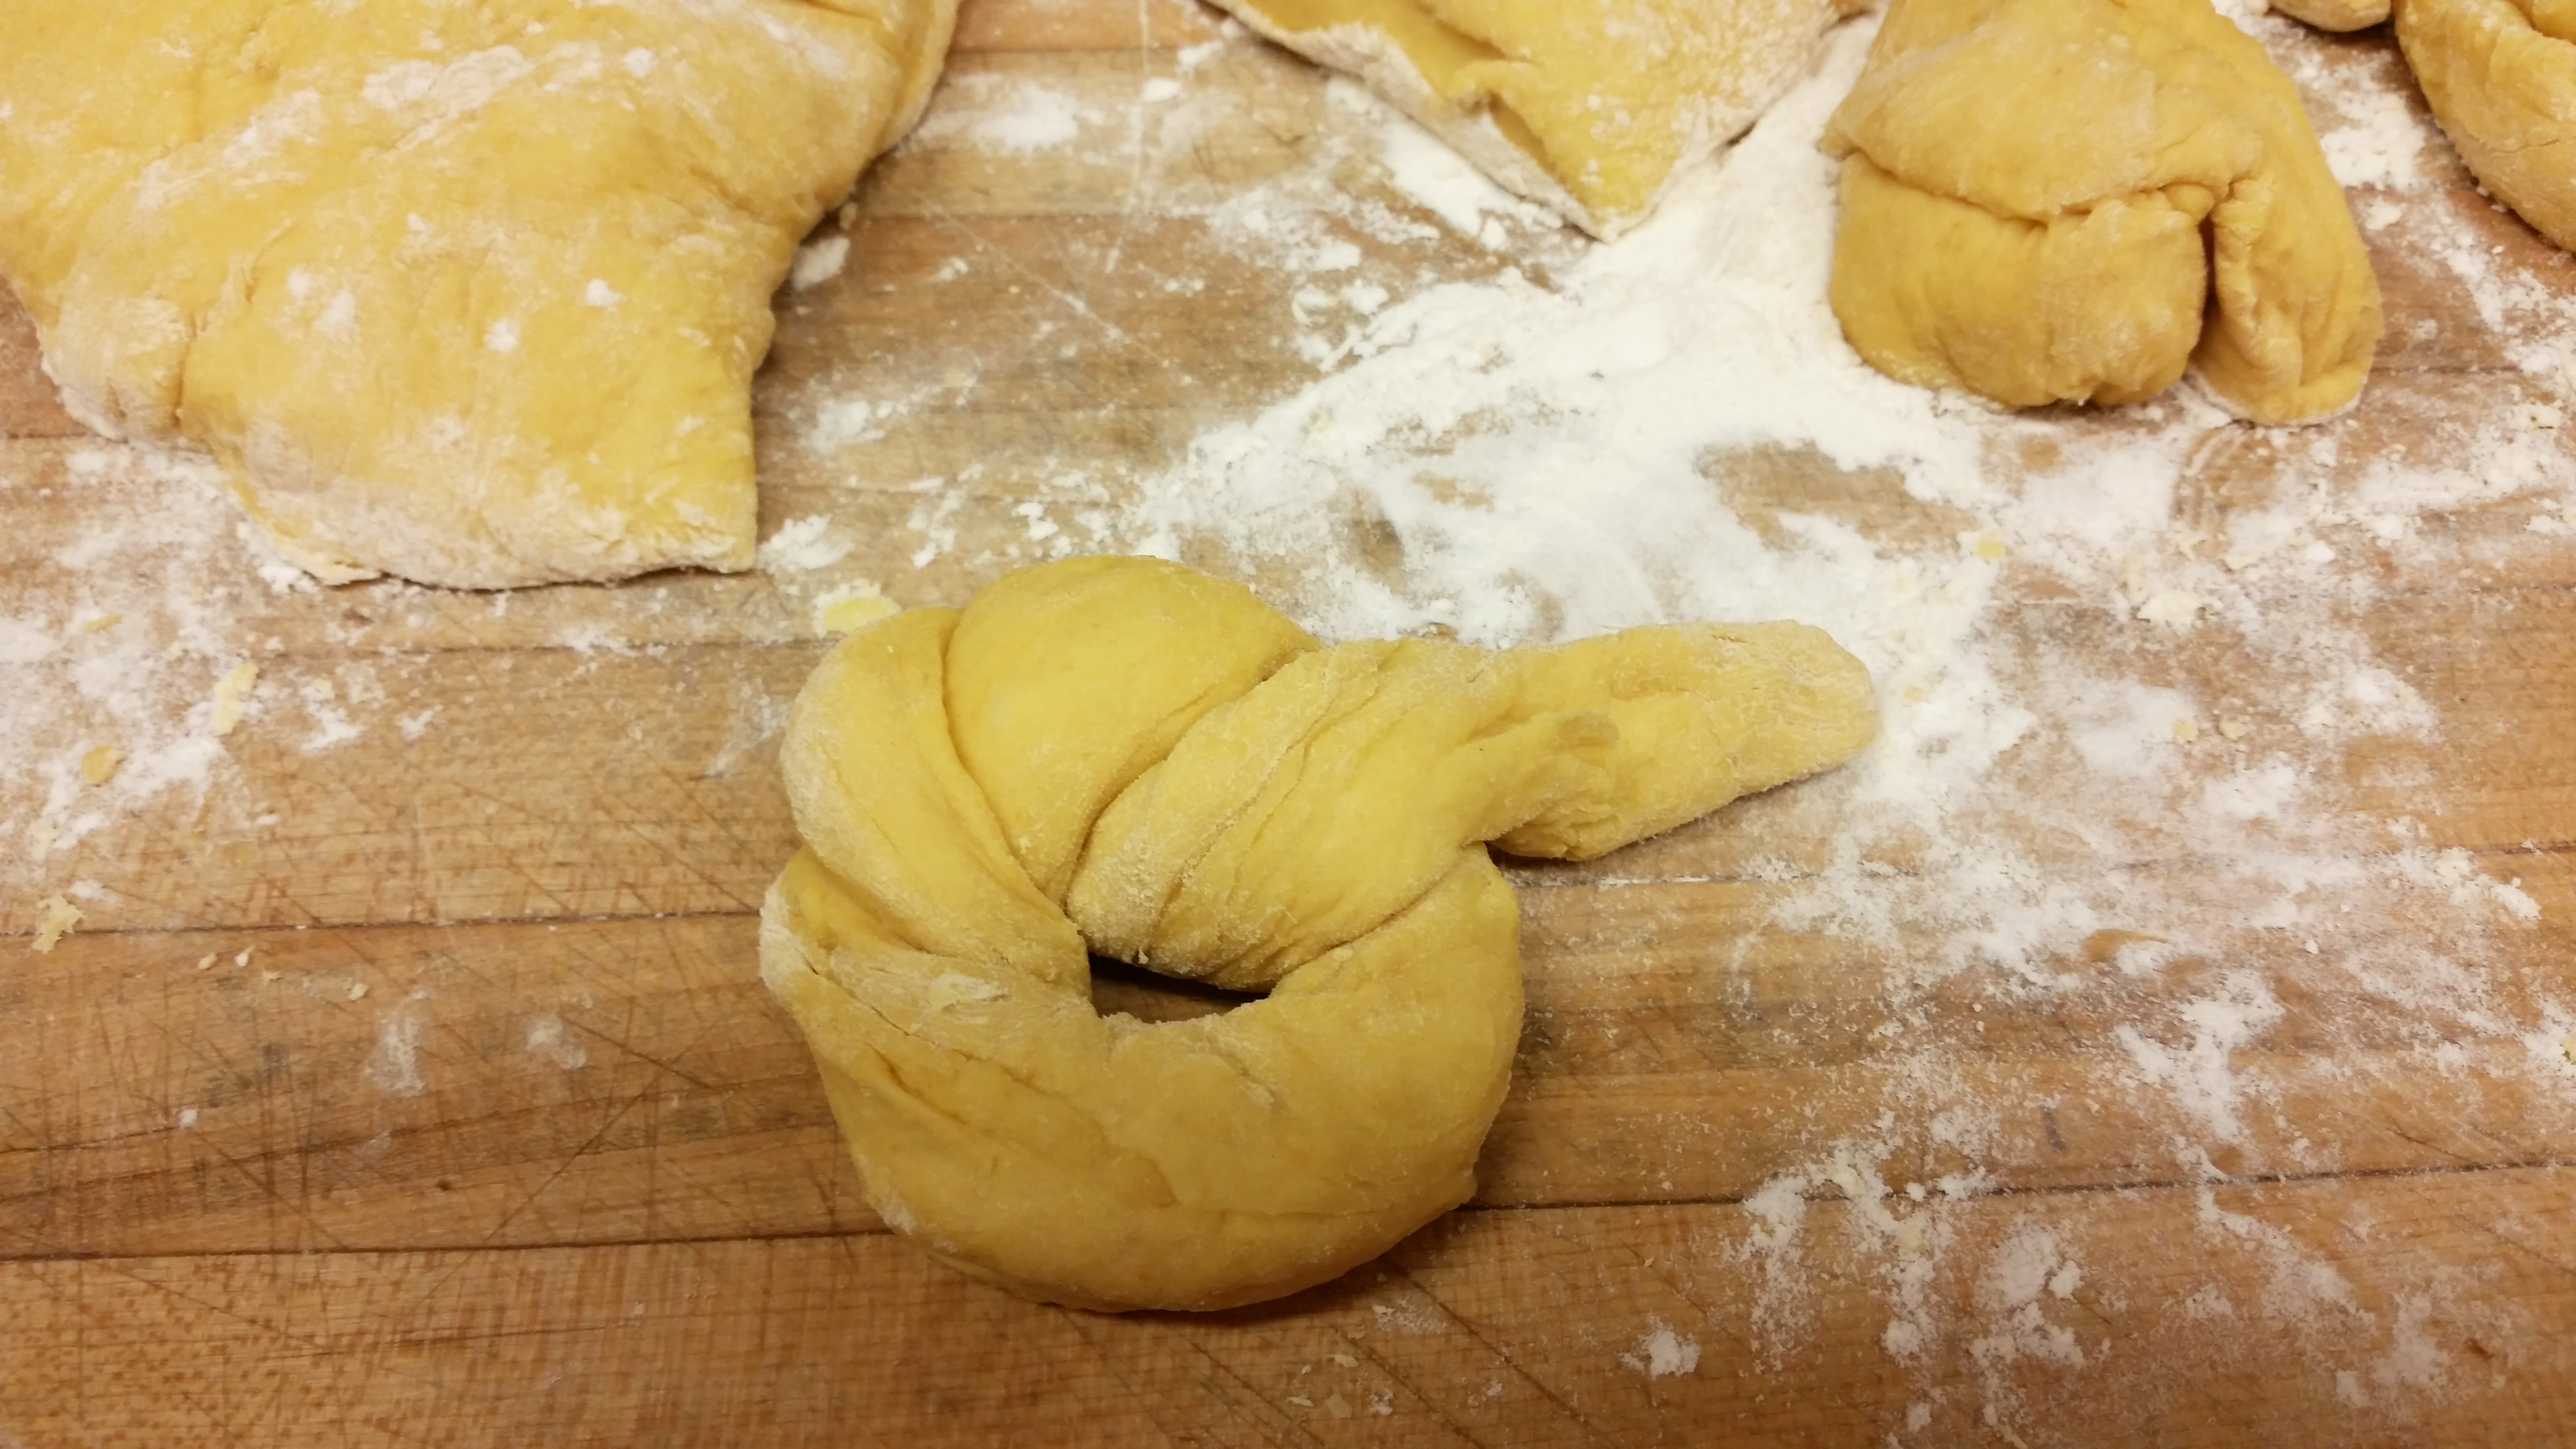
- Turn out the dough onto a lightly floured surface. Divide into 24 evenly-sized pieces. Working a few at a time, roll each piece of dough into a 12-inch rope on an un-floured surface. Before shaping, lightly dust ropes with flour, and then, with floured hands, turn each one into a pumpkin.
- Create a small loop in the rope with a long tail on one side and a short tail on the other. Wrap the long tail around the edge of the loop 2-to-3 times. Hold the remaining end of the long tail on the bottom-side of the loop with a finger to keep it from unraveling as you continue to work. Wrap the other tail around the edge of the loop, tucking it through the center of the loop.
- Pinch both of the ends together where they meet on the bottom side of the loop. If you’re not happy with the look of any of the rolls, simply set them aside for about 10 to 15 minutes and reshape. Place finished rolls on parchment lined baking sheets. Cover rolls loosely with plastic wrap and let rise for about 10 minutes.
- Just before baking, brush rolls with an egg wash for a shiny look or butter for a matte finish. Insert a sliced pecan into the center of each roll, pressing so the pecan touches the pan. In an oven preheated to 400° F, bake rolls for 12 to 15 minutes, rotating halfway through baking time. Rolls should be golden brown and gently firm to the touch. If not serving right away, shorten the baking time by several minutes and finish baking right before eating.