A young newlywed couple from Russia came to Bethany for an extended stay. Alexi, the groom, was delighted to discover that an old friend and former mentor from Russia was unexpectedly going to be near enough to spend some time with him while he was in the States. He immediately extended an invitation to him and his friends for dinner – a real, Russian meal that he himself would prepare for them.
The day of the planned dinner Alexi felt ill and was unable to do any cooking. With his permission I prepared a meal that I thought would be close to what he would have made, and I felt one of the dishes should be stuffed cabbage. I prepared them as I remembered my Ukrainian mother always preparing them.
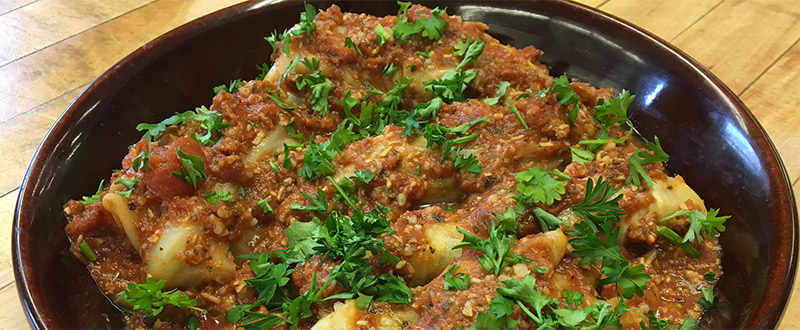
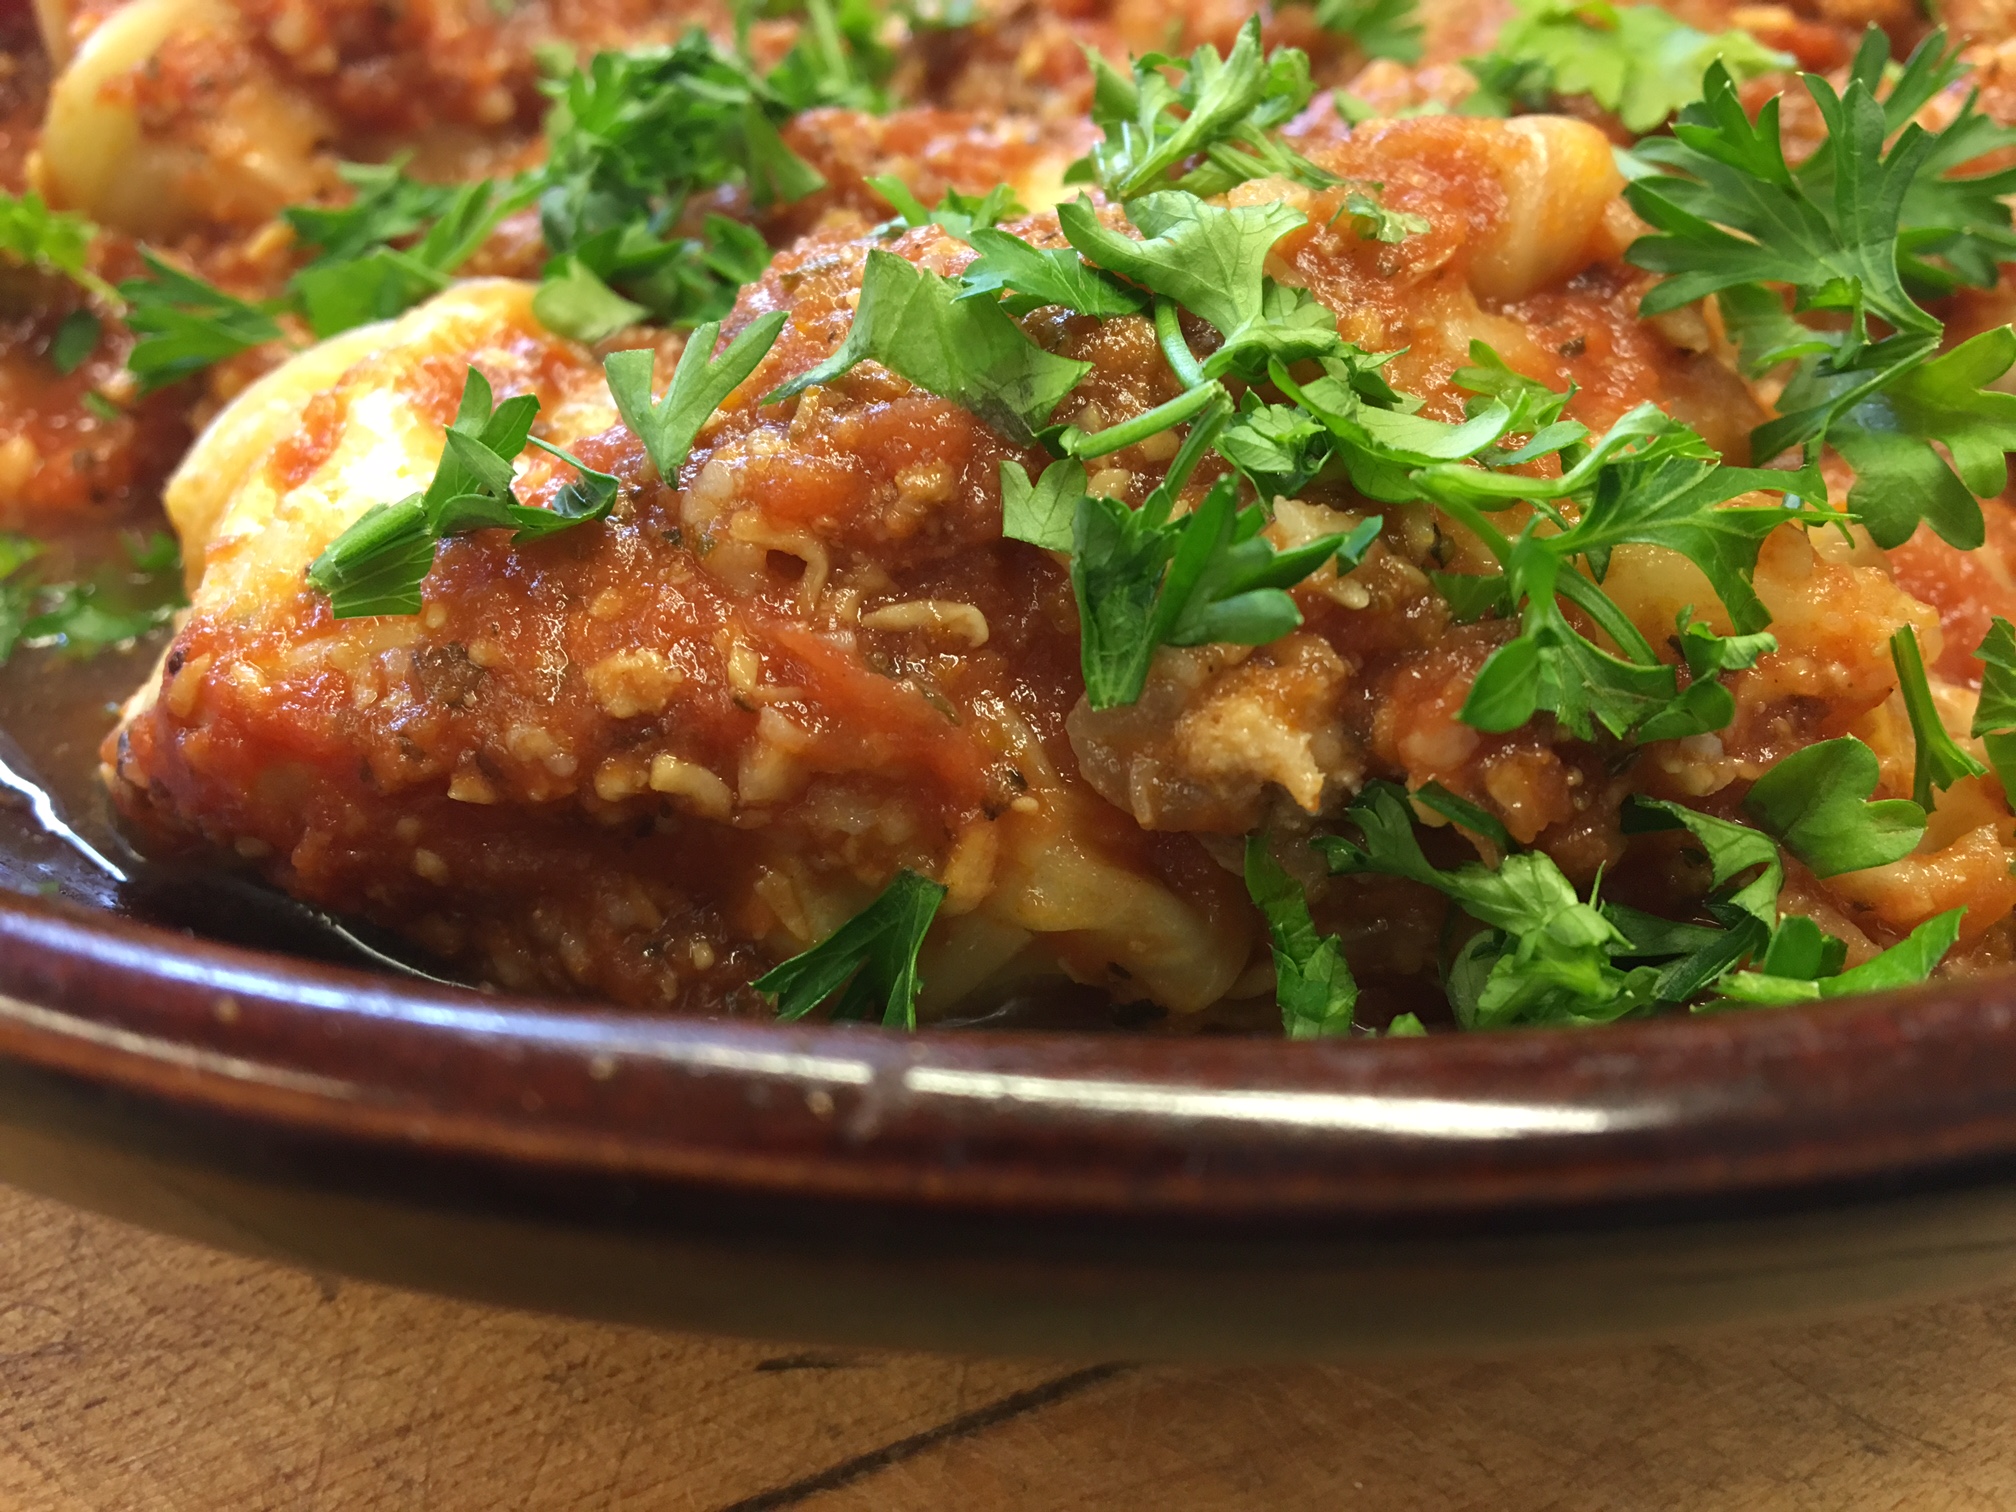
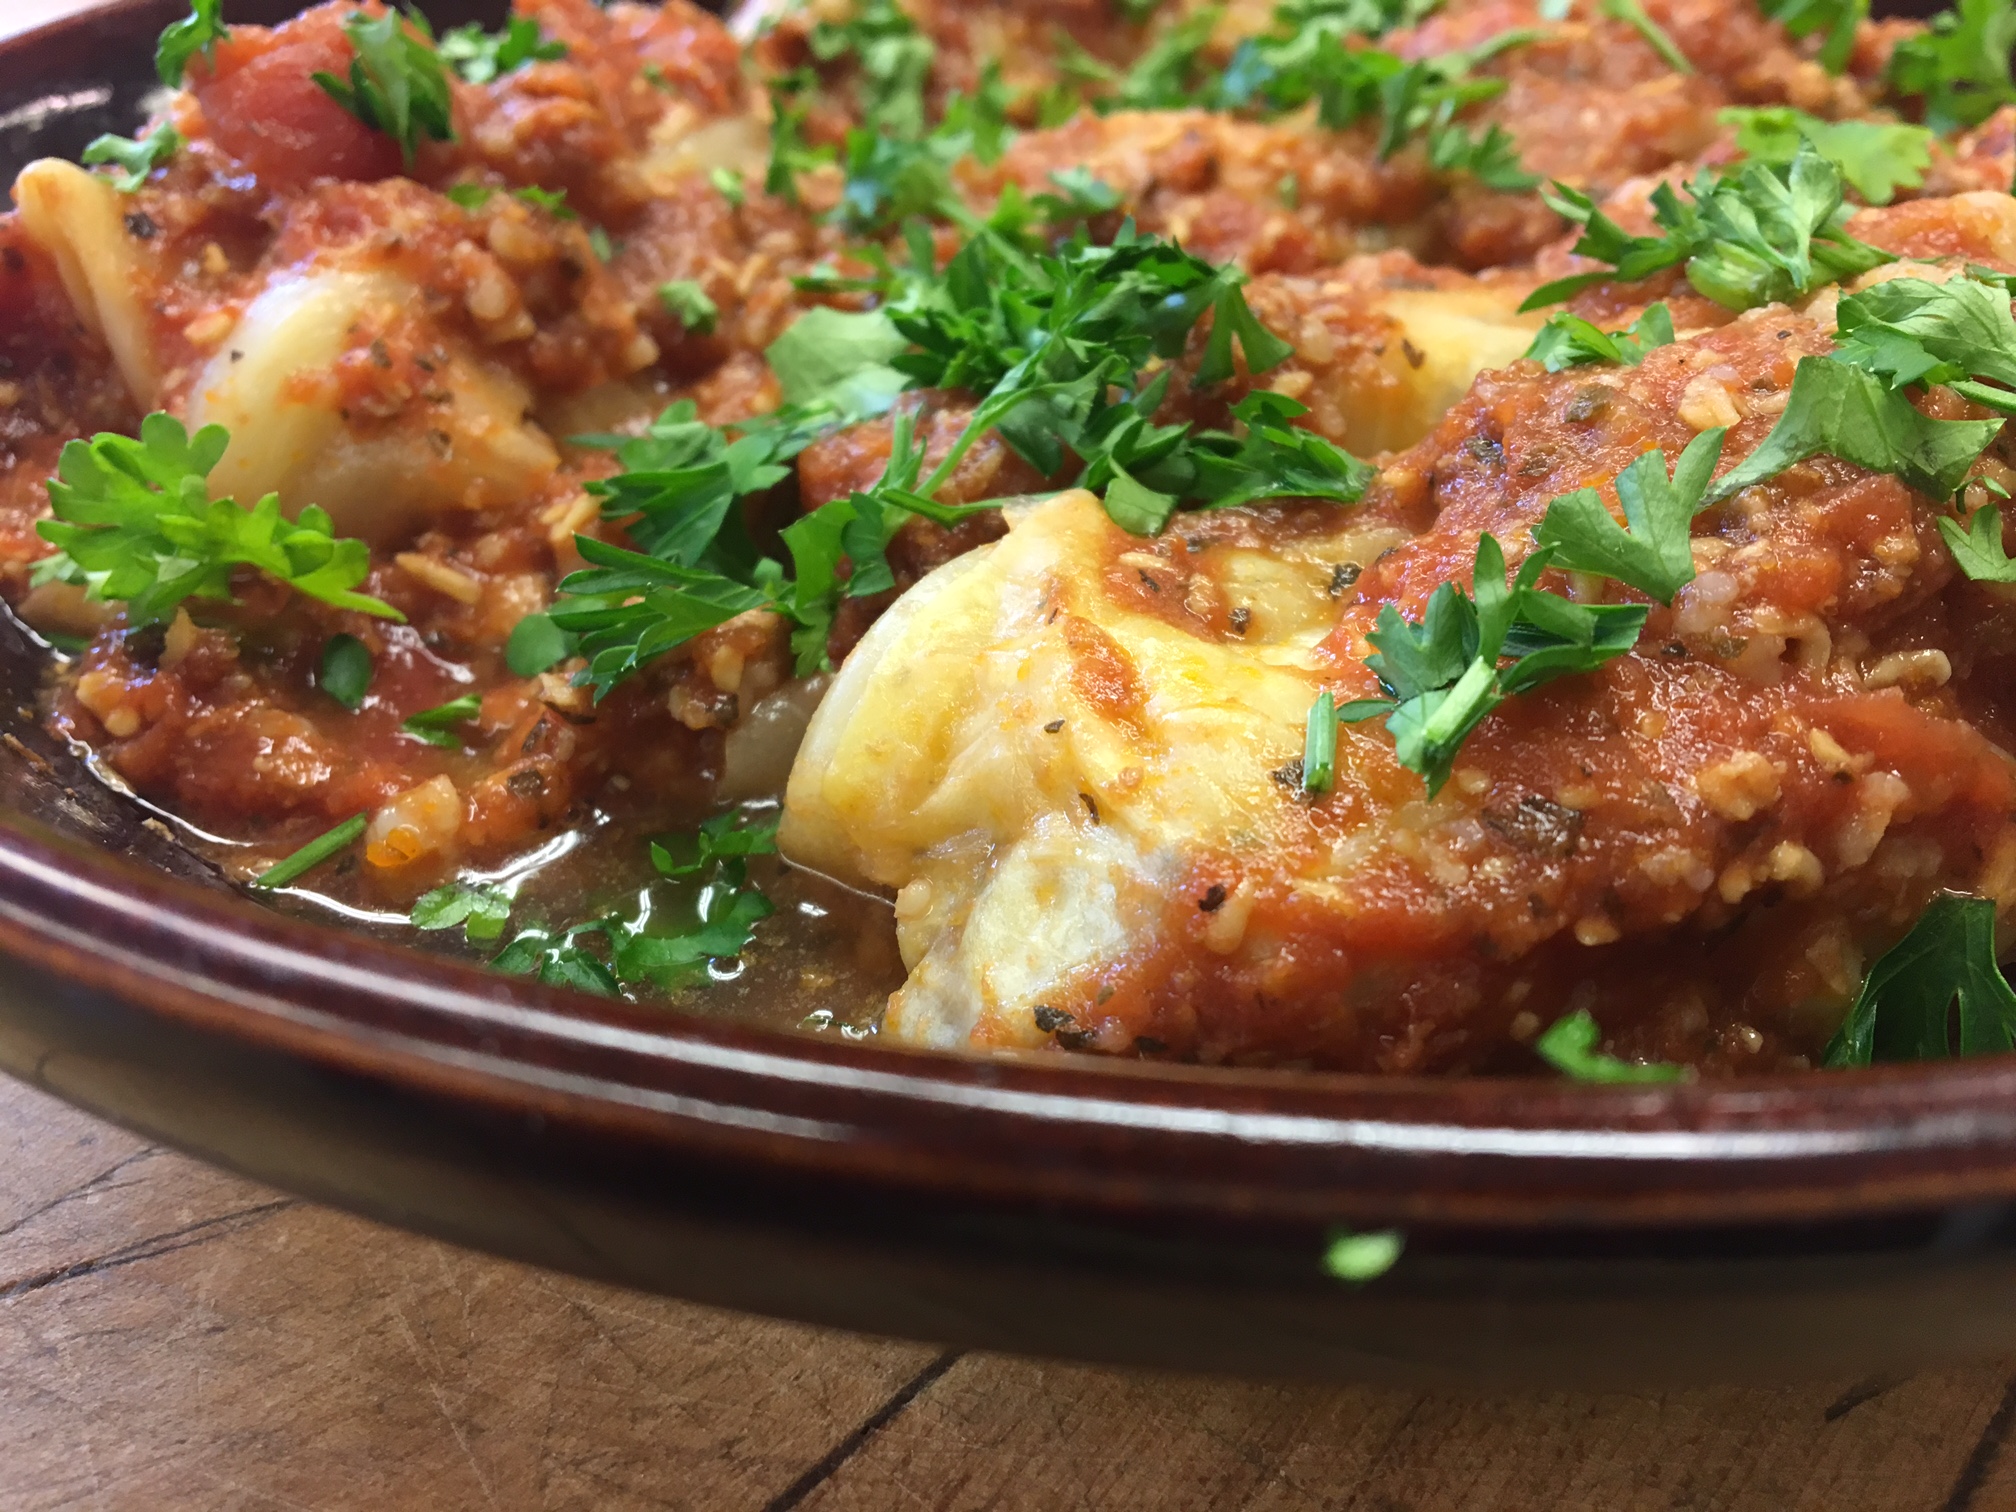
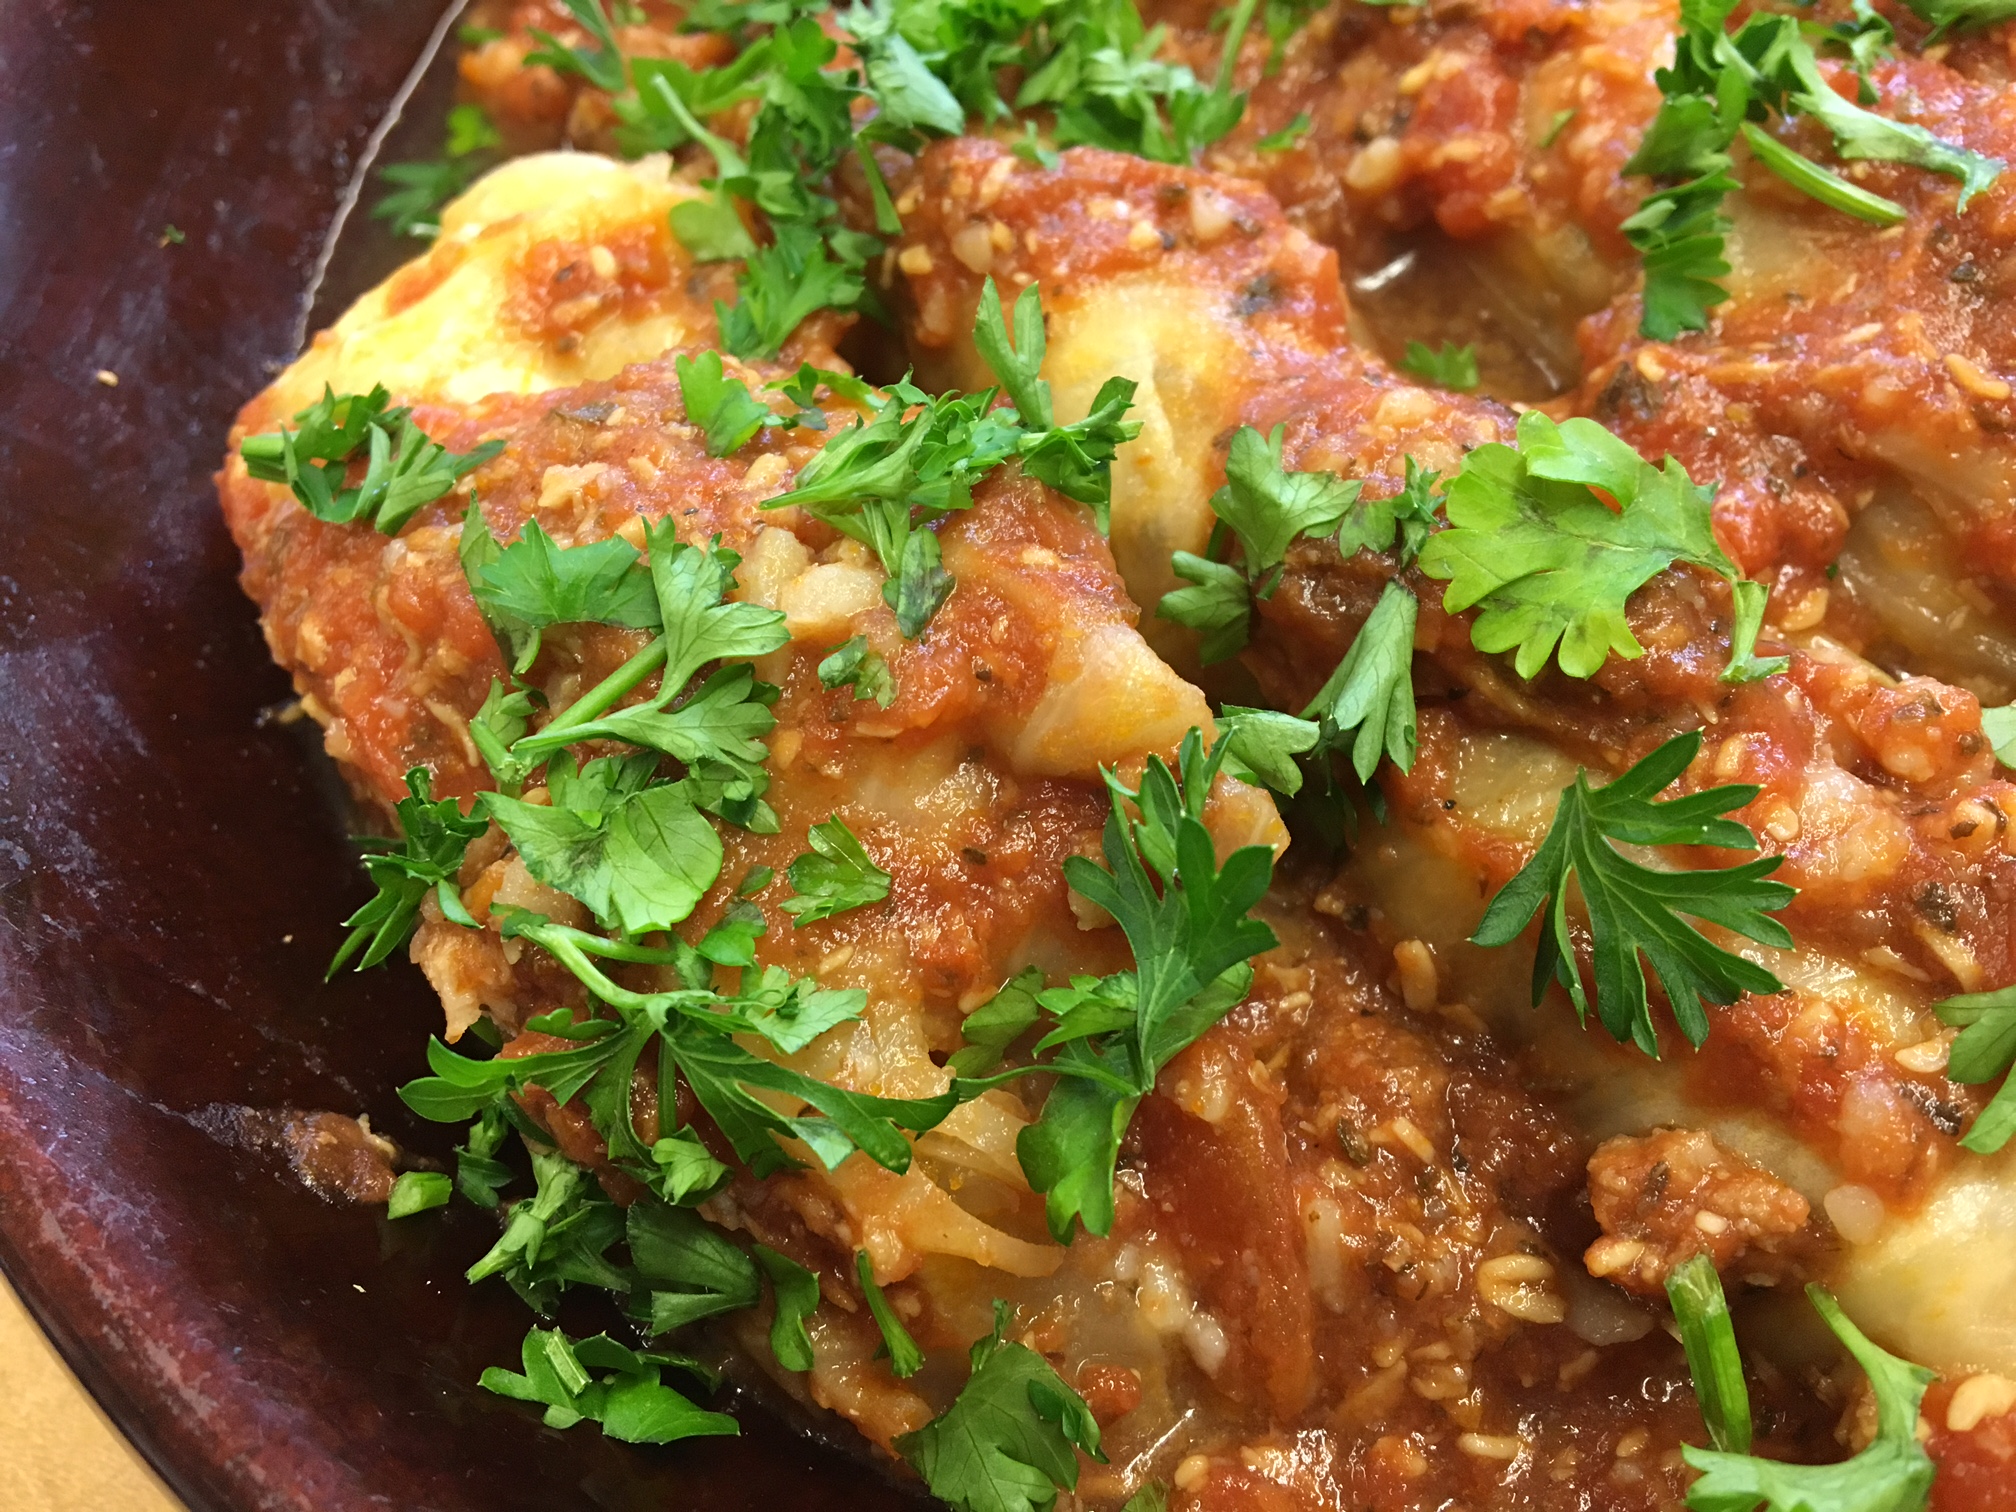
By dinnertime Alexi was well enough to join his guests and no mention was made of his not feeling well earlier. Everyone enjoyed dinner and Maestro Serge was particularly taken with the stuffed cabbage. “This,” he said to me, “is authentic.” Then he added, “A real Russian can always discern whether or not the Russian food he has been served was prepared by a real Russian.”
Cut up tomatoes and simmer with olive oil, onion salt, oregano and sugar until reduced to 1 cup or 8 ounces of sauce. Can be done while preparing cabbage.
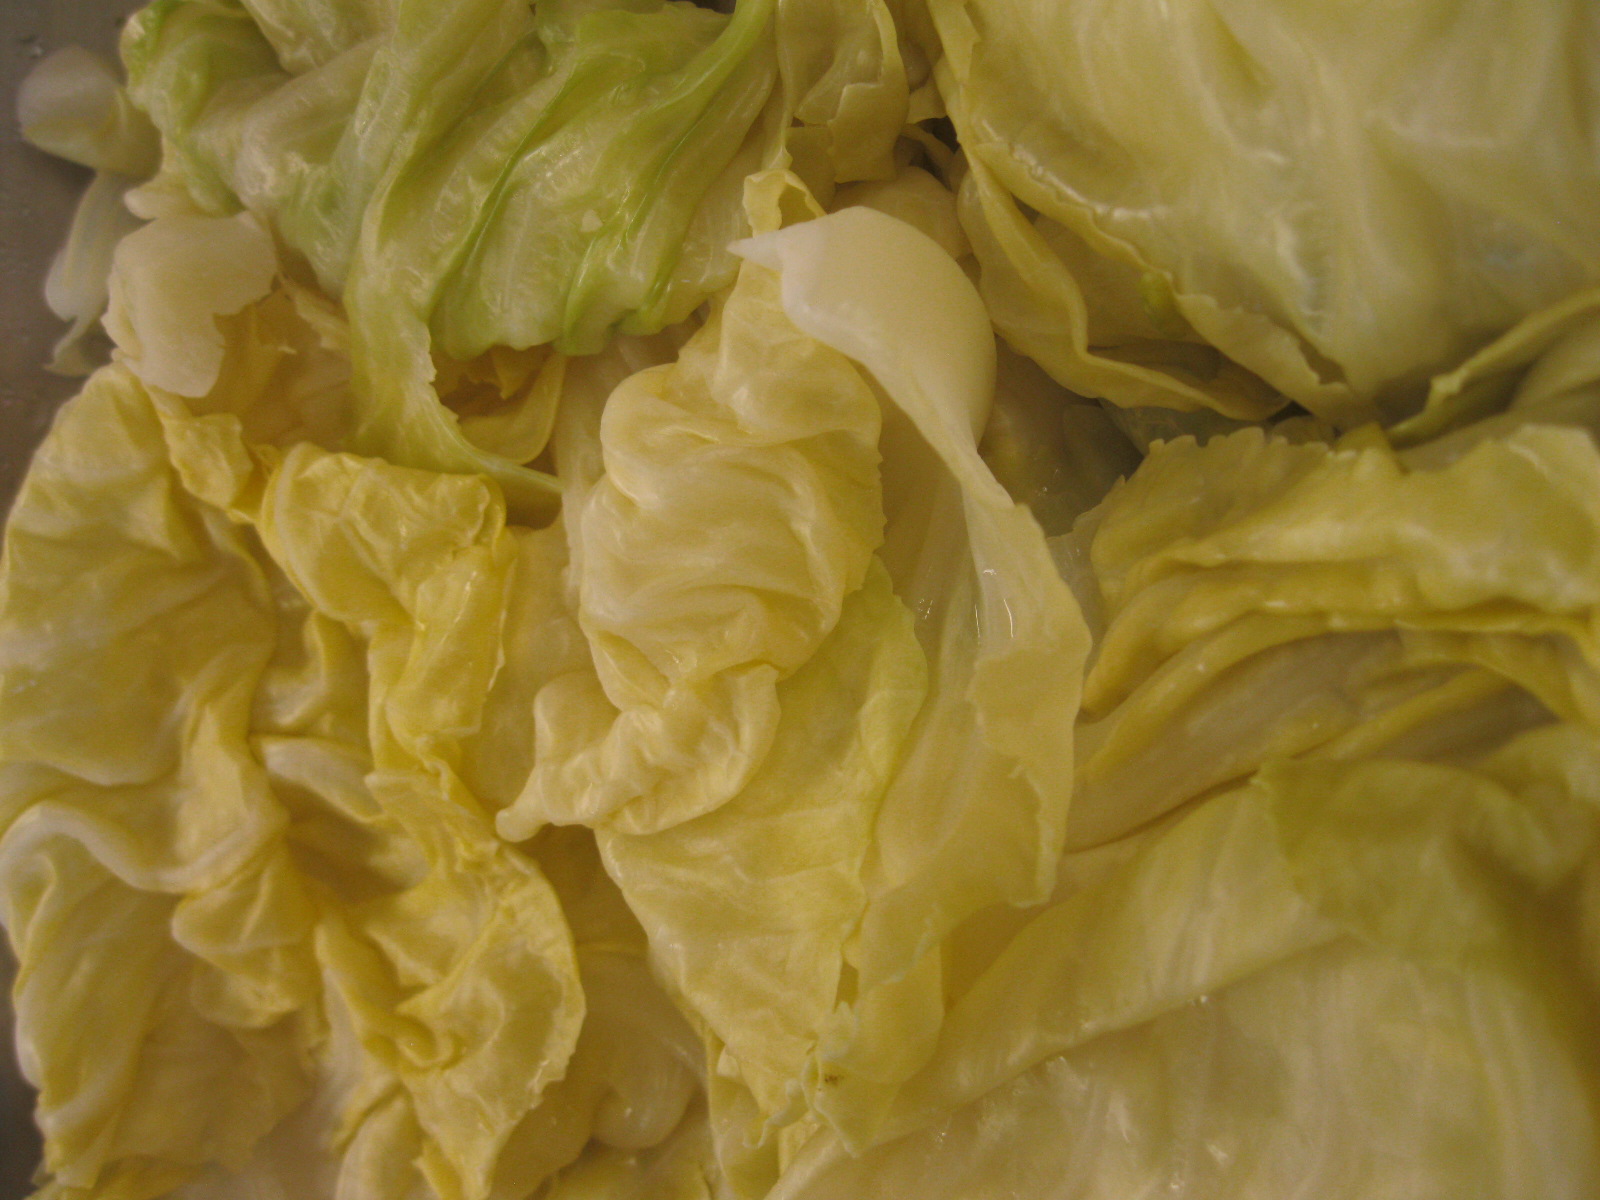
Leave cabbage whole, but cut around the stem, and parboil for 5 minutes; let steep for another 5 minutes.
Remove cabbage from water and drain; separate cabbage leaves. Chop the small inside leaves and the core and use to line a Dutch oven.
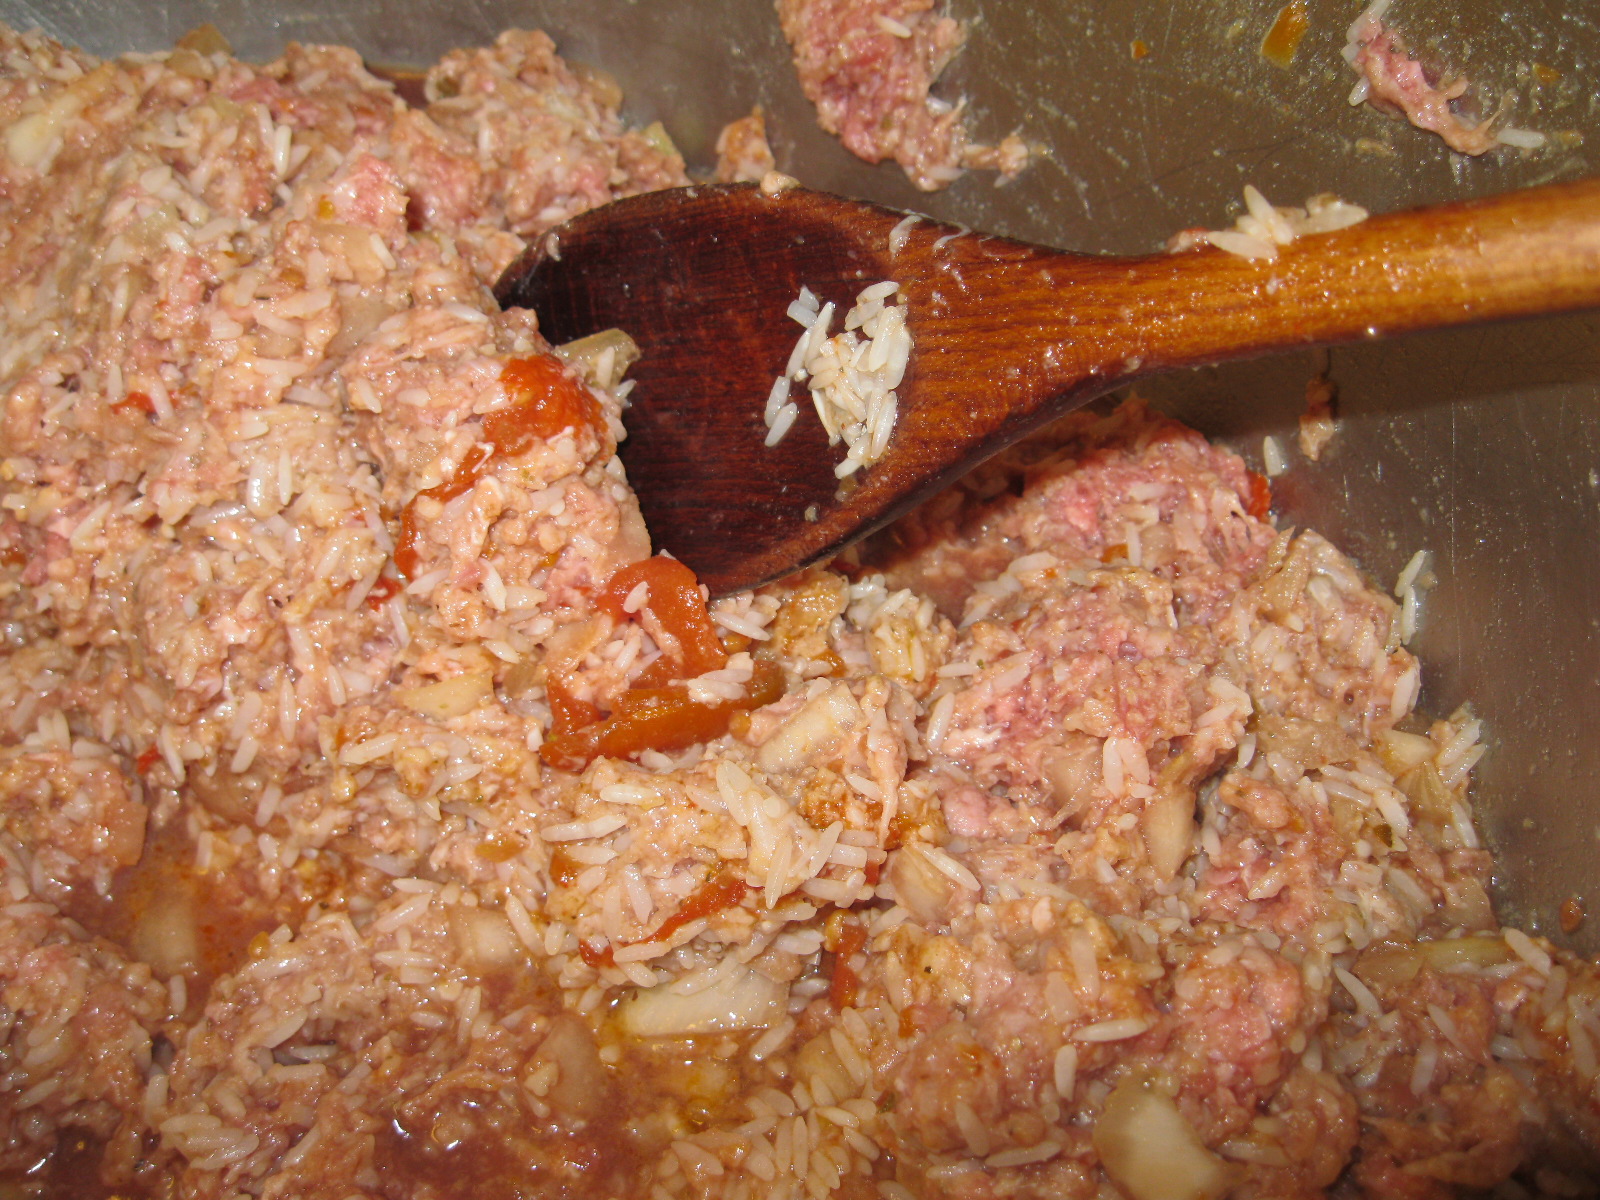
Combine all the stuffing ingredients and mix thoroughly. Season with salt and pepper to taste.
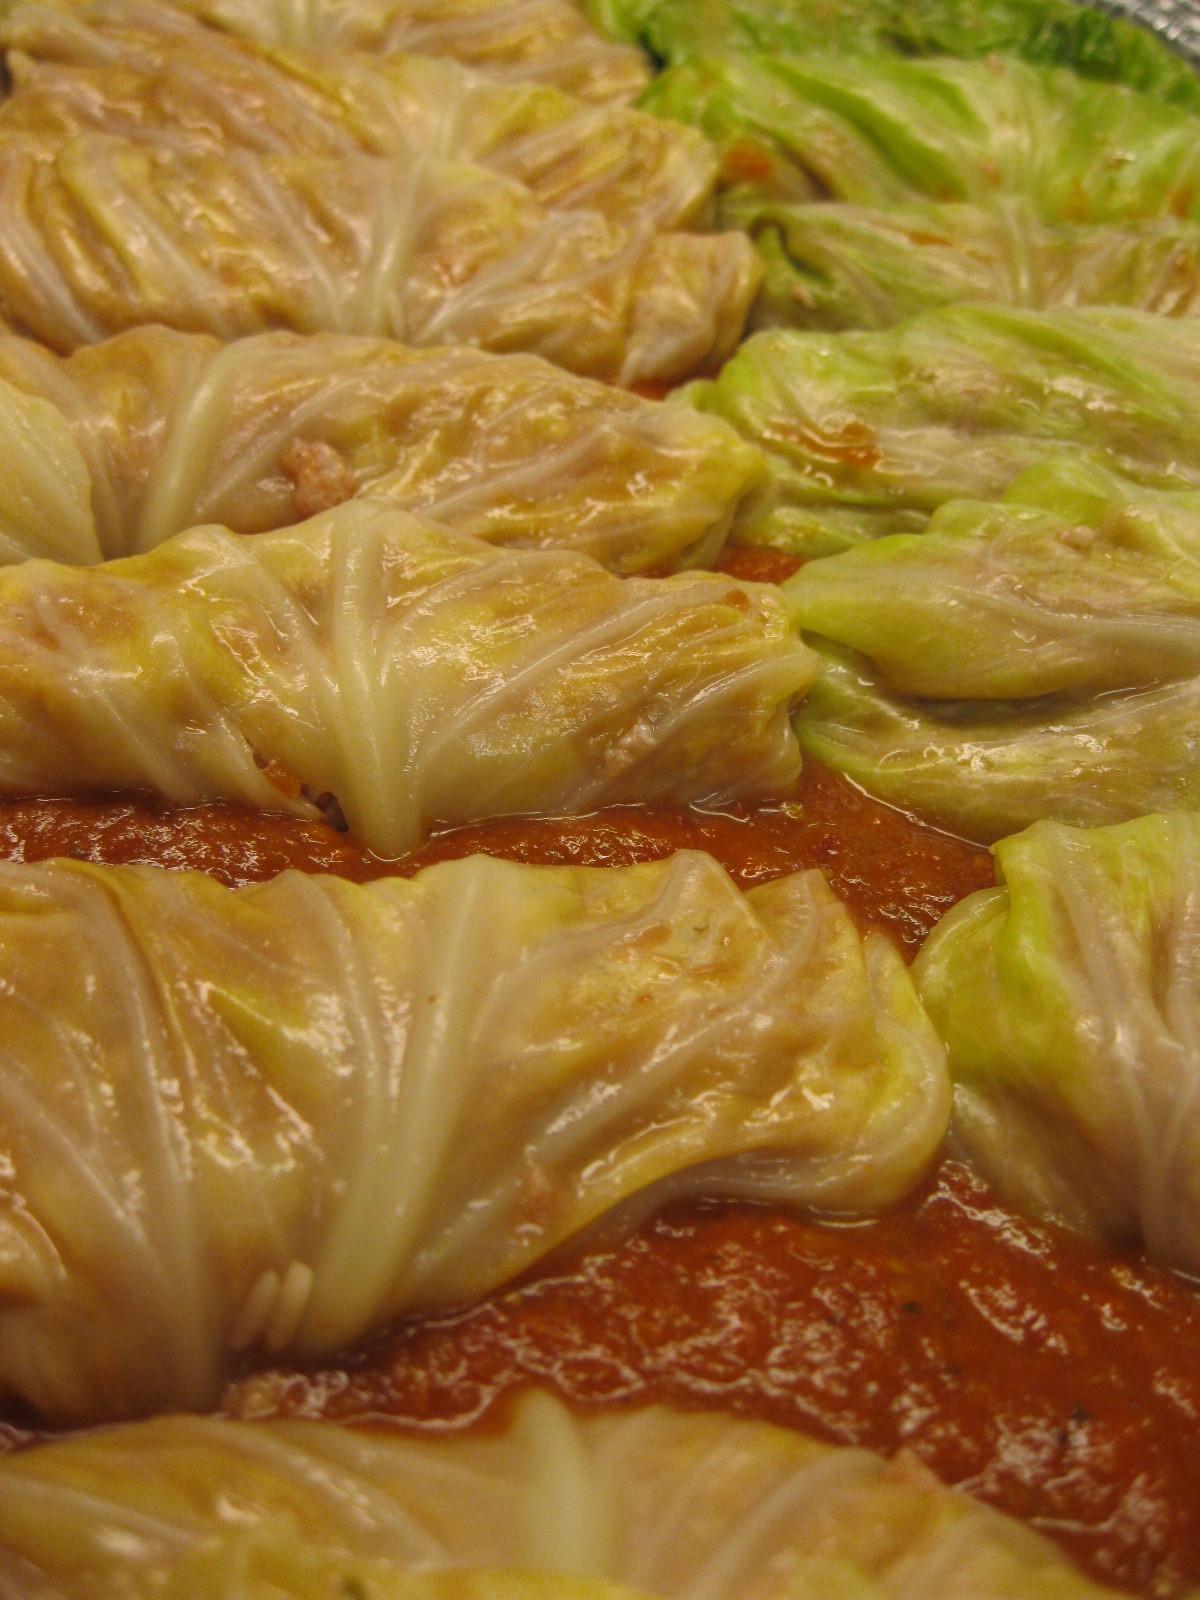
Place 1 tablespoon stuffing on each of the larger cabbage leaves, fold ends of leaves over the stuffing, and roll leaves.
Arrange the stuffed cabbage leaves in rows in Dutch oven; sprinkle each layer with olive oil, tomato sauce, and crushed bay leaf.
Sprinkle lightly with salt and pepper; add remaining tomato sauce, beef broth and enough water to cover.
Place a plate on top of cabbage rolls, and simmer over low heat for 1 hour. If using cooked rice cut final cooking time in half.
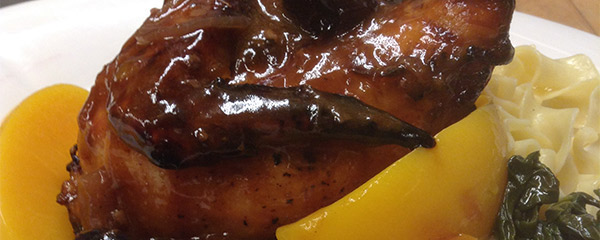
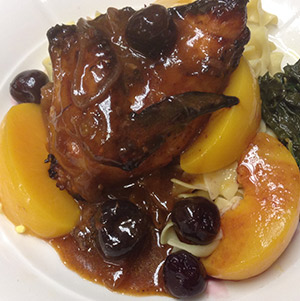
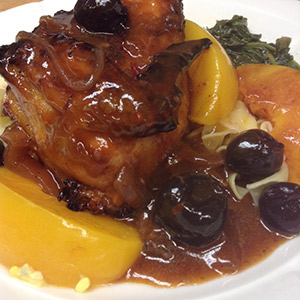
Serve the cabbage rolls with the pot sauce poured over them.
Thirty some years ago, before today’s current interest in food and cooking, a group of young men attending a culinary institute in Connecticut asked to schedule a retreat at Bethany. None of them were known to us except for one, but it took no time for all of us to feel at home with each other. I have fond memories of that experience.
I was of course pleased that they appreciated the food prepared for them, in particular a chicken dish which we served for many retreats back then and which they unanimously praised. It was my version of a recipe adapted from an old homemaker’s paperback of prizewinners. It still amuses me to remember these “professional chefs in the making” as they left, each of them clutching a copy of this recipe from a housewife’s collection of favorites, and featuring a bottle of store bought salad dressing.
Waking up on these cold, crisp fall mornings with frost on the ground, my alarm clock begs to be put on snooze for those last 5 minutes of shut-eye. But in Convent life, that’s not what we’re called to; instead, a quick prayer of thanks to God, and our feet hit the cool ground as we dress for Lauds. I sometimes imagine God smiling at our groans, the creaks in our bones, and the selfish moments we want to steal for ourselves before spending time with Him. I’ve recently experienced the transparent love that God has for me and I think these waking moments are no different! After Lauds, we have a silent breakfast together in our refectory. Silence is essential to our spiritual life because it allows us time to listen to God’s voice preparing us for the day, and not our own. I have to admit that I battle doing my own mental checklist during this time; fragile as we are, God smiles!
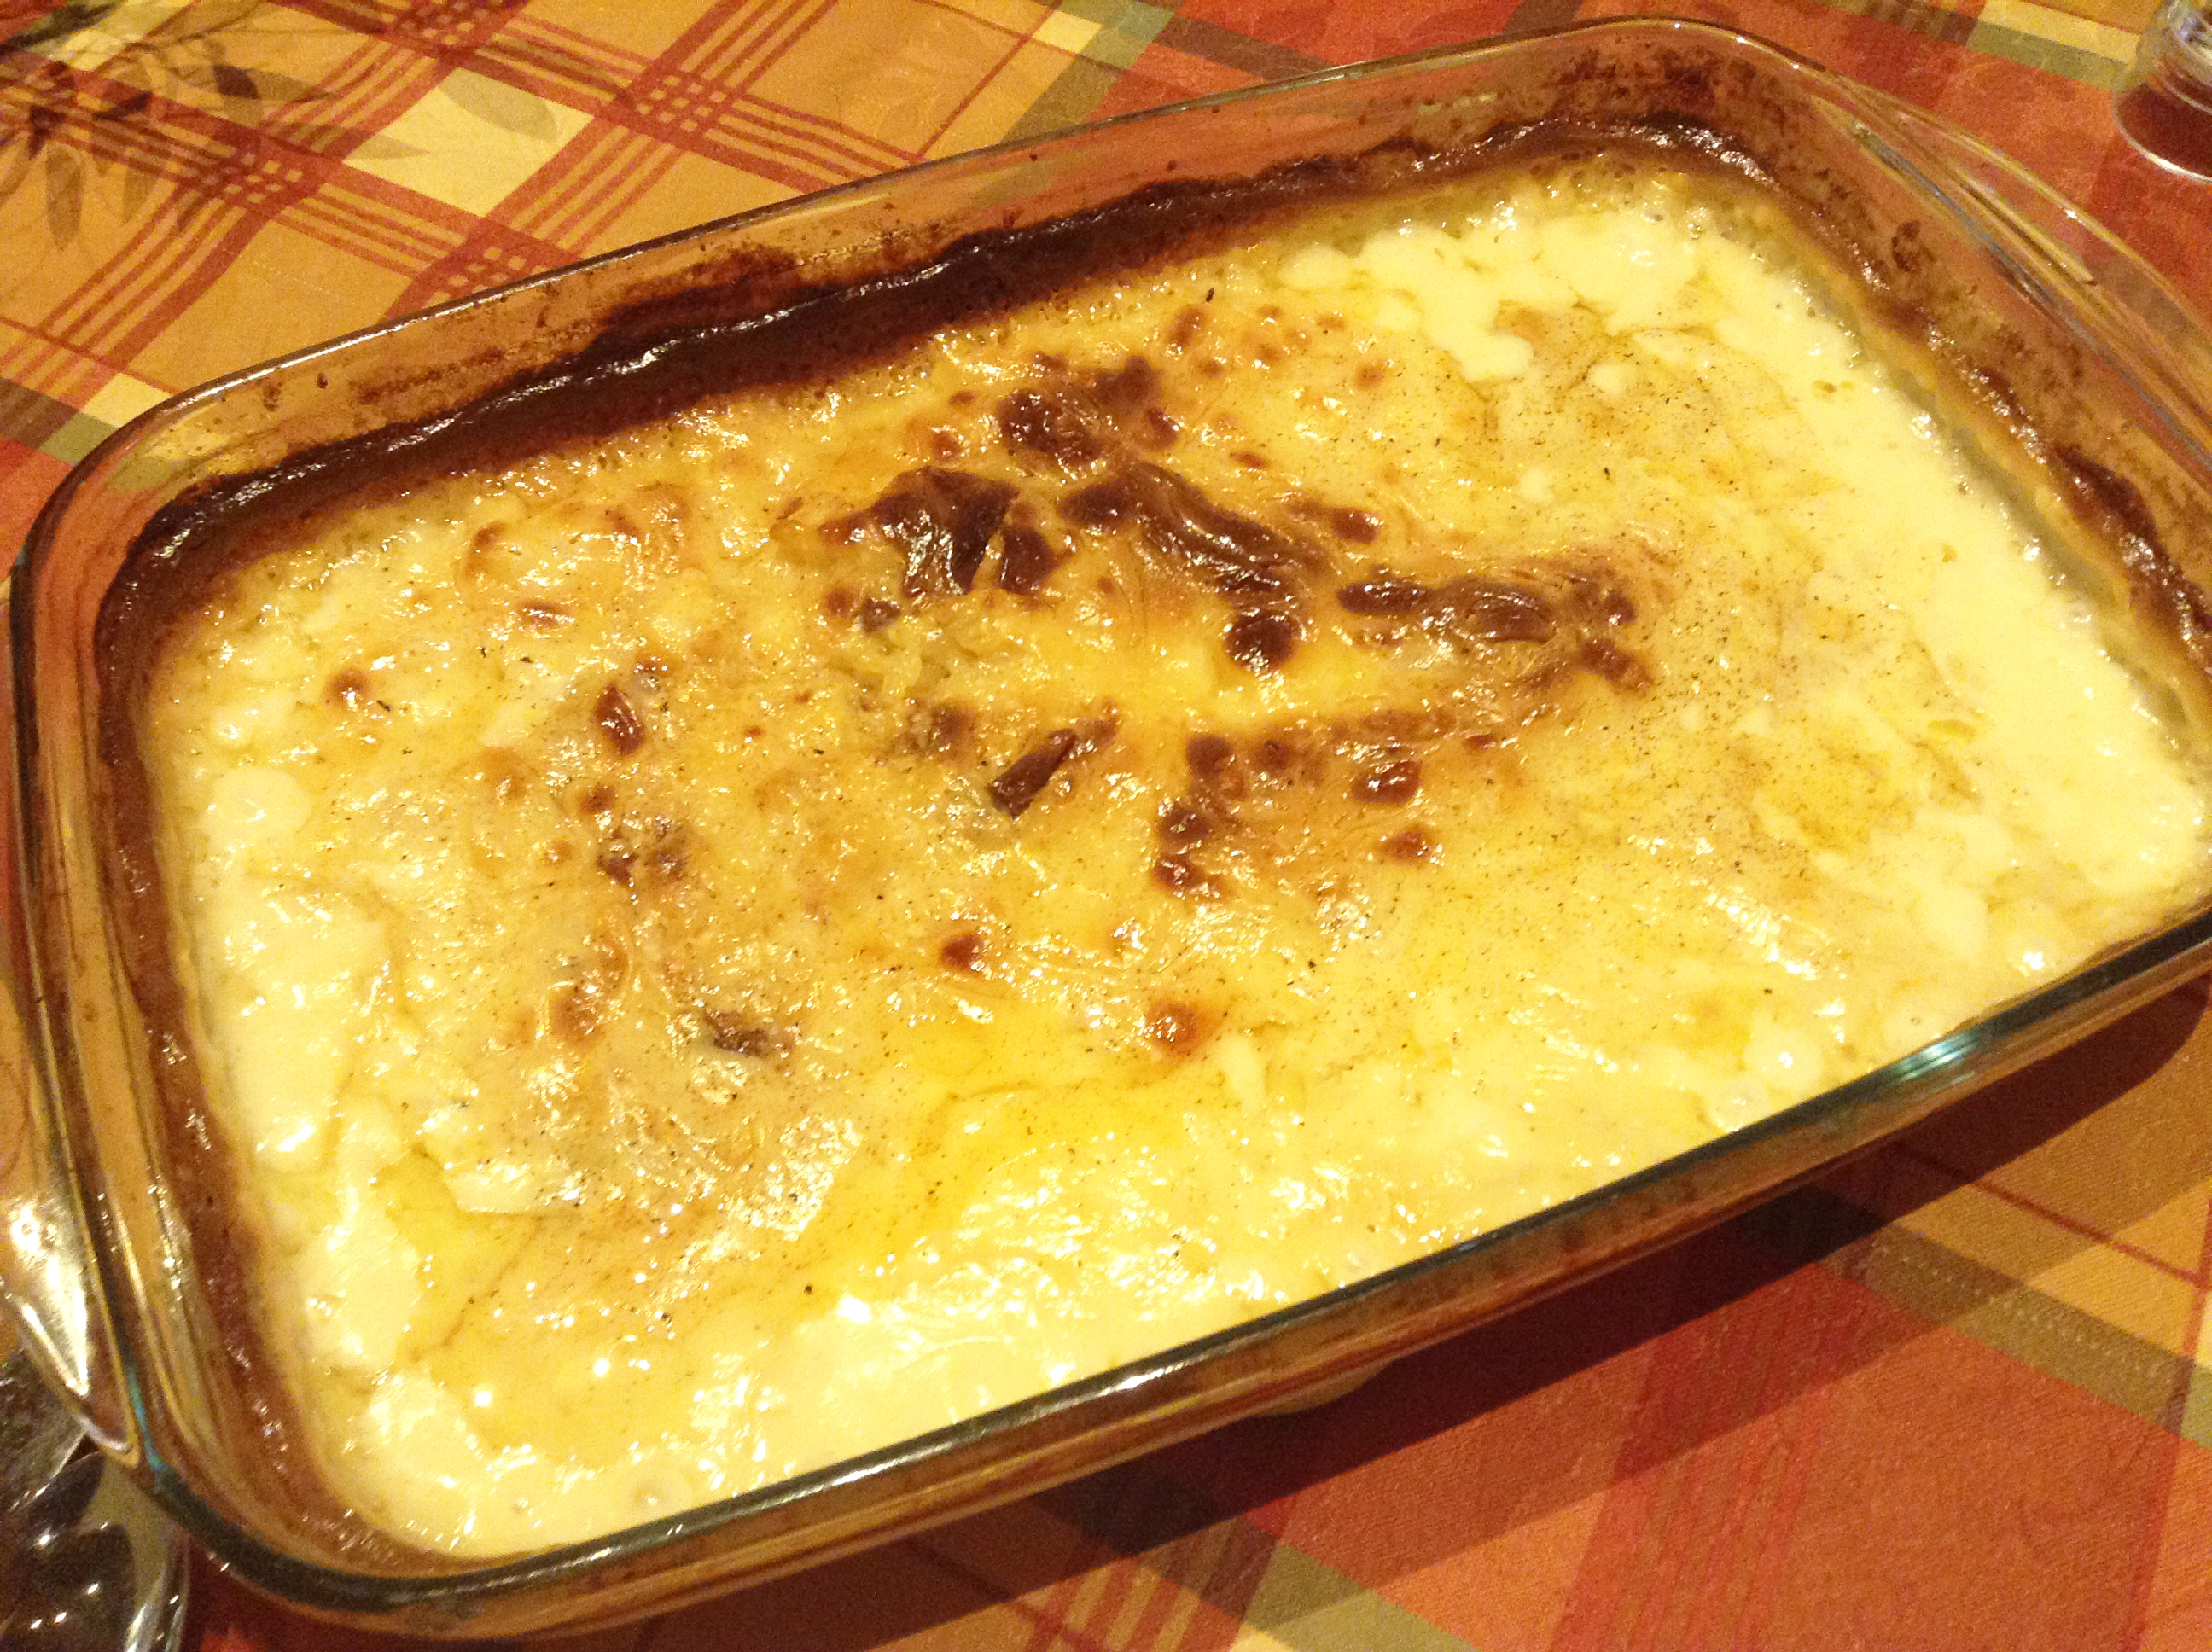
The change of season also brings its own collection of recipes, both old and new. Warm custards and puddings, soups and stews, root vegetables, apples and pears. I particularly love rice pudding, and this old fashioned recipe (so similar to the one that my grandmother used to make) is lovely to enjoy warm for breakfast or with whipped cream for a cold evening’s dessert.
Preheat the oven to 300 F and grease a 9x13" glass pyrex pan or 8 cup ovenproof dish with butter.
Rinse the rice under cold water and place in the dish.
Place the cream, milk, sugar, and a generous grating (or 1 tsp) of nutmeg in a medium saucepan. Scrape the seeds of the vanilla beans into the milk mixture (if using) or add the vanilla.
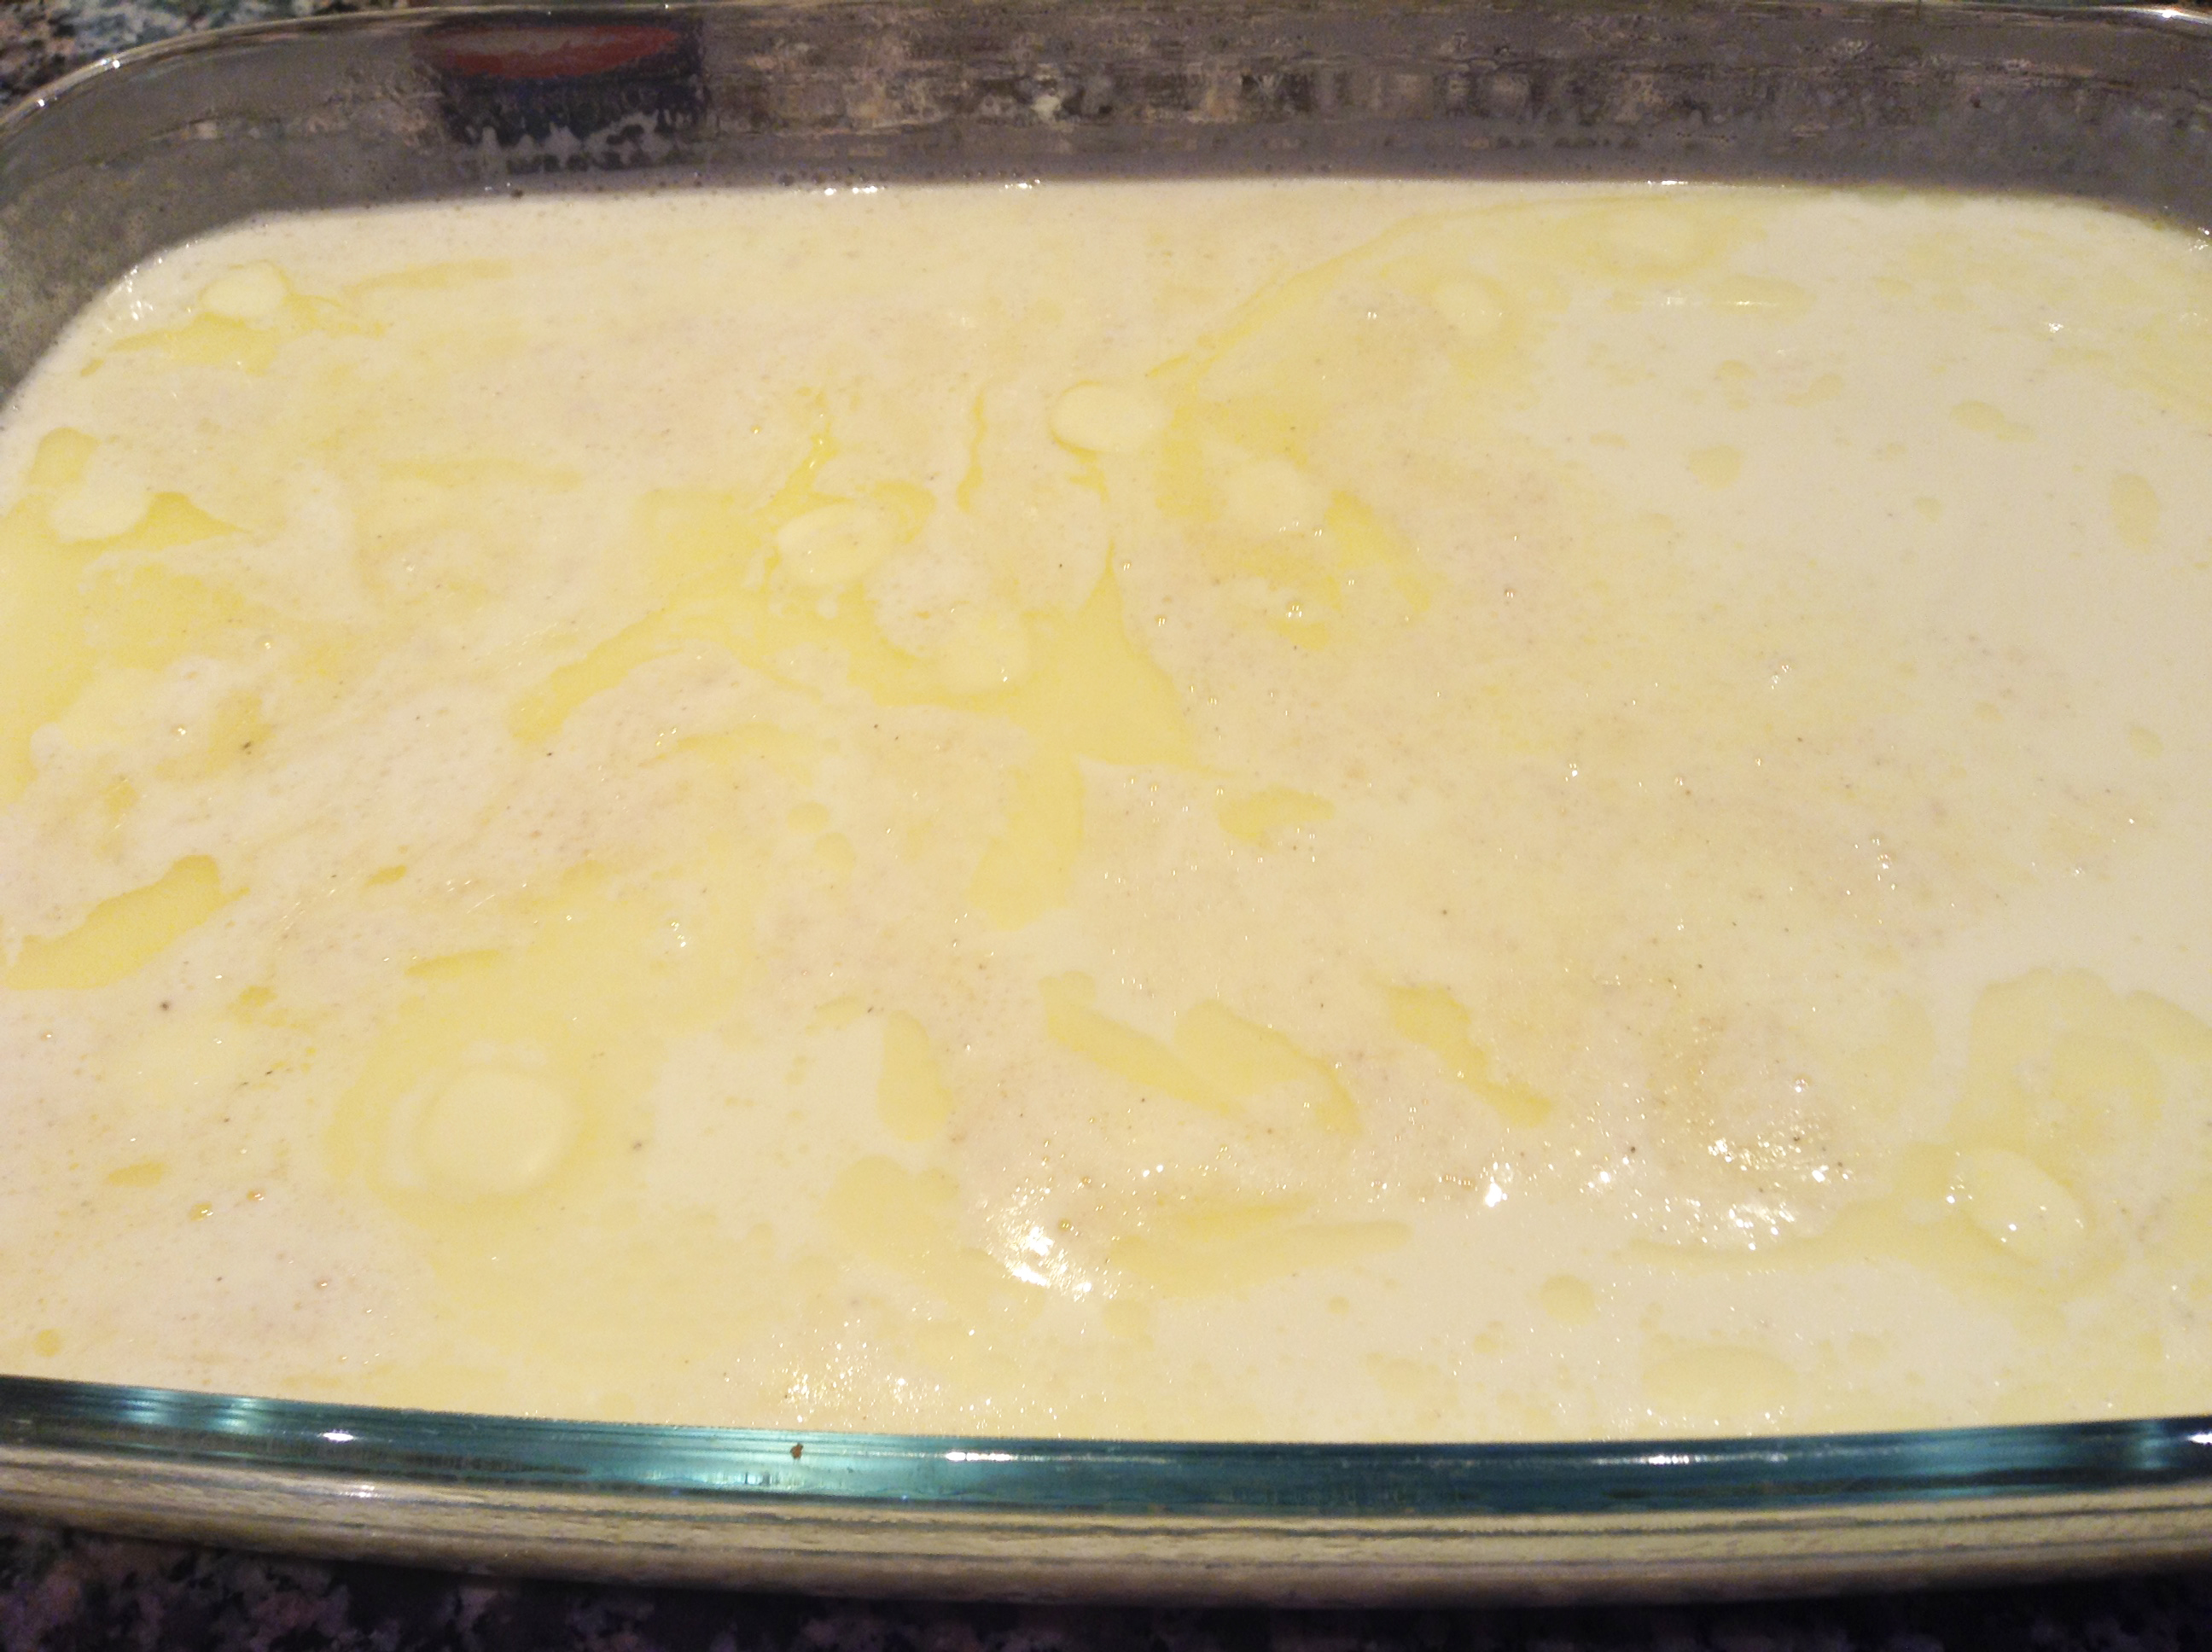
Heat gently until almost simmering, then remove from the heat and pour over the rice, stirring well.
Dot the butter over the top and place in the oven for 1 1/2 hrs, stirring after the first 30 min. At this stage, you can add an extra grating of nutmeg if you like.
If the pudding still seems very runny, return to the oven, checking every 10 min., until it is loosely creamy but not runny (the rice should be cooked, but the liquid will continue to be absorbed once you take it out of the oven).
When the pudding is golden brown on top and has a soft,creamy texture, remove from the oven and allow to rest for 10 min. before serving.
Last week we started “putting the gardens to bed” for the season.
This end of an era always seems to creep up on us before I expect it
to. For me it is always accompanied with a certain sadness. No more
beautiful early morning sights of garden tubs overflowing with choice red
tomatoes, crisp green lettuce and chard, gorgeous shiny eggplants and
colorful summer squashes ushering in the new day. What did arrive
this morning were some wonderful prizewinning heads of cabbage, a goodly
amount of green beans and plenty of assorted tomatoes. So tonight we
will enjoy a favorite old world classic for our dinner: Stuffed
cabbage rolls with fresh garden tomato sauce along with tender whole
green beans.
Cut up tomatoes and simmer with olive oil, onion salt, oregano and sugar until reduced to 1 cup or 8 ounces of sauce. Can be done while preparing cabbage.
Leave cabbage whole, but cut around the stem, and parboil for 5 minutes; let steep for another 5 minutes. Remove cabbage from water and drain; separate cabbage leaves. Chop the small inside leaves and the core and use to line a Dutch oven.
Combine all the stuffing ingredients and mix thoroughly. Season with salt and pepper to taste. Place 1 tablespoon stuffing on each of the larger cabbage leaves, fold ends of leaves over the stuffing, and roll leaves.
Arrange the stuffed cabbage leaves in rows in Dutch oven; sprinkle each layer with olive oil, tomato sauce, and crushed bay leaf. Sprinkle lightly with salt and pepper; add remaining tomato sauce, beef broth and enough water to cover. Place a plate on top of cabbage rolls, and simmer over low heat for 1 hour. Serve the cabbage rolls with the pot sauce pored over them.
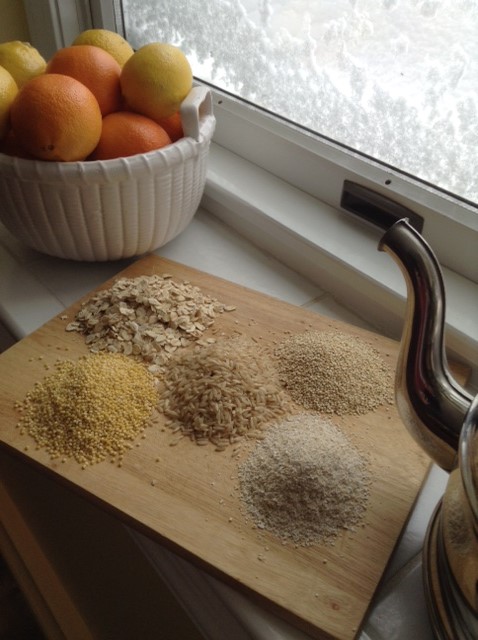
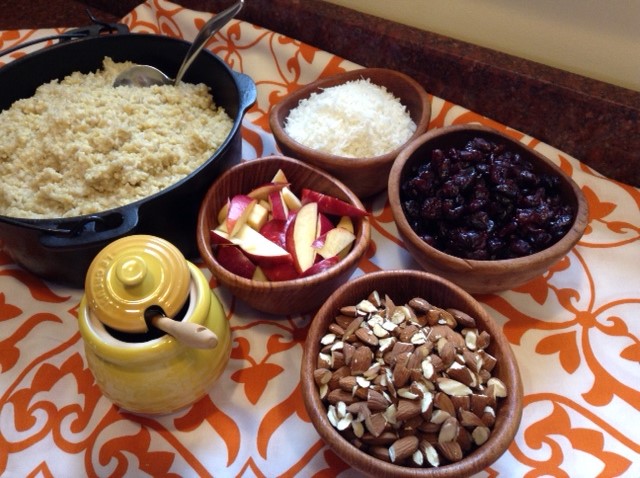
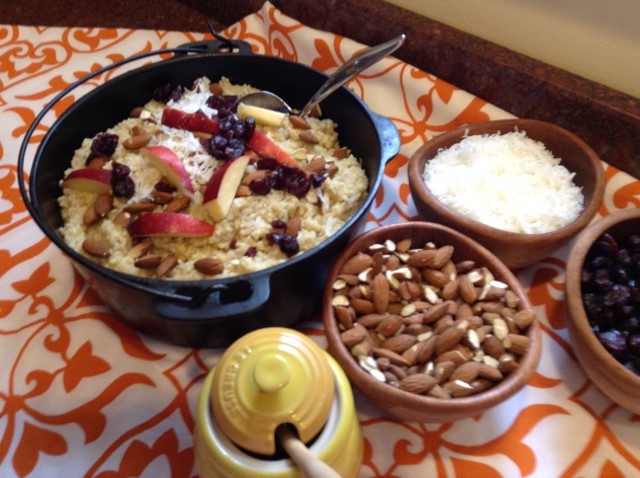
“Some like it hot….some like it cold” Whatever your preference, you are bound to LOVE this hearty, wholesome 5 grain porridge that we have been serving for breakfast at the convent these cold, blustery winter days.
Our snow shoveling sisters are out early every am battling the drifts to clear the walks and entrances so that we can get from building to building. When they come in most of them are ravenous, and this warm cooked breakfast not only hits the spot but also fortifies them for the rest of the day.
If you have not yet gotten into porridge making , this is the time to do it. Don’t wait any longer to try out your own satisfying combination of healthy slow simmered grains. If you don’t have the 5 we used, substitute with what you do have or like. It’s the combining of textures and flavors that gives it its appeal. Top it with fresh or dried fruits and or nuts, seeds or coconut etc. or add them to the mixture the last 10 minutes or so before serving.
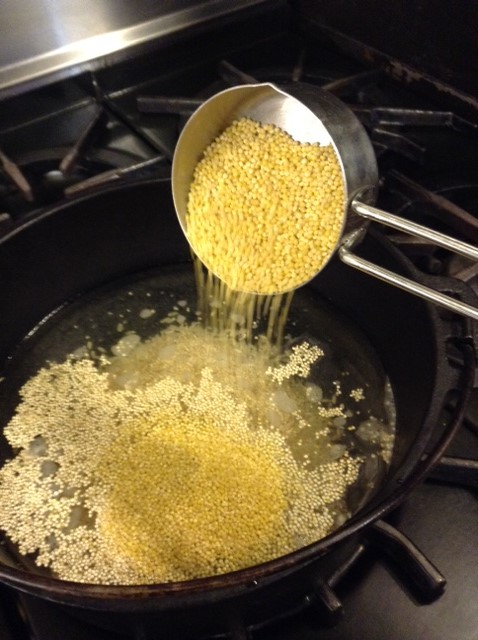
Bring brown rice, quinoa, amaranth, millet, wheat bran, salt, and water to a boil in a medium pot.
Reduce heat, partially cover, and simmer, stirring occasionally, until cereal is the consistency of porridge (softer and thicker than the usual bowl of oatmeal) and water is absorbed, 40–50 minutes.
NOTES
Do Ahead: Porridge can be made 5 days ahead. Let cool; cover and chill.
This weekend, we will be harvesting the last of our peppers from our garden. We have been so blessed to have such an abundance of beautiful vegetables this year, so much so, that we are still reaping the benefits of the eggplant, leeks, butternut squash, and pumpkins. My brain goes into overdrive, as recipe after recipe comes to mind.. what magical combination can we concoct next?
We had a special request for stuffed peppers from one of our Sisters. She adores them, and has happy childhood memories from her Pennsylvania roots. I was delighted to fulfill her request. While in Italy, I came across this wonderfully spicy stuffed pepper recipe. I modified it with the ingredients I had on hand. I’ve never been a big fan of green peppers, but I love the sweet, colored varieties, as recommended here. The flavors of Italy abound: balsamic, red pepper flakes, fennel and spicy sausage. This is sure to be a family favorite.
Bring rice and water to a boil in a saucepan over high heat. Reduce heat to medium-low, cover and simmer until the rice is tender, and the liquid has absorbed, 20-25 min. Remove from heat and set aside
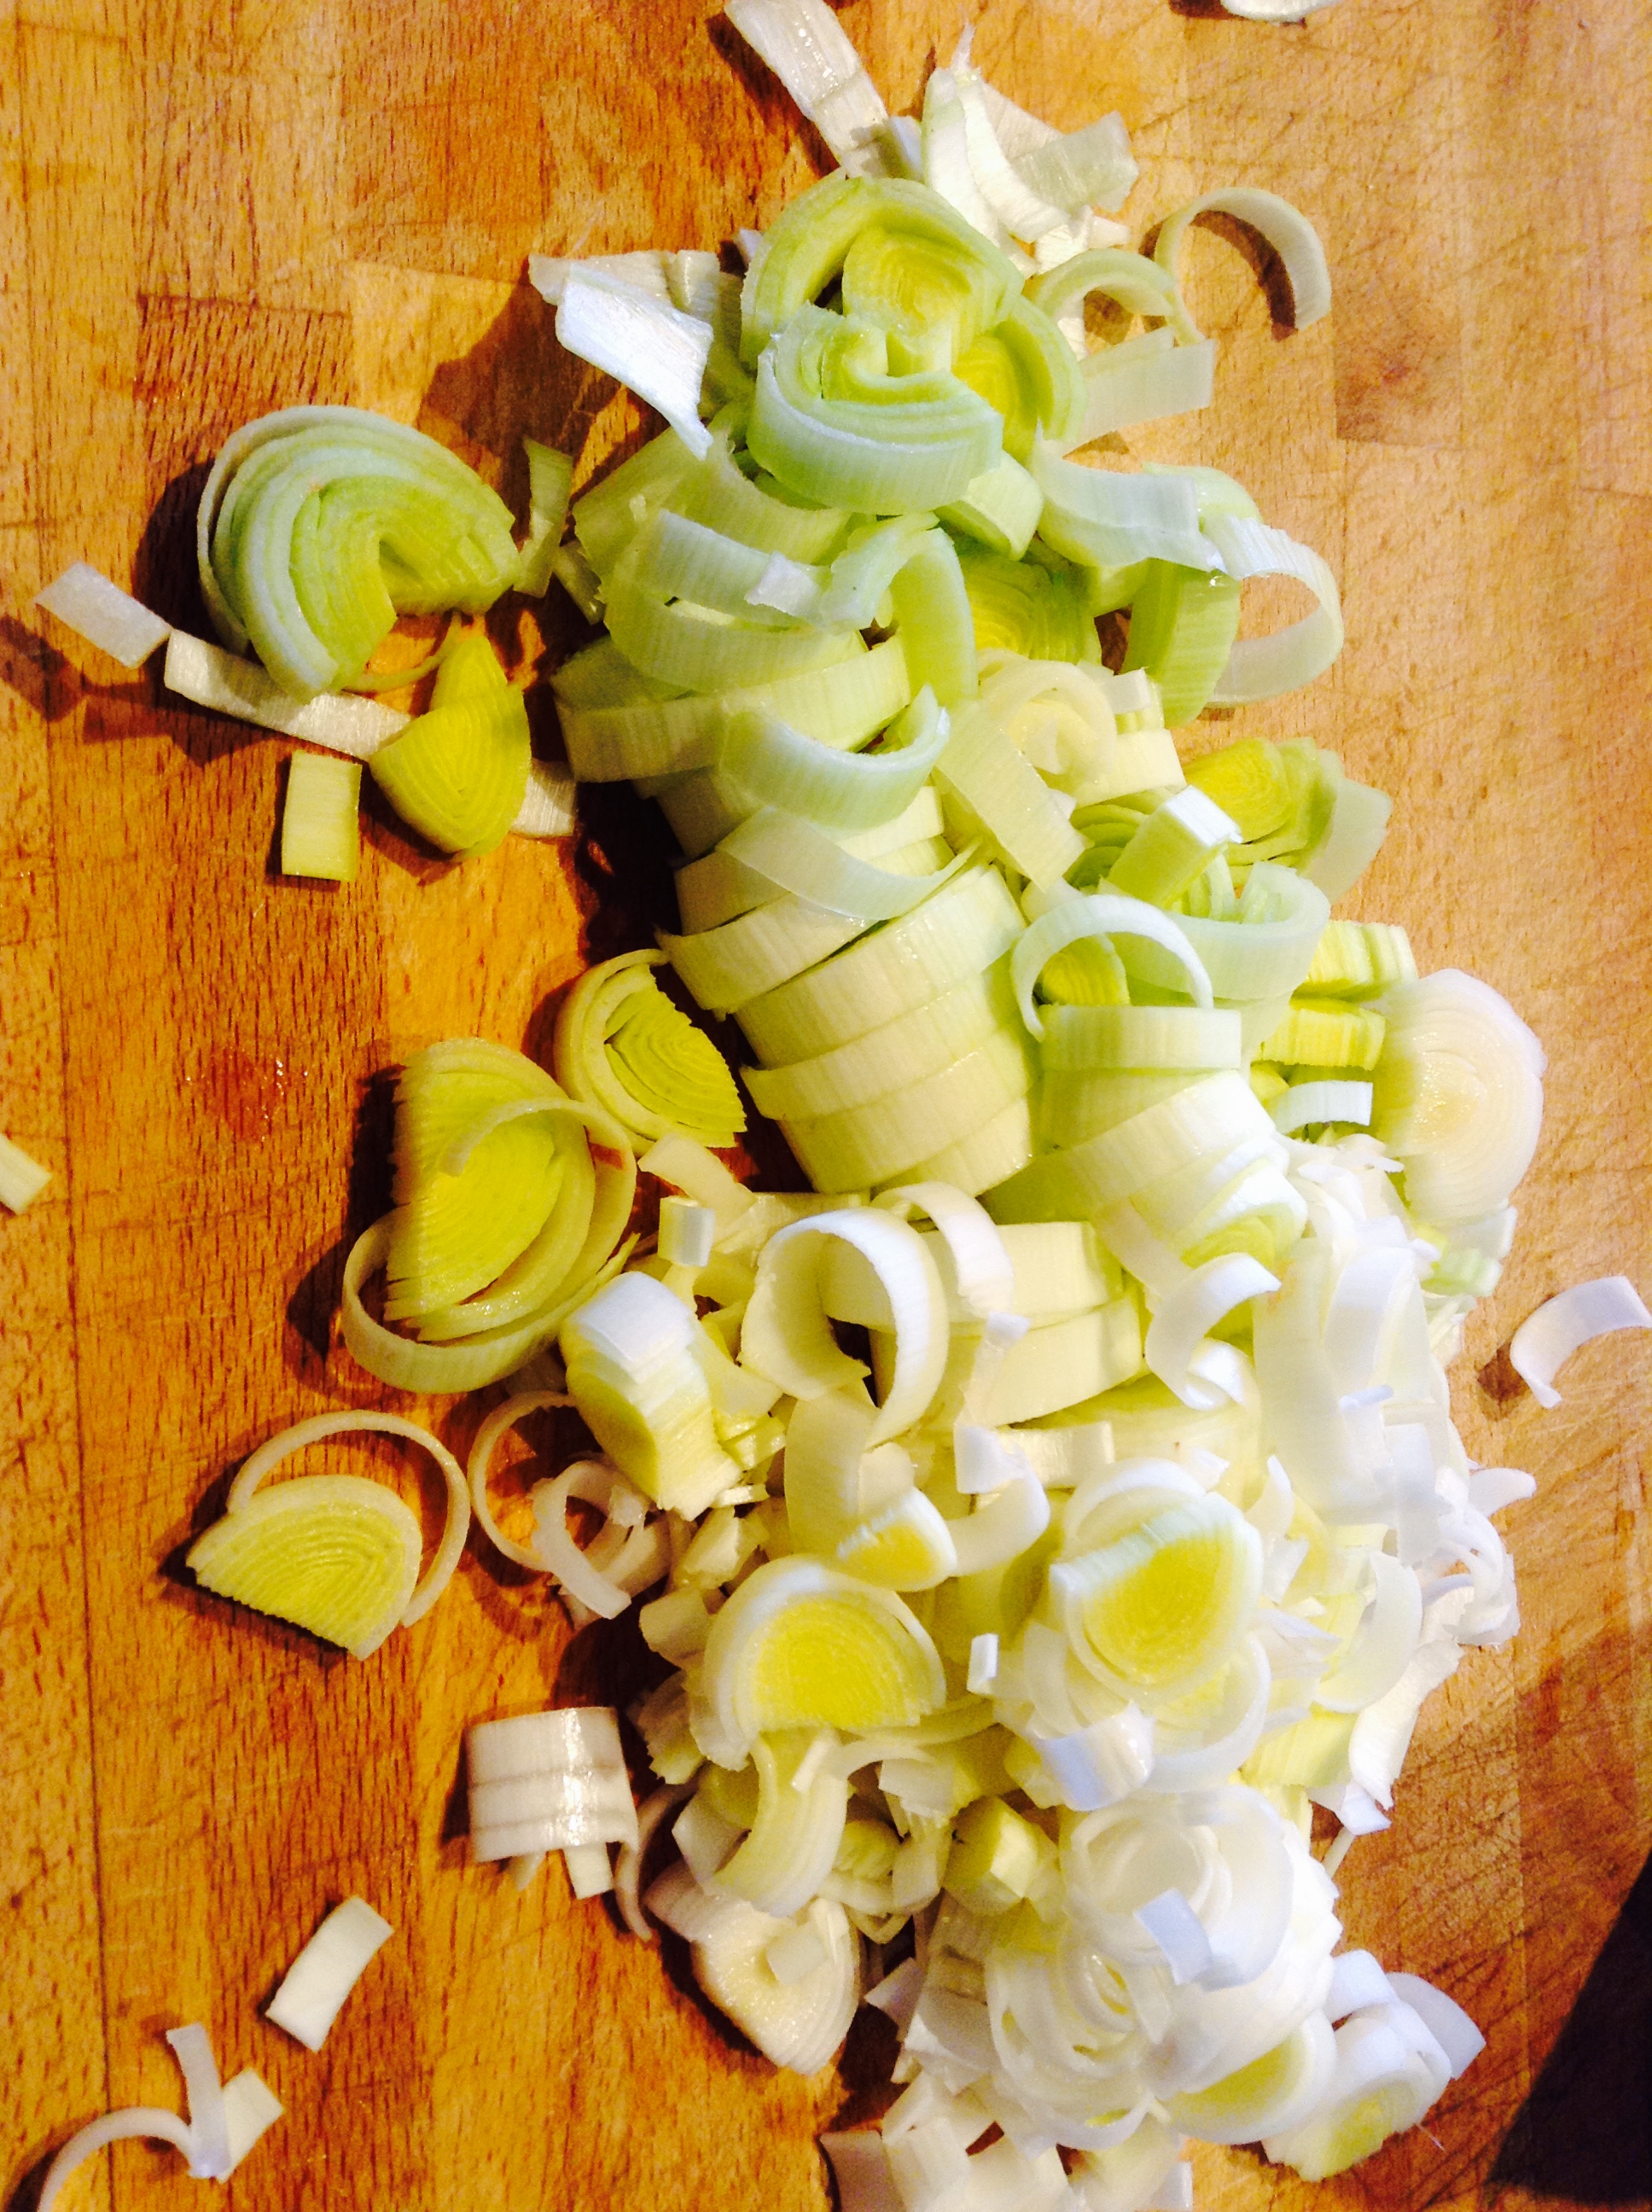
Cook the chopped leek in olive oil over medium low heat until the leek begins to soften (watch that it doesn’t burn), about 5 min. Transfer half of this mixture to a large bowl and set aside.
Stir tomato sauce, beef broth, balsamic vinegar, and red pepper flakes into the skillet with half the leek mixture; cook and stir for 1 minute.
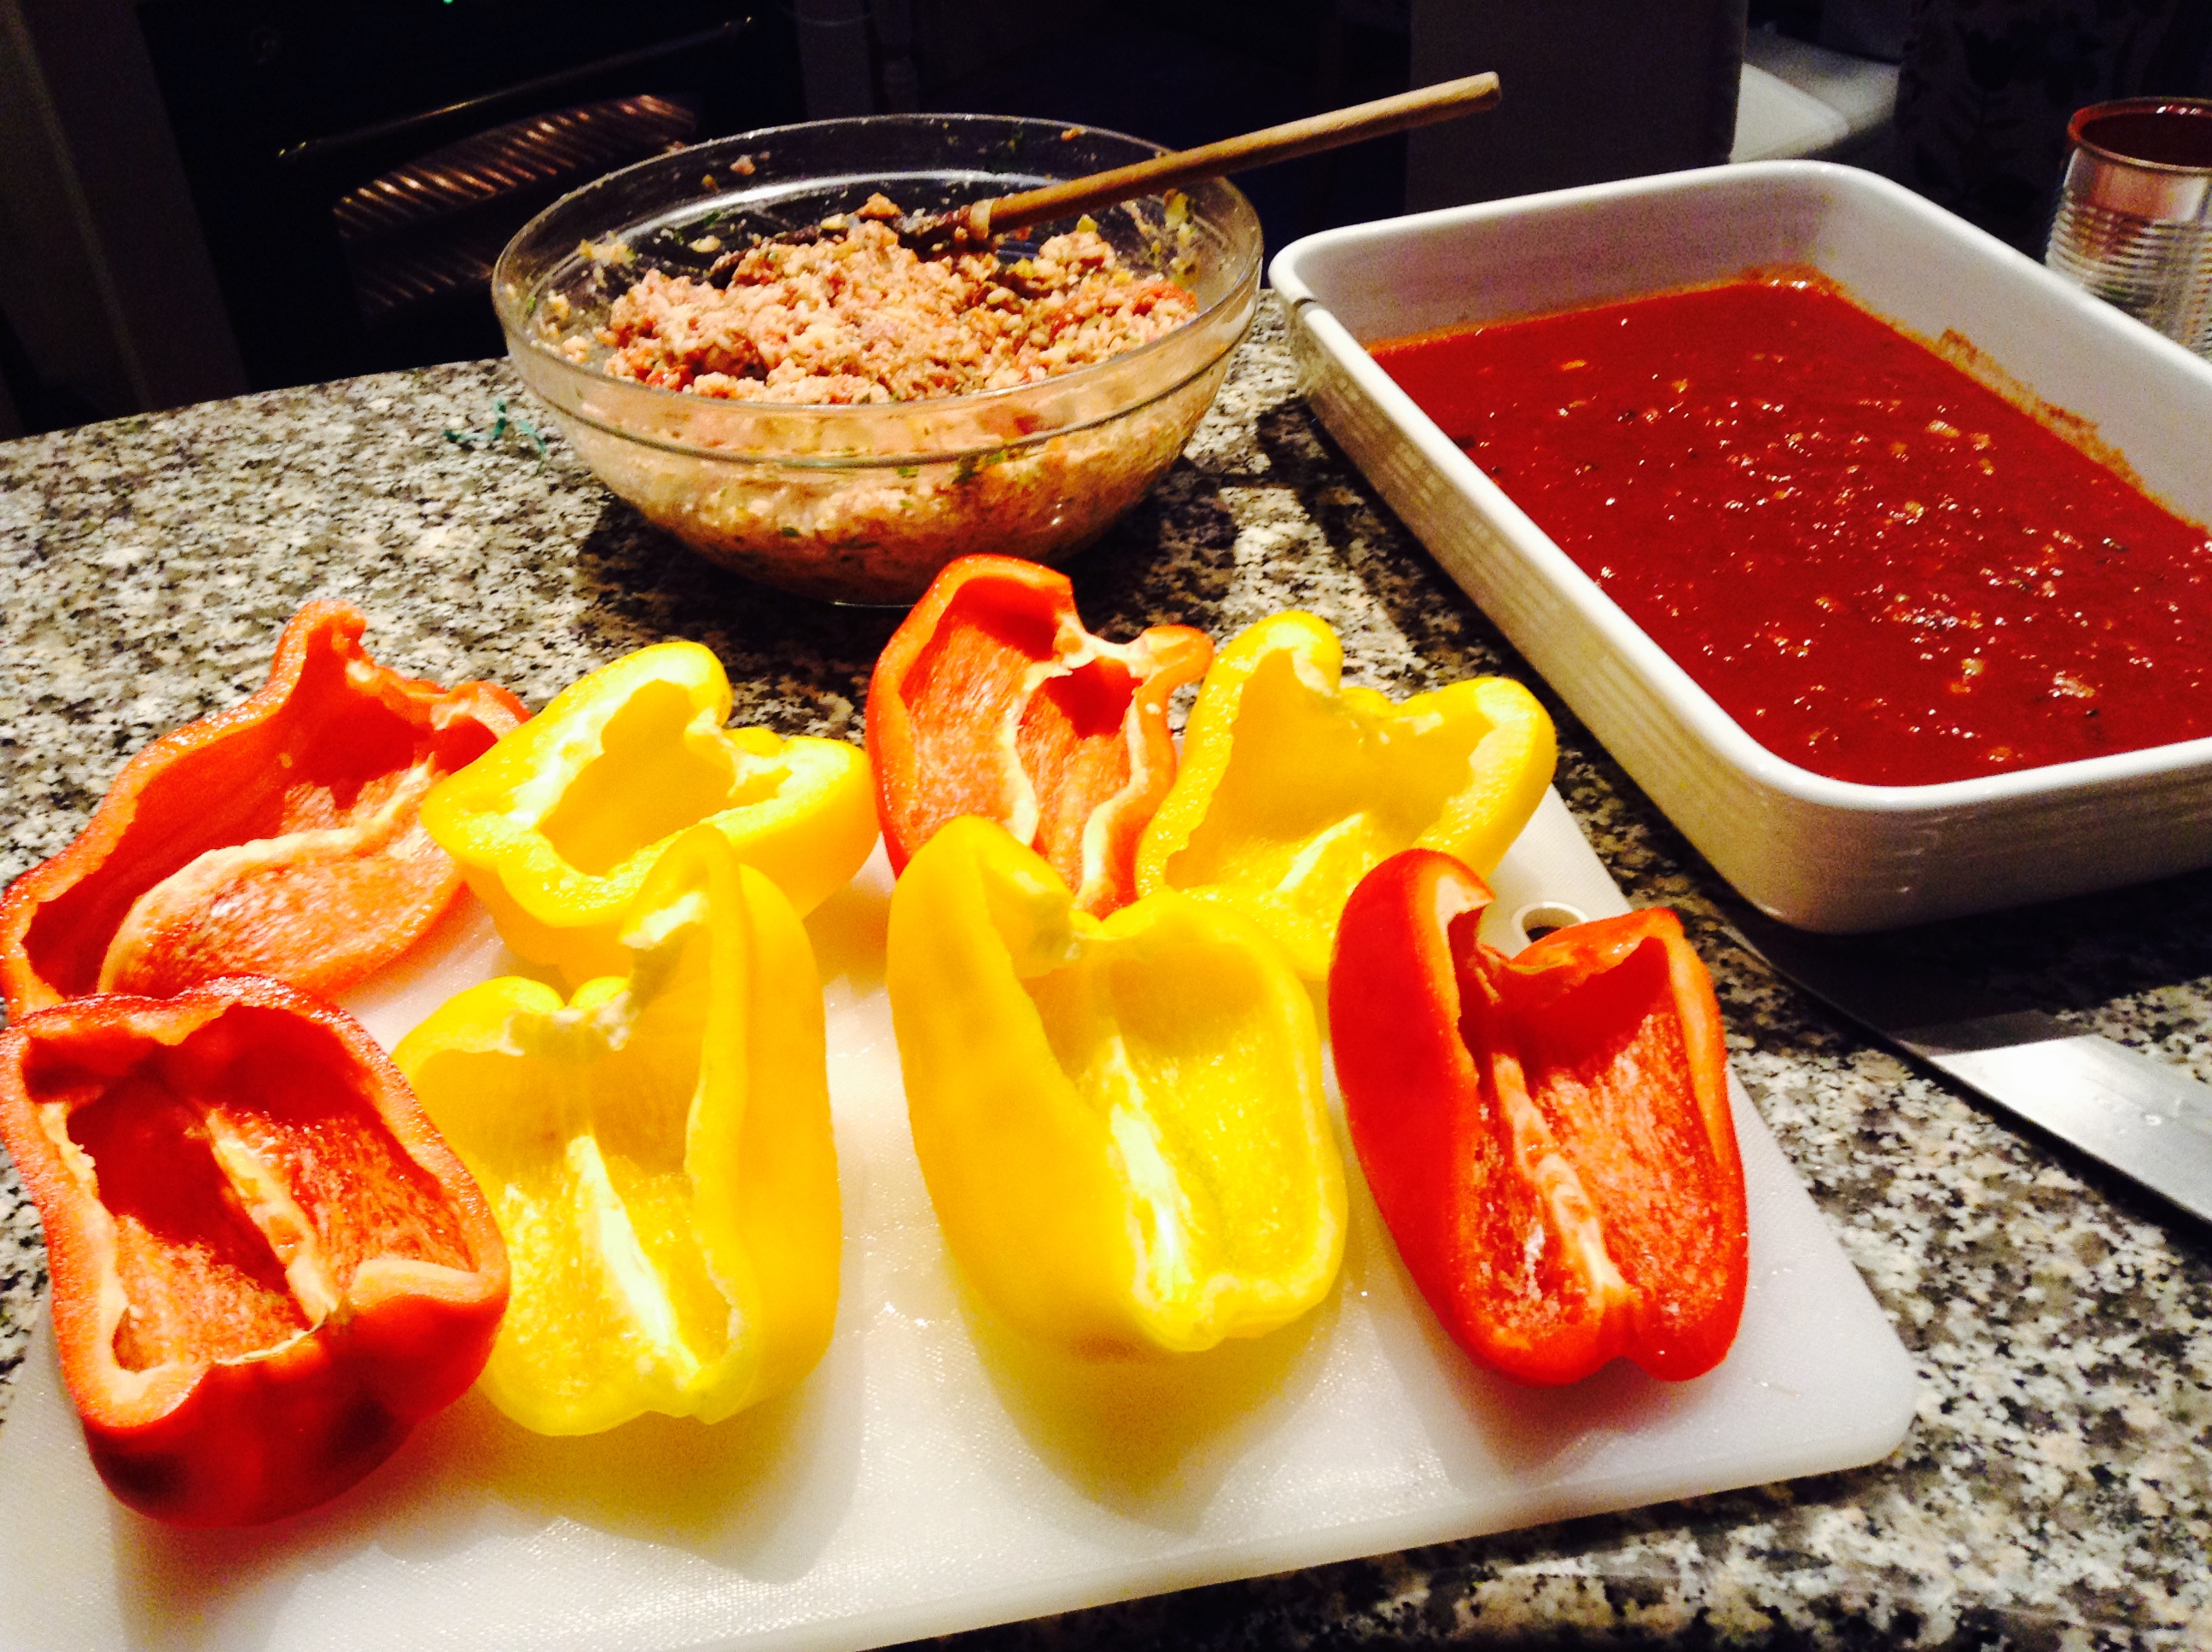
Pour tomato sauce mixture into a 9x13-inch baking dish and set aside.
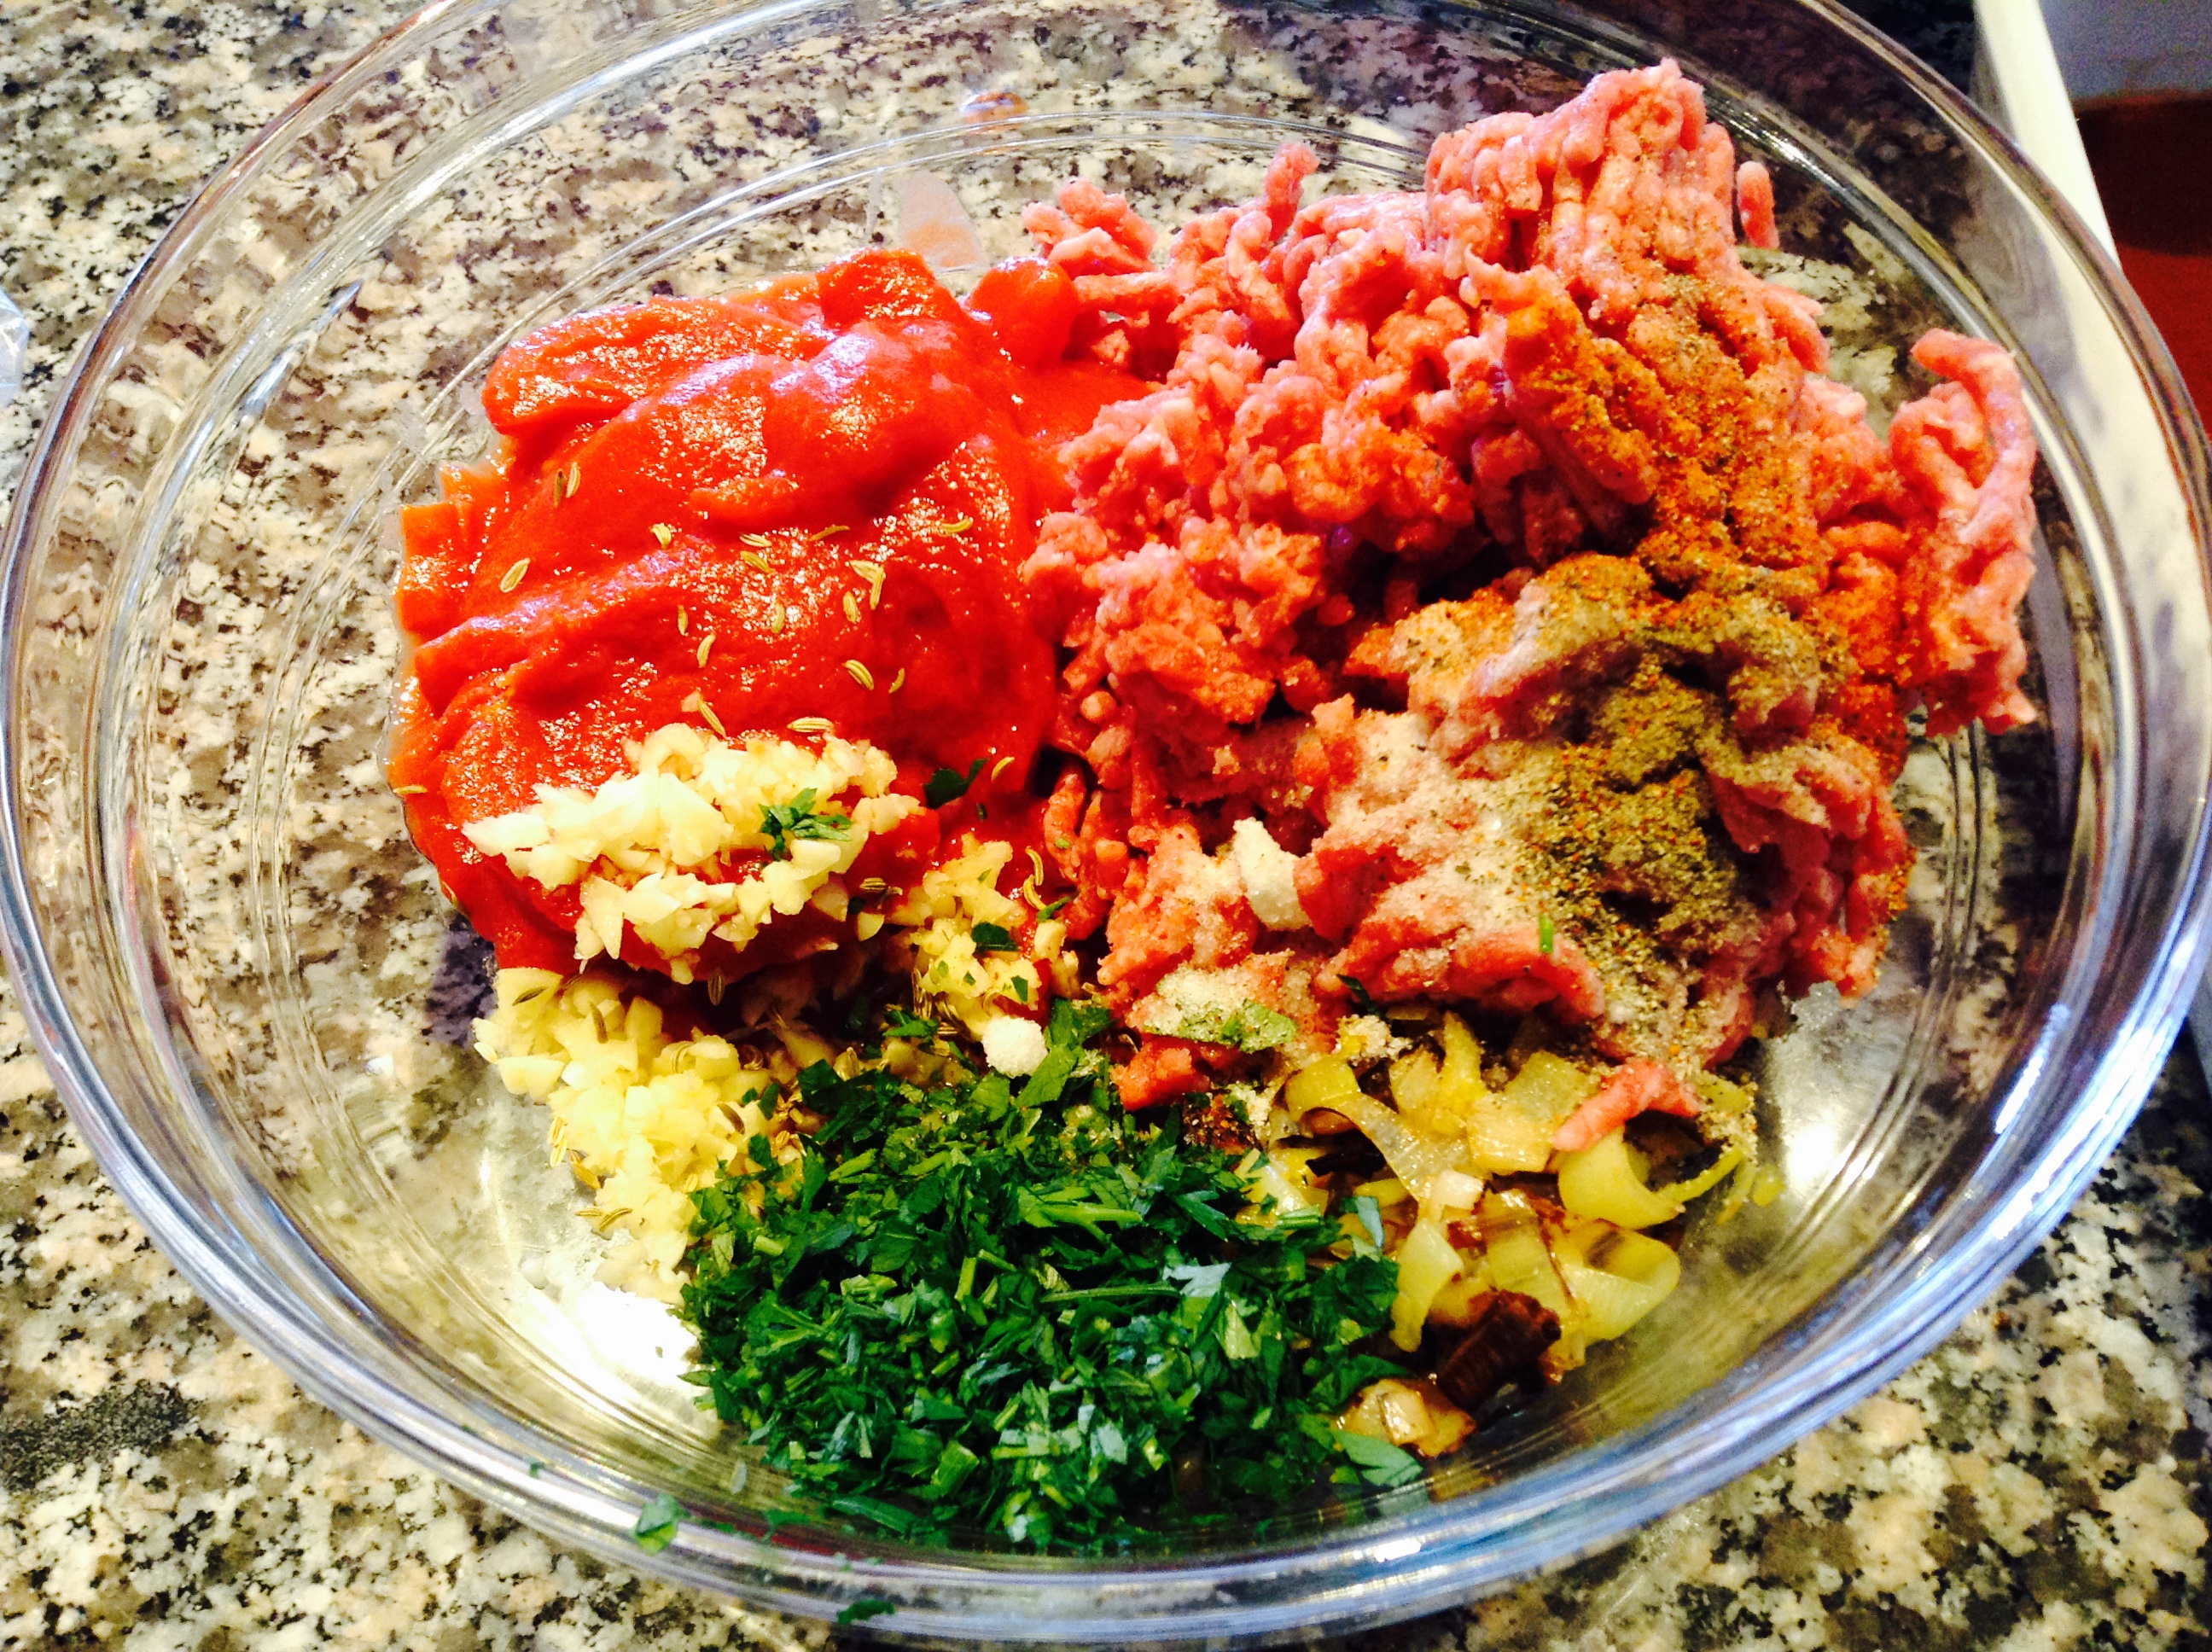
Combine the ground beef, Italian sausage, fennel seeds, diced tomatoes, parsley, garlic, salt, black pepper, and cayenne pepper into bowl with reserved leek; mix well. Stir in cooked rice and 1 cup of Parmigiano Reggiano. Stuff bell peppers with beef and sausage mixture, heaping slightly.
Place stuffed bell pepper halves in the baking dish over tomato sauce; cover baking dish with aluminum foil, and bake in the preheated oven for 45 minutes.
Remove aluminum foil, sprinkle with remaining Parmigiano-Reggiano, and bake until the meat is no longer pink, the peppers are tender and the cheese is browned on top, an additional 20 to 25 minutes. Andiamo Mangiare!