Refreshing and Versatile Summer Shrubs

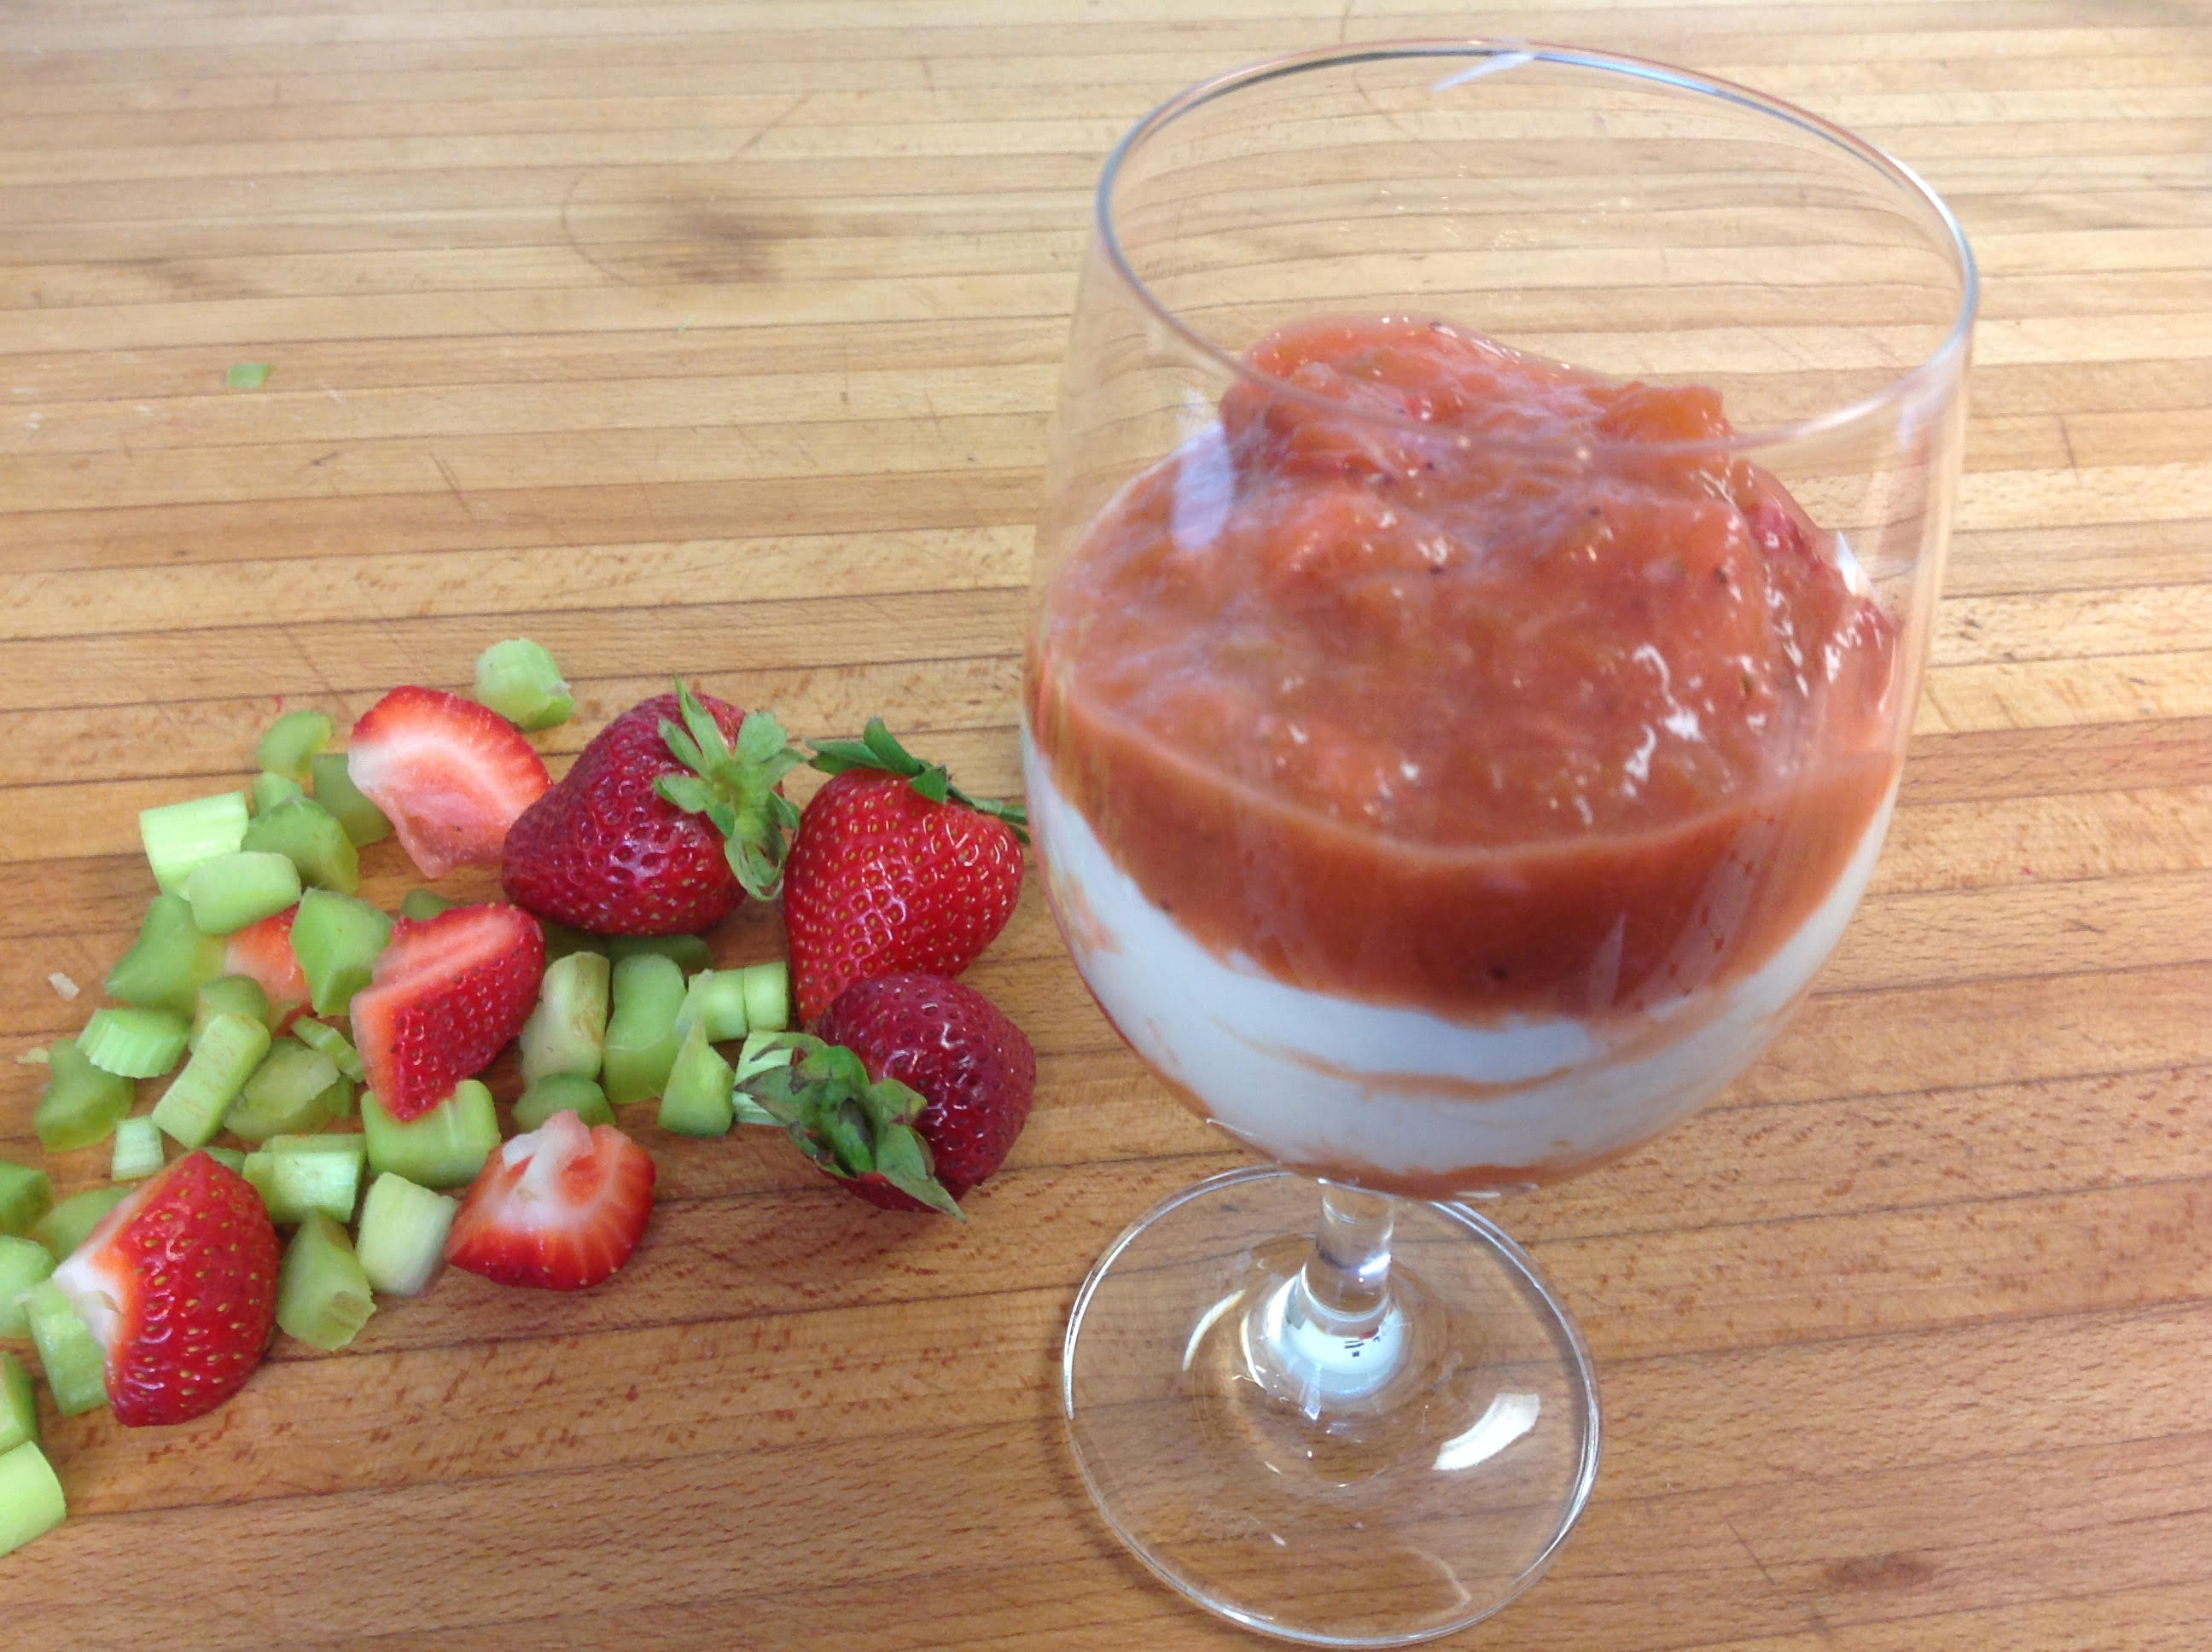
Shrub: a fruit, herb and/or spice-infused syrup preserved with vinegar, sometimes referred to as a “drinking vinegar.” Commonly used in drinks, salad dressings or other additions.

I was craving a fresh shrub soda the other day, and oh my goodness I love an icy shrub on a hot summer day! Mixed with club soda and infused with fresh herbs, I am instantly refreshed and ready to tackle (most) anything the day holds.

Interestingly, drinking vinegars date back to ancient times, and Colonial sailors employed its concentrated dose of Vitamin C and antibacterial properties to prevent sickness while onboard. Derived from the Arabic word sharab, shrub concoctions have stood the test of time–and with good reason!

Surprisingly versatile, most anything can be made into a shrub: cranberries, apples, basil,
turmeric, grapefruit, rhubarb–the possibilities are truly endless. Use shrubs in cold drinks, salad dressings or glazes this summer, and you might just find yourself creating new combinations of flavors with tasty health benefits on the side. Below are 3 shrub recipes to get you started…

Print Recipe
Votes: 2
Rating: 4.5
You:
Rate this recipe!
Refreshing and Versatile Summer Shrubs
(Cold process)
SERVINGS
3cups (serving size, 2 oz)
CHANGE SERVING SIZE
cups (serving size, 2 oz)
COOK TIME
PREP TIME
15minutes
READY IN
15 minutes + 2 days

Ingredients

Instructions

  1. Prep ingredients: chop fruit, slice roots, roughly chop or muddle herbs
  2. Combine shrub ingredients in a non-reactive bowl such as glass or stainless steel.
  3. Add sugar and stir to thoroughly combine. Cover and chill 2 hours or overnight.
  4. Remove from refrigerator and leave at room temperature, stirring occasionally 2-7 days. The longer the ingredients are combined, the more concentrated the flavor will be.
  5. Strain remaining solids and add vinegar. Stir to combine.
  6. To serve: Pour 2 ounces of shrub into the bottom of a glass. Layer with ice and 6 ounces of club soda or unflavored seltzer water. Add fresh mint, basil or herb of your choice. Stir to combine and enjoy!

Frosted Lemon Sugar Cookies

Print Recipe
Votes: 0
Rating: 0
You:
Rate this recipe!
Frosted Lemon Sugar Cookies
Everyone in the neighborhood knew that my mother made the best sugar cookies on the block, but not everyone knew what made them them the best… When I discovered the secret I felt I’d made one of the greatest discoveries in the culinary world. Mama’s good friend Olga was Jewish and never used dairy products, so instead of butter she substituted schmaltz--which is rendered chicken fat--that gives the recipe a distinct flavor and richness unlike any other shortening--including real butter!
SERVINGS
2dozen
CHANGE SERVING SIZE
dozen
COOK TIME
10mins
PREP TIME
20mins
READY IN

Ingredients

Instructions

Cookies
  1. Preheat oven to 350 degrees.
  2. Cream schmaltz and sugar in an electric mixer using a paddle attachment.
  3. Add eggs (one a at time), lemon juice and lemon zest. Beat until well incorporated.
  4. Slowly add flour, baking soda and salt.
  5. Roll dough into balls roughly 1 ½ inches wide and place on a greased cookie sheet, or a baking sheet lined with parchment. Press each cookie with a bottom of a glass dipped in sugar.
  6. Bake for 10 minutes or until the bottoms are slightly golden. Remove and cool completely.
Frosting
  1. Combine all the ingredients until it reaches a creamy consistency. If it’s too thick, add either lemon juice for an extra shot of lemon or milk until it thins to the desired thickness.
  2. Either frost with a spreader (pictured) or pipe onto the cookies and enjoy!

Chocolate Babka

One of our sisters has a special interest in cooking the foods of other countries. Over time she has heard me repeat many stories of my Ukrainian mother’s experiences with food and what I learned about it through her.

Perhaps my favorite memory is that of packing our picnic boxes for our all-day blueberry picking excursions. These always contained fresh baked babka, lots of butter some fresh boiled eggs from our chickens and a little horseradish root from our garden. Today’s blog features a glorified babka bread filled with chocolate…enjoy!

Print Recipe
Votes: 0
Rating: 0
You:
Rate this recipe!
Chocolate Babka
SERVINGS
2loaves
CHANGE SERVING SIZE
loaves
COOK TIME
30mins
PREP TIME
20mins
READY IN
5 1/2hrs (3 hrs rising, 2 1/2 chilling)

Ingredients

Instructions

Babka Dough
  1. Combine yeast with warm water and let stand until it begins to bubble, about 5-8 minutes.
  2. Mix flour, sugar, yeast, and lemon zest in a mixer on a low speed until combined.
  3. Add eggs and water, and mix on medium speed until dough comes together, 2-3 minutes. Add salt, then butter, adding a few cubes at a time, mixing until thoroughly combined. Continue mixing for about 10 minutes on medium speed, until dough is completely smooth,and pulls away from the sides of the bowl. Be sure to scrape the sides of the bowl during this step!
  4. Place dough in a large greased bowl cover with plastic wrap. Let rise in a warm place until doubled in size.
  5. Grease two 9x4 inch loaf pans with oil and line the bottom of each pan with waxed paper. Divide dough in half and keep one half covered in the fridge.
Filling and Baking
  1. Whisk together powdered sugar, cocoa powder, chocolate, and butter until you have a spreadable paste.
  2. Roll out dough on a lightly floured surface and shape into a rectangle as wide as the pans are long.
  3. Position dough so that a long side is closest to you and spread half of the chocolate mixture over the rectangle, leaving a ¾ inch/2 cm border all around.
  4. Roll up the rectangle like a jellyroll, starting from the long side closest to you and ending at the other long end. Press to seal the dampened end, then use both hands to even out the roll into a uniform roll and place it on your surface seam side down.
  5. Trim about ¾ inch/2 cm off both ends, and slice the loaf into even 1-inch segments. Cover the pan loosely with plastic wrap and leave to rise in a warm place for 1½ hours.
  6. Preheat oven to 375°F. Remove plastic wrap and place loaves on middle rack of oven, and bake for about 25-30 minutes.
  7. Remove from oven when done and let cool. Babka will stay fresh for 24 hours in an airtight container at room temperature or tightly wrapped--don’t place in the fridge.
  8. Babka freezes well for up to 2 months. To thaw, leave on counter or overnight in the fridge, and leftovers make excellent bread pudding or fabulous French Toast!

Summer Strawberry Rhubarb Sauce Parfait

“Think the rain will hurt the rhubarb?”

Well, I certainly hope not, because this has been the best year yet for our rhubarb patches. Never have they produced so much fruit and never have we tried so many new rhubarb recipes. We’ve had many more compliments and requests for more rhubarb in any form we’ve made it!

Personally, I don’t think anything can top a lovely dish of plain rhubarb or strawberry rhubarb sauce for the finishing touch on a favorite meal. Make it now while the fruit is available, and freeze a good amount for when it’s not.

A favorite breakfast we often serve for those on retreat (or sisters!), is a strawberry rhubarb parfait made with our own yogurt, and topped with homemade granola. By the way, rhubarb is chock full of nutritional value which many people do not know!

Print Recipe
Votes: 2
Rating: 4
You:
Rate this recipe!
Summer Strawberry Rhubarb Sauce Parfait
SERVINGS
5parfaits
CHANGE SERVING SIZE
parfaits
COOK TIME
10mins
PREP TIME
10mins
READY IN
20mins

Ingredients

Instructions

  1. Combine sugar, orange juice, cornstarch, and vanilla in a large sauce pan.
  2. Bring to a boil over medium heat.
  3. Add strawberries and rhubarb, reducing heat and cook together stirring occasionally, until tender (5--10 minutes).
  4. Remove from heat and mash the cooked berries with a fork.
  5. Serve in a parfait glass, layering yogurt, sauce and granola as desired.

This sauce is also a treat served warm over vanilla ice cream!

Syrian Pita Bread

Years ago before pita pockets, as we now know them, had become so common and readily available commercially, they were a regular everyday staple in our home. We called these Syrian bread, because we had an authentic Syrian neighbor who baked it regularly for her household and taught my mother how to make it. I have many happy memories of helping my mother shape the dough into the round loaves. I loved watching these magically puff up into inflated discs in the oven as they baked; and then settle back down into their original shapes after they came out of the oven and cooled.

Always we would roll some of the bread up into towels while still warm; when it cooled this way it had a much chewier texture which I especially liked just with plain butter. However there are so many ways to enjoy it. Sisters particularly love it stuffed with fried or roasted eggplant and fresh sliced tomatoes, roasted onions, peppers, and zucchini or yellow squash slices, with a sprig of fresh basil.

Another favorite way we eat it is split in half, brushed with oil, herbs of choice, onion salt and grated Parmesan. Then baked in 400 degree oven for 5-10 minutes until brown and crisp. It is a fun bread to bake and a fun bread to eat in whatever way you like.

Print Recipe
Votes: 2
Rating: 2.5
You:
Rate this recipe!
Syrian Pita Bread
SERVINGS
6-8pitas
CHANGE SERVING SIZE
pitas
COOK TIME
5-7mins.
PREP TIME
1 1/2hrs.
READY IN

Ingredients

Instructions

  1. In a small bowl dissolve the yeast and the sugar in the water and allow to get bubbly.
  2. In a food processor, pulse the flour with the salt.
  3. With the machine on, pour in the yeast mixture and then the oil and process until the dough forms a ball.
  4. Turn the dough out onto a lightly floured work surface and knead it a few times.
  5. Form the dough into a ball.
  6. Lightly oil a bowl with olive oil.
  7. Transfer the dough to the bowl and turn to coat
  8. Cover the bowl with plastic wrap and let the dough rise in a warm place until doubled in bulk, about 1 hour.
  9. Take the dough and divide it up into 6-8 sections.
  10. On a floured surface, shape the dough into little flat circles.
  11. Heat your oven to 475 degrees Fahrenheit.
  12. Baking the breads 2-3 at a time bake them for 5-7 minutes. Just till they turn a nice golden brown.
  13. Take them out the oven, let them cool and then ENJOY!

pita01

dough01

Lemon Souffle Pudding Cake

As our choir was preparing for our Lenten concert program this past week, we reminded ourselves that the English word Lent is a shortened form of Old English len(c)ten, which means ‘spring’.  This means that Lent refers to ideas of rebirth, rejuvenation, renewal, resurrection and regrowth.

What could be more spring-like than a warm tart and sweet lemon soufflé?  As I was preparing this dessert as a gift for a friend, I looked out into our snow-covered yard imagining crocuses budding their heads out of the frozen earth as a promise of what lies ahead.

Print Recipe
Votes: 7
Rating: 4.29
You:
Rate this recipe!
Lemon Souffle Pudding Cake
SERVINGS
6people
CHANGE SERVING SIZE
people
COOK TIME
40-45mins
PREP TIME
30mins
READY IN
1.5hrs

Ingredients

Instructions

  1. A soufflé will work the best if all of your ingredients are at room temperature before beginning.

    Preheat oven to 325 degrees F and place rack in the center of the oven. Butter and dust with sugar six – 1 cup ramekins or other heatproof bowls or a six cup soufflé dish.
  2. Set aside 2 tablespoons of the sugar to use when whipping the egg whites. Place the remaining sugar in a medium sized bowl. Add the lemon zest to the sugar. With the beater attachment, grind the lemon zest into the sugar, creating a fragrant, slightly yellow tinged sugar. Working the zest into the sugar will release lots of the essential oils in the zest, creating a super lemony batter.
  3. In the bowl of your electric mixer or with a hand mixer, cream the lemony sugar and softened butter. Add the three egg yolks, one at a time, and beat until incorporated. Beat in the vanilla extract. Add the flour and salt and beat until combined (do not over mix)
  4. With the mixer on low speed, gradually pour in the lemon juice and milk. Set aside while you beat the egg whites.
  5. In a clean bowl of your electric mixer, or with a hand mixer, beat the egg whites until frothy. Add the cream of tartar and continue to beat until soft peaks form. Gradually add the remaining 2 tablespoons of sugar and beat until stiff peaks form.
  6. Gently fold the egg whites into the batter, in three additions, mixing only until incorporated.
  7. Carefully pour (or use a ladle) the batter into the prepared ramekins. (The batter does not rise much during baking so you can fill the ramekins almost to the rim.)
  8. Place the ramekins or soufflé dish in a larger baking pan. Boil a tea pot of water to create a water bath. (A water bath is used to provide temperature protection for the eggs.)
  9. Place the basting pan with the souffle inside into the oven, carefully pulling the oven rack out a bit. Carefully pour in enough hot water so that the water is halfway up the sides of the ramekins or soufflé dish, and carefully slide the rack back into the oven.
  10. Bake for about 40 – 45 minutes or until the sponge cakes are golden brown and a toothpick inserted into the cake portion comes out clean. Be careful not to insert the toothpick into the lemon sauce at the bottom of the ramekins. Remove the ramekins from the water bath and cool slightly before serving.

This dessert can be served warm or at room temperature. Dust the tops of the puddings with confectioners sugar and dress with a dollop of whipped cream and fresh berries or lemon slices.