​Old Fashioned Creamy Rice Pudding

Waking up on these cold, crisp fall mornings with frost on the ground, my alarm clock begs to be put on snooze for those last 5 minutes of shut-eye. But in Convent life, that’s not what we’re called to; instead, a quick prayer of thanks to God, and our feet hit the cool ground as we dress for Lauds. I sometimes imagine God smiling at our groans, the creaks in our bones, and the selfish moments we want to steal for ourselves before spending time with Him. I’ve recently experienced the transparent love that God has for me and I think these waking moments are no different! After Lauds, we have a silent breakfast together in our refectory. Silence is essential to our spiritual life because it allows us time to listen to God’s voice preparing us for the day, and not our own. I have to admit that I battle doing my own mental checklist during this time; fragile as we are, God smiles!
The change of season also brings its own collection of recipes, both old and new. Warm custards and puddings, soups and stews, root vegetables, apples and pears. I particularly love rice pudding, and this old fashioned recipe (so similar to the one that my grandmother used to make) is lovely to enjoy warm for breakfast or with whipped cream for a cold evening’s dessert.
Print Recipe
Votes: 9
Rating: 3.67
You:
Rate this recipe!
​Old Fashioned Creamy Rice Pudding
SERVINGS
6people
CHANGE SERVING SIZE
people
COOK TIME
1-2hours
PREP TIME
15minutes
READY IN

Ingredients

Instructions

  1. Preheat the oven to 300 F and grease a 9x13" glass pyrex pan or 8 cup ovenproof dish with butter.
  2. Rinse the rice under cold water and place in the dish.
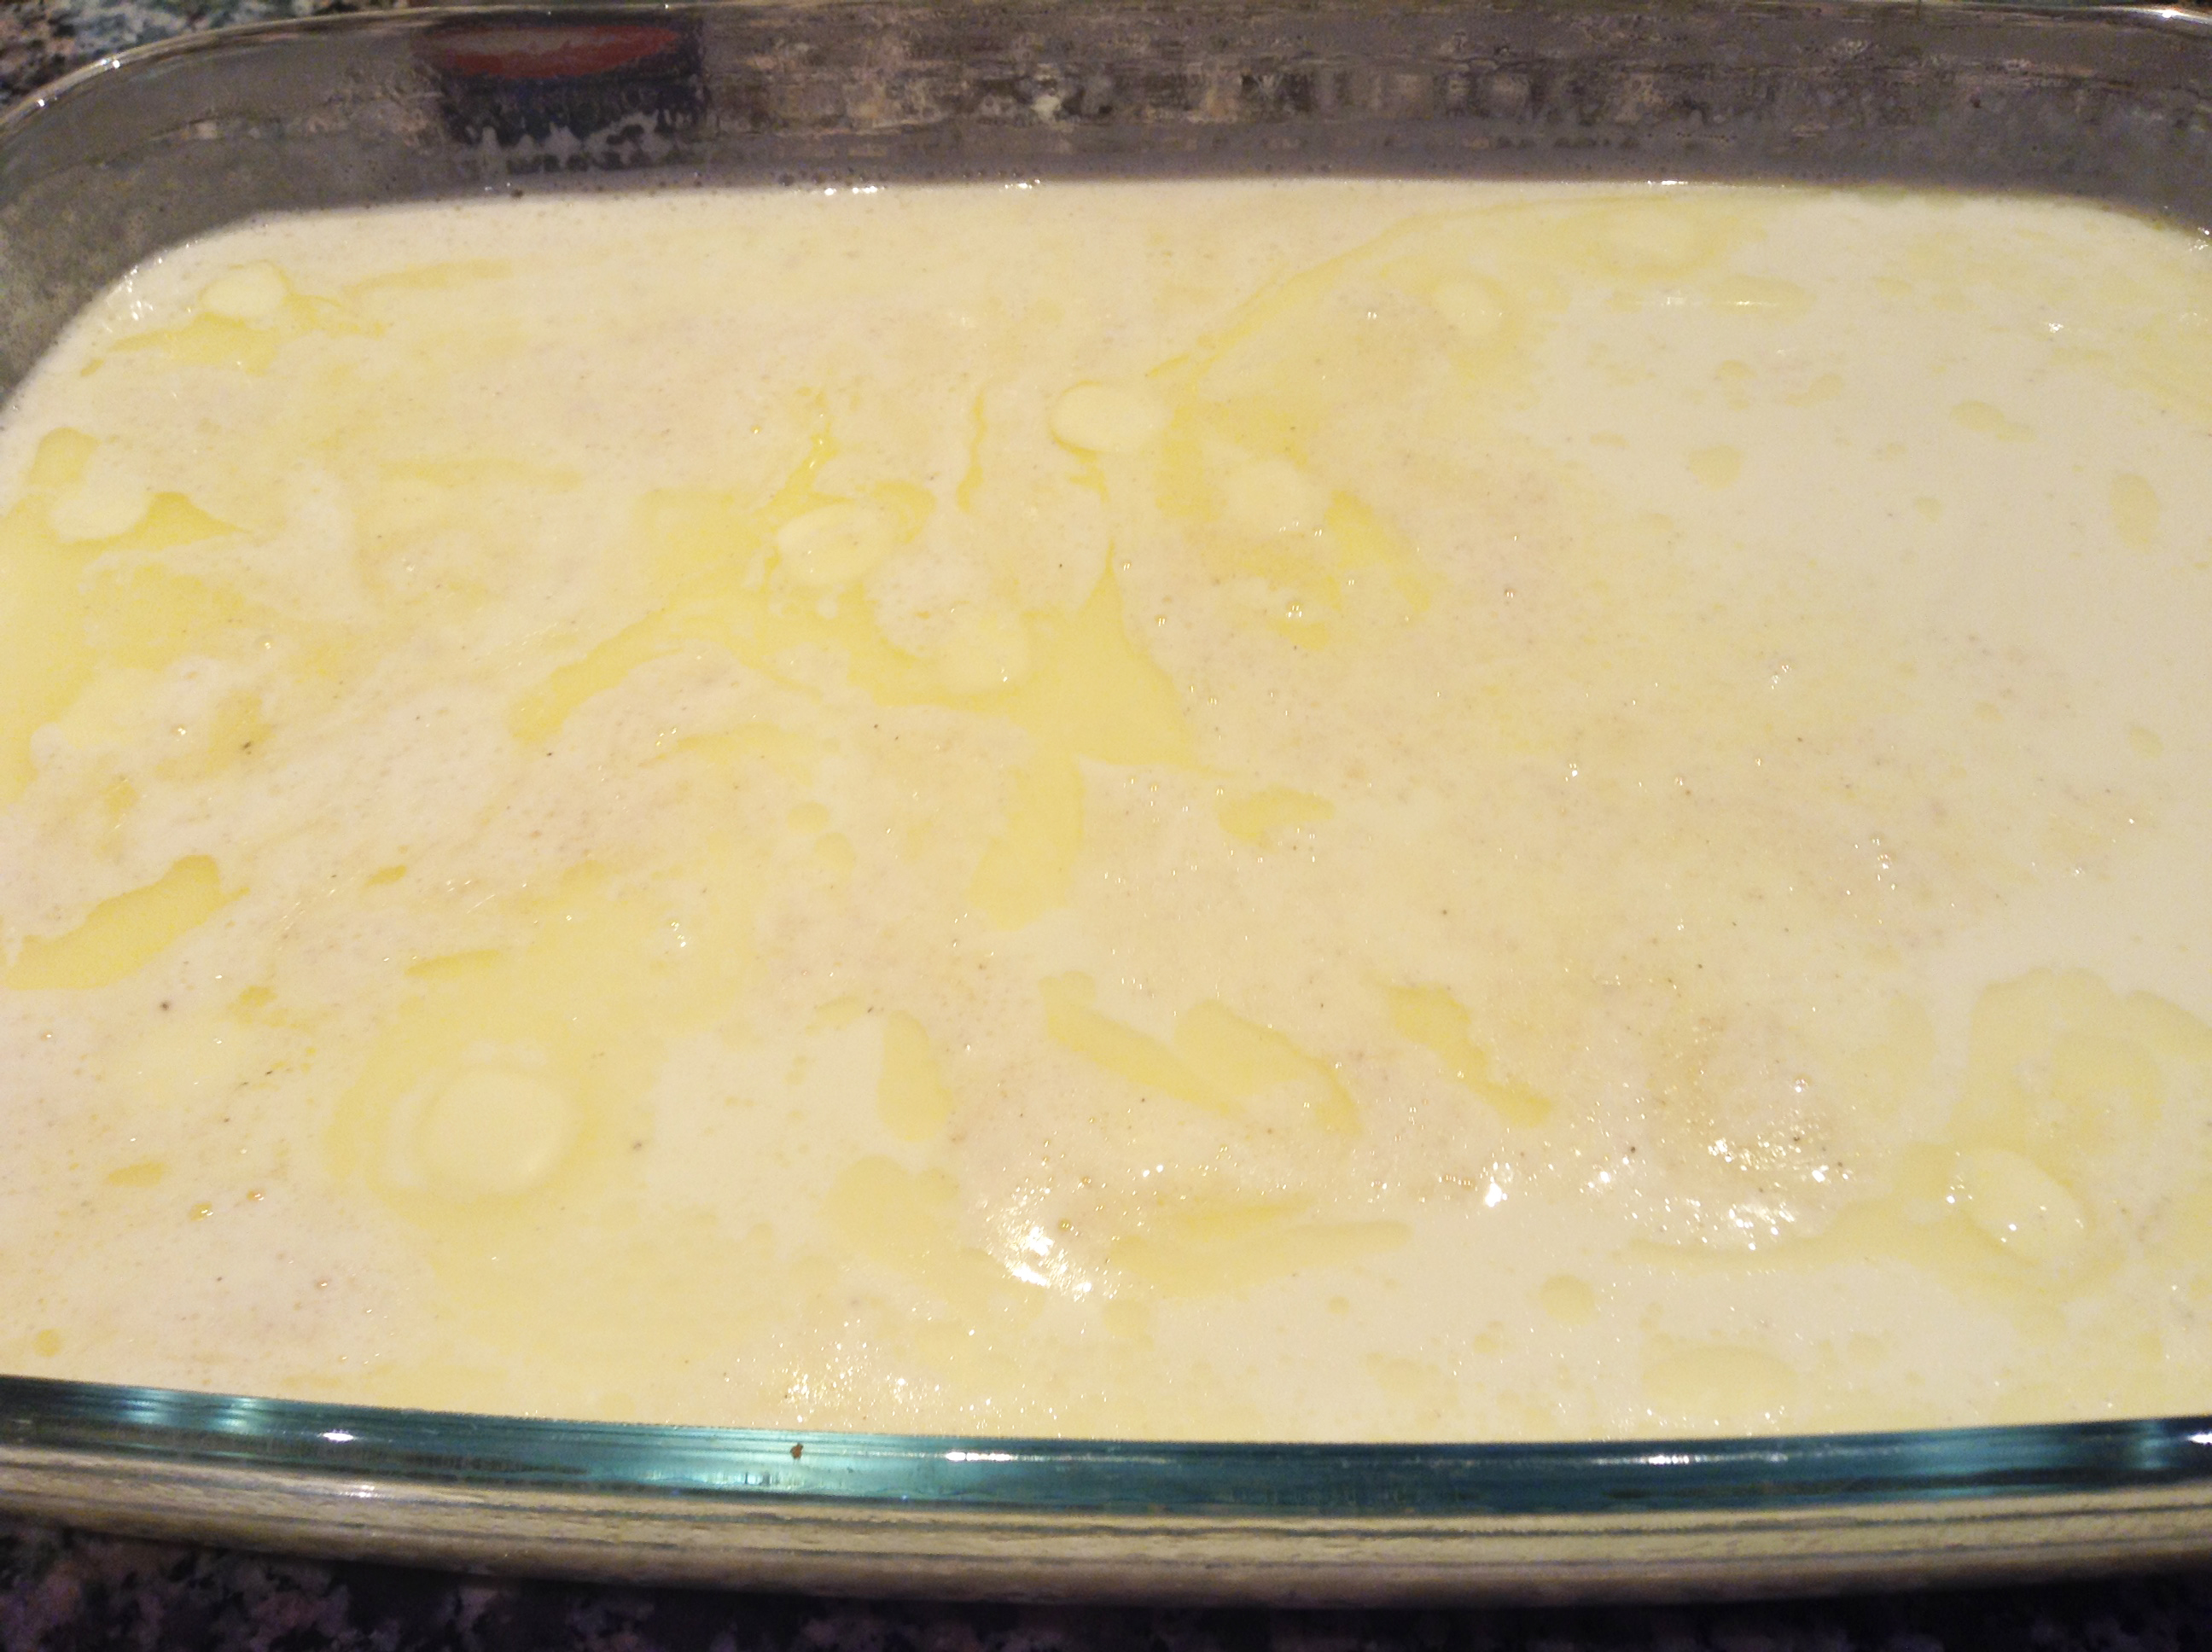
  3. Place the cream, milk, sugar, and a generous grating (or 1 tsp) of nutmeg in a medium saucepan. Scrape the seeds of the vanilla beans into the milk mixture (if using) or add the vanilla.
  4. Heat gently until almost simmering, then remove from the heat and pour over the rice, stirring well.
  5. Dot the butter over the top and place in the oven for 1 1/2 hrs, stirring after the first 30 min. At this stage, you can add an extra grating of nutmeg if you like.
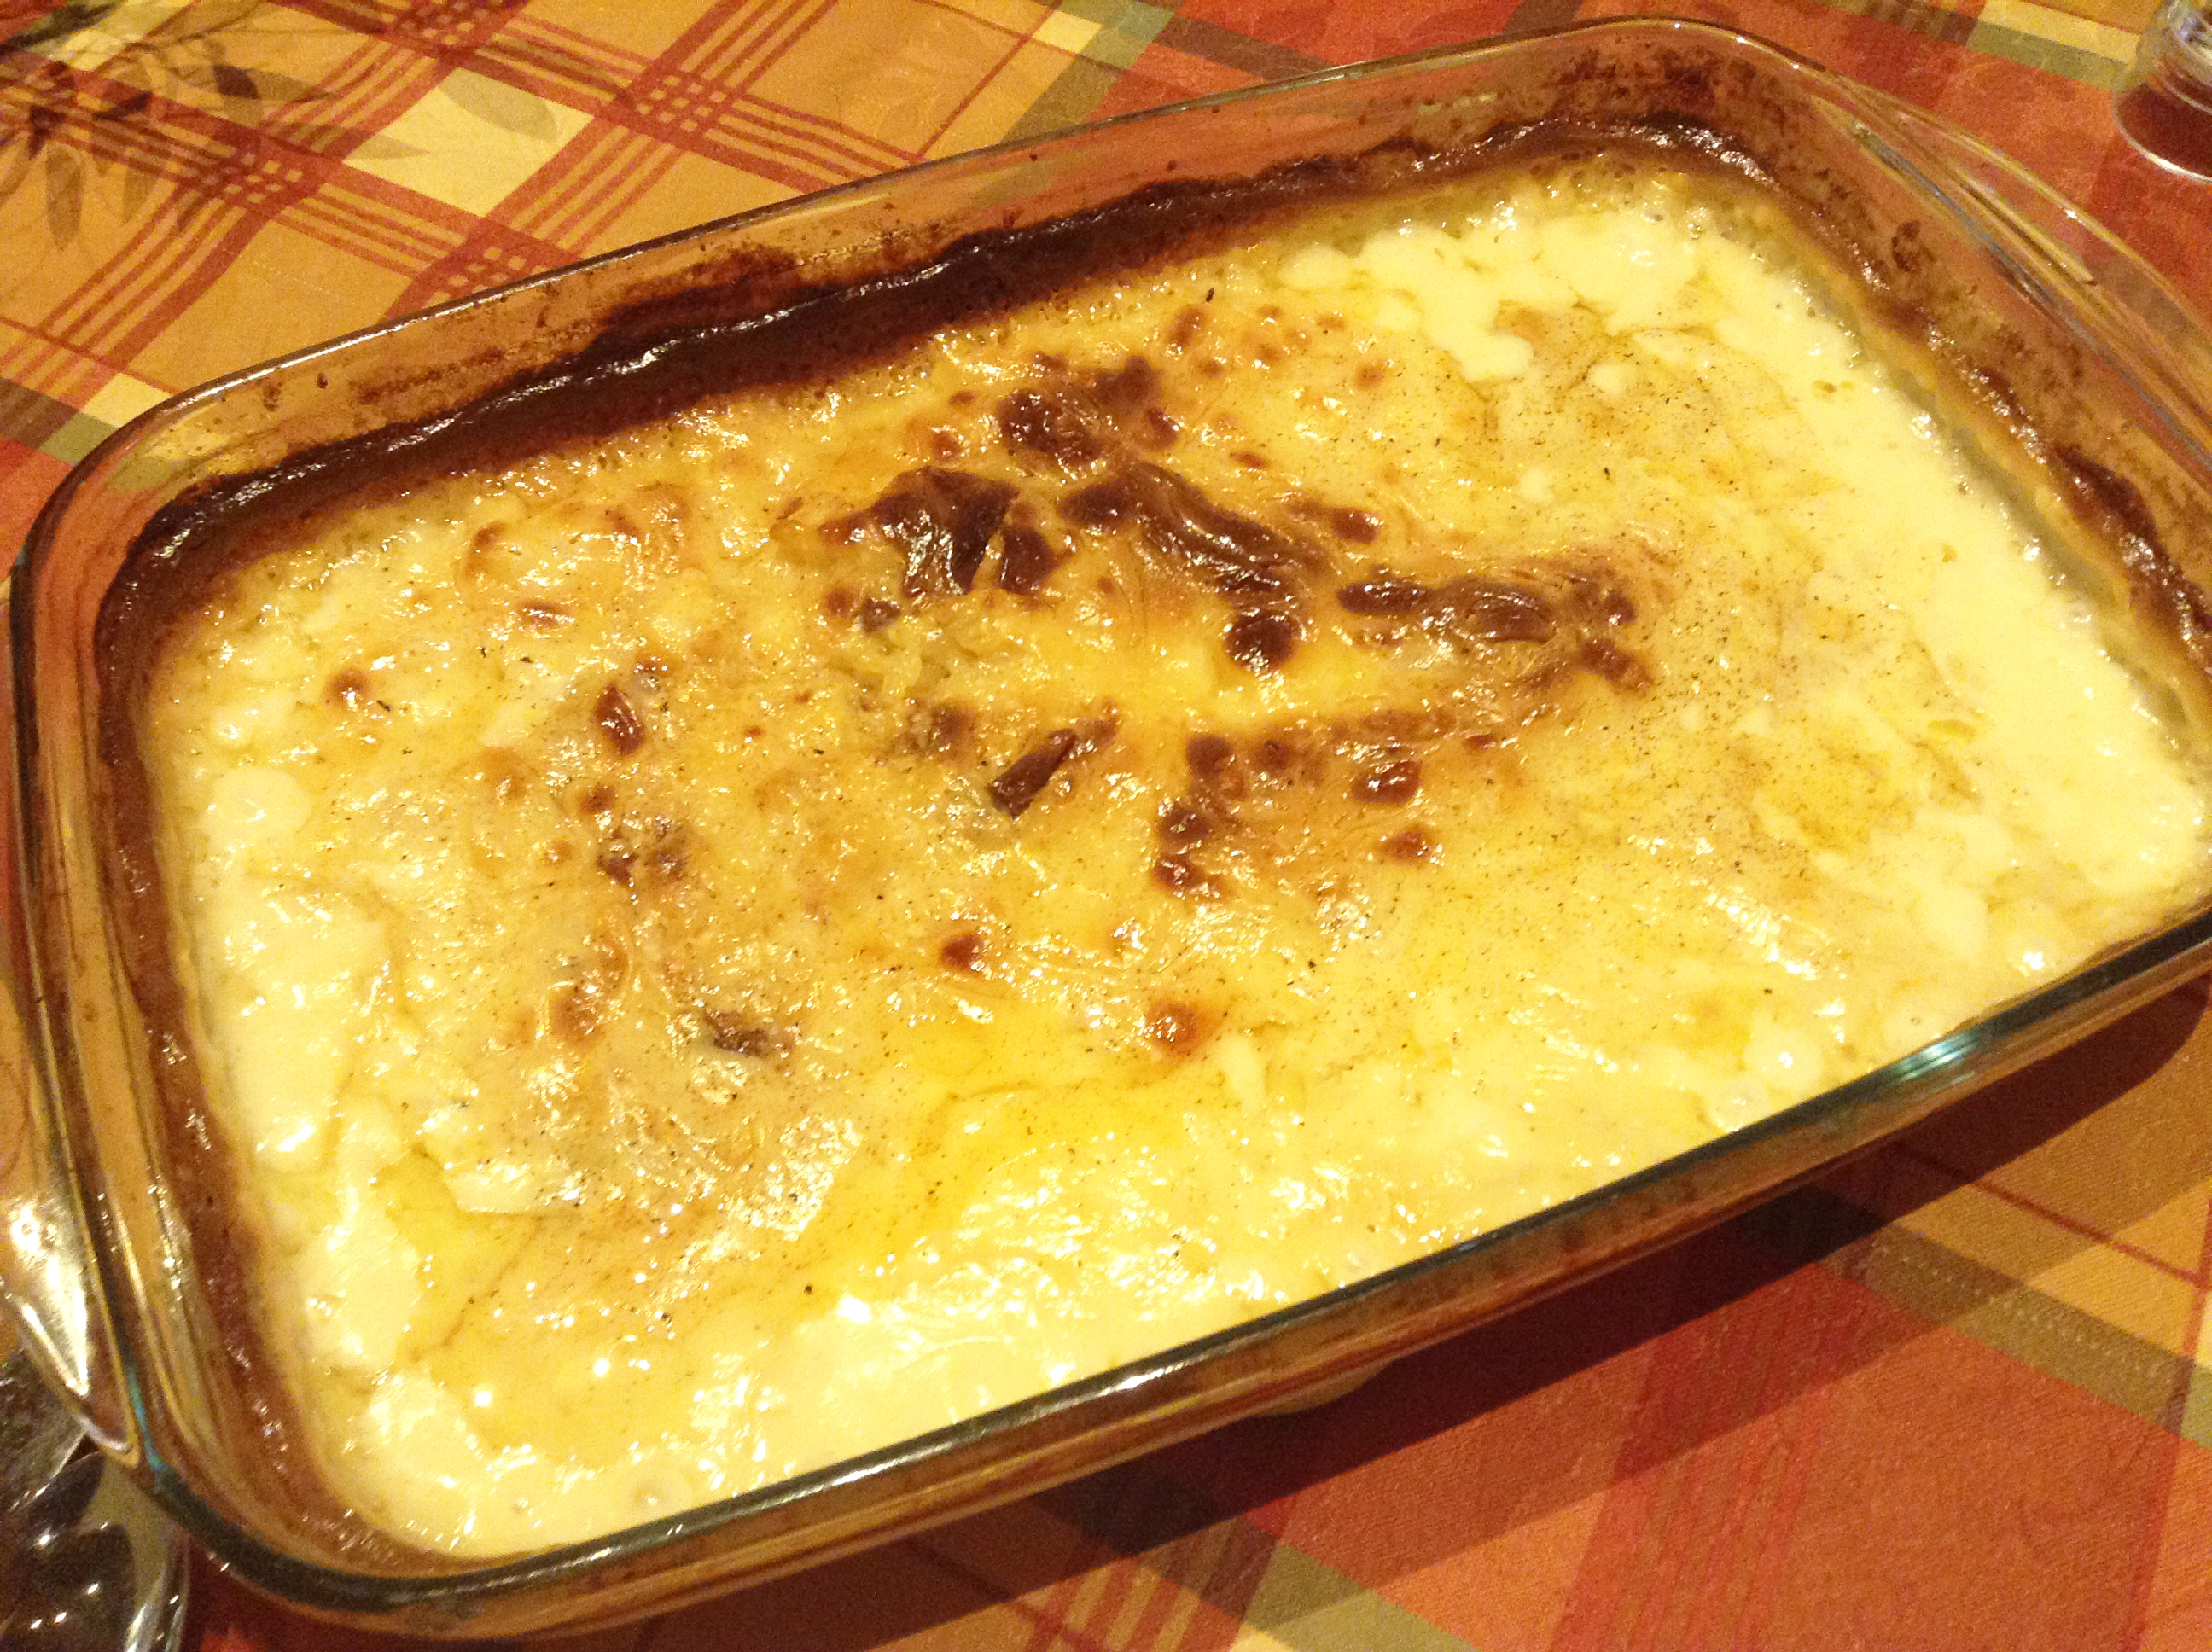
  6. If the pudding still seems very runny, return to the oven, checking every 10 min., until it is loosely creamy but not runny (the rice should be cooked, but the liquid will continue to be absorbed once you take it out of the oven).
  7. When the pudding is golden brown on top and has a soft,creamy texture, remove from the oven and allow to rest for 10 min. before serving.

monastery-pudding01 monastery-pudding02

Tantalizing Tangerine Crepes

“One of the things I most look forward to each time I come to Bethany is the luxury of my leisurely breakfasts. Sitting in the dining room enjoying the view of the harbor, I savor each bite of my beautifully prepared morning meal — such a lovely contrast to the hasty ‘no prep’ breakfasts I generally have before hurrying off to work each day at home.”

This testimonial came from one of our Bethany guests the last time she was with us. Looking at our upcoming guest list I realize that this very person is scheduled to be with us next week! Suddenly I have the perfect breakfast in mind for her, something that had recently caught my eye and made me want to improvise and try my own version of it. We will start her time at Bethany off with Tantalizing Tangerine Crepes. I can’t wait!

Print Recipe
Votes: 0
Rating: 0
You:
Rate this recipe!
Tantalizing Tangerine Crepes
SERVINGS
12crepes
CHANGE SERVING SIZE
crepes
COOK TIME
30minutes
PREP TIME
30minutes
READY IN
1hour

Ingredients

Instructions

  1. In a saucepan, combine sugar and 1 cup water and bring to a boil over high heat, stirring to begin dissolving sugar. Reduce heat to medium and simmer, stirring occasionally, until sugar has dissolved completely, 5 minutes. Add tangerines and continue to simmer 8 to 10 minutes, until fruit is translucent and syrup has thickened. Remove from heat, set aside, and let cool.
  2. In a blender, combine flour, eggs, melted butter, and milk, and blend until smooth.
  3. Place an 8-inch skillet over medium-high heat, add a knob of butter, and swirl pan to coat bottom evenly. Ladle 1/4 cup of crepe batter into hot pan and swirl pan to coat bottom evenly with batter. Cook until batter is lightly browned on bottom, about 1 minute. Using a small spatula, lift edge of crepe and flip it over. Cook other side until golden brown.
  4. Transfer to a warmed plate and repeat with remaining batter. To serve, fold 2 crepes in half, place them on a plate, and spoon some candied tangerines on top.

Posted in Uncategorized | 1 Reply

Good Friday Hot Cross Buns

Good Friday marks the second day of the Triduum (from the Latin for ‘three days’), the day on which we commemorate the Lord’s crucifixion and death. The Good Friday liturgies at our monastery (and many others around the world) mark our observance of Christ’s final hours, picking up from Maundy Thursday Eucharist, and continuing through the Holy Saturday Vigil, the Great Vigil of Easter, and carrying us all the way to Easter morning.

In keeping with the solemnity of the day, we remember Christ’s death by bringing to the liturgy of the hours the full range of spiritual depth and beauty found in the ancient texts; we participate in the veneration of the cross, and chant Gospel Passion Narrative. It is a special and holy time, filled with moments of silence, listening, reflection and conviction, as well as a time of joy-filled anticipation.

This day of the Cross marks us with God’s presence, and He marks us for his own.

Print Recipe
Votes: 8
Rating: 4.63
You:
Rate this recipe!
Good Friday Hot Cross Buns
SERVINGS
1dozen buns
CHANGE SERVING SIZE
dozen buns
COOK TIME
25mins
PREP TIME
30mins
READY IN
3hrs

Ingredients

Instructions

  1. Dissolve the yeast by sprinkling it over the very warm water and add a pinch of sugar to activate.
  2. Heat milk in a medium saucepan over low heat until about 100 degrees F. (but no more than 110 degrees)
  3. In a mixer, fitted with a dough hook, add the warmed milk to the yeast mixture.
  4. Plump the raisins (or currants) and citron in the microwave with a little orange juice; cool and set aside
  5. To the yeast & milk mixture add the remaining sugar, melted butter, egg yolk and extract.
  6. Add the salt, nutmeg, cinnamon and ginger to the mixture and continue kneading.
  7. Add the flour, 1 cup at a time, until the dough starts pulling away from the sides of the bowl.
  8. Remove the orange juice from the raisins and citron and discard.
  9. Add the raisins and citron to the dough and mix well. The dough should be slightly sticky and not dry.
  10. Knead until soft and elastic, about 8 min. Shape into a ball.
  11. Brush the inside of a large bowl with butter. Put dough in the bowl and turn to coat. Cover with plastic wrap and let rise at room temperature until doubled in size, about 1 hr. 30 min. **
  12. To form the rolls: Pam a 9x13” pyrex pan. Turn the dought out of the bowl and roll into a log. With a dough cutter or sharp knife, divide the dough into 12 equal portions. Roll each of these pieces into a round bun shape, tucking the edges under.
  13. Place them seam side down in the prepared pan, leaving a little space between each roll. Cover the pan with plastic wrap and let rise in a warm place until the rolls are doubled in size, about 45 min. or longer.
  14. Meanwhile, preheat your oven to 350 degrees F. and prepare your egg wash.
  15. Prepare glaze: In a mixer, combine powdered sugar, milk and vanilla or almond extract and oil until smooth (the oil will give it a high gloss). The icing should be quite thick. If too runny, add more powdered sugar. Transfer icing to a pastry bag or a ziplock bag with a corner snipped off.
  16. Remove the plastic wrap from the top of the rolls and brush the buns with egg wash. Bake rolls until golden brown and puffy, about 25 min. (an instant read thermometer inserted into the roll should read 190 degrees F.)
  17. Ice buns with a thick cross shape on the top of the warm buns and serve.

** Please note:  This dough might take a long time to rise, but be patient...it is worth the wait because they will come out nice and light!

Lemon Souffle Pudding Cake

As our choir was preparing for our Lenten concert program this past week, we reminded ourselves that the English word Lent is a shortened form of Old English len(c)ten, which means ‘spring’.  This means that Lent refers to ideas of rebirth, rejuvenation, renewal, resurrection and regrowth.

What could be more spring-like than a warm tart and sweet lemon soufflé?  As I was preparing this dessert as a gift for a friend, I looked out into our snow-covered yard imagining crocuses budding their heads out of the frozen earth as a promise of what lies ahead.

Print Recipe
Votes: 7
Rating: 4.29
You:
Rate this recipe!
Lemon Souffle Pudding Cake
SERVINGS
6people
CHANGE SERVING SIZE
people
COOK TIME
40-45mins
PREP TIME
30mins
READY IN
1.5hrs

Ingredients

Instructions

  1. A soufflé will work the best if all of your ingredients are at room temperature before beginning.

    Preheat oven to 325 degrees F and place rack in the center of the oven. Butter and dust with sugar six – 1 cup ramekins or other heatproof bowls or a six cup soufflé dish.
  2. Set aside 2 tablespoons of the sugar to use when whipping the egg whites. Place the remaining sugar in a medium sized bowl. Add the lemon zest to the sugar. With the beater attachment, grind the lemon zest into the sugar, creating a fragrant, slightly yellow tinged sugar. Working the zest into the sugar will release lots of the essential oils in the zest, creating a super lemony batter.
  3. In the bowl of your electric mixer or with a hand mixer, cream the lemony sugar and softened butter. Add the three egg yolks, one at a time, and beat until incorporated. Beat in the vanilla extract. Add the flour and salt and beat until combined (do not over mix)
  4. With the mixer on low speed, gradually pour in the lemon juice and milk. Set aside while you beat the egg whites.
  5. In a clean bowl of your electric mixer, or with a hand mixer, beat the egg whites until frothy. Add the cream of tartar and continue to beat until soft peaks form. Gradually add the remaining 2 tablespoons of sugar and beat until stiff peaks form.
  6. Gently fold the egg whites into the batter, in three additions, mixing only until incorporated.
  7. Carefully pour (or use a ladle) the batter into the prepared ramekins. (The batter does not rise much during baking so you can fill the ramekins almost to the rim.)
  8. Place the ramekins or soufflé dish in a larger baking pan. Boil a tea pot of water to create a water bath. (A water bath is used to provide temperature protection for the eggs.)
  9. Place the basting pan with the souffle inside into the oven, carefully pulling the oven rack out a bit. Carefully pour in enough hot water so that the water is halfway up the sides of the ramekins or soufflé dish, and carefully slide the rack back into the oven.
  10. Bake for about 40 – 45 minutes or until the sponge cakes are golden brown and a toothpick inserted into the cake portion comes out clean. Be careful not to insert the toothpick into the lemon sauce at the bottom of the ramekins. Remove the ramekins from the water bath and cool slightly before serving.

This dessert can be served warm or at room temperature. Dust the tops of the puddings with confectioners sugar and dress with a dollop of whipped cream and fresh berries or lemon slices.

Lemon Cream Custard Pie

Lemon meringue pie has always been my most favorite lemon dessert, but recently I was introduced to another lemon dessert that really rivals it: Lemon Cream Custard Pie. Similar in its fresh tangy flavor, but different in texture and topped with whipped cream instead of meringue.  I have only had it once but definitely want it again.

Lemon Cream Custard Pie

Print Recipe
Votes: 2
Rating: 1.5
You:
Rate this recipe!
Lemon Cream Custard Pie
SERVINGS
1pie
CHANGE SERVING SIZE
pie
COOK TIME
15 mins.
PREP TIME
READY IN
12hrs.

Ingredients

Instructions

  1. In saucepan, mix sugar, pinch of salt, cornstarch, butter, lemon peel, lemon juice, egg yolks and milk; stir and cook until thick, about 5-10 minutes.
  2. Cool.
  3. Fold in sour cream.
  4. Pour into pastry shell.
  5. Refrigerate at least 12 hours.
  6. Serve with sweetened whipped cream.
  7. Garnish as desired.

Little Nectarine Cake

We are exceptionally fortunate to have a variety of fruit trees so close to the convent where we can actually see the fruit daily ripening on their branches. I never tire of watching them, year after year, as they develop from buds and blossoms to fully formed peaches, plums, pears and apples. Right now nectarines are the main attraction and center stage in all their beauty, with peaches just behind waiting in the wings to make their appearance.

There is a sweet little cake with a zesty fresh lemon flavor that lends itself perfectly as an accompaniment to any fresh fruit.  It is a simple to mix batter into which you add slices of your choice of fruit according to the season; apricots, peaches and apples. It is surprisingly versatile and appealing and can be served in many ways.  Lovely all by itself with a cup of tea, or alongside a dish of fresh fruit, it also packs nicely into a lunch box or picnic basket. This morning a beautiful basket of freshly picked nectarines appeared on the kitchen counter, some of them still on their leafy branches. This afternoon we made little nectarine cakes. They all disappeared in no time.
Little Nectarine Cake
Print Recipe
Votes: 0
Rating: 0
You:
Rate this recipe!
Little Nectarine Cake
SERVINGS
12muffins
CHANGE SERVING SIZE
muffins
COOK TIME
20mins.
PREP TIME
READY IN

Ingredients

Instructions

  1. Preheat oven to 350°.
  2. Coat 12 muffin cups with non-stick spray.
  3. Whisk flour, baking powder, and salt in a medium bowl.
  4. Using an electric mixer, beat butter and sugar in another medium bowl, until light and fluffy about 2 minutes.
  5. Add egg, lemon zest, and vanilla and beat until combined.
  6. With mixer on low speed, add dry ingredients in 3 additions alternately with milk in 2 additions, beginning and ending with dry ingredients.
  7. Divide batter among muffin cups (cups will be only 1/3 full) and smooth tops.
  8. Top with nectarine slices and sprinkle with sugar.
  9. Bake until cakes are golden and toothpick comes out clean, 20-25 minutes.
  10. Transfer pan to a wire rack; let pan cool 5 minutes, then transfer cakes to a rack and let cool completely.
  11. Cakes can be made one day ahead. x
  12. Cakes can be made one day ahead.
  13. Store airtight at room temperature. Makes 12.