I think the biggest event of this past week (well, maybe not, but it seems that way…) was the visitation of the wild turkey. I was talking with a friend in one of the offices and she suddenly jumped up and said “there’s a wild turkey!” and ran out the door. He appeared in the entryway to our common, and proceeded to climb up onto the guest house patio, as if he belonged there. What a handsome fellow! I had never seen one close up, and it was a real treat to see him strutting back and forth, admiring himself in the windows.
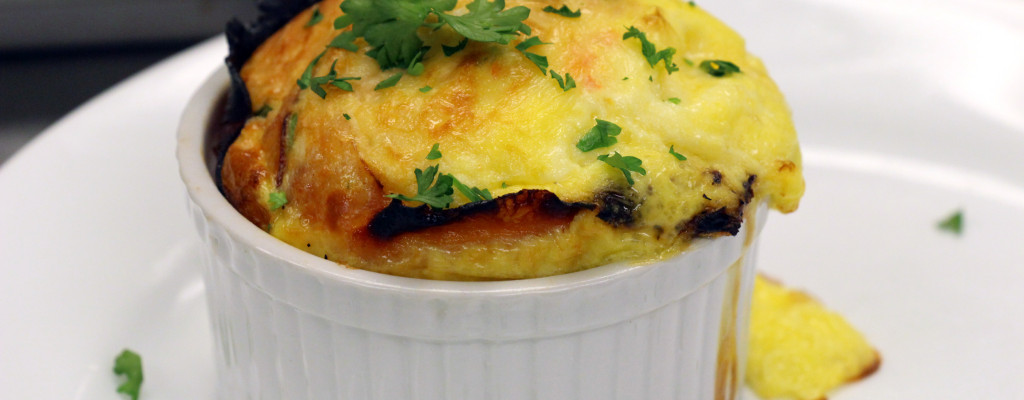
For a recent brunch type reception, I was asked to come up with a mini egg dish that was similar to quiche, but not heavy. We tried a number of things, and discovered a delicious breakfast option. We tried it first in pastry, which is nice, but then switched it to a ham cup and…oh my!!! Here they are in a breakfast-sized form, which we made for a retreat this past weekend, but you can also do them mini-size, which are delightful for a brunch reception!
Print Recipe
Votes: 0
Rating: 0
You:
Rate this recipe!
Fluffy Breakfast Eggs in a Ham Cup
SERVINGS6servings
|
COOK TIME25mins. |
PREP TIME |
READY IN |
Ingredients
Instructions
- Preheat oven to 375 degrees F.
- Spray 6 ramekins with cooking spray.
- Line with ham, trimming so you don’t have too much overhang — just a little border of ham over lip of ramekin.
- Saute red pepper and onion until soft.
- Divide cheeses and pepper/onion mixture among ramekins.
- Whip eggs and egg whites with salt until frothy, then add chives and sour cream.
- Divide among the ramekins evenly.
- Bake in a 375 degree oven until puffed and golden, about 25 minutes.
Notes:
You can use any kind of cheese or fresh herbs, according to your preference. Have fun!
It is a sunny, slightly warm day here on the Cape, but cold weather is on its way again soon. I’m not quite ready for spring, though, I am still waiting for the BIG snow of the season. We did have a couple of snow falls of a couple of inches, but I would really love a good 10 to 12 inches. Snow is also great for the garden, and we are already planning what vegetable seeds to buy, along with starting another plot for a garden, so please pray that we get the big storm!
I recently had a birthday and was given one of my favorite desserts — a coconut cream trifle. I have served this in little glasses, and called it coconut cake in a glass — and it is truly divine. This recipe is a little complicated and time consuming, but I promise it is well worth the effort for any event or family gathering.
Coconut Cake in a Glass, or Coconut Cream Trifle
Print Recipe
Votes: 0
Rating: 0
You:
Rate this recipe!
Coconut Cake In A Glass, Or Coconut Cream Trifle
SERVINGS
|
COOK TIME30mins. |
PREP TIME |
READY IN40mins. |
Ingredients
Instructions
First make the simple syrup:
- Bring water and sugar to a boil.
- Stir in the coconut, remove from the heat and let sit for about 30 minutes.
- Strain the liquid into a clean saucepan, bring to a boil and let cook until the mixture is slightly reduced, about 5 minutes.
- Let cool.
Then the custard:
- Bring milks to a simmer over low heat in a nonreactive saucepan.
- Whisk together the yolks, sugar, and cornstarch in a large bowl.
- Whisk in a small amount of the milk mixture to the egg mixture to temper the eggs, then slowly whisk in the rest until smooth.
- Return mixture to the pot over medium heat, and bring to a boil, whisking constantly, until thickened.
- Scrape mixture into a bowl, and whisk in the rum and vanilla extract. Let cool to room temperature, then cover with plastic wrap and refrigerate until cold.
Now the cake:
- Preheat the oven to 350 degrees F.
- Generously butter and flour 2 (9″by 2″) cake pans and line bottoms with parchment paper.
- Whisk together the milk, egg whites, vanilla in a medium bowl.
- In the bowl of a mixer fitted with a paddle attachment, mix together the flour, sugar, baking powder and salt.
- With mixer running at low speed, add the butter, one piece at a time, and continue beating until mixture resembles moist crumbs.
- Add all but 1/2 cup of milk mixture to crumbs and beat at medium speed until the mixture is pale and fluffy, about 1 1/2 minutes.
- With mixer on low speed, add remaining milk mixture, increase speed to medium and beat 30 seconds more.
- Scrape sides of bowl and mix for another 20 seconds.
- Divide batter between the 2 pans and smooth tops with a spatula.
- Bake until a toothpick inserted into the center comes out with a few crumbs attached, about 22 to 24 minutes.
- Cool for 10 minutes on a rack, then invert onto the rack, removing the parchment. Let cool completely.
- Toast the 1 cup of coconut until golden for topping.
- Whip the 1 1/2 cups of cream, and fold 2/3 of it into the cooled custard for the filling between layers of cake, reserving the last 1/3 for the final layer of the dessert.
To assemble:
- Slice each cake into 2 layers, brush with the simple syrup, and then chunk up into bite size pieces.
- You can make these either individually in glasses, or for a crowd in a large glass bowl.
- Put a layer of cake pieces in the bottom of your container, then a layer of the custard mixture, continuing until your container is full, final layer being the last 1/3 of the whipped cream, and sprinkle with the toasted coconut.
- This is most delicious if you refrigerate it for a couple of hours so the flavors meld.