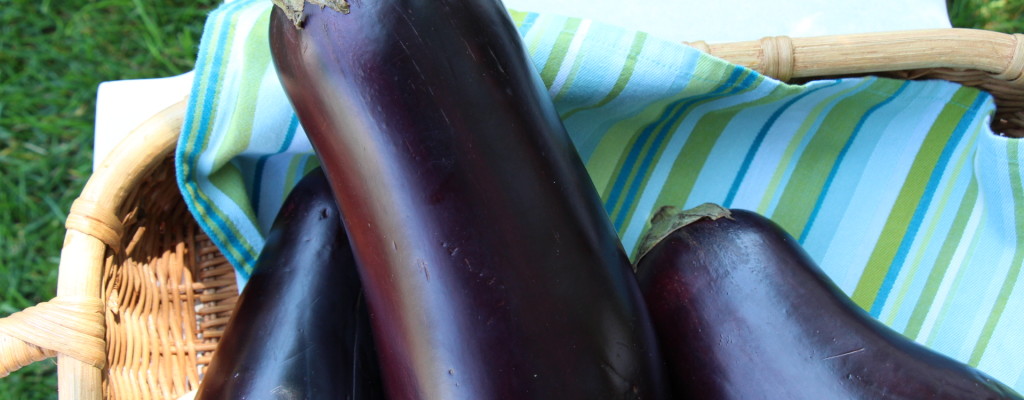
As I helped clear the Retreat lunch tables, one of the leaders, a good friend (and one of my most honest) looked up at me with a smile on his face and a twinkle in his eye. “Delicious, Sister Irene,” he said, “But why is it that people in general seem to think that the only way to cook eggplant is with tomatoes?” Well, here was a question I’d never before been asked that made me stop and think. I didn’t feel it was a complaint or criticism so much as a challenge. He appeared to have enjoyed my eggplant Parmesan because his plate was clean. He’d even had a second helping!
His forthrightness set me on a course that expanded my eggplant repertoire. Up until then I had pretty much settled for recipes I’d felt comfortable making and knew most people liked. But he was a Southerner and his tastes were more towards creamy-styled dishes than Mediterranean. I asked him for suggestions and then launched into an exploration of tomato-less eggplant dishes. After trying multiple ones I settled on several favorites that I’ve stuck with over the years, this being one that both he and I like—you may, too.
Print Recipe
Votes: 4
Rating: 4.75
You:
Rate this recipe!
Recipes From A Monastery Kitchen
SERVINGS6servings
|
COOK TIME45mins. |
PREP TIME |
READY IN |
Ingredients
Instructions
- Cook eggplants in 2 quarts salted, slightly boiling water for 15 minutes or until tender.
- Remove skins and mash pulp; add 2 Tablespoons butter, yolks, cream, and season to taste with onion salt and pepper.
- Soak bread crumbs in milk and squeeze crumbs in a dry cloth to remove moisture.
- Add crumbs to eggplant.
- Fold in egg whites and turn into generously buttered soufflé dish.
- Sprinkle with almonds mixed with the same amount of toasted bread crumbs and a little melted butter. Bake for 30 minutes in a 400 degree oven.
- Serve immediately in the baking dish.
Don’t you love it when something unexpected thwarts your plans forcing you to take a different course which then turns out to be a blessing in disguise? I do! That’s what happened to me the other night. Dinner was scheduled to be barbequed ribs, corn-on-the-cob and salad. The sister unfortunately had to be elsewhere and there was no one available to replace her. What a predicament! What to do about the ribs was the big question. I ran down the list of possible substitutes but nothing clicked or felt just right. I flipped on the oven to 450 degrees seasoned the meat generously with onion salt and spread them out on a baking sheet and left them alone for 45 minutes. The result??? Gorgeous golden ribs, crisp and crunchy on outside, tender, juicy and succulent on the inside. They had simply cooked themselves with no help from anyone! Served with a choice of our favorite prepared chutney, sweet and sour sauce or barbeque sauce and a sprinkling of fresh chopped mango they made a huge hit. Everyone had a great time dipping and trying each sauce to their own liking and some chose to have them just as they were straight out of the oven. If anyone was terribly disappointed at not having our usual, fall off the bone saucy cooked ribs they soon forgot it or at least never mentioned it. What most of them asked was “How come we don’t have ribs this way more often?”
Fast Crispy, Crunchy Ribs
Print Recipe
Votes: 0
Rating: 0
You:
Rate this recipe!
Fast Crispy, Crunchy Ribs
SERVINGS
|
COOK TIME45mins. |
PREP TIME |
READY IN |
Ingredients
Instructions
- Season ribs generously with onion salt, roast on baking sheet or roasting pan at 450 degrees for 45 minutes.
- Garnish with fruit if desired.
It is so amazing to me how the humble little garbanzo bean has grown in popularity over recent years and so firmly established itself in our American diet. Because it is so rich in protein and fat free it is a healthy source of nourishment. Recent tests have now verified that adding garbanzos to one’s diet reduces, in many people, craving for other less wholesome foods. These little chickpeas, as some people prefer to call them, are a fantastic snack roasted in a little olive oil and sprinkled with onion salt or other favorite seasonings.
But our favorite way of having them at the convent is in the form of homemade hummus with pita pockets – when sisters see this on the lunch menu a cheer sounds throughout. Everyone goes away from the meal happy- including the kitchen crew because it is such an easy meal to prepare to eat and to clean up.
Print Recipe
Votes: 0
Rating: 0
You:
Rate this recipe!
Basic Plain Homemade Hummusv
SERVINGS
|
COOK TIME |
PREP TIME |
READY IN |
Ingredients
Instructions
- Puree in food processor to desired taste and consistency.
The convent is very fortunate to have so many sisters who love to bake bread. As a result we enjoy it with many of our meals. Years ago we started making our own whole wheat bread (even grinding our own wheat) and ever since, it has become breakfast toast most mornings. Then we experimented with other varieties as more sisters became interested in learning to bake. One sister is now especially acclaimed for her Italian bread sticks, foccacia and pizza crusts. Another specializes in calzones and yet another in whole wheat pita pockets to go with her own homemade hummus.
Every Wednesday night during Lent we have a simple supper of soup, salad, fruit, and home baked bread while we discuss the week’s study topic. Last week we enjoyed a great oatmeal molasses bread — one of our most popular varieties. But tonight we are having our special dill bread. Beautiful golden braided loaves, equally as appealing when baked into little bow knot rolls.
If you have never tried your hand at baking bread you might be surprised to discover as so many others have that it is really very easy, very therapeutic and tremendously rewarding
Print Recipe
Votes: 10
Rating: 4.2
You:
Rate this recipe!
Dill Bread
SERVINGS36rolls
|
COOK TIME |
PREP TIME |
READY IN1hour |
Ingredients
Instructions
- Preheat oven to 375 degrees.
- Dissolve yeast in warm water; add milk, sugar, onion salt, eggs, shortening or margarine, and 6 cups of flour.
- Mix well.
- Add enough of the remaining flour to make a soft dough.
- Knead until smooth and elastic.
- Place in a greased bowl, cover, and let rise until doubled in bulk (about 1 hour).
- Punch down and form into rolls or loaves.
- Place on a greased pan and let rise until doubled in bulk.
- Bake for 12 to 15 minutes for rolls and between 30 to 40 minutes for loaves.
For almost ten years, a group of us met every Monday at 6:00 am to research, study, discuss, and plan the art work for our church. To make the early morning work more palatable, I prepared breakfast for the group. I loved doing it, they loved eating it, and showered me with compliments for the food. All around it was a most pleasant experience which we still refer to from time to time. I was particularly proud of my individual omelets which I felt I’d mastered the art of making. They were perfectly golden browned on the outside, while light and moist on the inside. Everyone raved about them including Tom, our widely traveled food connoisseur.
However, twice after serving them he asked me “Do you ever make frittatas”? Well no I hadn’t, nor had I ever had any desire to. For some reason I pictured them as a heavy baked egg dish which held no appeal to me, and I am ashamed to say that I let years go by before ever trying them. However, once I did, I immediately understood the reason for Tom’s question. Now I am an avid frittata fan, and I ask you, “Do you ever make frittatas”? If not, don’t wait as long as I did to try one. Start now. You’ll be glad you did. One secret: Don’t over bake!
Greek Frittata
Print Recipe
Votes: 0
Rating: 0
You:
Rate this recipe!
Greek Frittata
SERVINGS4servings
|
COOK TIME30 – 35mins. |
PREP TIME |
READY IN |
Ingredients
Instructions
- Heat toaster oven to 350 degrees F.
- Add the oil to a 2-quart casserole and transfer to oven for 5 minutes.
- Meanwhile, in a bowl, whisk together the eggs, salt and pepper.
- Add the spinach, tomatoes, bacon, scallions and combine.
- Gently stir in the Feta.
- Remove the casserole from the oven.
- Pour the egg mixture into the casserole.
- Bake until the frittata is browned around the edges and slightly puffed and a knife comes out clean, 25 – 30 minutes.
Fresh Pear Blue Cheese Salad
A perfectly ripened pear is a beautifully elegant sight to behold. Equally as satisfying to senses is the savoring of its taste. Here again is something so naturally delicious it needs no enhancing. Be that as it may, whenever I’ve served a Fresh Pear Blue Cheese Salad the responses are so overwhelming that I keep wondering why I don’t do it more often. These two ingredients so naturally compliment each other when “peared” together, it’s as though they were made for each other. Here is all you do to create this marvelous tasting sensation:
Place one beautiful lettuce leaf on a serving plate. Top with a handful of cut lettuce. Drizzle with your favorite ranch dressing. Place a pear half cavity side up. Fill with a spoonful of thick sour cream seasoned with onion salt. Sprinkle the entire salad as generously or as sparingly as desired with crumbled blue cheese. Sprinkle the entire salad with lightly salted toasted pecans. The key of course is the perfectly ripened beautiful fresh pear.
Print Recipe
Votes: 0
Rating: 0
You:
Rate this recipe!
Fresh Pear Blue Cheese Salad
SERVINGS
|
COOK TIME |
PREP TIME |
READY IN |
Ingredients
Instructions
- Place one beautiful lettuce leaf on a serving plate.
- Top with a handful of cut lettuce.
- Drizzle with your favorite ranch dressing.
- Place a pear half cavity side up.
- Fill with a spoonful of thick sour cream seasoned with onion salt.
- Sprinkle the entire salad as generously or as sparingly as desired with crumbled blue cheese.
- Sprinkle the entire salad with lightly salted toasted pecans.
- The key of course is the perfectly ripened beautiful fresh pear.