Gluten Free Crepes

Print Recipe
Votes: 0
Rating: 0
You:
Rate this recipe!
Gluten Free Crepes
SERVINGS
14crepes
CHANGE SERVING SIZE
crepes
COOK TIME
5mins
PREP TIME
5mins
READY IN
10mins

Ingredients

Instructions

  1. Combine all of the ingredients in a blender and mix until batter is smooth ( 15-20 seconds).
  2. Spray non-stick cooking spray onto a 8 inch frying or crepe pan. Pour 1/4 cup batter into the pan and cook over medium-low heat. Turn pan immediately from side to side to evenly coat the bottom of the pan.
  3. Cook for 1-2 minutes per side, or until lightly golden. Remove from heat and stack with a piece of baking paper between each one until ready to serve.
  4. Serve with your favorite toppings...we love fresh fruit!

Coconut Any Way You Slice It!

Print Recipe
Votes: 0
Rating: 0
You:
Rate this recipe!
Coconut Any Way You Slice It!
With daffodils and crocuses springing up everywhere, what could be more appealing on these beautiful April days, than a coconut cream pie—and prepped in a surprisingly simple way!
SERVINGS
8-10
CHANGE SERVING SIZE
COOK TIME
10mins
PREP TIME
45mins
READY IN
1hour

Ingredients

Instructions

Pie Crust
  1. Preheat oven to 375 degrees
  2. Combine salt and flour; cut in shortening with 2 knives or pastry cutter, until pea-size pieces.
  3. Add water a little at a time, using a fork toss lightly and mix until it holds together. Don’t over mix!
  4. Shape dough into a flat disk, gently roll out and place in a pie plate, crimping until the edge firmly grips the top of the dish.
  5. Brush lightly with the egg mixture to make if flakey and crisp; with a fork poke holes
  6. Bake for about 8-10 minutes, or until golden
Pie Filling
  1. While crust is in the oven, make pudding following the directions on the box, adding salt, coconut flavoring; chill in the refrigerator until firm, about 20 minutes
  2. In a small pan, toast 1/4 cup of coconut in the oven for 3-4 minutes until light brown
  3. Fold a generous spatula full of cool whip into pudding, adding 1/4 cup of coconut
  4. Spoon into cooled pie crust, top with more cool whip (or whipped cream) and sprinkle toasted coconut on top

Frosted Lemon Sugar Cookies

Print Recipe
Votes: 0
Rating: 0
You:
Rate this recipe!
Frosted Lemon Sugar Cookies
Everyone in the neighborhood knew that my mother made the best sugar cookies on the block, but not everyone knew what made them them the best… When I discovered the secret I felt I’d made one of the greatest discoveries in the culinary world. Mama’s good friend Olga was Jewish and never used dairy products, so instead of butter she substituted schmaltz--which is rendered chicken fat--that gives the recipe a distinct flavor and richness unlike any other shortening--including real butter!
SERVINGS
2dozen
CHANGE SERVING SIZE
dozen
COOK TIME
10mins
PREP TIME
20mins
READY IN

Ingredients

Instructions

Cookies
  1. Preheat oven to 350 degrees.
  2. Cream schmaltz and sugar in an electric mixer using a paddle attachment.
  3. Add eggs (one a at time), lemon juice and lemon zest. Beat until well incorporated.
  4. Slowly add flour, baking soda and salt.
  5. Roll dough into balls roughly 1 ½ inches wide and place on a greased cookie sheet, or a baking sheet lined with parchment. Press each cookie with a bottom of a glass dipped in sugar.
  6. Bake for 10 minutes or until the bottoms are slightly golden. Remove and cool completely.
Frosting
  1. Combine all the ingredients until it reaches a creamy consistency. If it’s too thick, add either lemon juice for an extra shot of lemon or milk until it thins to the desired thickness.
  2. Either frost with a spreader (pictured) or pipe onto the cookies and enjoy!

Chocolate Babka

One of our sisters has a special interest in cooking the foods of other countries. Over time she has heard me repeat many stories of my Ukrainian mother’s experiences with food and what I learned about it through her.

Perhaps my favorite memory is that of packing our picnic boxes for our all-day blueberry picking excursions. These always contained fresh baked babka, lots of butter some fresh boiled eggs from our chickens and a little horseradish root from our garden. Today’s blog features a glorified babka bread filled with chocolate…enjoy!

Print Recipe
Votes: 0
Rating: 0
You:
Rate this recipe!
Chocolate Babka
SERVINGS
2loaves
CHANGE SERVING SIZE
loaves
COOK TIME
30mins
PREP TIME
20mins
READY IN
5 1/2hrs (3 hrs rising, 2 1/2 chilling)

Ingredients

Instructions

Babka Dough
  1. Combine yeast with warm water and let stand until it begins to bubble, about 5-8 minutes.
  2. Mix flour, sugar, yeast, and lemon zest in a mixer on a low speed until combined.
  3. Add eggs and water, and mix on medium speed until dough comes together, 2-3 minutes. Add salt, then butter, adding a few cubes at a time, mixing until thoroughly combined. Continue mixing for about 10 minutes on medium speed, until dough is completely smooth,and pulls away from the sides of the bowl. Be sure to scrape the sides of the bowl during this step!
  4. Place dough in a large greased bowl cover with plastic wrap. Let rise in a warm place until doubled in size.
  5. Grease two 9x4 inch loaf pans with oil and line the bottom of each pan with waxed paper. Divide dough in half and keep one half covered in the fridge.
Filling and Baking
  1. Whisk together powdered sugar, cocoa powder, chocolate, and butter until you have a spreadable paste.
  2. Roll out dough on a lightly floured surface and shape into a rectangle as wide as the pans are long.
  3. Position dough so that a long side is closest to you and spread half of the chocolate mixture over the rectangle, leaving a ¾ inch/2 cm border all around.
  4. Roll up the rectangle like a jellyroll, starting from the long side closest to you and ending at the other long end. Press to seal the dampened end, then use both hands to even out the roll into a uniform roll and place it on your surface seam side down.
  5. Trim about ¾ inch/2 cm off both ends, and slice the loaf into even 1-inch segments. Cover the pan loosely with plastic wrap and leave to rise in a warm place for 1½ hours.
  6. Preheat oven to 375°F. Remove plastic wrap and place loaves on middle rack of oven, and bake for about 25-30 minutes.
  7. Remove from oven when done and let cool. Babka will stay fresh for 24 hours in an airtight container at room temperature or tightly wrapped--don’t place in the fridge.
  8. Babka freezes well for up to 2 months. To thaw, leave on counter or overnight in the fridge, and leftovers make excellent bread pudding or fabulous French Toast!

Gluten Free Golden Fried Mozzarella Sticks

Looking for the perfect game day snack? How about warm and yummy Fried Mozzarella Sticks. For some reason, I always thought these to be a daunting task until I served them at several Christmas occasions that we catered. In reality, they were quite simple and fun, even when serving for twenty-five guests. I decided to try a gluten-free version so that everyone could enjoy them. They came out more golden and beautiful than the regular ones! Take time to prep them well and give them a good freeze and you’ll be happy with the results. (See tip below for other uses for this recipe.) For that next Big Game, consider trying these out with your favorite marinara sauce.

Print Recipe
Votes: 1
Rating: 5
You:
Rate this recipe!
Gluten Free Golden Fried Mozzarella Sticks
SERVINGS
4servings
CHANGE SERVING SIZE
servings
COOK TIME
30mins
PREP TIME
20mins
READY IN
2hrs

Ingredients

Instructions

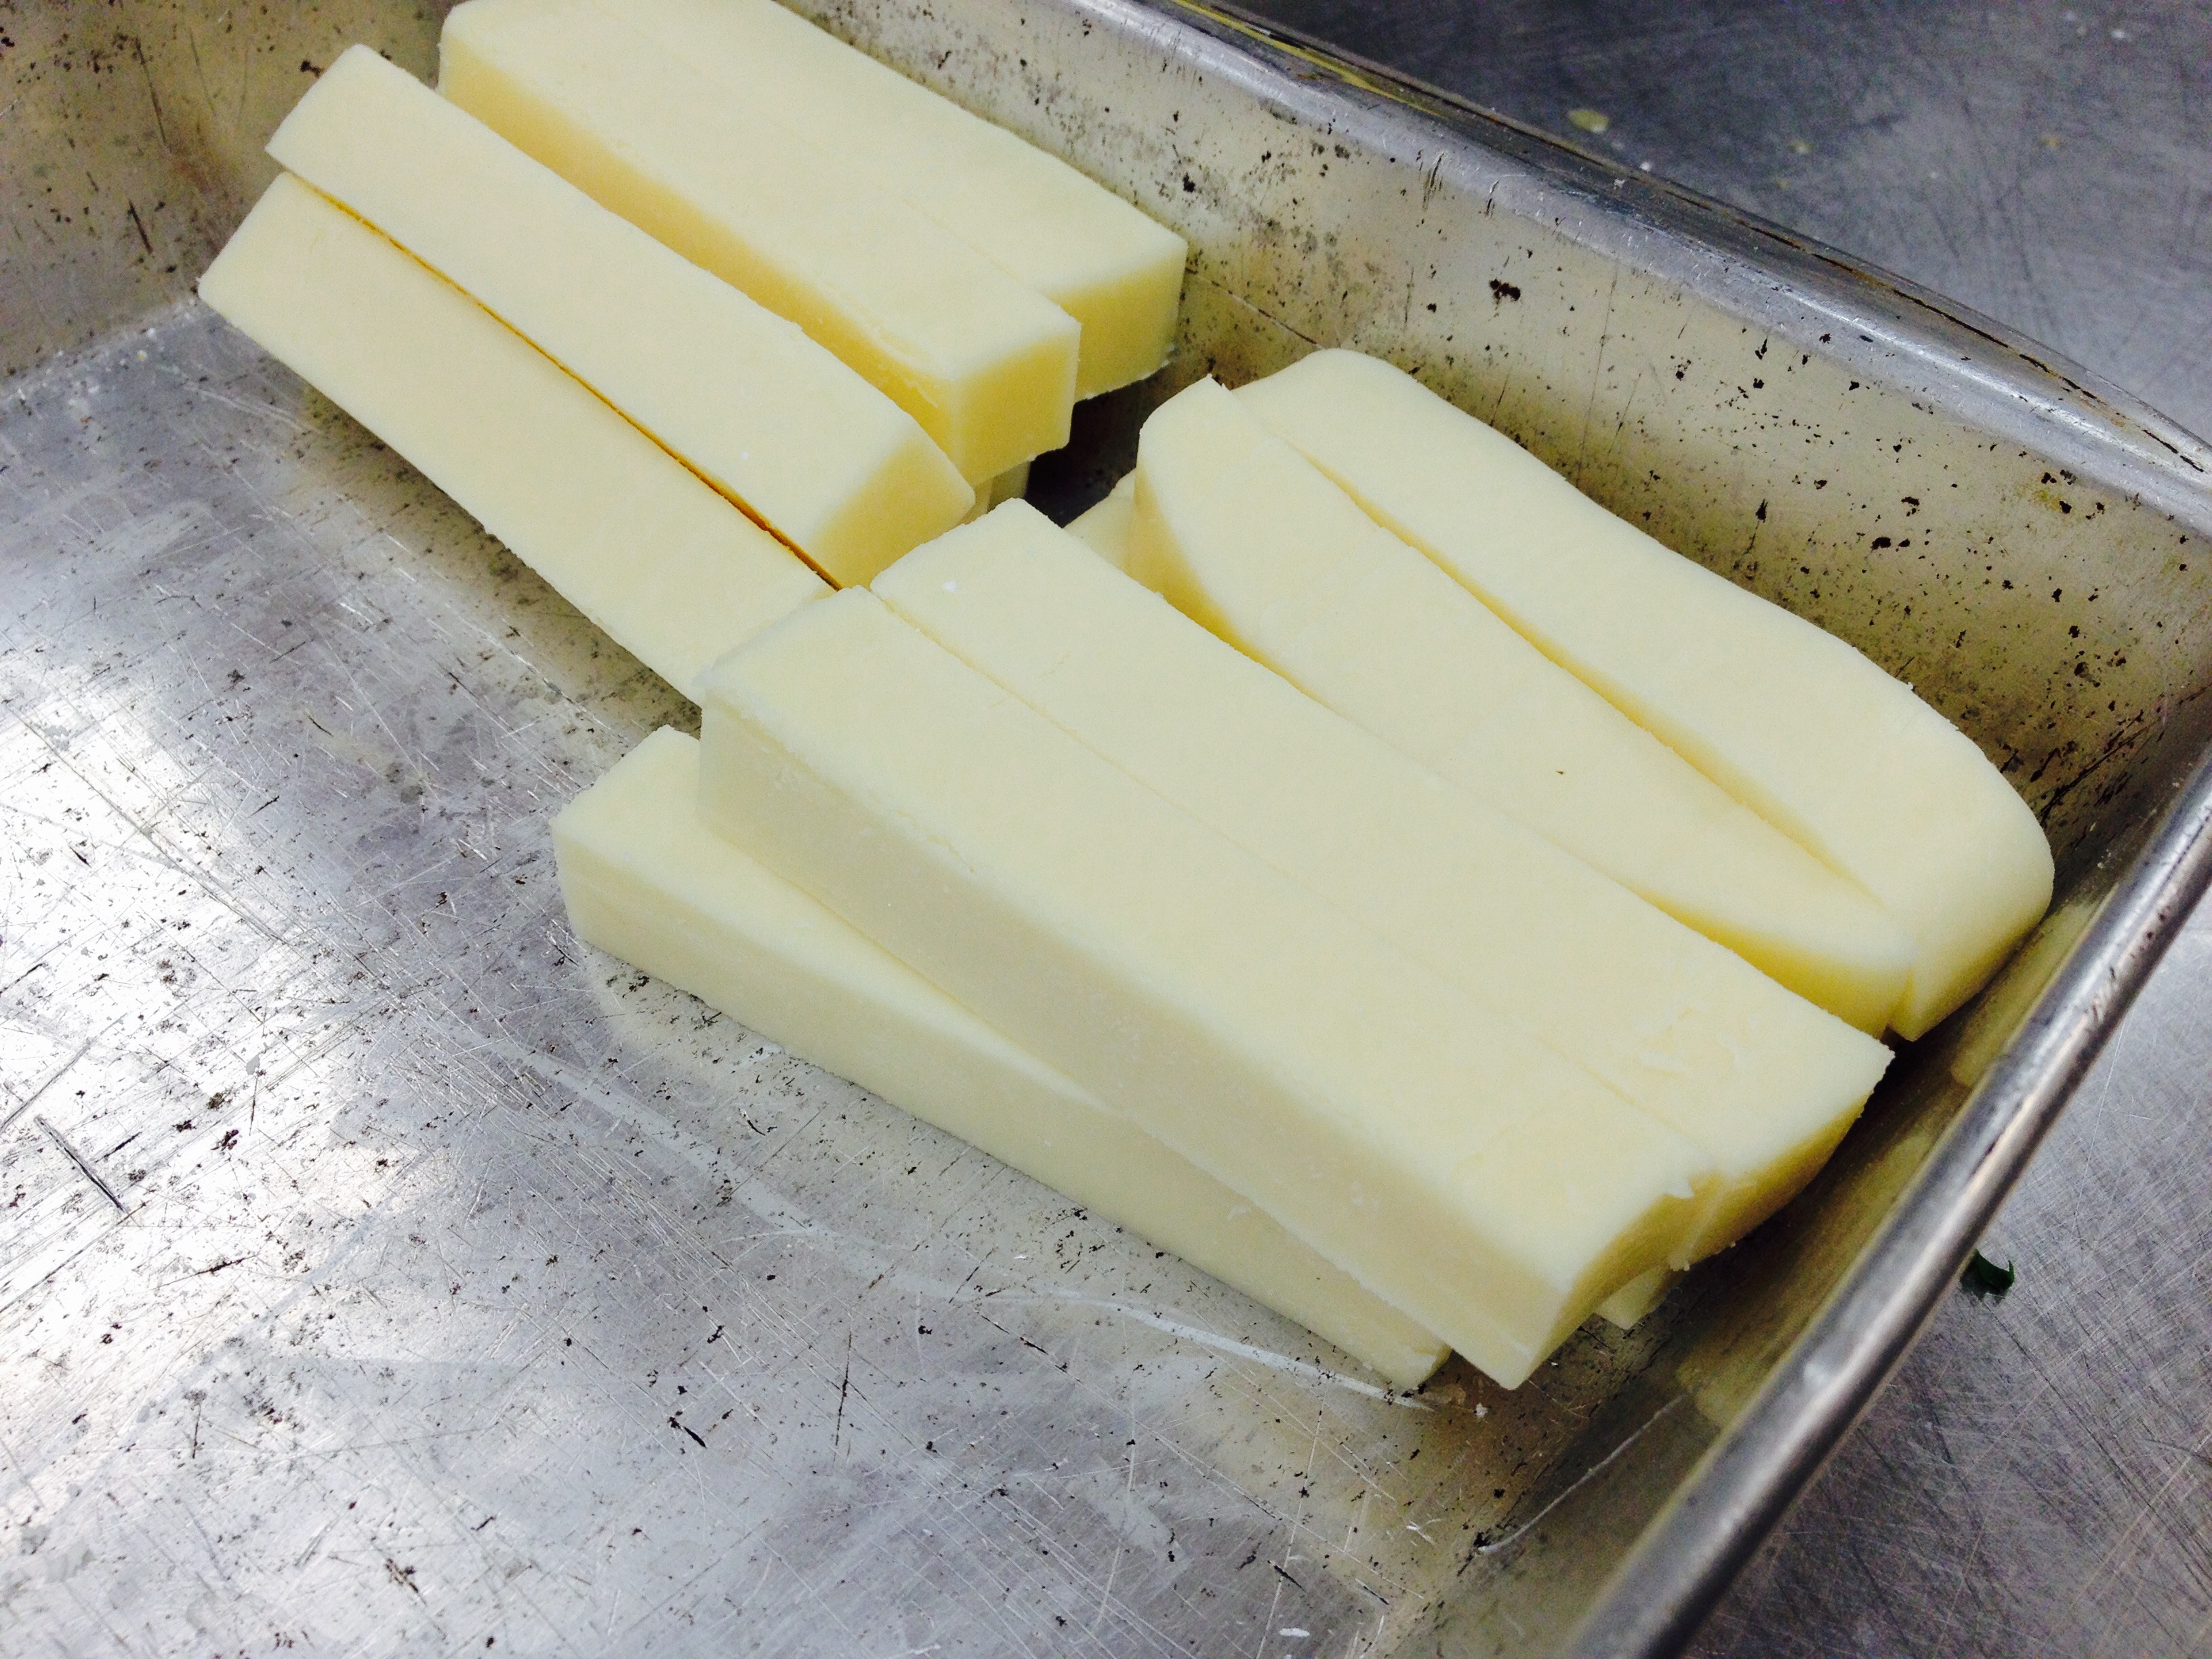
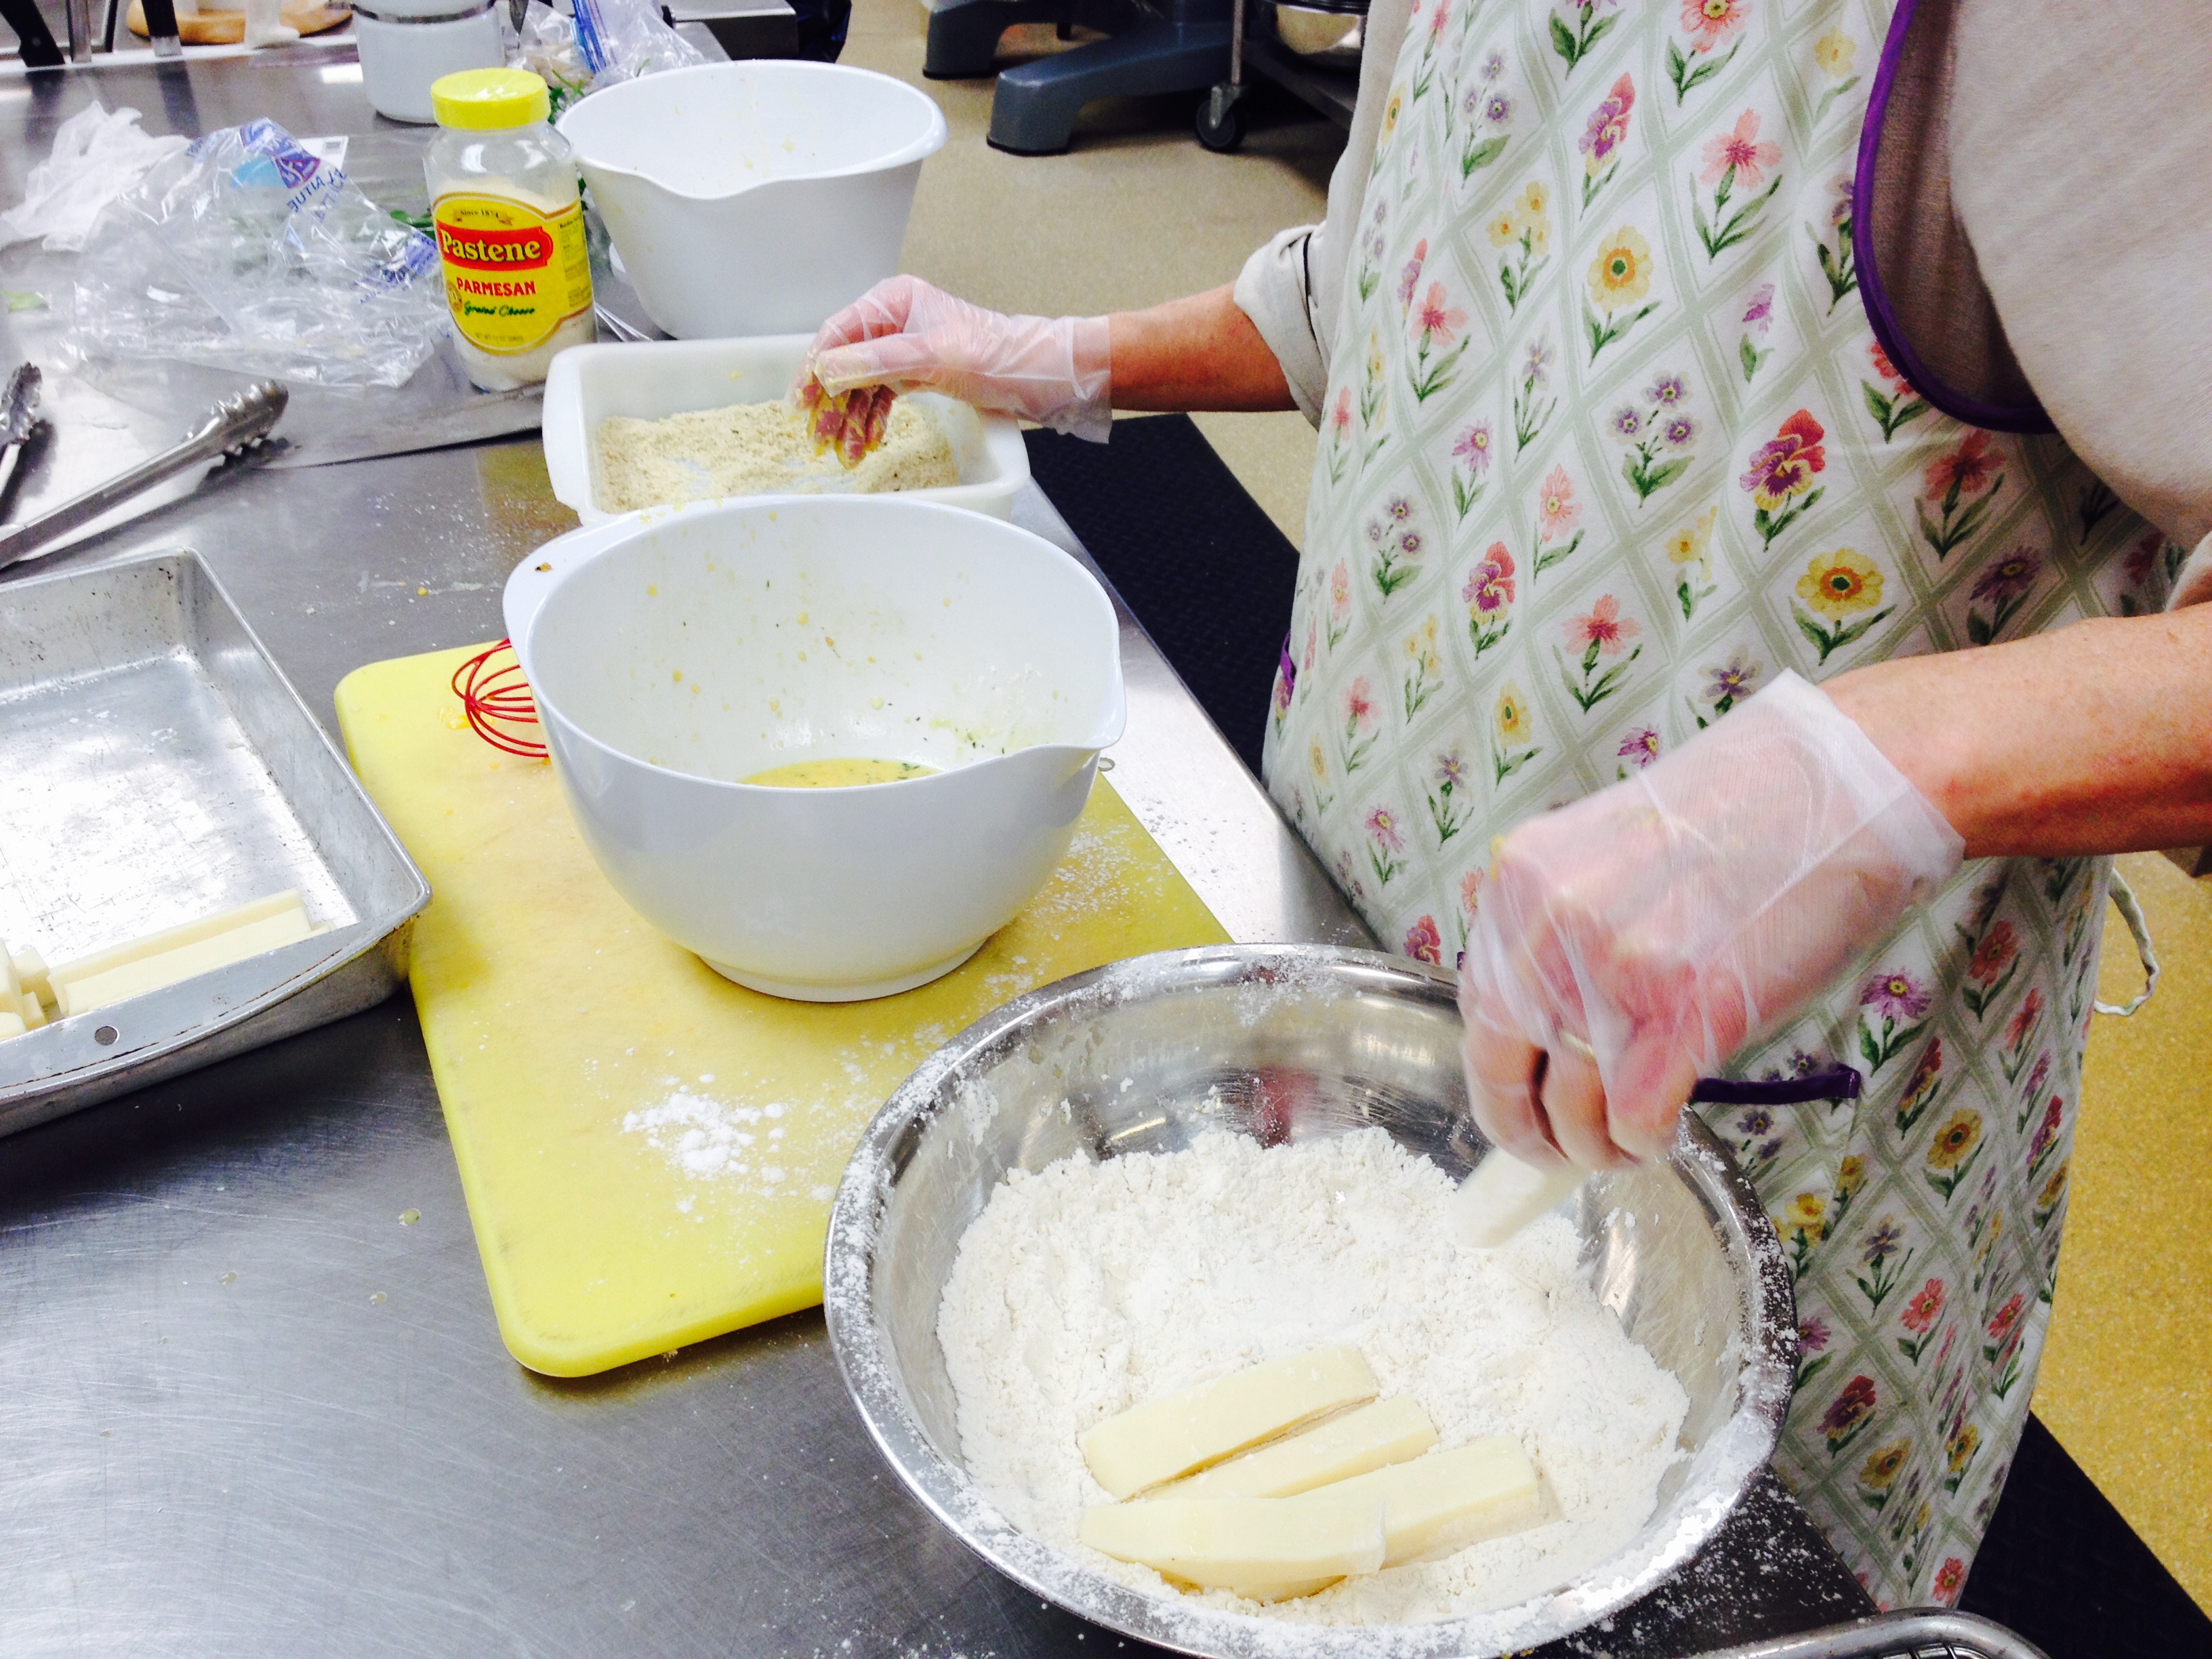
  1. Cut mozzarella into 3 x½" pieces. Place gluten-free flour in a shallow dish and add some salt and pepper to season. Whisk eggs and milk in another shallow dish. Put 1/2 gluten-free breadcrumbs (or panko) in a third shallow dish (refilling dish as needed with crumbs).
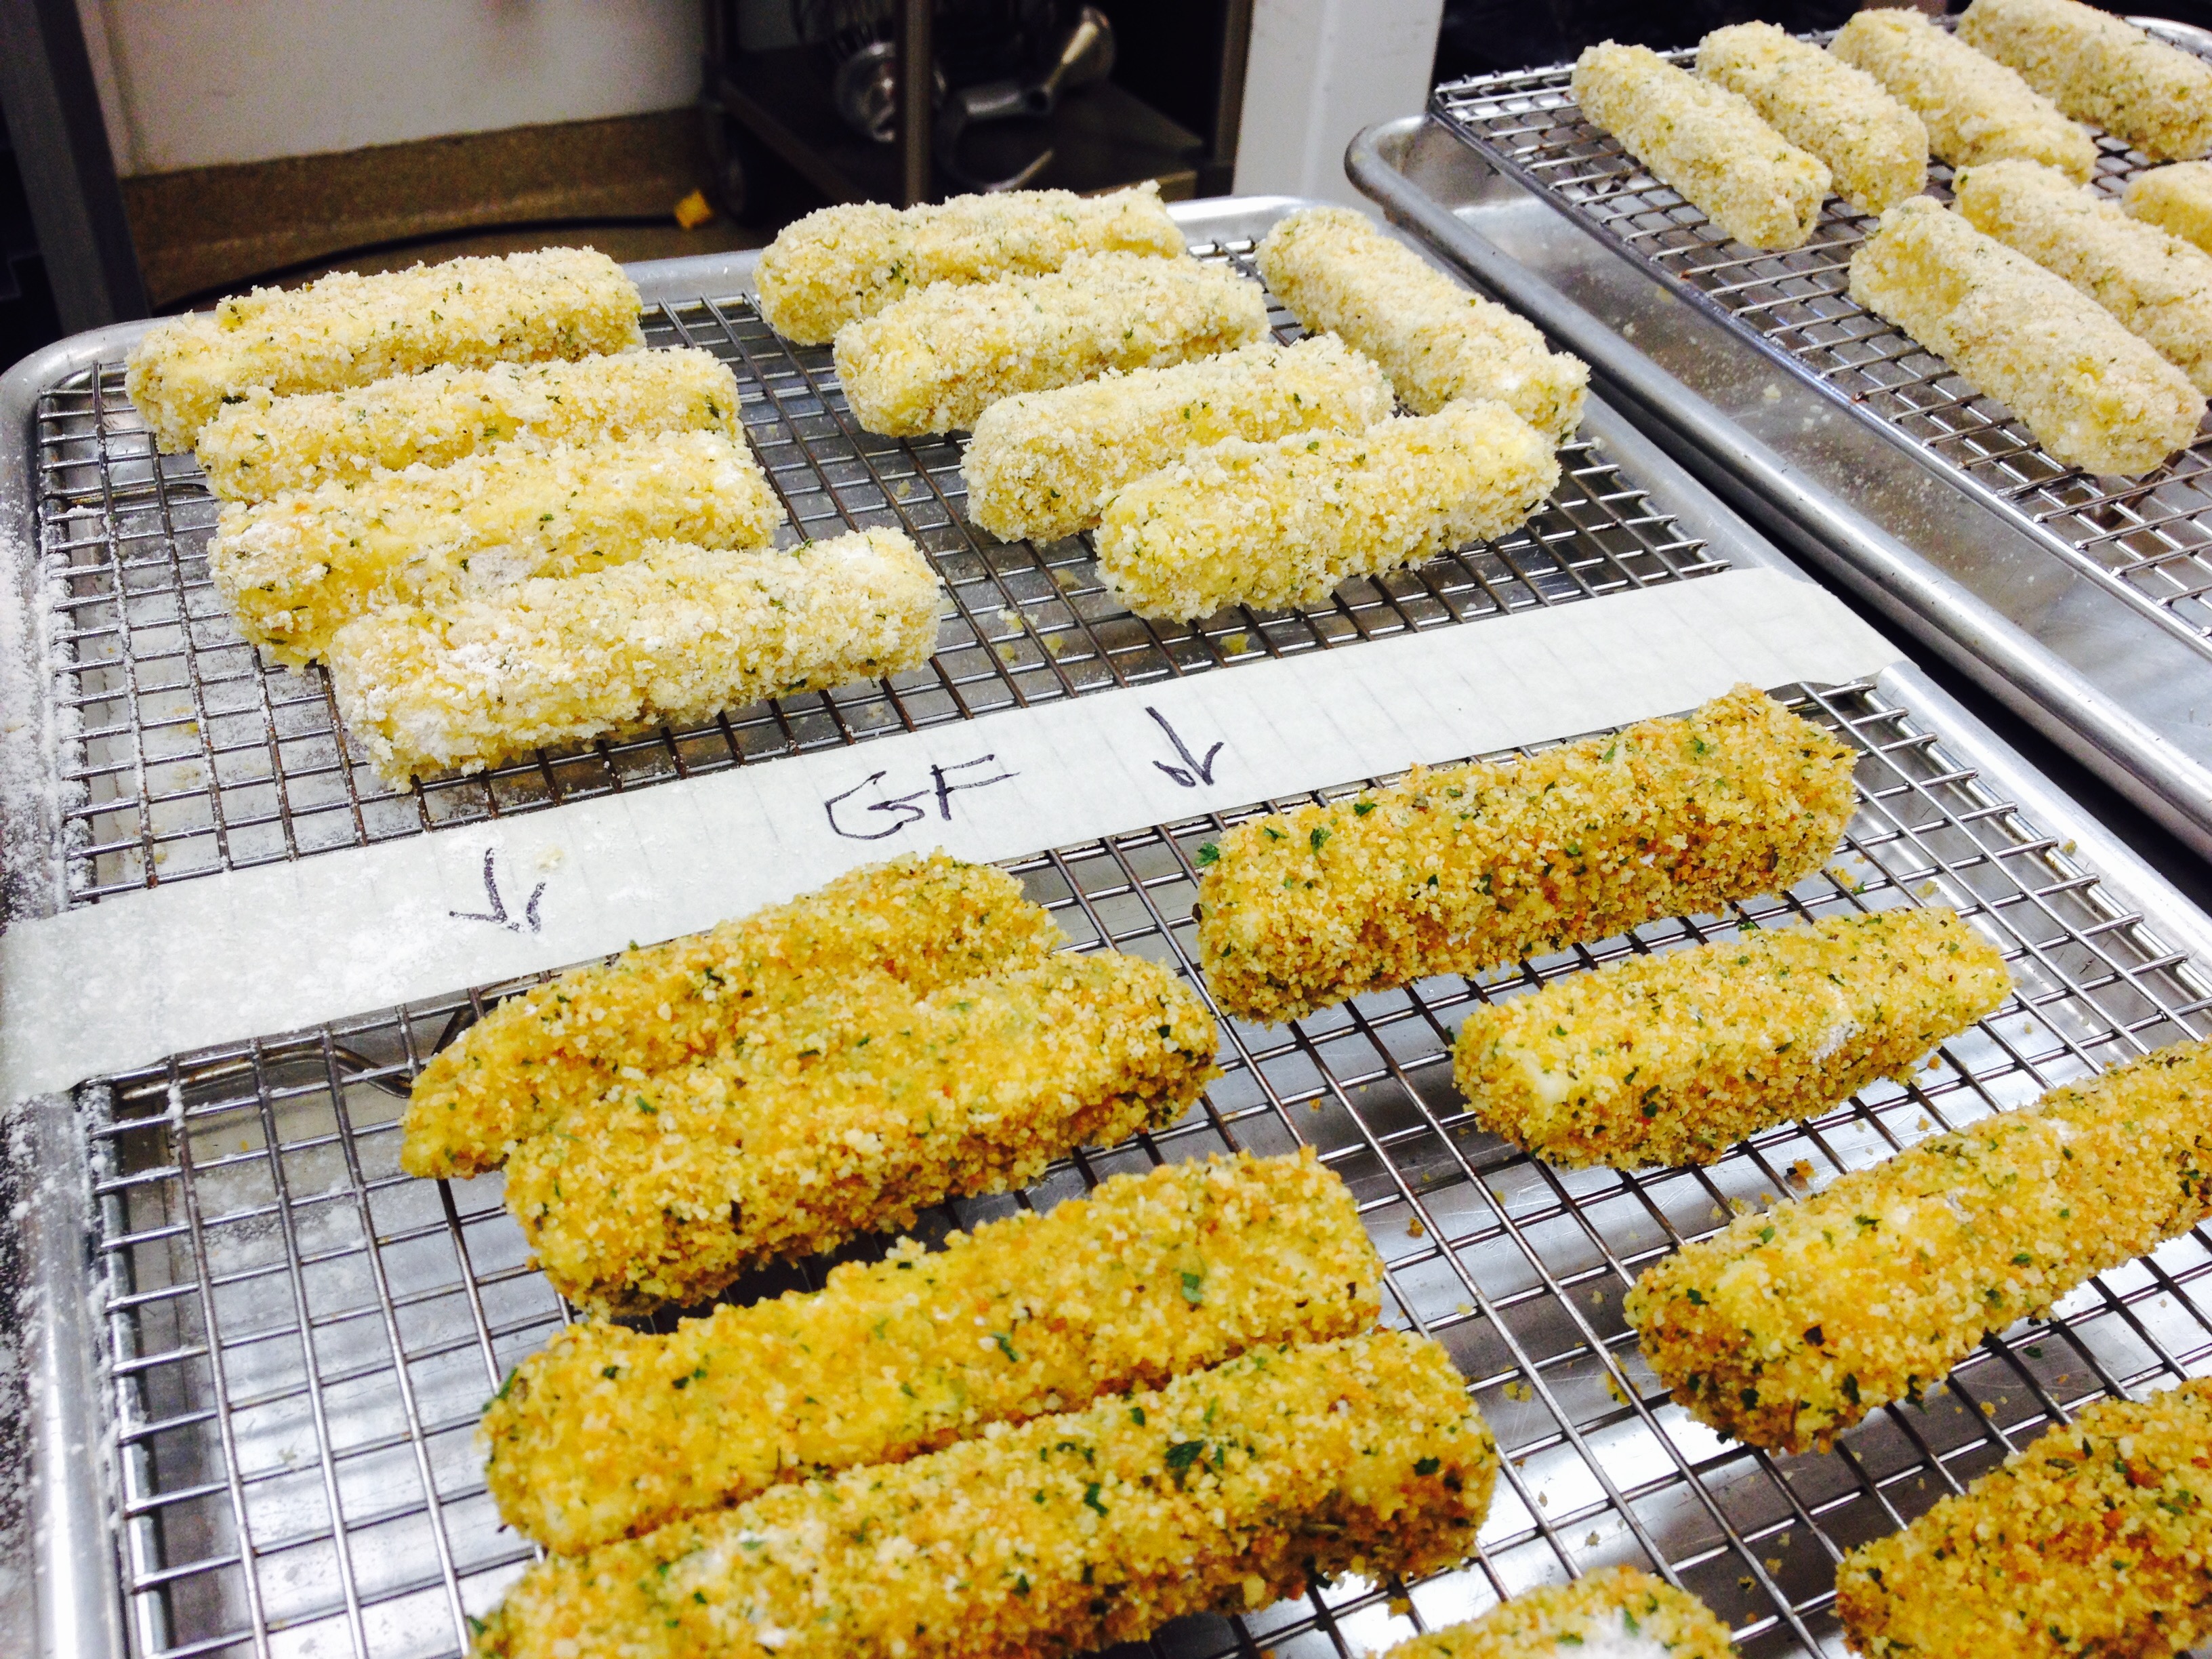
  2. Working with one piece of mozzarella at a time, dredge in flour, shaking off excess. Dip in egg mixture, then coat in breadcrumbs, pressing to adhere. (Tip: Keep one hand clean to transfer from one dish to the next to avoid clumping or keep a bowl of water handy to dip into a bowl between dipping) Repeat steps for a second coating. Transfer to a wire rack set inside a rimmed baking sheet. Repeat with remaining mozzarella. Transfer rack with mozzarella to freezer and freeze at least 1 hour and up to 3 days.
  3. Using a fry-daddy or a large pot pour in oil to come 2" up sides. Heat over medium-high until a deep-fry thermometer registers 350°. Working in batches (don't overcrowd the pan!), fry mozzarella, occasionally turning, until golden brown and crisp, 2–2½ minutes. Transfer to a paper towel-lined plate and season with salt while still hot. Serve with Marinara Sauce.

**Tip: This is a basic "dredging" technique that can be used for chicken, veal or pork cutlets as well. Simply follow the same steps going from seasoned flour to egg/milk mixture to panko or bread crumbs and fry. Delicious!

St. Lucia Bread

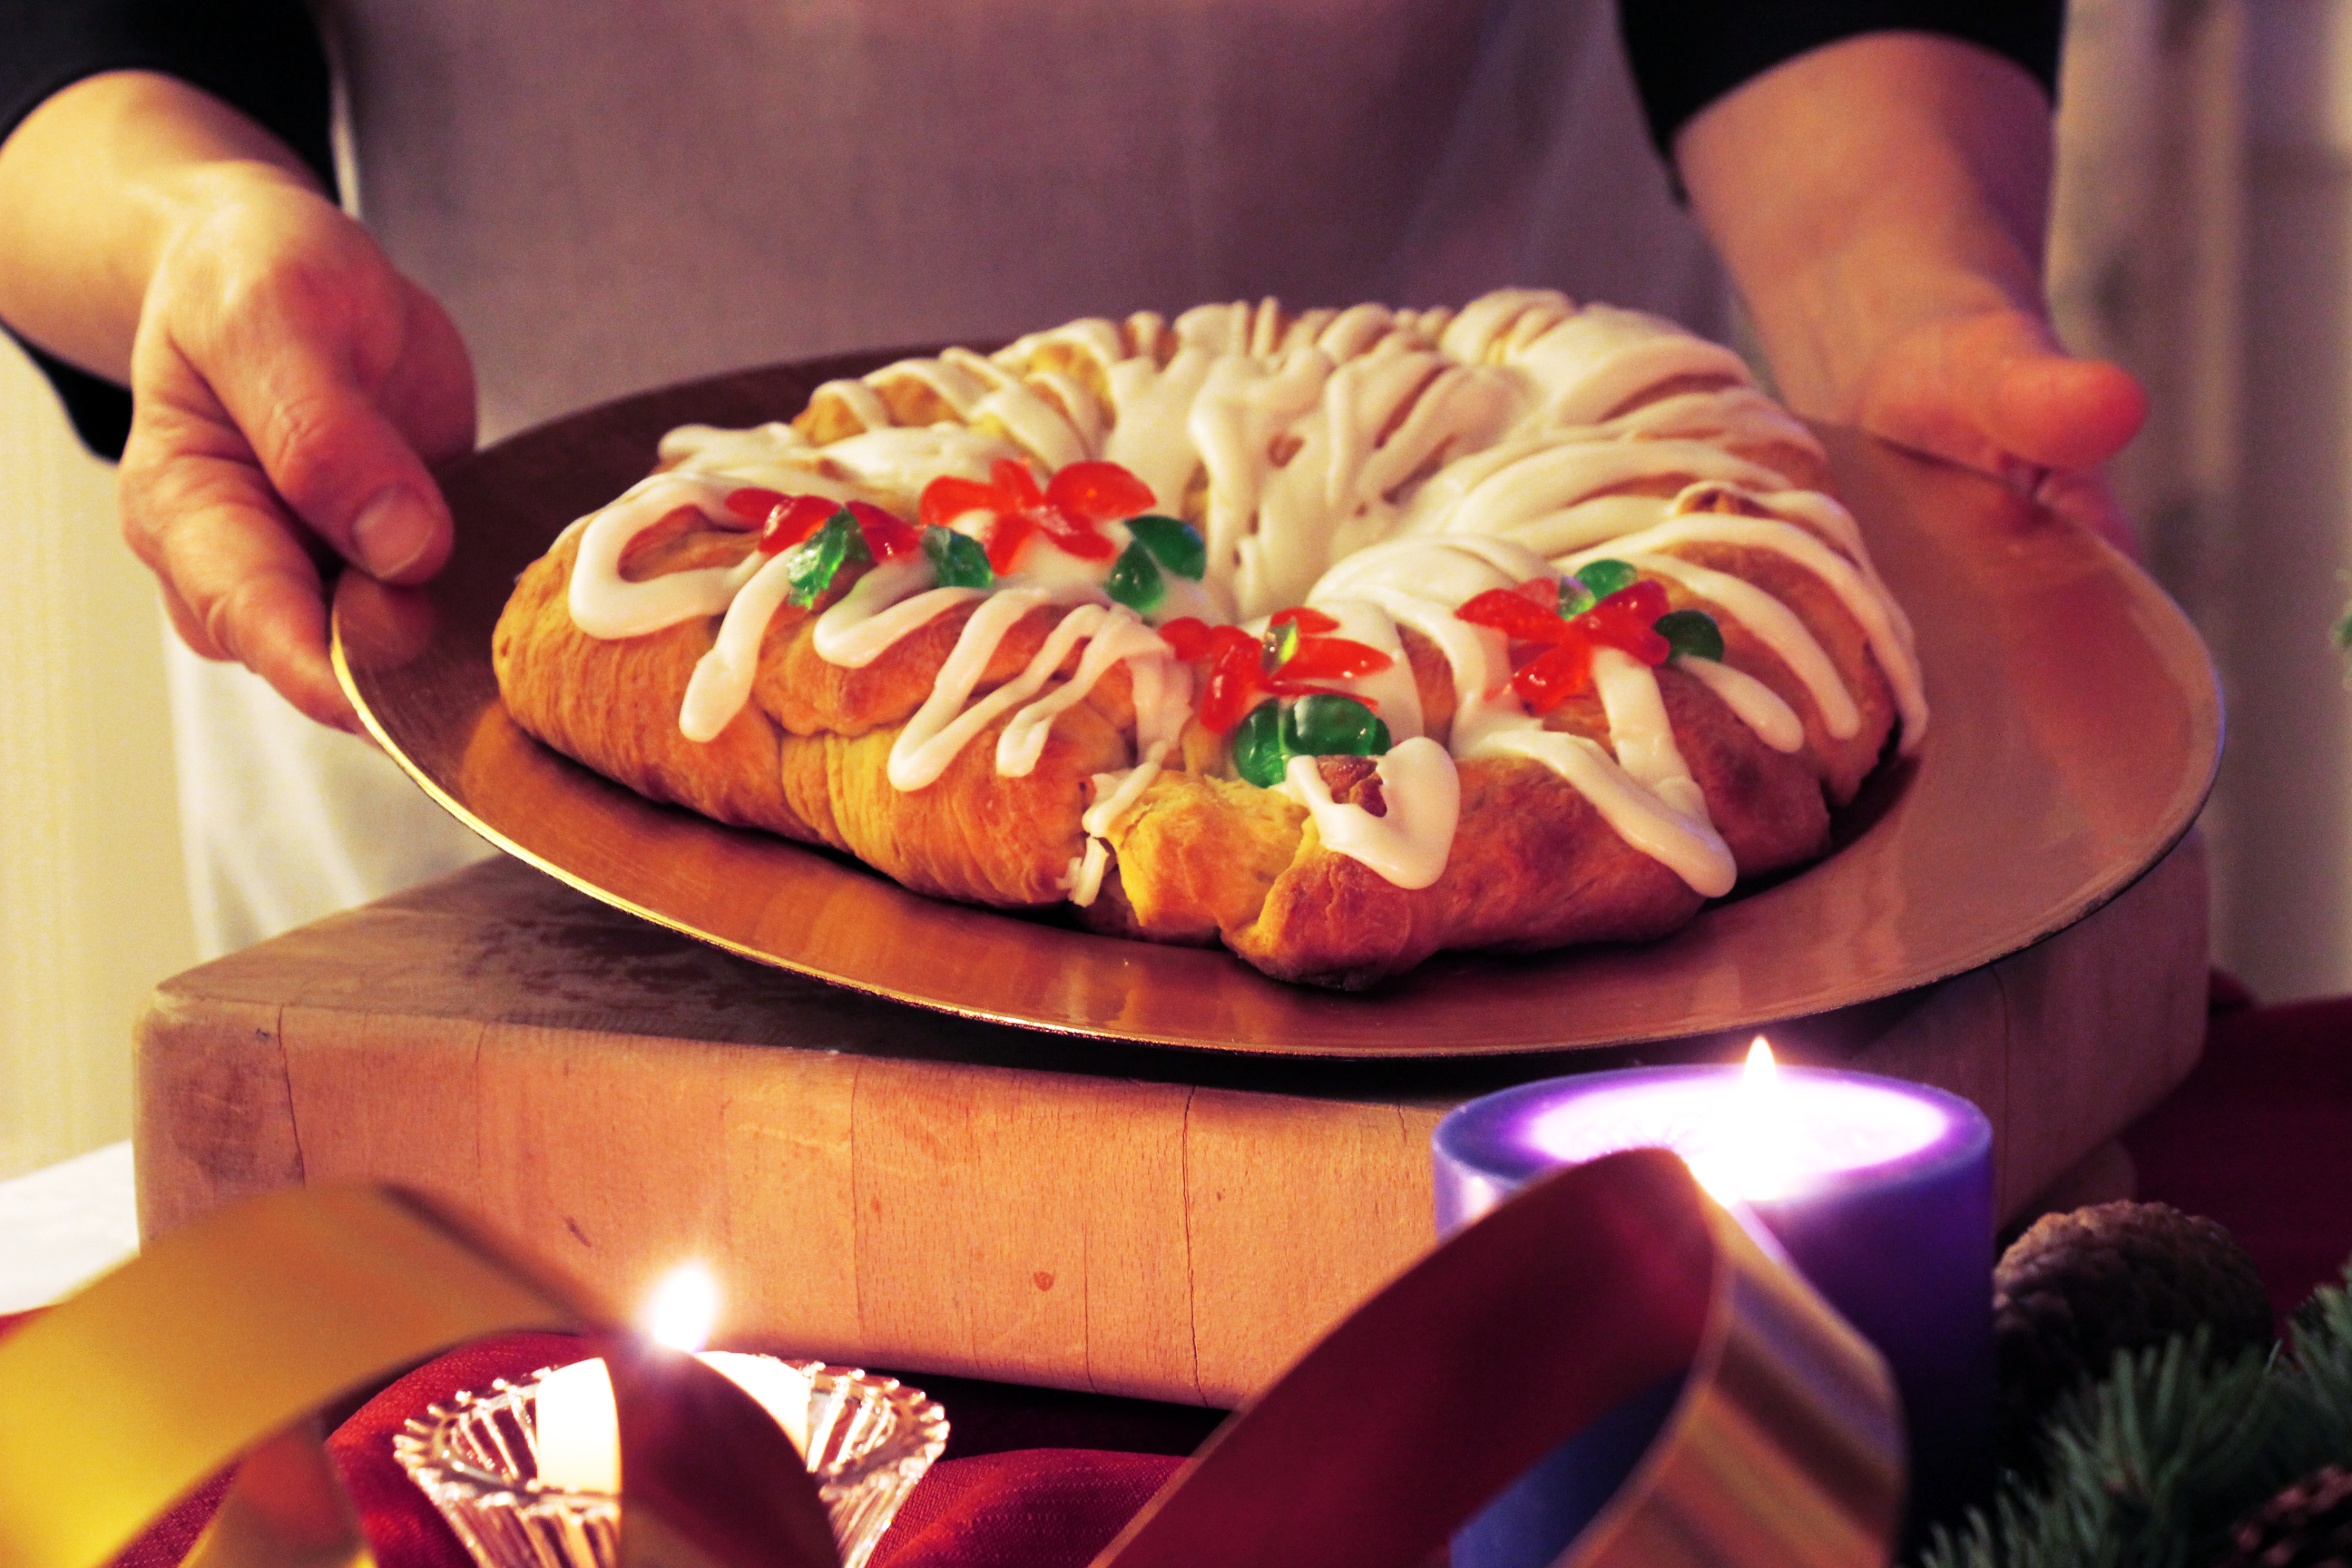
Since St. Lucia’s Day (or St. Lucy’s Day) is just around the corner on December 13th, we thought we’d share this special Swedish bread with you – fantastic for the Holidays. The celebration of the day comes from stories that were told by Monks who first brought Christianity to Sweden. “St Lucia was a young Christian girl who was martyred, killed for her faith, in 304. The most common story told about St Lucia is that she would secretly bring food to the persecuted Christians in Rome, who lived in hiding in the catacombs under the city. She would wear candles on her head, so she had both her hands free to carry things. Lucy means ‘light’ so this is a very appropriate name.” (see note below**)

December 13th was also the Winter Solstice, the shortest day of the year, in the old ‘Julian’ Calendar and a pagan festival of lights in Sweden was turned into St. Lucia’s Day. It is now celebrated by a girl dressing in a white dress with a red sash around her waist and a crown of candles on her head. Thus, the wreath of bread dotted with candied “berries.” If you’d like you can also add small candles to the cake as well for a more festive look.

** read more at https://www.whychristmas.com/cultures/sweden.shtml

Print Recipe
Votes: 0
Rating: 0
You:
Rate this recipe!
St. Lucia Bread
SERVINGS
2loaves
CHANGE SERVING SIZE
loaves
COOK TIME
20-25mins
PREP TIME
30mins
READY IN
2-3hrs

Ingredients

Instructions

  1. In a large mixer, soften the yeast in the warm water
  2. Heat the milk until warm. Add the oil and sugar and stir to dissolve.
  3. Add this mixture to the yeast mixture in the mixer
  4. Add salt and saffron
  5. Add the 3 slightly beaten eggs and mix with dough hook.
  6. Add the lemon zest, citron and almonds and continue mixing
  7. One cup at a time, add the flour and mix well after each addition. Stop adding the flour when the dough starts pulling away from the side of the bowl. Adding more flour if necessary.
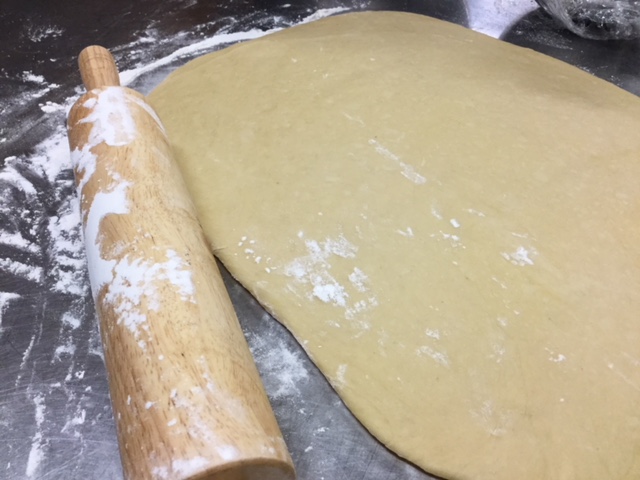
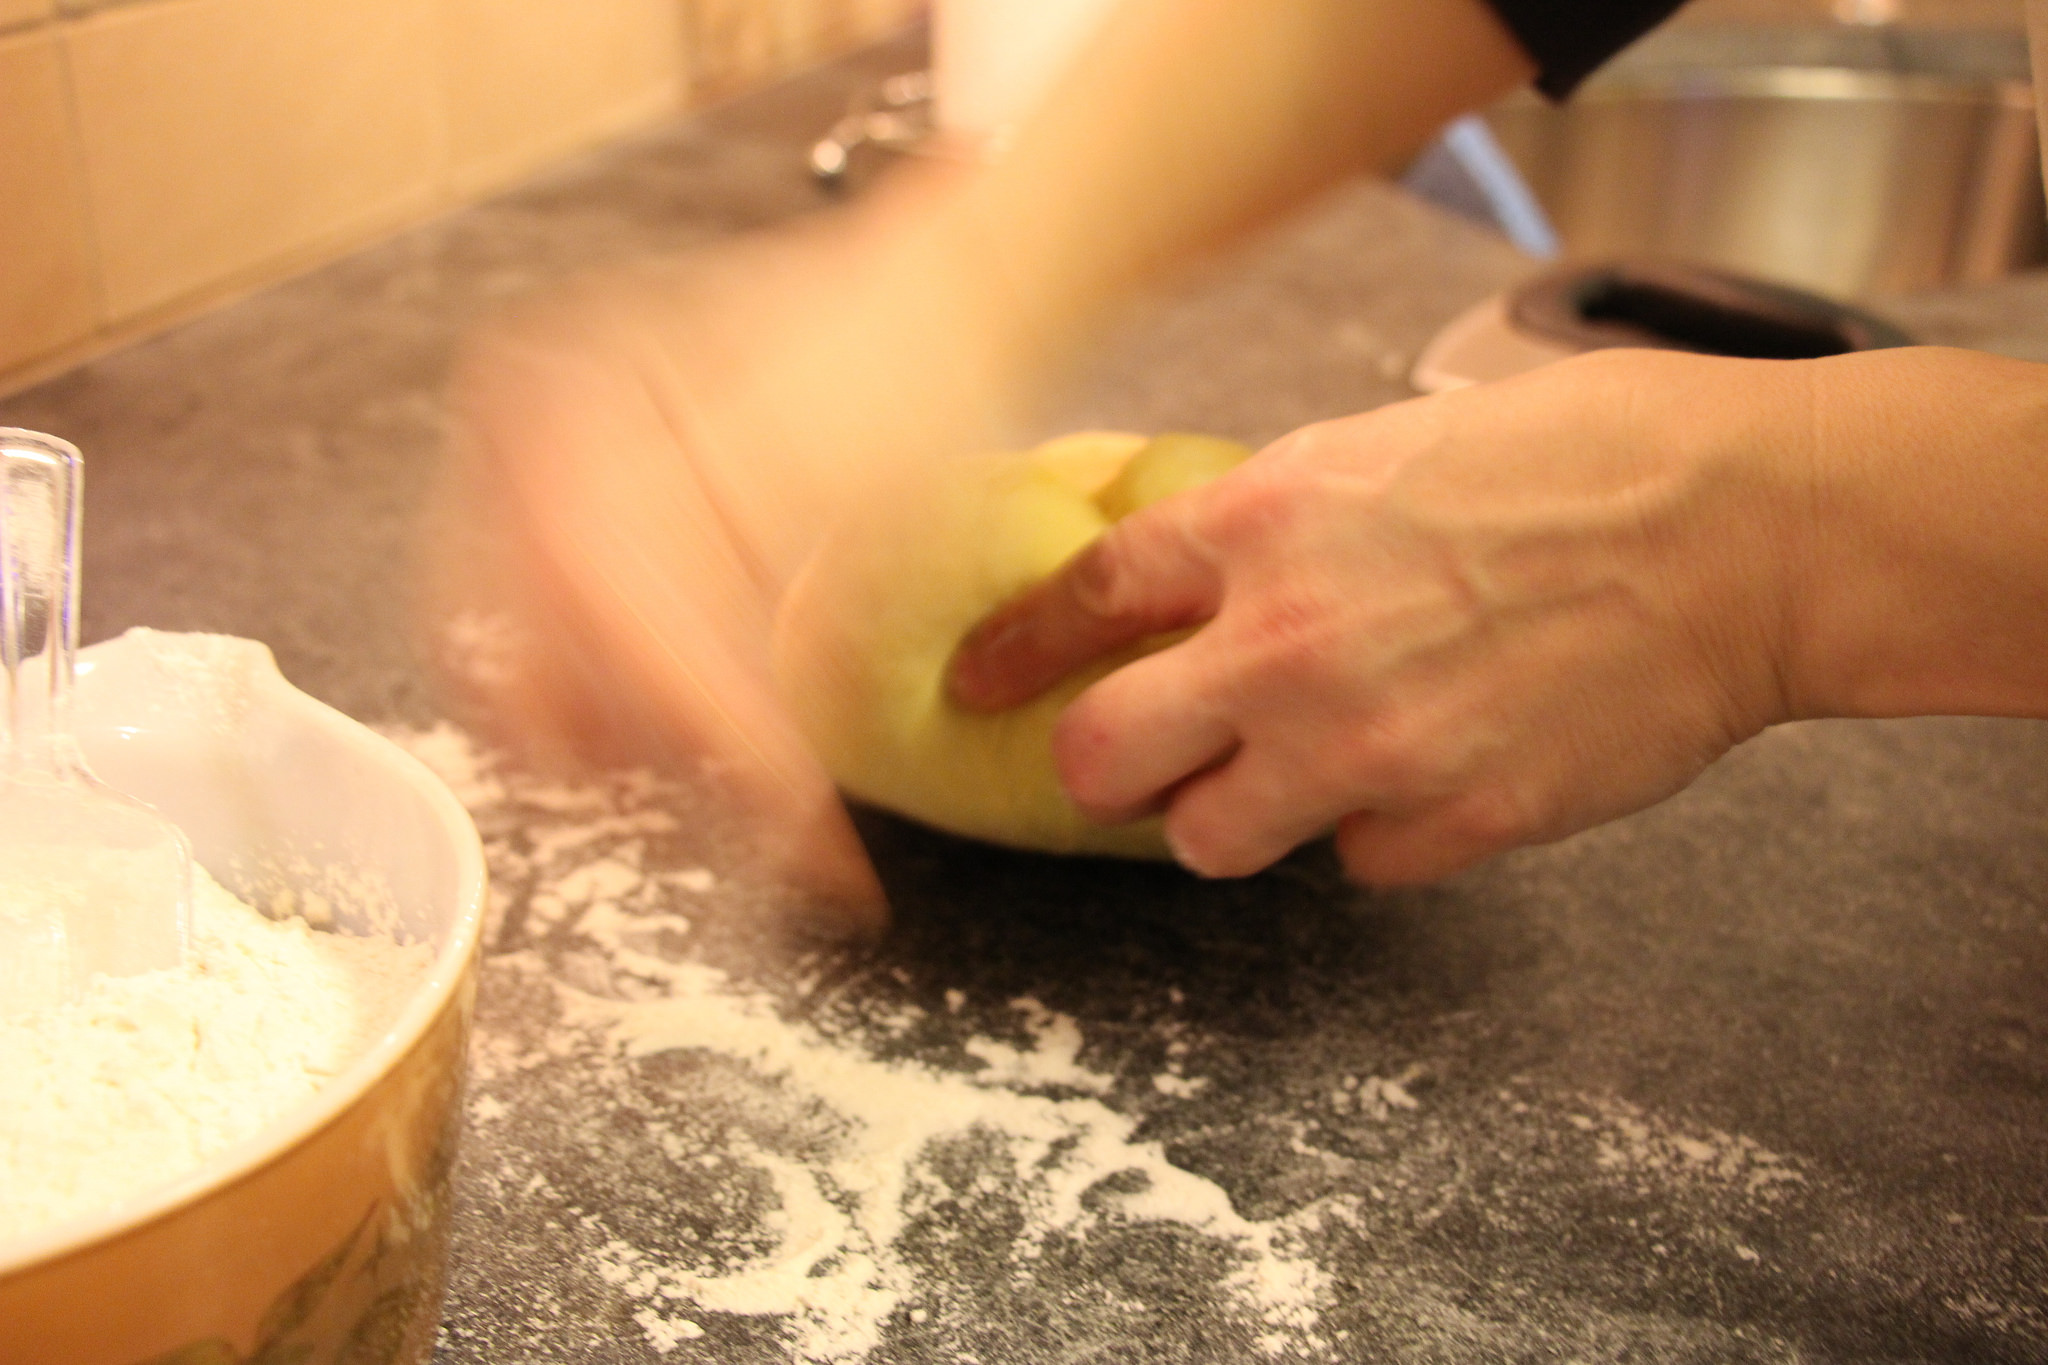
  8. Turn the dough out onto a floured board and knead for 5 min, or until dough becomes smooth and elastic; adding flour as necessary.
  9. Place the dough in a greased bowl, cover, and let rise in a warm place until almost doubled in size, about 1 hr. (At this point, you can refrigerate the dough, if you want to work with it later).
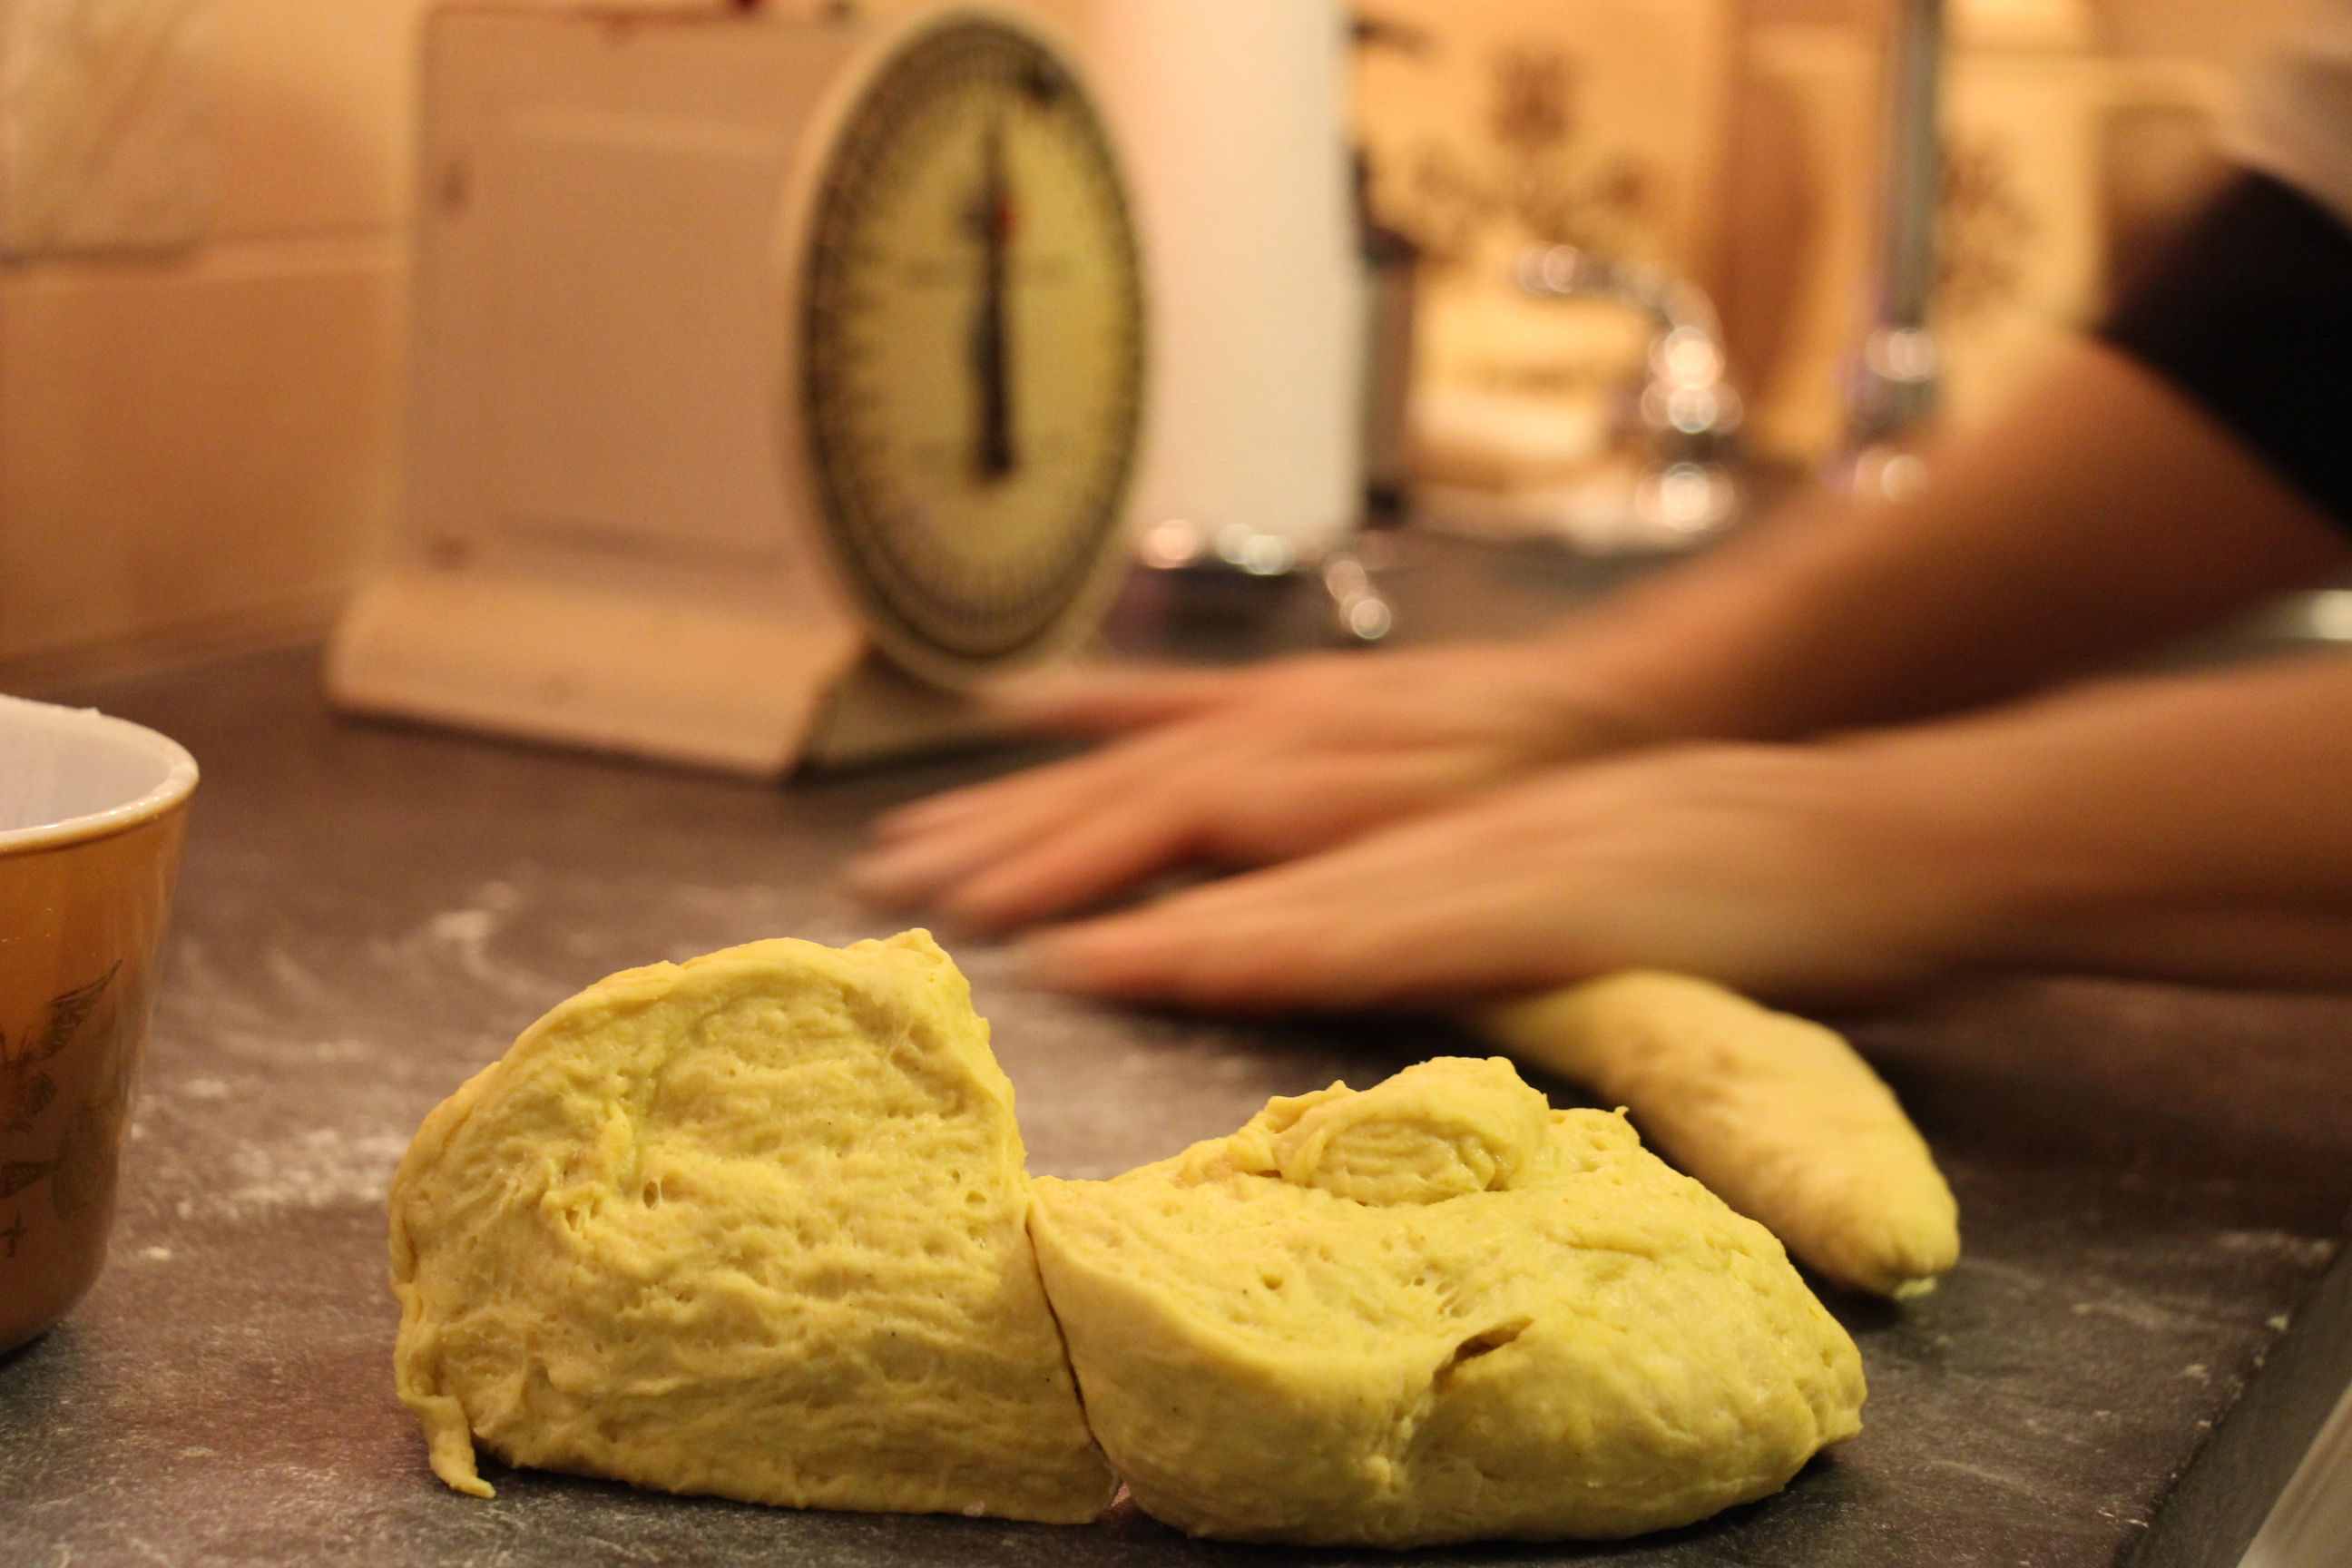
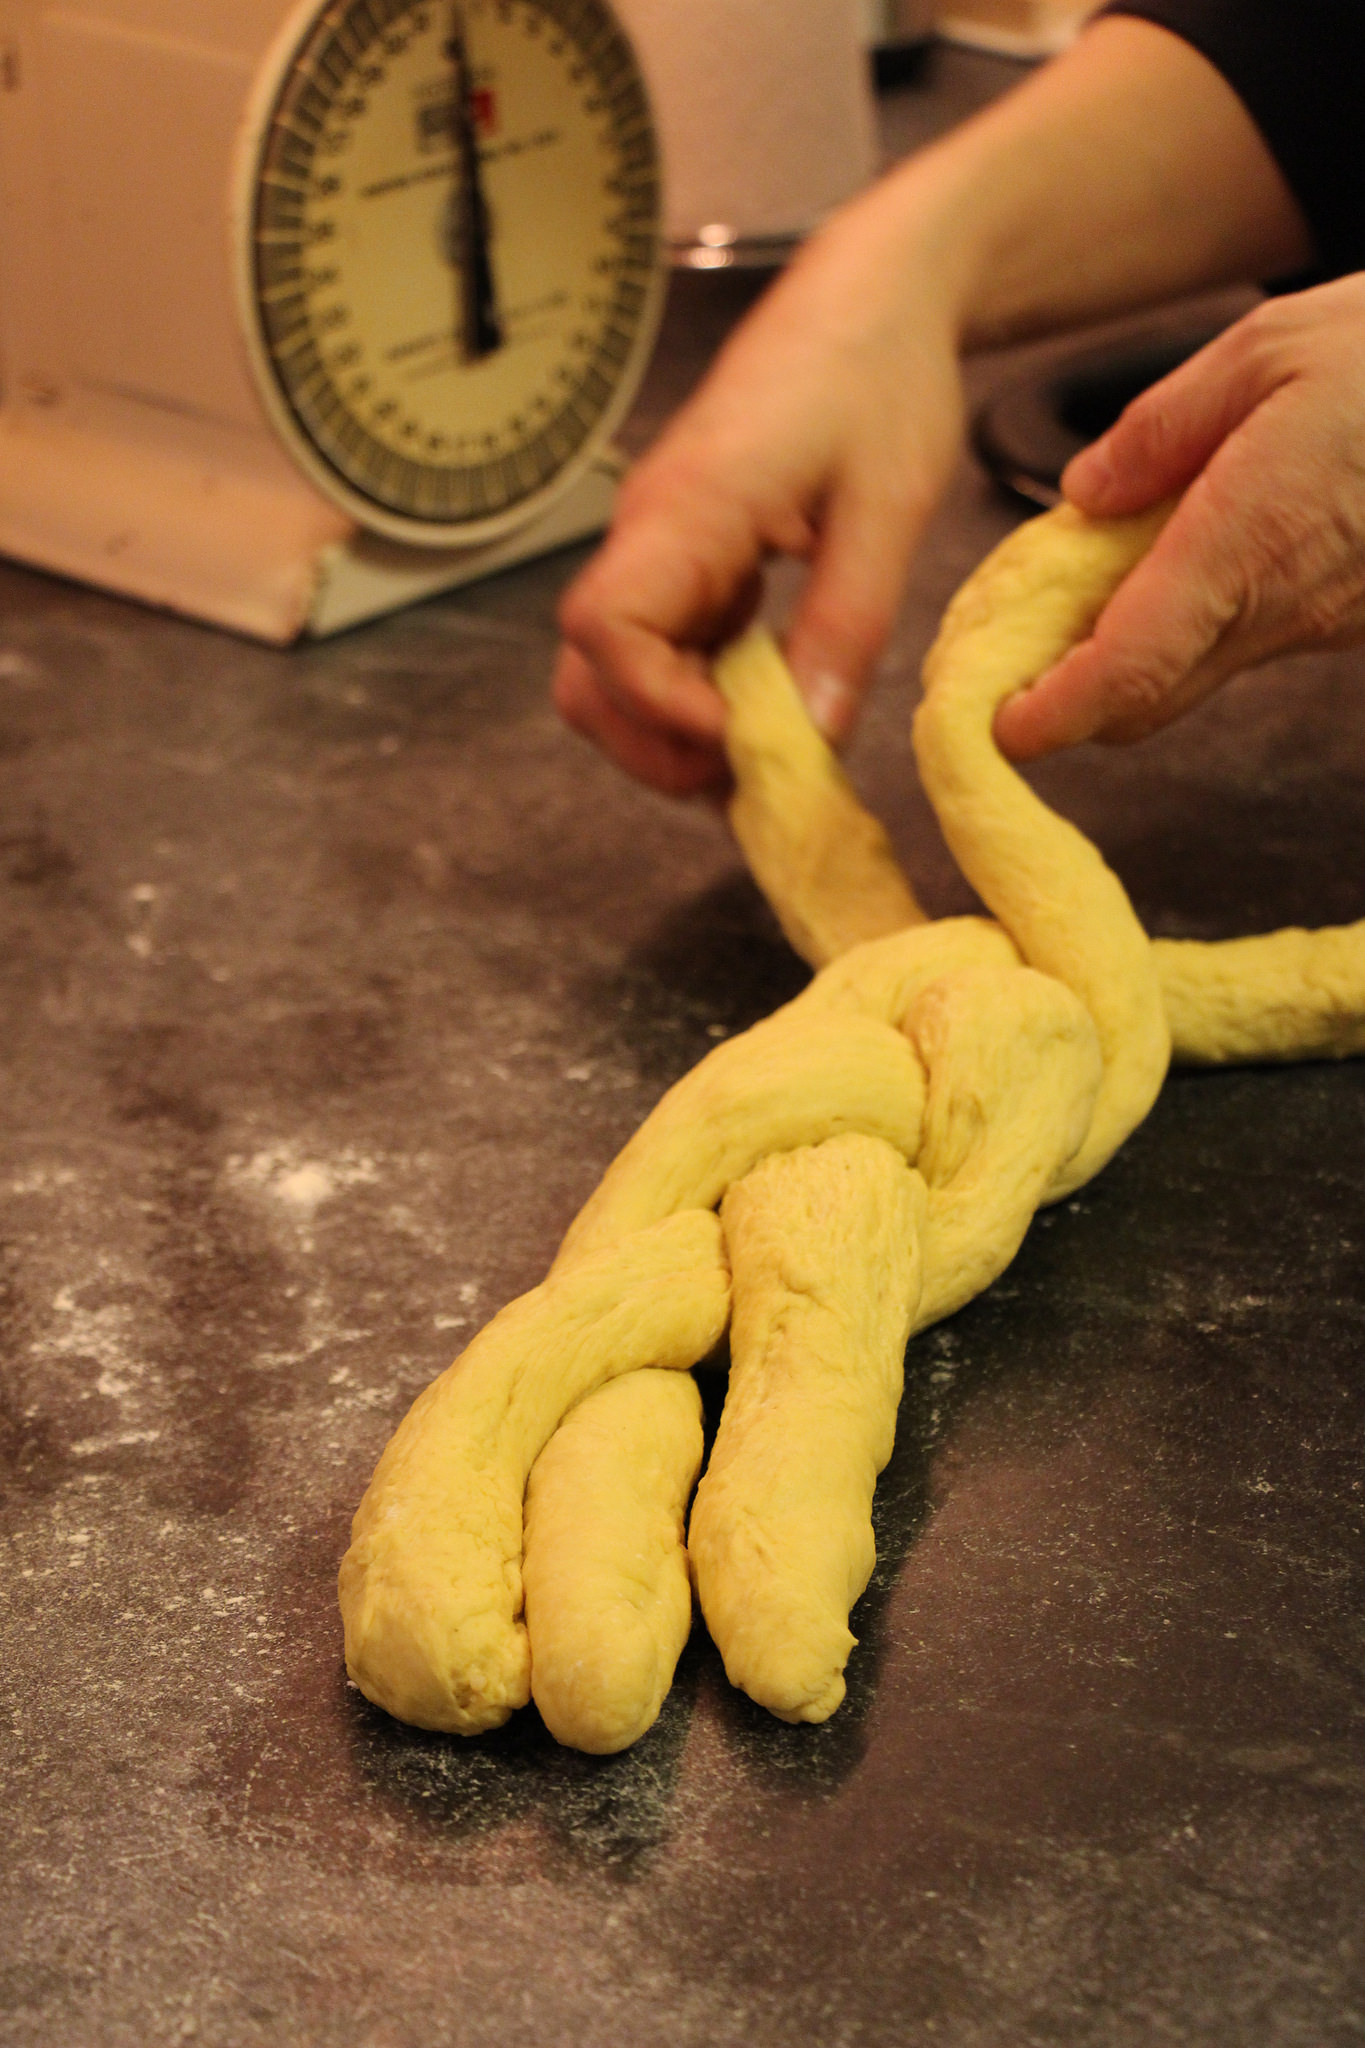
  10. Divide the dough into six equal balls and roll into large ropes and then braid three together, making two braids.
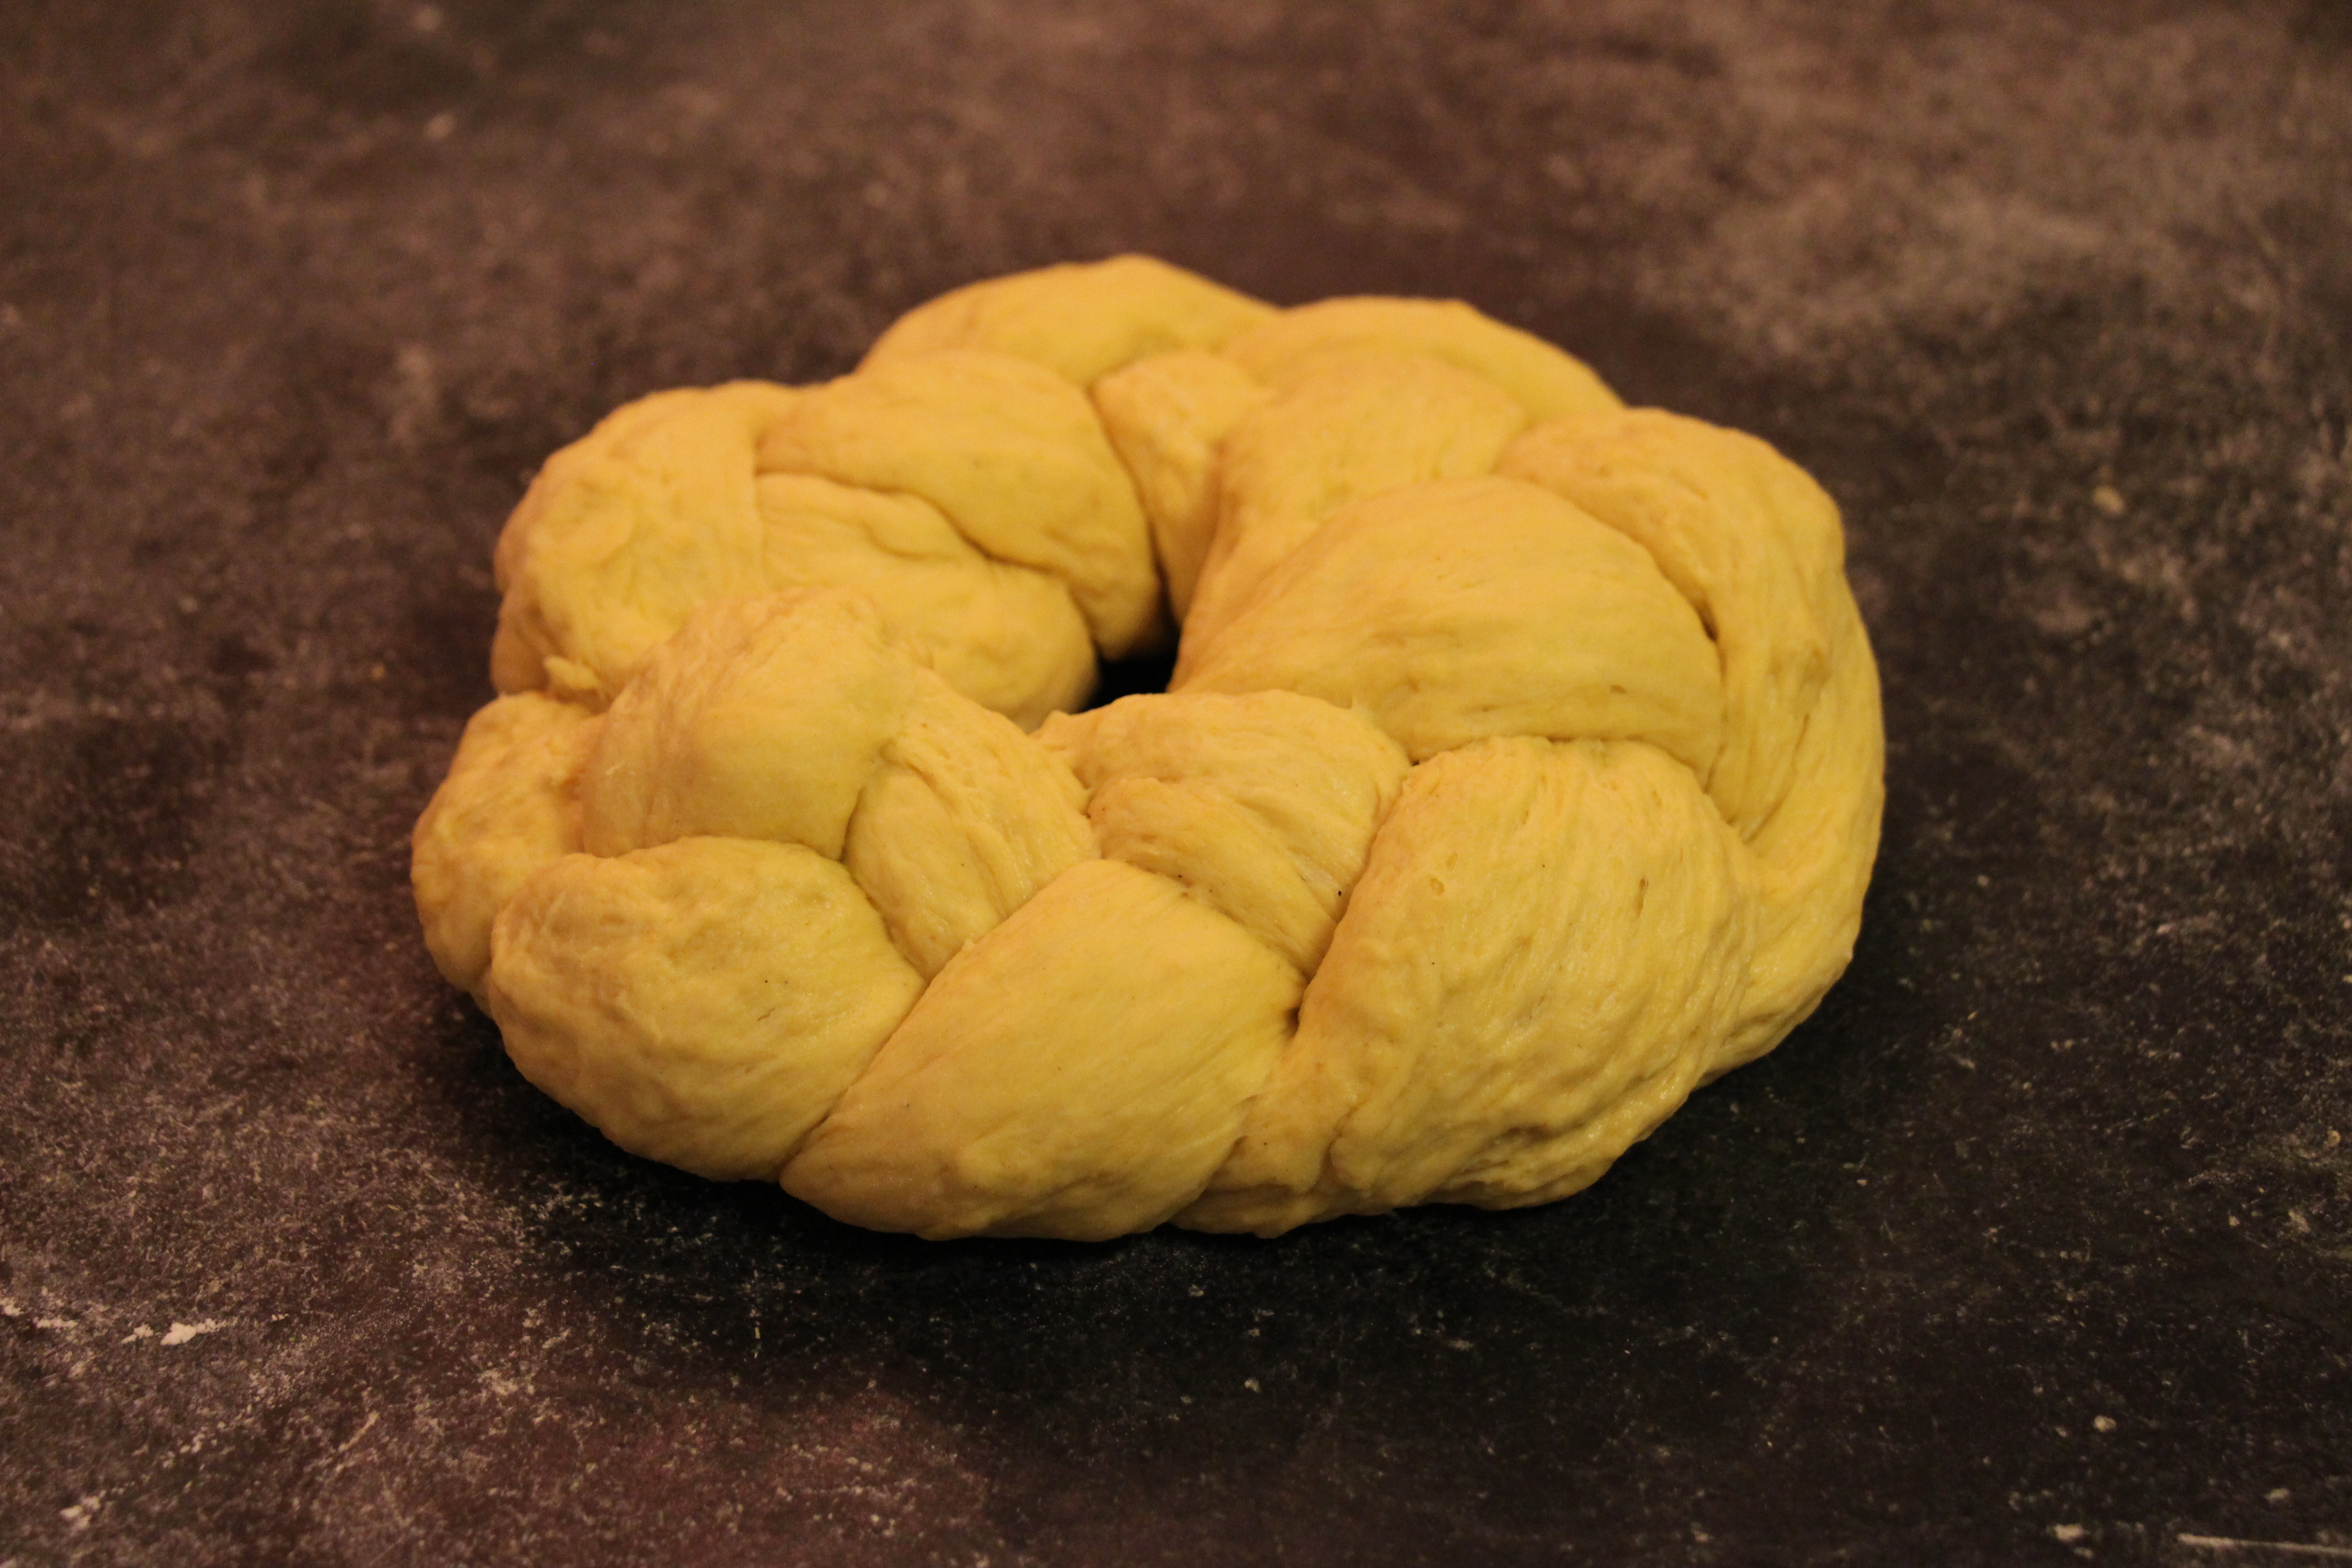
  11. Pinch the two ends together and tuck under, forming two circular loaves.
  12. Preheat oven to 325 degrees. Line two sheet pans with baking paper, or grease, and put a braided loaf on each pan.
  13. Cover and let rise in a warm place, until doubled.
  14. Combine the remaining egg with a tablespoon of water to make an egg wash, and brush on the braids.
  15. Bake for about 20-25 min or until the loaf feels firm to the touch. If you would like to use a thermometer, the internal temperature should read about 190 degrees.
  16. While the bread is baking, prepare your frosting, mixing all ingredients until smooth and on the thicker side. Cut your cherries in half.
  17. Remove bread from the oven and cool slightly, then decorate, using the green cherries as leaves, and the red as berries.